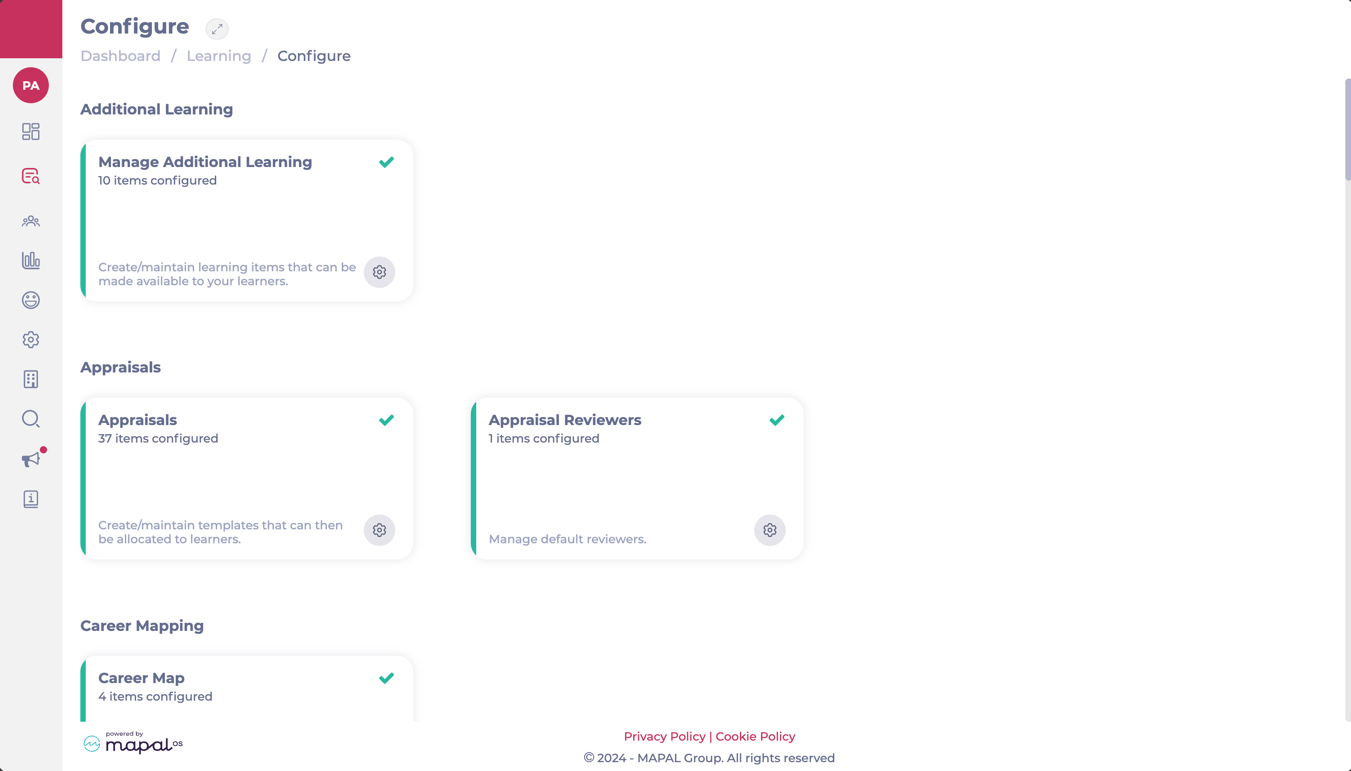
Set up appraisal reviewers by branch and department
Start from: The Flow Learning dashboard.
Navigate to Learning & Development > L&D Settings.
Scroll down to Appraisal Reviewers and select View.
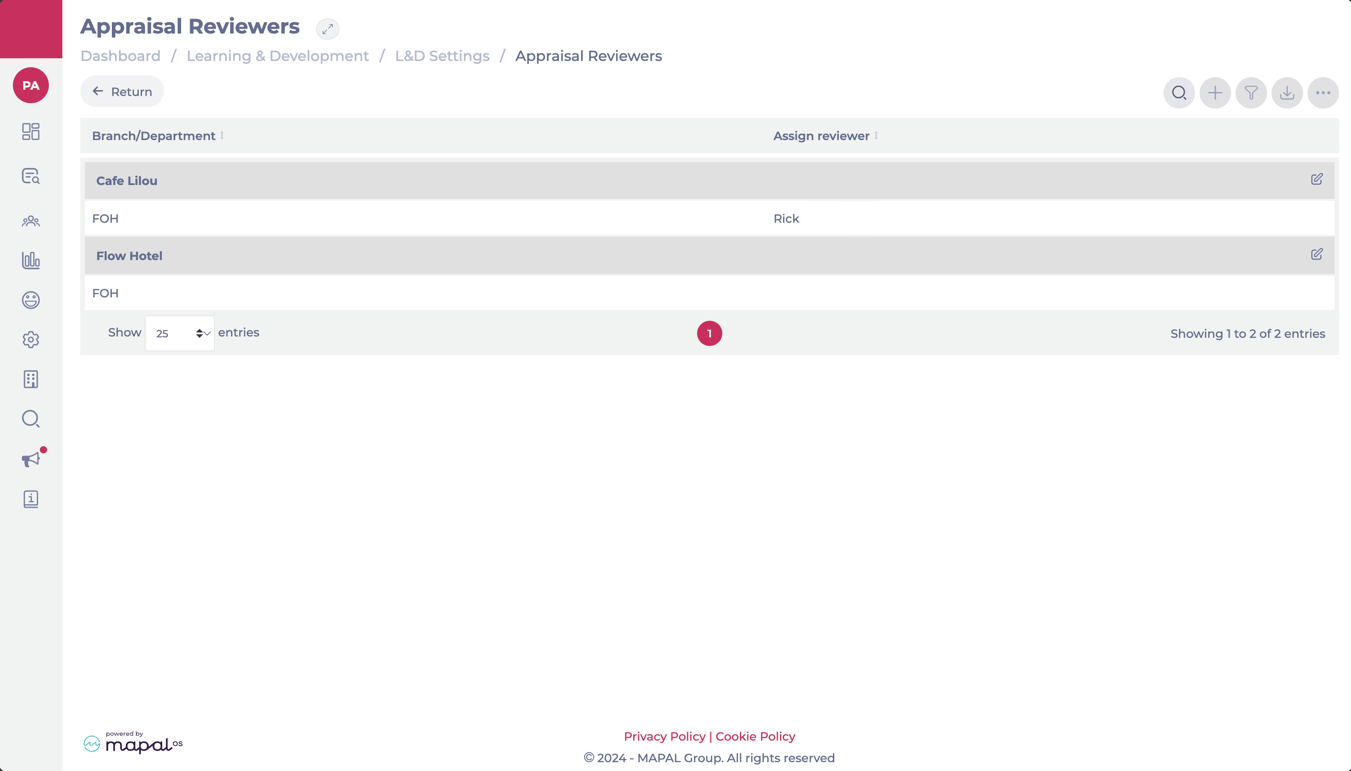
The Appraisal Reviewers screen shows you a grid where all the available branches/departments are listed.
To assign or edit a default reviewer for a branch, select the Edit button at the far right of the branch’s name.
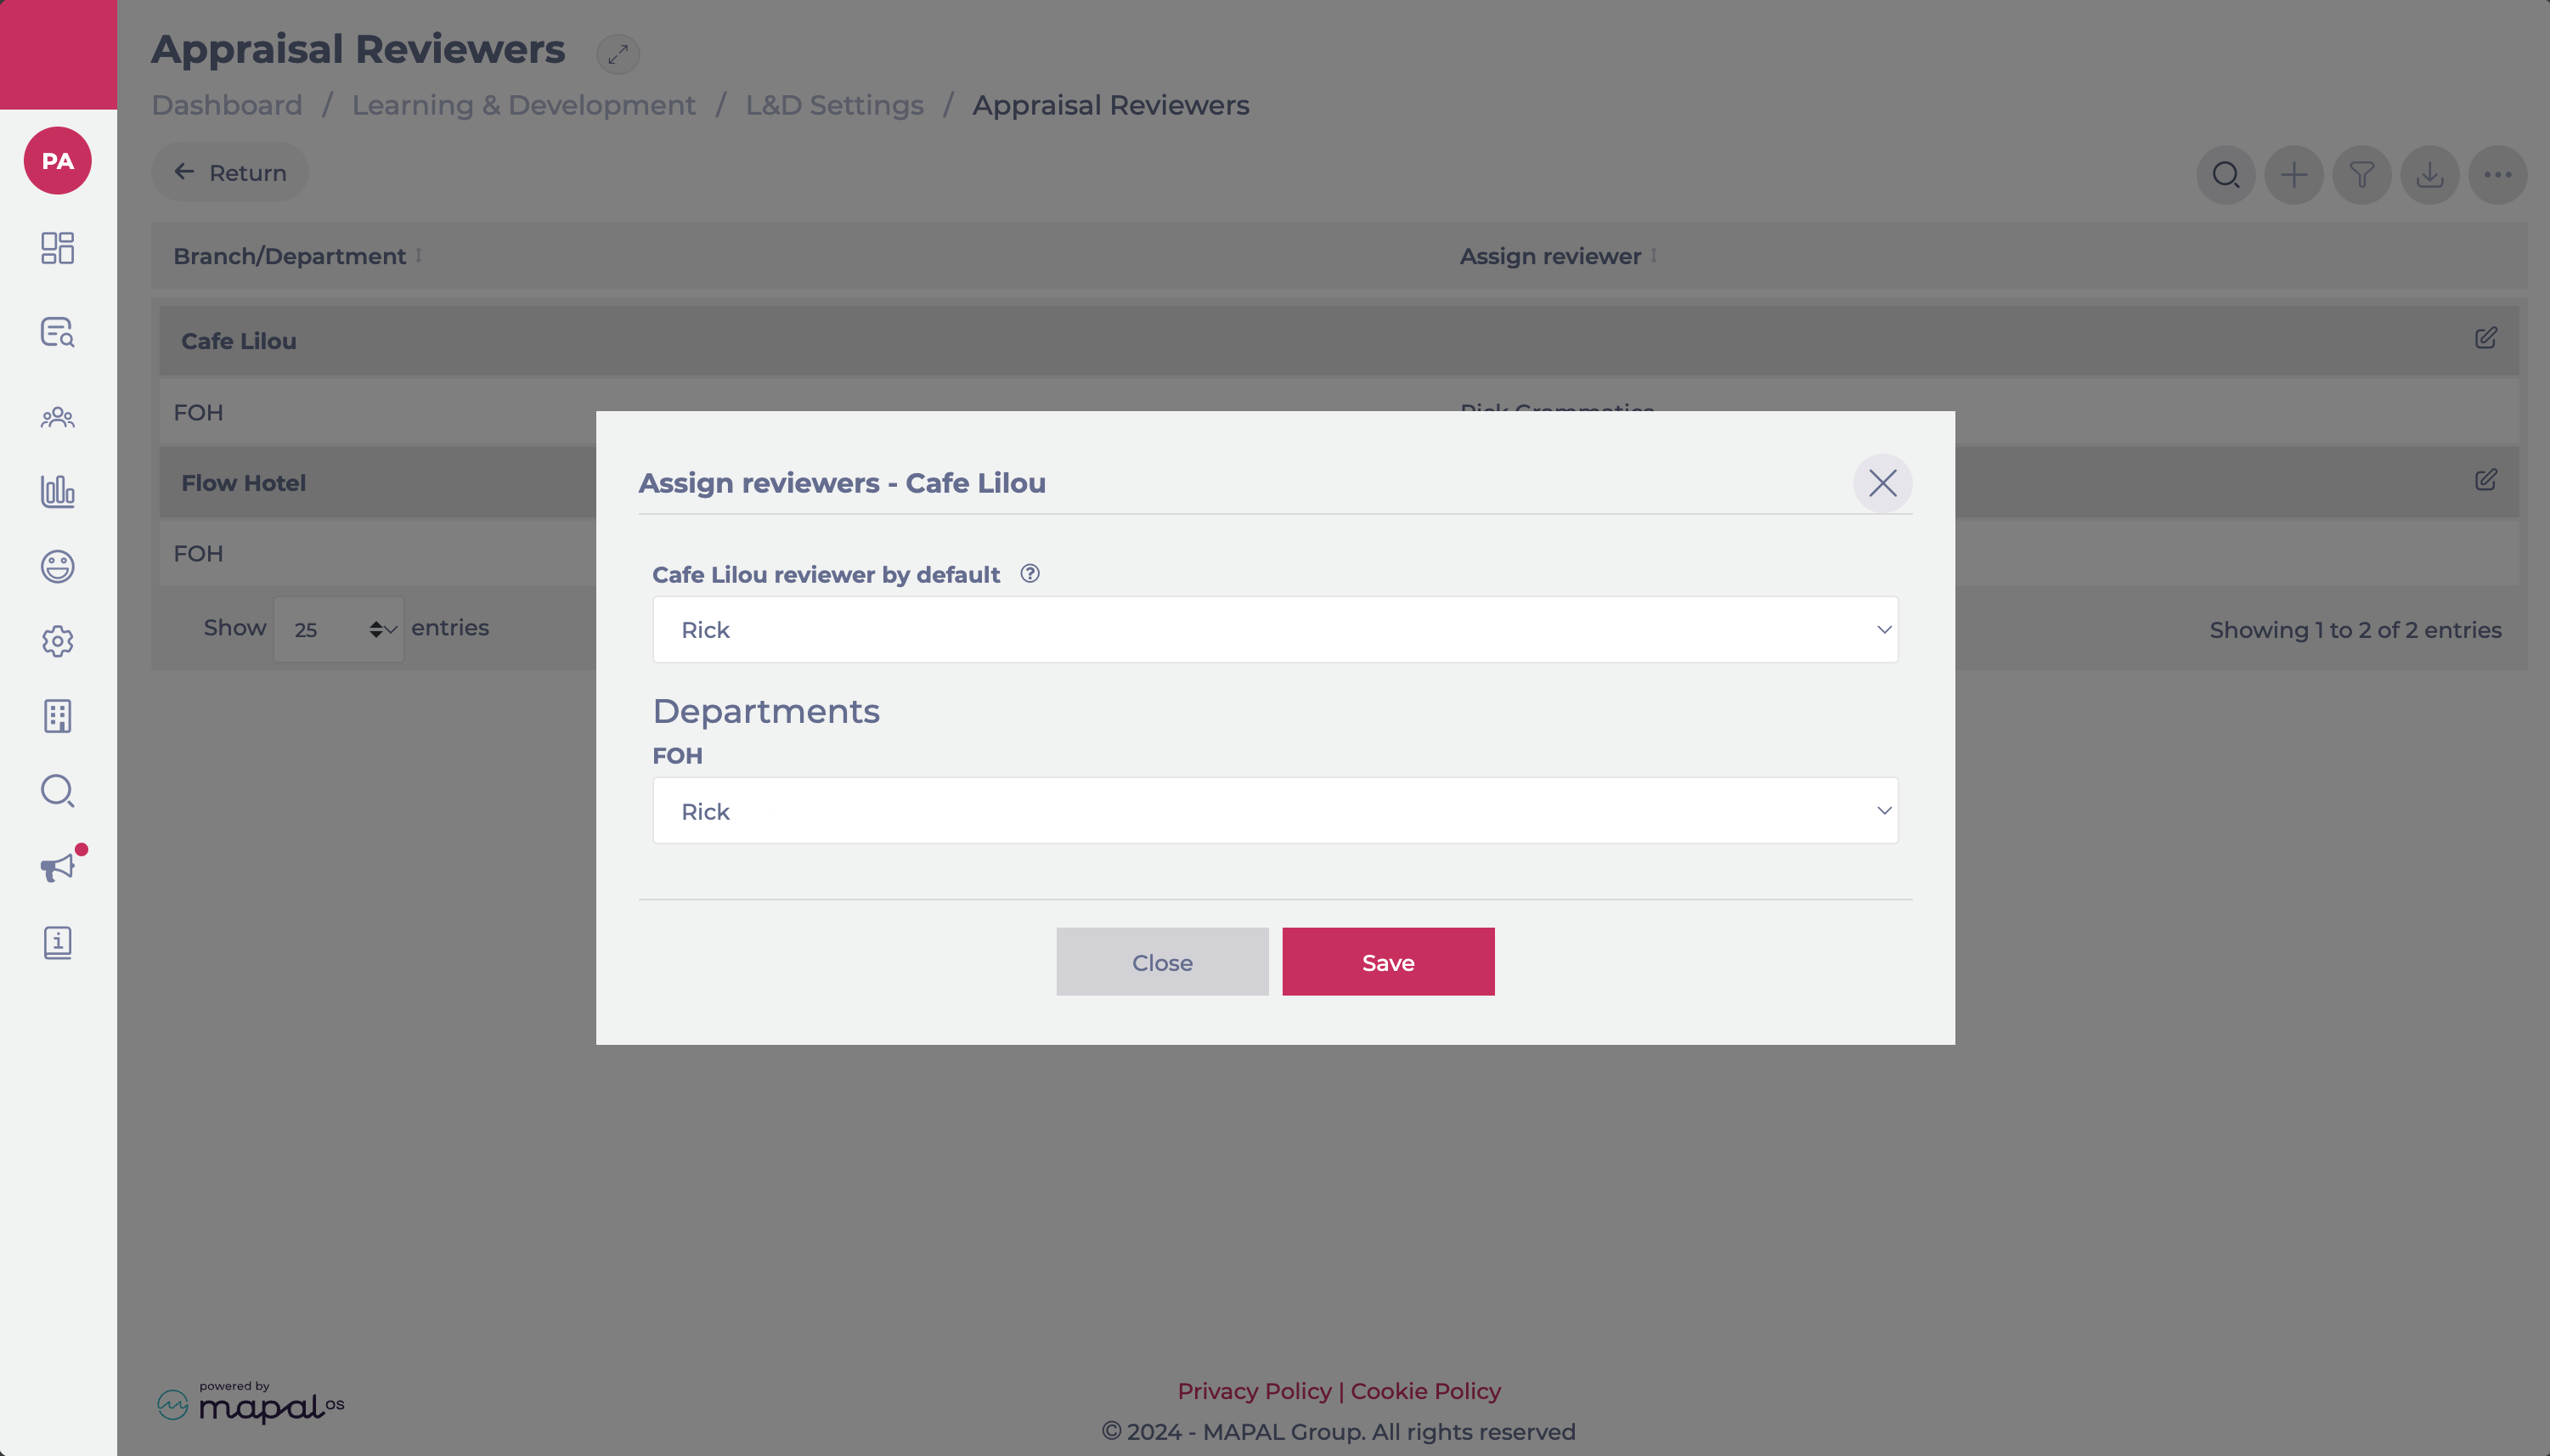
The Assign Reviewers popup window will open. Here, you will be able to assign:
Default reviewer per Branch: A reviewer that will cover all appraisals in the branch if a reviewer for specific departments hasn’t been assigned.
Reviewer per Department: A reviewer specifically assigned to cover the appraisals in a particular department.
Once you have selected the reviewer, select Accept to save your configuration.
Automatic reviewer unassignment when permissions change
If a reviewer’s permissions or branch access are modified so that they no longer meet the criteria to review appraisals, Flow will automatically unassign them from any incomplete appraisals.
When this happens:
The affected appraisals are reassigned to the branch’s default reviewer, if one is configured.
If no default reviewer exists for that branch, the appraisals will appear in the Appraisals requiring reviewer tile on the dashboard, allowing managers to quickly reassign them.
This automatic process ensures that only valid reviewers remain assigned, reducing administrative work and maintaining visibility of appraisals that still require attention.
Assign default reviewers by branch
Start from: the Flow Learning dashboard.
Select Learning & Development > Company Structure from the main menu.
Head to the Branches tile.
Choose a branch from the list,
To assign the default reviewer, select from the Appraisal Default Reviewer field.
Hit Save to return to the list of branches.
Note: when a default reviewer has been set up, their name will be displayed as the reviewer when an appraisal is assigned to a learner.
Manage branches in Flow Learning
Start from: The Flow Learning dashboard.
Navigate to Company > Company Structure.
Add a branch
Once in Company Structure, select View on Branches.
Select Add +.
A popup window will open. Fill in the information for your new branch, such as the name, location, address, jurisdiction, branding, language, etc.
Select Save. Your new branch will now appear on the list.
Edit a branch
Once in Company Structure, select View on Branches.
Select the three dots button in the specific branch you wish to edit.
A popup window will open with all the information about your branch. Fill in the fields or edit the existing content as required.
Select Save to update your branch’s information.
Import branches
Once in Company Structure, select Settings on Import Branches.
The Import Branch popup window will appear.
Select Upload File to upload a CSV file with information on your branches.
Select Test feed to test the validity of the data in the CSV file before uploading.
Note: CSV is the only admitted format. Selecting the Test feed option will result in no data actually being imported.
Once you have confirmed the validity of the data, you can reupload the file with the Test feed option deactivated.
Select Save to finalize your upload.
You should now be able to see your recently uploaded branches in the Branches list.
Create a site
Managing business units through Mapal OS
For users on Mapal OS, your business units should now be managed on the Mapal OS dashboard. You can find out more at Manage business units in Mapal OS.
Note: if you're not sure whether you are on Mapal OS, contact your line manager or Mapal support.
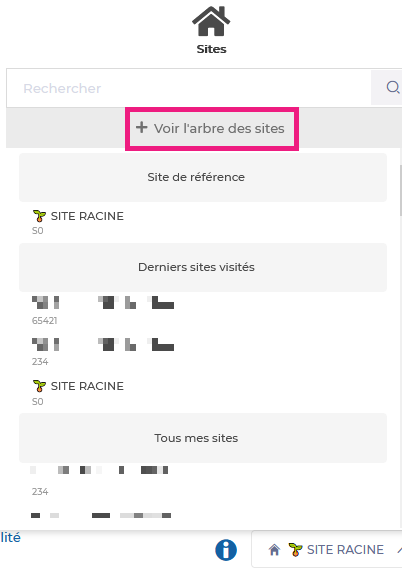
Create a site via Easilys settings
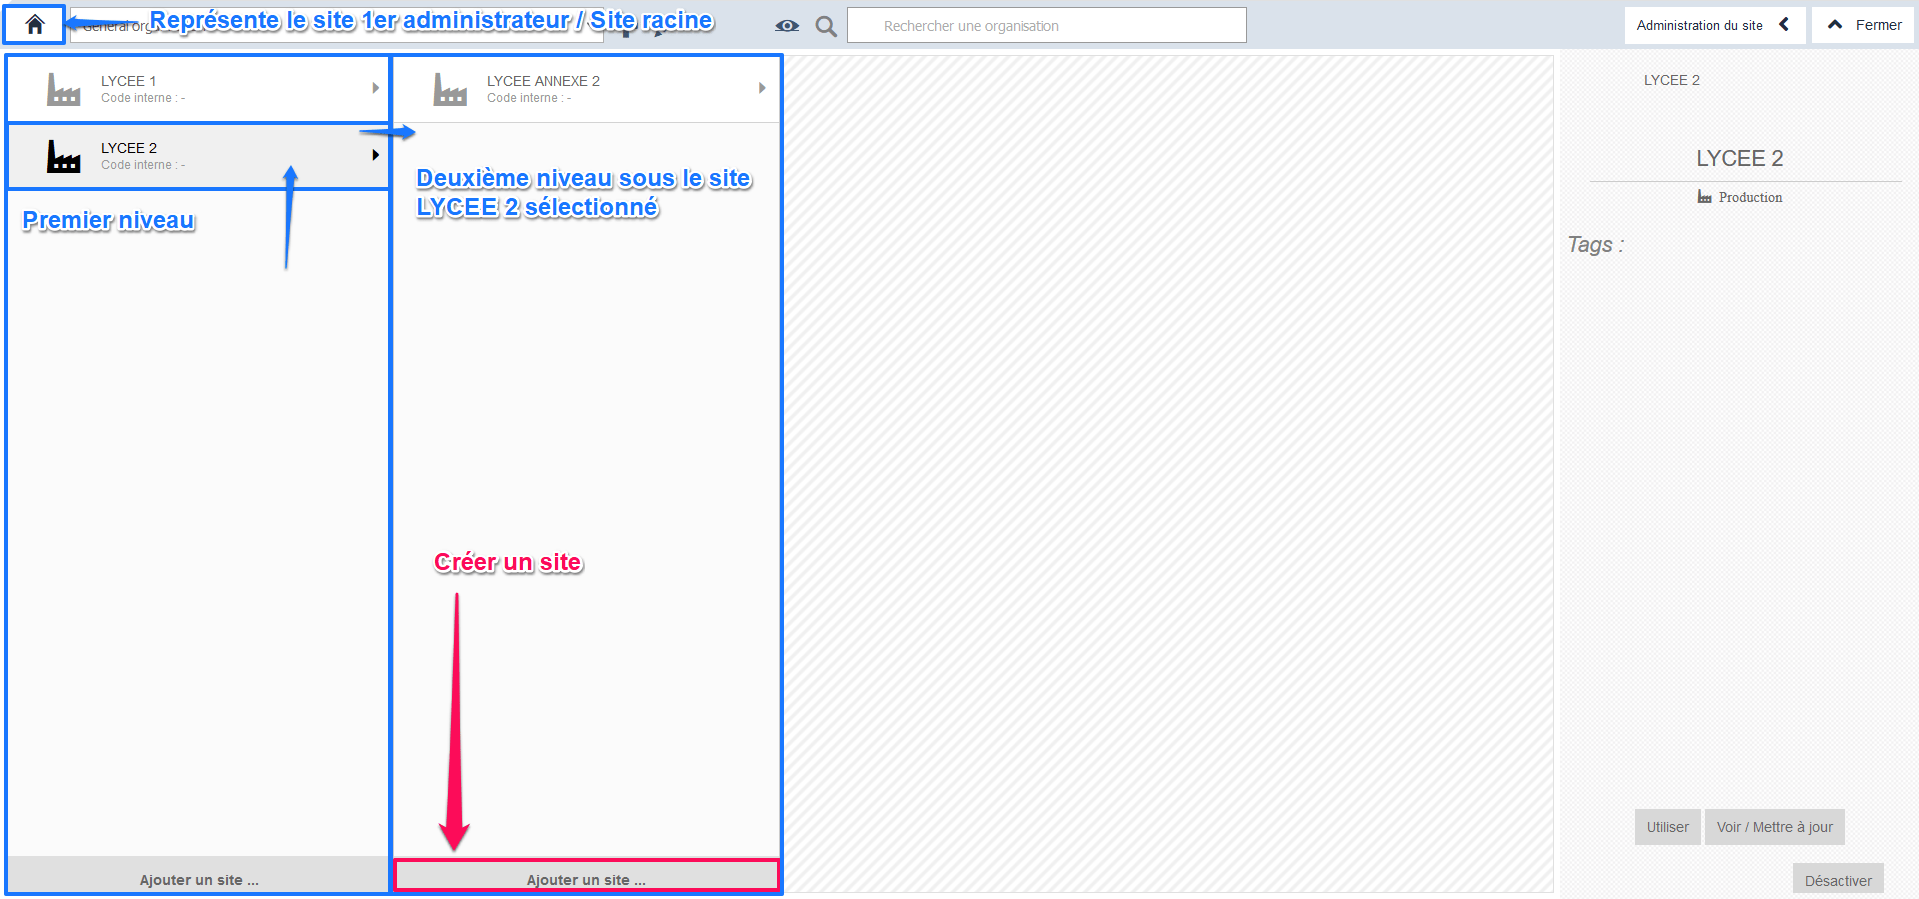
Start fromthe Easilys menu.
Select your site name.
Select "Voir l’arbre des sites" (View site tree).
Select Ajouter un site… (Add a site) at the bottom of the column where you want to create the site.
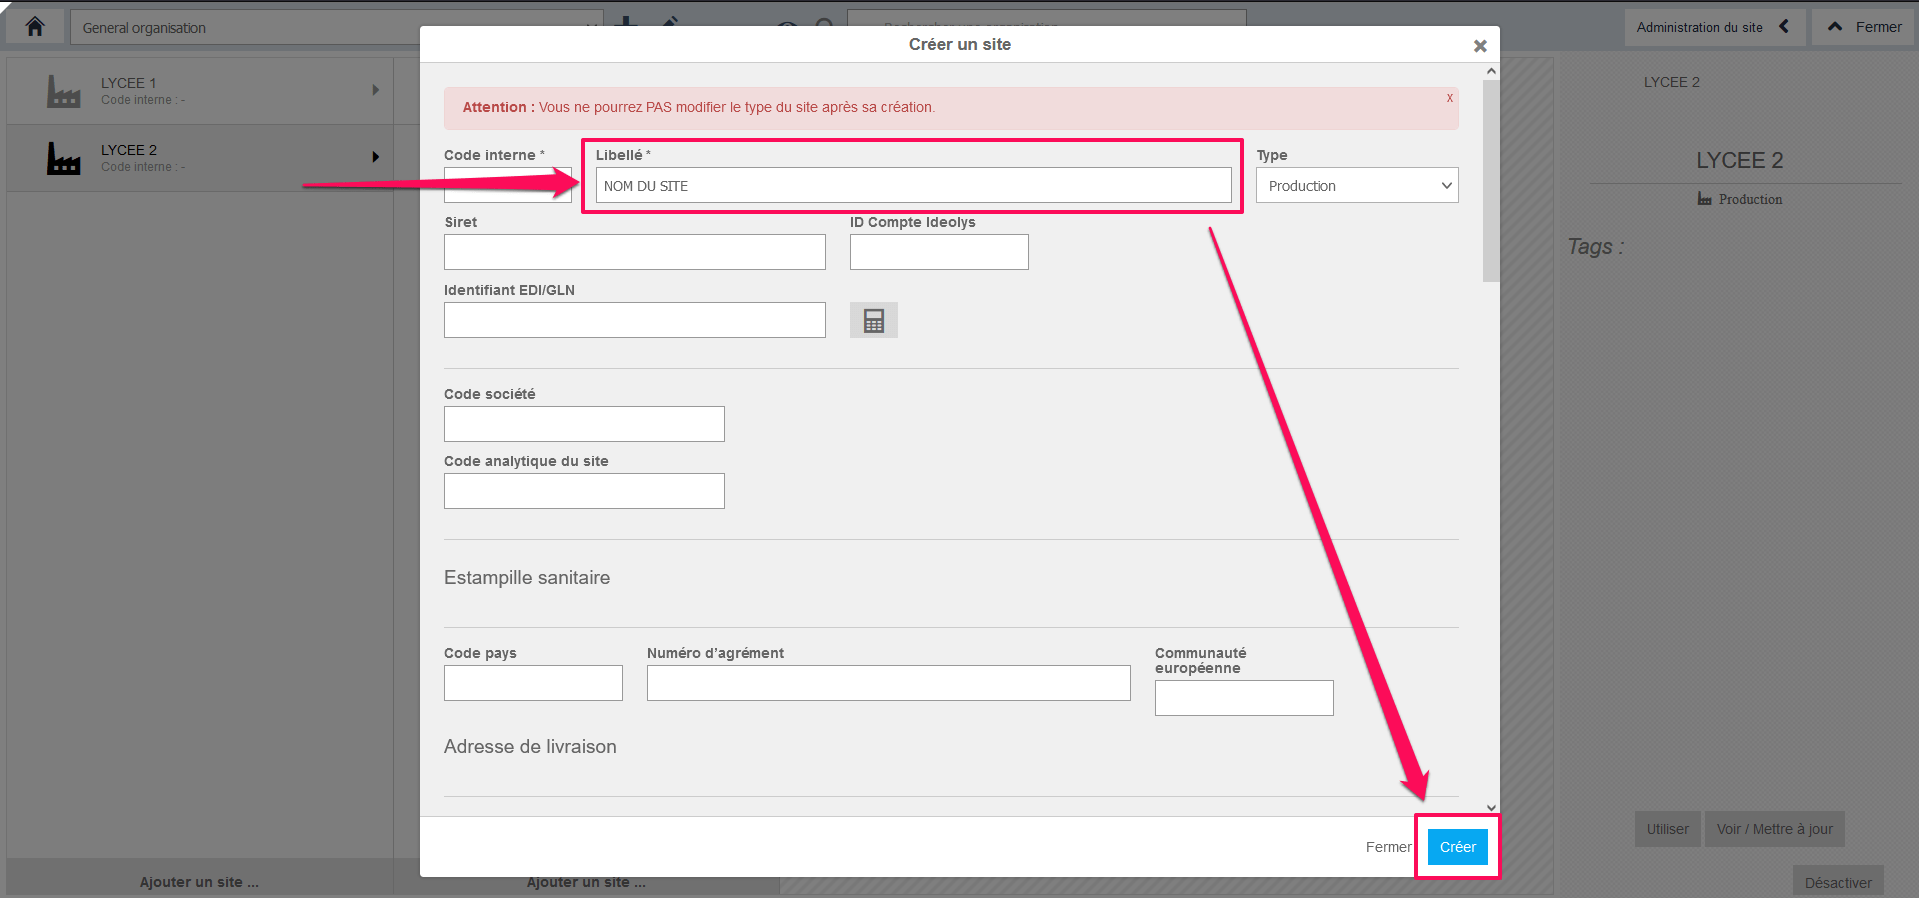
Example :You want to create a child site of site B, itself a child of site A, which is the child site of the root site. Select site A then site B and select Ajouter un site… (Add a site). The "Créer un site" (Create a site) window appears on the screen.
Complete the requested information. Fields marked with an asterisk (*) are compulsory.
Choose whether you want to assign by Branch OR by Branding. You can also use the multiple filters (Section, Division, Region, Area, Branch, Job Titles or Department).
Select Save.
This will send this noticeboard to all whom have been selected: they will receive an email up to approximately 30 minutes after sent.
Removing / Archiving noticeboard items
Select Communications > Noticeboard.
Select the three dots icon on the Noticeboard item you want to remove/archive.
Select Archive All OR Delete All.
Note: deleting a Noticeboard item is permanent and irreversible. However, you can unarchive an archived one.
To unarchive, select Archive from the dropdown menu. This will show all the Noticeboard items that have been archived:
Select Unarchive all to make them active again.
Note: if you want to remove Noticeboard items from specific branches, you can simply change the Group by dropdown menu from name to branch. This will thus not affect the other branches.
Copy noticeboard items to a selected branch
Visit Company > Company Structure > Branches.
Find the three dots icon on the relevant branch, then Copy noticeboard items.
Select All or choose the Particular items you would like to copy - the list shows the noticeboard items that have not yet been copied/assigned to the chosen branch.
Use the Save button to copy these items to the selected branch.
Create noticeboard categories and subcategories
Start from: The Flow Learning Dashboard.
Select Communications > Configure from the main menu.
Select Noticeboard categories and subcategories.
Create a category
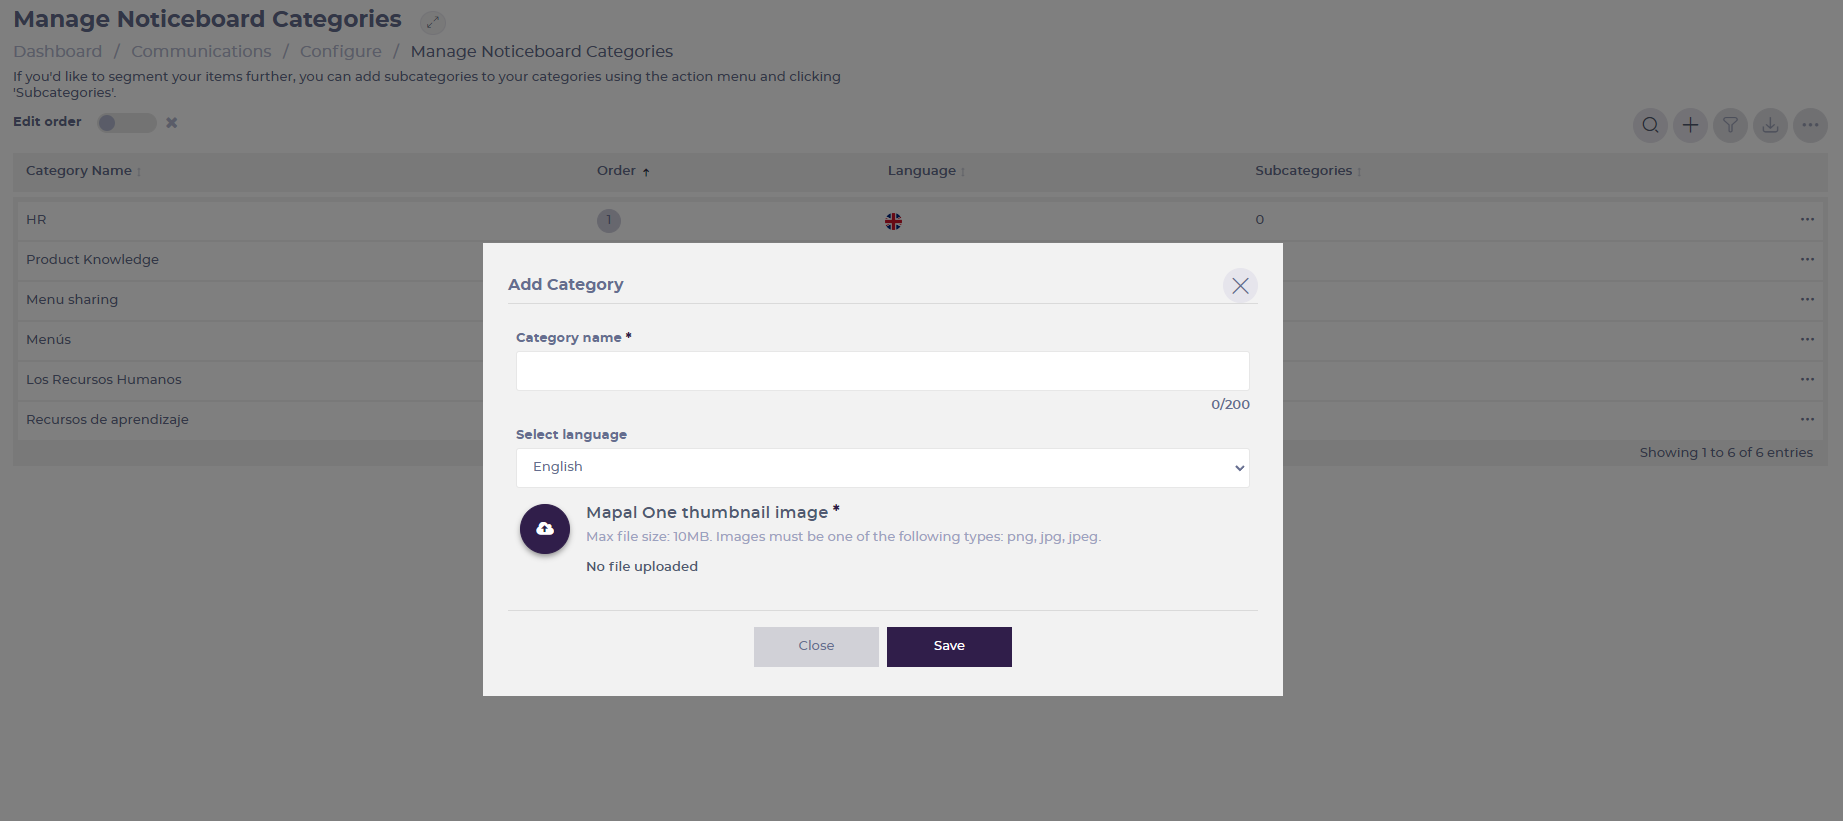
Select the Add + button and fill in the following fields:
Category Name (mandatory): Specify what would you like your folders to be named.
Select Language: Select a preferred language from the drop-down menu.
Mapal One thumbnail image (mandatory): Select a preferred image. All folders must have an image.
Select Save to save the new category OR Close to dismiss it.
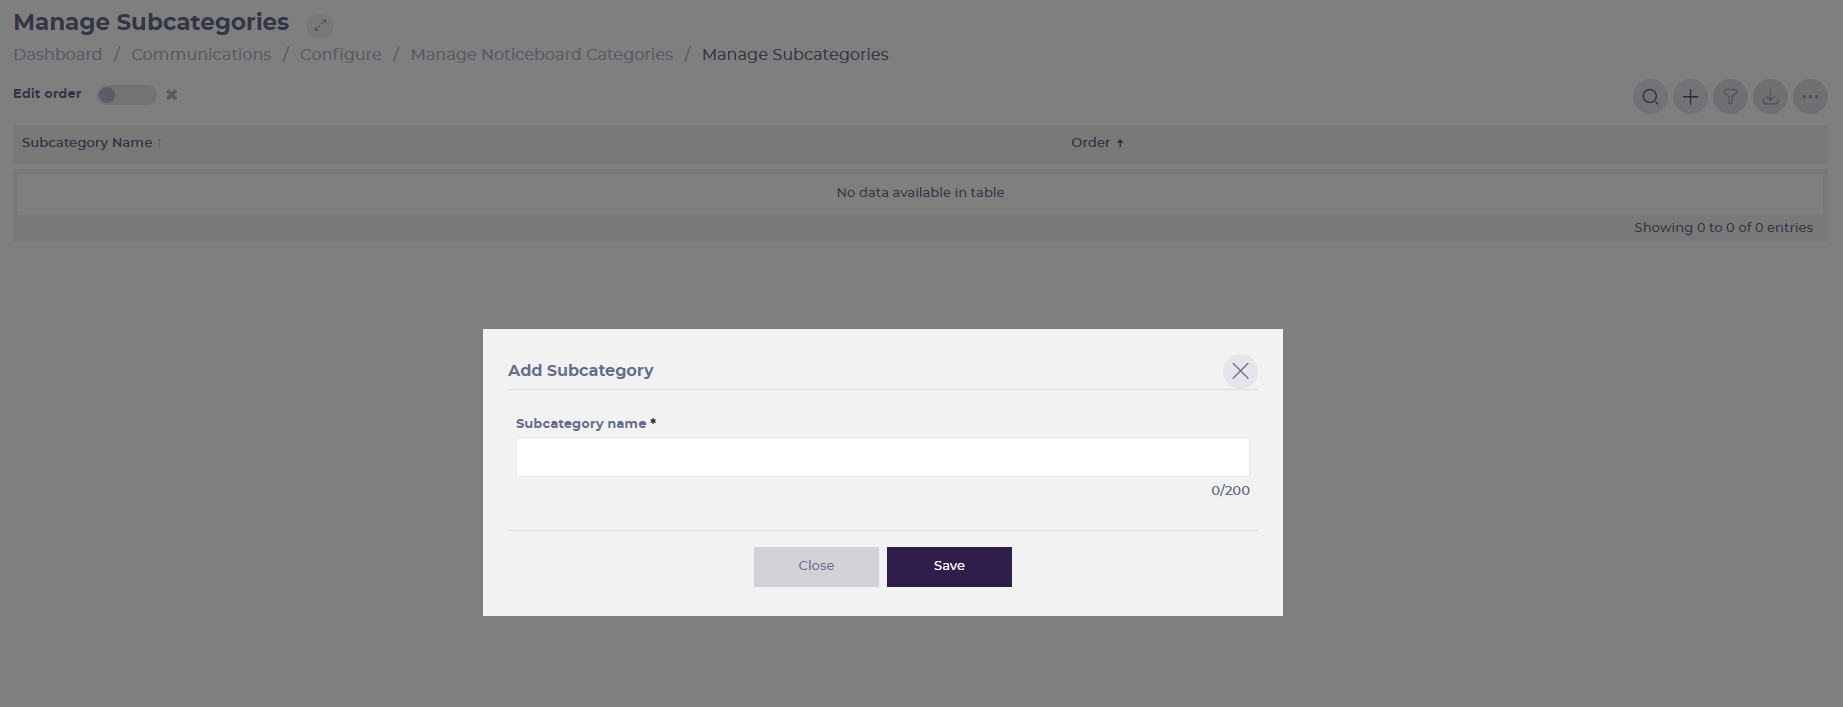
Create a subcategory
Select the three dots in the category's box and then select Subcategories.
Select the Add + button and assign a Subcategory name.
Select Save to save the new subcategory OR Close to dismiss it.
Manage business units in Mapal OS
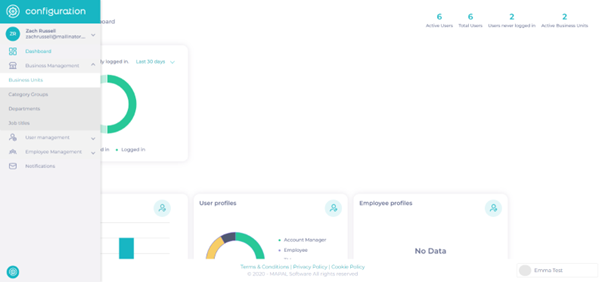
Start from: The Mapal OS Dashboard.
Select the Configuration tool.
You will now have access to the Configuration Dashboard.
Users with access to view Business Units will have access to Business Units via the Menu and will be able to view the Business Units they are assigned to within their User profile.
Note: You may have limited access to some fields in the following menus. depending on how your data is managed by Mapal.
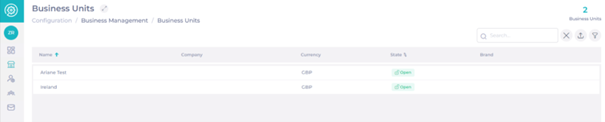
Select Business Management > Business Units.
Search for a specific Business Unit using the search function.
Export the list of Business Units using the export function.
For more details, select directly one Business Unit:
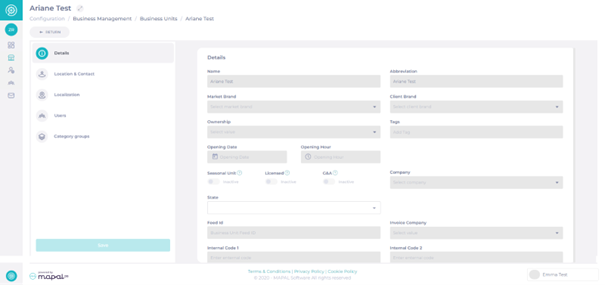
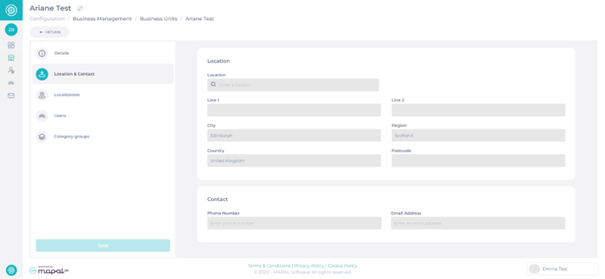
Location & Contact
The Location & Contact details are visible for users if the user profile has maintain OR view access to Users.
Note: The Location field is mandatory and must be populated in order to configure a business unit. By populating this field, the system can better support geolocation-aware features such as region-based reporting, time zone calculations, and access rules.
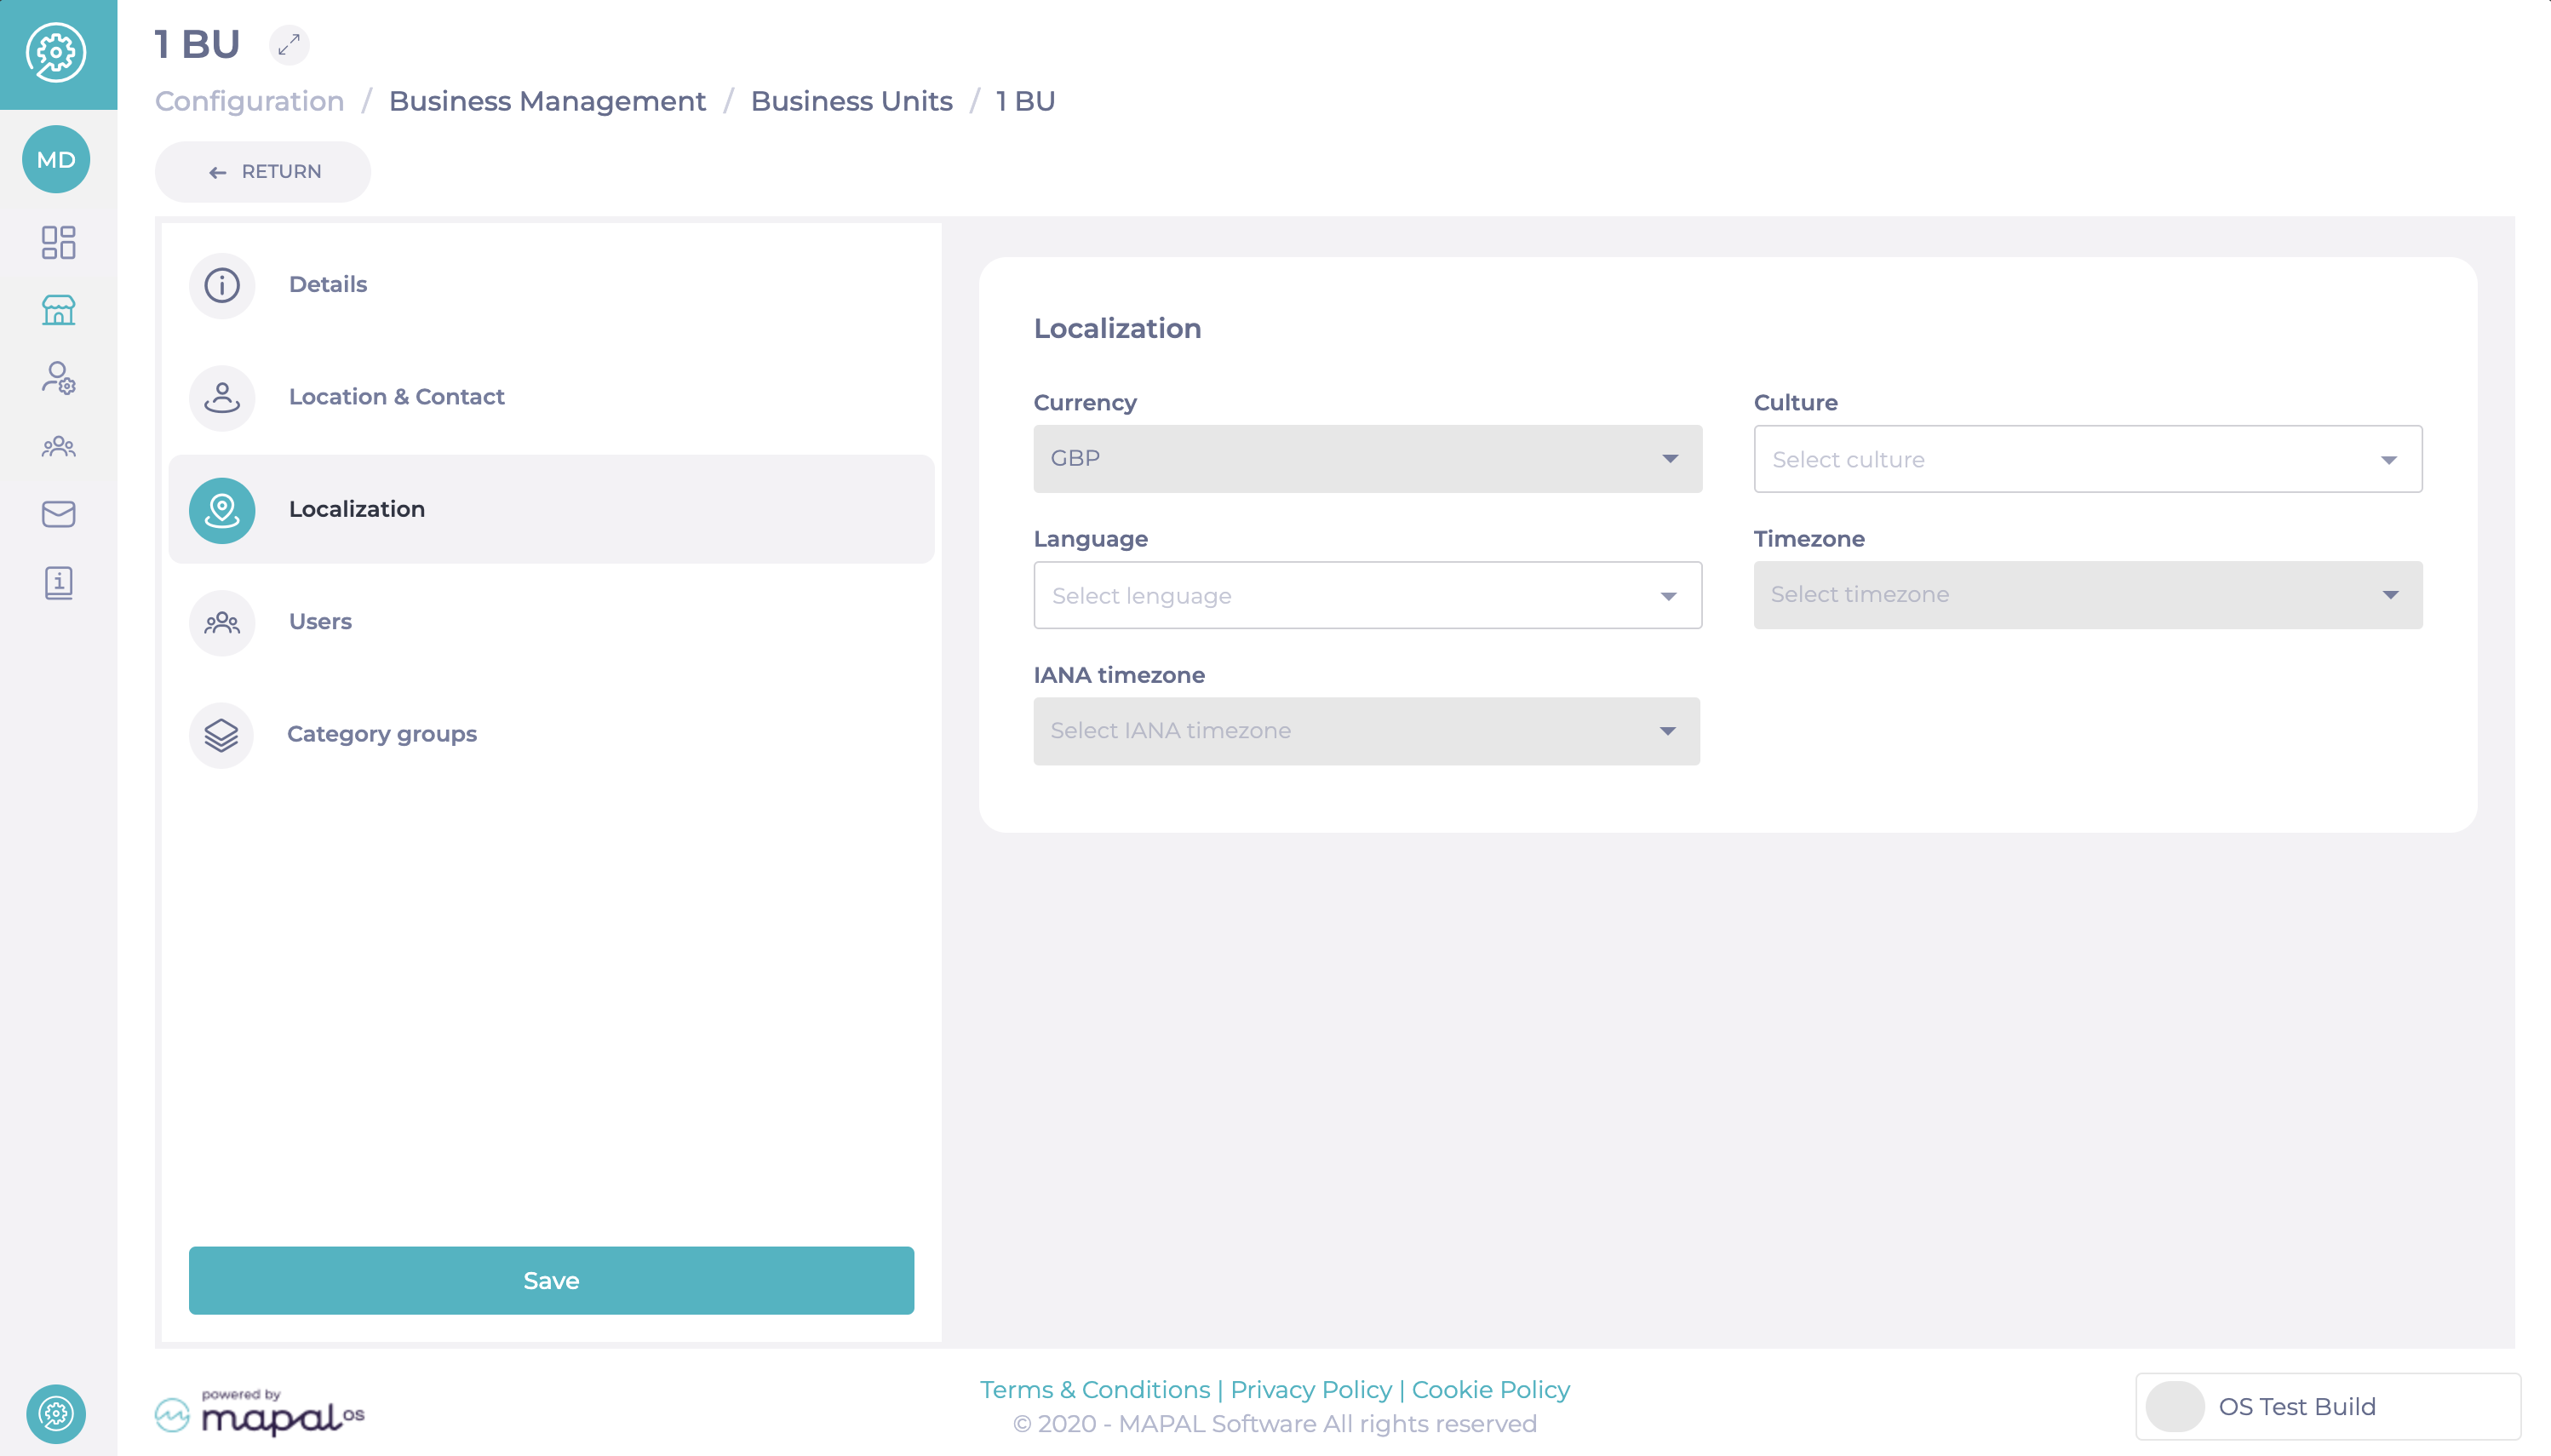
Localisation
The Localisation tab provides options for local customisation across all products. Key features include:
Language: The default language here may differ from the default language at the Operator level. This flexibility allows multi-language operators to send welcome emails, notifications, and communications in supported languages specific to their branches.
Additional Local Settings:
Currency: Specify the currency for the Business Unit.
Timezone: Set the appropriate timezone for scheduling and reporting.
IANA Timezone: Select the official timezone standard for precise localisation. These are time zone IDs that map to a unique time zone and are standardized by the Internet Assigned Numbers Authorit???
These settings ensure that each Business Unit can operate with tailored configurations, improving efficiency and clarity for multi-regional operators.
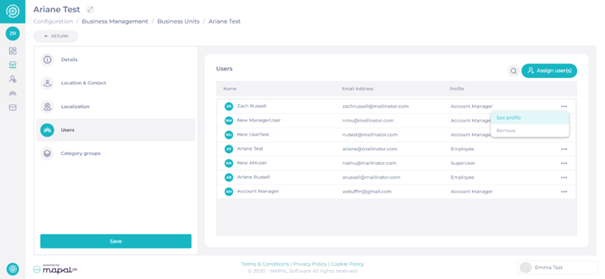
Users
The users details in the Business Unit will be visible.
Search for a specific user using the search icon.
View each profile by selecting the 3 dots icon.
You will be redirected to the User's profile in Mapal OS.
Note: Users with no access to users will not be able to view the list of users.
Assign a user to a Business Unit
Select Assign user(s)
Use Search users to find the right record and then Assign.
When you have found all the relevant users, select Done.
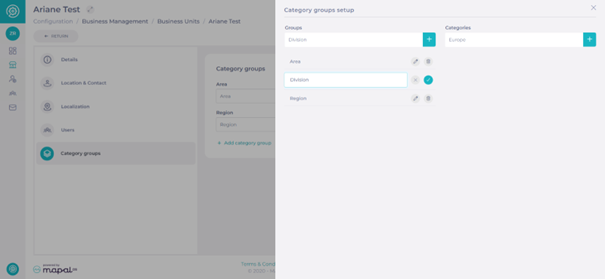
Category groups
Within Category groups, users with maintain access to Category Groups will be able to view and edit category groups.
Note: Users can amend Category groups by using the dropdown menus AND/OR add a new Category group by selecting the "+ Add category group" icon.
The Category groups will through to the Flow Management System as reporting levels and branches will be assigned their reporting fields.
Users with view access to Category groups can only view Category groups.
Users with no access to Category groups cannot view or edit Category groups.
Deactivating Business Units
Users may want to deactivate Business Units for various operational reasons. There are two options available depending on your situation:
You can deactivate a Business Unit by setting its Status to Inactive. This completely disables the Business Unit in the system.
If you are preparing a new site for launch (e.g., setting up the Business Unit while you hire employees and configure data), it is strongly recommended to set the Status to Not visible instead. "Not visible" keeps the Business Unit hidden but technically active, preventing issues when assigning employees or setting up configurations before launch.
Business Units can be placed in one of the following statuses:
Open: Visible in the system and shifts can be scheduled.
Active: Visible but shifts cannot be scheduled.
Inactive: Temporarily closed, not usable, but can be reactivated later.
Invisible: Hidden from the list, cannot be used, but may remain available for reporting purposes.
Notes: Choosing the correct status is important. For example, use Invisible when preparing a new site, so the Business Unit remains hidden but available for reporting. Before saving any status updates, ensure a valid postcode is entered in the Location & Contact section. Missing data may block the save.
What happens to employees in deactivated Business Units?
When a Business Unit is deactivated, all employees assigned to that Business Unit will automatically have their End Date set to the deactivation date. This action makes the employees inactive and revokes their access to the system.
If the Business Unit is reactivated later, you must manually reactivate each employee individually. The employees are not automatically reactivated.