Noteactions performed on the Easilys platform are subject to user access permissions. If you are unable to carry out the actions described in the articles, it may be because you do not have the necessary permissions activated on your user profile. Contact the Support team, or your administrator, for help.
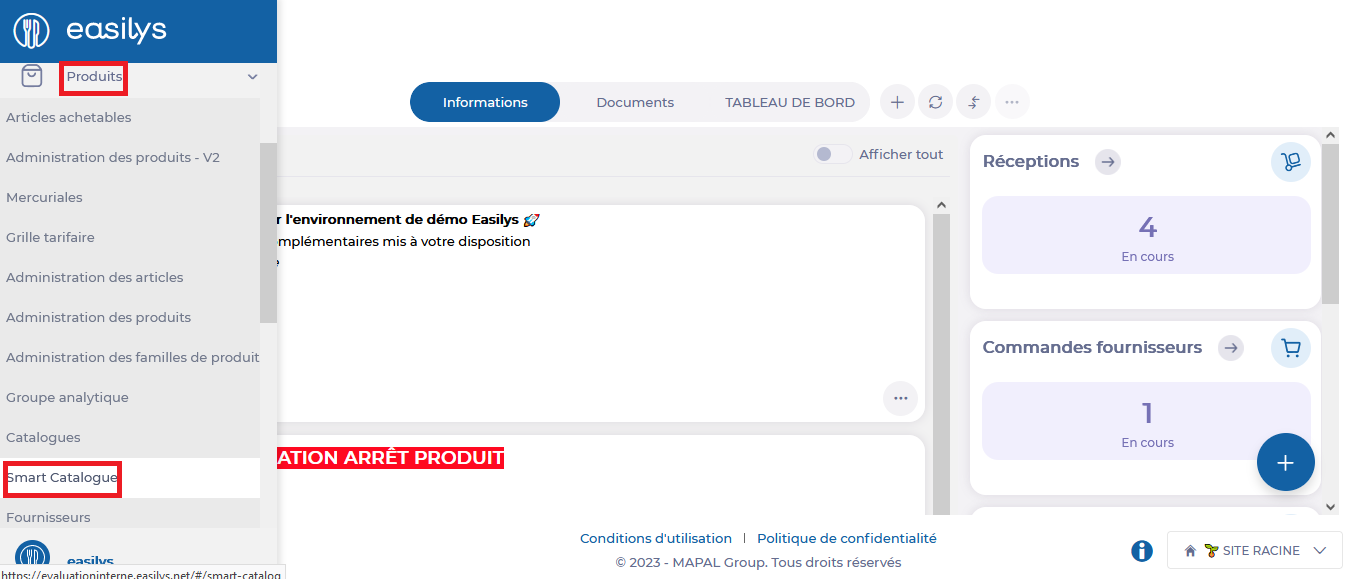
Start fromthe Easilys menu.
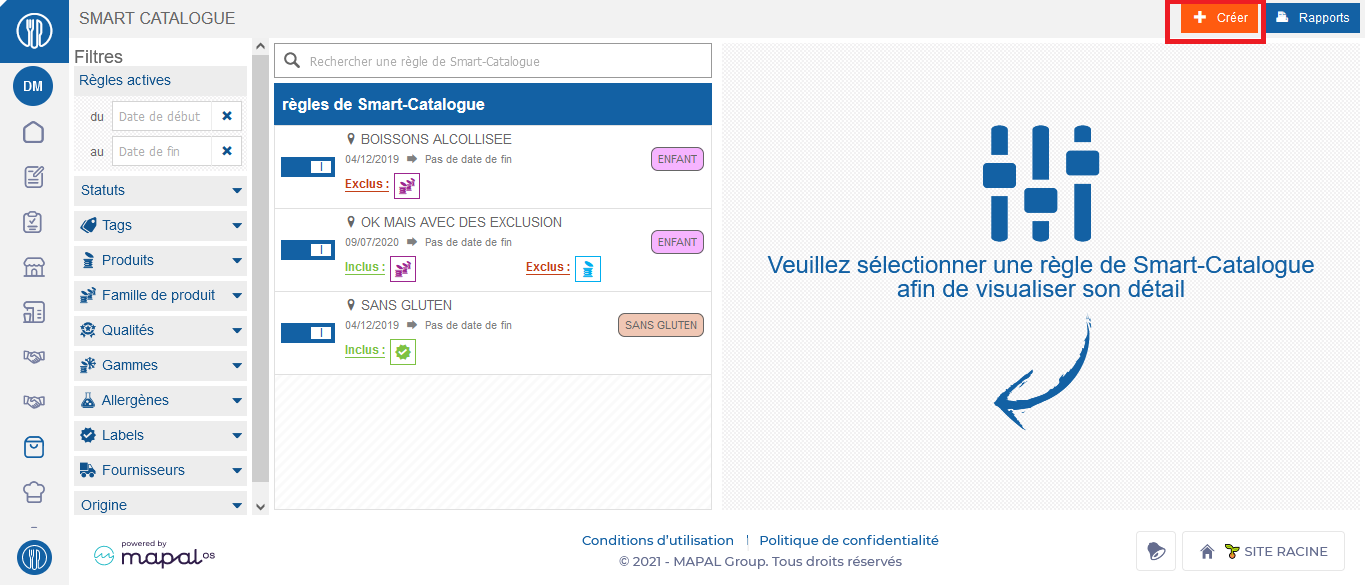
- Select Products > Smart Catalogue from the main menu.
See Create Smart Catalog rules for more information.
There are several types of rules, with different procedures depending on the type chosen:
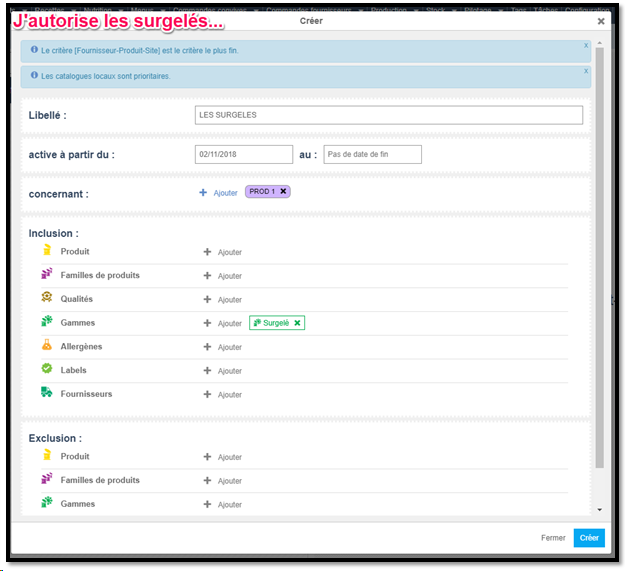
Inclusion type rule
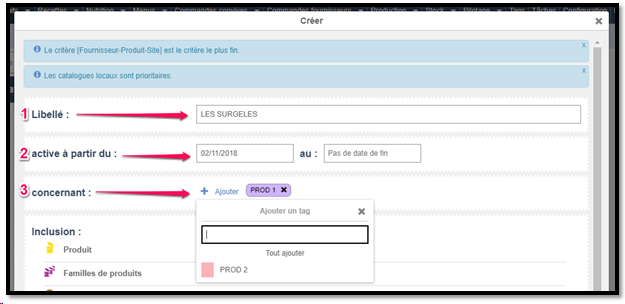
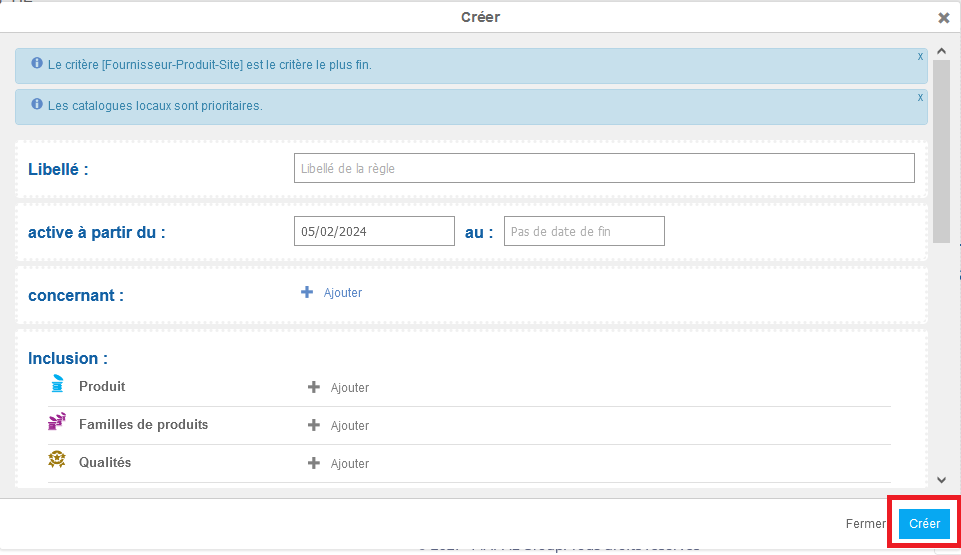
- Add one or more inclusion criteria to indicate what the site is allowed to see.
Noteby default, a site has visibility over everything. Once an inclusion rule has been created, it can only see what is allowed by inclusion rules.
Example 1: I want to authorize frozen products for sites tagged PROD 1.
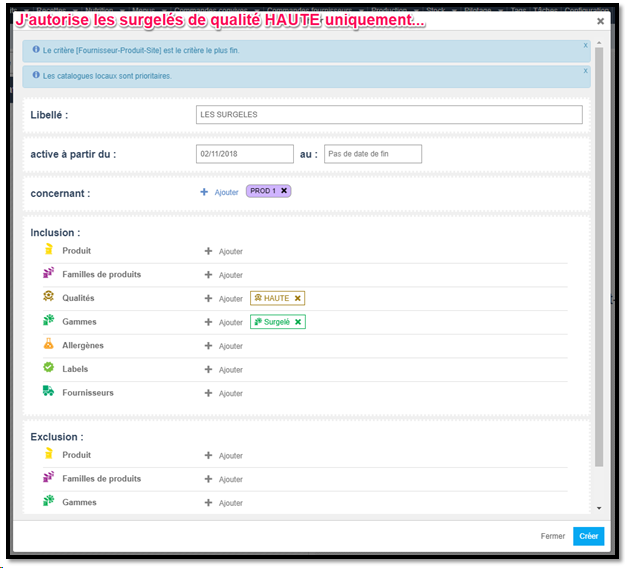
Example 2: I would like to authorize high quality frozen products only, for sites tagged PROD 1.
Exclusion type rule
- Add one or more inclusion criteria to indicate what the site is not allowed to see.
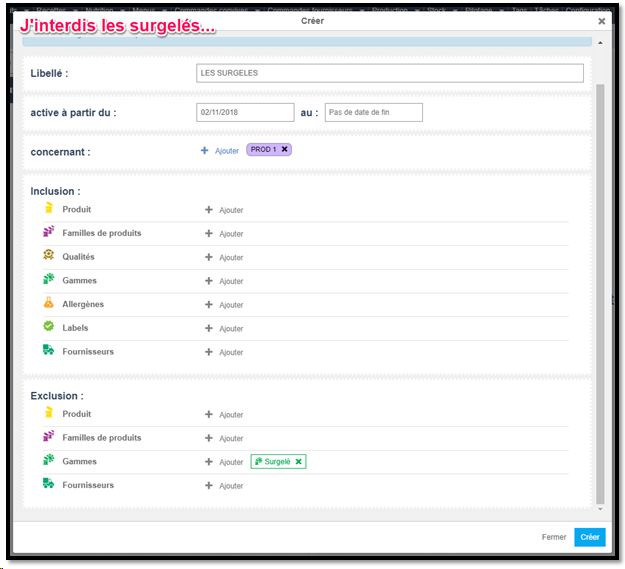
Example 1: I want to ban frozen products from sites tagged PROD 1.
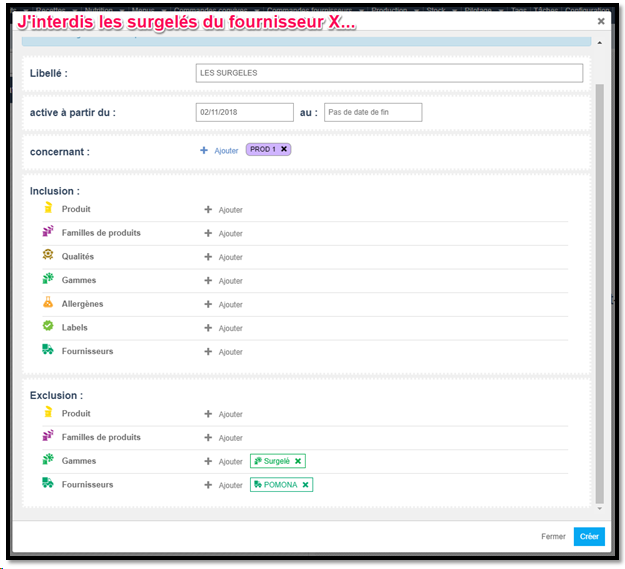
Example 2: I would like to ban frozen products from supplier X.

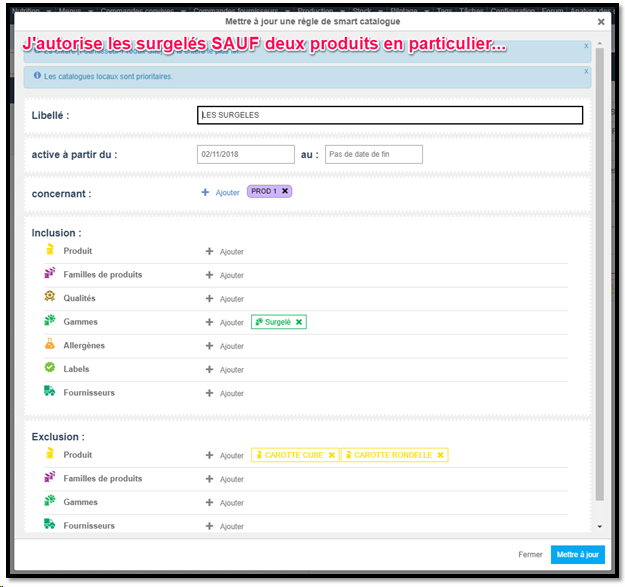
Inclusion and Exclusion type rule
- Add one or more inclusion criteria to indicate what the site is allowed to see, and one or more exclusion criteria to indicate exemptions.
Example 1: I want to authorize frozen products for sites tagged PROD 1, except for frozen products from supplier X.
Example 2: I want to authorize frozen products for sites tagged PROD 1, except for round carrot and diced carrot products.