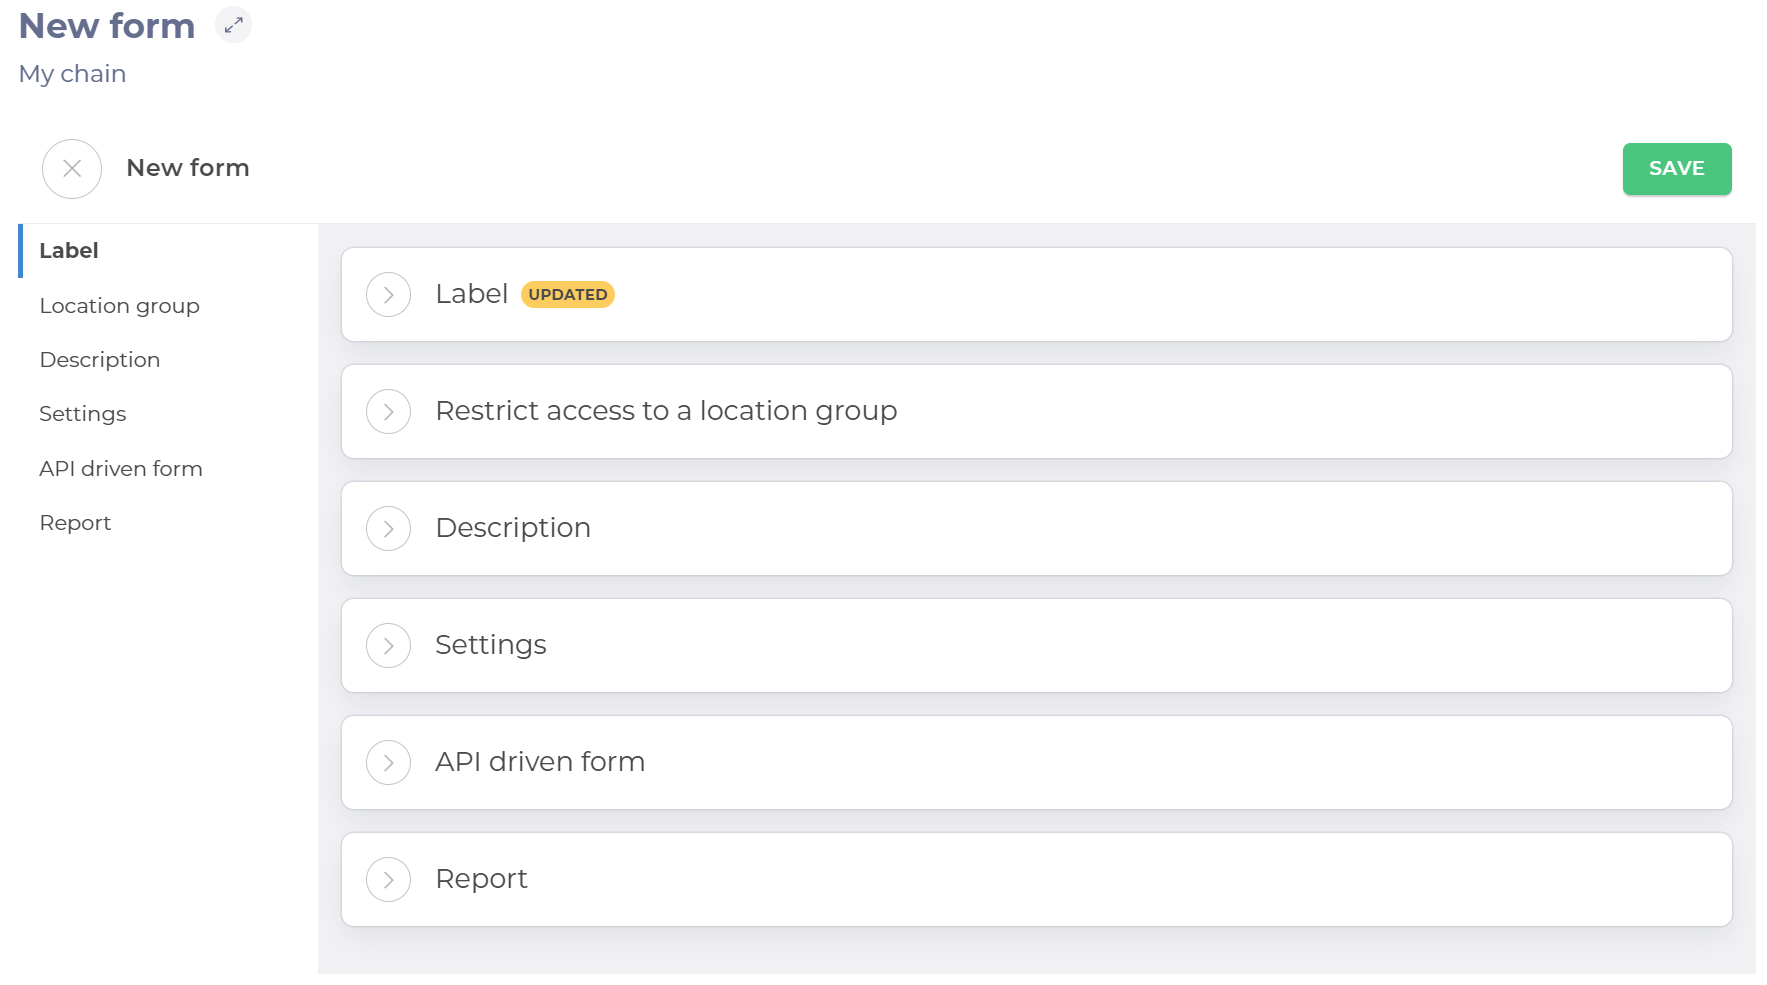
The New form page contains six panels for setting up the form.
Select to open each panel to change the settings and populate the fields.
Note: Use the panel heading links to navigate quickly to that section when you have multiple panels open.
Label
Enter the name of the form.
Restrict access to a location group
Use the dropdown list to select a location group. Access to the form will be restricted to that group only.
Description
Enter a description of your form. If populated, the Description link appears on your form on the dashboard. Selecting this will open the description.
Note: You can add text, tables, images and links using the formatting menu.
Settings
Toggle the buttons to enable and disable the following options.
Assign to existing users and make default for new ones – When enabled, this option assigns the form to all existing users and allows it to be selected from the assignments list when creating a new user automatically.
Private – When enabled, this option allows you to select the roles that can see the form. When disabled, the form is not visible to any of the roles.
Meeting – When enabled, this option allows you to use this form for planning your meeting. creating a meeting agenda and adding follow-up actions for every agenda item. See Create forms as a meeting agenda to know more.
Downcooling – When enabled, this option allows you to use this form specifically for temperature checks with automatic sensors. See Create a downcooling form to know more.
Label printing – When enabled, this option enables you to use the form to print labels from a drop-down list of templates.
Revision Handling settings
Forbid re-open – When enabled, this option stops the completed forms from being amended. Users will only be able to complete the form once. When disabled, the form can be amended as required.
Limited access – When enabled, this option shows a checklist of roles. Tick the roles to allow those roles to create new revisions, reopen completed ones and handle deviations from completed revisions. When disabled, all roles can view the revisions and open deviation, but do not have the permissions to action them.
Check to select which roles have permission to revise the form, re-open completed ones and handle deviations (an answer that is outside of the parameters of what's expected).
Report
Add the email address of anyone requiring notification of when a form is completed.
Select Add to add the address to the list of people to be notified. You can add as many addresses as required.
Select the trash icon next to an entry in the list to remove that address.
Saving the Form
Select Save from the top of the page to save your form and jump automatically to the Task screen.
Note: If you navigate away from the page before saving, your settings will be lost. You will not be prompted to save before closing.
The new form will now be accessible to specific roles in a particular area. Until it is published, only the user who has created the form can view or use it.
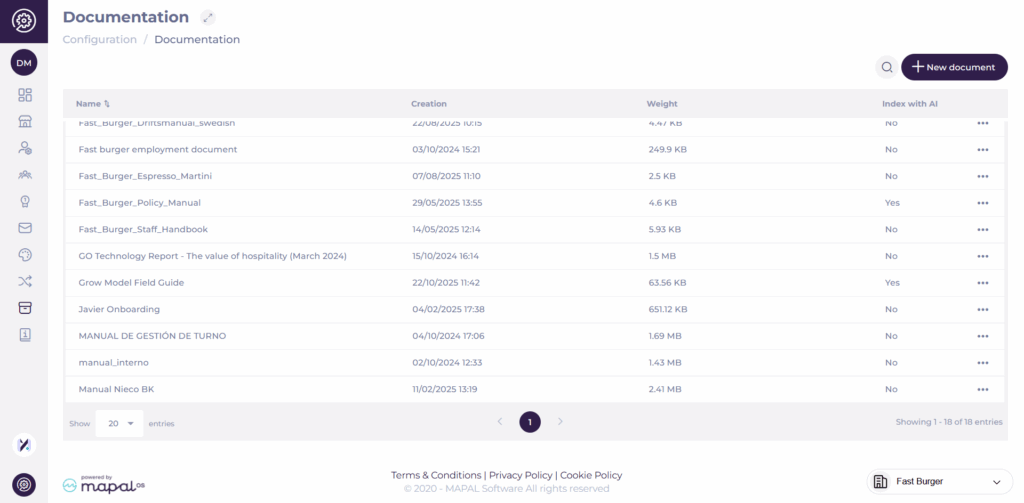
Manage company documentation on Mapal OS
Start from: The Mapal OS Configuration module.
Navigate to Documentation.
The purpose of this section is to have a single place to collect documentation. The screen shows you a grid with all the uploaded documentation, showing details such as the name, creation date, how big the file is and if it’s indexed with the AI.
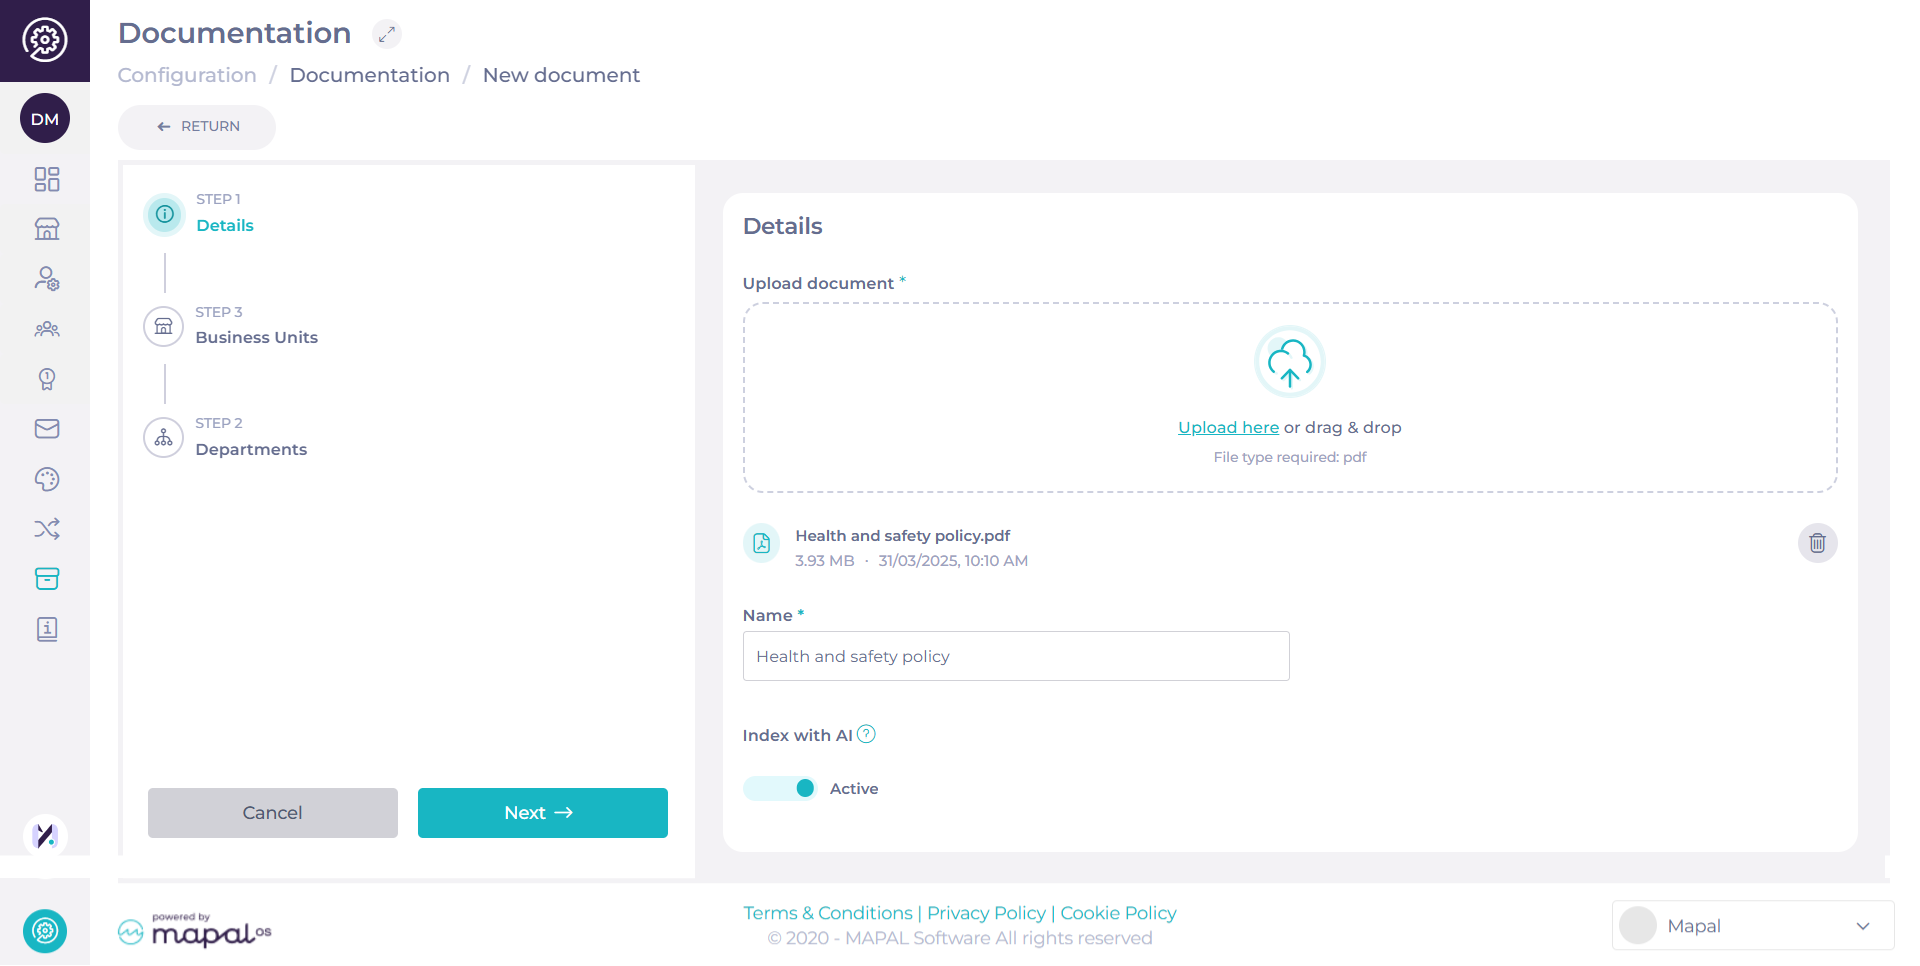
Add new document
Select + New Document.
Upload or drag & drop a file. The only file type allowed is .pdf.
Assign a Name* to your file.
Use the Index to AI toggle to decide if the file should be included in AI-powered answers.
Tooltip:“This document will be used to feed the AI in order to answer users' questions. Maximum of 100 allowed.”
Each operator can index up to 100 documents. Note: If the limit is already reached, attempts to enable indexing on a new or updated file will be blocked, and you’ll see the message: “Limit of 100 documents reached.”
Best practice: Choose intentionally which documents are indexed to maximise relevance. Core policies, compliance guides, and frequently referenced resources are good candidates.
Non-indexed documents remain fully available in the Documentation grid for users to search and access—they just won’t be used by the AI.
Select Next.
Assign Access
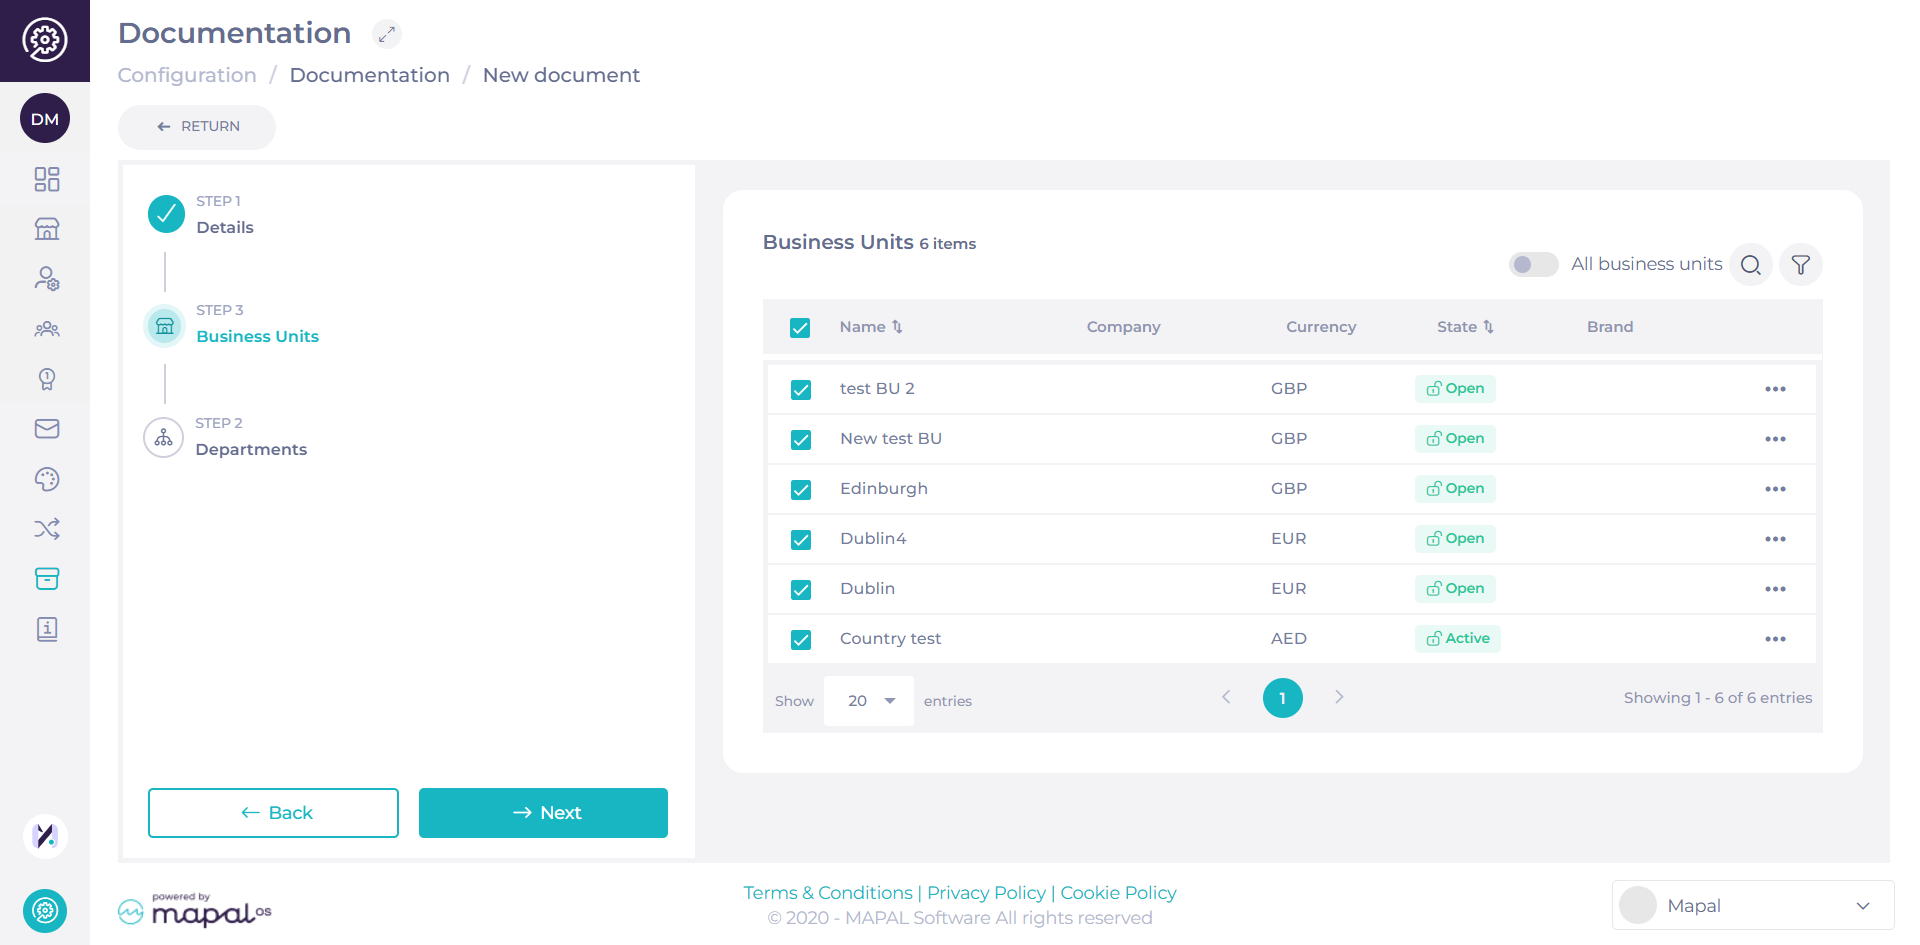
Option 1: Assign by Business Units
Select the Business Units that should have access to the document.
Use the Search bar or Filter to locate specific units, or select All Business Units to share the document company-wide.
Select Next to proceed.
Option 2: Assign by Category Groups
You can also toggle to Category Groups instead of Business Units to manage document access by category segmentation.
Select the relevant Category Groups and press Next to continue.
Use this view to assign documents according to organisational categories such as regions, brands, or site groups. The access logic ensures that only users belonging to the selected Category Groups will see the document in their Documentation area.
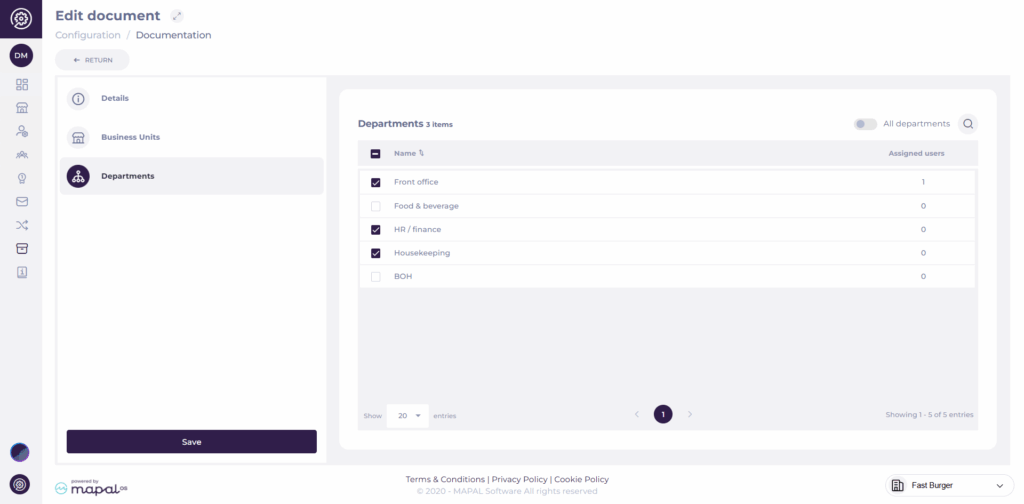
Assign to Departments
Select one or multiple Departments to assign the document to.
You can also use a toggle to apply to All Departments at once.
Note: Use the filterto display only selected departments for easier review. Filters support multi-select for Location, Country, Region, and City.
Once you have selected the right department(s), select Save to complete the setup.
The document appears then in the Documentation grid.
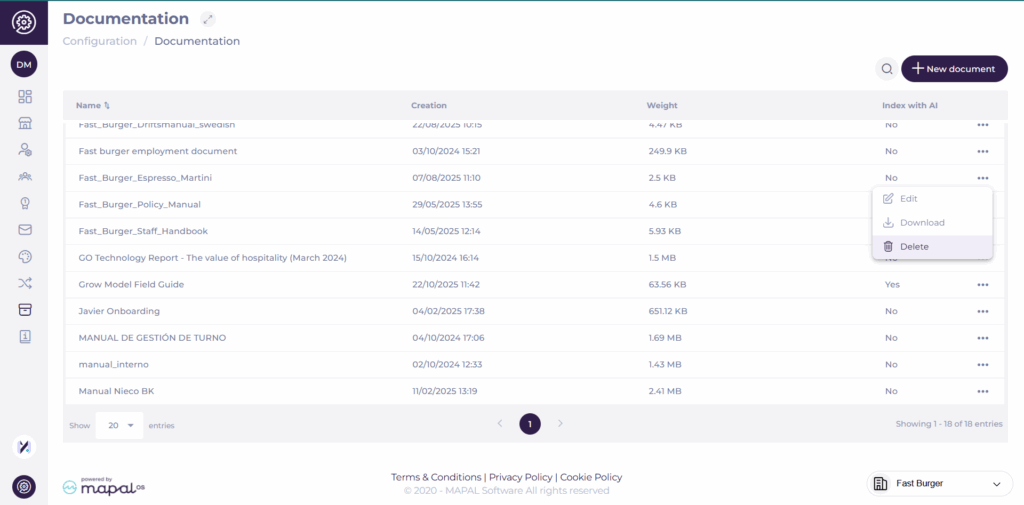
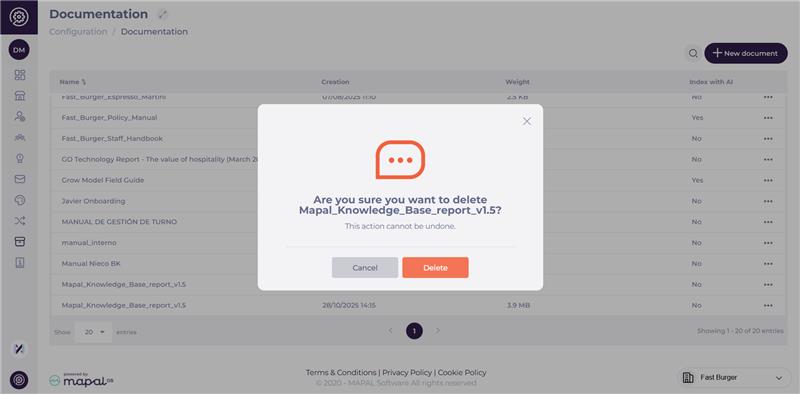
Delete documents
You can remove outdated or unnecessary files directly from the Documentation page.
Locate the document you want to delete in the grid.
Select the three-dot menu (?) at the far right of the document’s row.
Choose Delete from the dropdown menu.
Confirm your choice in the pop-up window.
Once deleted, the document is permanently removed from the system and will no longer appear in the Documentation grid or in AI search results (if previously indexed).
Note: Deletion is irreversible. If a document needs to be replaced or updated, consider uploading a new version instead of deleting it.
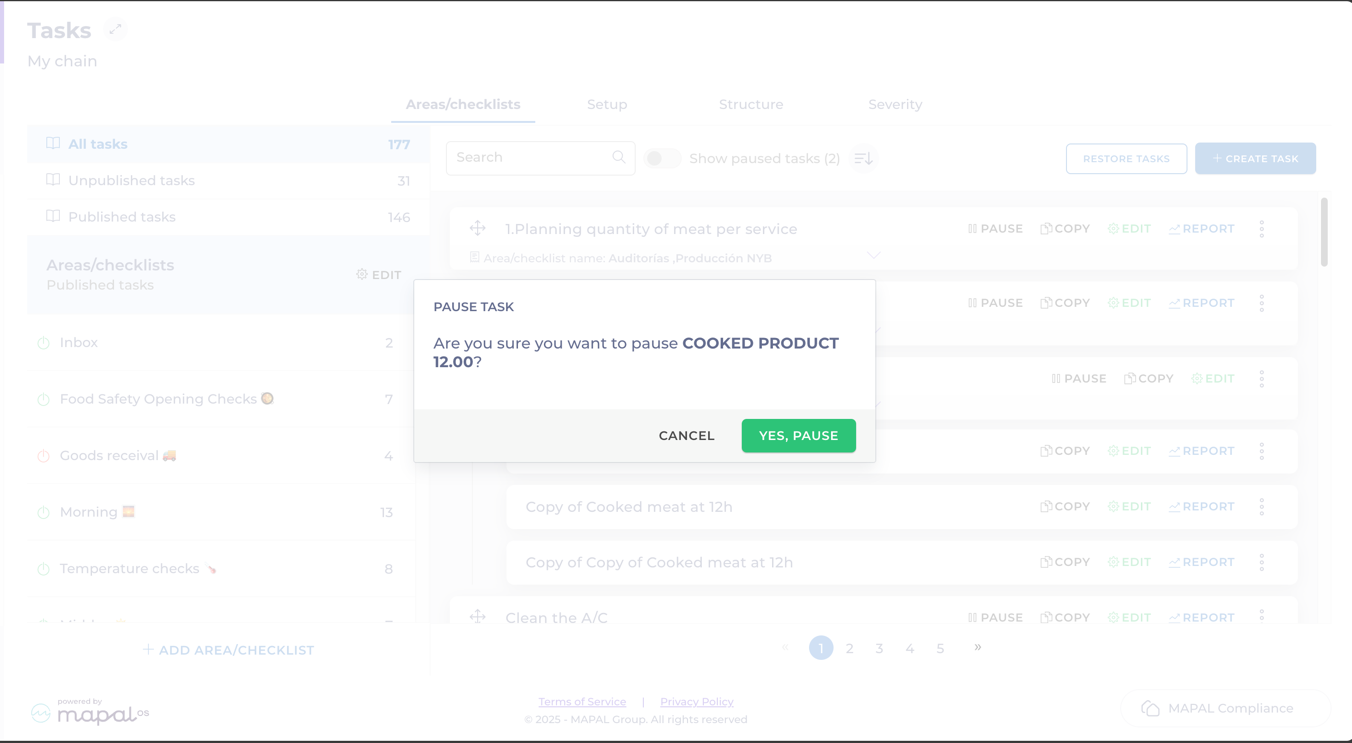
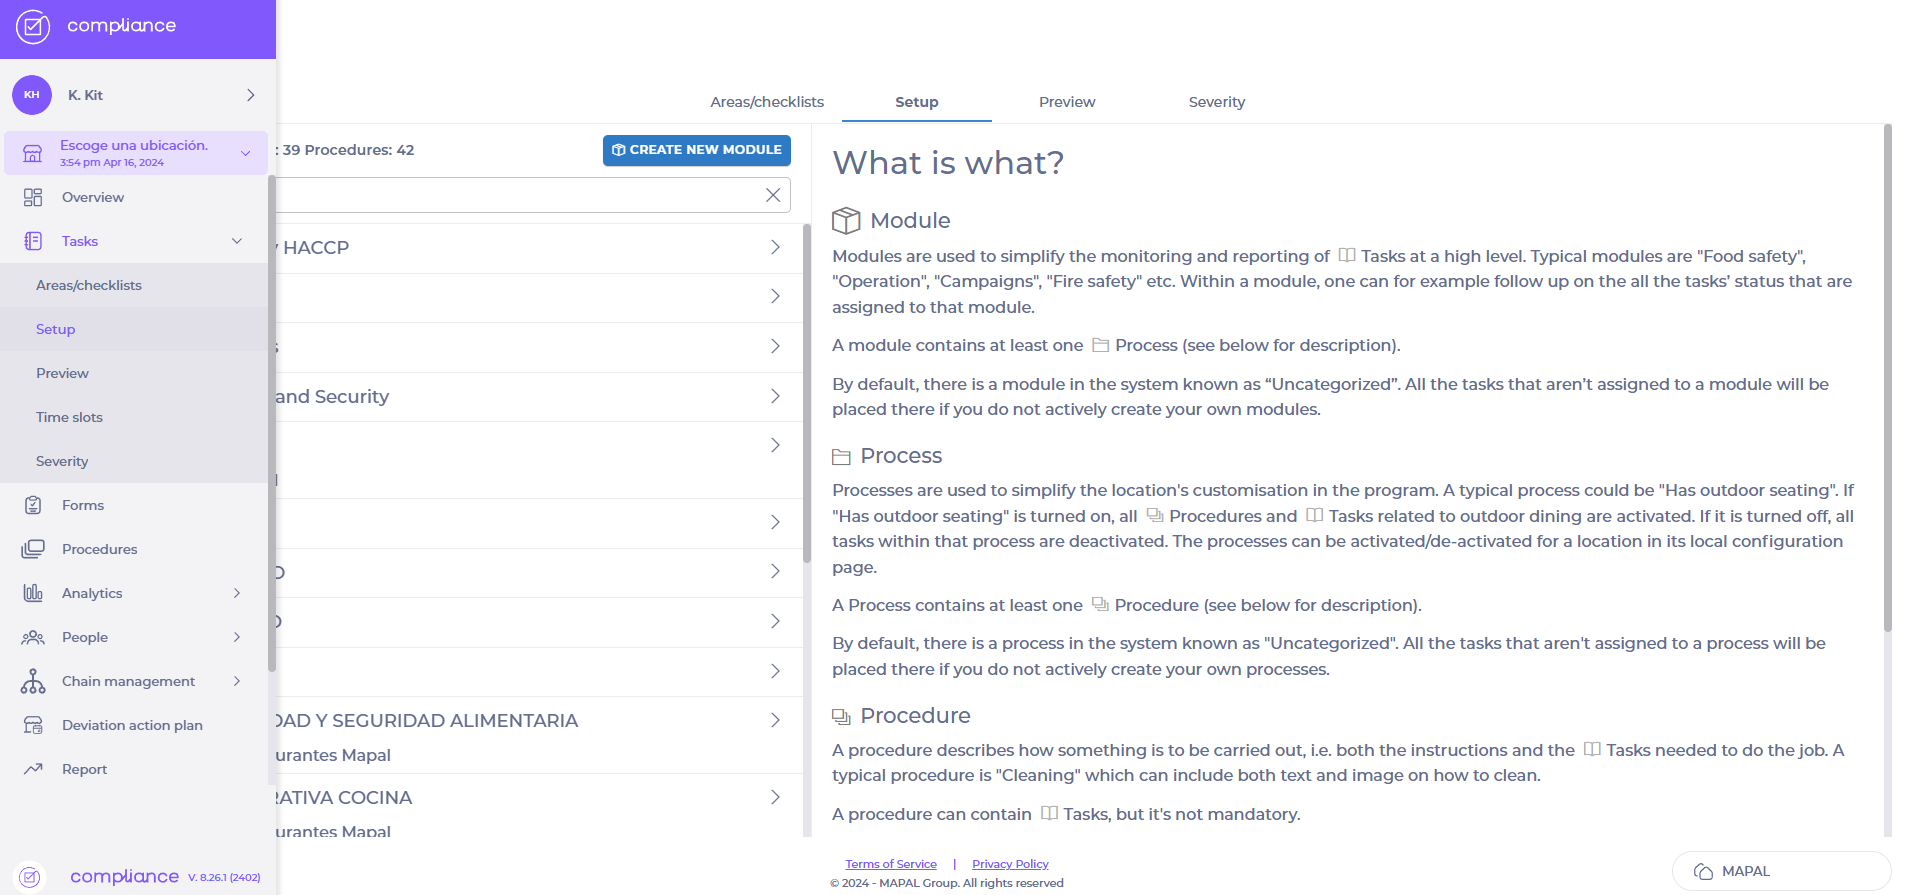
Copy a module at a central level
Start from: the Compliance Overview page.
Select Tasks > Setup from the main menu.
Select the module you’d like to copy from the list.
Select the Copy button.
Select Yes to confirm.
Note: this function will copy all processes, procedures, and central tasks (these will not be published). The process may take a little while.
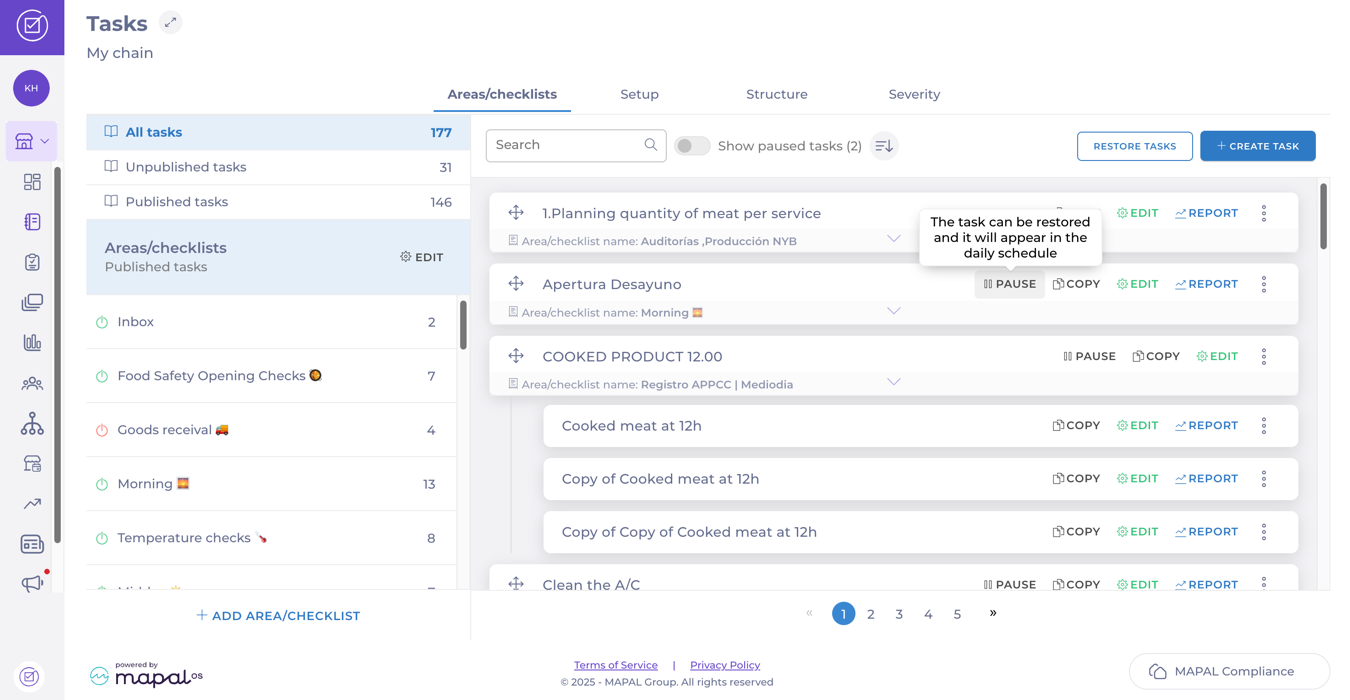
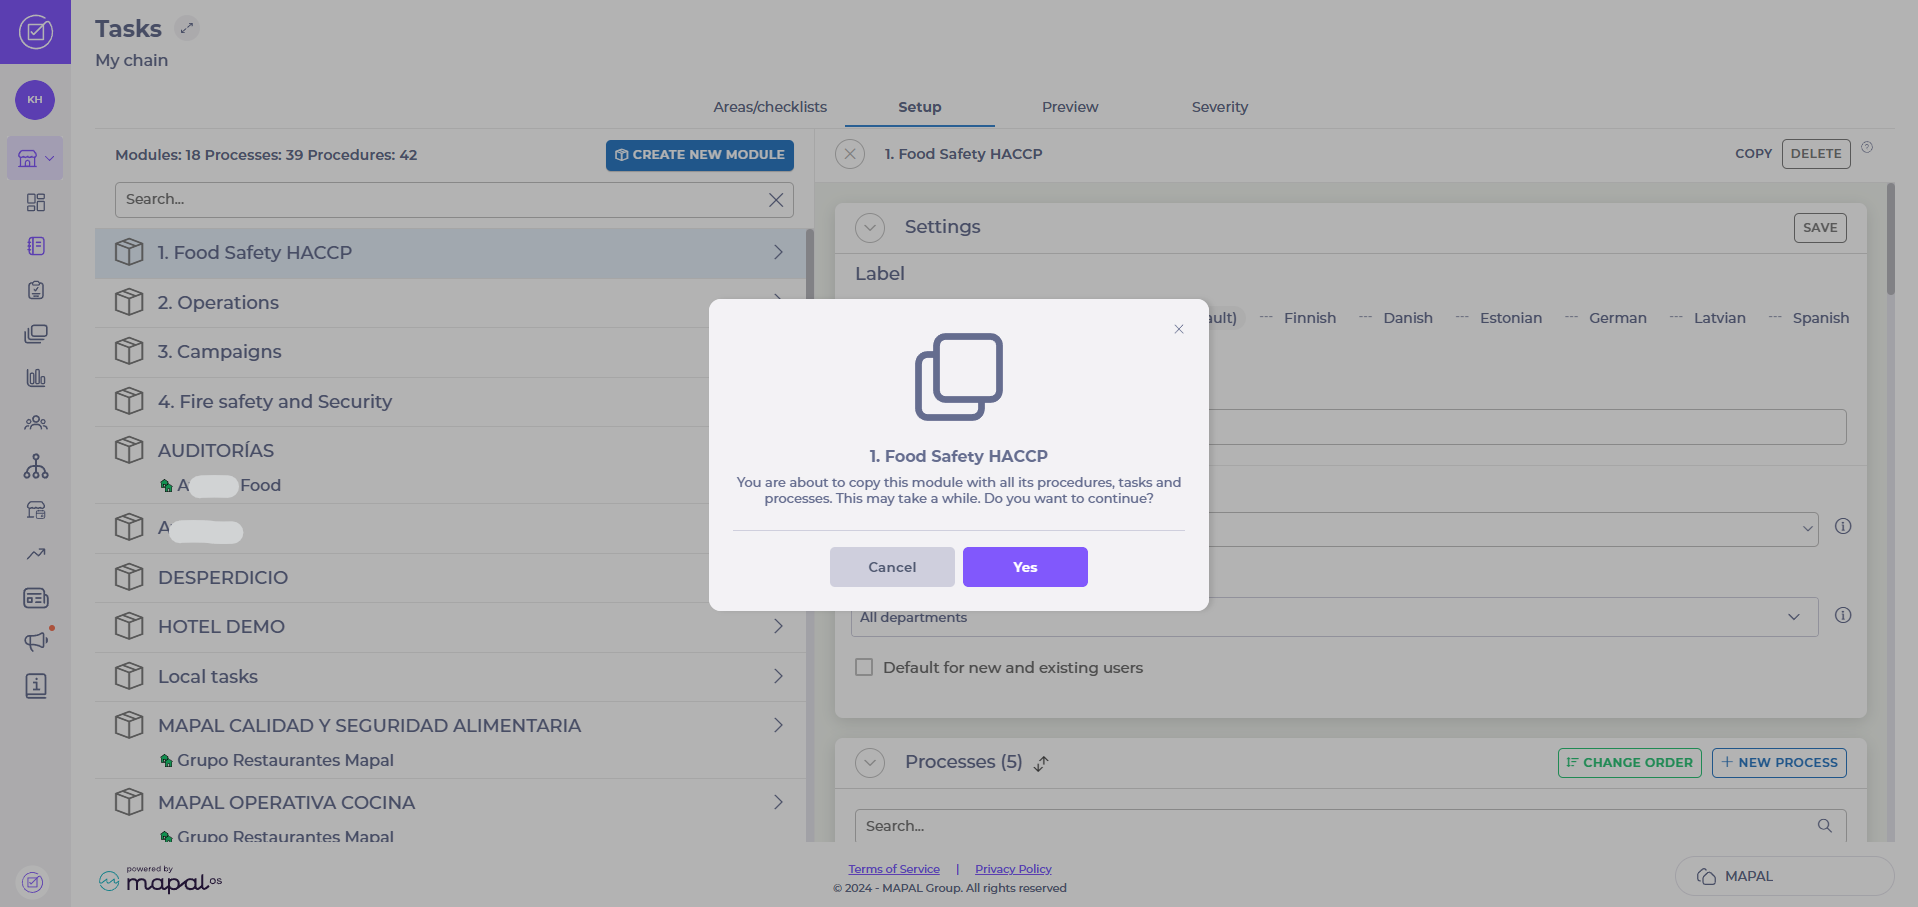
Schedule a form in the Daily Schedule
Start from: The Compliance overview.
Navigate to Tasks > Areas / Checklists.
Select the specific checklist where you want to publish the task.
Select + Create task in '[name of the checklist]'.
In the New Task screen, complete the General Setup.
Scroll down to Answer options and set the Answer Type to Button.
Select the relevant form from the Start form dropdown list. This action will link the task to the chosen form and create a new revision of that form when the answer is triggered.
In the Scheduling step, define the Frequency or choose the Days of the week you want the task and form to appear in the Daily Schedule.
Once you have completed the steps, select Save in the top right-hand corner to finalise and activate the task.
Assign modules and forms to specific location groups
Start from: The Compliance overview.
Navigate to Tasks > Setup.
Select Create new module or locate an existing module.
Fill in the required fields under Settings.
Find the dropdown labelled Restrict access to a location group.
Select the relevant location group from the list.
Once completed the setup, select Save to finalise the assignment.
Create a Smart Delivery rule
Note: Every action that can be performed in the application is subject to access permissions. If you are unable to perform the actions recommended in the articles you consult, it may mean that the necessary permissions are not enabled for your user profile. Contact the Support team or your administrator for more information.
Start from: The Easilys menu.
Note: Smart delivery rules are only valid for orders created from the Order preparation screen.
Indeed, these rules do not apply to orders placed directly from the Supplier orders screen.
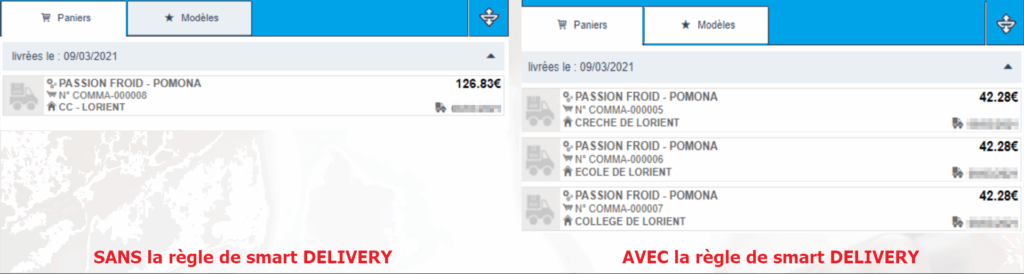
Example of the impact of a Smart delivery rule when exporting orders
Smart delivery rules must be created directly on the root site or the site responsible for orders for child sites. However, it is possible to specify a site on which the rule will be active: in this case, the rule will be active only on the specified site.
Go to the root site or the parent site where orders are placed for child sites.
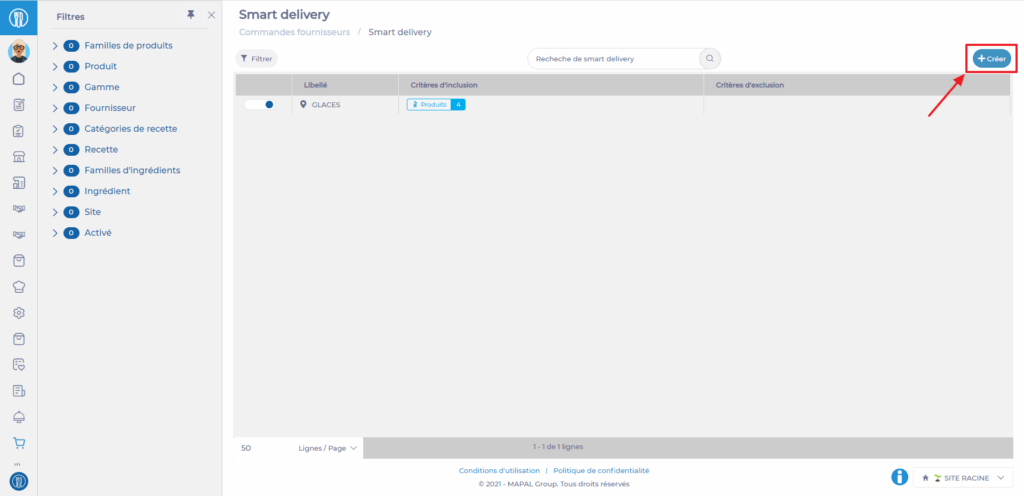
Select Smart delivery available in the Supplier orders section.
Select + Create.
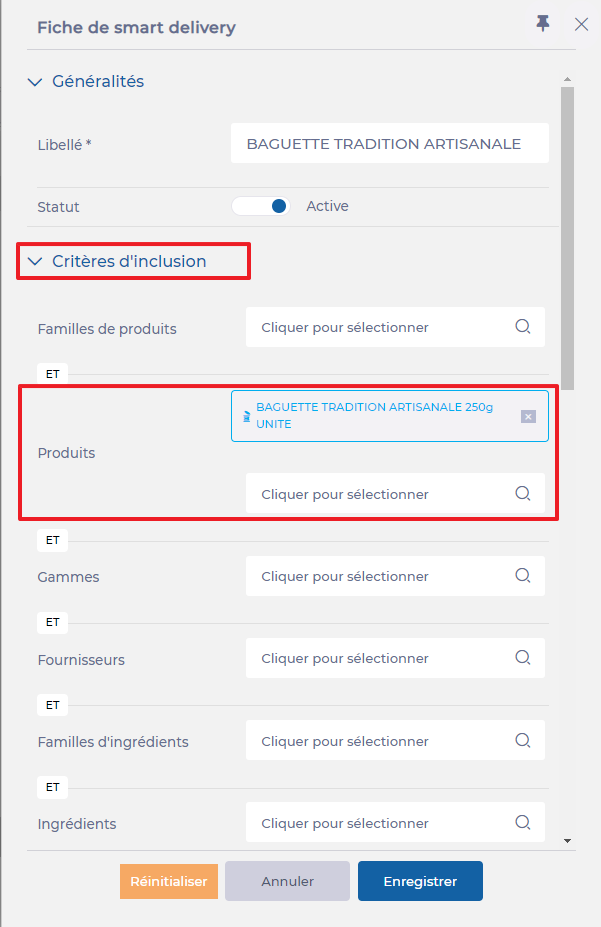
Enter a name for the rule in the Label field.
Modify the status of the rule if necessary, which by default is set to active.
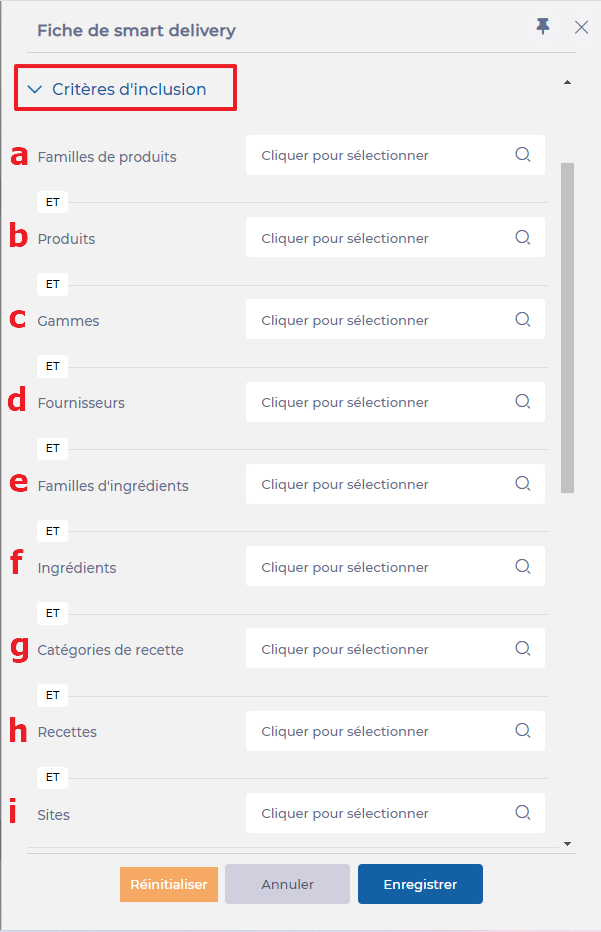
Enter inclusion criteria
To specify the products concerned by the rule, you need to add inclusion criteria. You can enter several criteria at the same time:
Product family: The rule will apply to products belonging to the selected product family. (a)
Products: The rule will apply directly to the selected industrial product. (b)
Ranges: The rule will apply to products belonging to the selected ranges (grocery, fresh, frozen, etc.). (c)
Suppliers: The rule will apply to products belonging to the selected suppliers. (d)
Ingredient family: All products belonging to the specified ingredient family will be affected. (e)
Ingredients: The rule will apply to all products linked to the selected ingredient. (f)
Recipe categories: The rule will apply to industrial products included in recipes linked to the selected recipe categories. (d)
Recipes: All products within the selected recipes will be affected by Smart delivery. (h)
Sites: This criterion is separate. It indicates that the rule will apply only to the selected sites. If no site is specified, the rule will apply to all child sites of the site where the rule is created. (i)
If there are several inclusion criteria, the rule will apply to products that meet all the criteria.
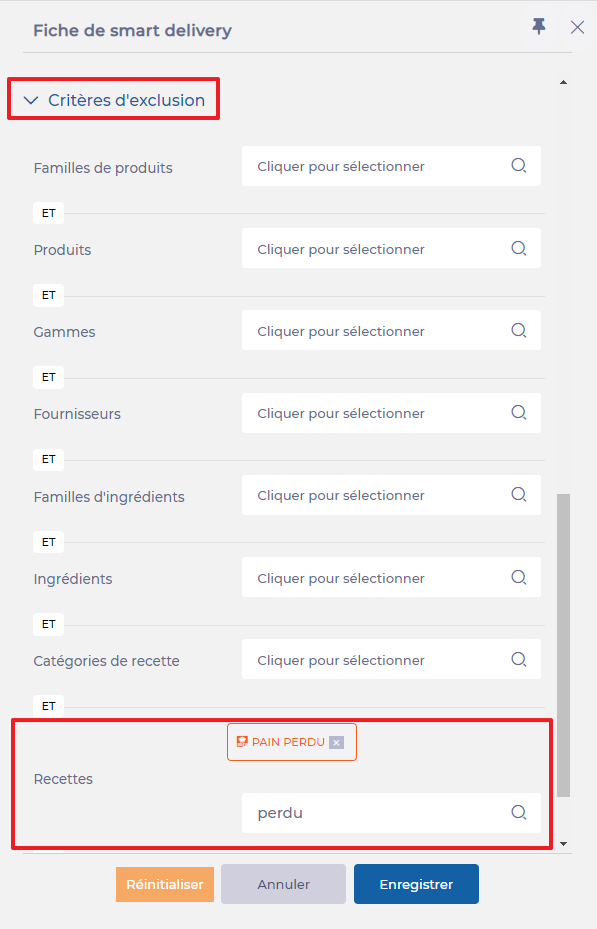
Enter exclusion criteria
Exclusion criteria allow you to specify certain cases where a product covered by the inclusion rules should not be affected by a Smart delivery rule. The exclusion criteria are identical to the inclusion criteria.
Example:Bread should always be delivered directly to the final consumption site, except for the French toast recipe, which must go through a central kitchen for processing.
You should therefore specify the relevant product in the inclusion criteria. In the exclusion criteria, you will specify the French toast recipe.
To validate the rule:
Select Save.
Note: It is possible to create two Smart delivery rules for the same item: one rule may have only inclusion criteria, and the other may have only exclusion criteria, to avoid having both criteria in the same rule. The result will be the same, but it allows you to deactivate only one of the two rules if necessary.
Download exports from the central overview
Start from: The Compliance Central Overview.
Navigate to Overview.
Here, you will find different tabs. You can export information from the Daily Schedule and Forms.
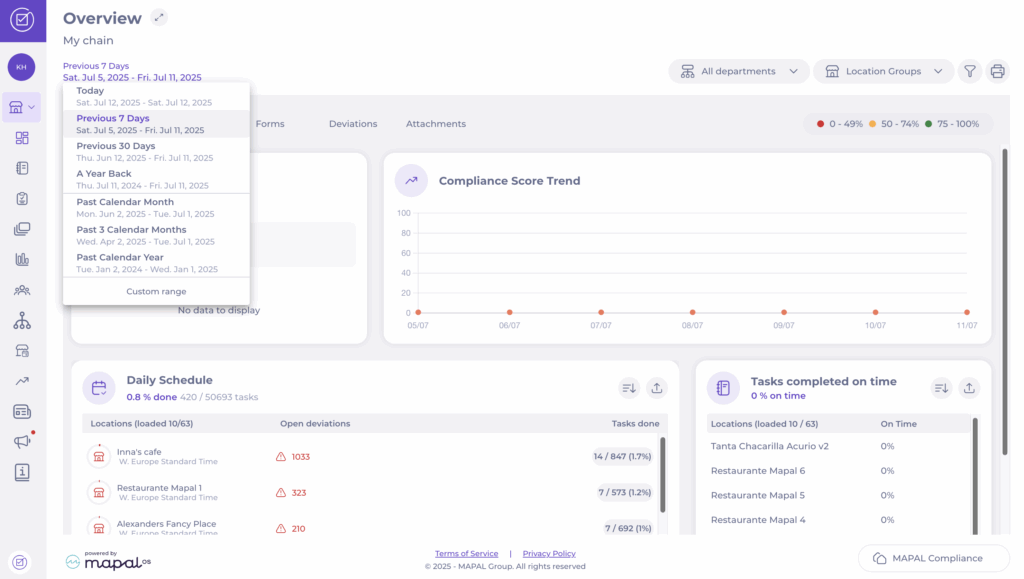
Daily Schedule
When entering the Overview, you will see a summary of how your units are responding to the daily schedule.
Here, you can choose:
Date.
Departments.
Location Groups.
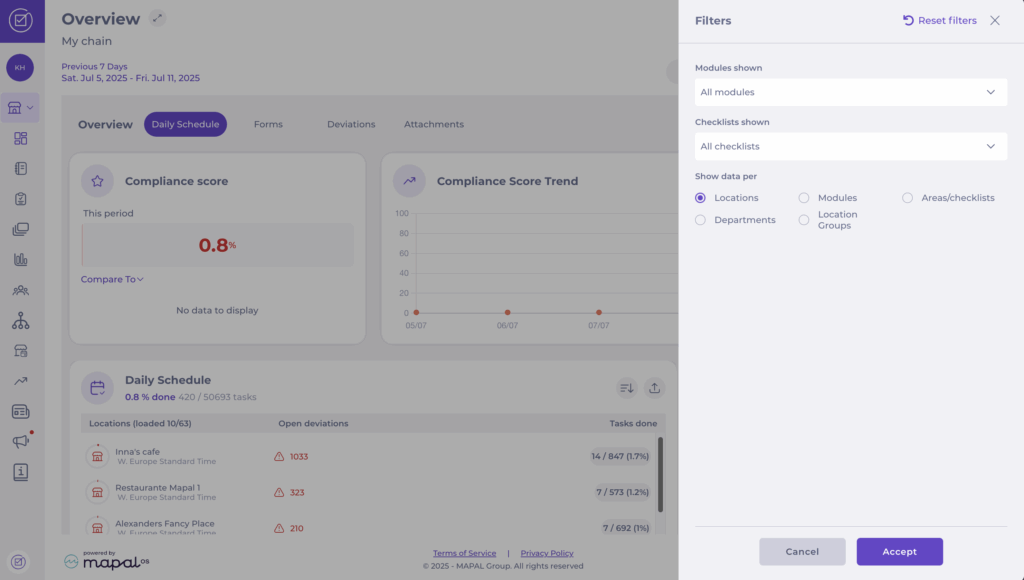
To narrow down the information in your export, click the Filter icon in the top right corner. There, you can:
Select which checklist or module you want to display.
Choose how the data should be shown: by unit, module, or area/checklist.
Example: If you only want to view the "Food Safety" module, set the filter to only show "Food Safety". You will then see how your units have answered the checklists connected to that module.
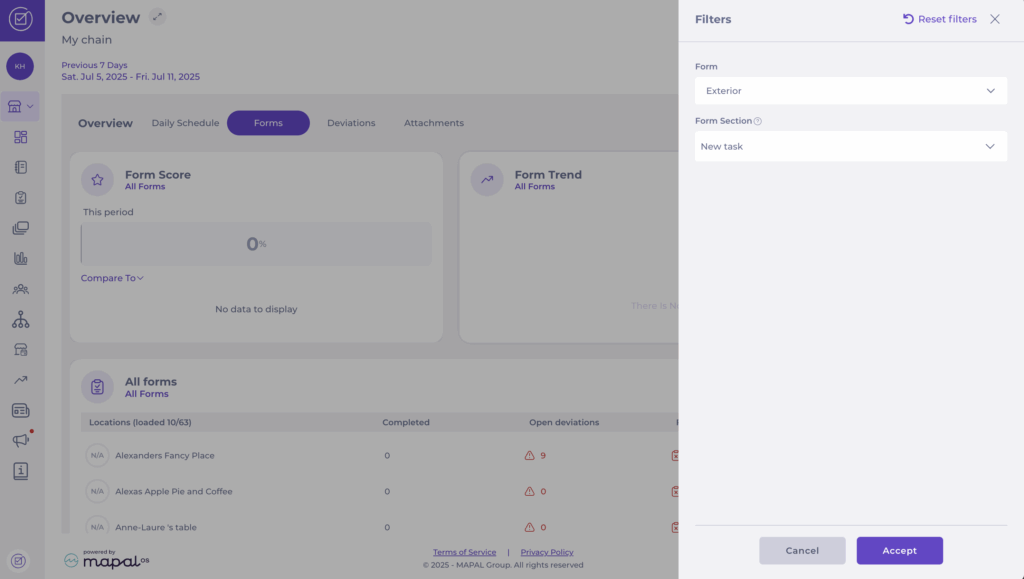
Forms
When you access the overview, click on the Forms tab. Here, you can select:
Date.
Location Groups.
To narrow down the information shown in your export, click the Filter icon in the top right corner:
You can filter by specific forms, or by specific sections within a form.
This will show only statistics related to the selected form.
Export Options
From either the Daily Schedule or Forms views, select the Export button to download the data. The following options are available:
Export responses: All answers submitted in the form, displayed vertically (detailed information per response).
Export overview: Overview of started, not started, and completed forms. Includes answered questions, number of deviations, open deviations, and scores.
Export audits: All responses per unit and form, shown in a horizontal view. Provides details on started/completed forms and deviations.
Deviation Summary export: Aggregated summary of deviations across forms, including an Answer column that shows the specific response linked to each deviation.
Scheduled Task Registration export: Detailed list of scheduled tasks logged in Compliance, including a Unit field to indicate which business unit the task belongs to.
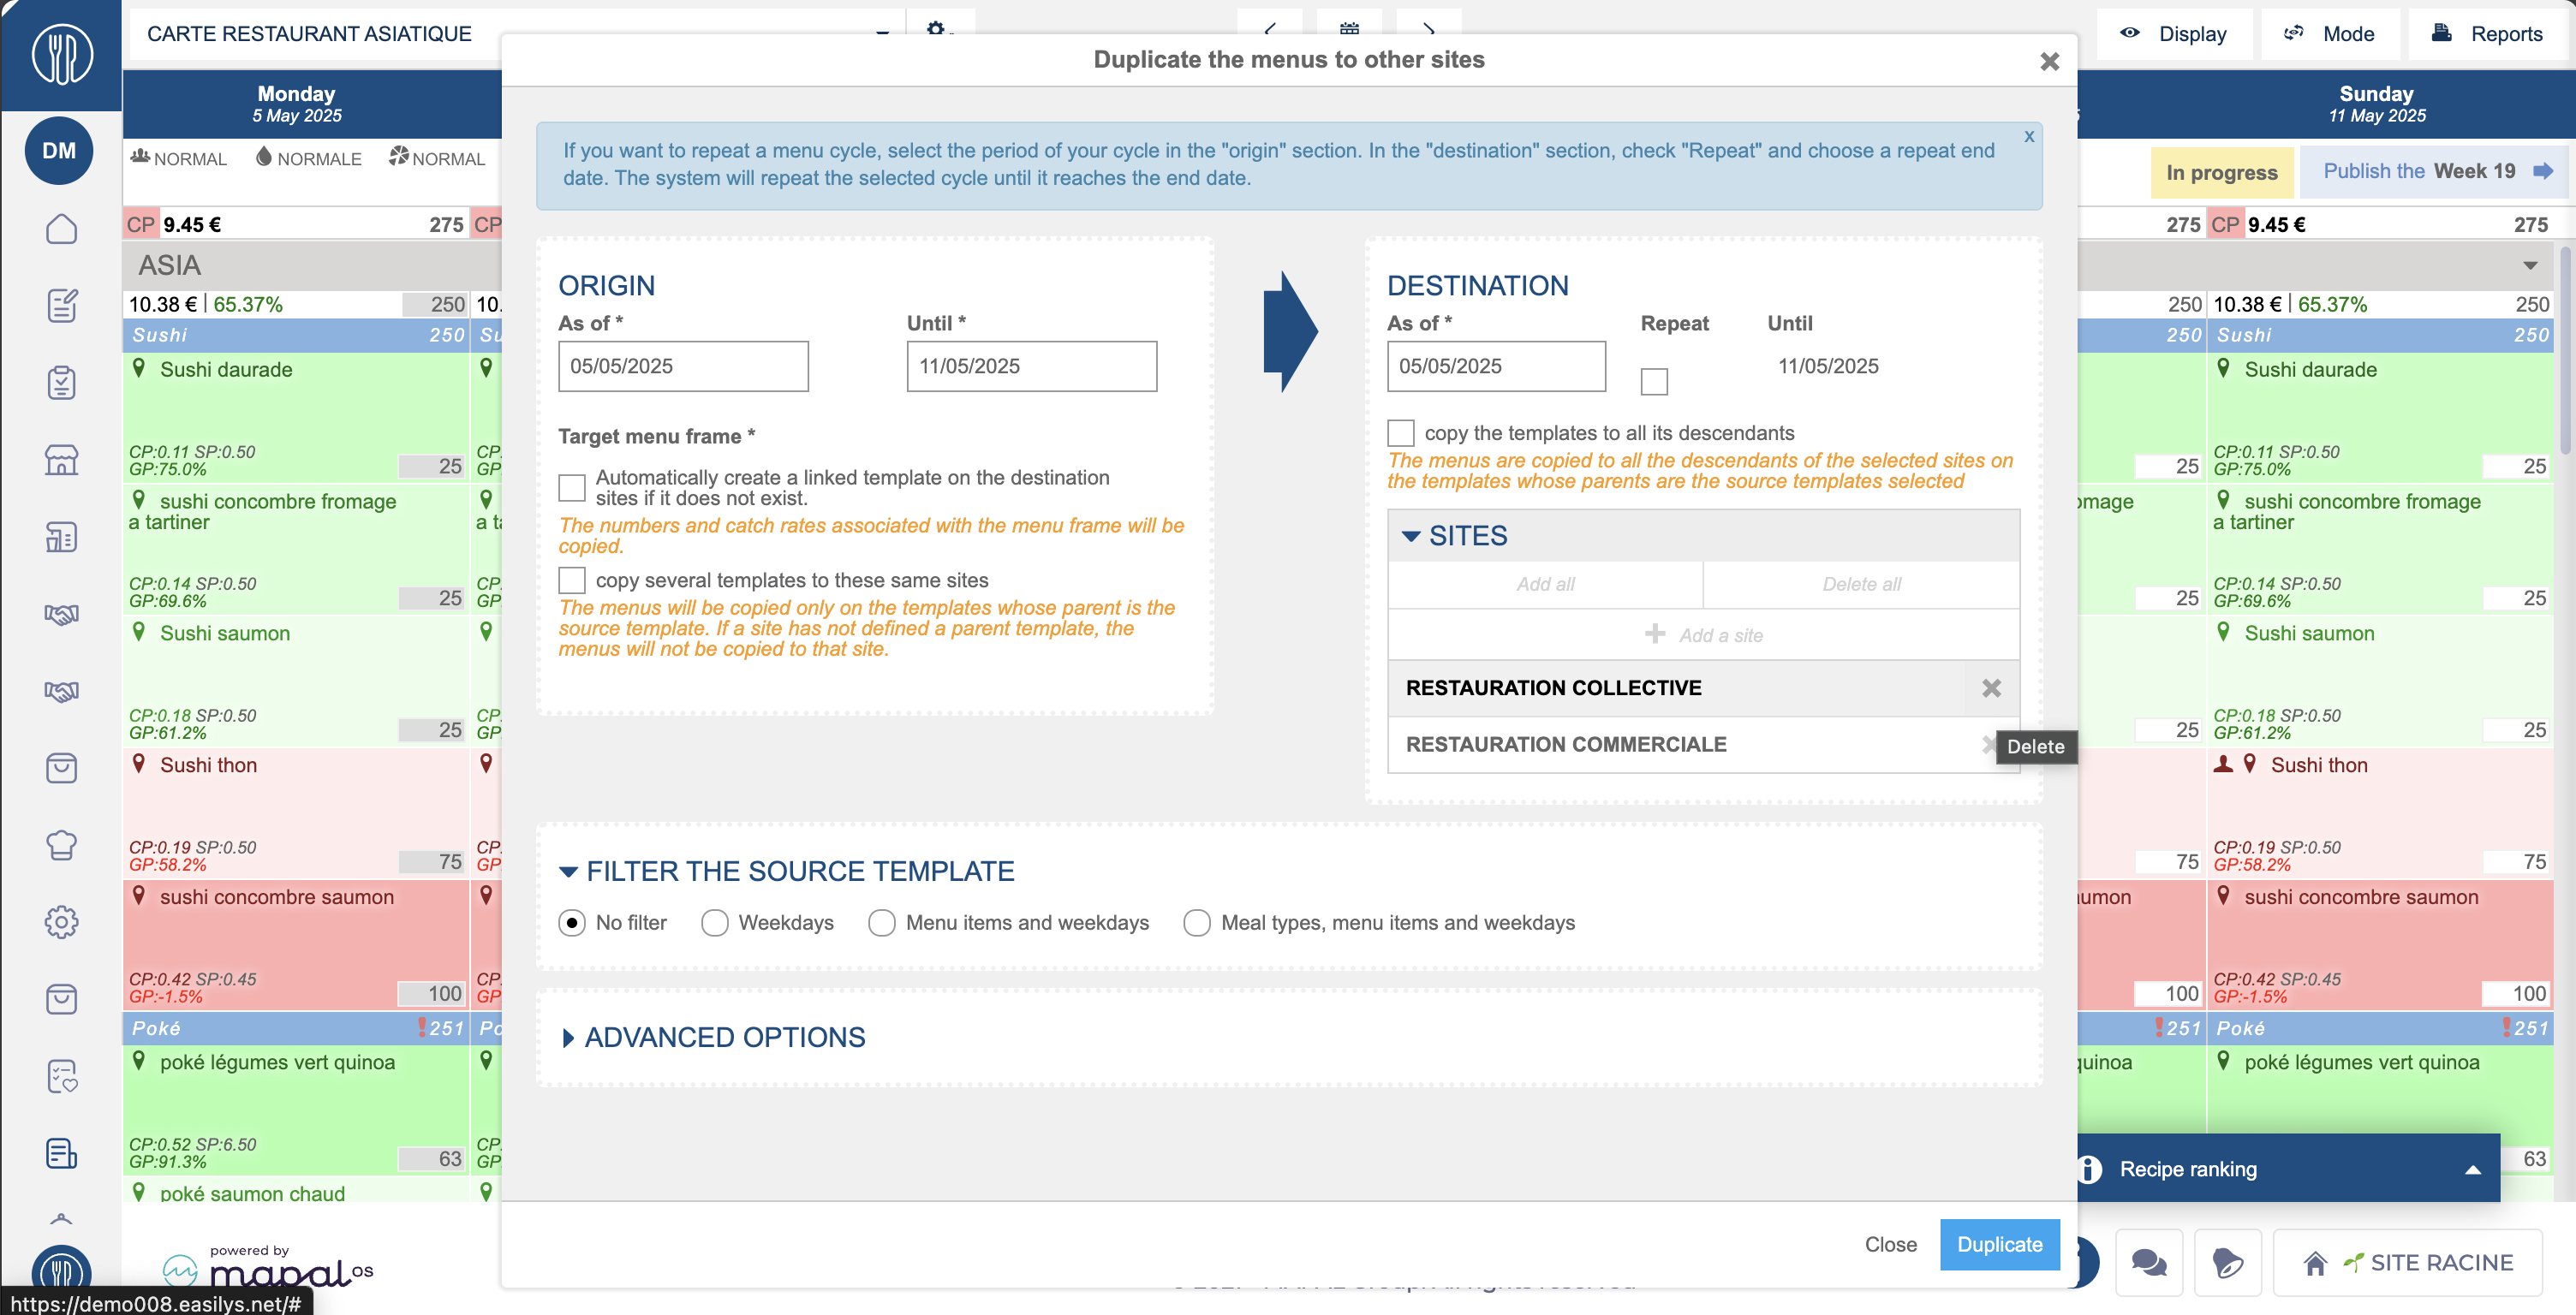
Simplify the duplication of menus across multiple sites
Note: actions performed on the Easilys platform are subject to user access permissions. If you are unable to carry out the actions described in the articles, it may be because you do not have the necessary permissions activated on your user profile. Contact the Support team, or your administrator, for help.
Start from: The Easilys menu.
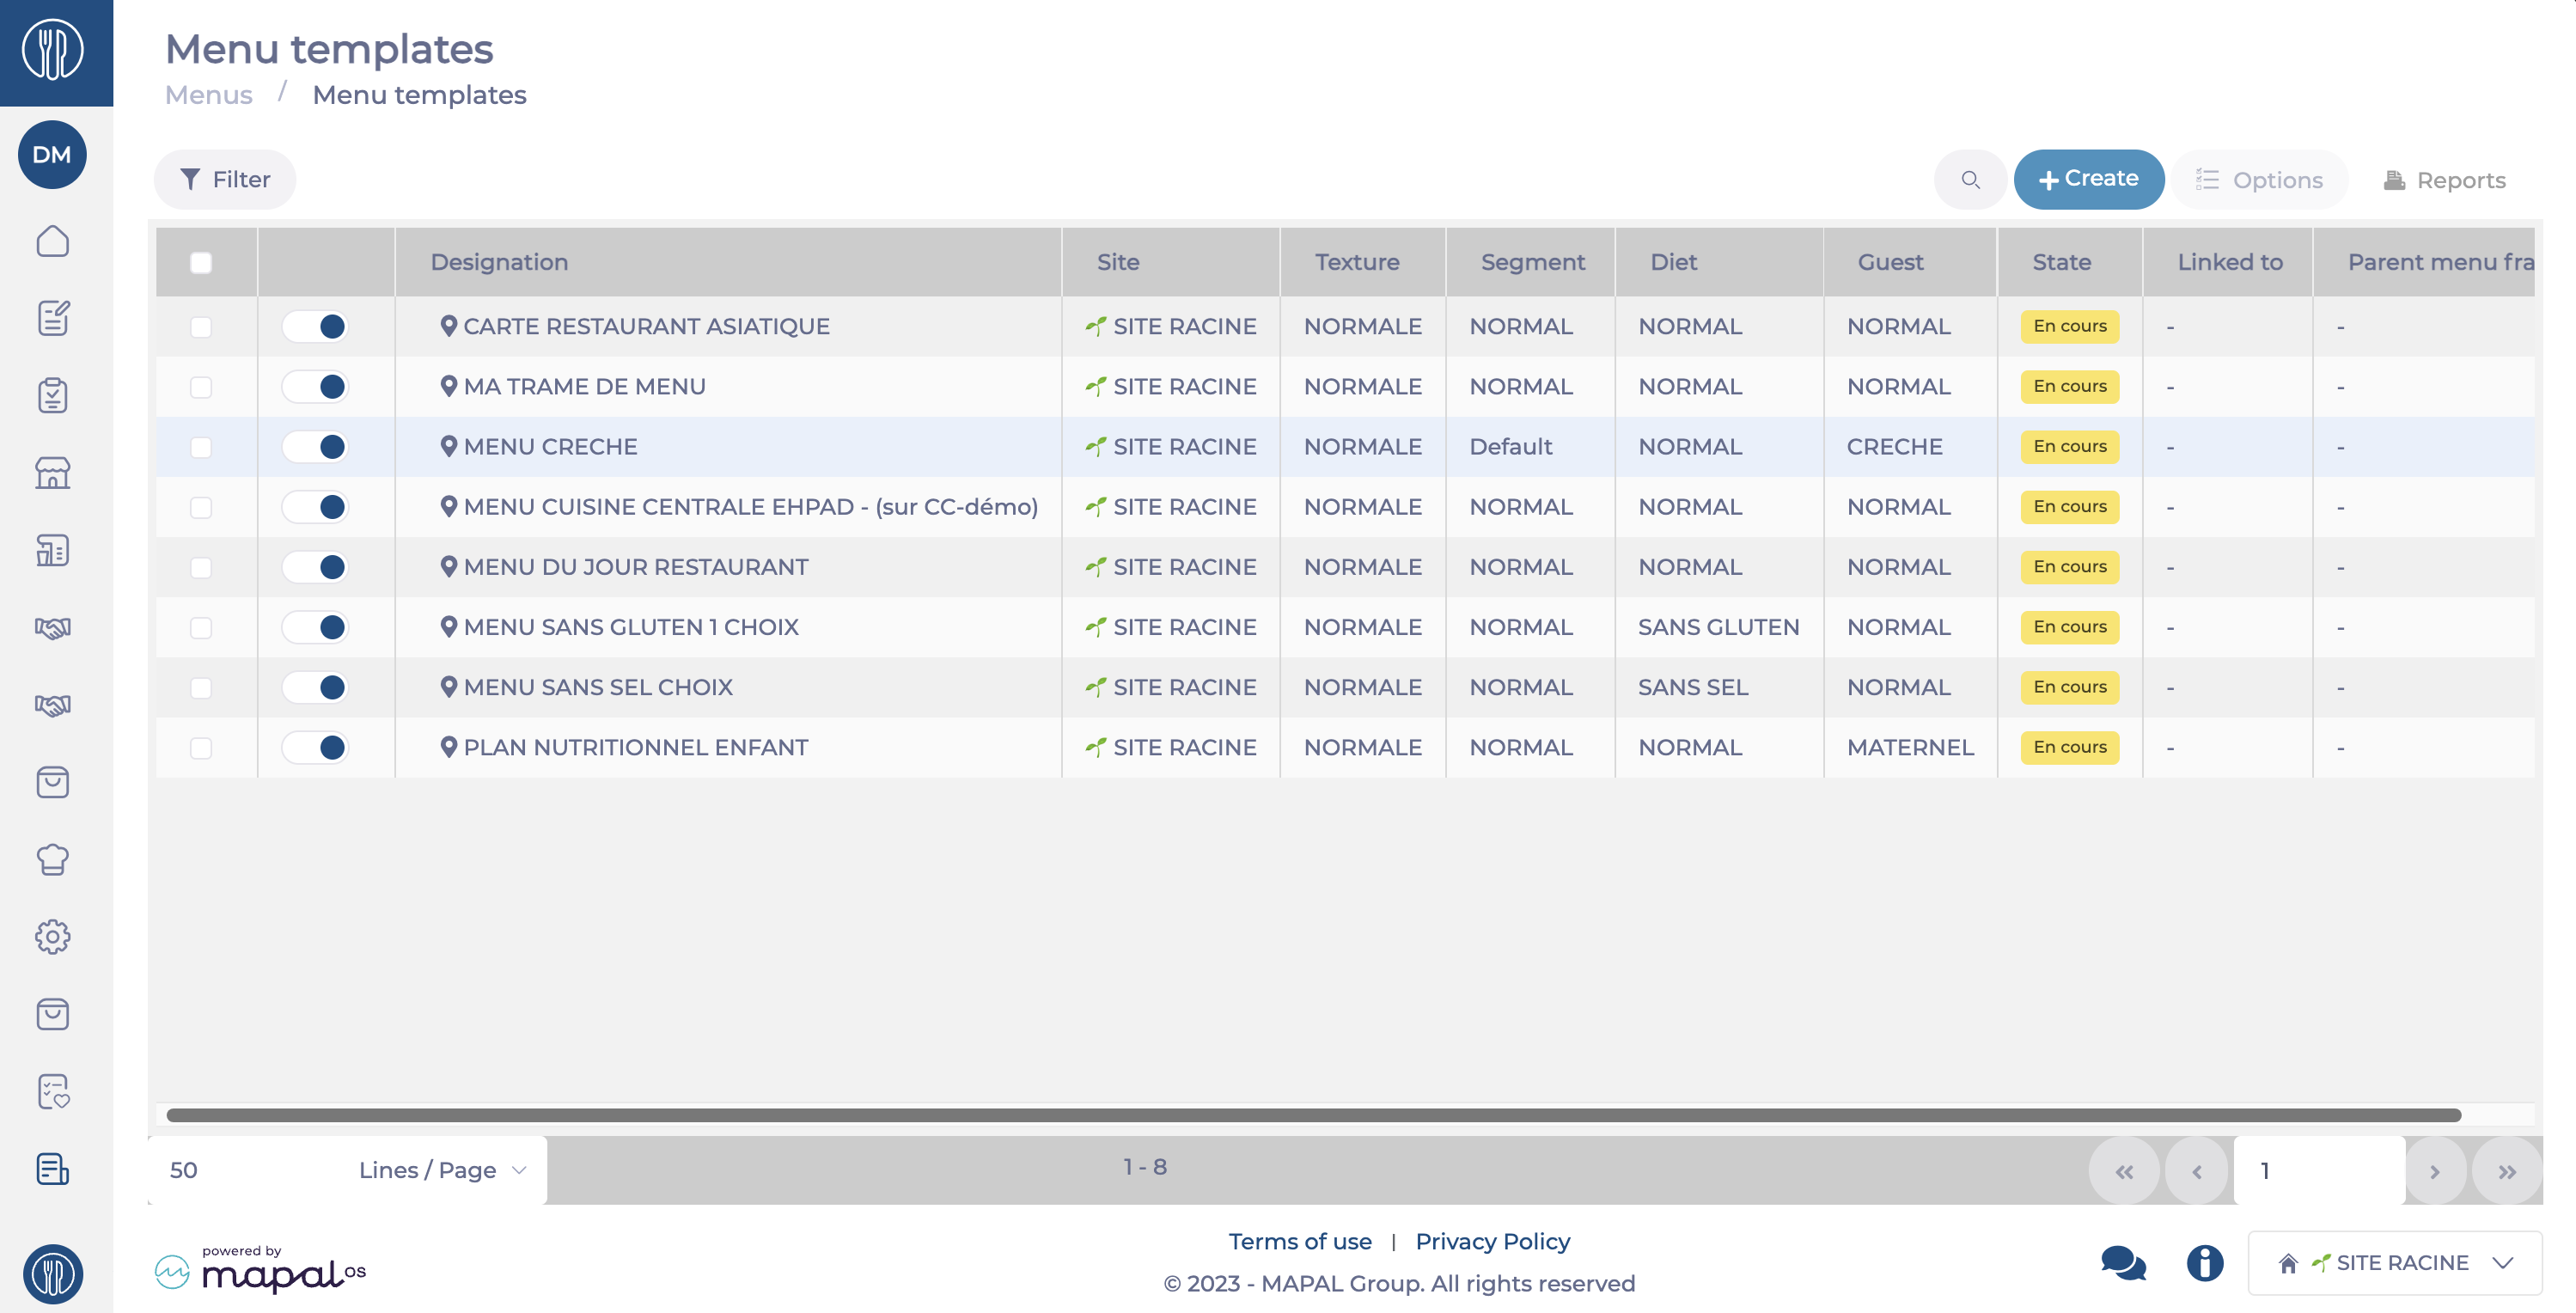
Navigate to Menus > Menu Templates.
Select a menu to act as your parent template.
Note: Set up key parameters such as staff allocations and calendar settings on the parent before duplication.
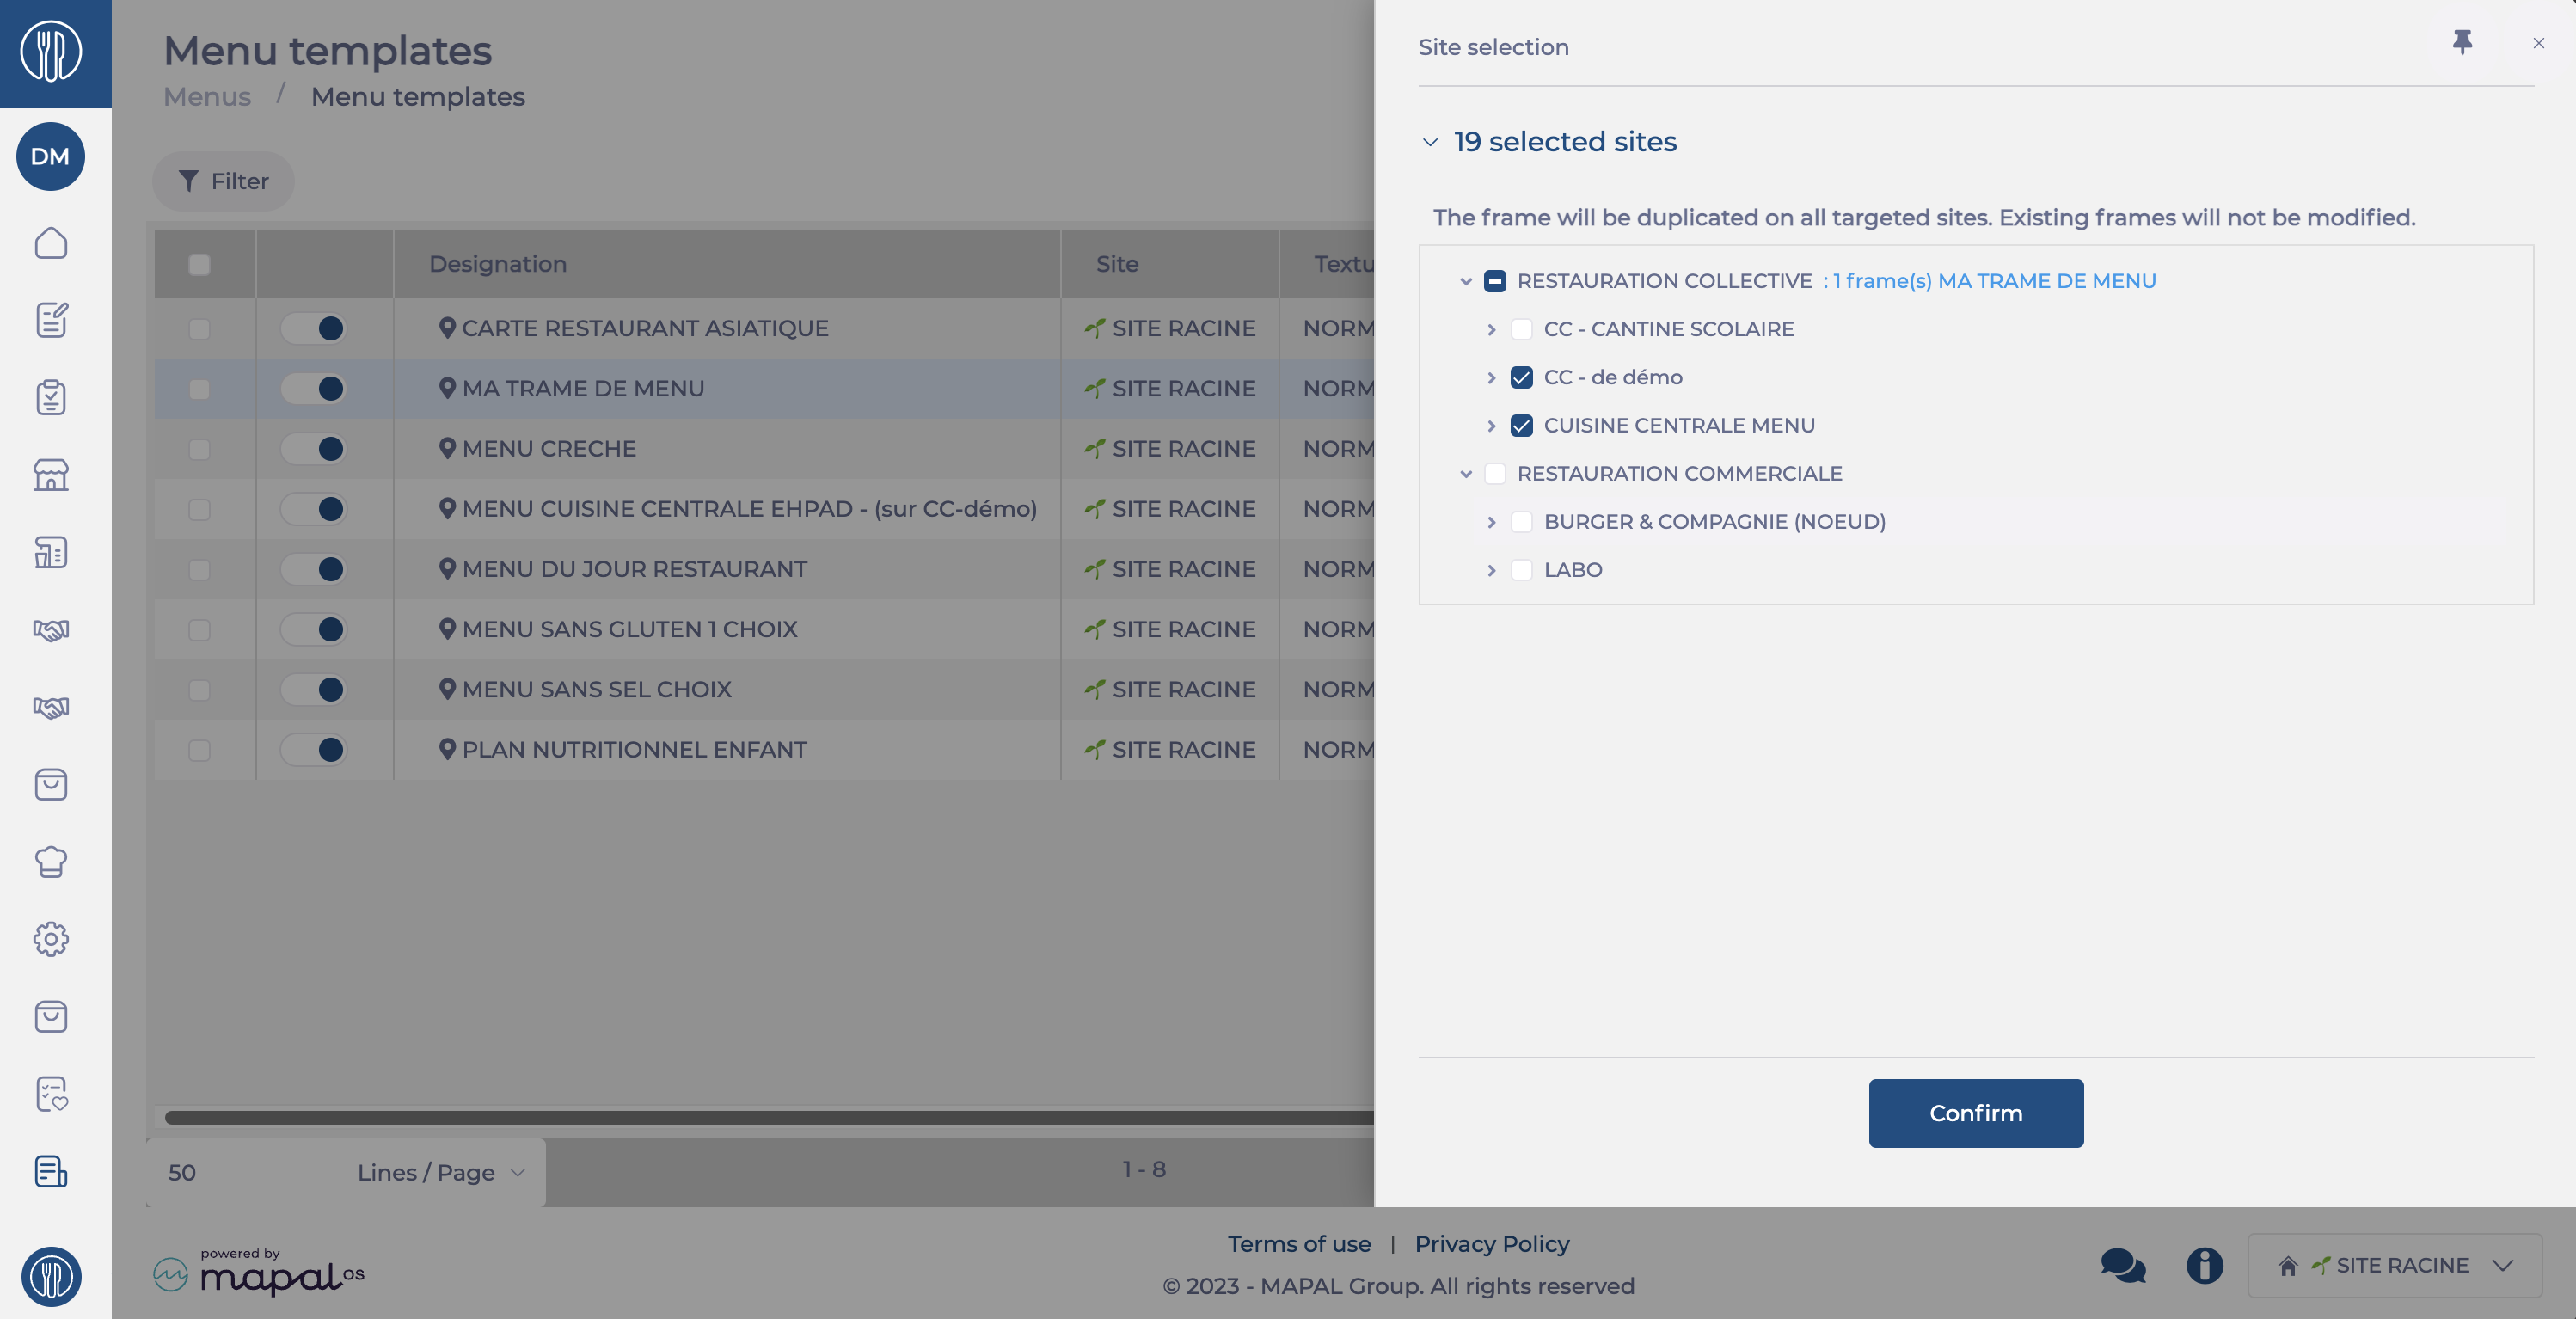
Use the Duplicate button.
Select the targeted sites.
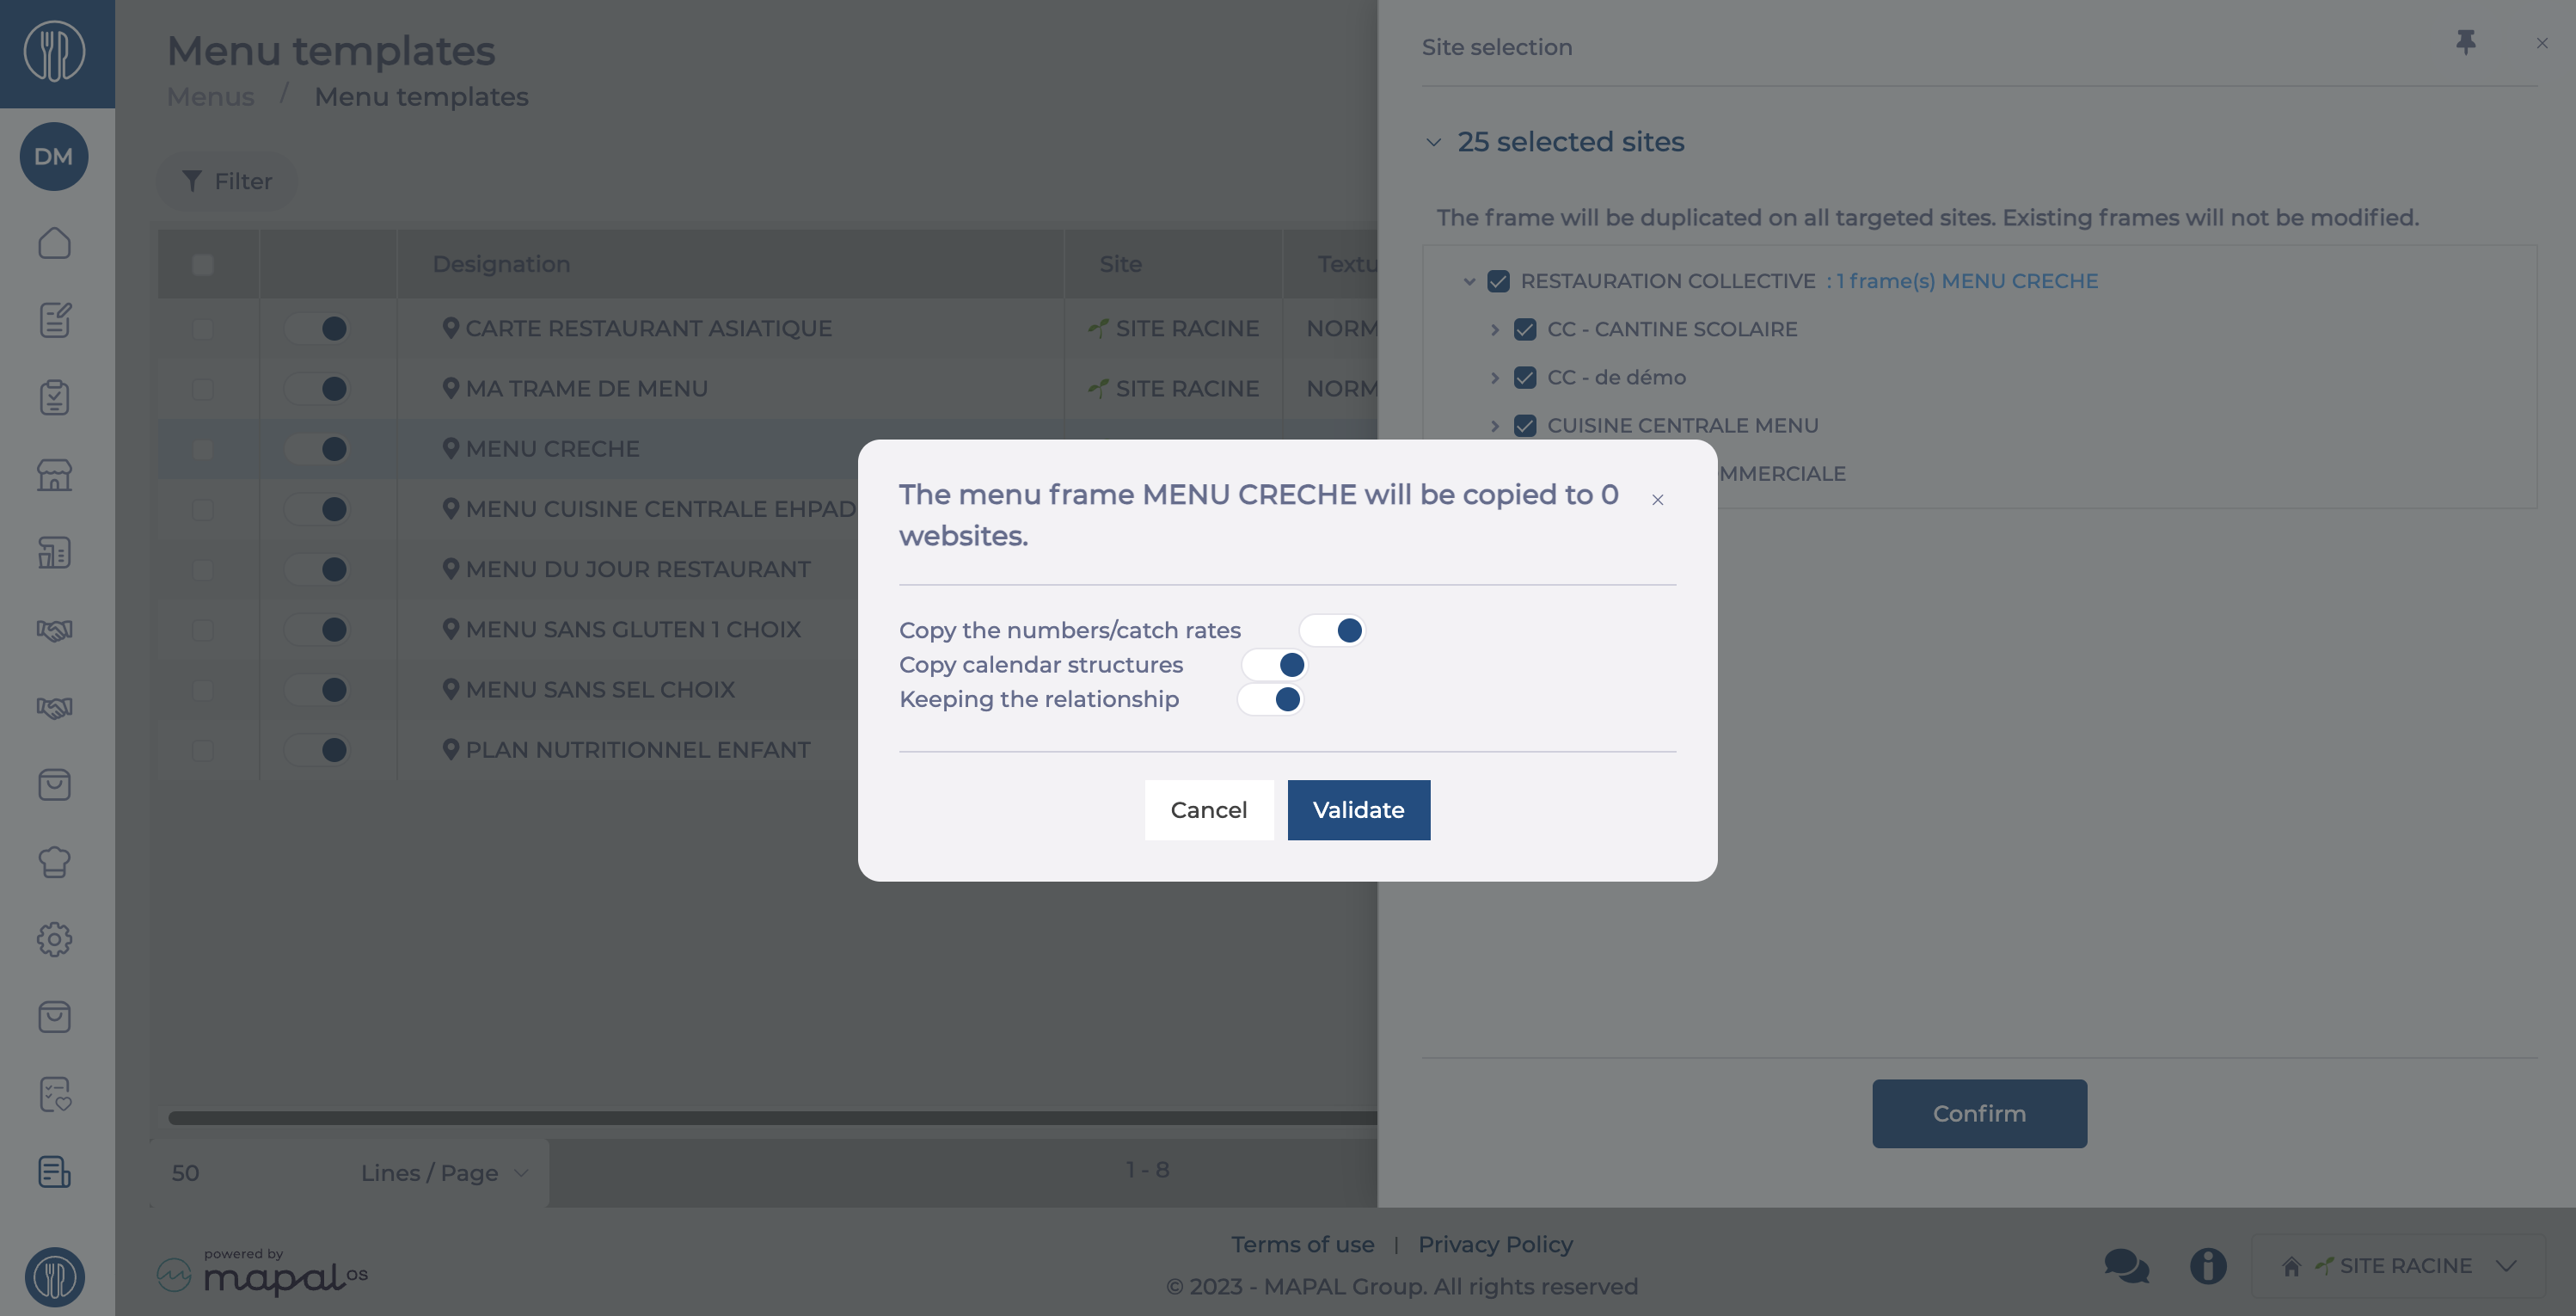
When prompted, enable Keeping the relationship to ensure future updates propagate.
Select Validate to initialise duplication. The system creates a menu structure on the child sites.
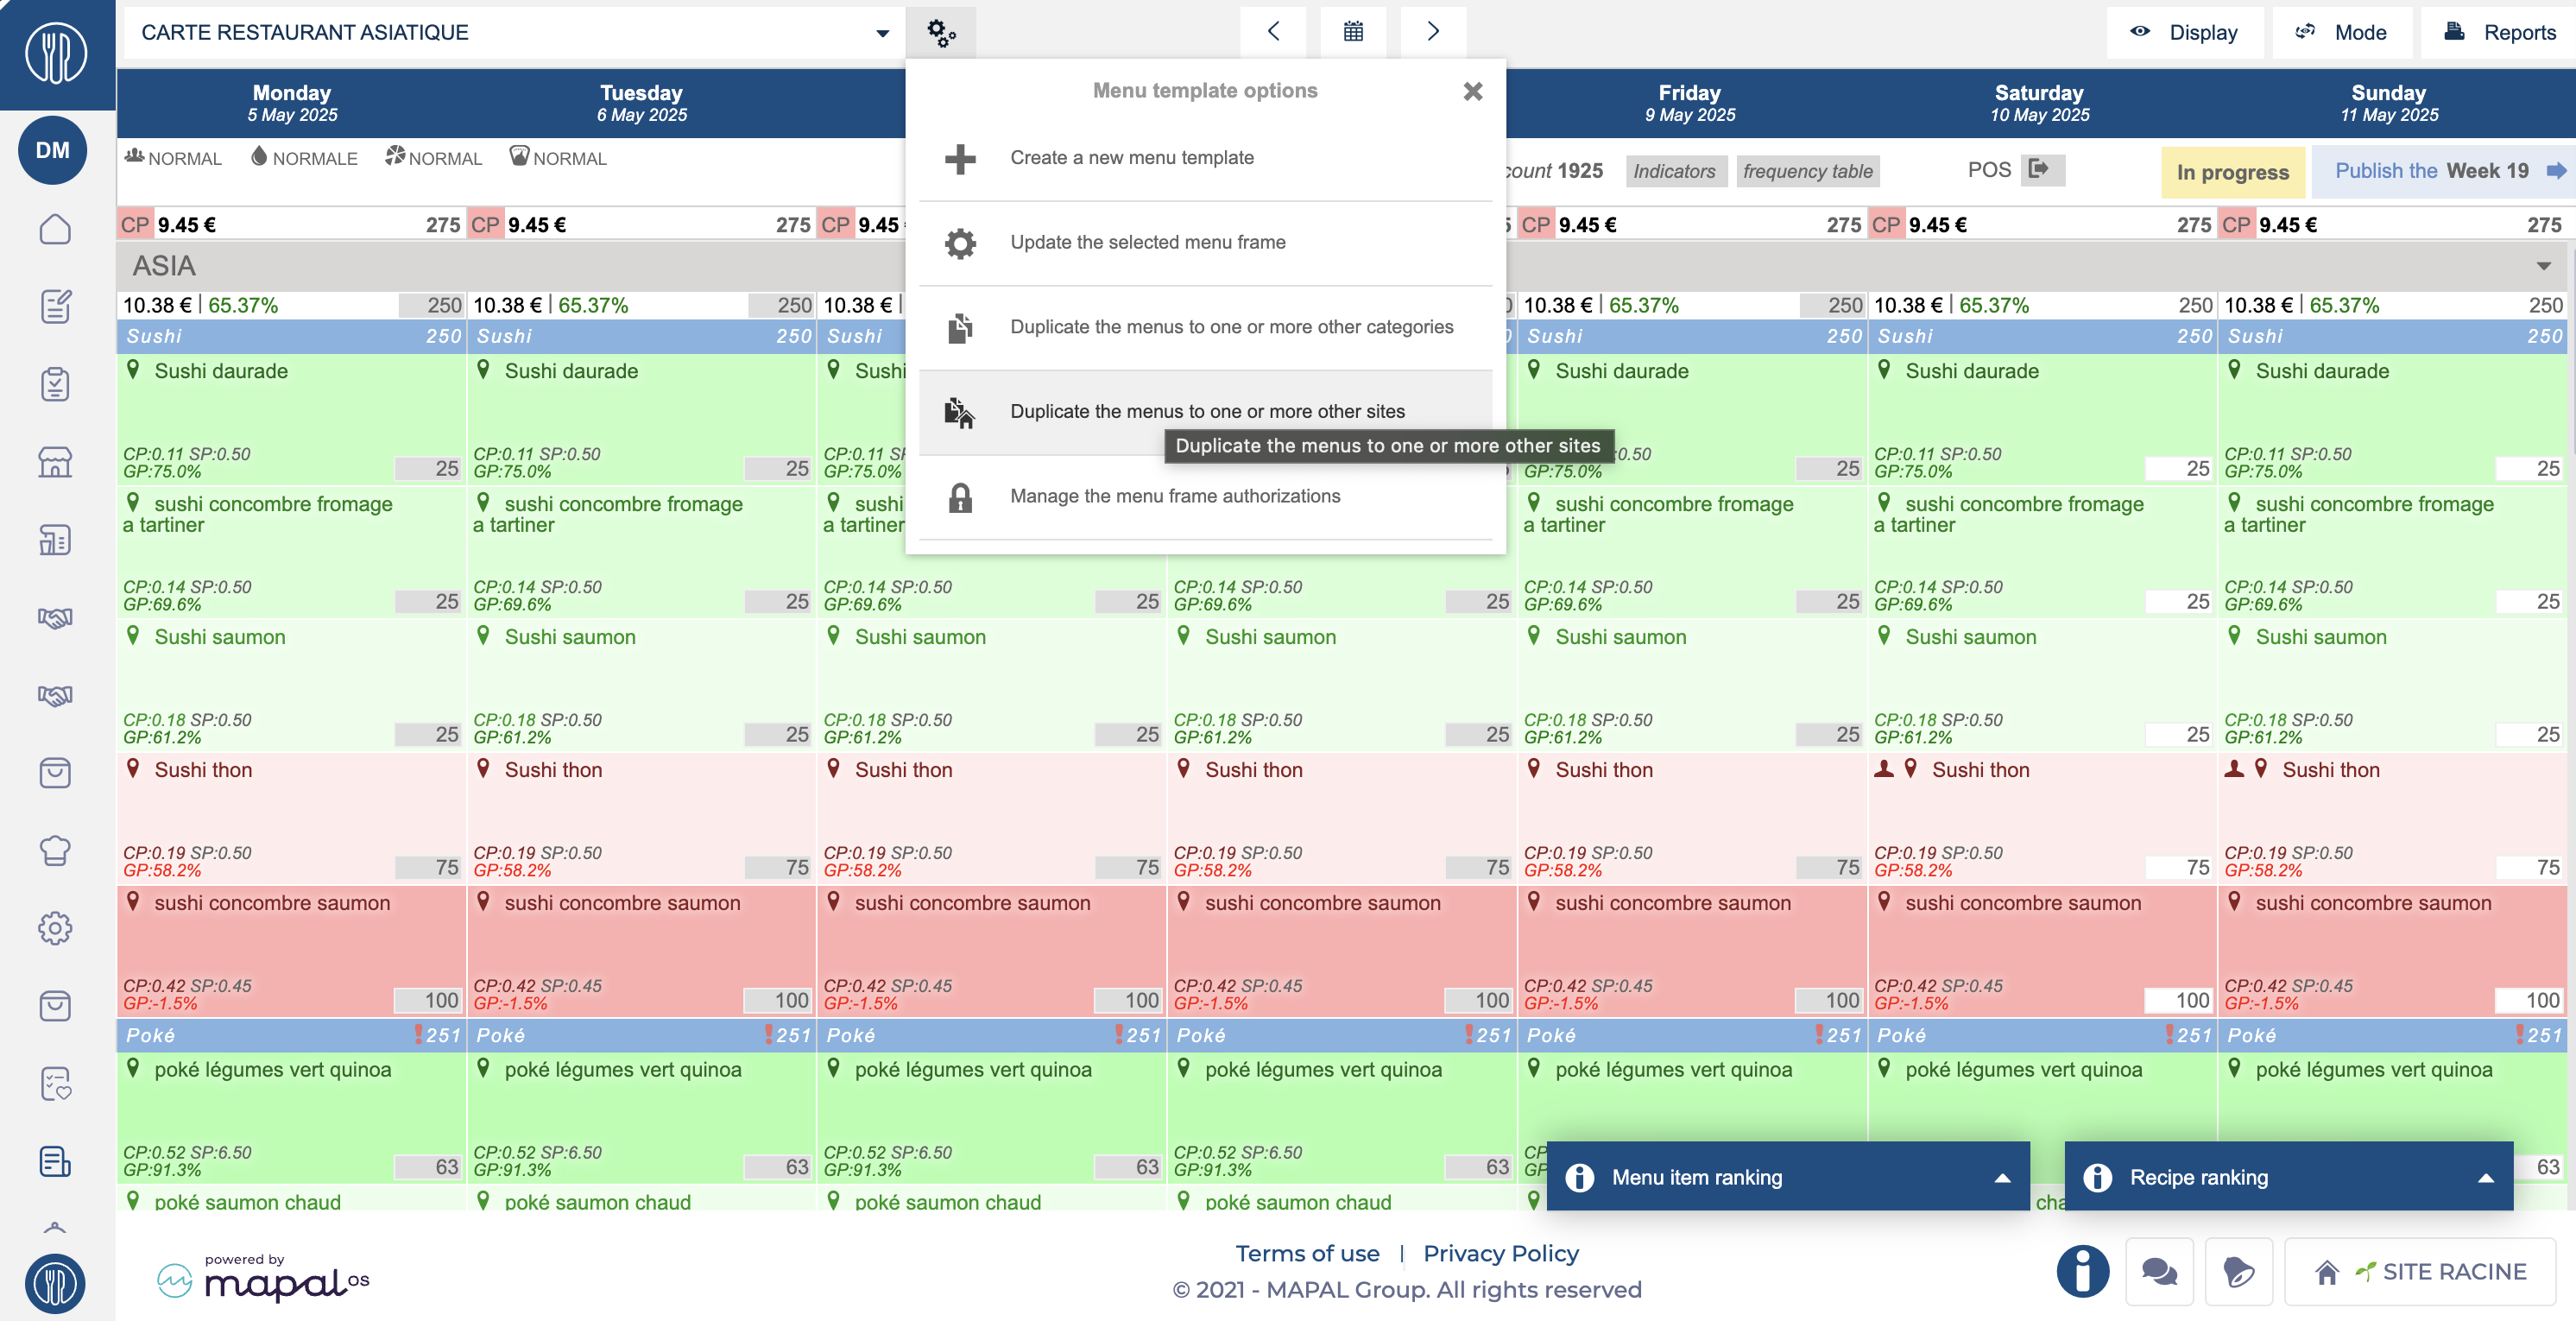
Back on the main menu, navigate to Menus > Menus.
Select the parent menu again and click Duplicatethe menus to one or more sites.
Choose Copy the templates to all its descendants to apply the parent structure across all linked child sites.
Select Duplicate to complete the process.
Note: Existing menu data at child sites will be replaced by the parent structure if duplicated. Parental links ensure that structural updates at the parent level can be pushed automatically.
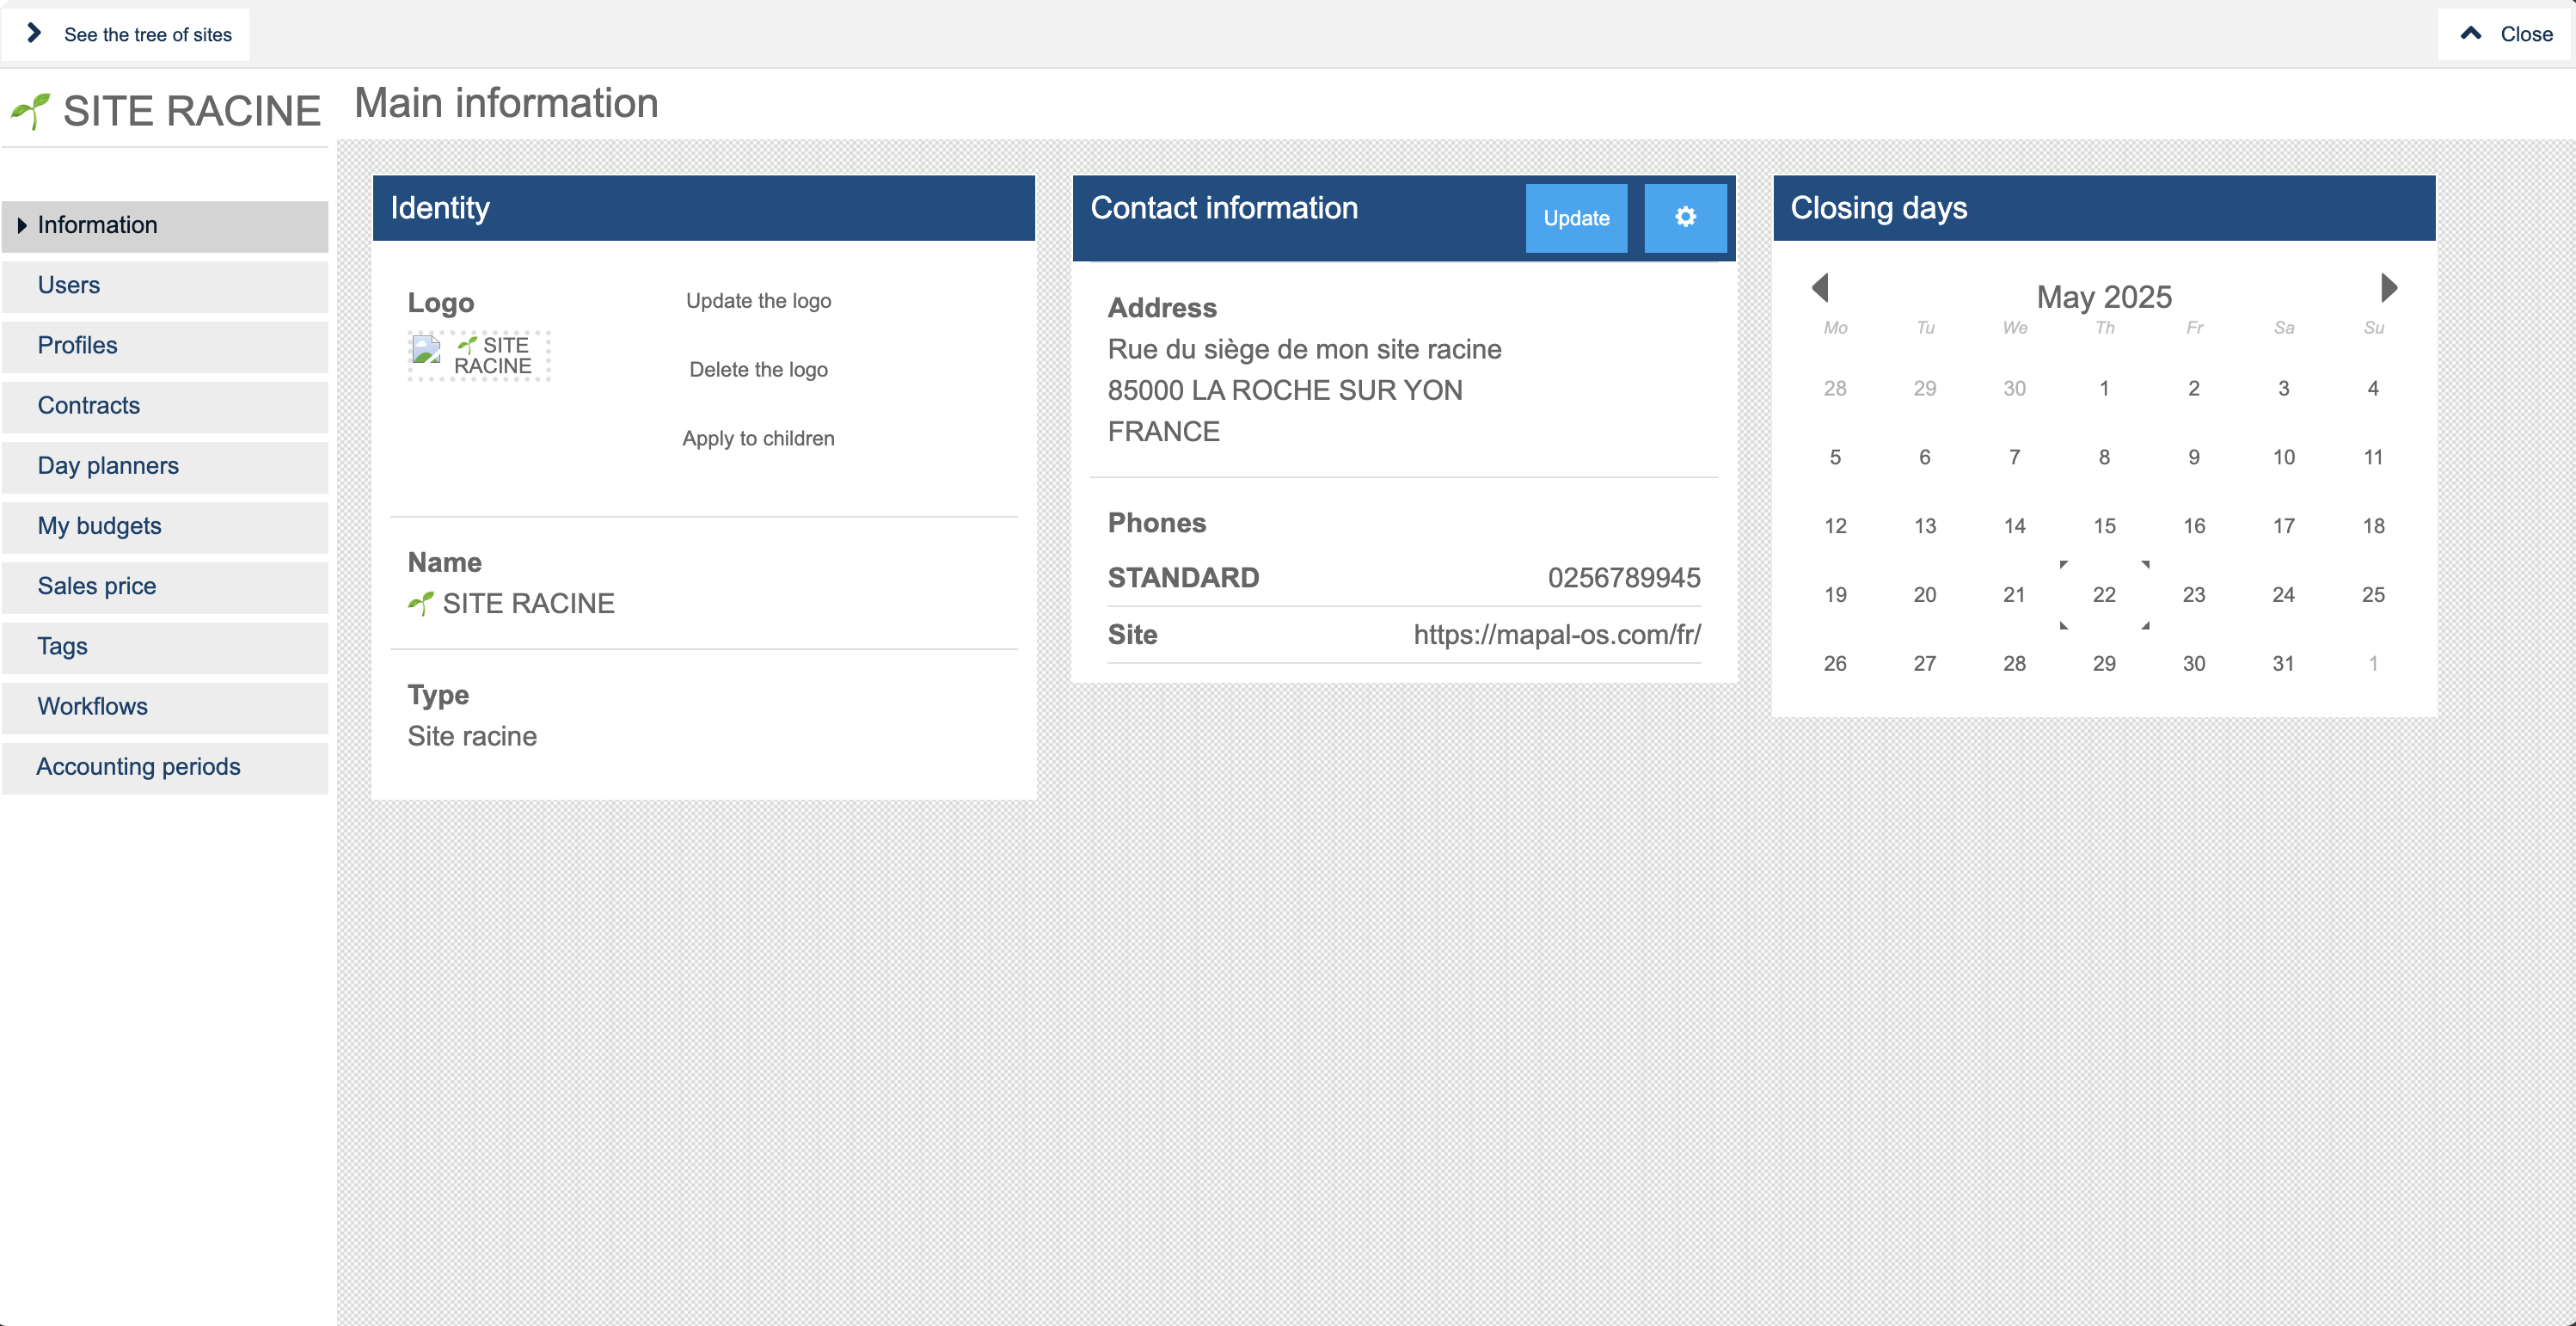
Invoice supplier orders to an alternative site
Note: Actions on the Easilys platform depend on your user access permissions. If you are not able to perform the actions below, this may be due to restrictions on your user profile. Please contact the support team or your administrator for assistance.
Start from: The Easilys menu.
Navigate to [Username/avatar] > Site parameters.
In the site parameters screen, select Information.
In the Contact information tile, select Update.
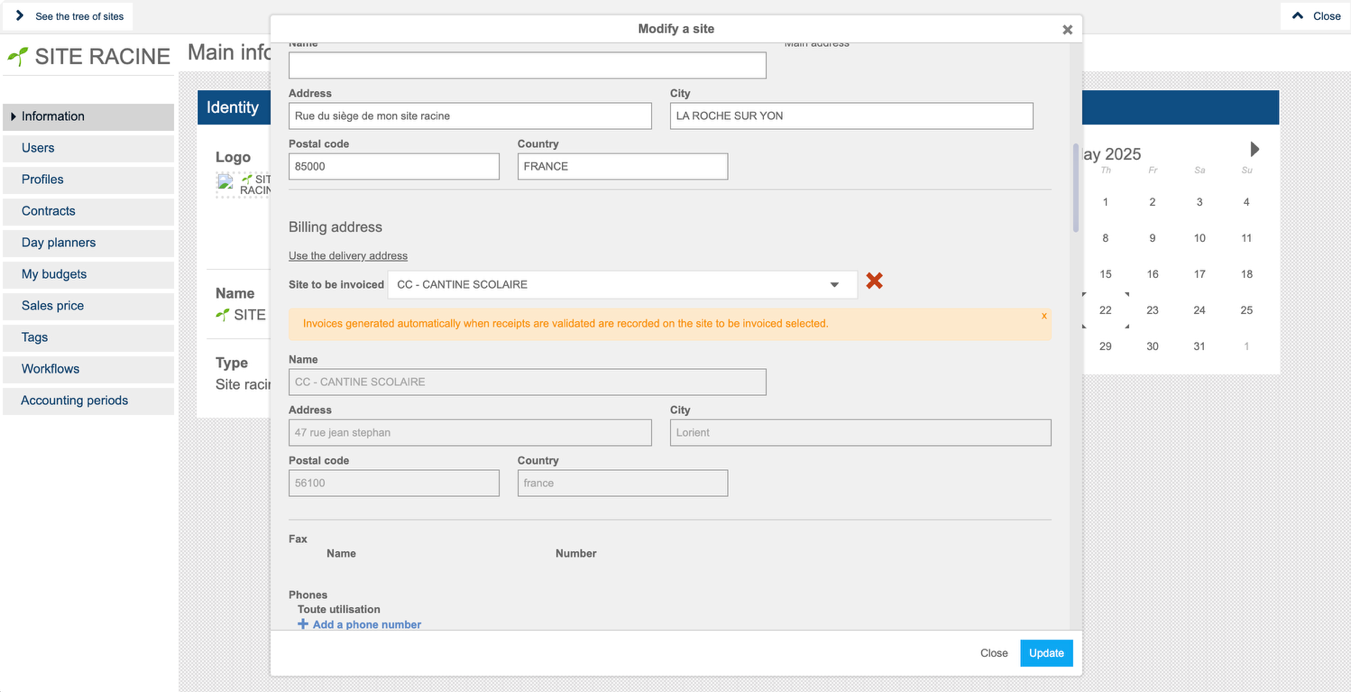
Locate the field titled Site to be invoiced within the Billing address section.
Use the dropdown menu to select the site that should receive invoices.
Select Update to apply the change.
When to use this feature
You want one site (e.g. headquarters or central kitchen) to handle invoicing for several satellite locations.
You need a way to simplify supplier billing and streamline financial reporting.
You want to ensure that supplier orders placed from different sites are invoiced to a single designated entity.