Hide completed checklists
Start from: The Daily Schedule.
- Select the filter icon.
- Activate the "Hide completed checklists" toggle switch.
Now you will only be able to see the checklists with tasks left to do:

View the history of an Area or Checklist on the web
Start from: the Compliance Overview page.
- Select Compliance history > Areas/checklists to open the list of Areas and Checklists.
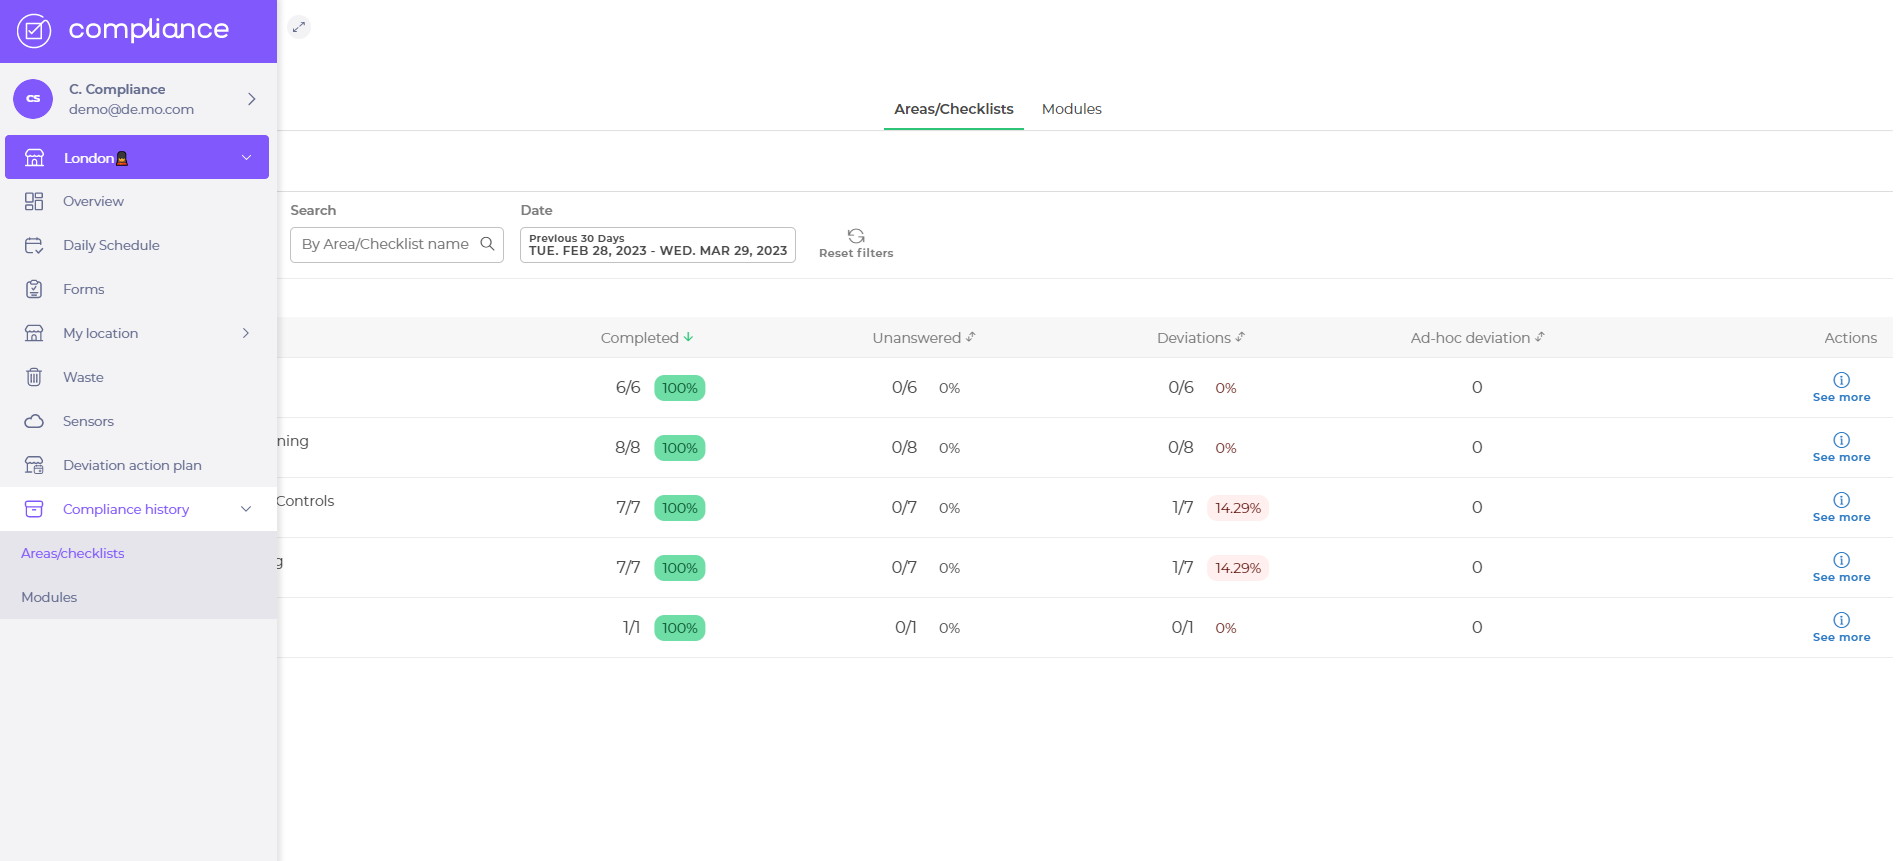
- Select the Area/Checklist title OR See more next to the Area and reveal the Area/Checklist answer history for each Task.

Note: you can export the history to an Excel document by selecting the button with an arrow facing up.
- Select the statistic boxes in both the web and the app to filter the answer history.
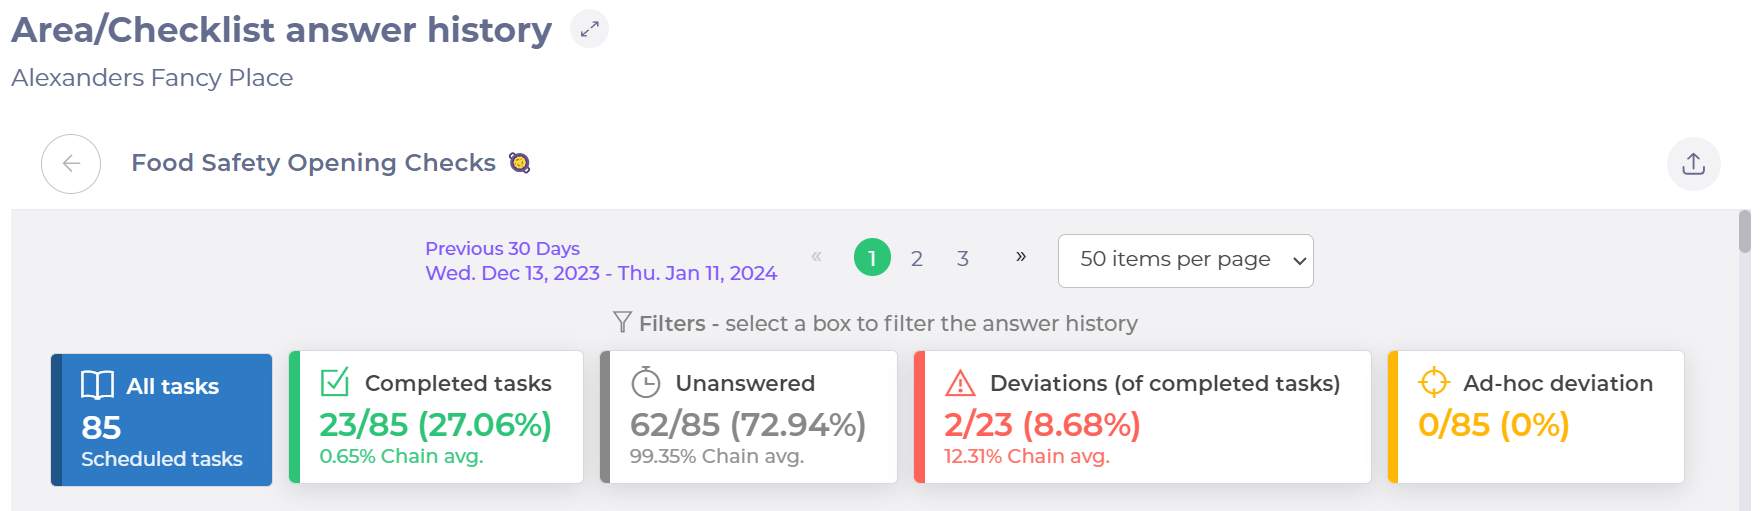
- Select a Task title to open the Task (you will see that the down arrow by the Answer text will turn into an up arrow when the task is opened).
- Select the left arrow by the Area/Checklist title to close the window and return to the Area/Checklist overview window.
Create an area/checklist
Note: After creating a task, it must be published to an area. Areas are where tasks are displayed on the daily schedule.
Start from: The Compliance Dashboard.
- Select Tasks > Areas/checklists.
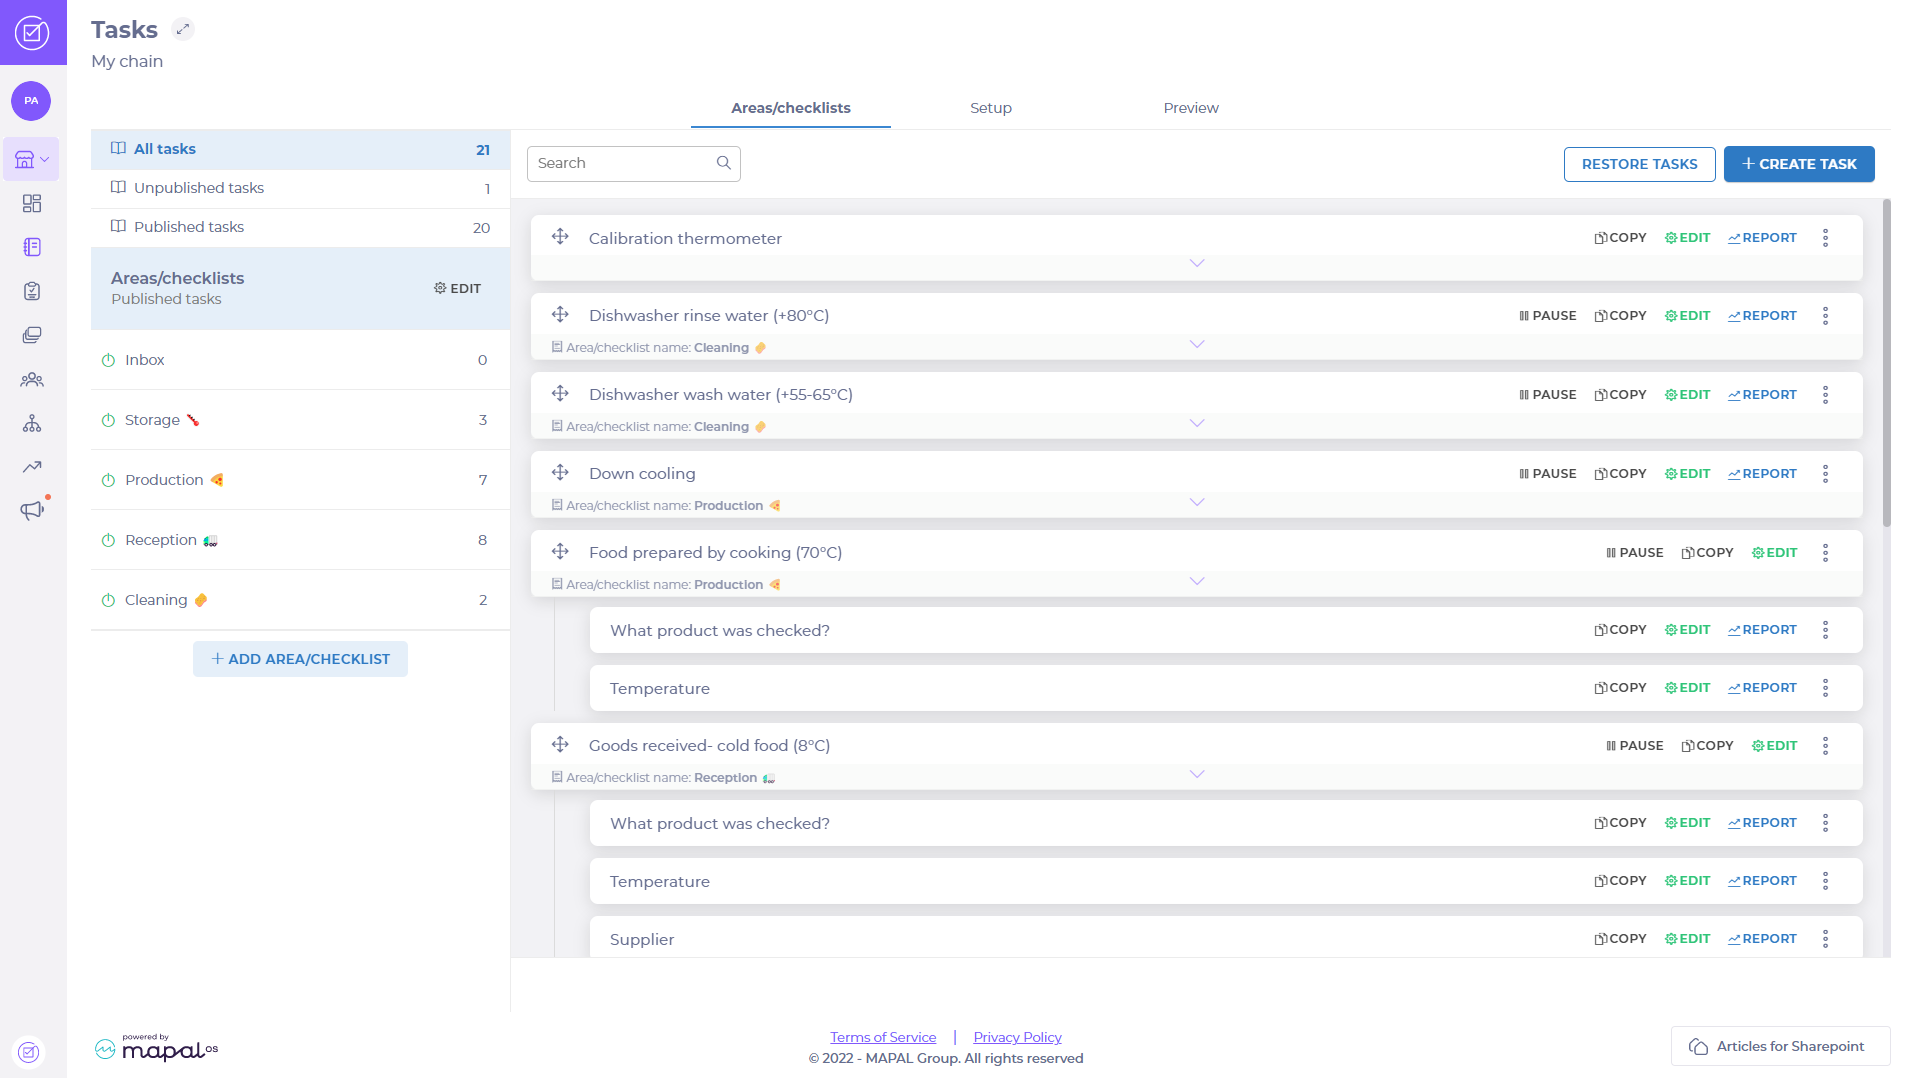
- Select ADD AREA/CHECKLIST
 and a popup will open.
 - Enter the name of the area that you want to create in the Area/Checklist Name field.
- Tick Mandatory to all users to prevent users from deactivating the area on their account.
- Tick Assign to all users to automatically enable the area for new users when they are created. This can be disabled later if necessary.
Note: It is not possible to tick both Mandatory to all users and Assign to all users.
- Select CONFIRM to create the new area OR select CANCEL to discard it and close the popup.
New areas with published tasks will be shown in the Daily schedule.
Enable or disable an area
Start from: The Compliance overview page.
- Select Tasks > Areas/checklists.
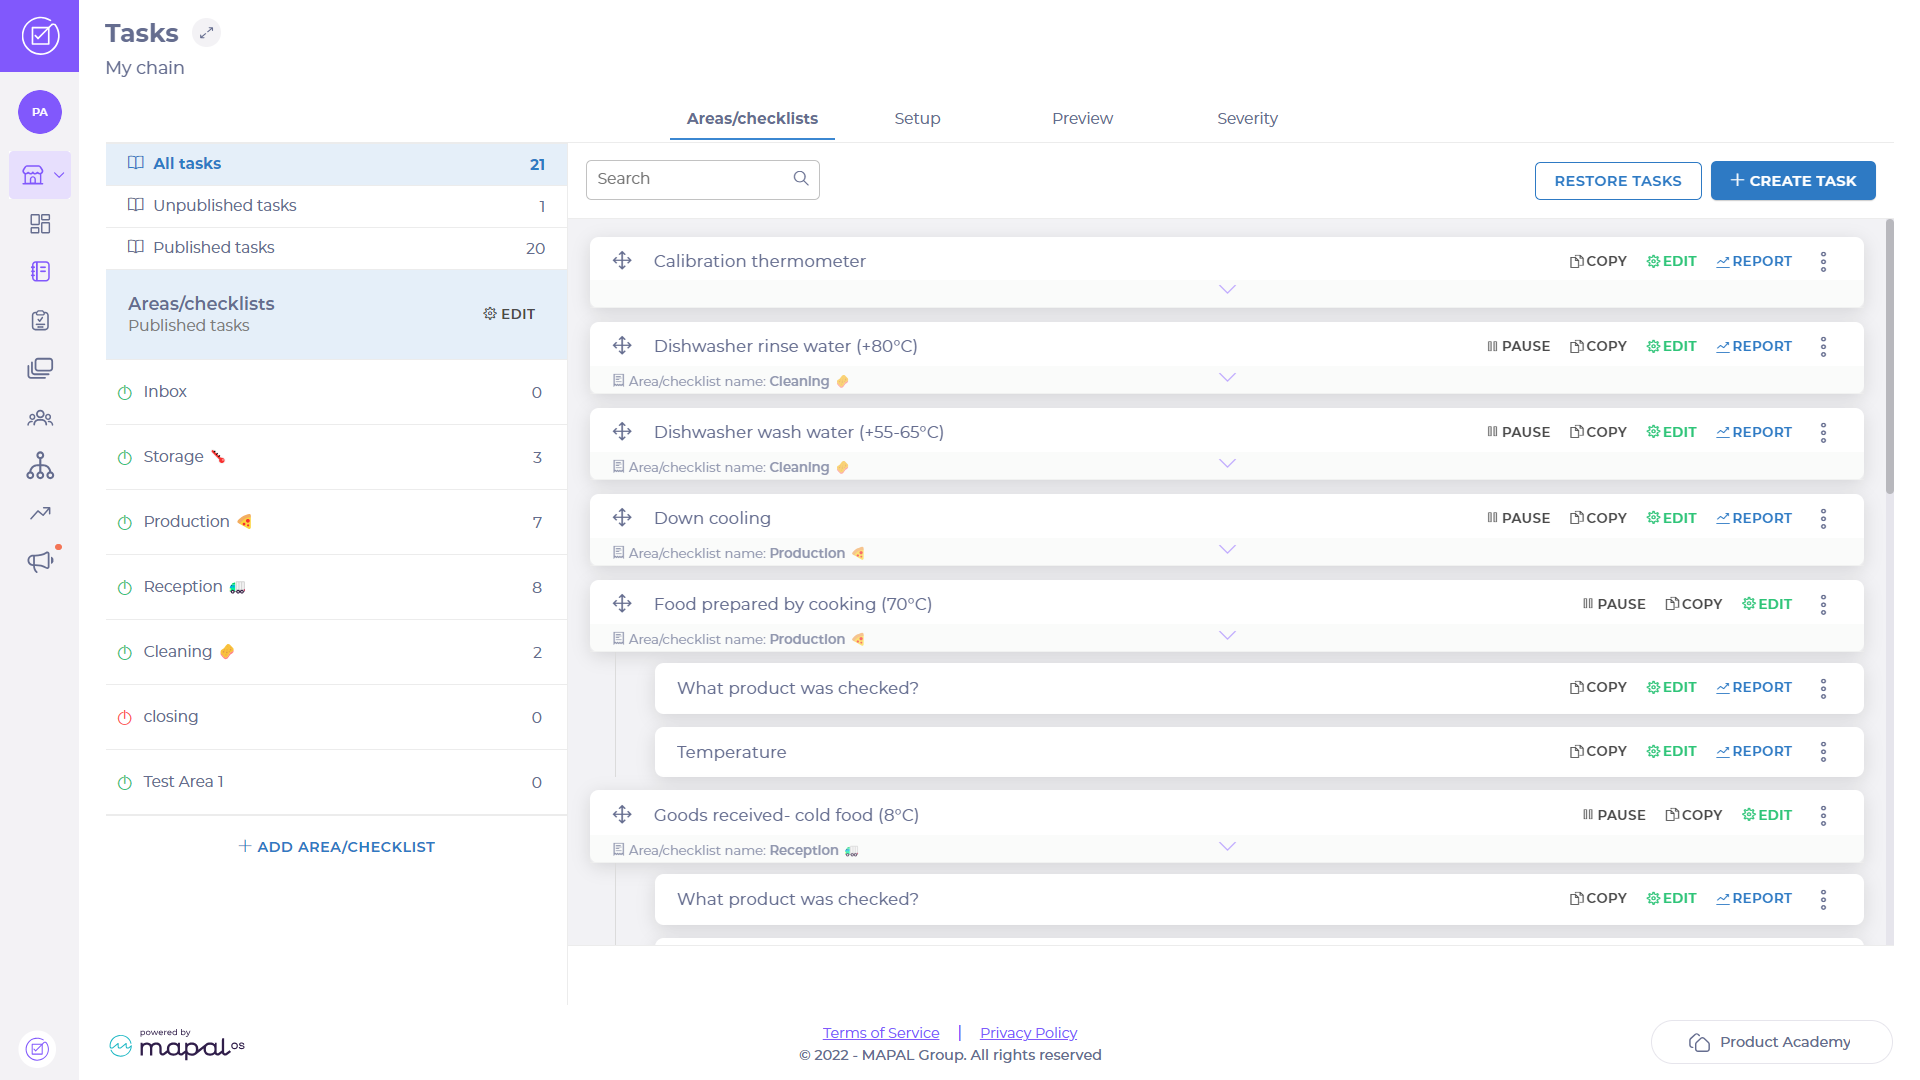
- Select EDIT

Note: The Areas/checklists list will reveal Edit or Delete options for each area.

- Find the area in the list that you want to enable or disable.
- Select Edit. Note: A pop-up will display the area and settings.

- Select the Publish Checklist in the Daily Schedule toggle switch to enable or disable the checklist from appearing in the Daily schedule.
- Select the Assign area /checklist to all users toggle switch to enable or disable the checklist from being assigned out to all users.
- Select the Mandatory to all users toggle switch to enable or disable the checklist from being mandatory to all users that are assigned it.
- Select SAVE to confirm your changes and enable the area OR select CANCEL to discard the change.
Note: The indicator ![]() next to each area in the Published tasks list appears green when enabled and red when disabled.
next to each area in the Published tasks list appears green when enabled and red when disabled.
Now that you have enabled the area, it will be displayed in the daily schedule. Disabling an area will remove it from the daily schedule.
Create a task - select an area and create a task within it
Start from: the Compliance Dashboard.
- Select Tasks > Areas/Checklists in the main menu.
- Scroll down to find and select the relevant area in the Published Tasks list.
With the correct area highlighted:
- Select CREATE TASK IN ‘YOUR SELECTED AREA’
- Select
 or
or  to choose which language(s) you would need to display your task in.
 - Enter the name of the task in the Task label field.
- Enable the Attachment/photo required toggle switch if the task requires an image.
- Select the Create deviation when unanswered task becomes overdue toggle switch, to create a deviation if the location does not respond to the task by its due date.
Note: A new deviation will be created every time a location fails to respond to a task. Therefore, if a location fails to respond to a task three days in a row, three deviations will be created. Use this toggle switch with caution as deviations can quickly build if the location is not active.

- Select a Deviation type from the dropdown list. For guidance on which type best suits your task, select
 next to this dropdown.
Note: The Deviation type dropdown list appears only when the toggle switch is selected.
- Select the Severity dropdown list and choose the level of severity of the task: high, medium or low. If the task is of high importance, set the severity level to high to help your team to prioritise tasks.
- Select the Categorisation dropdown list and choose the module that you want the assignment to be in.
Note: The assignment must be categorised into a module before the task can be created.
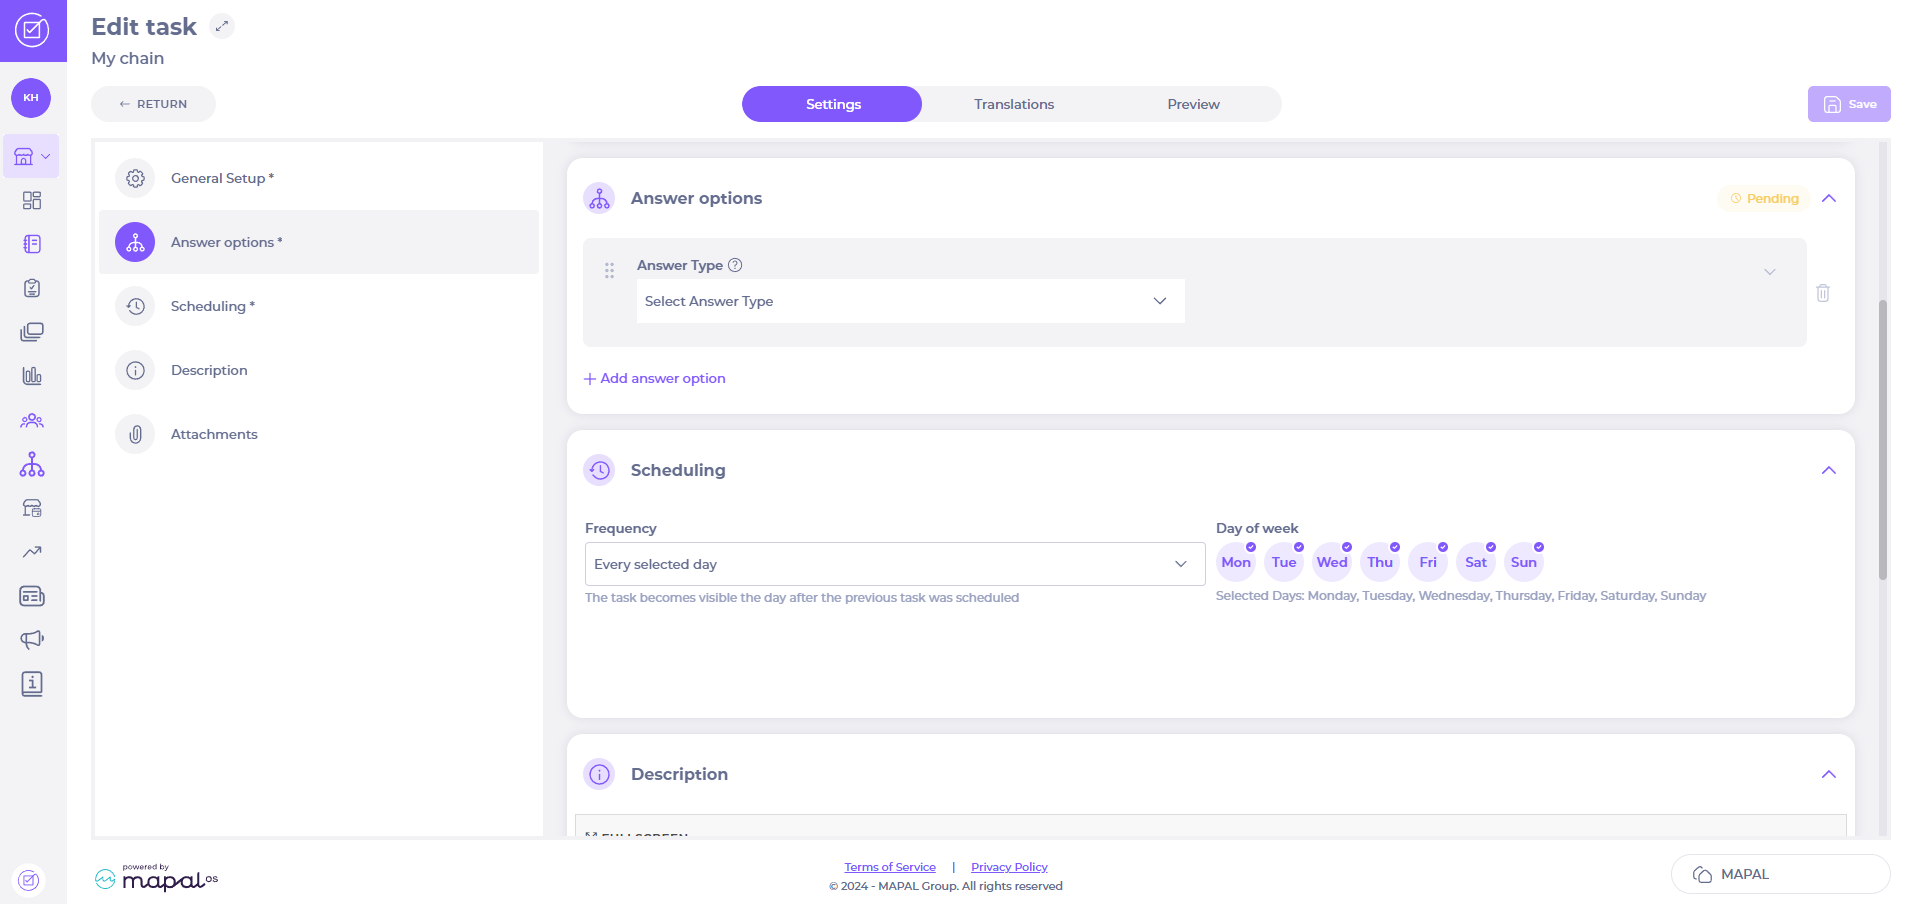
- Scroll down to the Answer options section or select answer options in the side menu.
- Select all dropdown lists and toggle switches to tailor your answer option.
Note:
o Date is entered as YYYY-MM-DD.
o Text is entered as text such as the name of a product.
o Check box/button shows a predetermined answer such as yes, no or not applicable.
o Numbers is entered as only numbers such as weight or quantity.
o Interval is entered as a maximum and minimum value and recorded as a deviation outside the value such as temperatures.
o Dropdown shows predetermined response options.
- The Preview shows how this will appear when the task is to be answered.
- Select + ADD ANSWER OPTION to create a new answer option.
- Select the Create deviation toggle switch to turn on deviation settings.
- Select the Deviation type dropdown list to flag as a Corrective Deviation or a Regular Deviation and whether comments are required.
- Select the Not applicable toggle switch if the task is irrelevant.
- Scroll down to the Scheduling section or select Scheduling in the side menu.
- Select the Frequency dropdown list to choose when the task must be carried out.
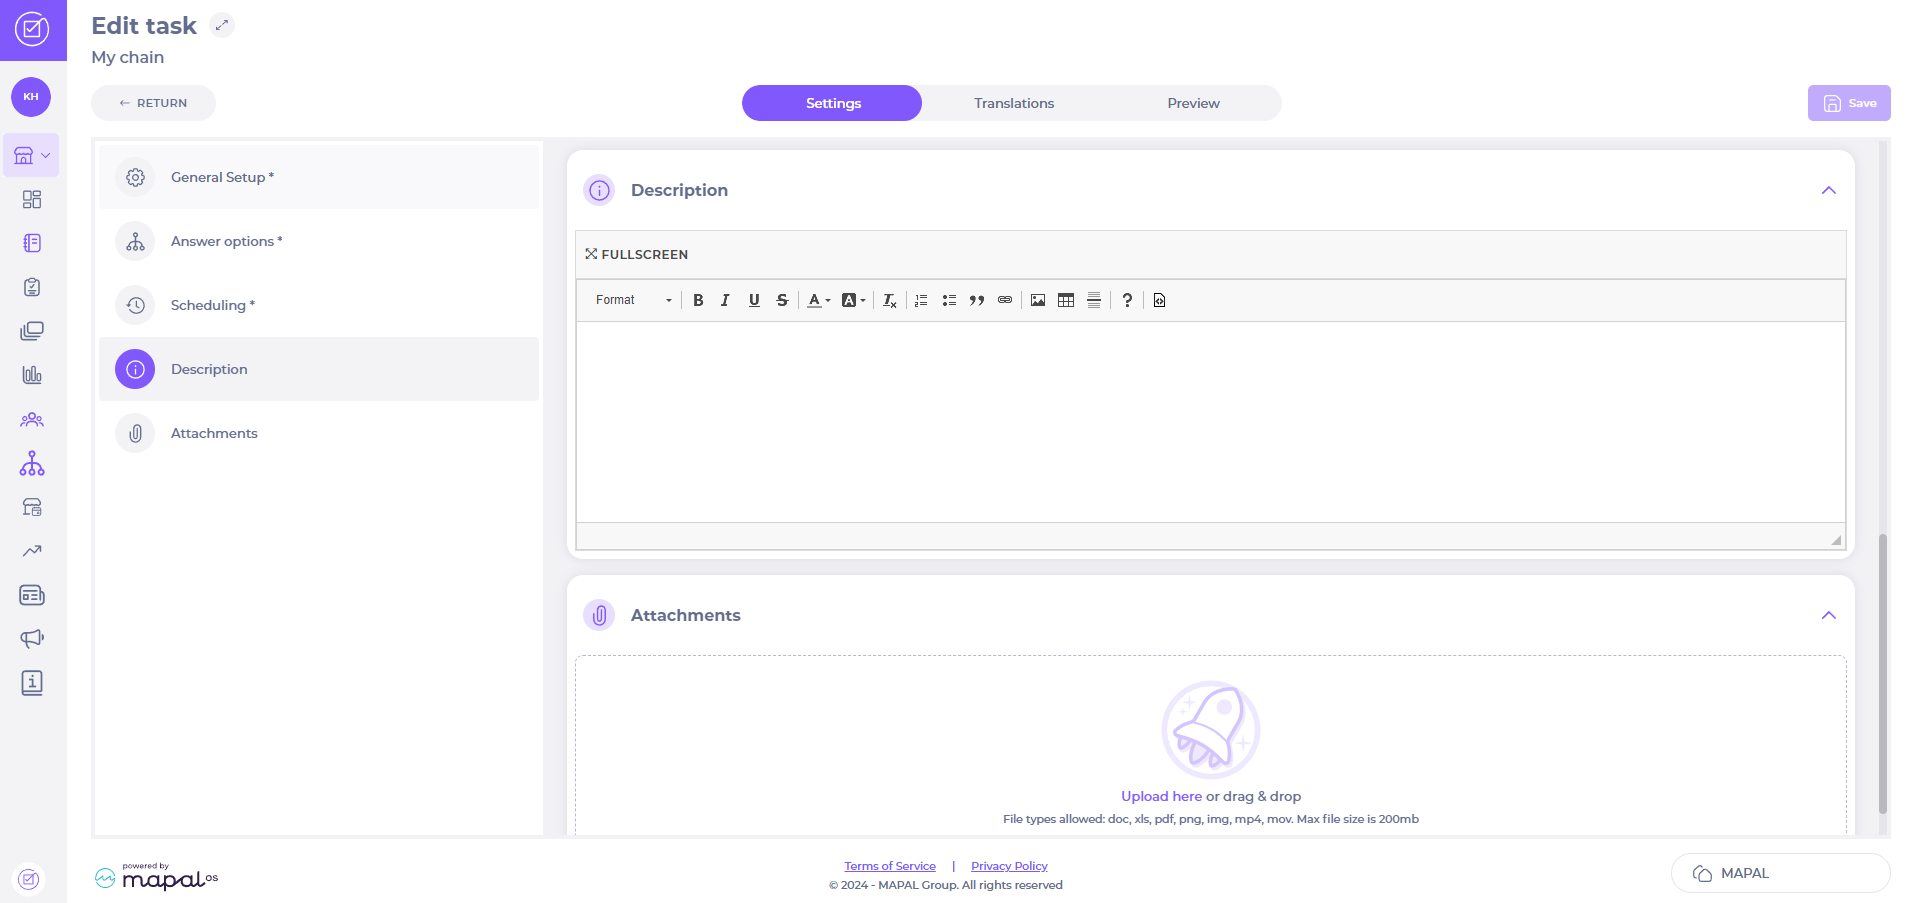
- Scroll down to the Description section or select Description in the side menu.
- Enter a Description of the task. This will appear when the task is to be answered.
- Scroll down to the Attachments section or select Attachments in the side menu.
- Select ADD FILE
 to upload a file to the task.
Select CREATE TASK when you have finished tailoring the task to suit your needs. When the task has been created, it can be found in your selected area.
The newly published central task will be displayed in the Daily Schedule. Your team will be able to view this task to make sure it gets completed as part of their shift.
Restore a task after it has been deleted
- Select My location > Tasks.
- Select the Restore tasks button.