Create recipe catalogues and make them available to desired sites
Start from: The Easilys menu.
1. Creating recipe tags
On the parent site:
Select Sites> Administration of tags.
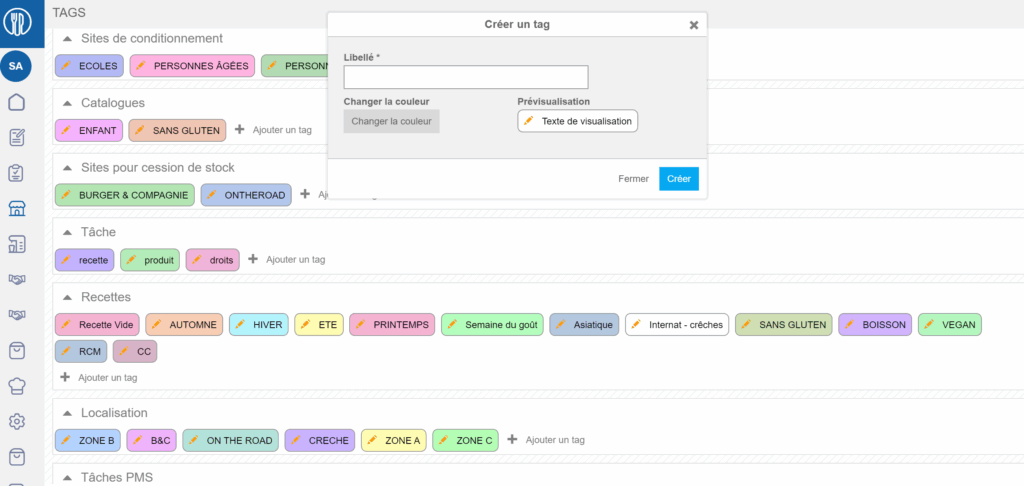
In the Recipes section:
Select Add tag.
The Create tag window appears:
Enter a label to name your tag.
Note: You can choose a color to associate with your tag. To do this:
Select Create.
To modify the label or color:
Select the orange pencil icon available on the created tag in the Recipes section of the Tags screen.
Note: It is not yet possible to delete a tag. If it is necessary to delete unused tags, please contact support.
2. Adding recipe tags to recipe cards
On the parent site:
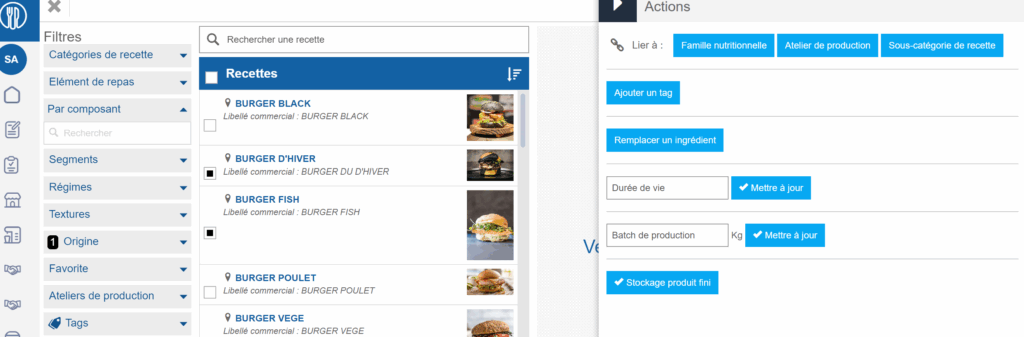
Select Recipes in the main menu > Recipes management.
Check the box in front of the local recipes to which you want to add the same tag.
Note: You cannot add a tag to an inherited recipe. The recipe must belong to the site you are on and therefore be local.
Select Update.
Select Actions.
Select Add tag.
Choose the tag to add to the selected recipes.
Proceed in the same way if you want to modify a tag on one or more recipes.
3. Assign appropriate recipe tags to child sites
This step allows you to define which sites can see specific recipe catalogues. This procedure is explained in the article Tag "Recipes".
Share information on a site and its child sites
??Notes: actions performed on the Easilys platform are subject to user access permissions. If you are unable to carry out the actions described in the articles, it may be because you do not have the necessary permissions activated on your user profile. Contact the Support team, or your administrator, for help.
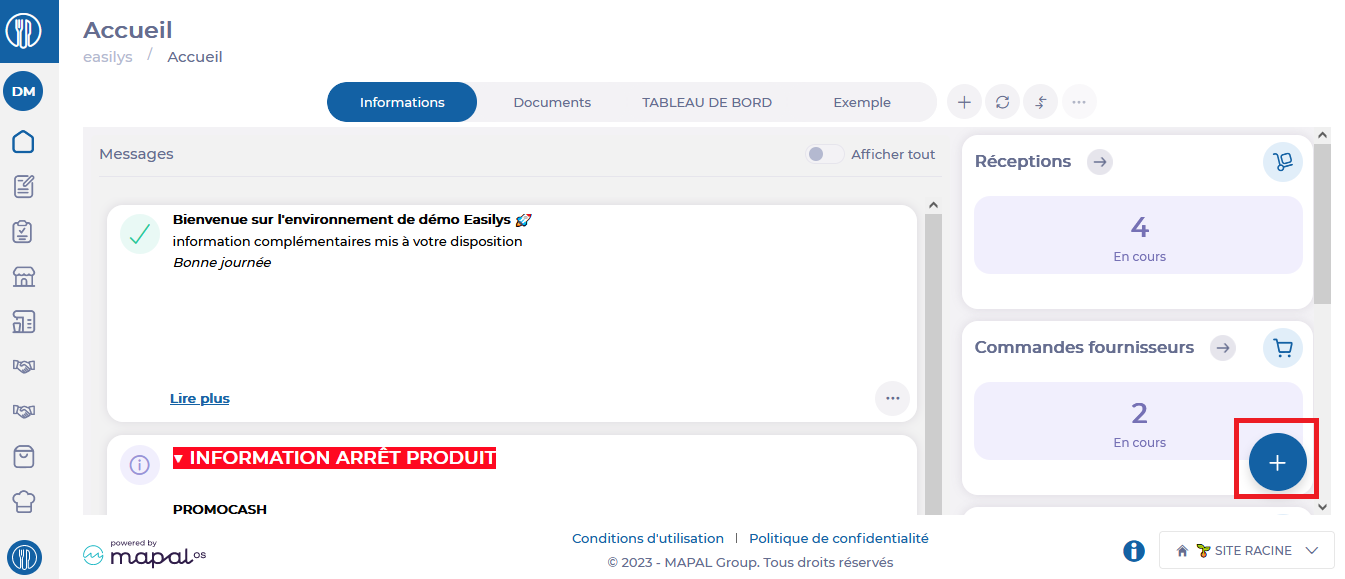
Select Home from the main menu.
You will be redirected to the Information area of the Home page.
If the message you wish to modify is no longer visible because its period has expired, you can, if your rights allow it, make it appear by activating the "Show all" option.
This space lets you share messages with your team.
These messages can be categorized into four types: Danger, Warning, Success, and Information. The type influences the message's positioning in relation to others and its color.
Messages can be programmed for selected periods.
Create a message
Select +.
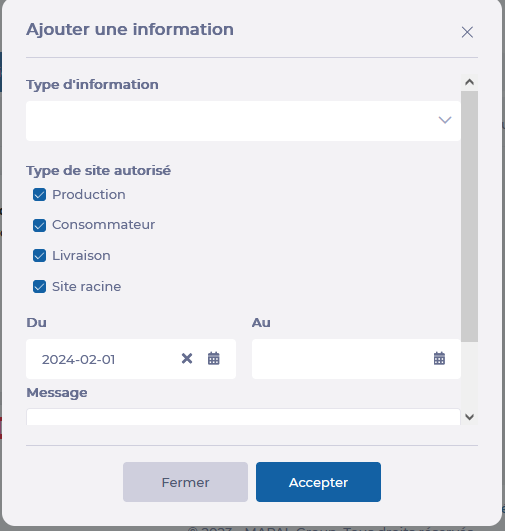
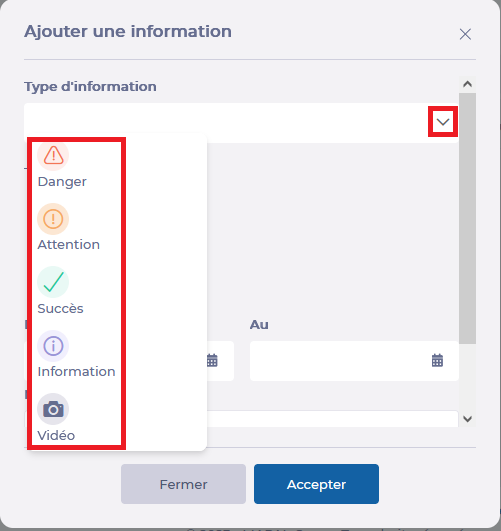
The "Add information" window appears on screen.
Select the type of information in question by clicking on the small arrow next to the "Type of information" heading: Danger, Warning, Success, Information, and Video.
?
Then select the authorized site type.
Notes: If an information sheet is created on a child site, the information does not go back to the parent site. This information sheet will only be visible on the child site and its own child sites if the corresponding site types are selected.
Add a start date to indicate when the message should be visible.
Add an end of validity to indicate when the message should no longer be visible. (If you don't, the message will be visible indefinitely).
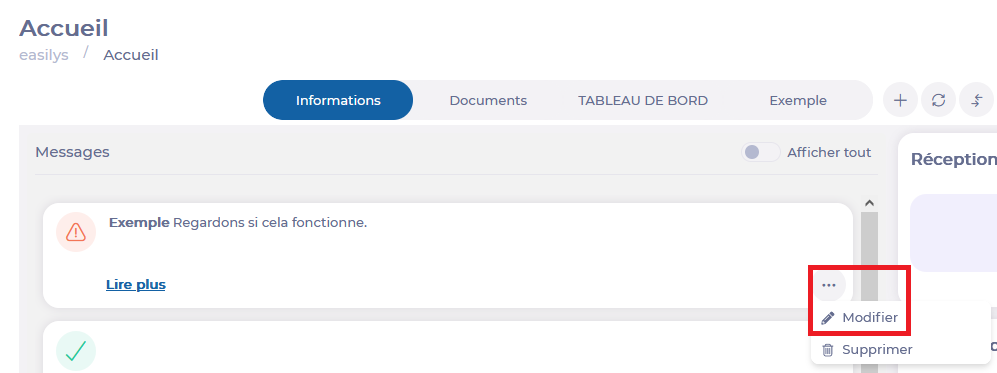
You will be redirected to the Information area of the Home page.
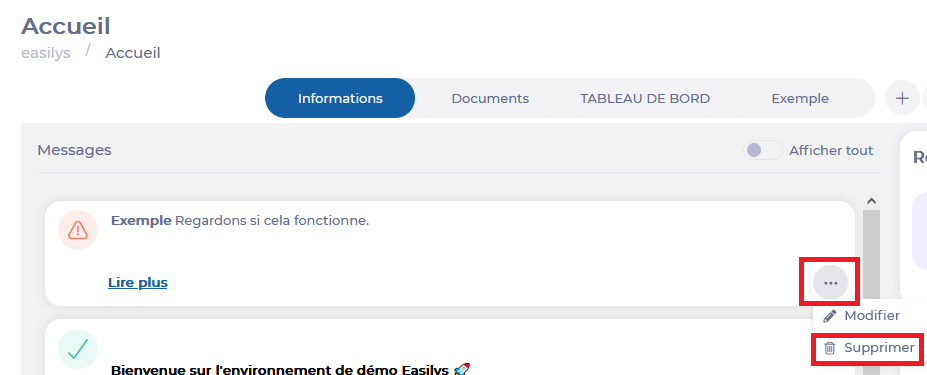
Select the 3 small dots in the message box you wish to modify.
Select Modify.
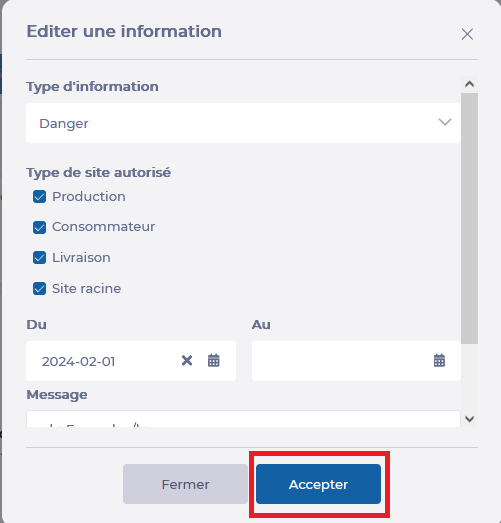
The "Editing information" window appears on screen.
Make the desired changes.
Select Accept to update the modified information.
?
Delete a message
Select Home from the main menu.
You will be redirected to the Information area of the Home page.
Select the 3 small dots in the message box you wish to modify.
Select Delete.
Notes: choosing Delete will automatically delete the message. So make sure you're sure of your choice before selecting this option.
Elements inherited from parent site to child site
Start from: Products > Suppliers
When managing supplier records and their associated price lists from a parent site, and then linking these supplier records to child sites so that they can order from them, certain pieces of information and options from the supplier record are inherited, while others are not.
Here is the list of the inherited elements:
Order deadline
Shipping costs
Minimum order amount
Cancel shipping costs if the order is greater than the minimum order
Prohibit an order less than the minimum order amount
Automatically create claims
Activate the claims workflow
Allow a delivery date less than the minimum deadline
Automatic email sending (claims/credit notes)
Automatic fax sending (claims/credit notes)
Minimum deadline between delivery and production
Contact details phone - fax - emails
Website
Display a clickable confirmation link in the order email
Use pre-orders
Automatically close an order at maturity
Note that when a child site makes a modification to an element, the inheritance link is broken. The modification on the original supplier record present on the parent site will then not be reflected on the associated supplier record on the child site. To restore an inheritance link, an action by the technical team is necessary. Contact us to learn more.
Associate the "PARENT SITE NAME" supplier on child sites
Using the Site supply screen, you can associate the "PARENT SITE NAME" supplier to child sites, so that they can order products from the parent site (in the orders screen).
Starting from: The Easilys menu.
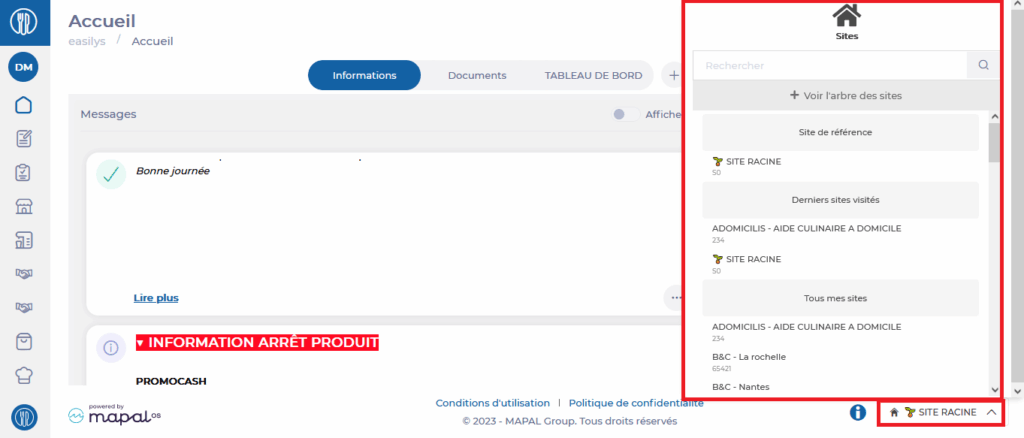
Go to each child site to associate the supplier record bearing the name of the parent site.
To do this, select Root Site at the bottom of the screen to display the list of your sites and select each of your child sites.
Then select the Products > Suppliers tabs.
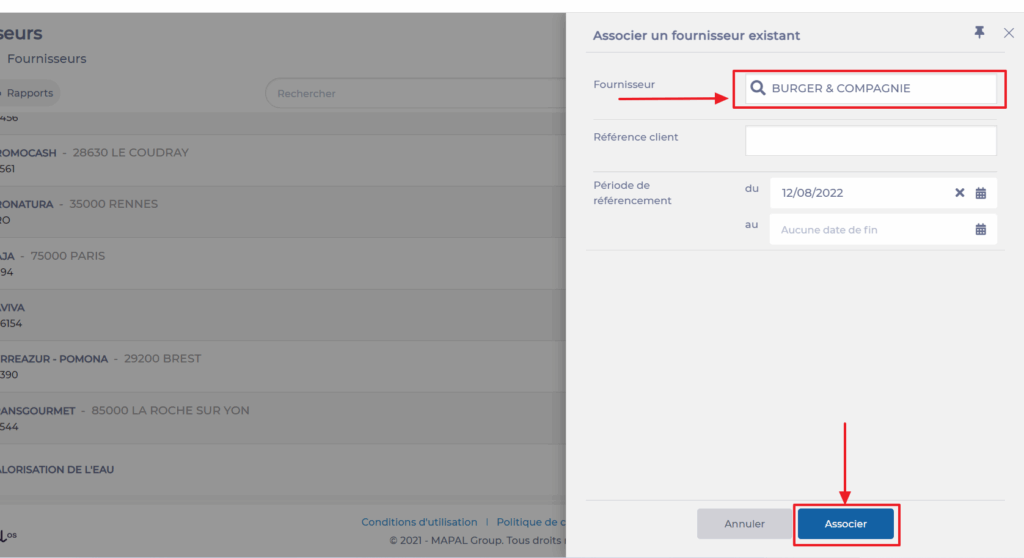
Select Associate.
The "Associate a supplier" window appears.
Enter the requested information and select Associate.
As a reminder, by associating a supplier record from a parent site on a child site, you allow the child site to order the products available in the price lists administered on the parent site. It is therefore essential to have not only associated the supplier record, but also created the price list(s) for this supplier.
Transfer a recipe from one site to its parent site
Note: Each action performed on the application is subject to user permissions. If you are unable to carry out the recommended actions in the articles you are viewing, this may mean that the necessary rights have not been activated for your user profile. Contact the Support team, or your administrator, to find out more.
Start from: The Easilys menu.
Select Recipes in the main menu > Recipe management.
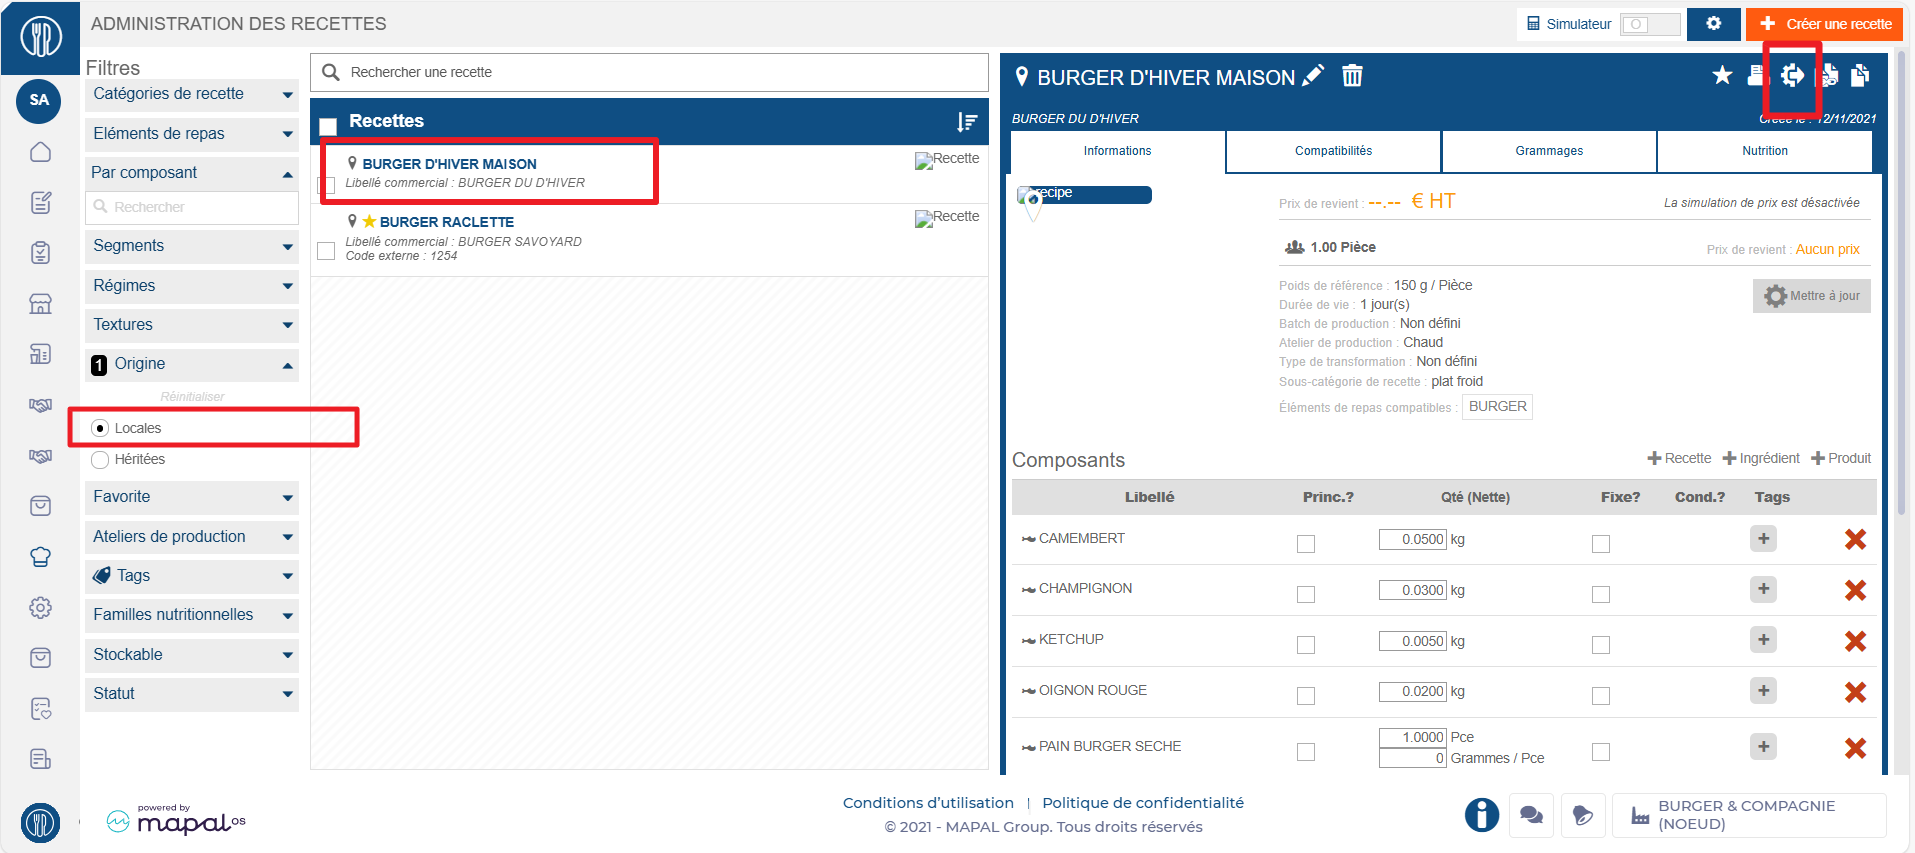
Select the local recipe you wish to transfer.
The recipe card is displayed:
Select the transfer icon at the top right of the recipe card.
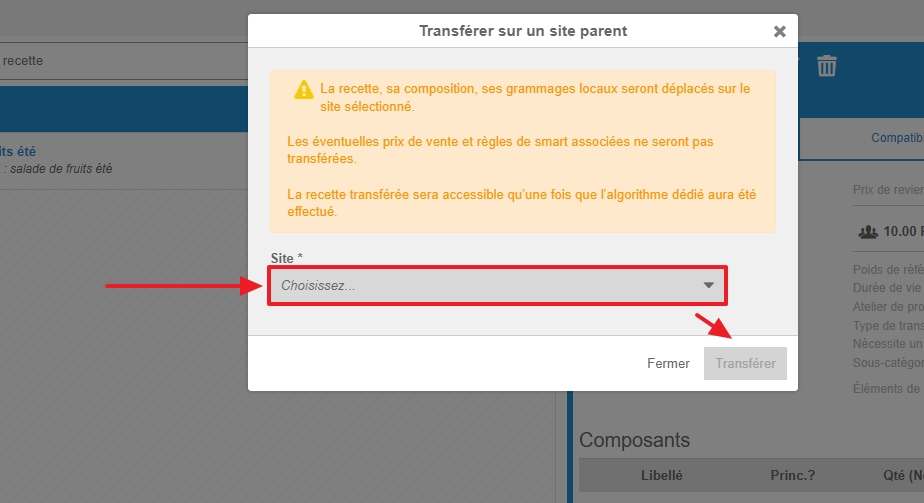
The Transfer recipe to parent site pop-up window appears:
Select the parent site to which the recipe is to be transferred.
Select Transfer.
Note: In some cases, recipe transfer may not work: for example, a sub-recipe may not be available on the parent site. This affects the integrity of the recipe, making transfer impossible. Easilys will then provide you with an explanation for its refusal.
GOOD TO KNOW: If the recipe being transferred to the parent site is stockable, then the associated finished product is also transferred to the same parent site. From then on, it can be added to price lists (mercuriales) from that level of the site hierarchy.
Share documents on a site and its child sites
??Notes: actions performed on the Easilys platform are subject to user access permissions. If you are unable to carry out the actions described in the articles, it may be because you do not have the necessary permissions activated on your user profile. Contact the Support team, or your administrator, for help.
Start from: The Easilys menu.
Add a shared document
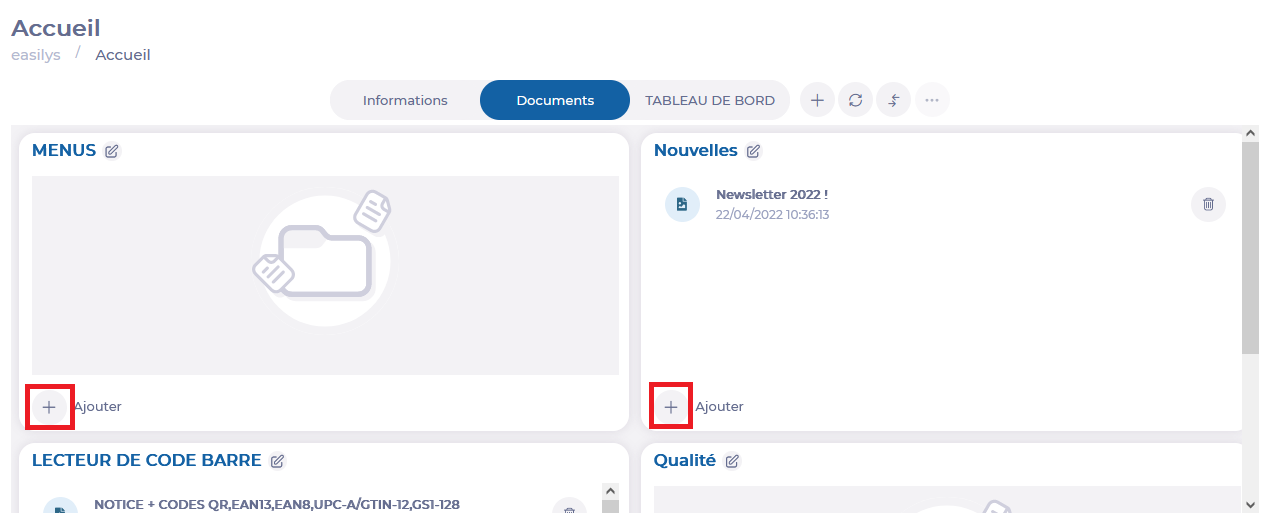
Select Home from the main menu, then the Documents tab.
This space lets you share documents with team members working on the same site as you, or consult documents shared by a parent site or the root site.
These documents can be downloaded or viewed (depending on the document format) by selecting their names.
Select Add + in one of the four storage blocks. ?
Note: the Documents area is made up of four storage blocks. You can rename blocks using the pencil (if your user rights allow it).
?? The “Add one or more documents” window appears on the screen.
Select Click here to upload to select the document to share from the files on your computer, or drop the documents directly into the window.
Select Validate.
Your document is now available for viewing on your site and child sites in the chosen storage block.
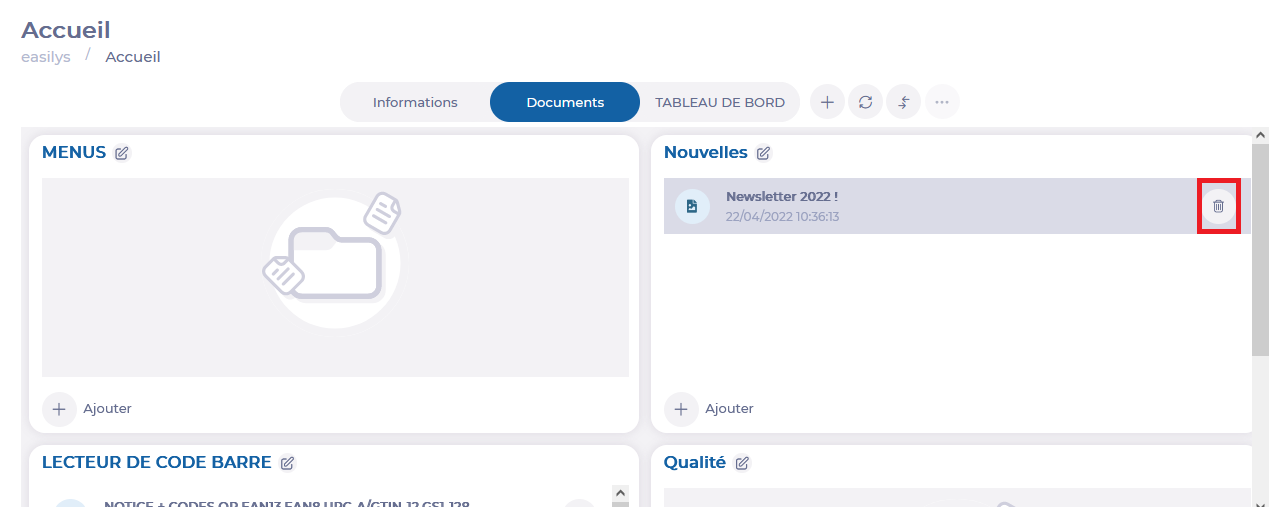
Delete a shared document
Select the trash can icon (visible if your user rights allow it). ?
?
Note: you can delete all shared documents added by you or your colleagues with a user account attached to the site, but you cannot delete shared documents proposed by a parent site or the root site.