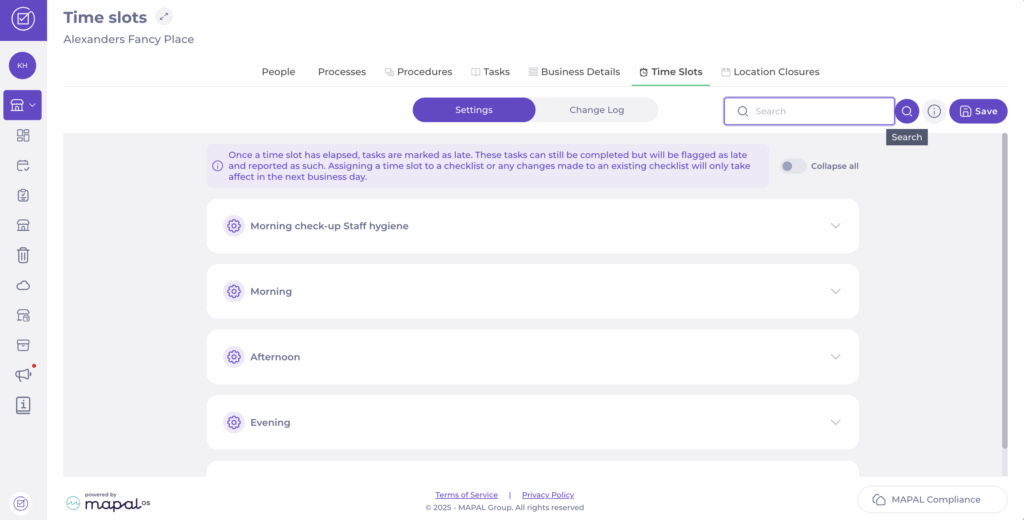
Time slots define specific periods during the day (for example, Morning, Afternoon, Evening) and determine when checklist tasks should be completed.
While tasks can still be answered at any time, those completed after their assigned time slot will be marked as late. Only tasks completed within their designated time slot are counted as Answered in time in the central overview tile.
Adjust time slots
Navigate to My Location > Time slots.
Use the Search button to find a specific time slot from the list; for example, Evening.
Once you find the time slot, set the start (From) and end (To) time for it.
Select Save to register the changes.
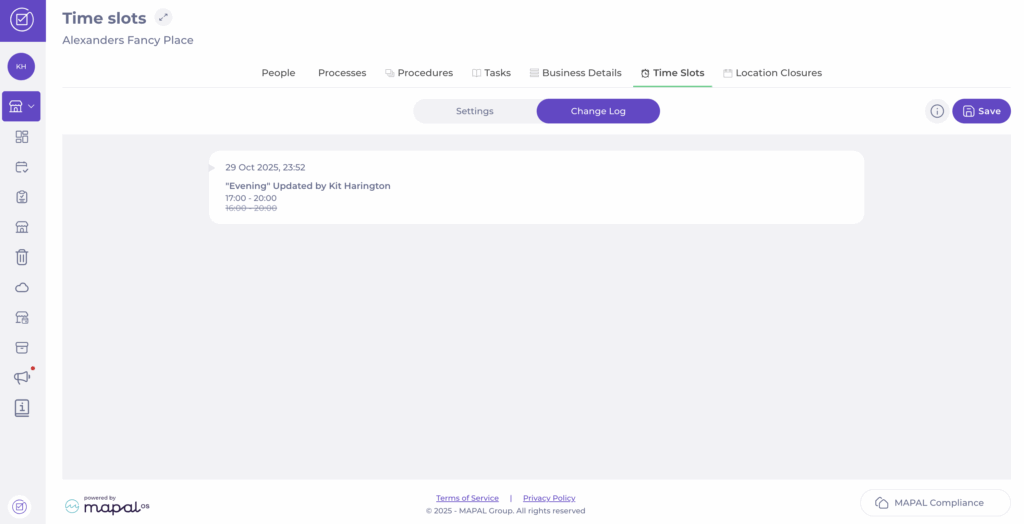
Track changes in time slots
Select the Change Log tab in the Time slots screen.
A list with all changes made to your time slots will appear. Here, you will be able to see:
Date and time the change was made.
Name of the time slot modified.
Name of the user who modified it.
Complete a task with the Bluetooth thermometer
Start from: The Daily Schedule.
Select Temperature checks.
In the Temperature BT Test section, select Connect to device.
Switch on your Bluetooth thermometer (for example, an ETI device or any other supported Bluetooth thermometer).
Select Connect in the Compliance app.
Measure the temperature and select Touch to record.
The temperature will now be registered as the answer to the Temperature check task.
If your thermometer does not work or you need to answer the task manually, select Unlock (will be registered) on the Compliance app.
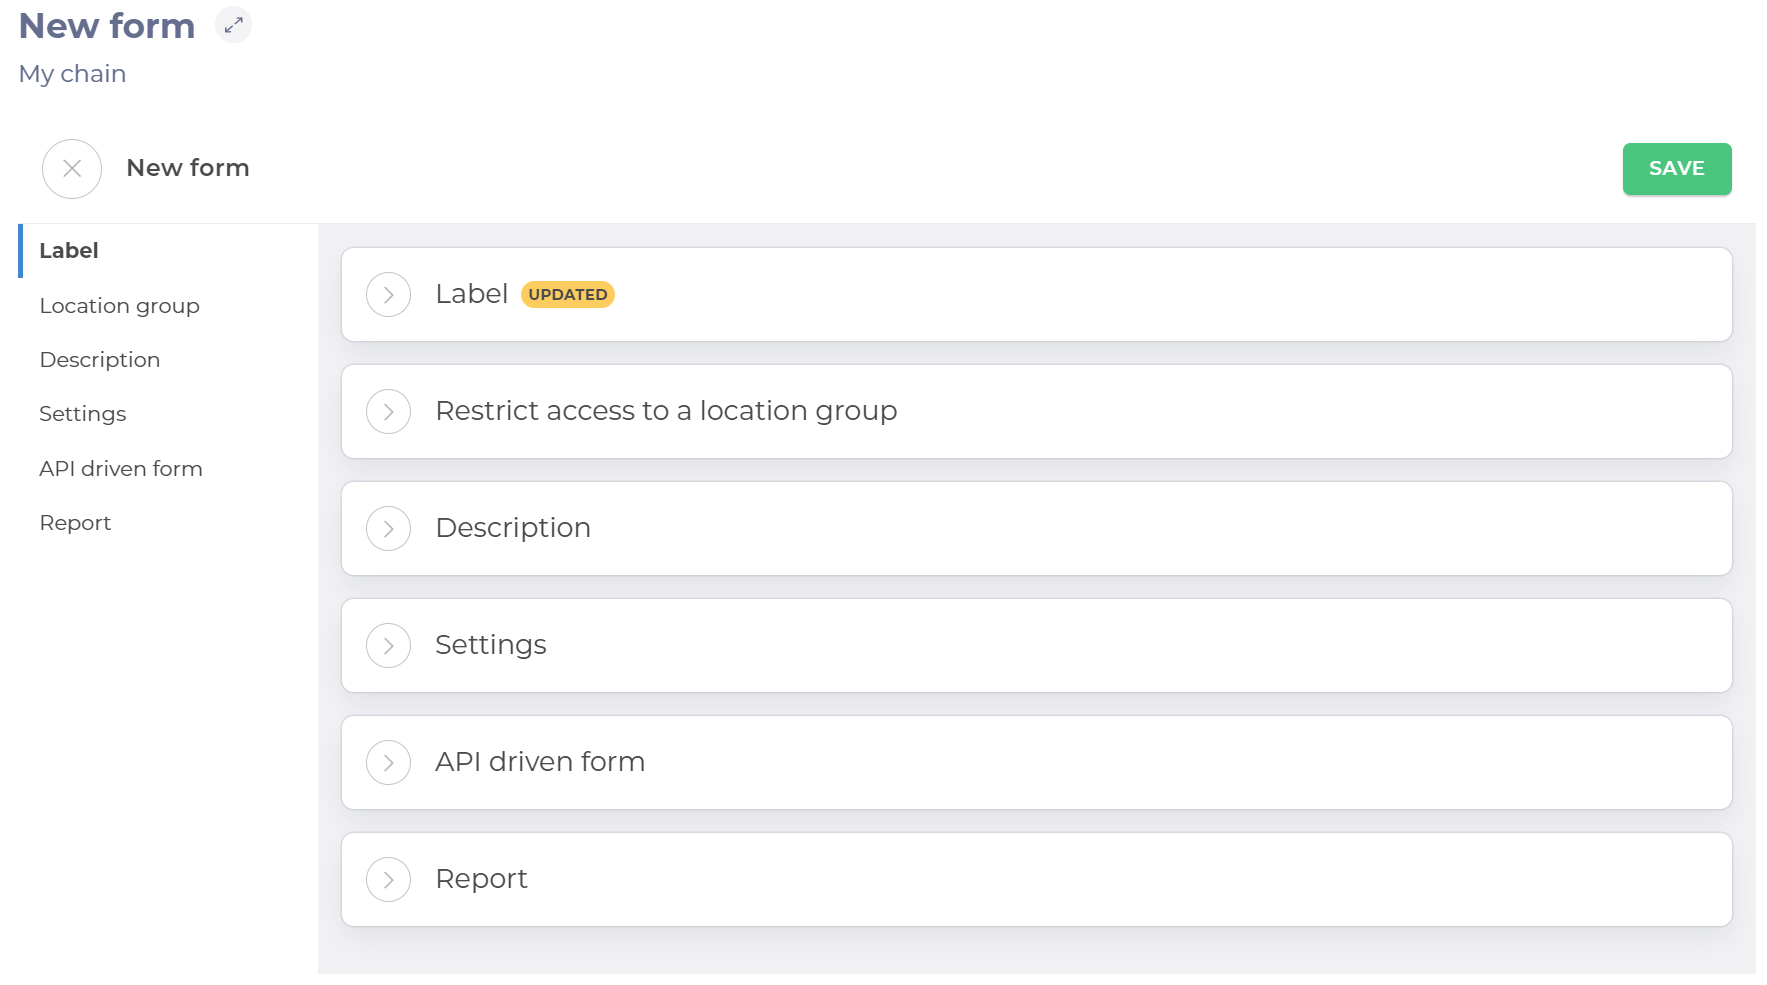
The New form page contains six panels for setting up the form.
Select to open each panel to change the settings and populate the fields.
Note: Use the panel heading links to navigate quickly to that section when you have multiple panels open.
Label
Enter the name of the form.
Restrict access to a location group
Use the dropdown list to select a location group. Access to the form will be restricted to that group only.
Description
Enter a description of your form. If populated, the Description link appears on your form on the dashboard. Selecting this will open the description.
Note: You can add text, tables, images and links using the formatting menu.
Settings
Toggle the buttons to enable and disable the following options.
Assign to existing users and make default for new ones – When enabled, this option assigns the form to all existing users and allows it to be selected from the assignments list when creating a new user automatically.
Private – When enabled, this option allows you to select the roles that can see the form. When disabled, the form is not visible to any of the roles.
Meeting – When enabled, this option allows you to use this form for planning your meeting. creating a meeting agenda and adding follow-up actions for every agenda item. See Create forms as a meeting agenda to know more.
Downcooling – When enabled, this option allows you to use this form specifically for temperature checks with automatic sensors. See Create a downcooling form to know more.
Label printing – When enabled, this option enables you to use the form to print labels from a drop-down list of templates.
Revision Handling settings
Forbid re-open – When enabled, this option stops the completed forms from being amended. Users will only be able to complete the form once. When disabled, the form can be amended as required.
Limited access – When enabled, this option shows a checklist of roles. Tick the roles to allow those roles to create new revisions, reopen completed ones and handle deviations from completed revisions. When disabled, all roles can view the revisions and open deviation, but do not have the permissions to action them.
Check to select which roles have permission to revise the form, re-open completed ones and handle deviations (an answer that is outside of the parameters of what's expected).
Report
Add the email address of anyone requiring notification of when a form is completed.
Select Add to add the address to the list of people to be notified. You can add as many addresses as required.
Select the trash icon next to an entry in the list to remove that address.
Saving the Form
Select Save from the top of the page to save your form and jump automatically to the Task screen.
Note: If you navigate away from the page before saving, your settings will be lost. You will not be prompted to save before closing.
The new form will now be accessible to specific roles in a particular area. Until it is published, only the user who has created the form can view or use it.
Answer scheduled tasks
Answer a task on the app
Select the hamburger menu > Daily schedule.
Select the Area/checklists that contains the task you want to answer.
Locate the specific task you’d like to answer and complete it, as described above.
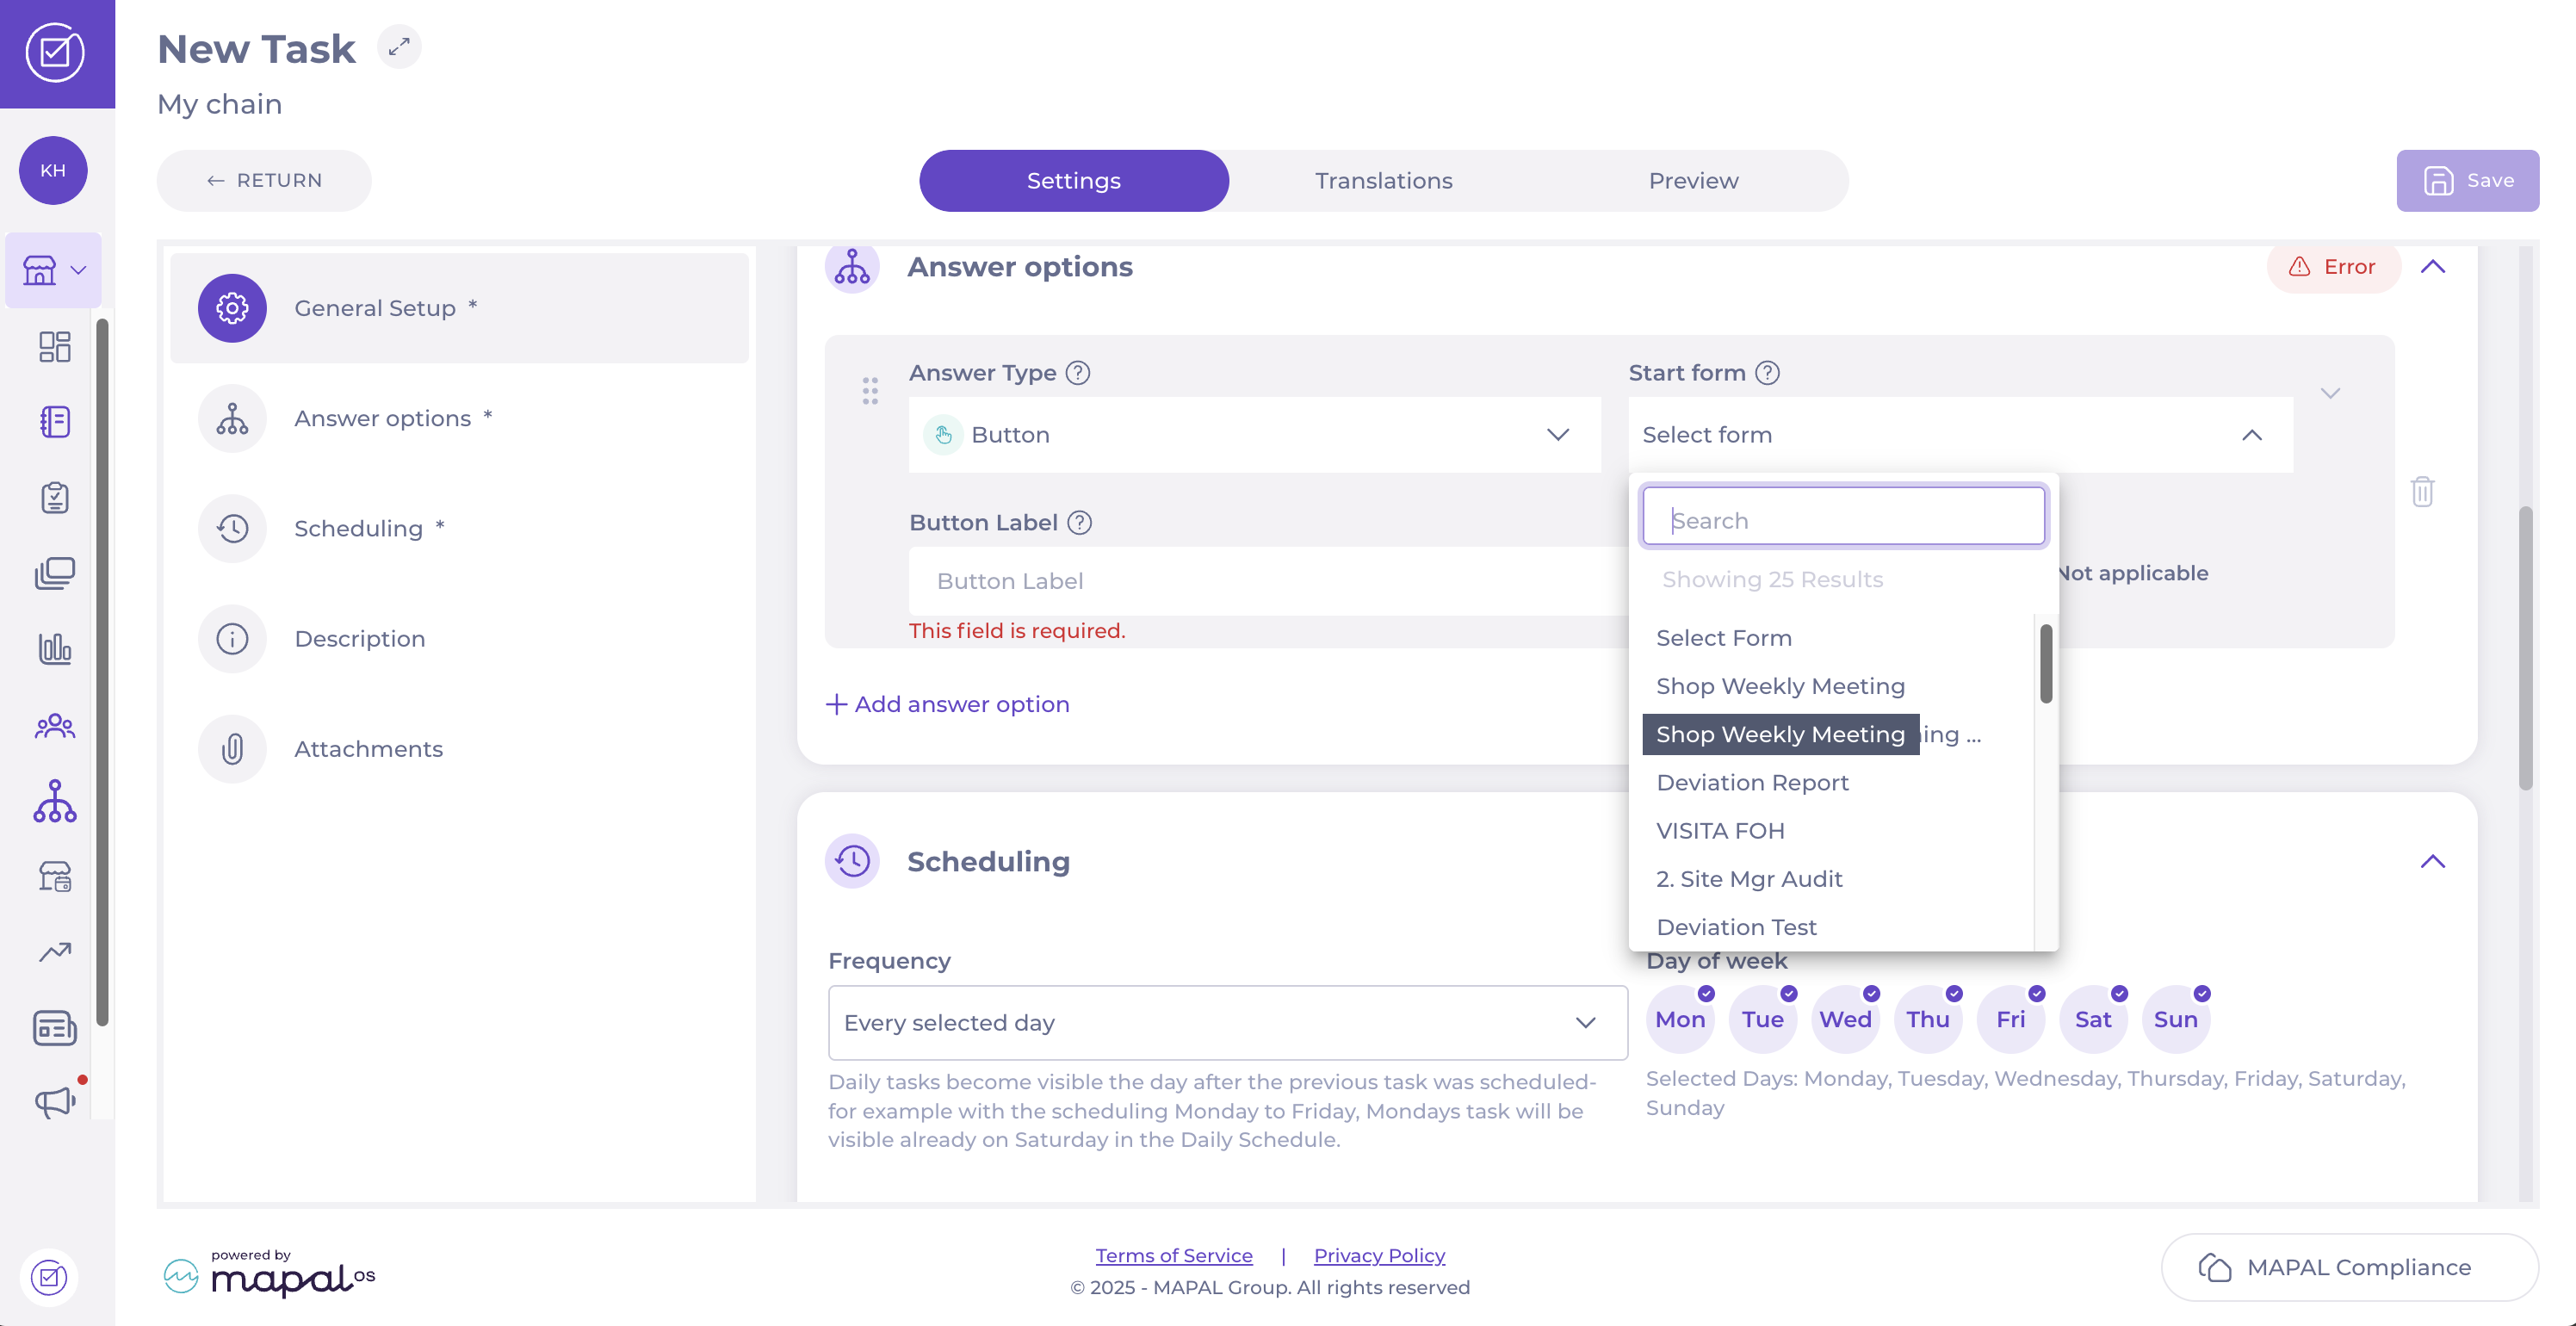
Schedule a form in the Daily Schedule
Start from: The Compliance overview.
Navigate to Tasks > Areas / Checklists.
Select the specific checklist where you want to publish the task.
Select + Create task in '[name of the checklist]'.
In the New Task screen, complete the General Setup.
Scroll down to Answer options and set the Answer Type to Button.
Select the relevant form from the Start form dropdown list. This action will link the task to the chosen form and create a new revision of that form when the answer is triggered.
In the Scheduling step, define the Frequency or choose the Days of the week you want the task and form to appear in the Daily Schedule.
Once you have completed the steps, select Save in the top right-hand corner to finalise and activate the task.
Local Overview in Compliance
Start from the Compliance overview page.
Select Overview: from the main menu.
Open deviations
The Open deviations section displays any deviations from expected compliance standards that are currently open and assigned to the user. Managers can filter deviations by severity—High, Medium, or Low—to prioritise tasks based on their impact. Selecting a deviation will provide further details and options for resolution.
Compliance score
The Compliance score shows the overall compliance performance of the business unit over the past seven days. This score is calculated based on the completion and accuracy of compliance tasks and helps managers gauge the unit's adherence to set standards. A lower score indicates areas needing improvement. Within this panel, you can see the percentage of completed tasks for the last 7 days (by default). Select the Previous 7 days dropdown to view the Compliance score for a different time period.
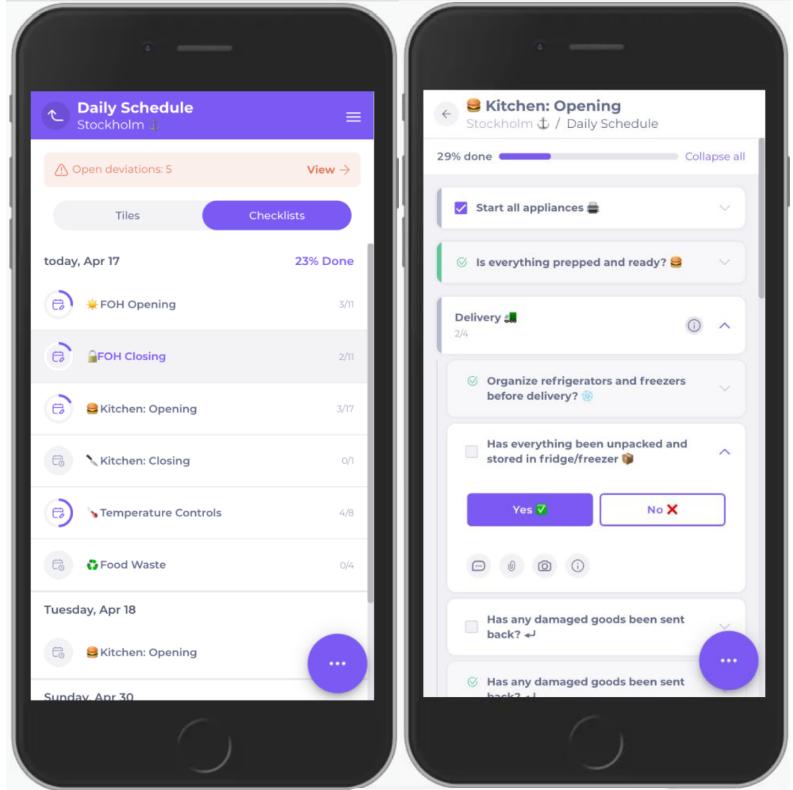
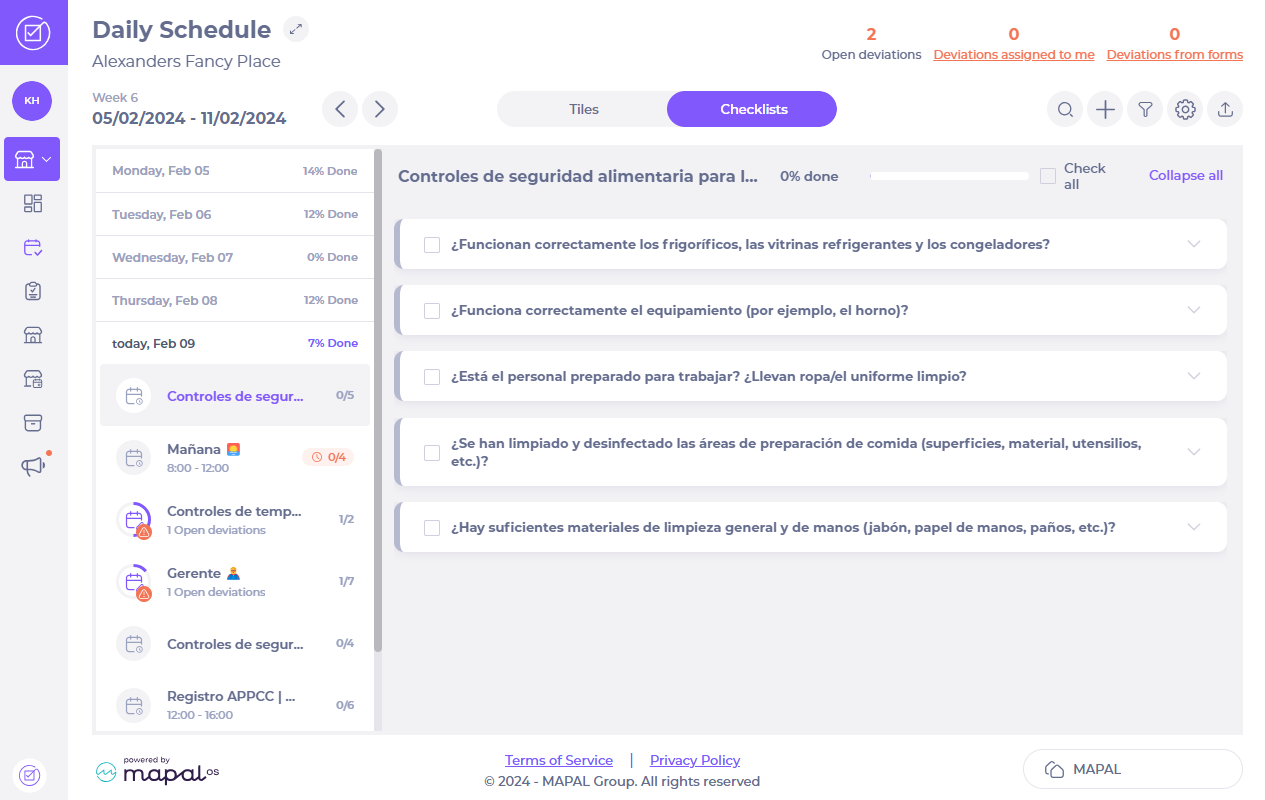
Daily Schedule
The Daily Schedule panel outlines the tasks and activities planned for the day. It includes a progress bar that shows the completion rate of the day’s tasks and highlights any that have deviations. Managers can use this section to ensure all scheduled tasks are completed, and address any compliance issues as they arise.
Forms
The Forms section lists all forms currently in progress or with open deviations. Managers can review and manage these forms, ensuring all necessary actions are taken to maintain compliance. Expanding a form entry will show more details and actions that can be performed.
Updates
The Updates area is divided into two tabs: Communications and Procedures. The Communications tab shows important messages and announcements that require acknowledgment, while the Procedures tab provides access to procedural documents relevant to the local unit. Managers can review and acknowledge updates to ensure they are up-to-date with the latest information and protocols.
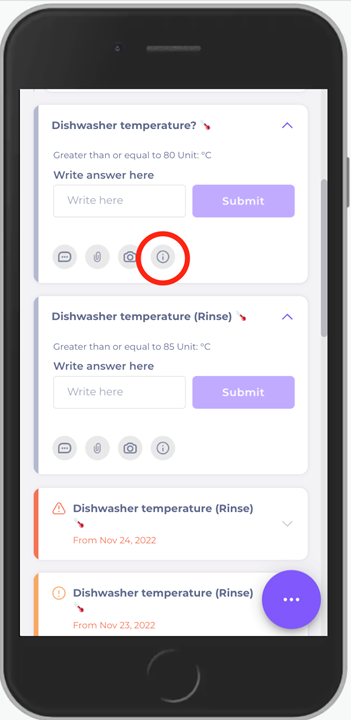
Manage, edit, delete tasks (app)
Start from: The Daily Schedule.
Add a task
Select a specific task.
Select the information "i" icon.
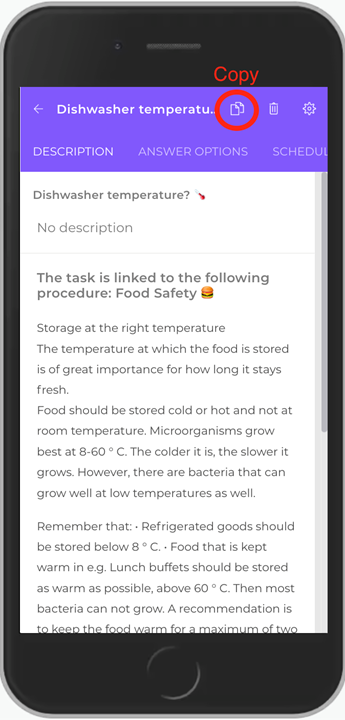
Select Copy (two paper sheets icon).
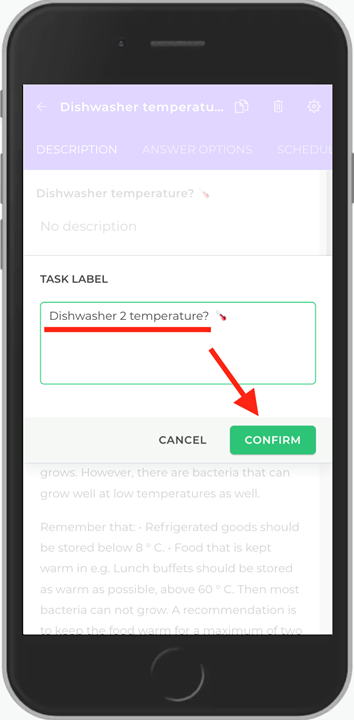
Enter the name of your new task.
Select Confirm.
Note: when you add or "create" a new task by duplicating an existing task and re-naming it, please make sure that the settings of the task that is being copied agrees with the new task you are creating (ex. temperature and scheduling). You cannot create a new task from scratch.
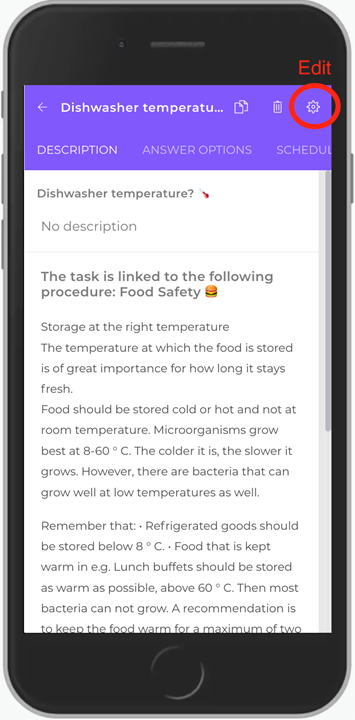
Edit a task
Select a specific task.
Select the information "i" icon.
Select the gear icon to edit settings.
Re-name the task.
Click anywhere on the screen so that a yellow field appears.
Select Save.
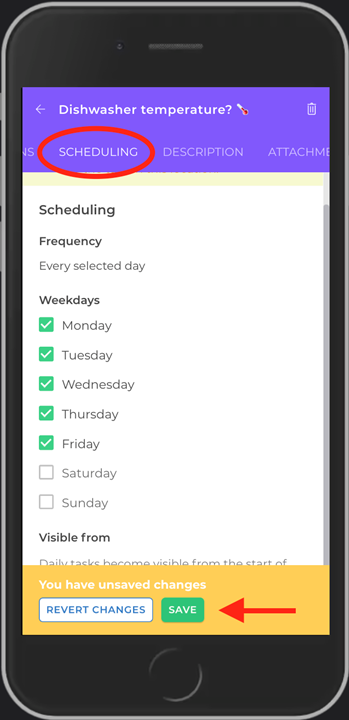
Change scheduling
Select a specific task.
Select the information "i" icon.
Select the gear icon to edit settings.
Select the Scheduling tab.
Set the days you want the task to take place.
Click anywhere on the screen so that a yellow field appears.
Select Save.
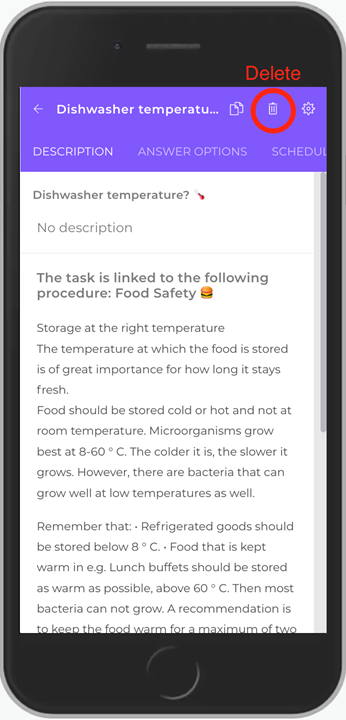
Delete a task
Select a specific task.
Select the information "i" icon.
Select the gear icon to edit settings.
Select the trash bin icon to delete the task.
The question Are you sure you want to delete this task? appears.
Select Yes.
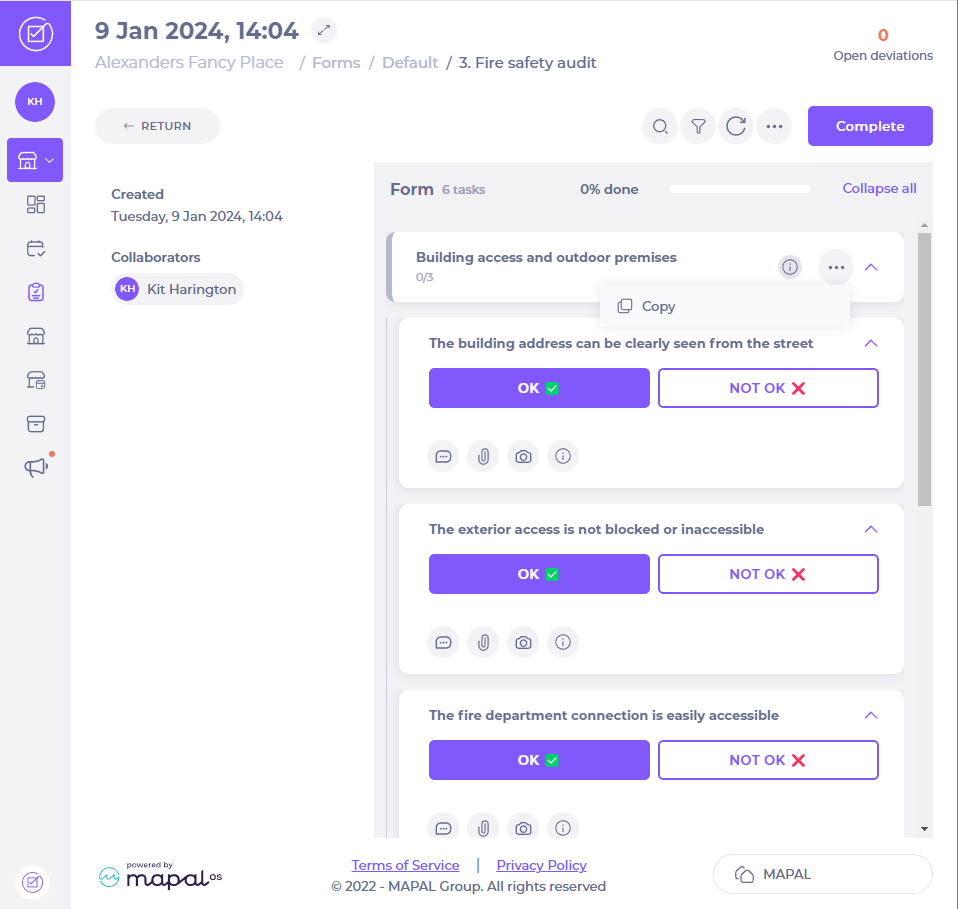
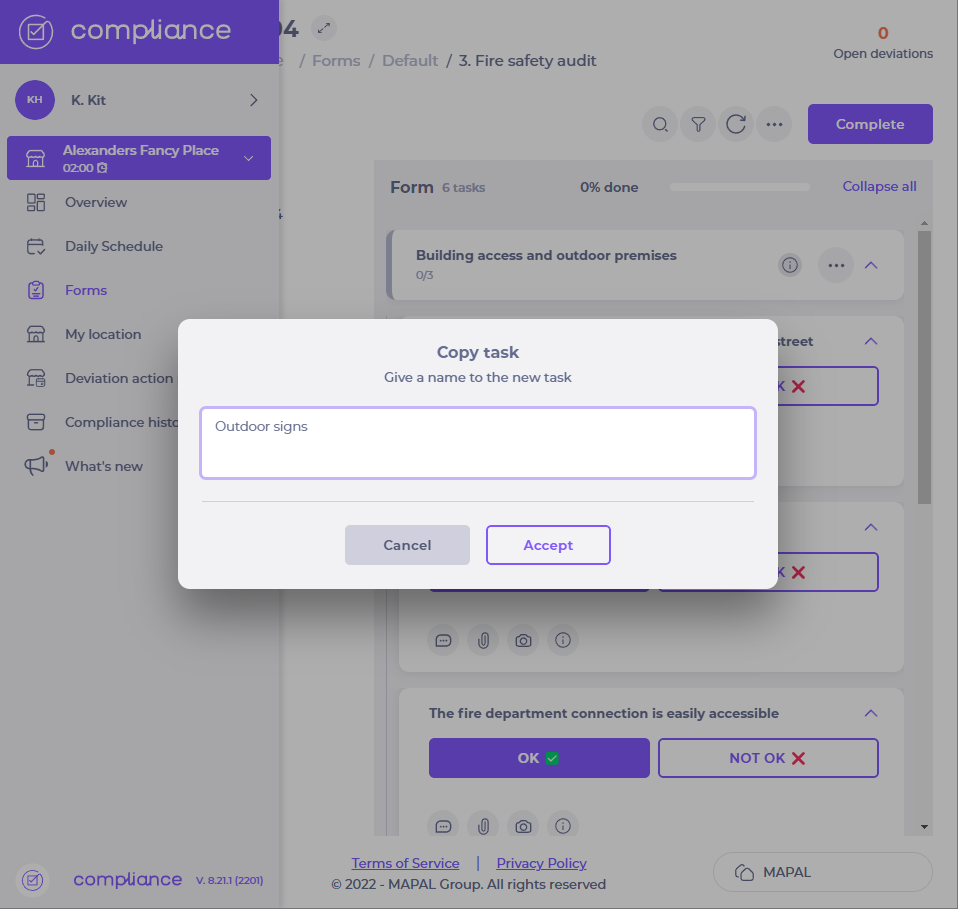
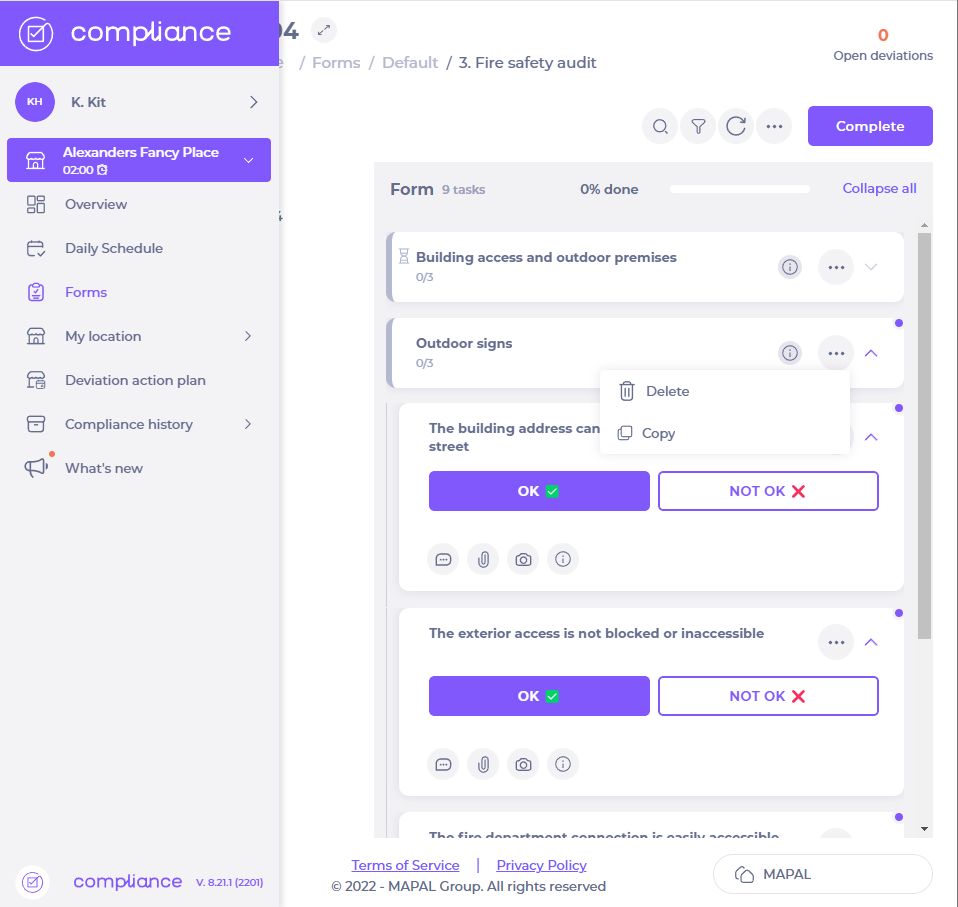
Copy a task in a form
Select + START NEW.
Select More (the three dots icon) next to the parent task you wish to copy.
Select Copy.
Enter a name for the new copied task and select Accept.
You can now copy or delete the new task by selecting the three dots icon next to it.
Filter to see assigned deviations
Start from: The Daily Schedule
Web view
Assigned deviations from the Daily Schedule
Select Deviations assigned to me.
Assigned deviations from the Overview page
Select
You should see the deviations assigned to you at the top of the page.
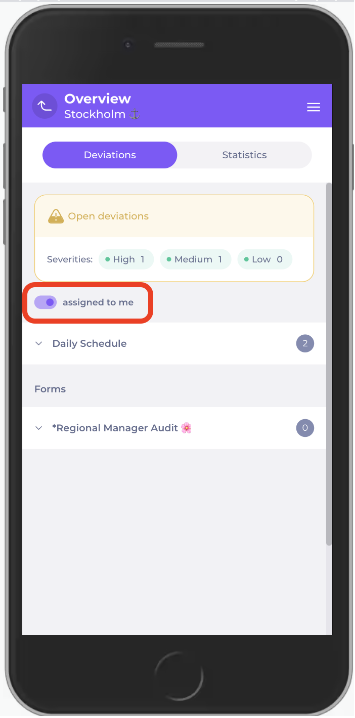
Assigned deviations from the Overview page
Select Overview:from the hamburger menu at the top of the page.
Toggle on assigned to me in the Deviations tab.
Hide completed checklists
Start from: The Daily Schedule.
Select the filter icon.
Activate the "Hide completed checklists" toggle switch.
Now you will only be able to see the checklists with tasks left to do: