Note: Downcooling forms must be specifically created for that purpose. For more information, see Create a downcooling form.
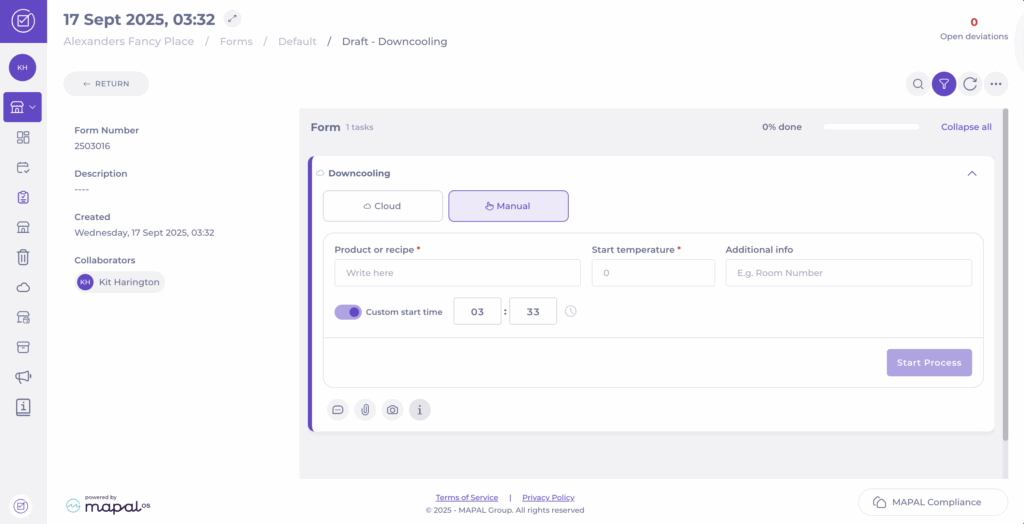
Select + Start new to record data.
In the form, select the Manual button.
Enter the Product or recipe name.
Set the Start temperature.
Record any Additional info.
Toggle Custom start time to set a specific start time for the downcooling process.
Press Start Process. The system will calculate the remaining time based on the rules.
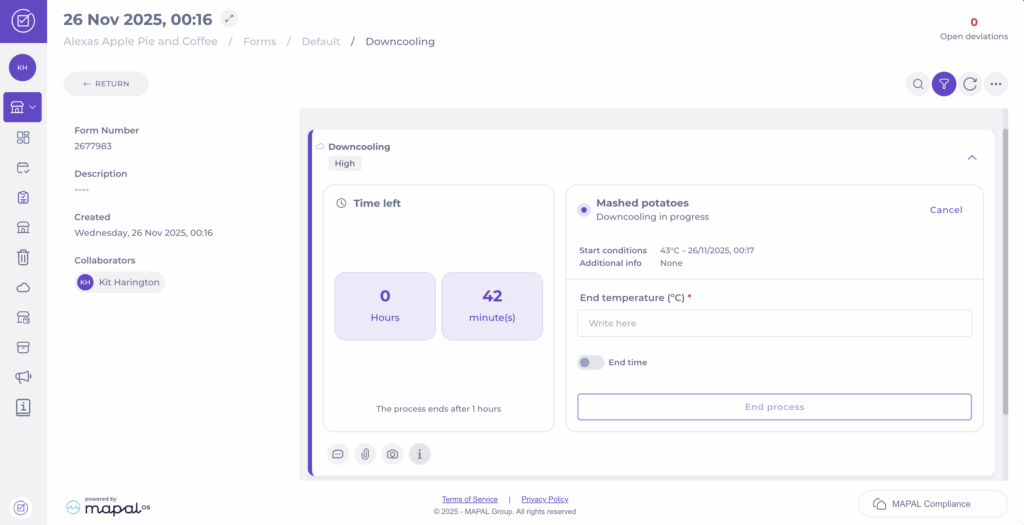
The task will now show the Downcooling in progress, displaying:
Time left
Start conditions
Additional info entered
When the countdown finishes (or earlier if needed), record the End temperature.
Select End process and confirm to complete the task.
Note: You can optionally toggle End time to enter the specific time when the process finished. If you leave this off, the system will use the current time as the end time.
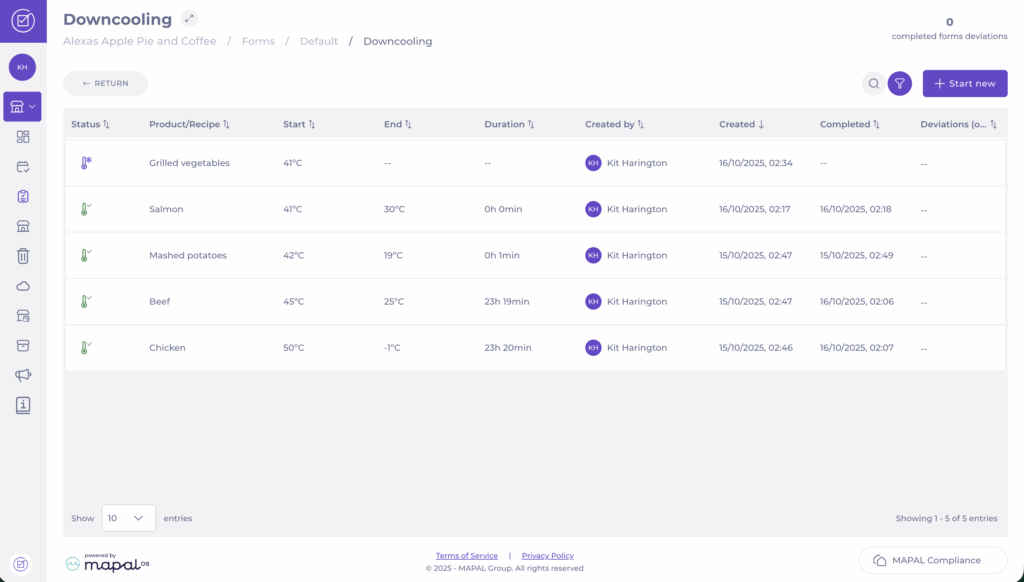
View recorded downcooling data
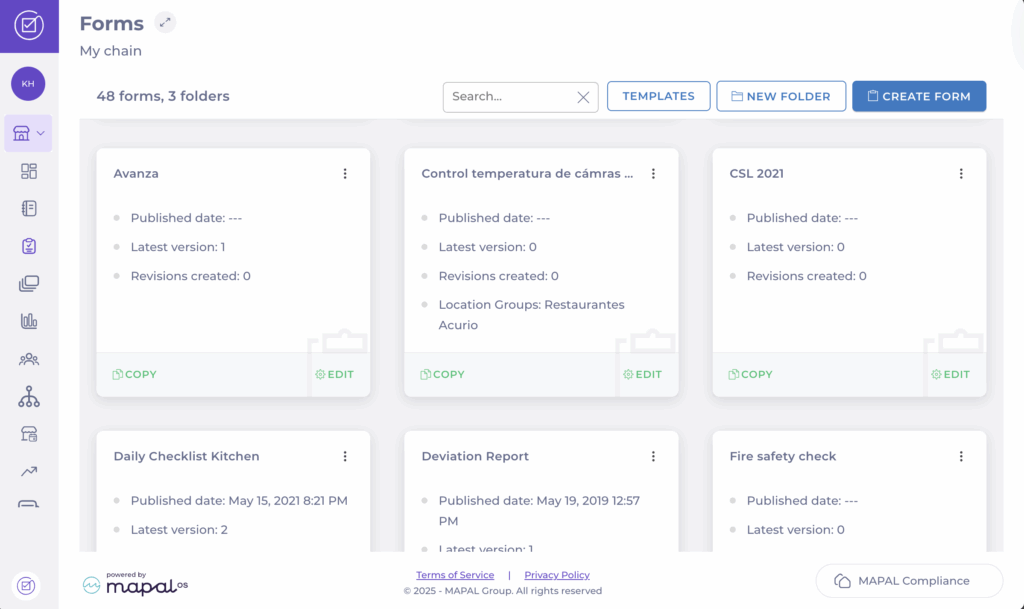
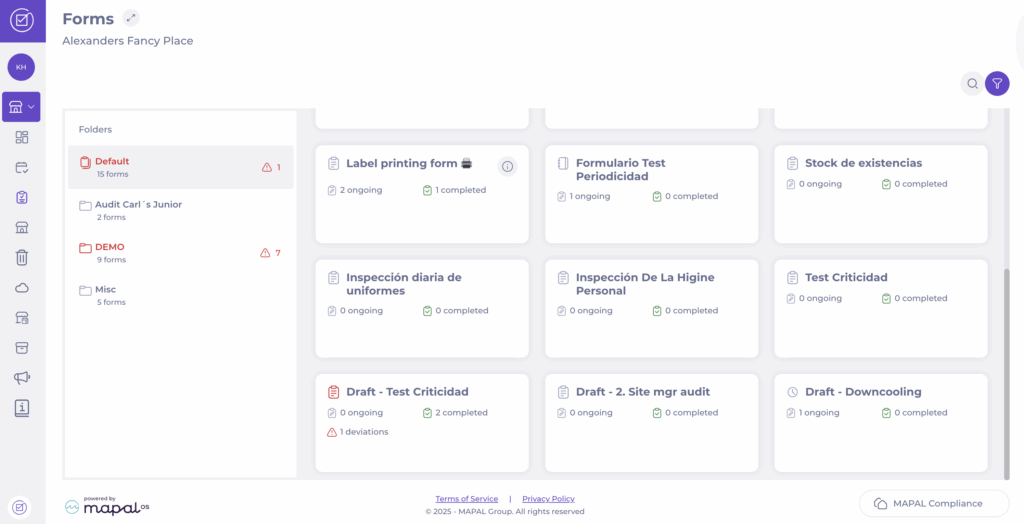
After saving, the process appears in the Downcooling grid for that form. To access it:
Navigate to Forms > [Specific downcooling form]
Here, you can view all recorded downcooling tasks, including:
Status (In progress / Completed)
Product/Recipe name
Start and End temperatures
Duration
Created by / Completed by
Dateof creation and completion
Deviations (Open / Total)
This dashboard view gives managers a quick summary of all completed or ongoing downcooling processes and highlights any items linked to deviations.
Note: If a downcooling task raises a deviation, it will appear in your Compliance deviation reports. For instructions on how to review and close these, see Respond to deviation reports.
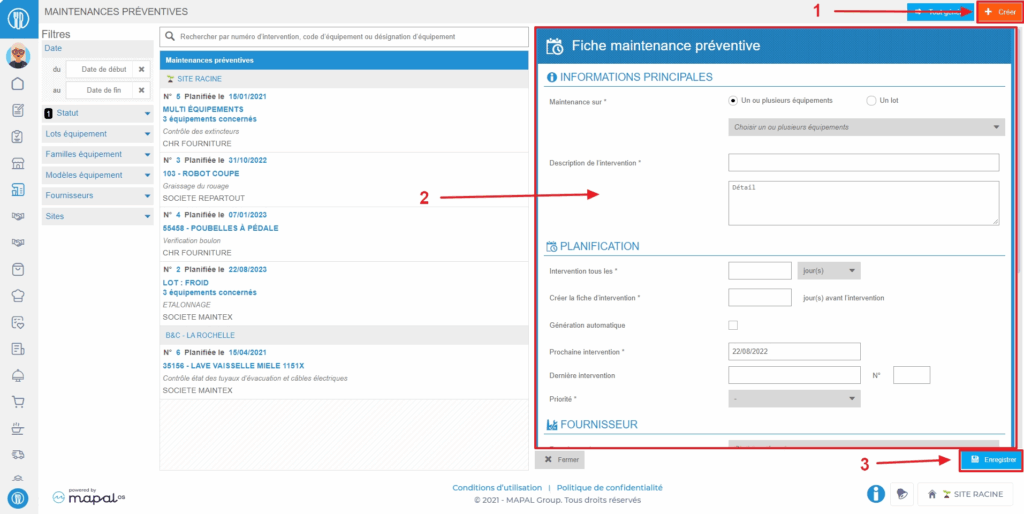
Create a preventive maintenance form
Start from: The Easilys menu.
Select the tabs Equipment > Preventive.
Select Create visible at the top right of the screen.
A blank preventive maintenance form appears on the right side of the screen.
Complete the requested information. Those followed by a * are mandatory to create the form.
Select Save at the bottom of the form.
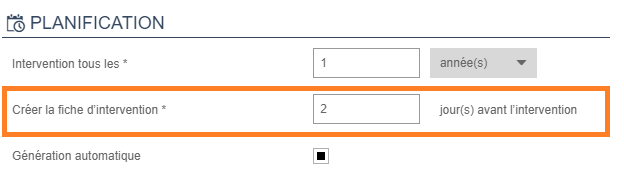
Note: Preventive maintenance forms automatically generate a service request on the date indicated in the form at the line "Create the service form". To generate requests in advance, you can manually generate the requests.
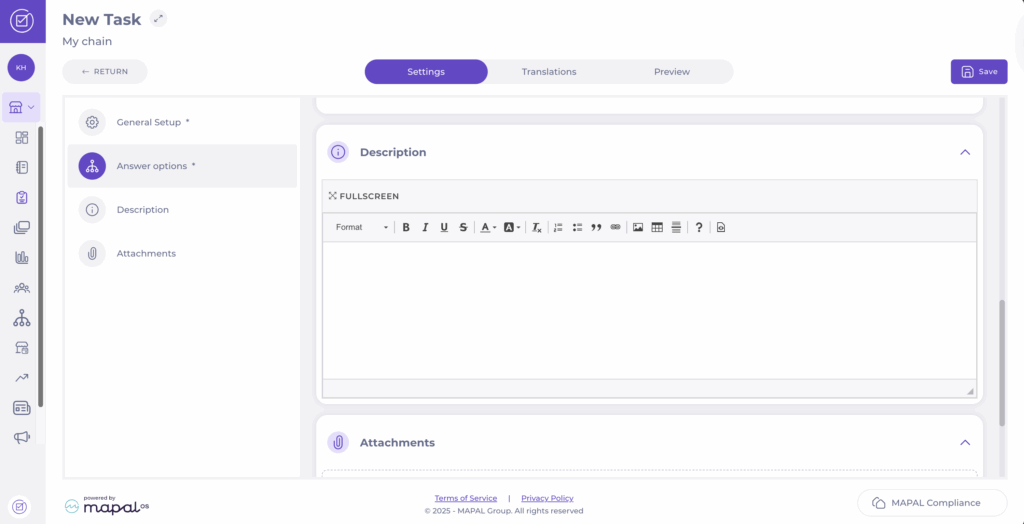
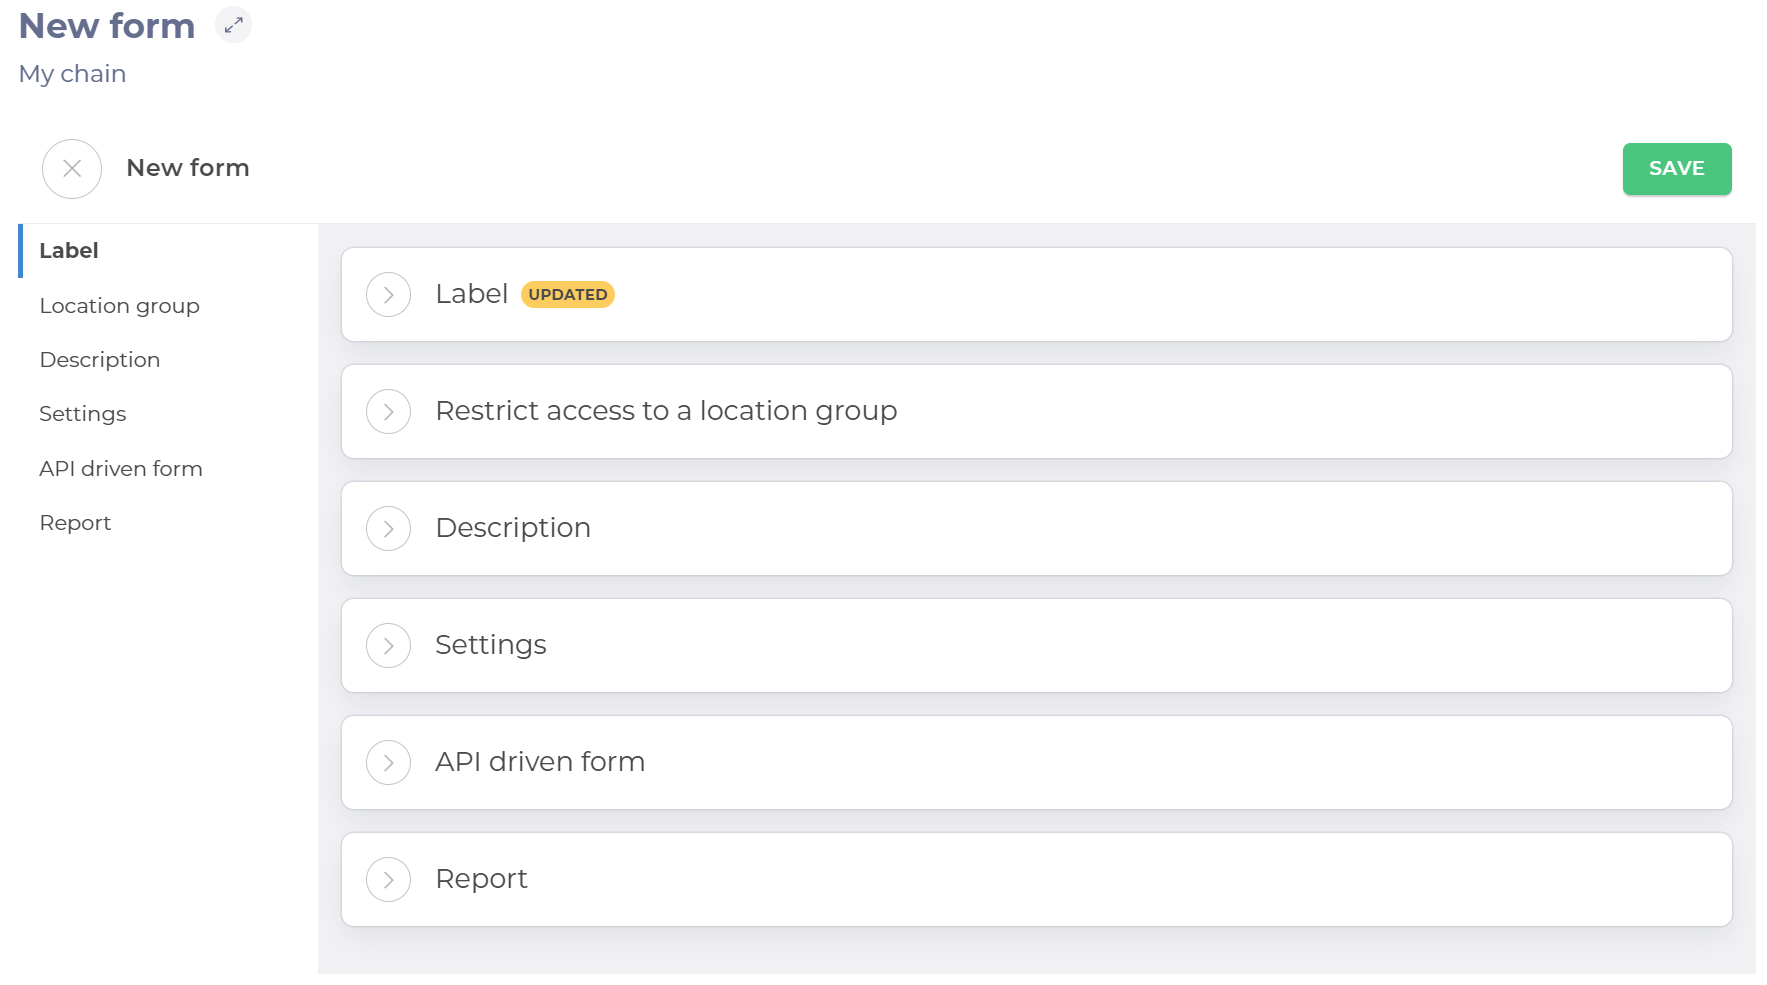
The New form page contains six panels for setting up the form.
Select to open each panel to change the settings and populate the fields.
Note: Use the panel heading links to navigate quickly to that section when you have multiple panels open.
Label
Enter the name of the form.
Restrict access to a location group
Use the dropdown list to select a location group. Access to the form will be restricted to that group only.
Description
Enter a description of your form. If populated, the Description link appears on your form on the dashboard. Selecting this will open the description.
Note: You can add text, tables, images and links using the formatting menu.
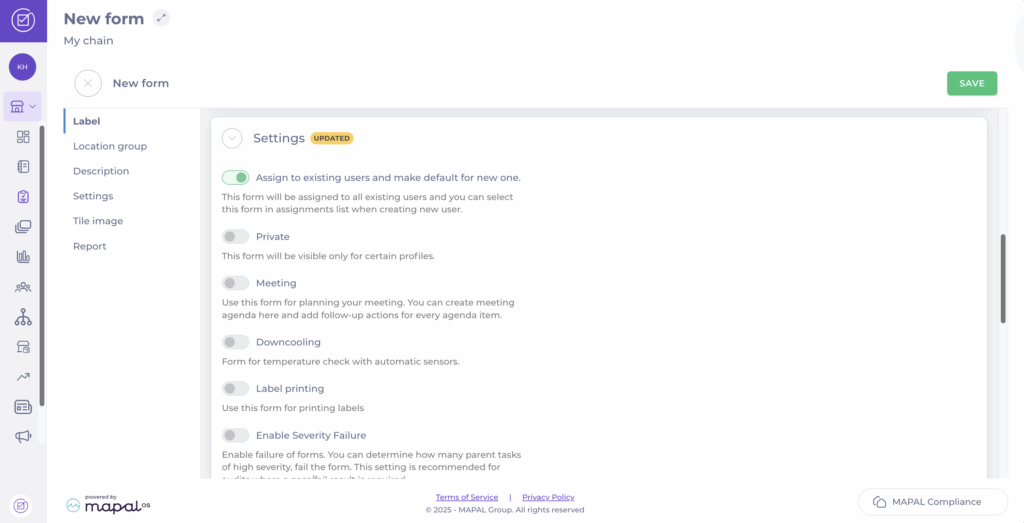
Settings
Toggle the buttons to enable and disable the following options.
Assign to existing users and make default for new ones – When enabled, this option assigns the form to all existing users and allows it to be selected from the assignments list when creating a new user automatically.
Private – When enabled, this option allows you to select the roles that can see the form. When disabled, the form is not visible to any of the roles.
Meeting – When enabled, this option allows you to use this form for planning your meeting. creating a meeting agenda and adding follow-up actions for every agenda item. See Create forms as a meeting agenda to know more.
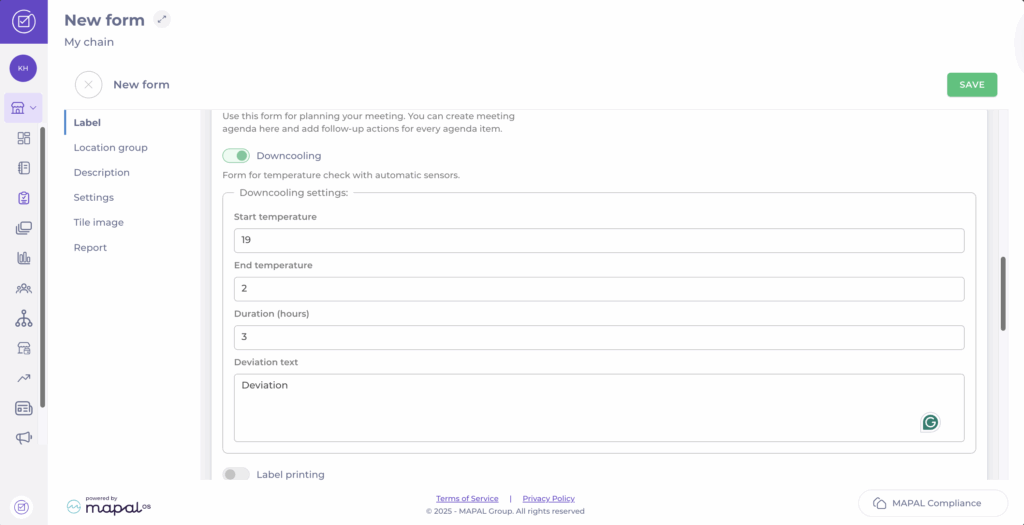
Downcooling – When enabled, this option allows you to use this form specifically for temperature checks with automatic sensors. See Create a downcooling form to know more.
Label printing – When enabled, this option enables you to use the form to print labels from a drop-down list of templates.
Revision Handling settings
Forbid re-open – When enabled, this option stops the completed forms from being amended. Users will only be able to complete the form once. When disabled, the form can be amended as required.
Limited access – When enabled, this option shows a checklist of roles. Tick the roles to allow those roles to create new revisions, reopen completed ones and handle deviations from completed revisions. When disabled, all roles can view the revisions and open deviation, but do not have the permissions to action them.
Check to select which roles have permission to revise the form, re-open completed ones and handle deviations (an answer that is outside of the parameters of what's expected).
Report
Add the email address of anyone requiring notification of when a form is completed.
Select Add to add the address to the list of people to be notified. You can add as many addresses as required.
Select the trash icon next to an entry in the list to remove that address.
Saving the Form
Select Save from the top of the page to save your form and jump automatically to the Task screen.
Note: If you navigate away from the page before saving, your settings will be lost. You will not be prompted to save before closing.
The new form will now be accessible to specific roles in a particular area. Until it is published, only the user who has created the form can view or use it.
Introduction to Appraisal Forms
What are Appraisals?
Appraisals in Flow Learning are customisable evaluation forms designed to measure and track the performance of learners. These forms can include tailored questions, action plans, or goals, enabling you to focus on specific areas of improvement and achievement. Appraisals can be enhanced with multimedia elements like images and videos, making them more engaging and personalised for each learner.
Key Features and Benefits of Appraisals
Customisable Content: Appraisals can be tailored to address specific training objectives, allowing you to create focused evaluations that reflect the unique needs of your learners and organisation.
Action Plans / Goals Setting: Including action plans or goals within appraisals ensures that learners have clear, actionable steps to achieve their objectives, supporting continuous growth and development.
Engaging Multimedia: Adding images, videos, and other multimedia elements to appraisals can make the evaluation process more engaging and personalised, helping learners connect more deeply with the feedback.
Flexible Sign-Off Process: Customisable sign-off settings allow you to control when learners and reviewers can see each other’s responses, ensuring that the evaluation process is transparent and aligned with your organisation’s policies.
Performance Tracking: Appraisals offer a structured approach to tracking learner performance over time, providing you with insights into their progress and areas for improvement.
Why Use Appraisals?
Using Appraisals in Flow Learning enables you to conduct thorough and focused performance evaluations. By providing structured feedback and setting clear goals, you can help your learners improve their skills and achieve their career objectives. The flexibility and customisation options within Appraisals ensure that your evaluations are aligned with your company’s training strategy, leading to more effective learning outcomes.
Next Steps
To maximise the effectiveness of appraisal forms in Flow Learning, explore some of the recommended articles below.
Understand all parameters of the supplier form
Notes: actions performed on the Easilys platform are subject to user access permissions. If you are unable to carry out the actions described in the articles, it may be because you do not have the necessary permissions activated on your user profile. Contact the Support team, or your administrator, for help.
During the creation of your new supplier record, you will be prompted to fill out a supplier form. Here, you will find the following field groups used to configure how the supplier will operate:
GENERAL INFORMATION
Name: Supplier name
Internal Code: Internal reference code
Client Reference: Local site's reference at the supplier
Company registration no.: Supplier's SIRET number
VAT Number: Intra-community VAT number
Health Stamp: Sanitary stamp of the supplier
Referencing period: Validity period for supplier reference, with filters available
Accounting account number: Code used for accounting interface
Comments: Free text, not used by the application
ORDERS
Minimum Order Amount: Defines minimum order value
Prohibit orders below the minimum order amount: Prevents sending orders below threshold
Shipping costs: Set delivery charges
Cancel shipping costs if the order exceeds the minimum order: If checked, shipping is free above minimum order value
Cost Centre for Shipping Fees: Analytical group for allocating shipping costs
Order period: Defines delivery day relative to order day (working days only)
Order deadline: Influences delivery day based on time of order
Authorize a delivery date earlier than the minimum time: Allows overriding minimum lead time
Opening Days: Specify supplier’s operational days
Sending Mode:
Manually
By email (requires setup)
By fax (requires setup)
By EDI (requires setup) Only selected modes are available at time of ordering
Order Form Language: Choose supplier’s preferred language
Display a clickable read confirmations link in the order email: Adds a clickable confirmation link in the order email
Specifications to be printed on purchase orders:Allows custom text on the purchase order
Internal note displayed on the order form screen:Displays a note during order placement
Purchase Type: Used in food cost tracking and receipt filters
Terms of payment: Terms agreed with supplier, used for due date calculation
Payment Method:
Default is auto-filled on new orders/invoices
History retained per transaction
Inherited supplier methods are not editable
Special methods can be added by admin
Use Pre-Orders: Enables pre-order functionality
External process used to validate orders:Launches third-party app on validation (e.g., budget control)
Order Commitment
Define market commitment references per supplier and period
Automatically applied to orders within the period
Cannot be edited on the order
Child sites inherit parent site commitments
Depot suppliers do not inherit group commitments
Adds a mandatory or optional free-text field at checkout
Displays on the order
DELIVERIES
Delivery Days: Define valid delivery days
Activate by Production Day: Forces delivery scheduling per production day
Minimum time between delivery and production: Working days only
Time Between Delivery and Consumption: Not defined
The status of a reception is 'Pending' whereas the EDI delivery note has not been received: Applies to EDI orders
Receipts are validated automatically, regardless of how the purchase order is sent: Triggers automatic invoice generation (requires setup)
Receipts and credit notes are valued on the basis of the price list in force on the date of delivery: Applies current rate card price at delivery date
INVOICES
The delivery note is also the supplier invoice: Generates invoice and accrual upon receipt validation
CLAIMS
Automatically create Claims: Triggered if received quantity or price differs from order
Enable the Claims Workflow: Triggers validation process if active
Mandatory Validation: Applies to claims marked “Requires Validation (workflow)”
Send automatically by Email: Sends claims to supplier upon receipt (requires setup)
Send automatically by Fax: Sends claims by fax upon receipt (requires setup)
CREDITS
Send automatically by Email: Sends credit requests by email upon receipt (requires setup)
Send automatically by Fax: Sends credit requests by fax upon receipt (requires setup)
CONTACT INFORMATION
Phone/Fax/Email:
Multiple entries with labels
Use cases include: All emails, Purchase Orders, Credit Requests, Claims, Tenders
Multiple emails separated by semicolons (no spaces) send to all recipients
ADDRESS
Includes: Address, Postal Code, City, Country, Website
Display in Supplier Directory: If checked, appears in supplier list screen
SPECIFICS
Supplier Type: Used in filters and supplier directory
Universes: Categorises suppliers by domain for filtering
Product Family: Links product categories for filtering
Descriptions: Associates product certifications or tags
Once you have completed the configuration, select Save at the bottom of the form to validate the creation.
Notes: Only the Name element is required to create your supplier. You will then be able to modify your form to complete it with the requested information. However, we recommend that you complete at least:
Select the specific checklist where you want to publish the task.
Select + Create task in '[name of the checklist]'.
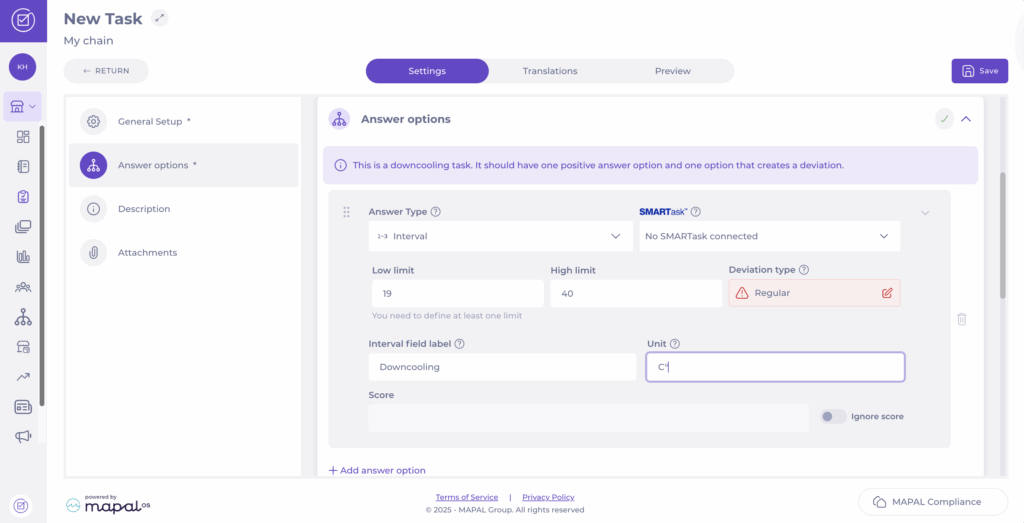
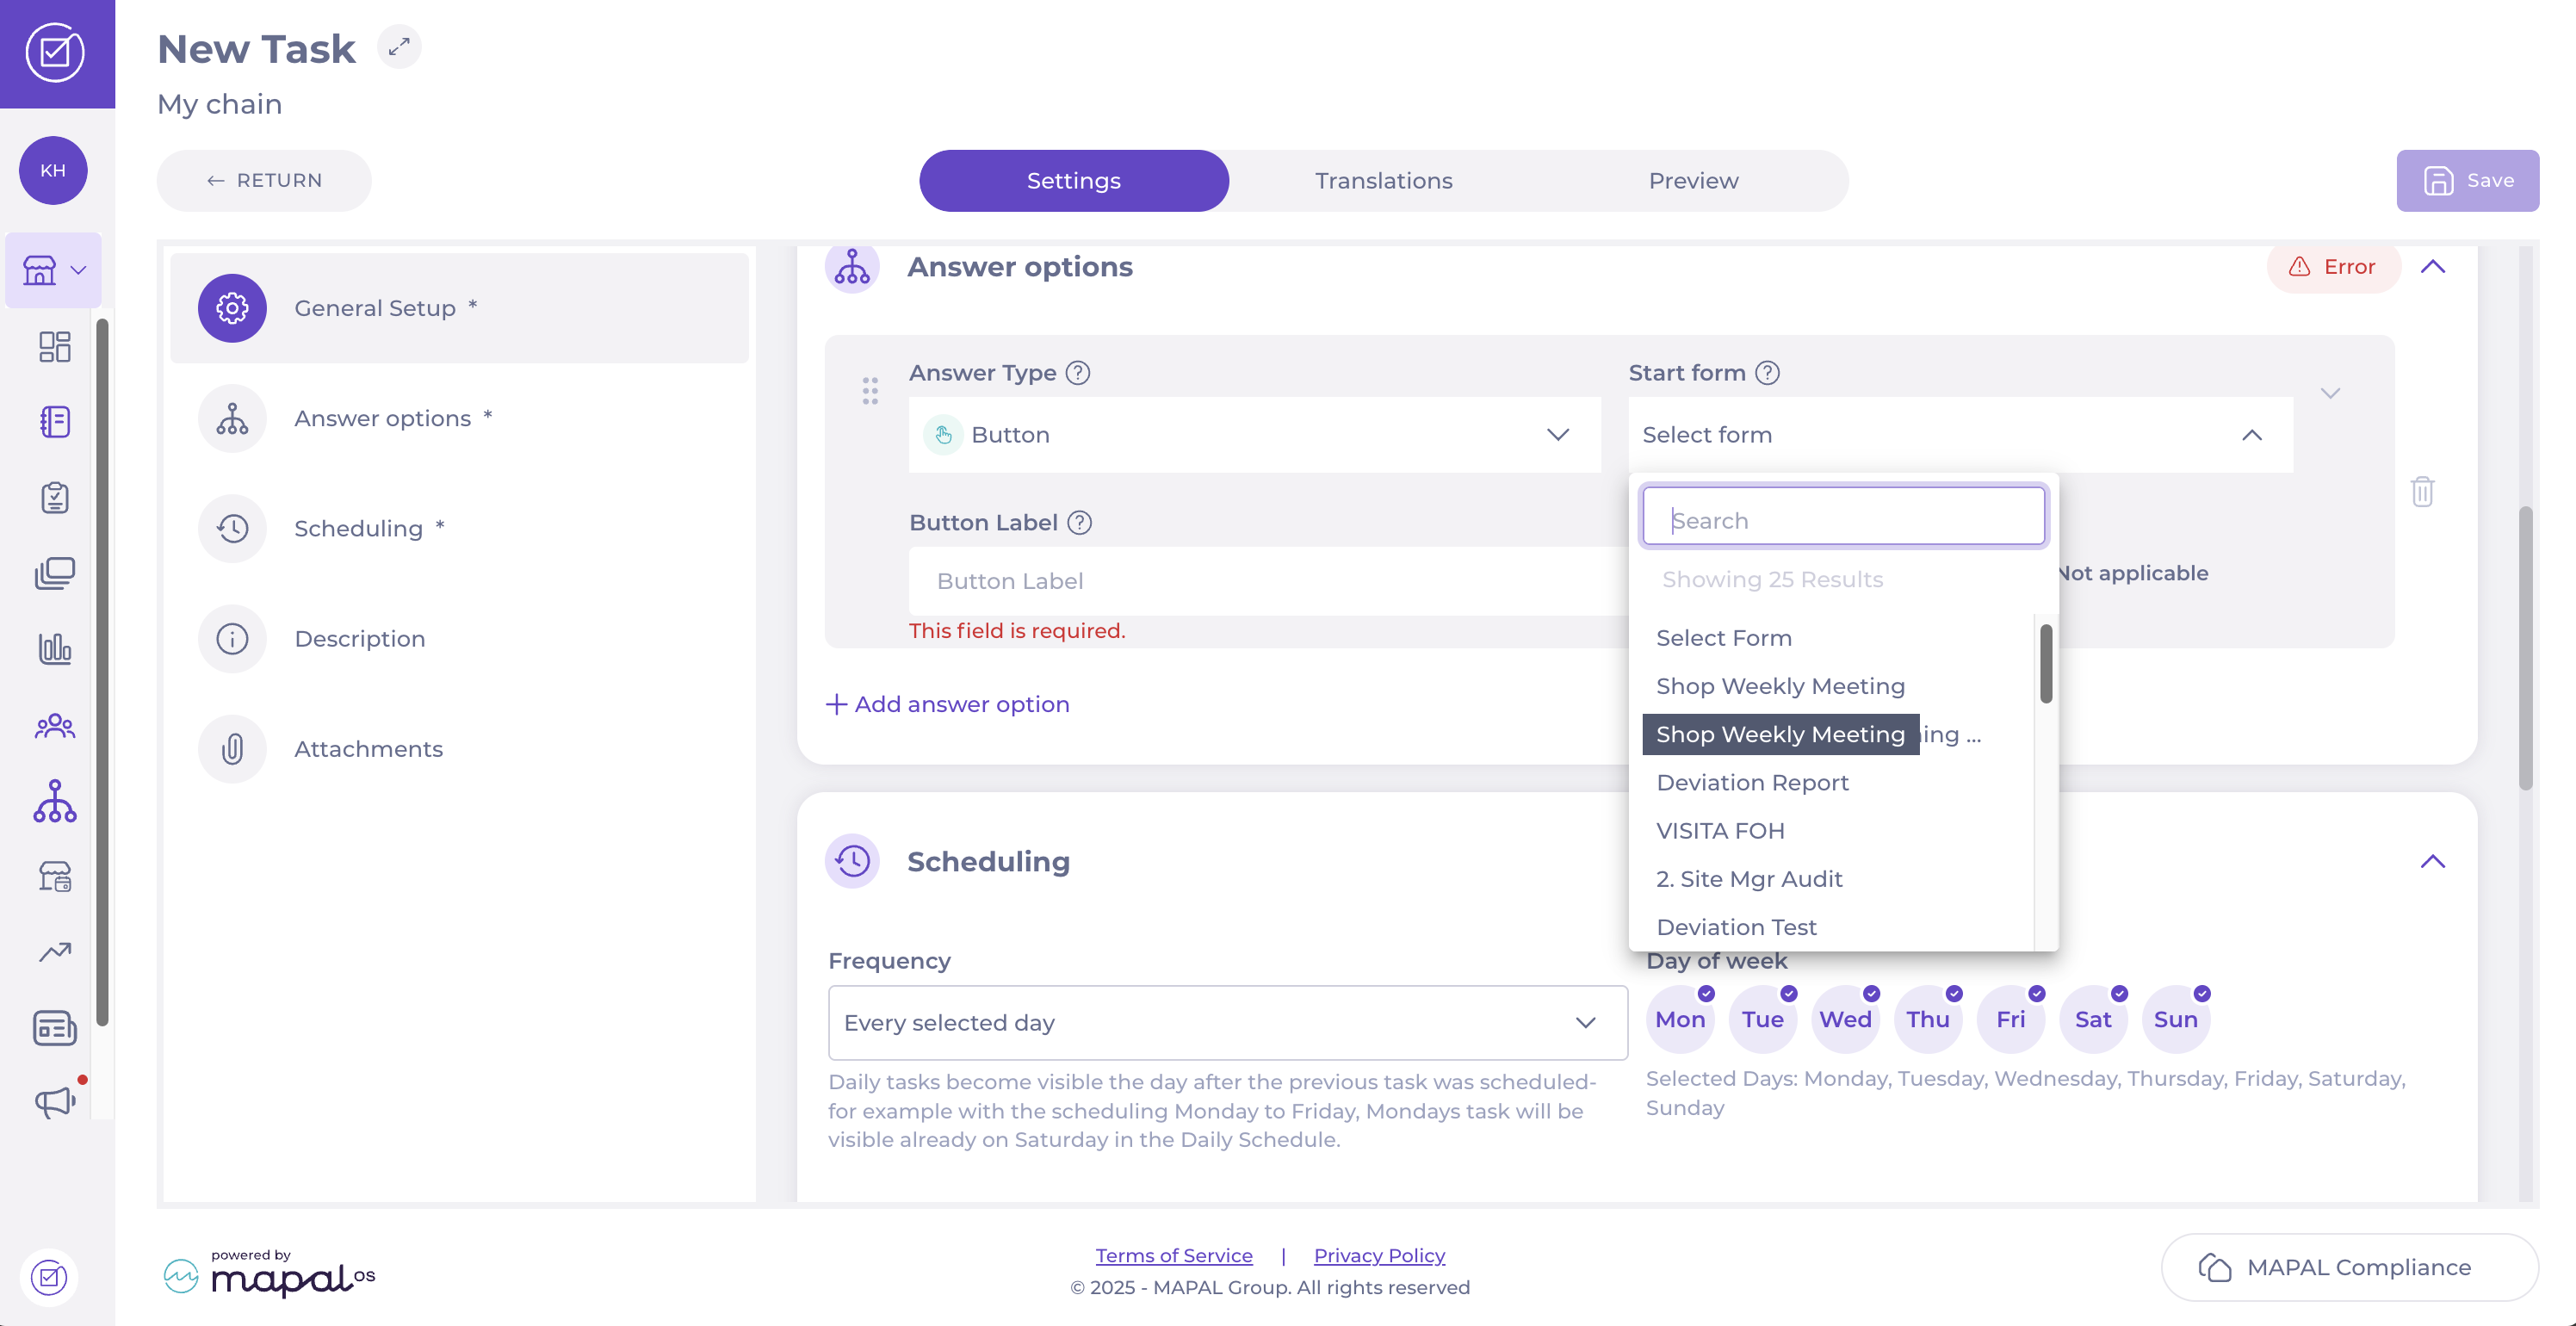
In the New Task screen, complete the General Setup.
Scroll down to Answer options and set the Answer Type to Button.
Select the relevant form from the Start form dropdown list. This action will link the task to the chosen form and create a new revision of that form when the answer is triggered.
In the Scheduling step, define the Frequency or choose the Days of the week you want the task and form to appear in the Daily Schedule.
Once you have completed the steps, select Save in the top right-hand corner to finalise and activate the task.
Assign modules and forms to specific location groups
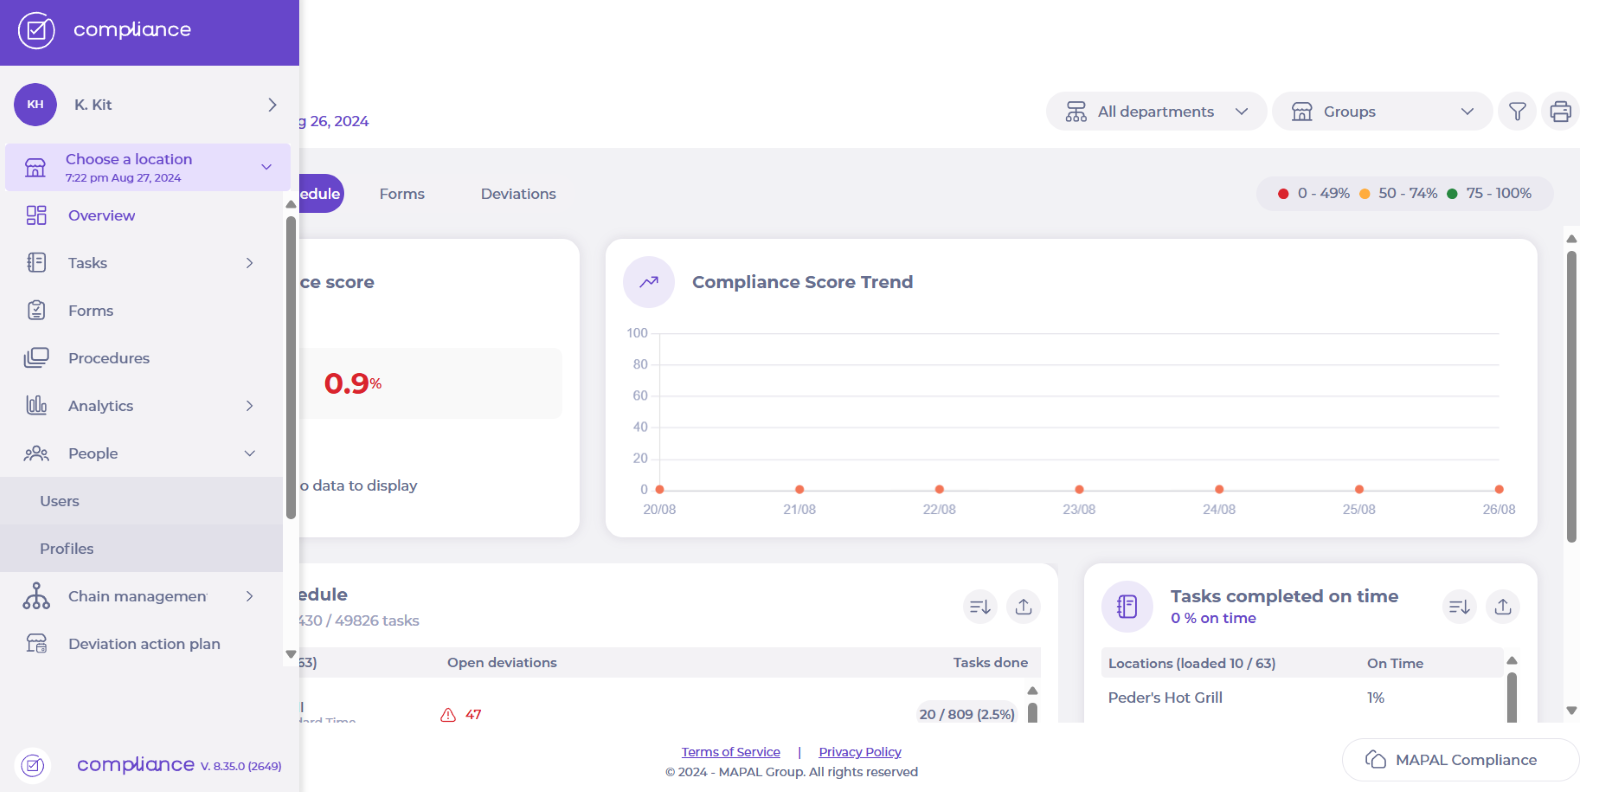
Start from: The Compliance overview.
Navigate to Tasks > Setup.
Select Create new module or locate an existing module.
Fill in the required fields under Settings.
Find the dropdown labelled Restrict access to a location group.
Select the relevant location group from the list.
Once completed the setup, select Save to finalise the assignment.
Deviation types in tasks and forms
Start from: The ‘create task’ or 'edit task' page in an unpublished form.
It is possible to add deviations to your daily tasks and tasks in a form. It is a good way to follow up any issues and problems that may occur at your unit.
Deviations can be generated by Checkbox/button, Interval (number), and Dropdown answer types. See Create a task within a formfor more information.
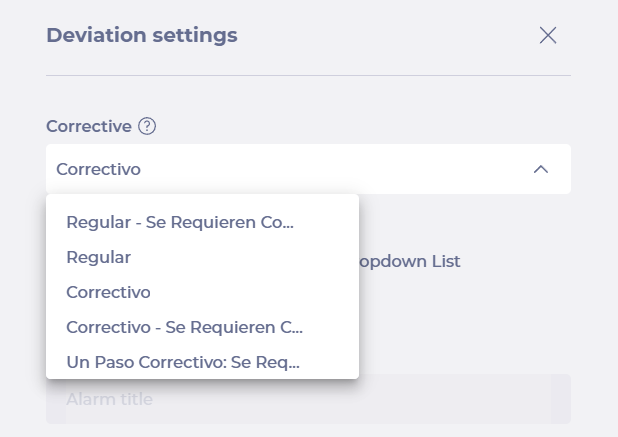
The different deviation types available are:
Regular: A basic deviation flow for a direct action. Comments are optional.
Regular, comments required: A basic deviation flow that requires the user to enter a comment for the action taken.
Corrective: A deviation flow with a direct and corrective action. Comments are optional.
Corrective, comments required: A deviation flow with direct and corrective action that requires the user to enter a comment for the actions taken.
Corrective – one step, comments required: A deviation flow with direct and one-step corrective action that requires the user to enter a comment for the actions taken.
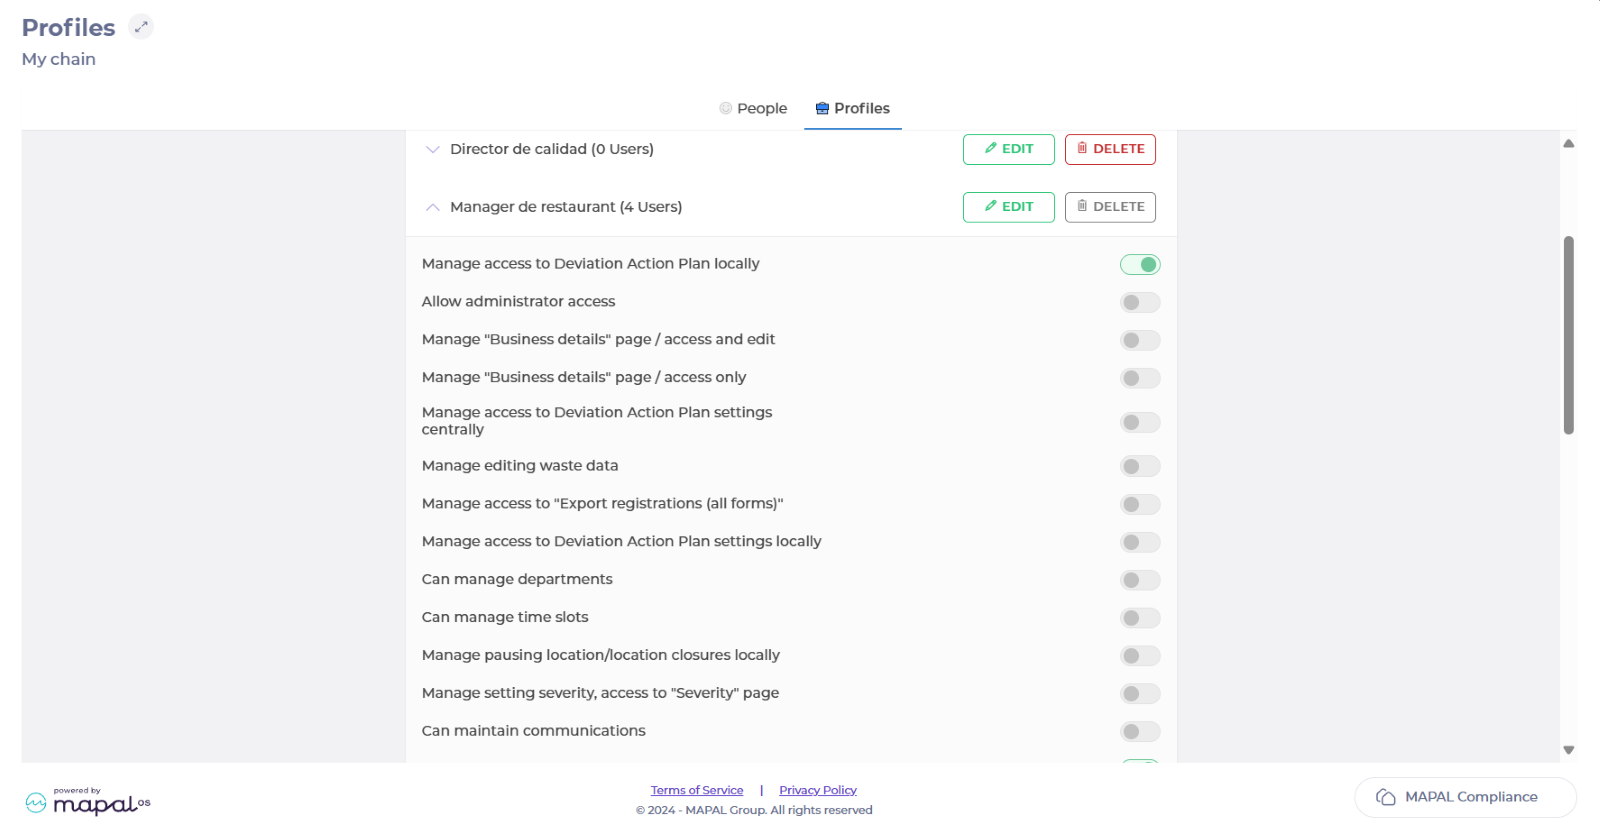
Manage tasks locally ("management mode"), manage actions with location (create, copy, activate/deactivate). Can see and acknowledge procedure updates is available to your tenant.
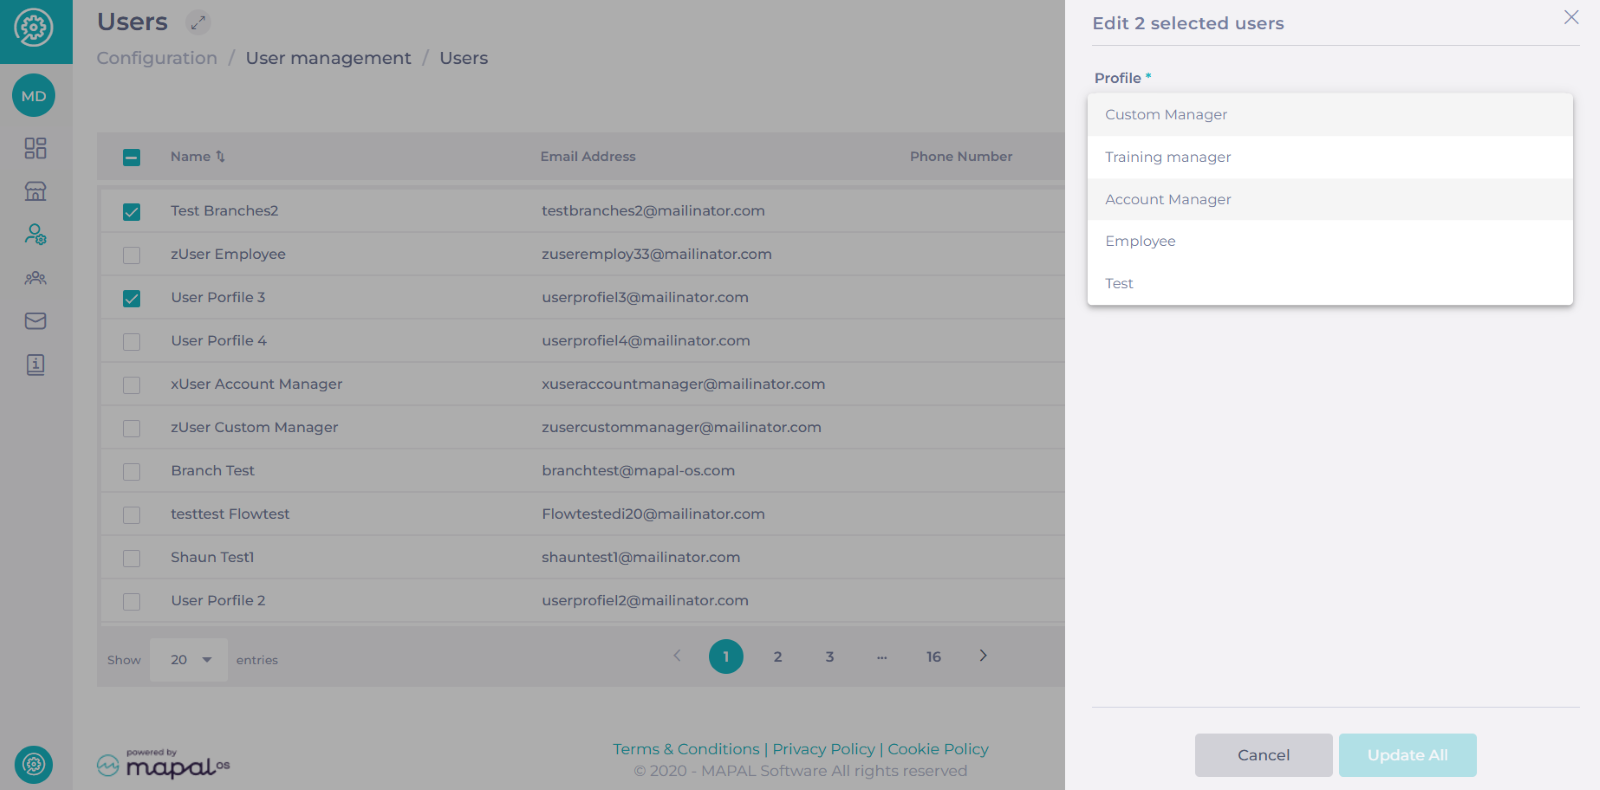
When you are done granting accesses to that profile, you can go back to Mapal OS and assign the profile to the respective user or users.