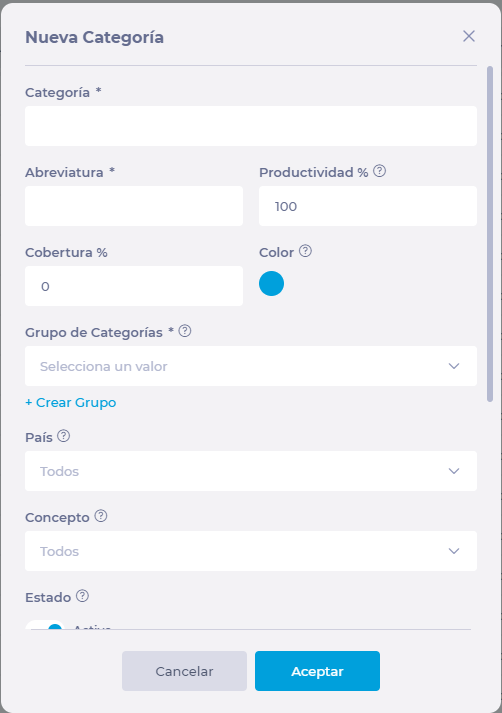
Sets an Abbreviation for the new category. It will be the one you see later when planning a shift or vacation.
Set a Productivity percentage for the labor category you are creating. We understand 100% productivity when the work performance is 100% related to sales. When this performance involves indirect labor, we will mark a lower percentage.
Set a Coverage percentage to determine the level of demand coverage in the shift for each category to achieve better cost control and guarantee the minimum coverage of operational needs.
Select a Colour that represents the job category. You will see this color when planning shifts and vacations.
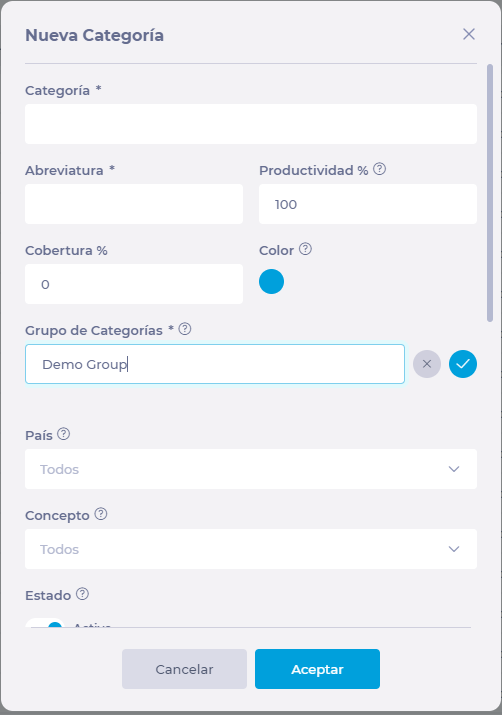
Select a Category Group where you will include the new category. If the group does not exist yet, see Group categories.
Select the Country of the work center for which you want the category to apply.
Select the Brand for which you want to create the category.
Define the Status of the category, indicating whether it is active or not.
Select Accept to create the category OR Cancel to discard the changes.
Group categories
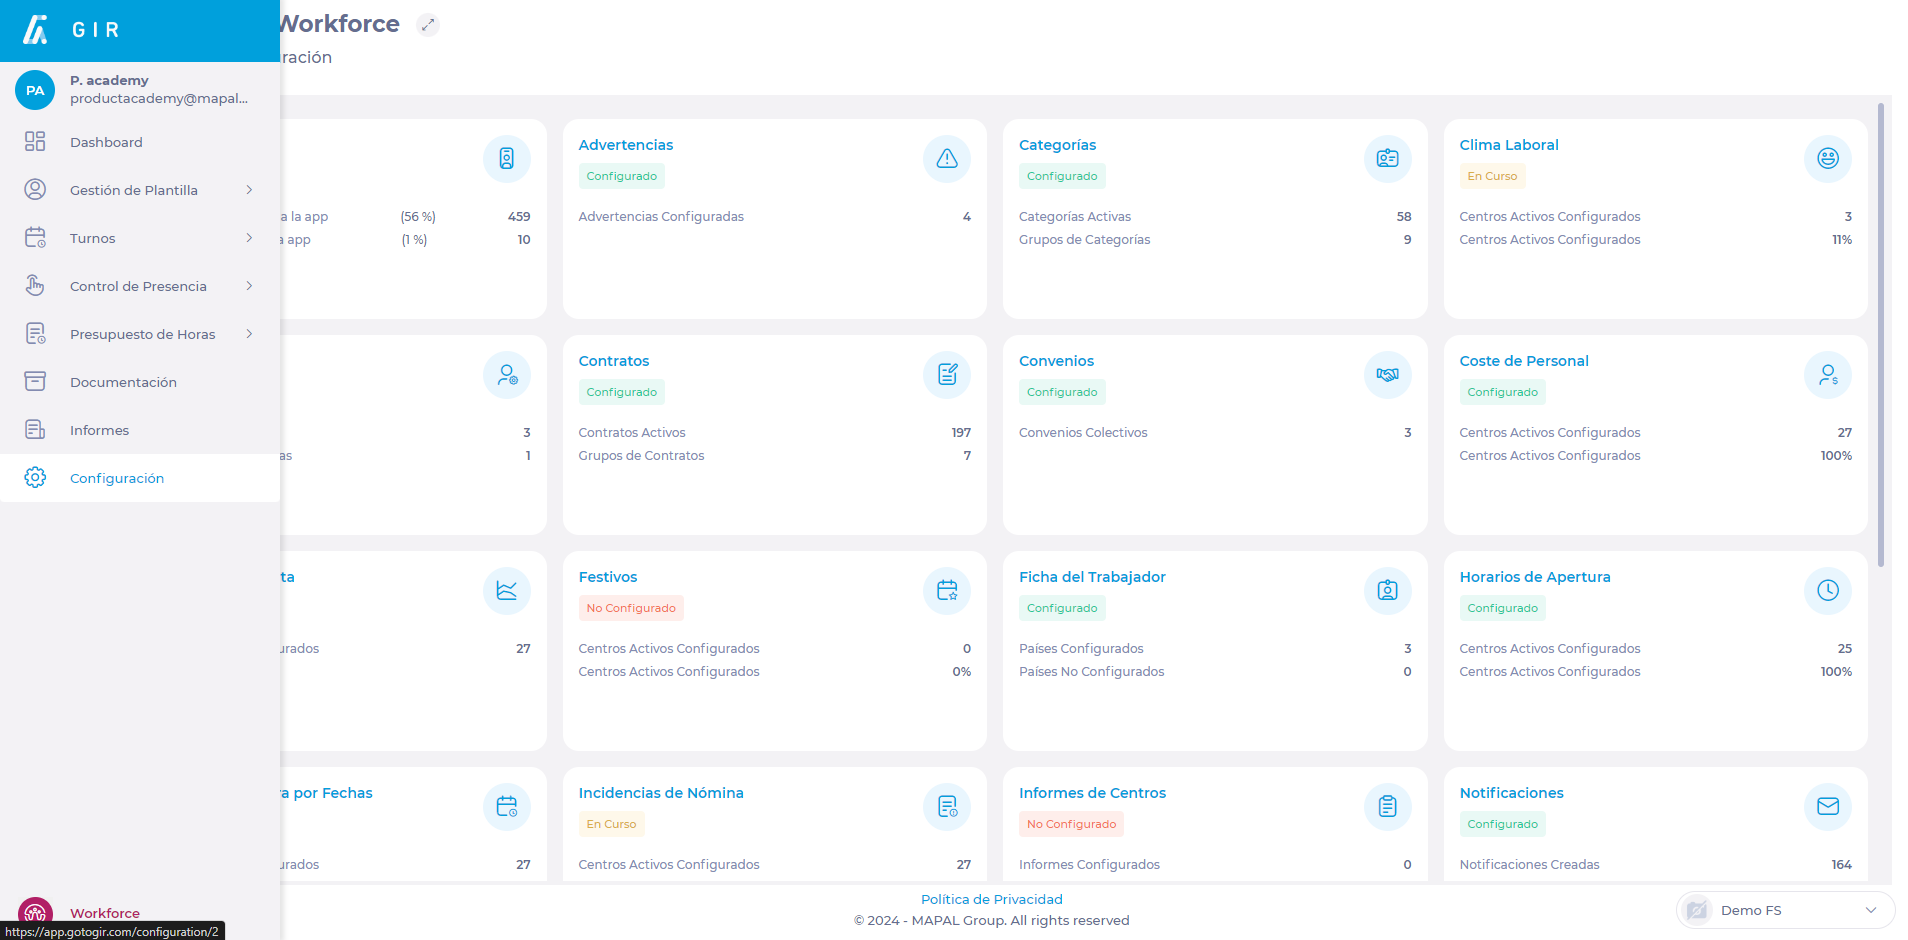
Start from: The Workforce module.
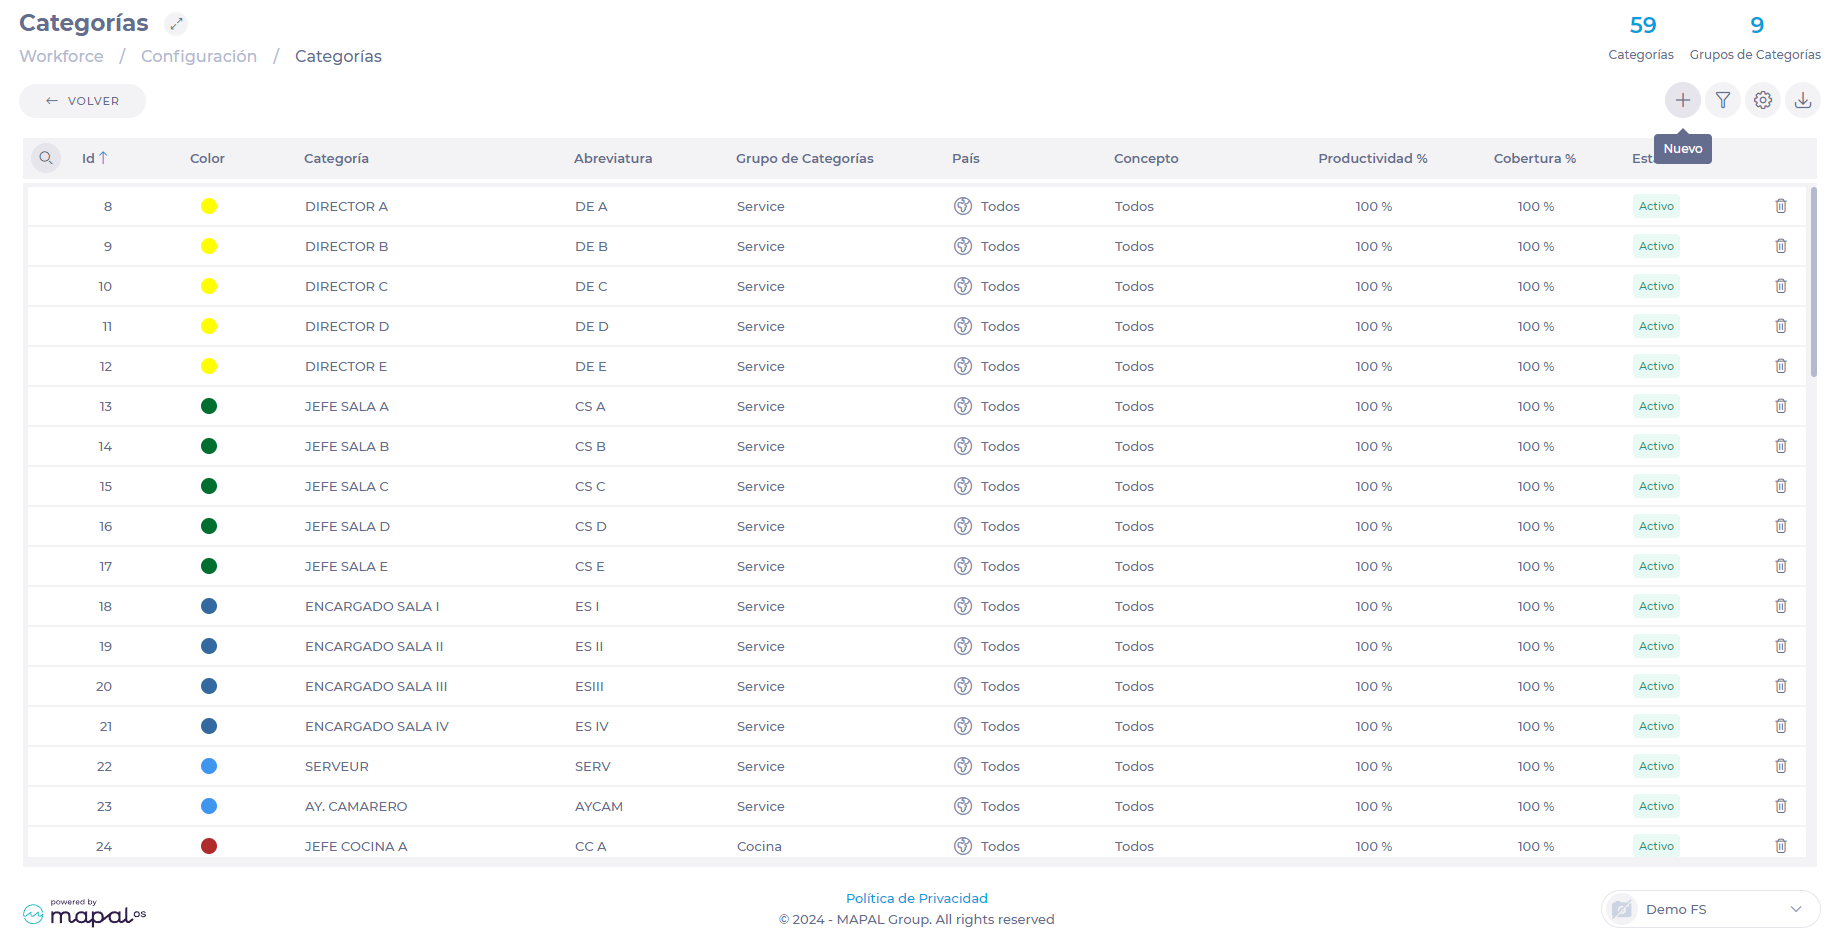
Select Configuration > Categories from the main menu.
Fill in the field with the group name and select the ? button .
Note: It is not necessary to press OK or Cancel to save the new group. These buttons are only activated if you have filled in all the fields to create a new category in addition to the group.
Through the category groups settings
On the Categories screen, select the Category Groups Settings ?button.
Once inside, you have different options:
Fill in the New field and select + to create a new group.
Select the Edit ?button in the group field to edit it.
Select the Delete button in the group field to delete it.
Choose whether you want to assign by Branch OR by Branding. You can also use the multiple filters (Section, Division, Region, Area, Branch, Job Titles or Department).
Select Save.
This will send this noticeboard to all whom have been selected: they will receive an email up to approximately 30 minutes after sent.
Removing / Archiving noticeboard items
Select Communications > Noticeboard.
Select the three dots icon on the Noticeboard item you want to remove/archive.
Select Archive All OR Delete All.
Note: deleting a Noticeboard item is permanent and irreversible. However, you can unarchive an archived one.
To unarchive, select Archive from the dropdown menu. This will show all the Noticeboard items that have been archived:
Select Unarchive all to make them active again.
Note: if you want to remove Noticeboard items from specific branches, you can simply change the Group by dropdown menu from name to branch. This will thus not affect the other branches.
Copy noticeboard items to a selected branch
Visit Company > Company Structure > Branches.
Find the three dots icon on the relevant branch, then Copy noticeboard items.
Select All or choose the Particular items you would like to copy - the list shows the noticeboard items that have not yet been copied/assigned to the chosen branch.
Use the Save button to copy these items to the selected branch.
Edit the order of collections
Start from: The Flow Learning dashboard.
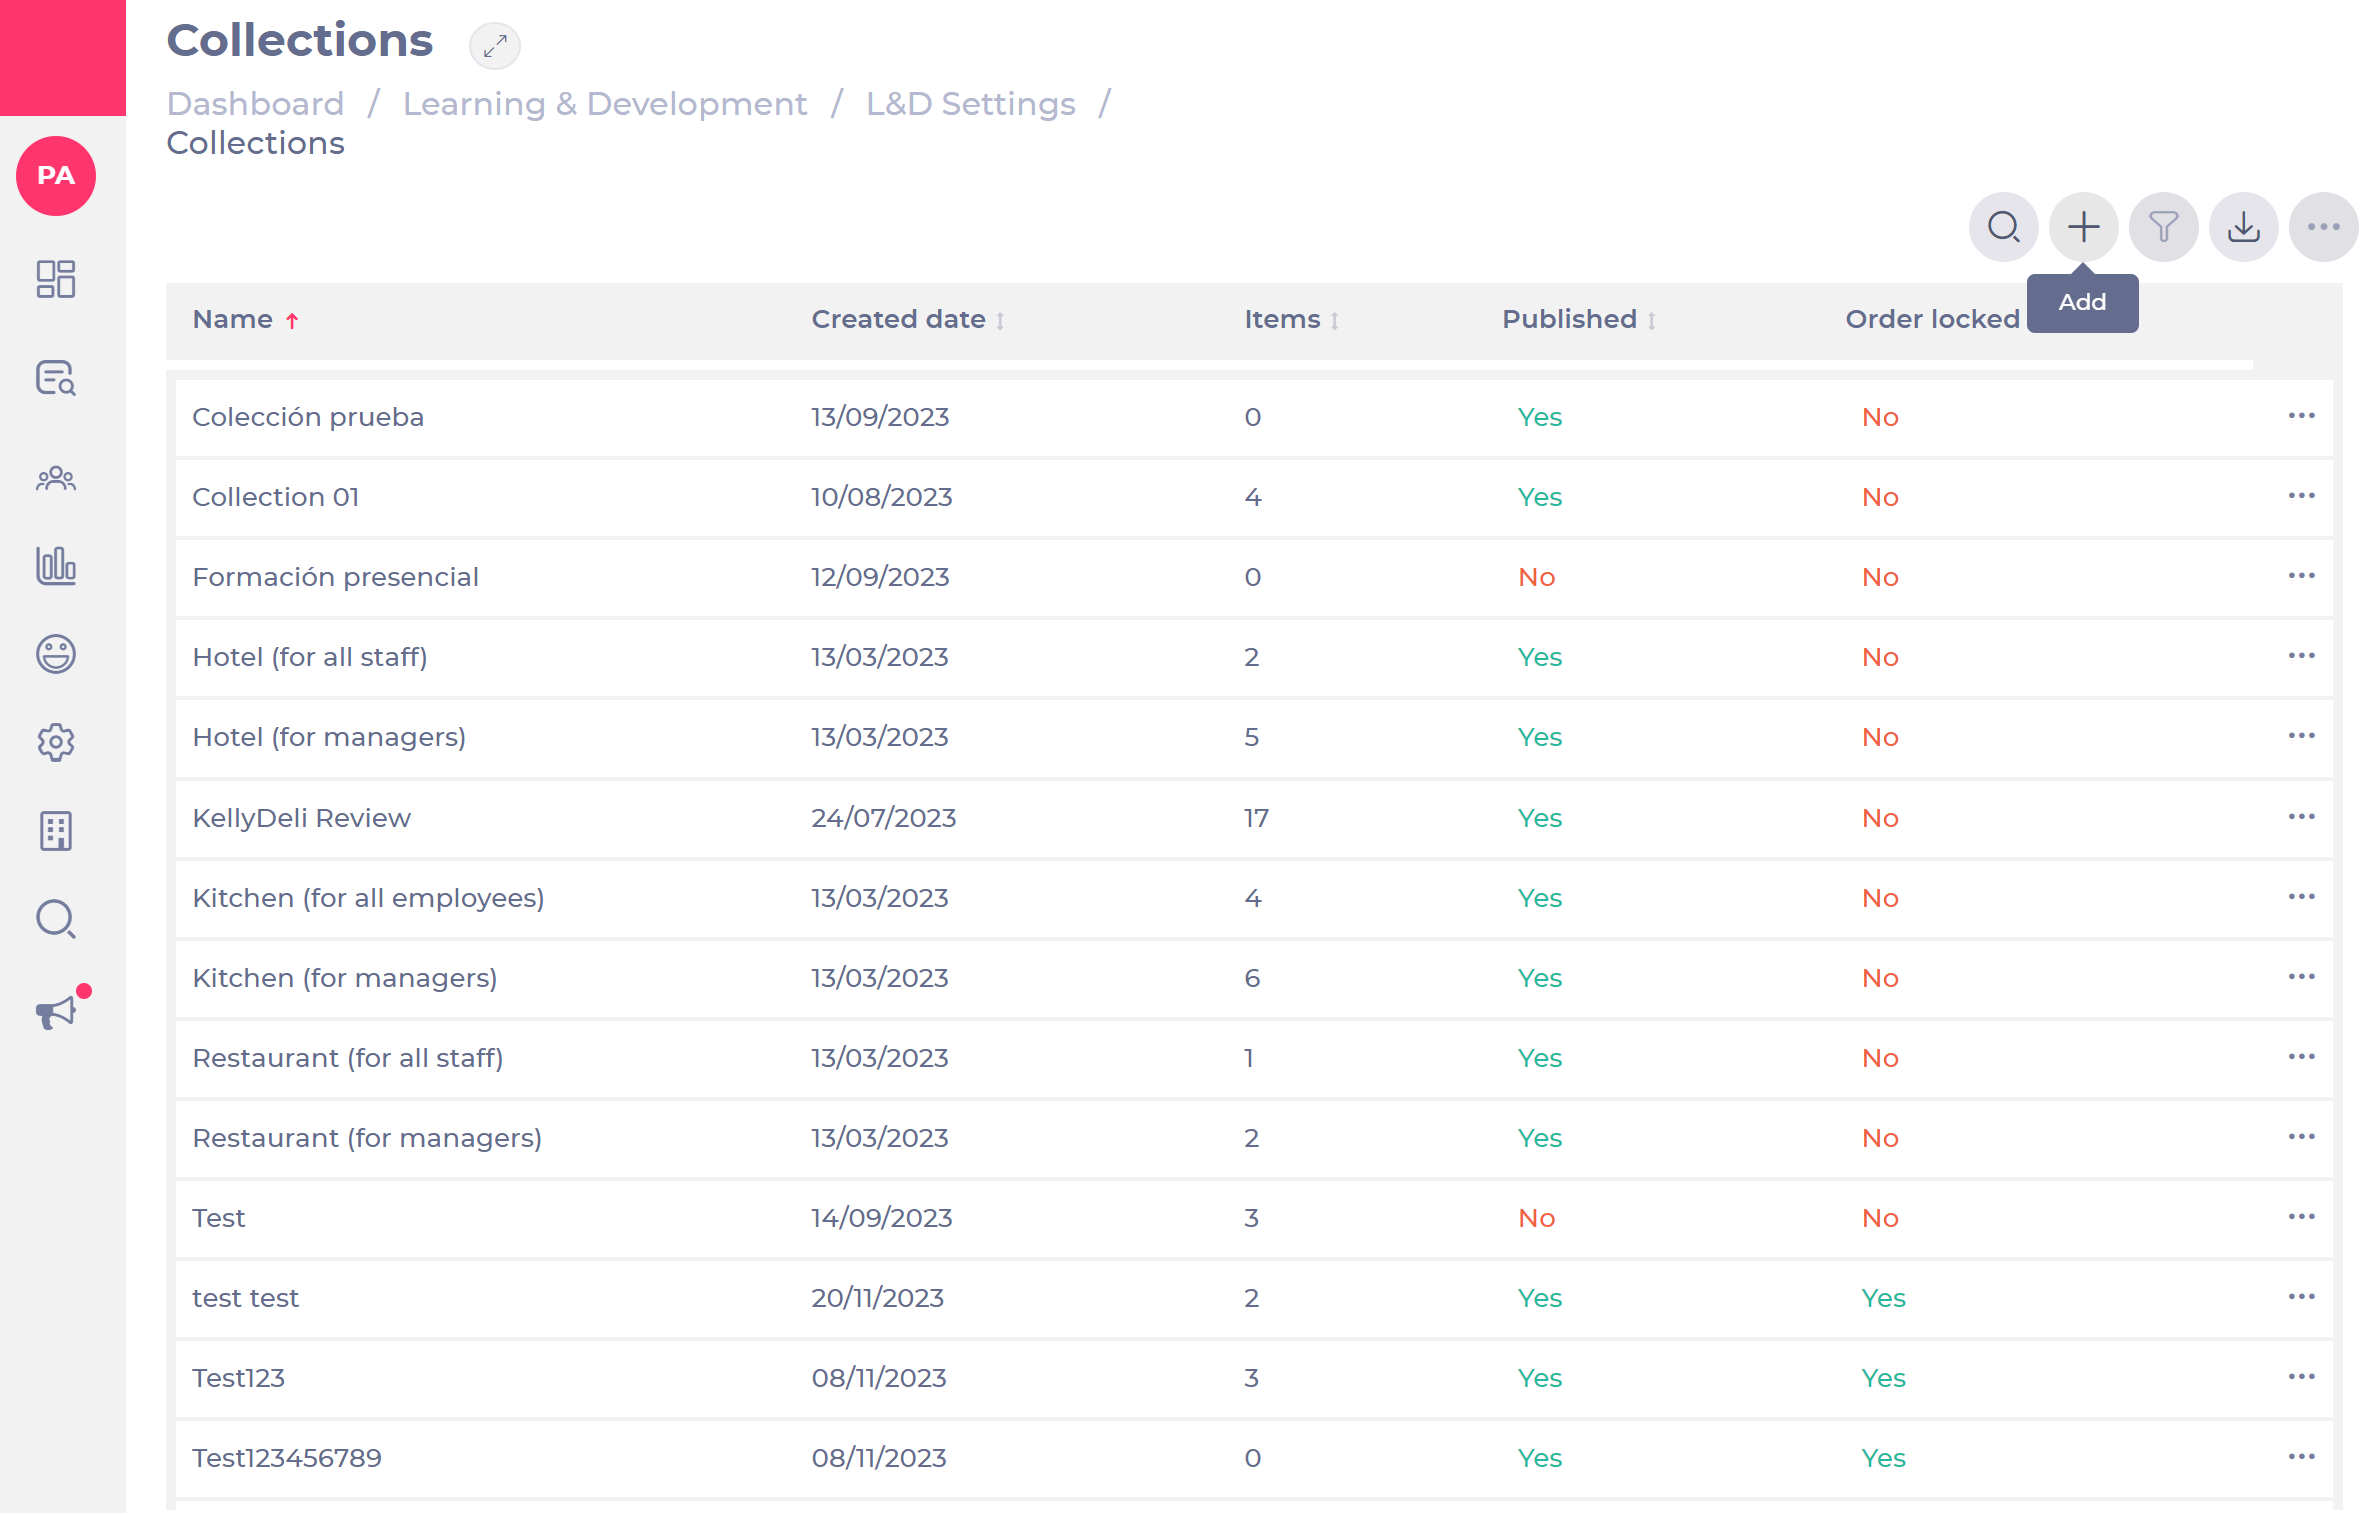
Select Learning & Development > L&D Settings > Create and Maintain Collections.
Select the + icon to add a new collection.
Step 1: Details
Enter a name (mandatory) and a description (optional).
Note: we strongly recommend adding an image to your collection.
Activate the toggle switch Order locked if you want the learner to complete the training in this order.
Add a tag in order to link your collection make your training more visible.
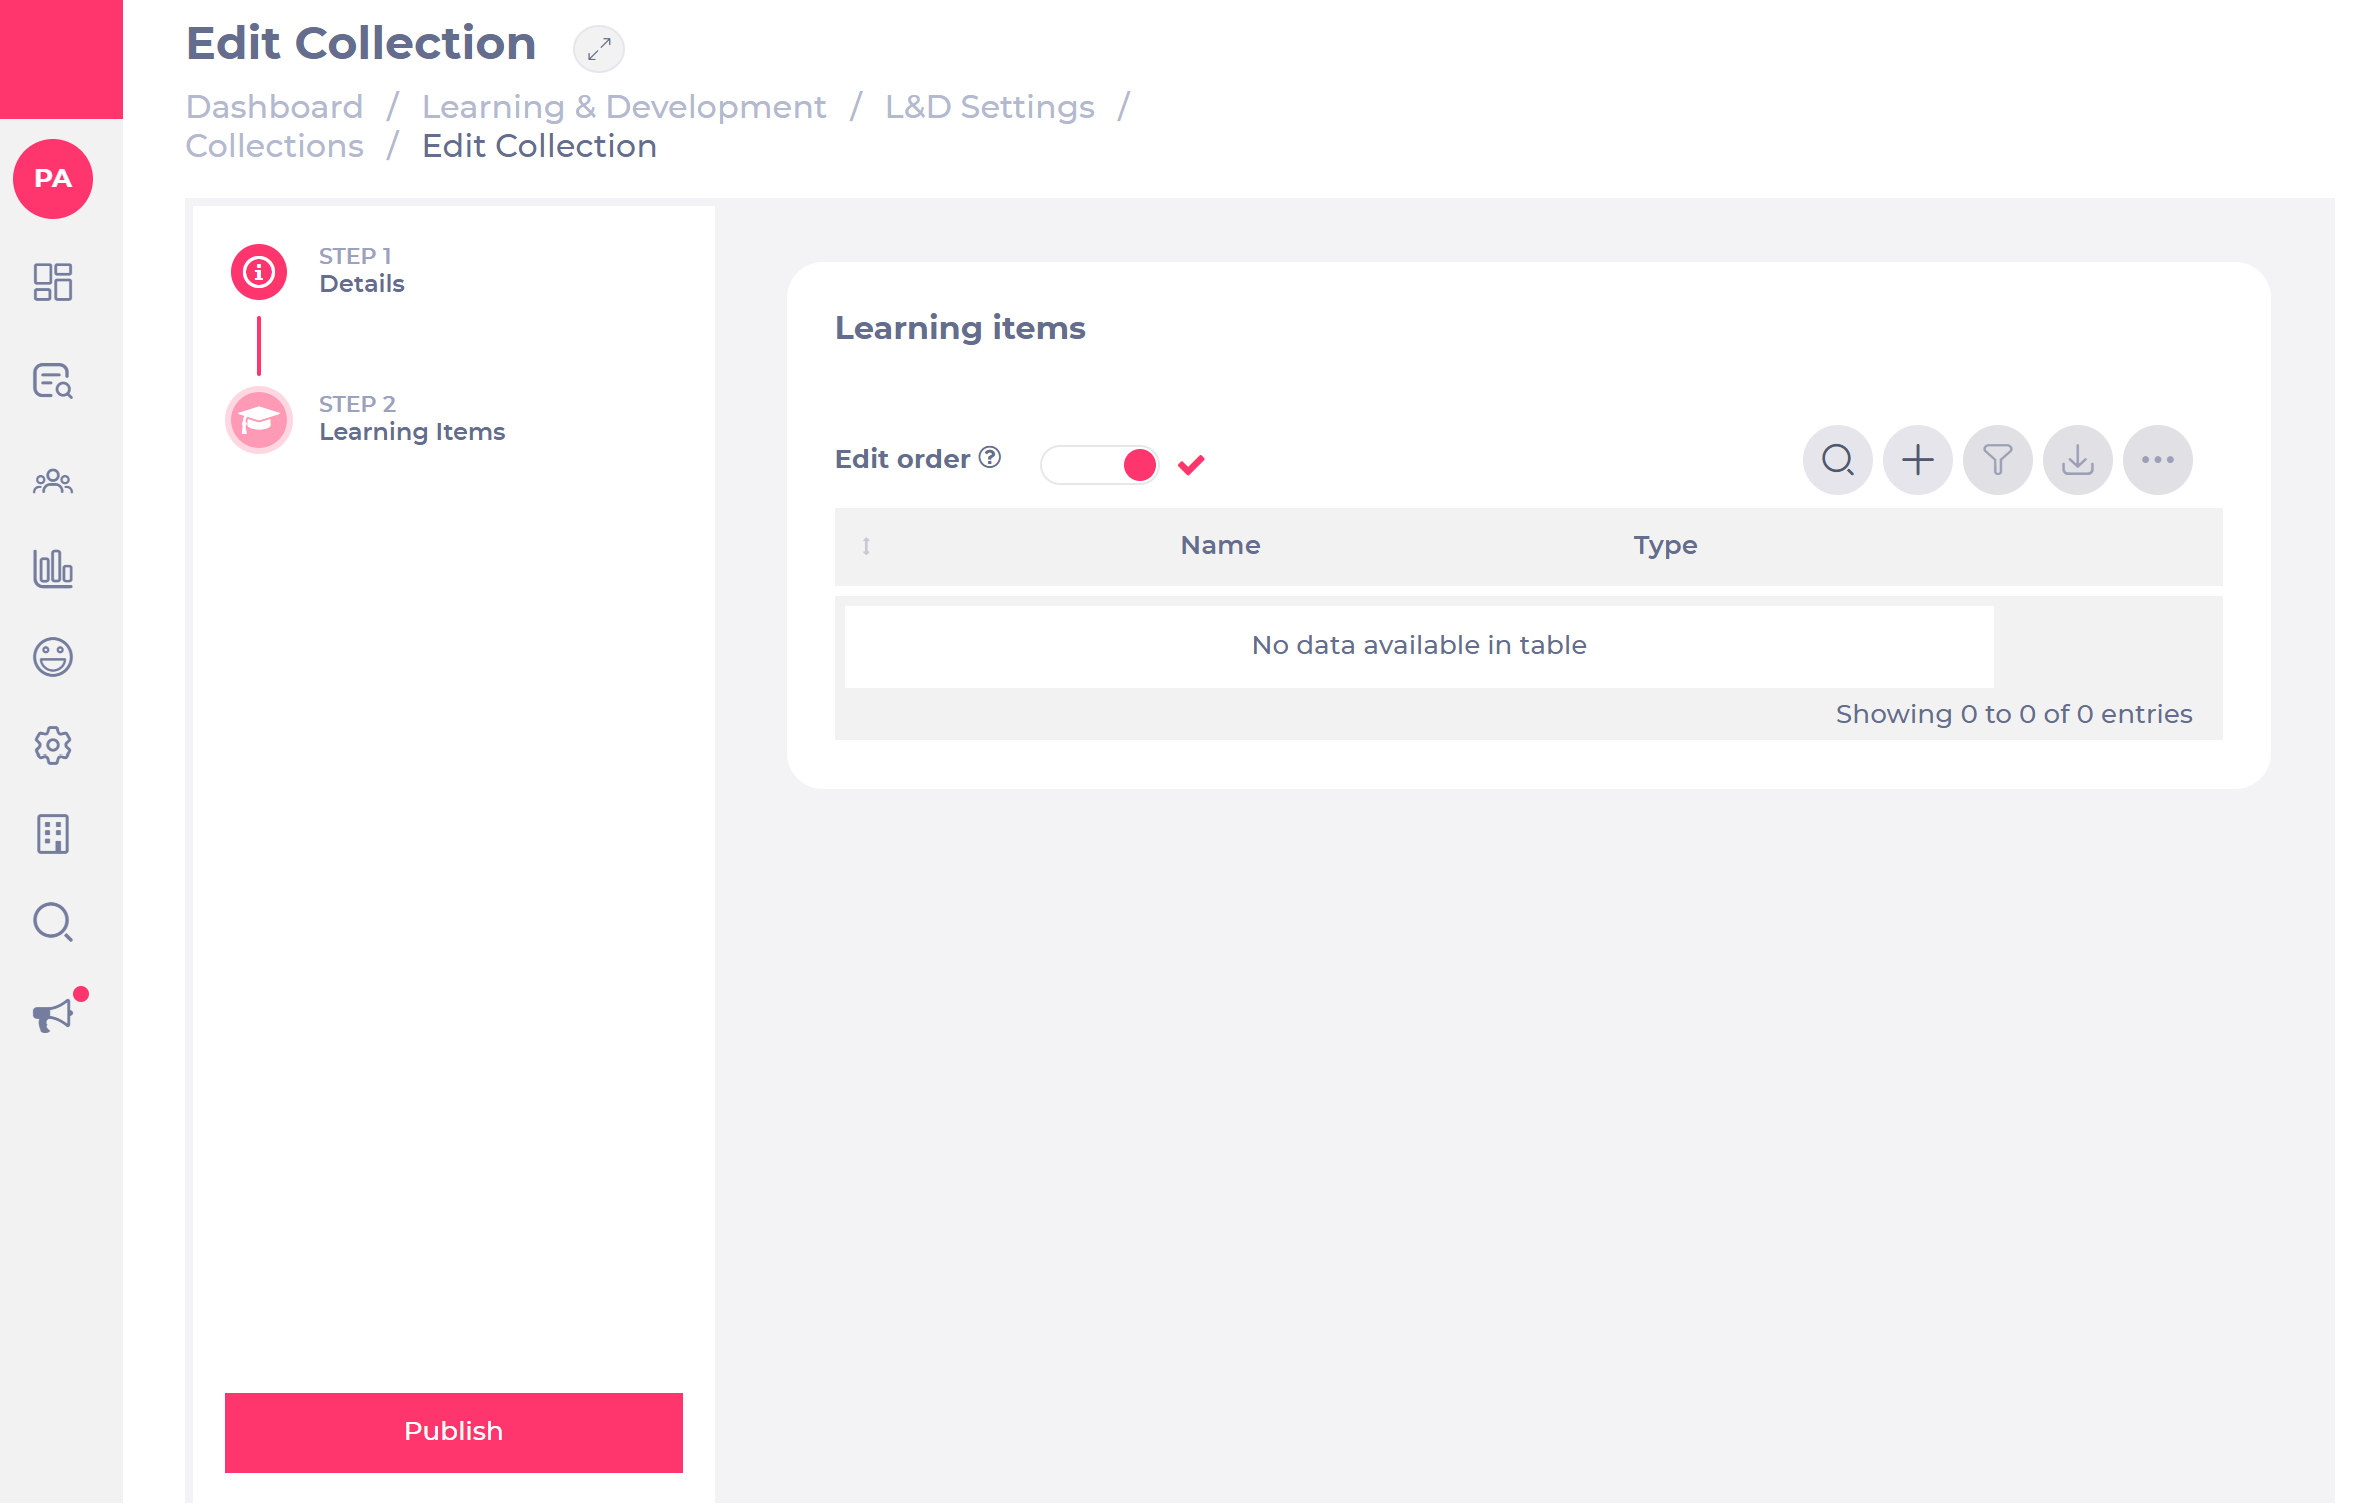
Step 2: Learning items
Add learning items selecting the + icon.
A new learning item pop-up window will open.
Note: you can add up to 25 collection items.
There are the several types of learning you can add:
Additional learning
Module
Bitesize learning
Goals
Competences
Appraisals
Workbooks
External Training
Editing the order
Once you have added your learning items, you can now edit the order of each of them:
Activate the toggle switch Edit order, and you will then able to move your items using the arrow icons.
Note: the order is relevant here if you have chosen to lock your order and want learners completing them this way.
Select Publish.
A pop-up icon will open: select Confirm OR Cancel.
Note: you can edit, unpublish or delete your collection by using the three dots icon.
Manage category groups in Mapal OS
Overview : As an account manager, you might need to manage category groups so that you can categorise similar groups of business units to get the most out of the Mapal suite of products.
Start from: The Mapal OS Dashboard.
Select the Configuration tool.
You will now have access to the Configuration Dashboard.
Note: Users with access to maintain Category groups can access Category groups via the menu.
Select Business Management > Category Groups.
Adding a category group
Select Add (the + icon).
A "New Category Group" pop-up window will appear:
Name the category group (Label).
Add the categories that should be linked to that group.
Note: The category groups can be assigned to Business Units for users who also can maintain Business Units.
Permission details
Users with access to view Category groups can access them by clicking on the existing category groups but cannot edit them.
Users with no access to Category groups cannot view or maintain information within Category groups.
Category groups in Flow Learning
To ensure Category Groups sync correctly with Flow Learning, managers must use specific Labels. The following labels are recognised and supported in Flow:
Region
Area
Division
Section
Use form folders
Start from: The Compliance Dashboard.
Create a new folder
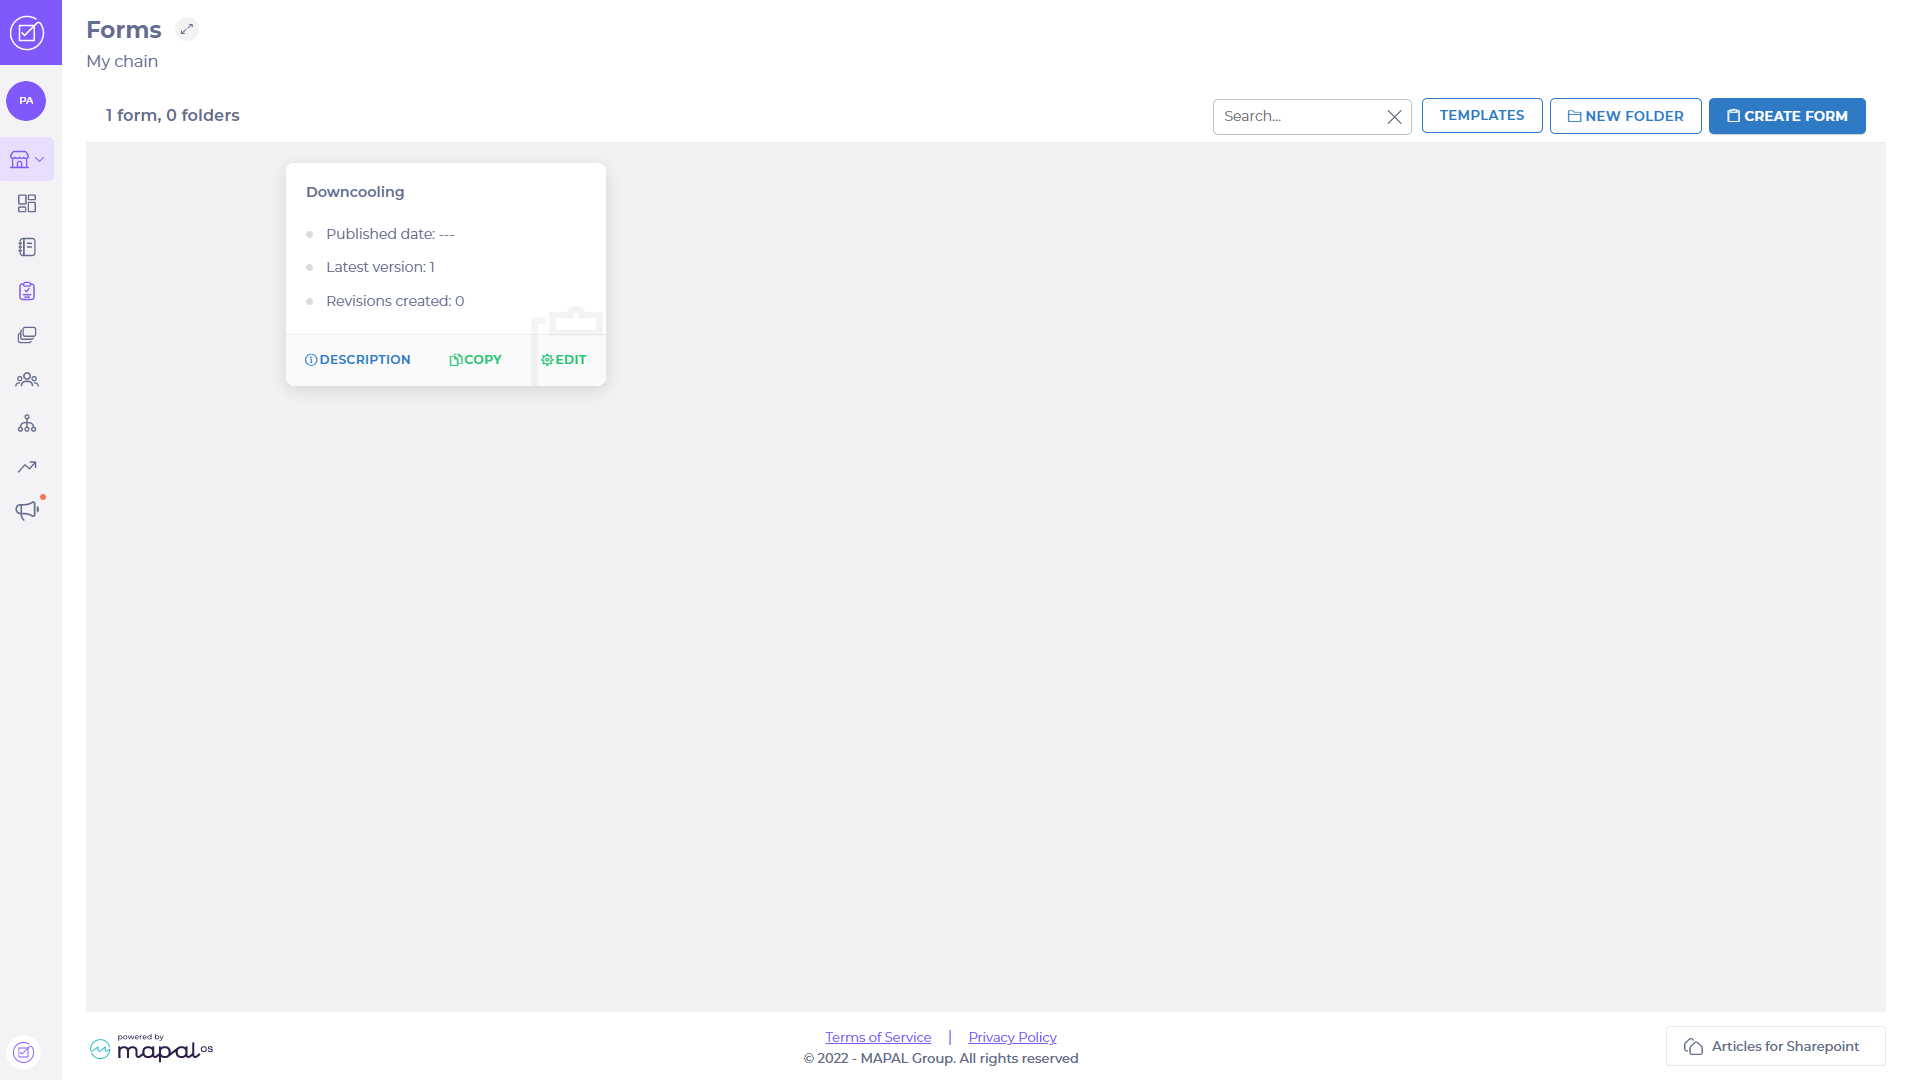
Select Forms in the main menu to open the Forms Dashboard for your chain.
Select NEW FOLDER to open a pop-up to set the folder title and language(s).
Select the language(s) that you require for your folder.
Enter the name of your folder.
Select SAVE to create your folder OR select CANCEL to stop and return to the Forms Dashboard without making a new folder.
The newly created folder will be available from the Forms Dashboard, ready to have forms added to it or created in it.
Note: Folders are differentiated from forms or agendas by the folder icon
Edit folder settings
From the Forms Dashboard for your chain:
Select EDIT on your folder to open an edit pop-up.
Change the languages and/or folder name(s).
Select SAVE to save your changes OR select CANCEL to stop and return without keeping changes.
Delete folder
From the Forms Dashboard for your chain:
Select DELETE on your folder to activate a delete pop-up.
Select YES, DELETE to confirm deletion OR select CANCEL to stop deletion and return to the Forms Dashboard.
Move forms to a different folder
In your dashboard, you can have forms that are not in a folder and you may need to organise them into a folder. You can also move a form from one folder to another.
Identify the form you wish to move on the dashboard OR in a folder.
Select > MOVE TO FOLDER on the form.
Select the Move to… dropdown list to choose a target folder for the form.
Select MOVE to transfer your form to the folder OR select CANCEL to stop and return to the forms page.
The form will now be available in the required folder on the Forms Dashboard, instead of its previous location.