Activate a process on a group
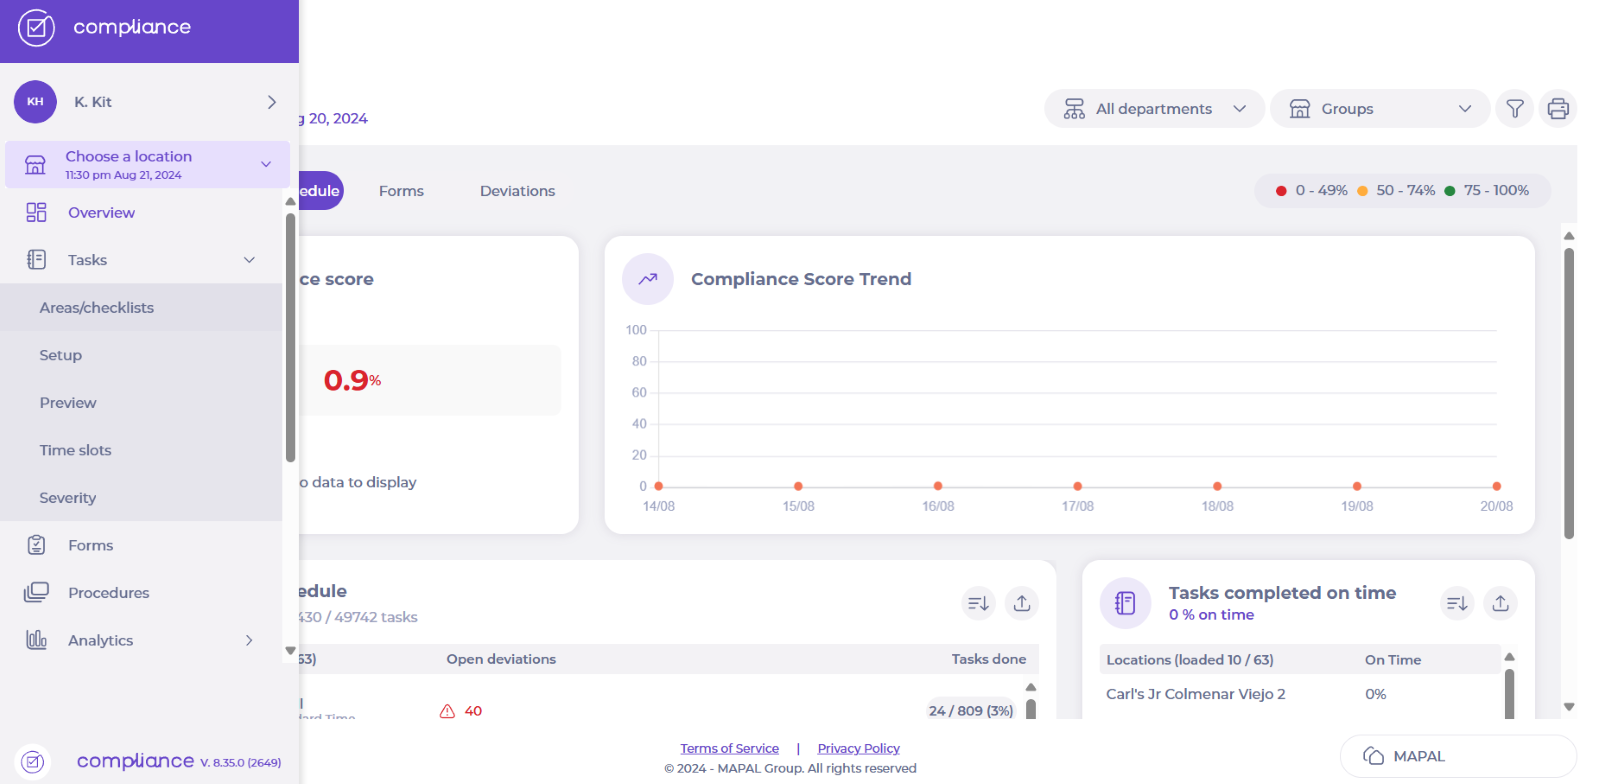
Start from: The Compliance dashboard.
-
Select Tasks > Setup from the main menu.
-
Select the specific module.
-
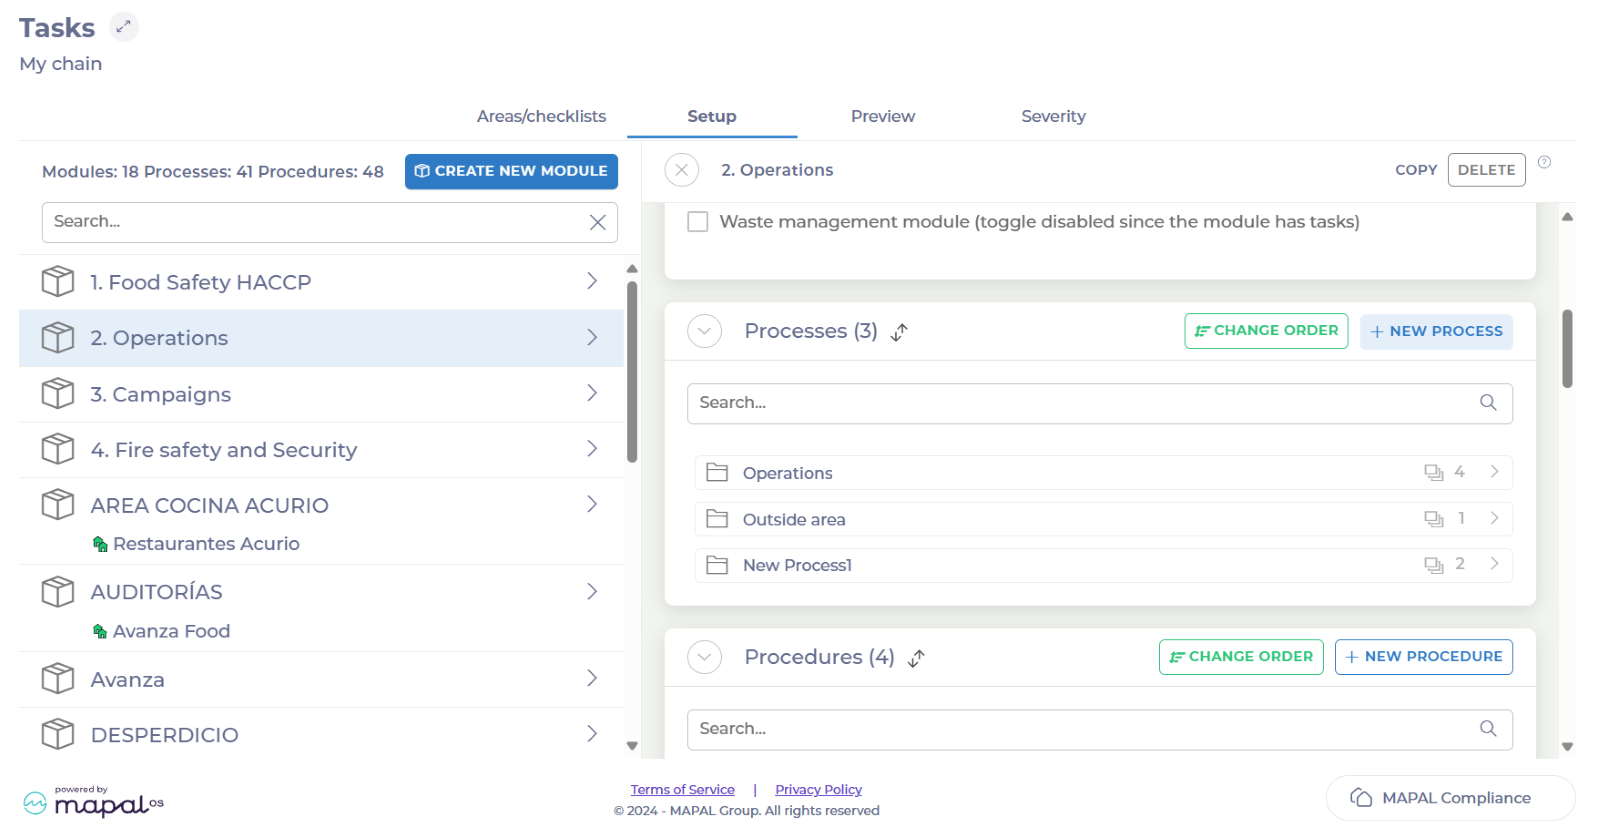
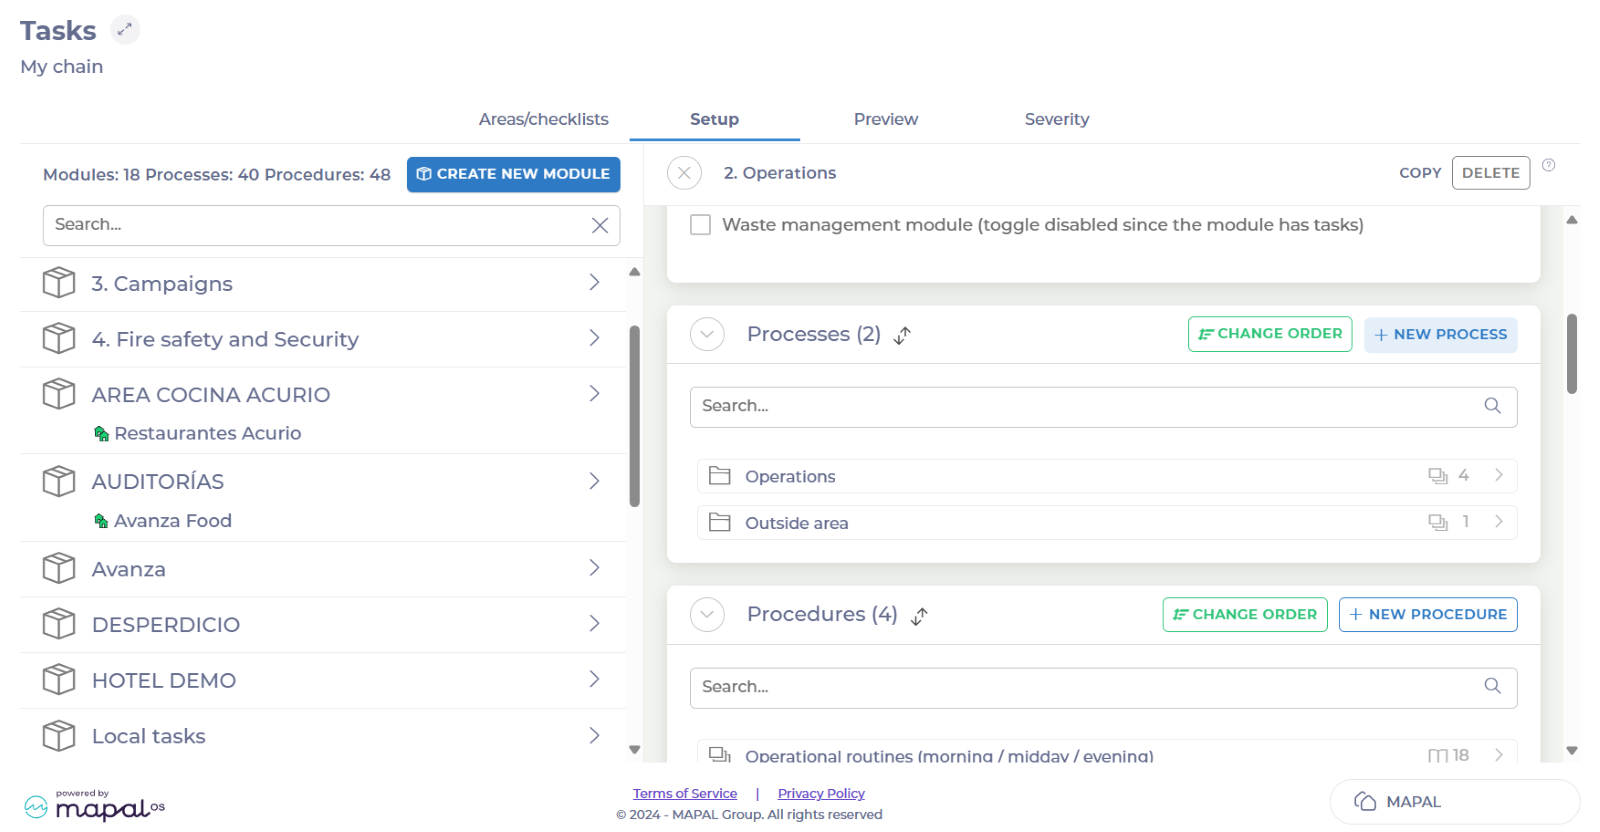
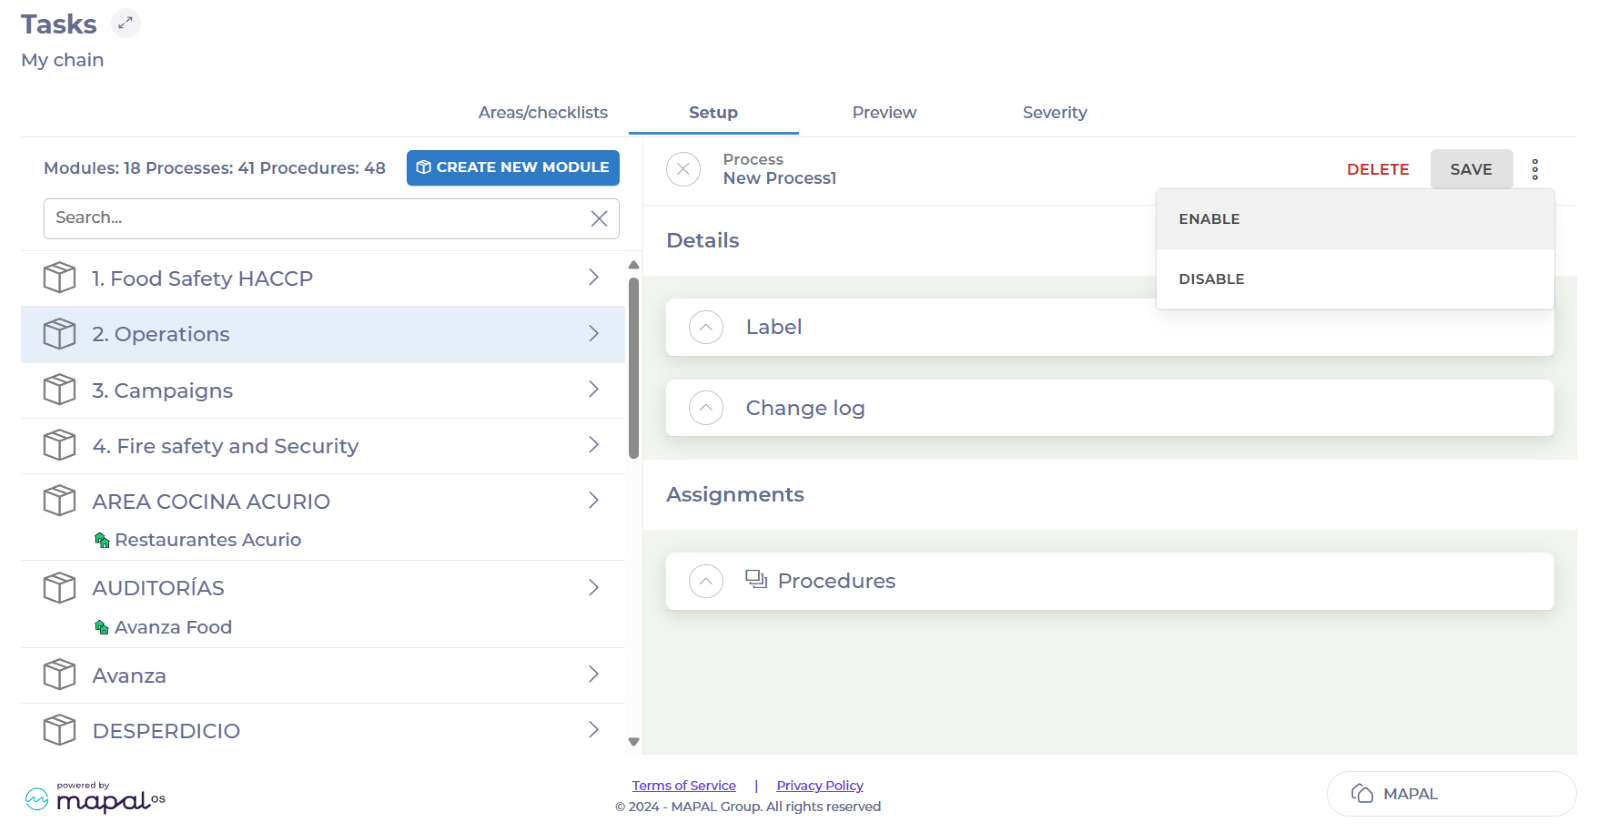
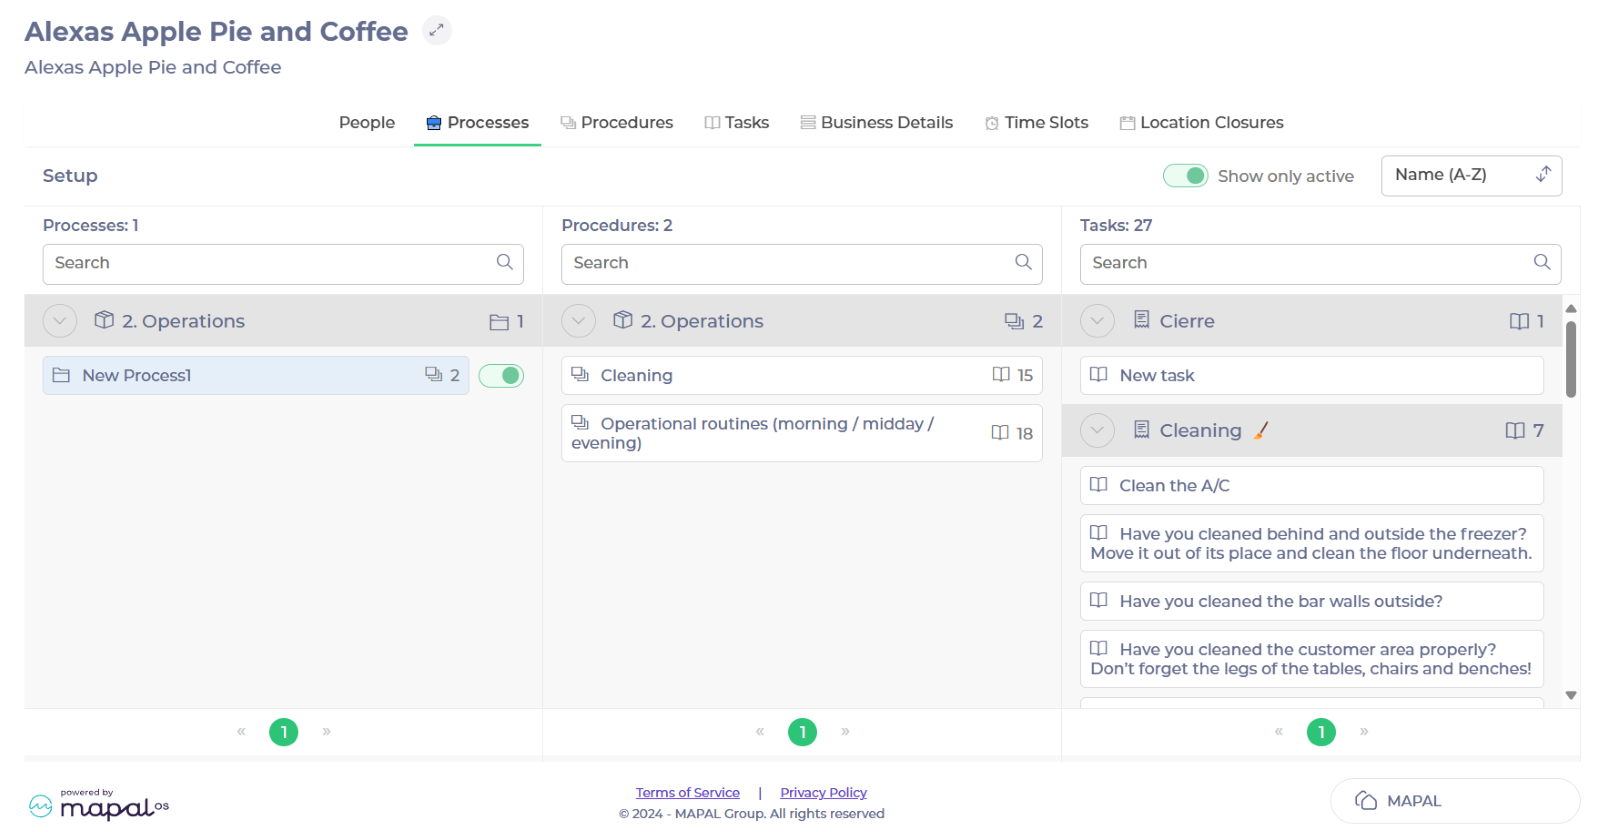
Scroll down to Processes and select the specific process.

-
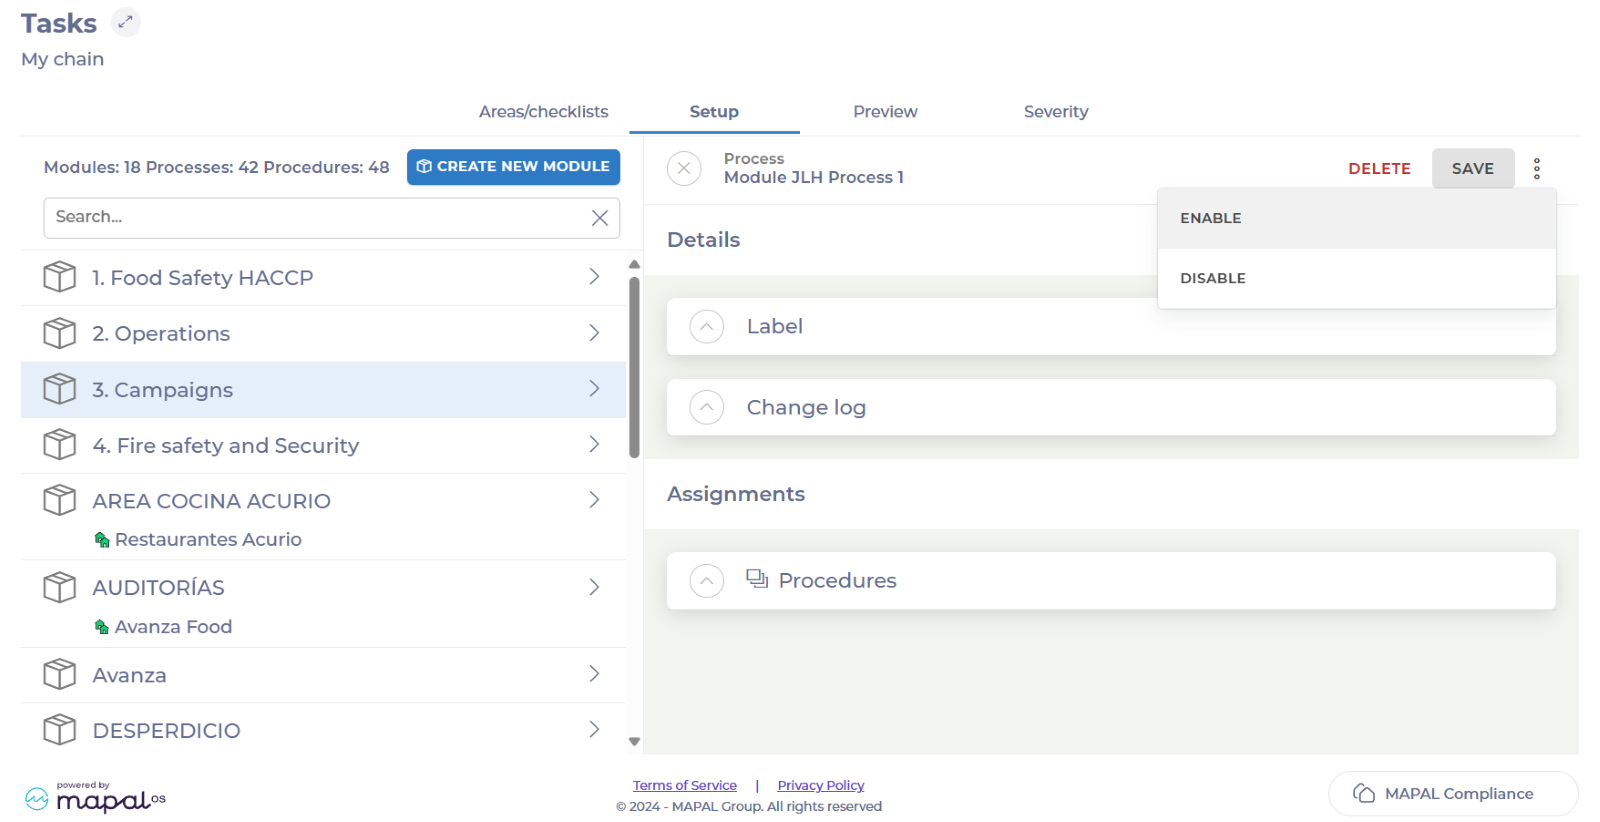
Once inside the process, select the three dots button in the top right corner.
-
Select Enable.
-
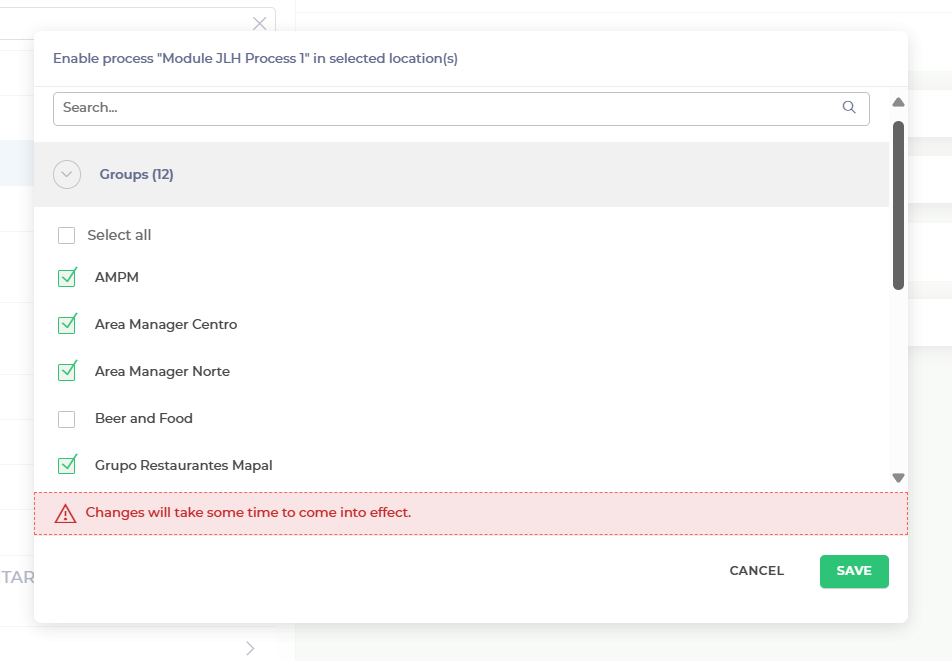
Search and select all the respective groups you want to add the process to.
-
Select Save.
The process will be now assigned to all the groups selected.
Create a process
Start from: The Compliance dashboard.
-
Select Tasks > Setup from the main menu.
-
Select the specific module in which you want to create a process.
-
Scroll down to Processes and select + New Process.
-
Assign a name to your new process in the Label field.
-
Select Save.
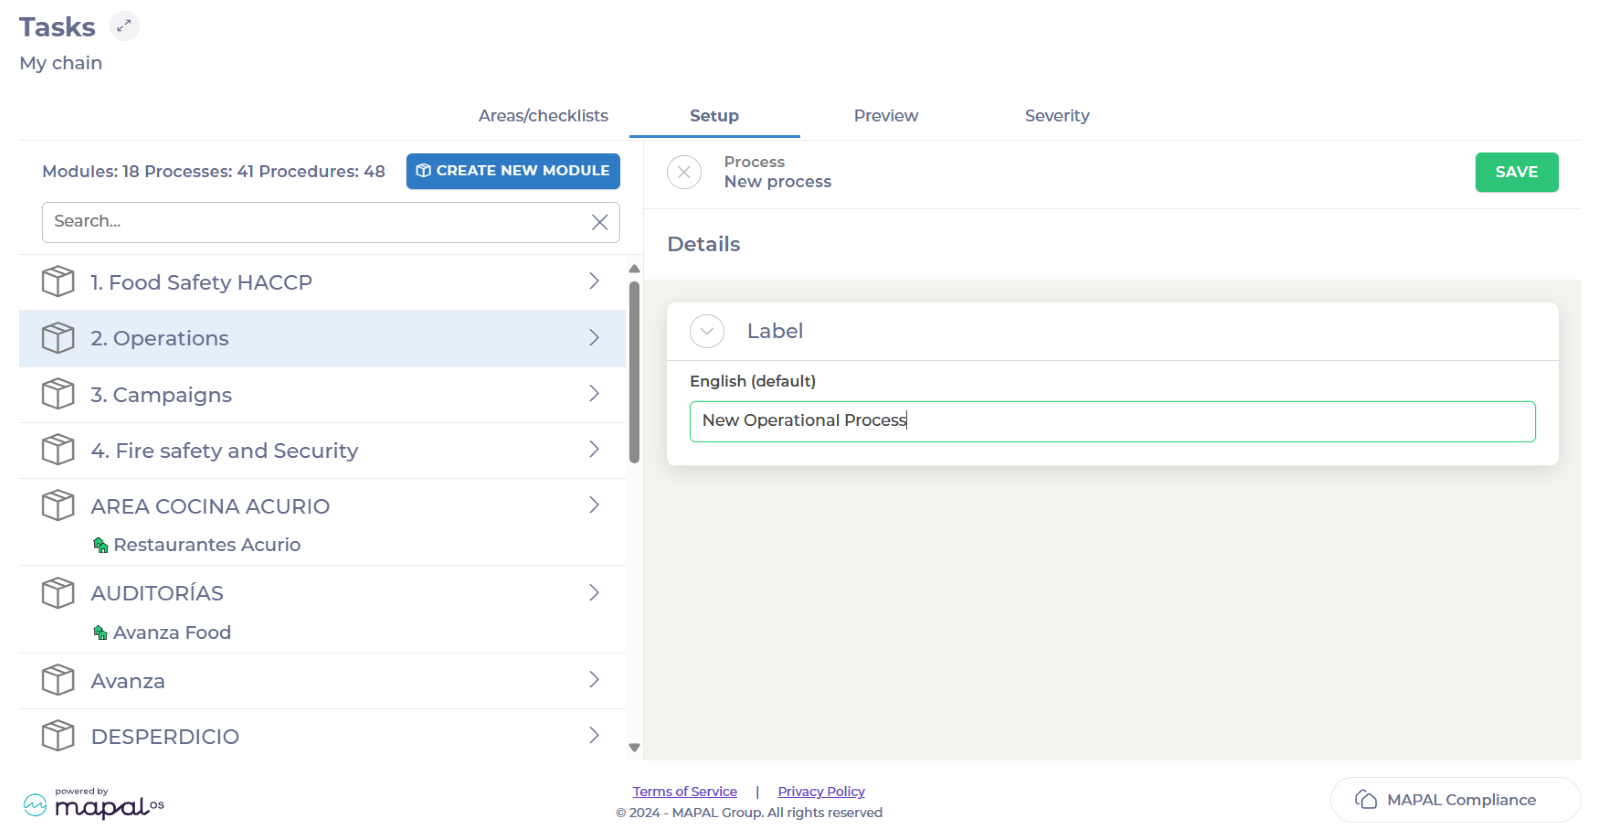
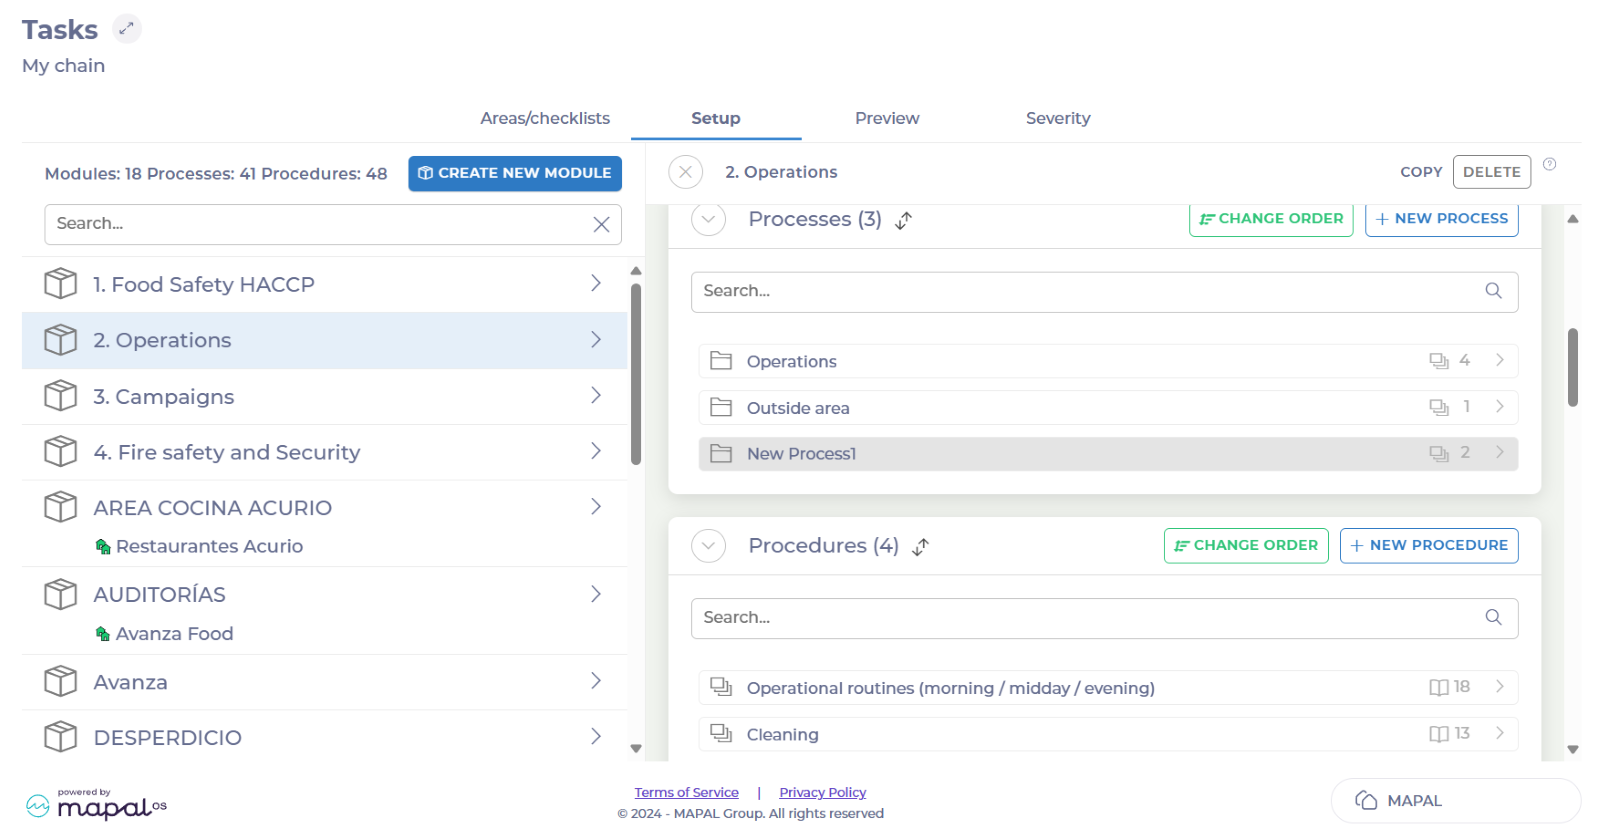
Your process is now created. You will be able to find it inside the module, under Processes.
Create processes and tasks within a procedure
Start from: The Compliance dashboard.
-
Select Tasks > Setup from the main menu.
-
Select the Module where your procedure is located.
If you haven’t created a procedure in the module yet, see Create a procedure.
Create a process within a procedure
-
Once inside the module, scroll down to Processes and select New Process.
-
Add the name of the new process on the Label field.
-
Select Save.

-
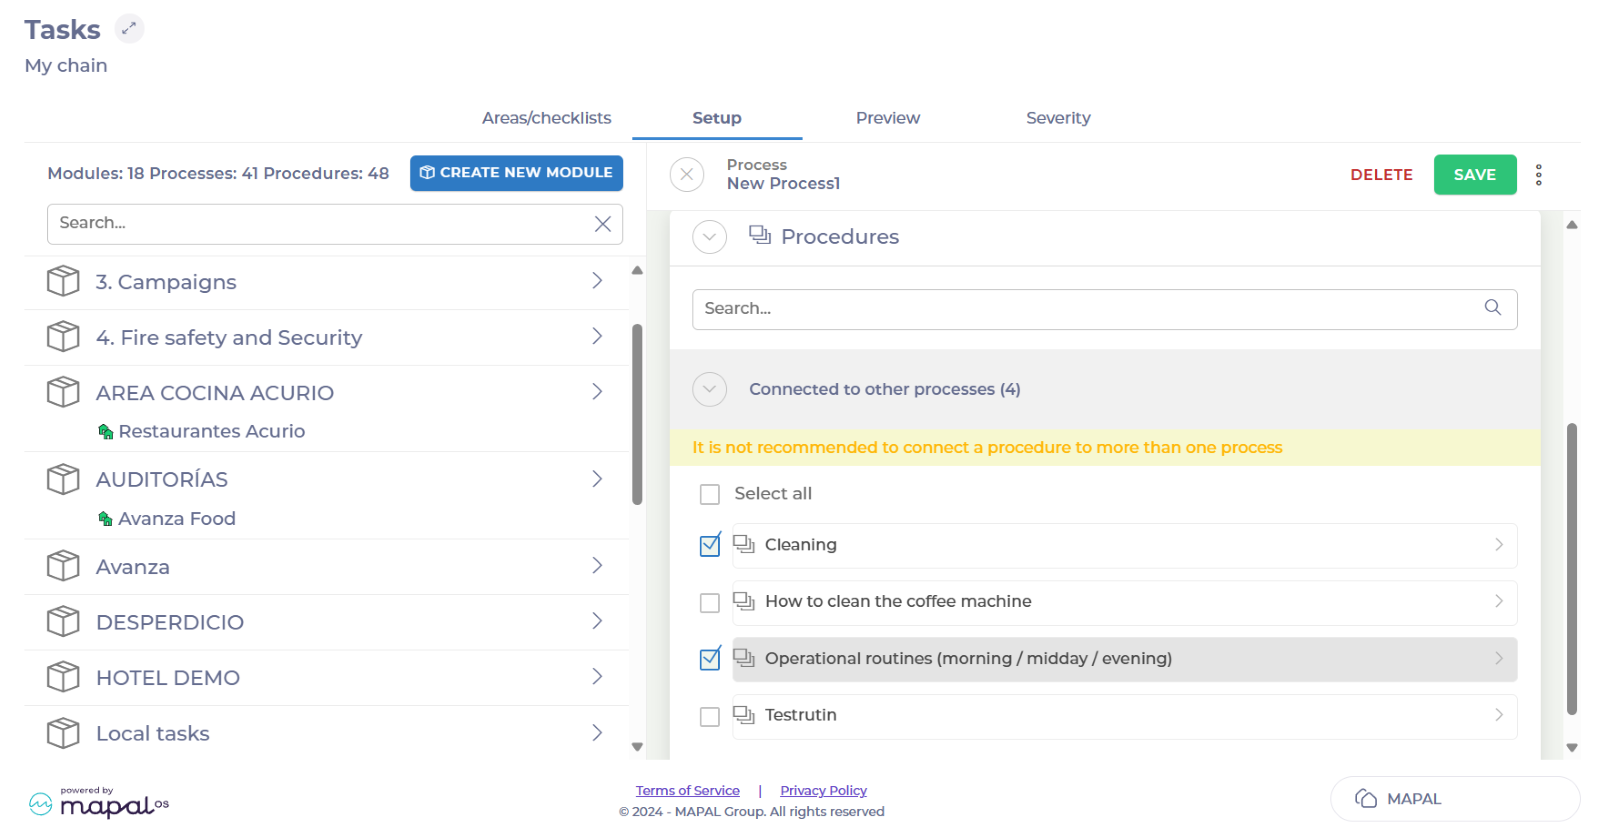
In your newly created process, select Procedures.
-
Select the ^ button beside Connected to other processes.
-
Check the box of the procedure or procedures you want to link to your new process.
-
Select Save.
Now the process you created is linked to the procedure.

Assign a process to a location
-
Select Tasks > Setup from the main menu.

-
Select the module where your new process is located.
-
Select your process.
-
Select the three dots at the top of the page and press Enable.
-
Search and select the locations that need the new process.
-
Select Save.

Create a task within a procedure
Tasks can be associated with a procedure at the moment of creation. You can then move them to the specific areas where you want them to be published.
To create a task associated with a procedure and assign it to an area, see Create a task and move it to the relevant area.
View your new process or task on a location
View tasks
-
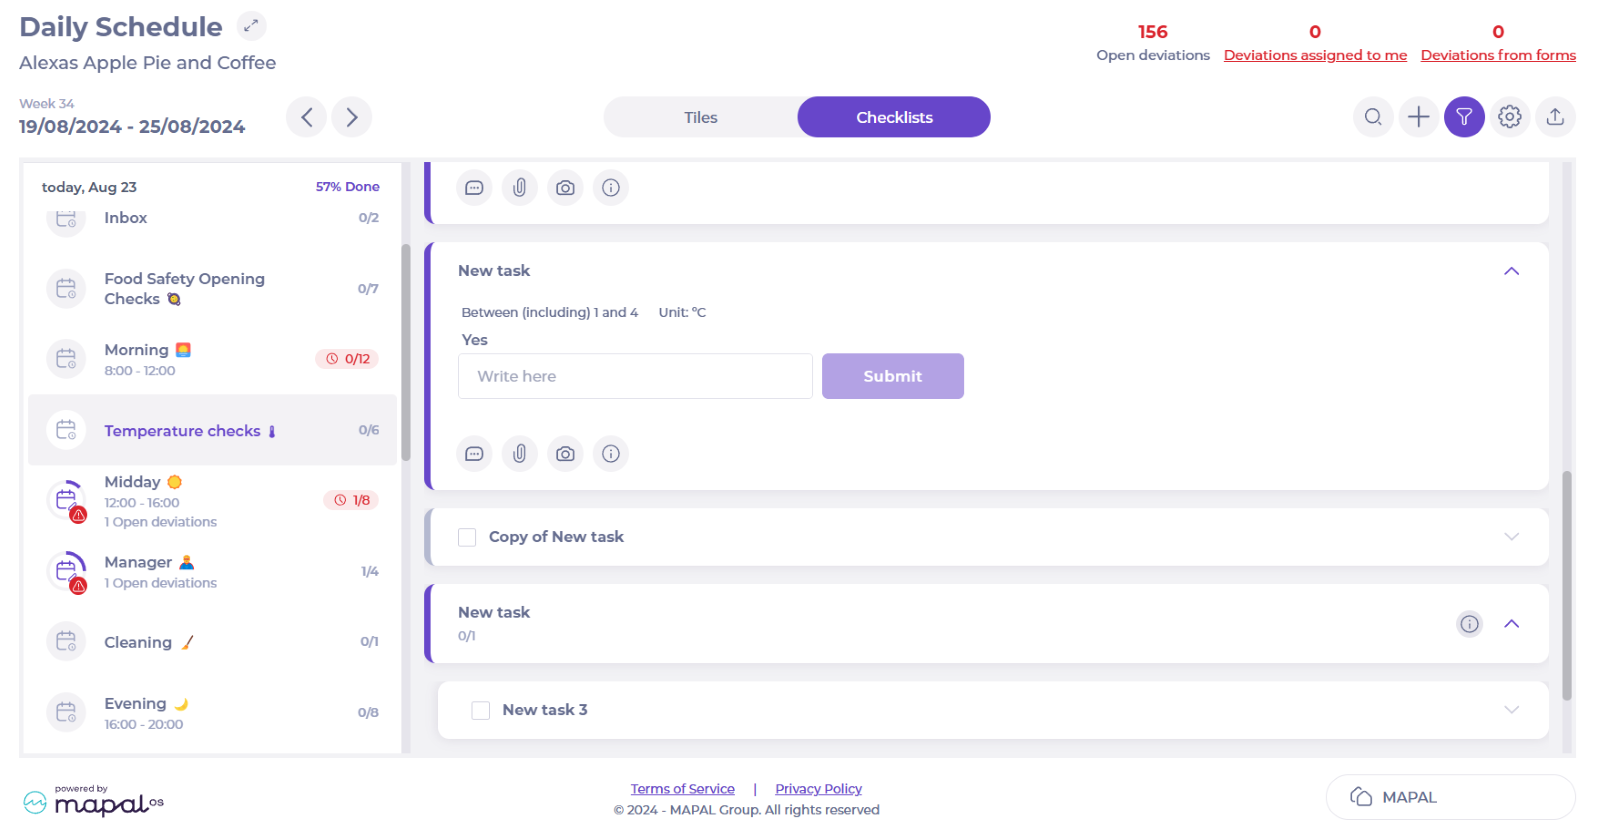
Select Choose location from the main menu.

-
Select the area where you assigned the task on the Daily Schedule and locate the task.
View processes
-
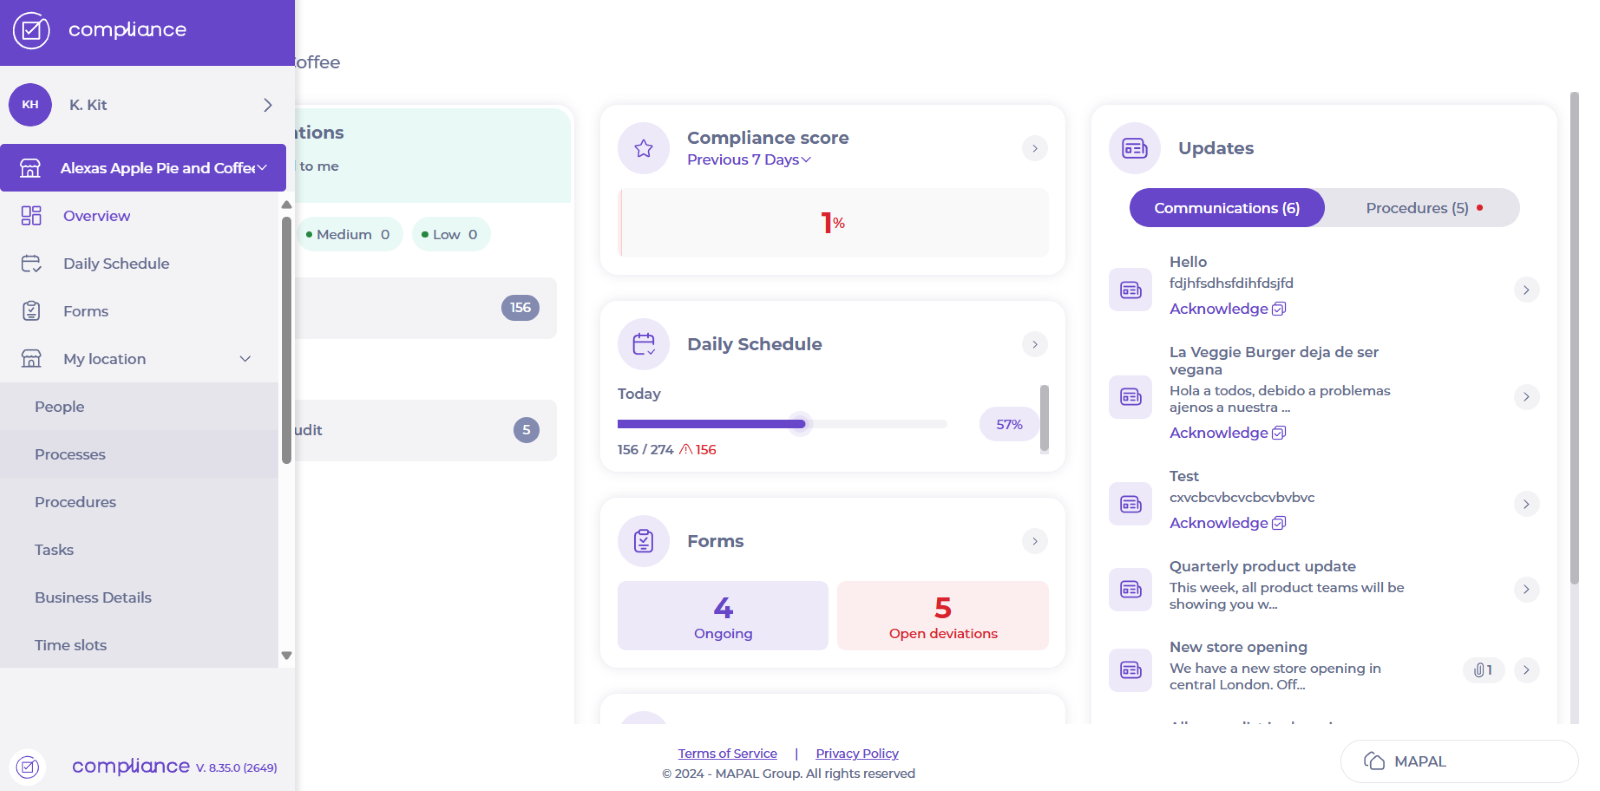
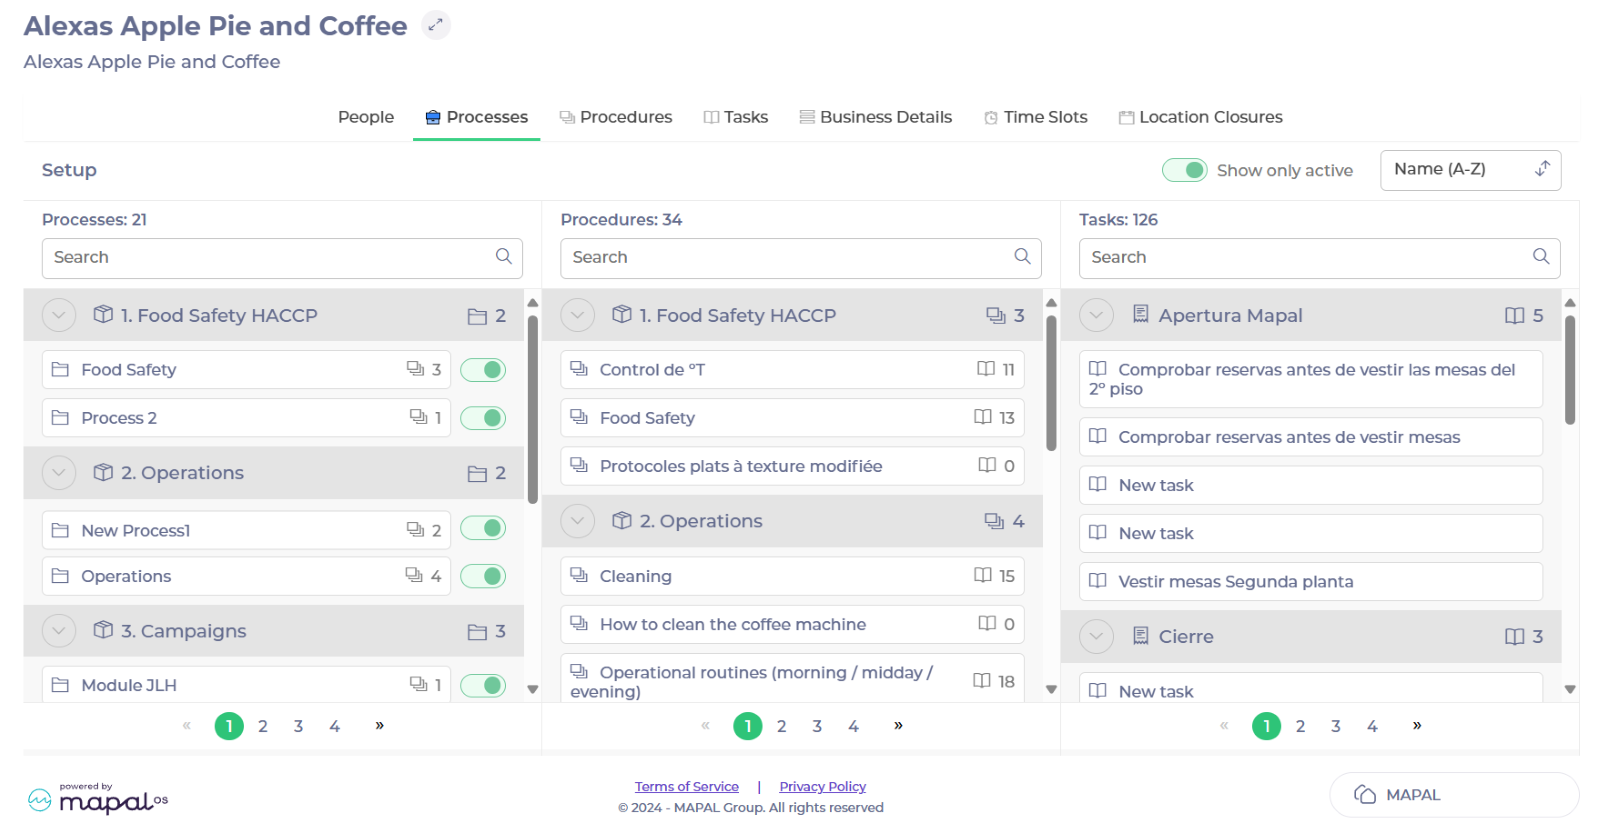
Select My location > Processes from the main menu.
-
See your new process active.
-
Select the process to see which procedures and tasks that are connected to it.
Create a task and move it to the relevant area
Start from: The Compliance dashboard.
-
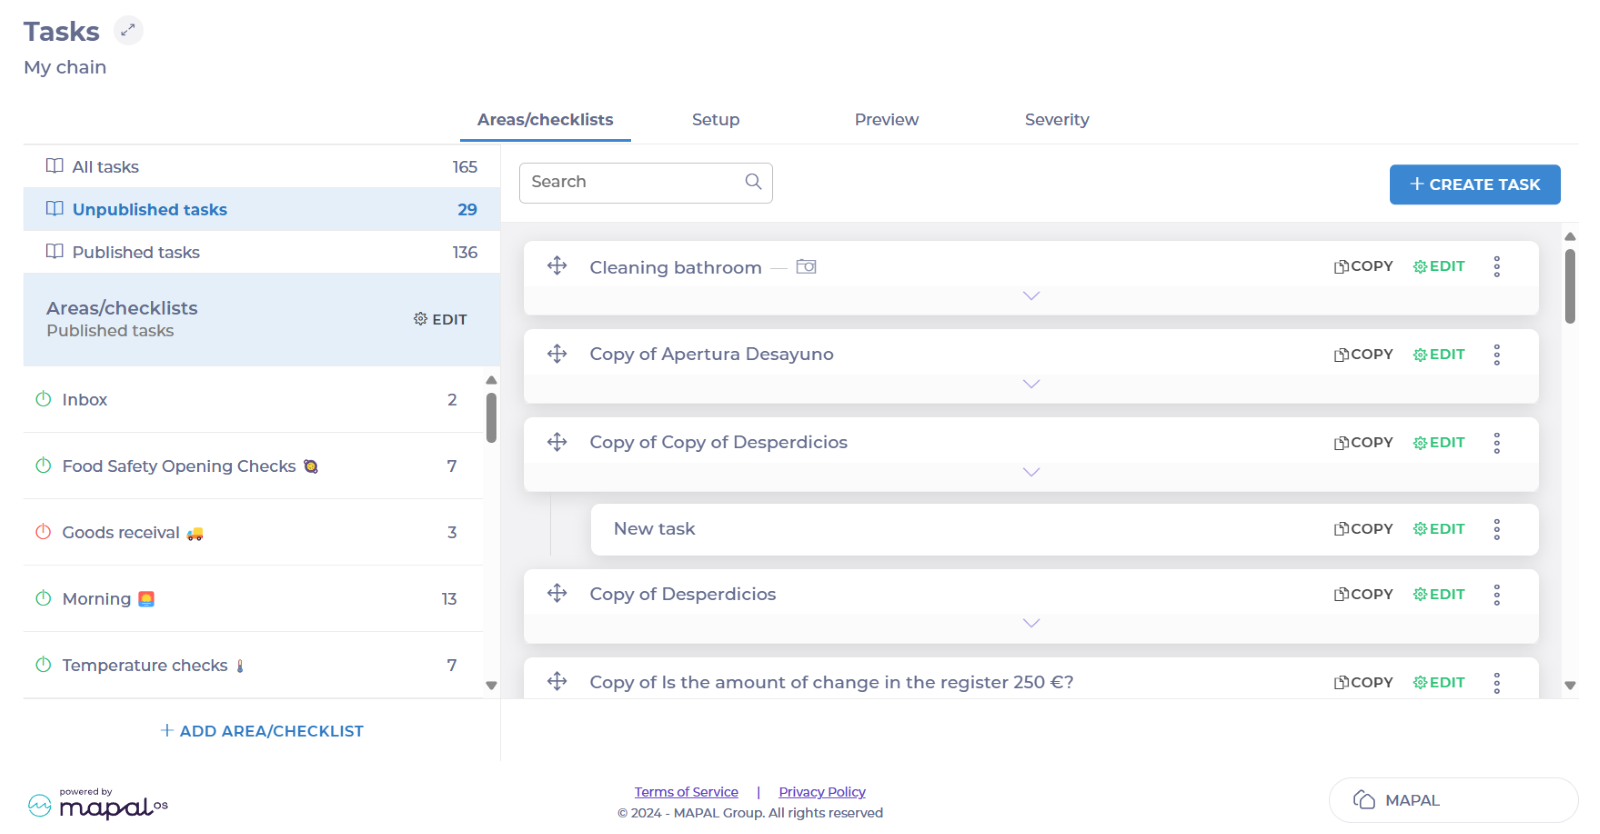
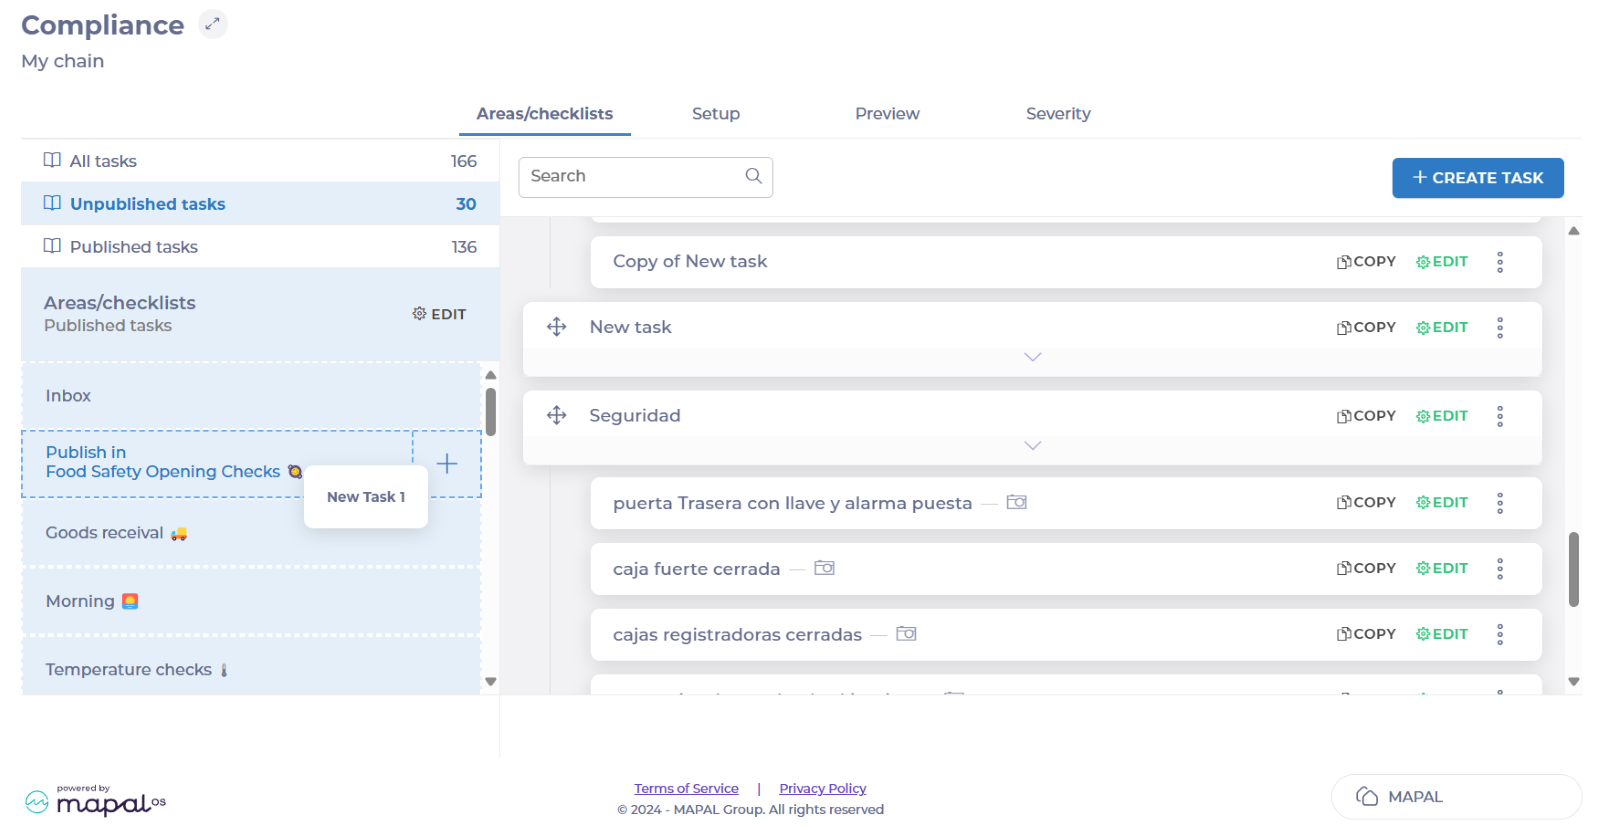
Select Tasks > Areas/checklists from the main menu.
-
Select Unpublished tasks and then + Create Task.
-
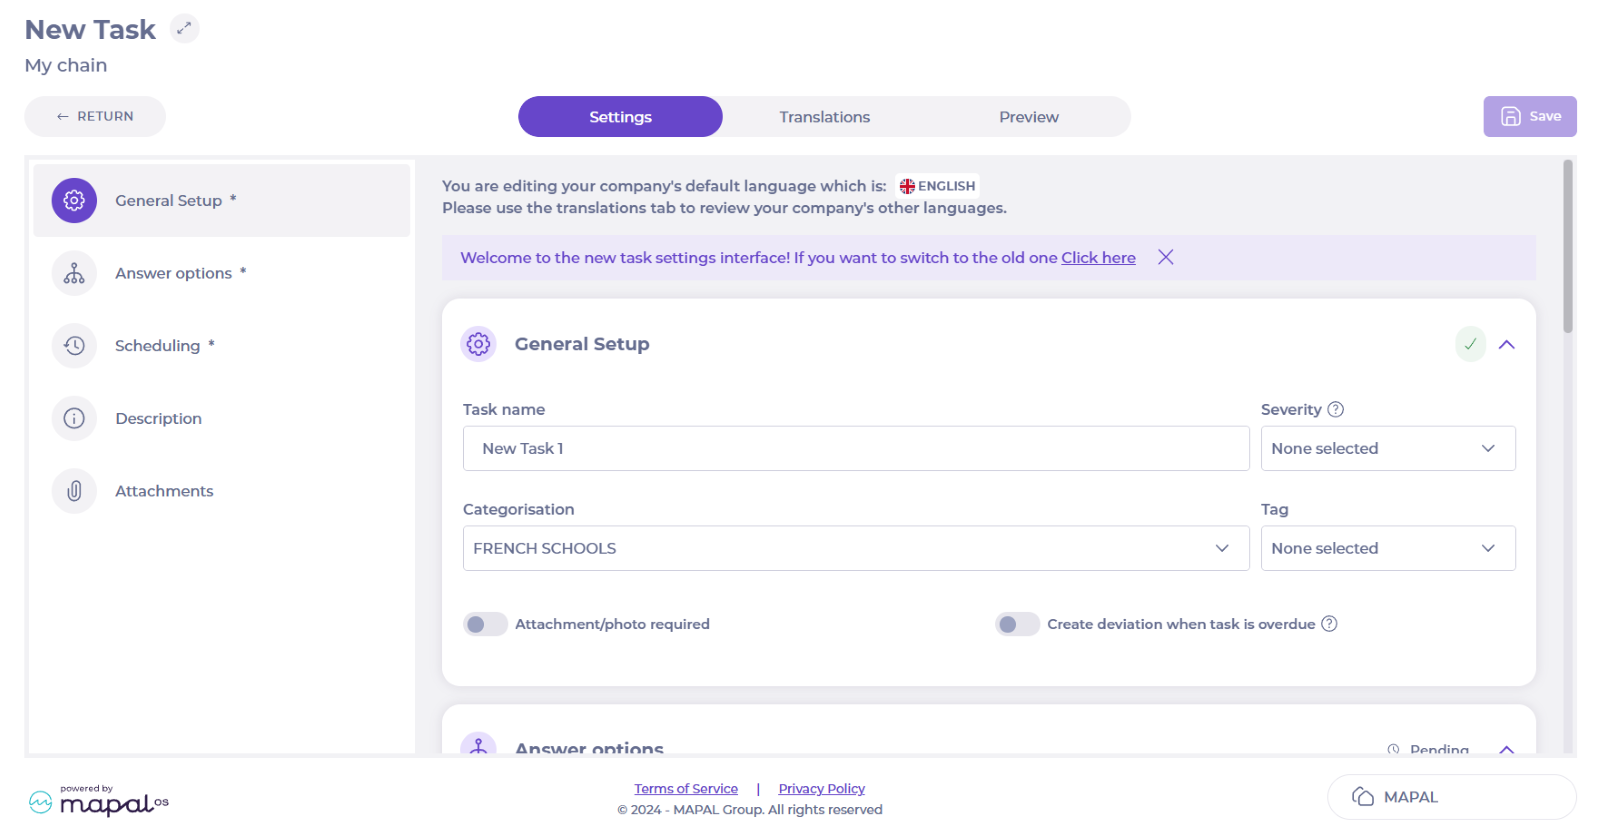
Add the Task name.
-
Select the specific Procedure in the Categorisation field.
-
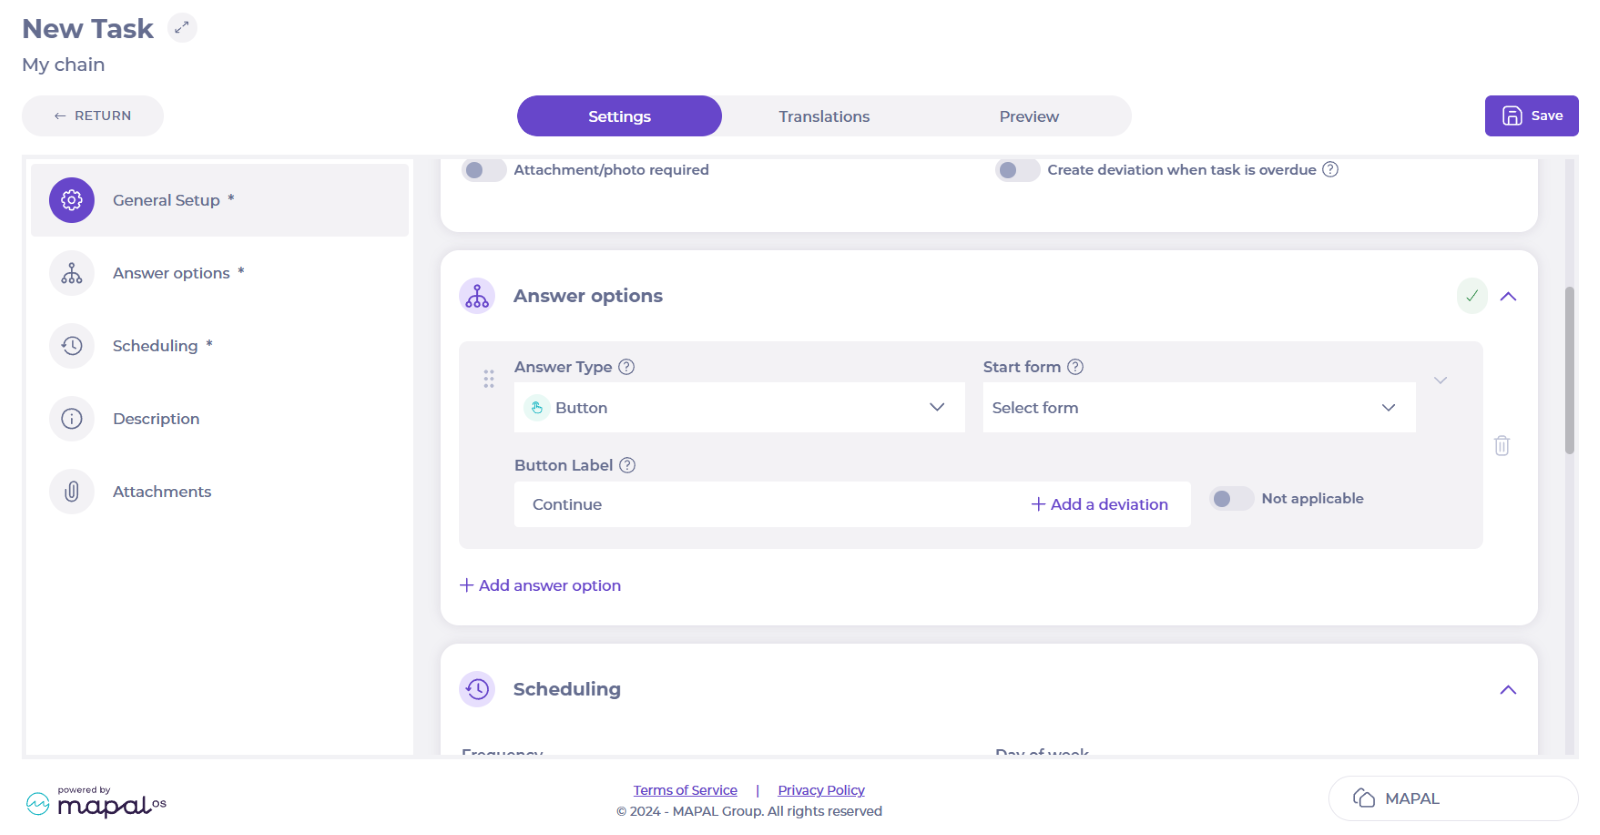
Choose the Answer options and labels. Configure here any deviations if needed.
-
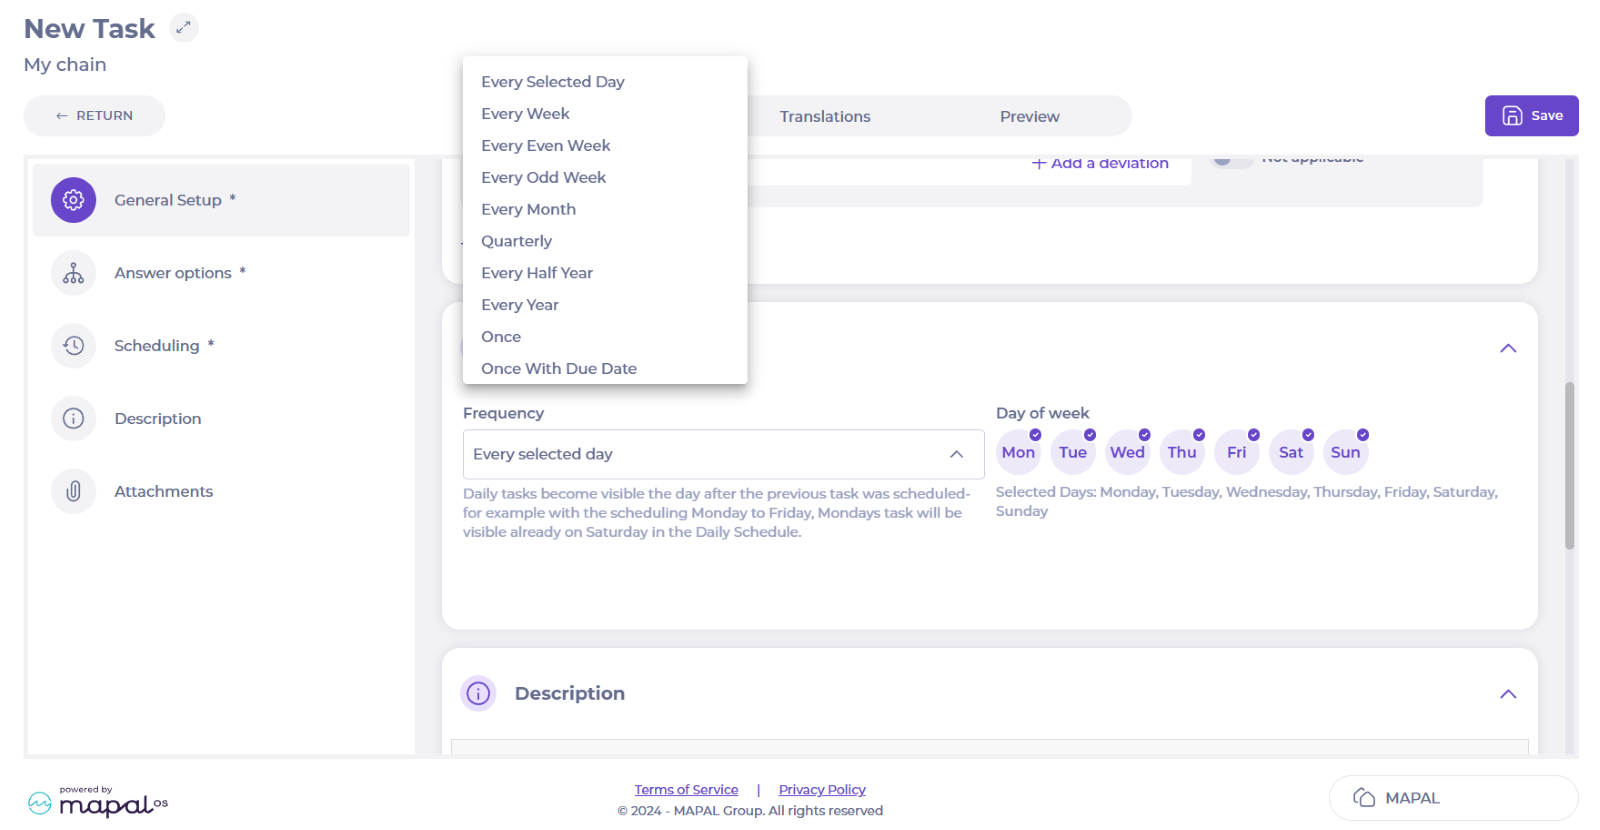
Choose the Scheduling for the task.
-
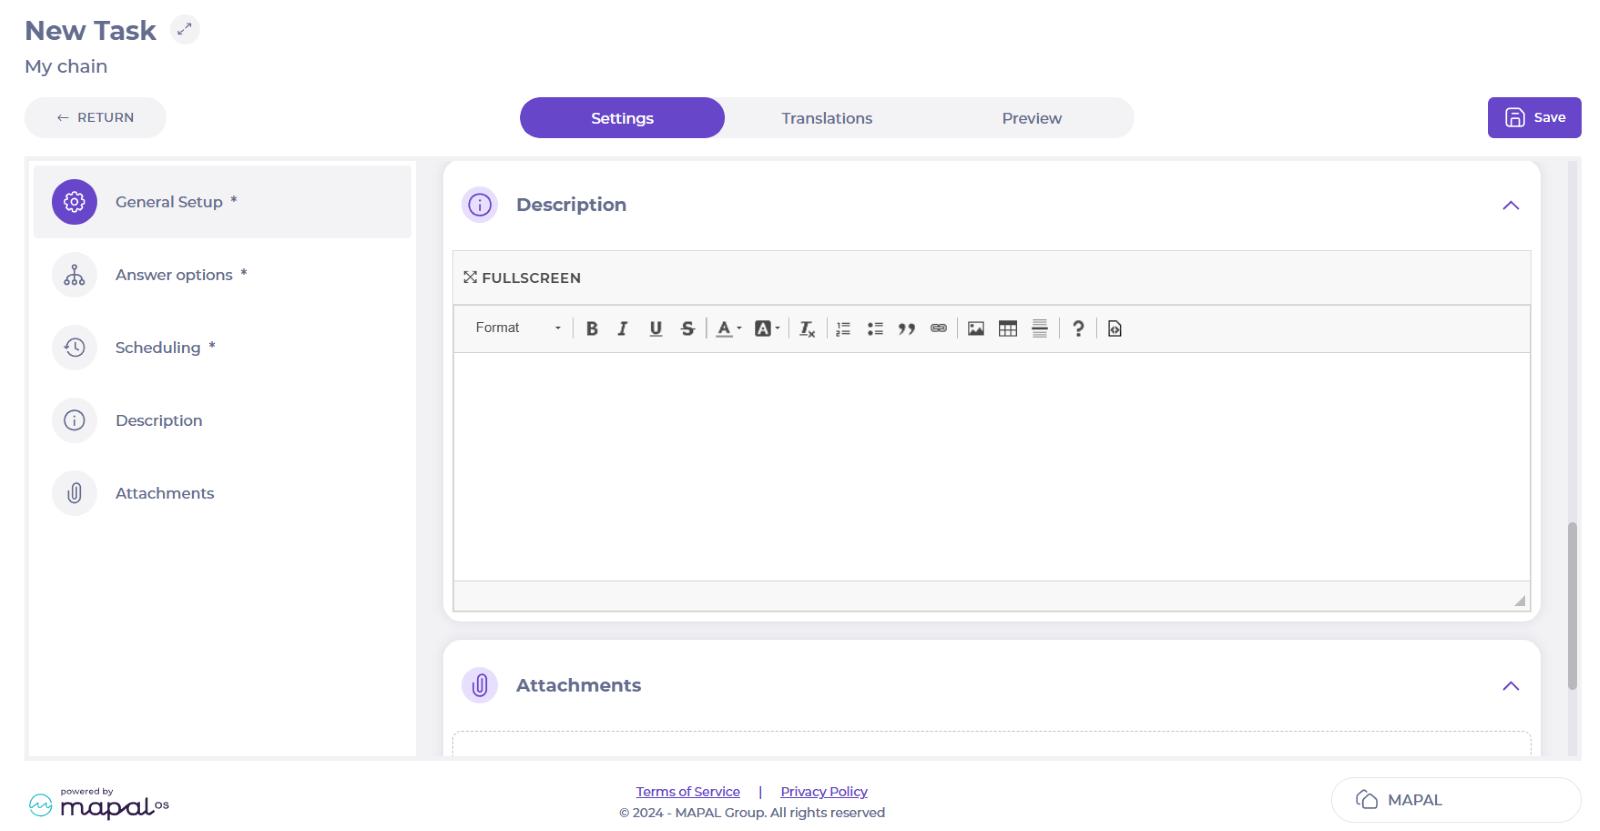
Assign a Description to the task and add Attachments if needed.
-
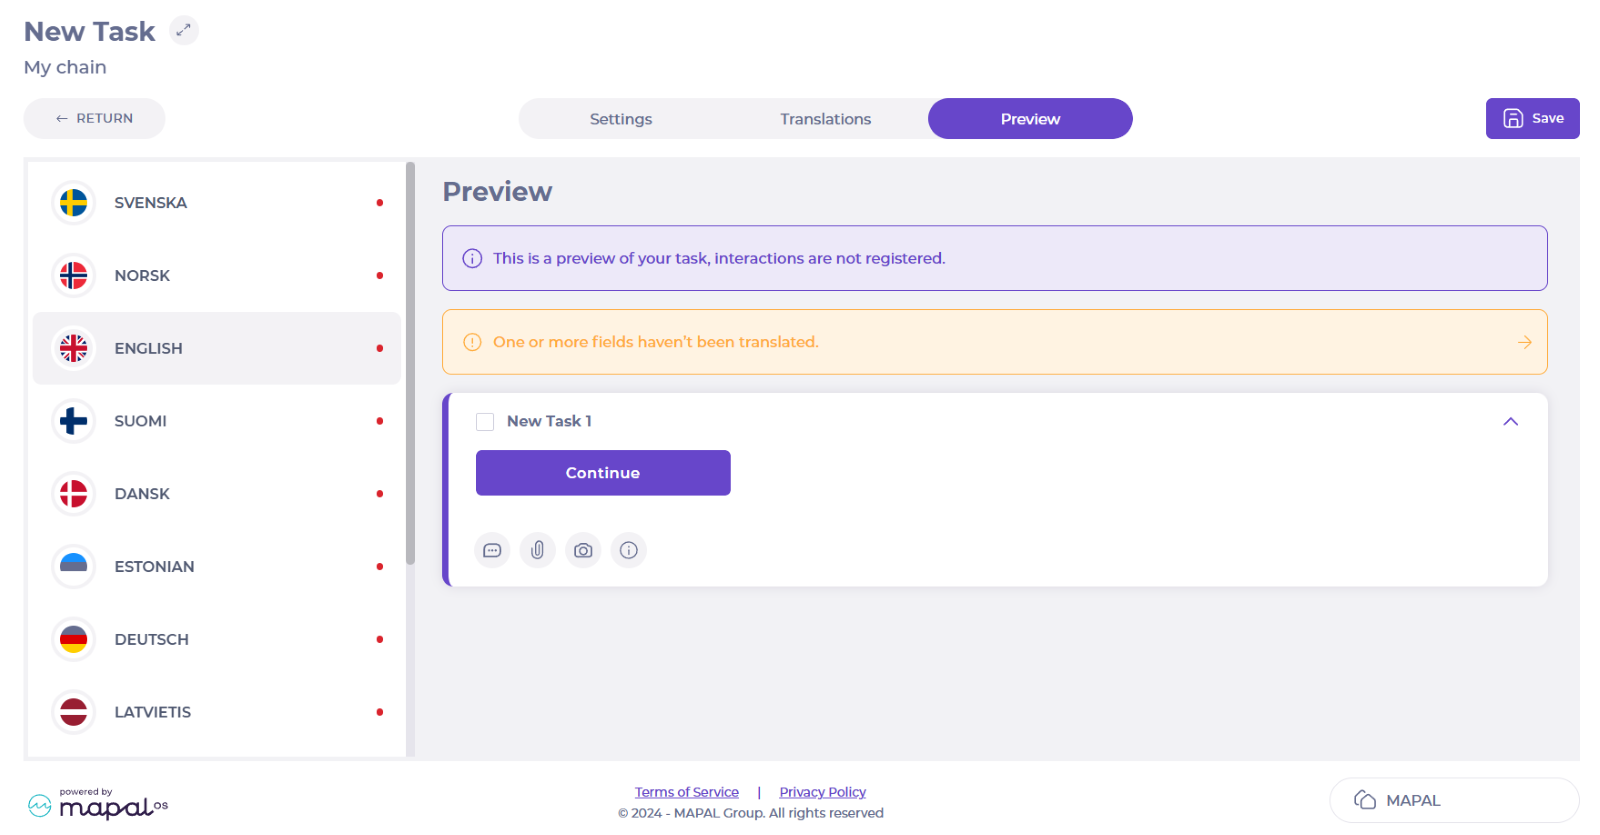
Select the Translations tab and add any necessary translations. You can add the translations manually, or use the automatic translation feature by selecting the desired language and pressing the Auto Translate button.
Notes: The Auto Translate feature needs to be requested. Contact your Customer Success Manager for more information.

-
Select the Preview tab to view the task details and correct as needed.
-
Select Save when you are done creating your task.
Back in Areas/checklist, you will now find your task under Unpublished tasks.
-
Drag and drop your task to the area you want it in.
-
When you have moved the task to the desired area, a confirmation window will open. Select Publish.

You will now be able to see your new task in the respective area you assigned.
Understand default and enabled workstations
The enabled and default positions are configured in the Projected Shift screen, at the time of shift configuration.
Enabled workstations
Enabled workstations are all positions that an employee is qualified to perform. Depending on their capabilities and performance, one or several positions may be assigned to the same employee.
Enabled workstations can be assigned on an employee-by-employee basis or using a general listing of the entire unit.
Default workstation
When shifts are created, employees will be automatically assigned to their assigned Default workstation. The default workstation will be one of the positions enabled for the employee.
Normally, when no default workstation is defined for an employee, his default workstation will be "Undefined".
For example, if an employee is new and has not been assigned a job yet, his default workstation will be "Undefined". However, if there is an employee who has already been qualified to fill kitchen, cashier, room, and service positions, but his default position is Kitchen, their shift will always be created for Kitchen by default.
It is always possible to change the assigned workstation in the shift manually through the Projected Shift screen.
To learn how to configure default and enabled positions, see Configure enabled and default workstations.
Understand the importance of stars in optimization
Each job position requires certain competencies, specific skills, and, in some cases, some prior academic preparation. For a worker to be considered qualified to perform a particular job, these aspects are taken into account and qualified.
For all those Centers whose Direct Work table is configured by "Demand by Workstations", Workforce will allow an employee's performance evaluation by workstation through a progressive "star" rating, ranging from 0.5 to 5 stars, being the lowest and highest qualification respectively.
This configuration will be made in the planning of weekly shifts and will help in the optimization process, since, by doing so, shifts will be projected to the most qualified employees in the Work Center during peak hours of traffic and sales in the Work Centers.
To learn how to perform shift optimization after employee qualification, see Configure shift optimization.
If you want to learn about the different shift optimization parameters, see Understand the types of optimization.
Create a procedure
Start from: the Compliance central Overview page.
- Select Procedures from the main menu.
- Select the CREATE PROCEDURE button.
- Complete the fields in each of the sections of the New procedure form that appears.
Note: the Label and Module fields are mandatory.

- Select PREVIEW to see what the procedure would look like.
- Select SAVE when you finish creating and editing the procedure.
See below for a brief description on how to complete each of the fields:
Label: enter a name for your procedure.
Module: select the module you wish to link the procedure to. For example, you may wish to link a ‘Disinfect working areas’ procedure to a Food Safety module.
Description: provide any necessary information on how to carry our this procedure. You can add text, images and links. Note: select the Full screen button to expand the text box.
Attachments: add any documents that are necessary to carry out this procedure. For example, you may wish to add an instructions manual for more complex procedures.
Manage an order placed by phone on Easilys
Note: actions performed on the Easilys platform are subject to user access permissions. If you are unable to carry out the actions described in the articles, it may be because you do not have the necessary permissions activated on your user profile. Contact the Support team, or your administrator, for help.
Start from: The Easilys menu.
When you place orders with your suppliers by telephone, you still need to keep Easilys informed, firstly to keep a written record of your order, and secondly to be able to manage the receipt of this order on the day.
-
Select Supplier orders > Supplier orders from the main menu.
-
Prepare your shopping cart. If necessary, see Prepare and send an order. ?
-
Once the order has been placed by phone, you need to tell Easilys that the order has been placed: select the shopping cart you have prepared and select Send manually.

The Send manually mode is specially designed for this situation. By sending the order manually, you are indicating to Easilys that the order has been correctly dispatched on your side, and that it can consider this task completed.
Notes: If the Send manually mode is not available, you must activate it on the supplier record (Products>Suppliers, select the supplier record and select Modify. Then activate the Manually option, then select Save).
Easilys automatically generates a delivery note (Supplier orders > Receptions) for the delivery date you indicated in the shopping cart. You can validate the goods receipt on the day you receive your goods.
Set your purchasing preferences for order preparation, create a Smart Selection rule
??Notes: actions performed on the Easilys platform are subject to user access permissions. If you are unable to carry out the actions described in the articles, it may be because you do not have the necessary permissions activated on your user profile. Contact the Support team, or your administrator, for help.
Start from: The Easilys menu.
When preparing a menu on Easilys, the application suggests supplier products corresponding to the ingredients listed in the recipes.
These supplier products are, by default, the cheapest supplier products. But it's quite possible that you'd like to use a higher range for a particular ingredient, or that you'd like to give preference to BIO.
Smart Selection rules then allow you to tell Easilys your preferences.
Thanks to them, you can tell Easilys to give you preference to BIO-labeled supplier products for your Taste Week menu, for example.
Creating a Smart Selection rule
-
Select Menus > Smart Selection from the main menu.

-
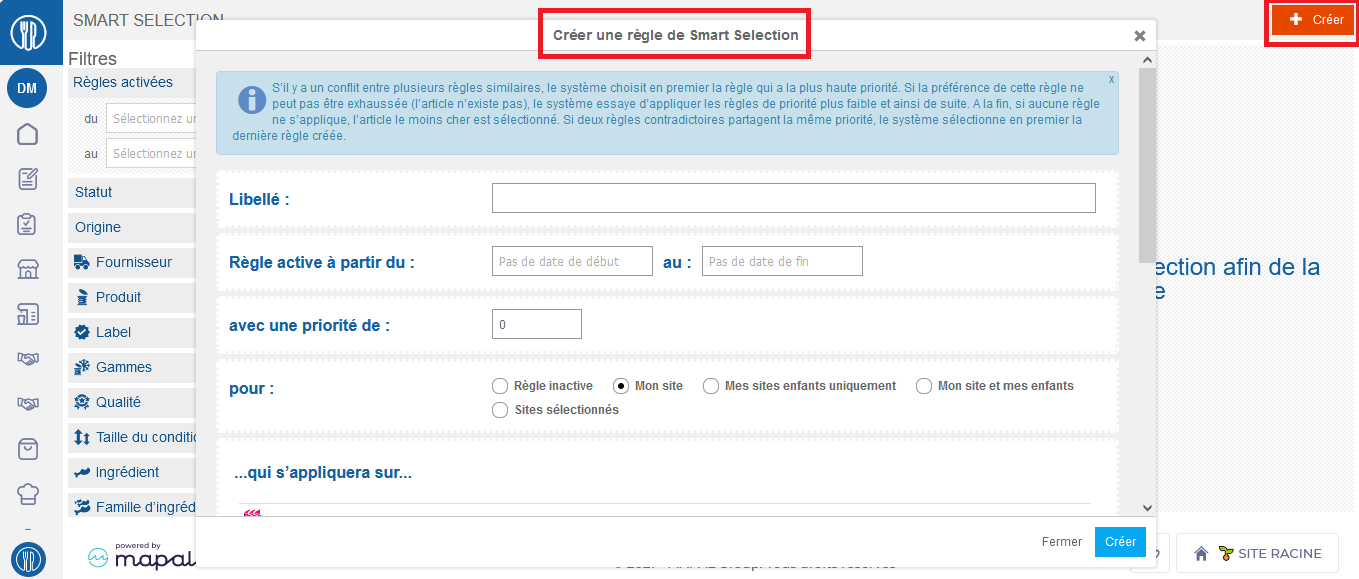
Select Create.
The "Create a Smart Selection rule" window then appears.
-
Fill in the information to create the rule.
Details of information required to create a rule
- Name: Enter the name of the rule here.
- Rule active starting from: ... to: Specify here the period during which you want the rule to be effective. It is possible to leave the date blank to let Easilys know that the rule will always remain in force.
- with a priority of: Indicate here the priority level of the rule. This enables Easilys to specify which rule should take precedence over another in the event of multiple rules potentially relating to the same criteria.
Example: One rule asks Easilys to give priority to frozen products for the "SEAFOOD PRODUCTS" ingredient family, and another rule asks Easilys to give priority to fresh products for the "HAKE FILLET" ingredient family.
These two rules conflict.
The "HAKE FILLET" rule will be given priority 1, so the "SEAFOOD PRODUCTS" rule will apply EXCEPT when proposing a supplier item corresponding to the "HAKE FILLET" ingredient.
So we'll have frozen products on offer EXCEPT for the "HAKE FILLET", which will be fresh.
- for: Indicate where the rule is to be applied. The rule can apply only to the site on which it is created (My site - Mon site) and its child sites (My site and my child sites - Mon site et mes enfants). It can be applied only to the child sites of the site on which it is created (Only my child sites - Mes sites enfants uniquement). And it can be applied to a list of specifically selected sites (Selected sites - Sites sélectionnés).
If you select "Selected sites", the "Sites" application criteria will appear in the next section "... which will apply to...", allowing you to add the sites to which the rule is to be applied.
- ... which will apply to...: Indicate here which elements you wish to apply the rule to by selecting +Add next to each element (Menu frames, Credits, etc.). Here you can add several preferences per element.
- ... according to these preferences...: Indicate here which preferences Easilys should give priority to for each item (Suppliers, Products, etc.) by selecting+Add. Here you can add several preferences per element.
-
Select Create to validate rule creation.

Prepare and validate an exit voucher
??Notes: actions performed on the Easilys platform are subject to user access permissions. If you are unable to carry out the actions described in the articles, it may be because you do not have the necessary permissions activated on your user profile. Contact the Support team, or your administrator, for help.
Prepare a new exit voucher
-
Navigate to Stock >Exit vouchers.
-
Select + Create.

?
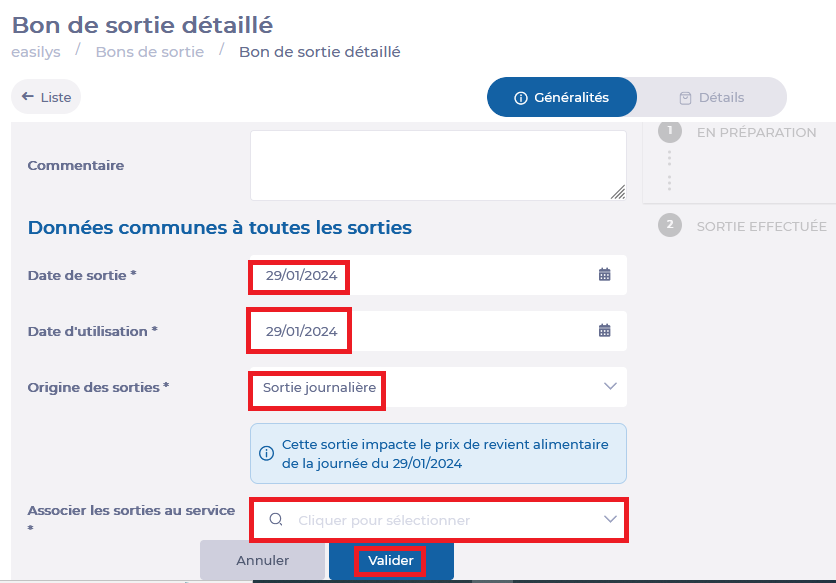
You are then redirected to a blank exit voucher form, in its "Generalities" tab.
-
Complete the information in the "Generalities" section: at the very least, indicate the release date, the service, and the origin of the outputs in question (daily exit [sortie journalière], manual regularization exit [sortie de régul. manuelle], annex exit [sortie annexe], or exceptional exit [sortie exceptionelle]).
-
Select Validate.
The exit voucher is now ready to be filled out.
Note the presence of a guide when you are in the "Generalities" tab of the exit voucher. This guide is here to remind you of the steps you need to take before validating your exit voucher.
-
Select the exit voucher's Details tab or select Add desired products to exit voucher in the guide.
-
Select + Product.
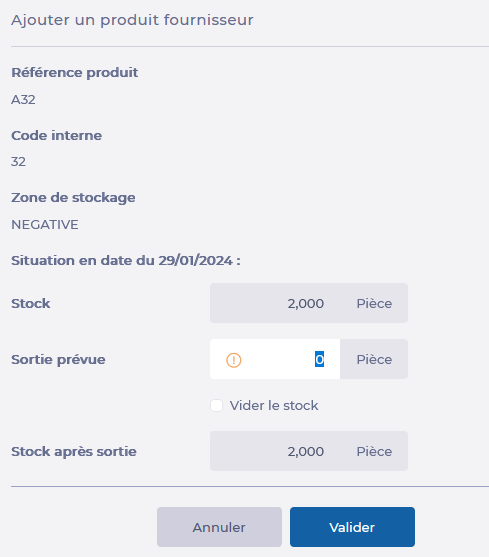
The "Add a supplier product" panel appears.

-
Select "Supplier product" in the search bar to select a product to add to the exit voucher.
The "Output" section of the "Add a supplier product" panel then appears.
-
Indicate the quantity to be issued from the selected supplier product.
-
Select Validate.
The product is added to the exit voucher.
Modify an exit voucher
-
Select Modify in the "Generalities" tab to change the release date or service, for example.
-
Select a supplier product from the list in the "Details" tab to modify the quantity to be issued or delete the product from the issue slip.
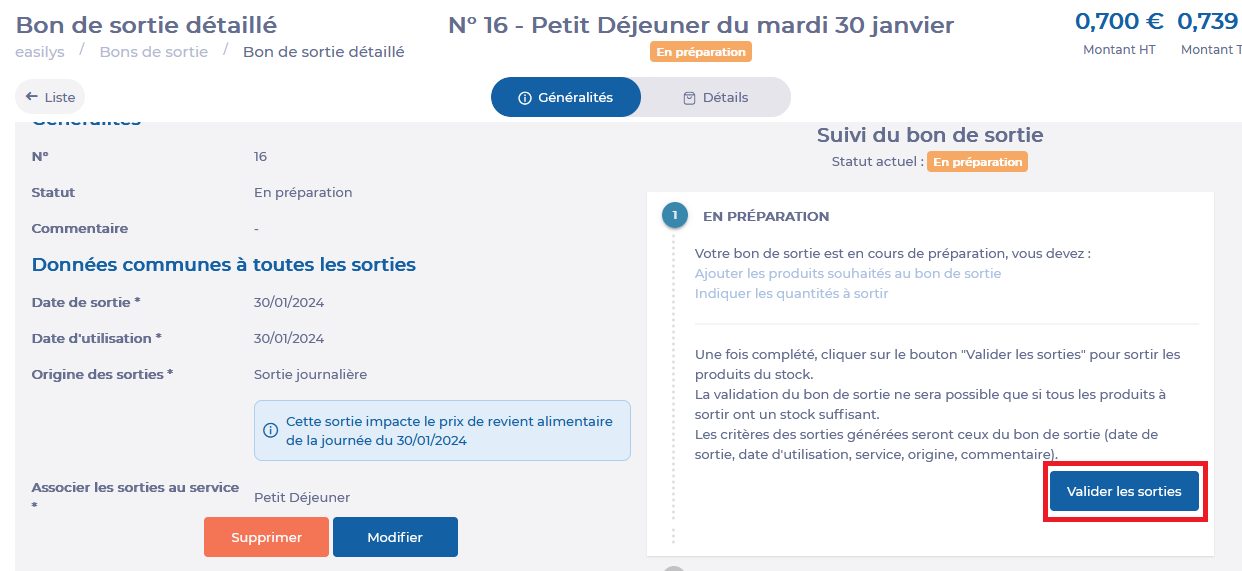
Validating an exit voucher
-
Select Validate outputs in the "Generalities" tab of the stock removal slip to validate the stock removal slip and enable Easilys to automatically remove stock from your warehouse.
?