Prerequisite: A technical action is required to activate multilingual mode in your environment. If you would like to use this mode and it has not yet been activated, please contact the support team.
Principle
In multilingual mode, users can translate certain data into the different working languages defined in Easilys, particularly into the language associated with their user profile.
For example, the name of the same recipe may vary depending on the user’s language:
For a user whose language is English: Creamy Chicken with Mushrooms
For a user whose language is Spanish: Pollo a la crema con champiñones
For a user whose language is French: Poulet à la crème et aux champignons
This multilingual option does not apply to the translation of interface elements (menus, buttons, etc.). Those translations are managed directly by our team and cannot be modified by users.
When the multilingual option is activated
When multilingual mode is enabled in your environment:
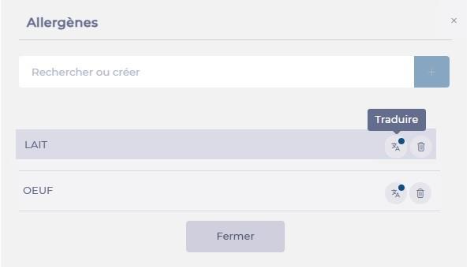
Multilingual fields can be identified by a translation icon.
If the icon’s indicator is green, it means the field already has translations in all the active languages of your environment.
Data is displayed in your own language (the one defined in your profile) if a translation exists. If not, it appears in grey using the default system language.
If you have permission to edit a field, and that field is multilingual, you can enter or update translations in all available languages in your environment.
Entering or editing translations
Click the translation icon next to the field.
Enter or modify the desired translations.
Click Validate or Save, depending on the case.
Example
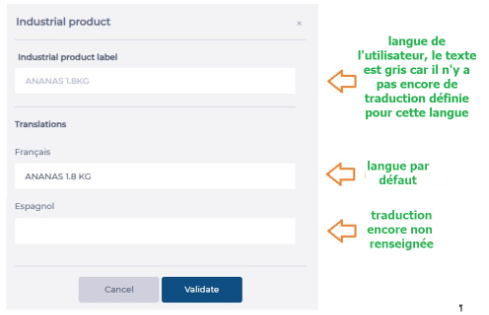
The following example shows the entry field for the name of an industrial product. The user’s language is English, but the data has not yet been translated. It therefore appears in the server’s language — in this case, French.
Note that the name appears greyed out, indicating that it has not yet been translated into English.
The user can then click the small translation button:
A panel appears showing which parts are already translated and which are not.
Non-exhaustive list of multilingual fields
Subject
Translatable Field
Ingredient
Ingredient name
Ingredient family name
Ingredient production unit name
Industrial Product
Industrial product name
Industrial product composition
Country / place of origin name
Label name
Allergen name
Industrial product family name
Industrial product range name
Industrial product category name
Industrial product quality name
Industrial product storage zone name
Supplier Product
Supplier product name
Recipe
Recipe name
Commercial recipe name
Recipe category name
Recipe steps name
Production workshop name
Transformation type name
Menu
Menu name
Meal component name
Service name
Segment name
Texture name
Diet name
Guest name
Other
Analytical group name
Smart Selection rule name
Smart Grammage name
Manage employee profiles in Mapal OS
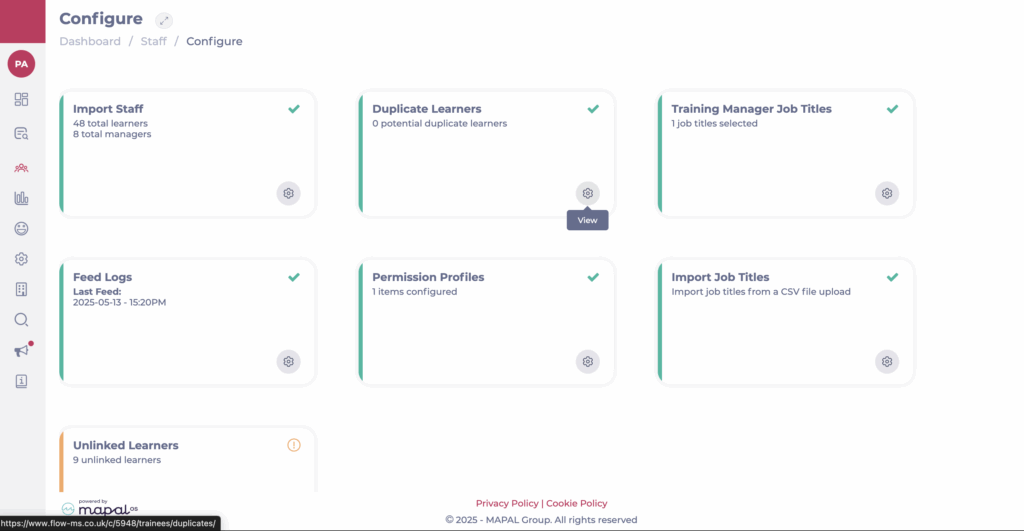
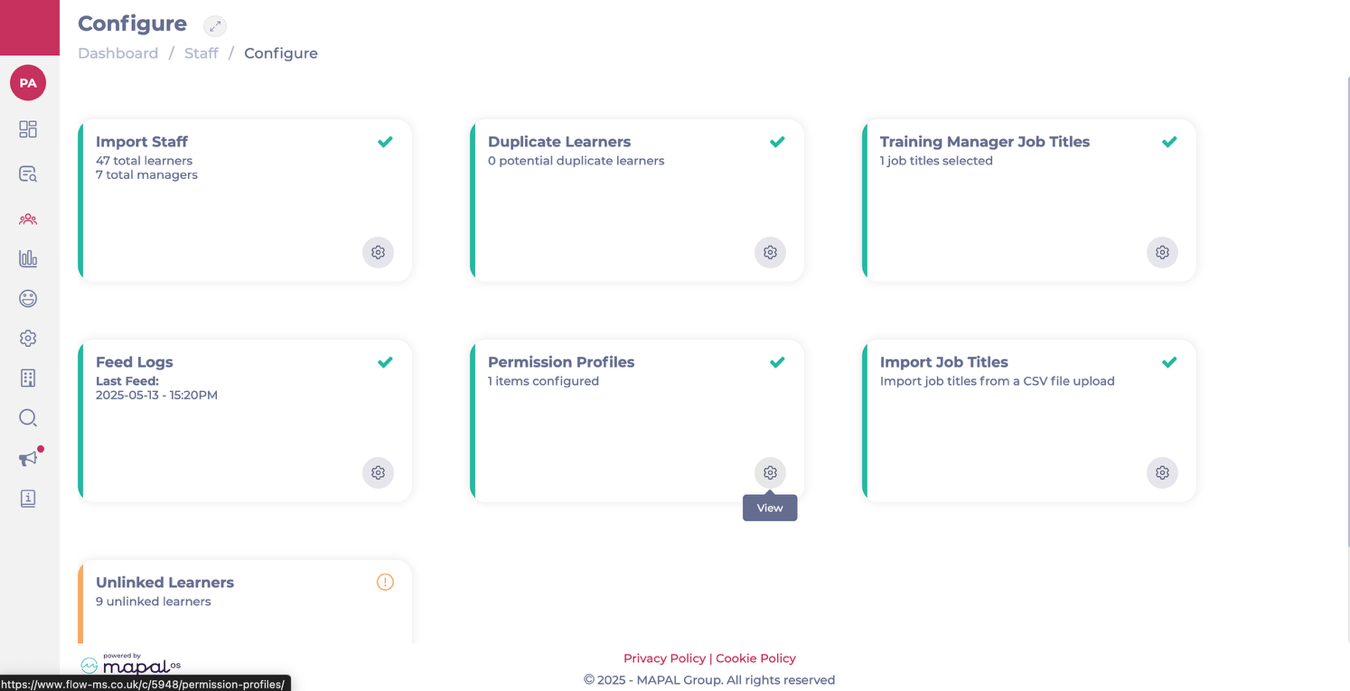
Start from: The Configuration dashboard.
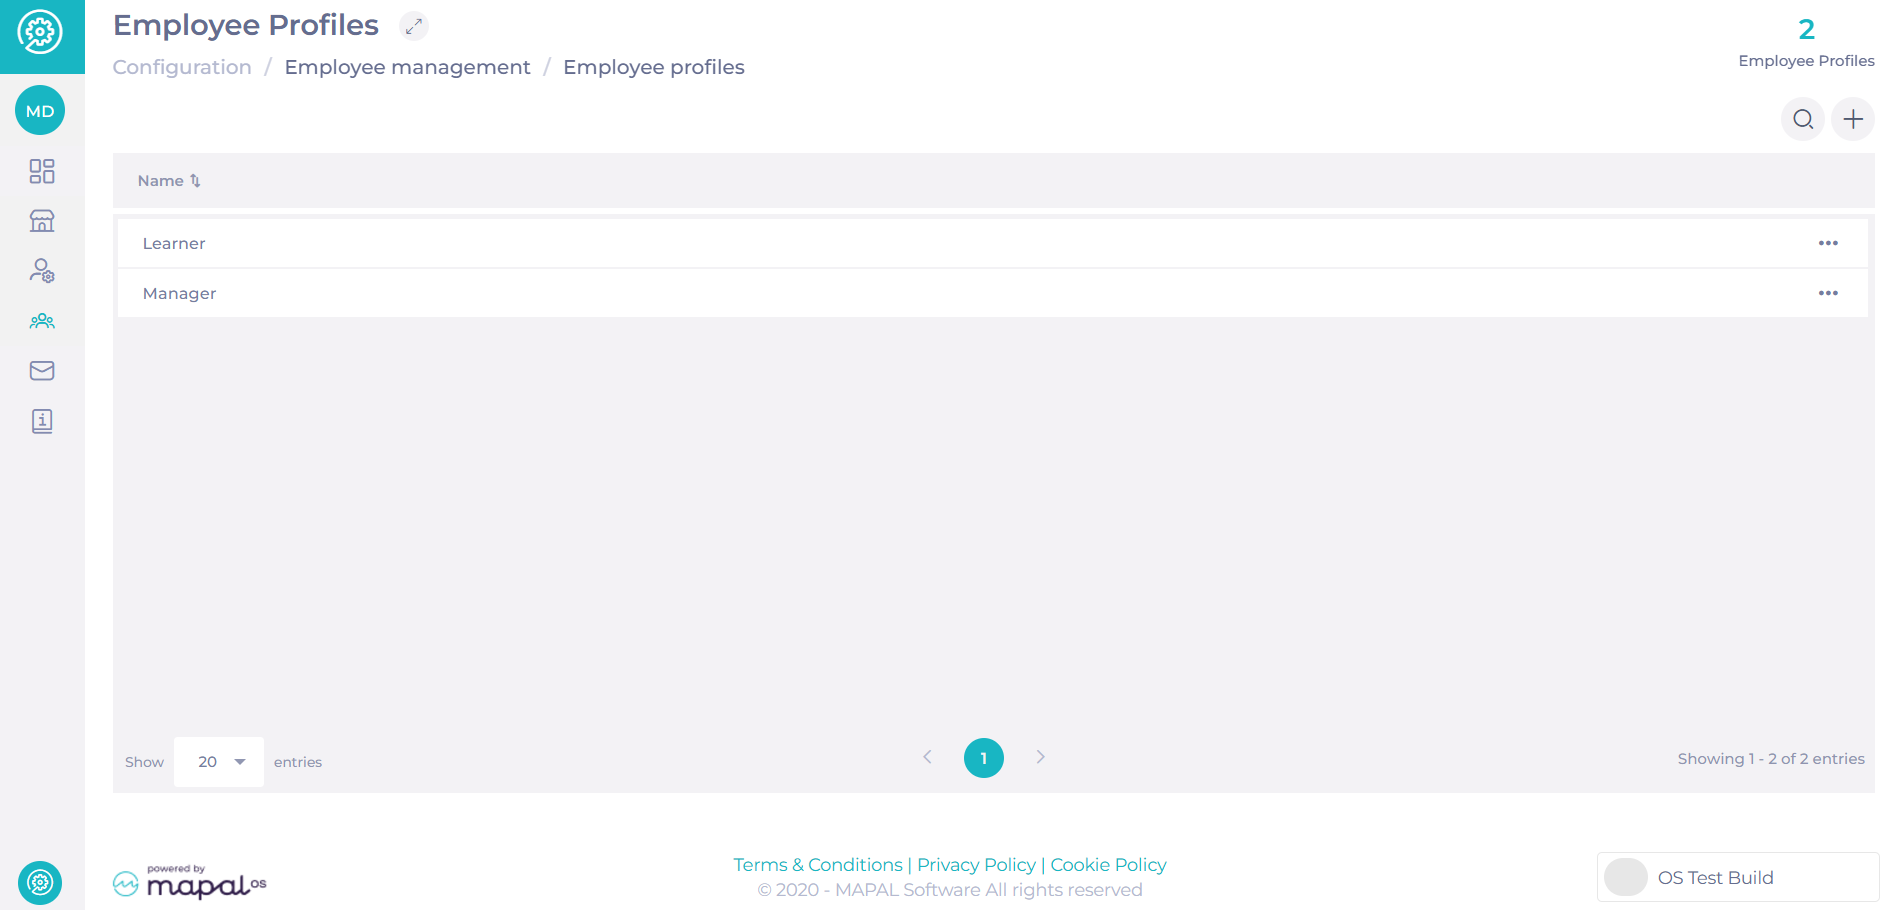
Employee Profiles
Assigning Employee Profiles allows managers to grant team members access to specific tools, apps, and resources within the Mapal OS ecosystem, streamlining operational efficiency and role-based access.
Create an Employee Profile
Select Employee Management > Employee Profiles from the main menu.
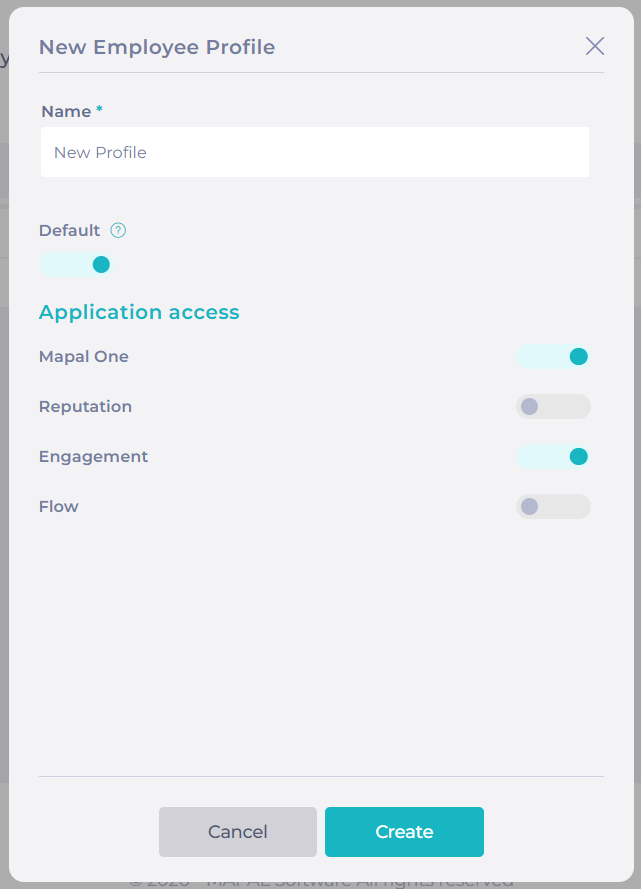
Select + Add to open the New Employee Profile window.
Fill in the Name field (mandatory).
Toggle the Default Profile option if you want this profile to be the default for new employees.
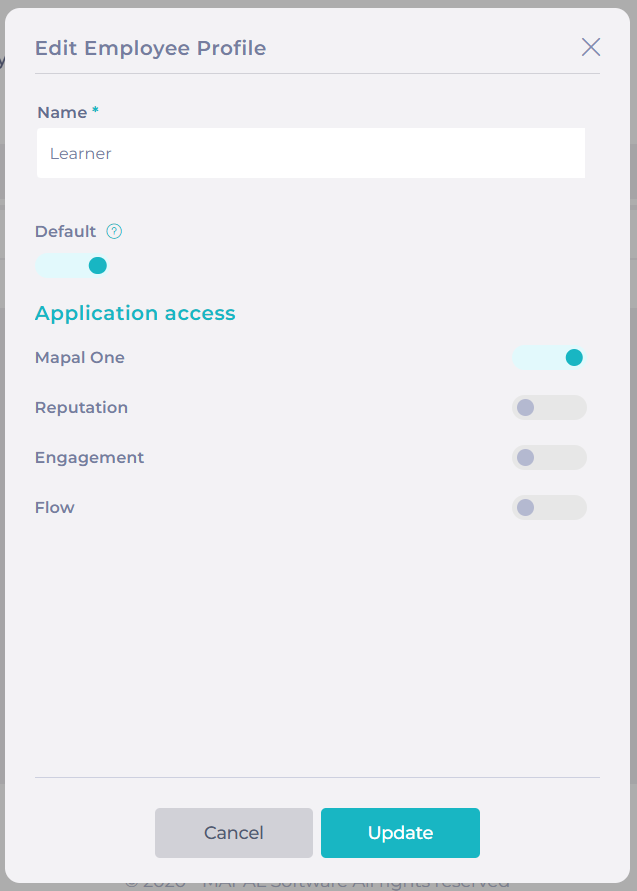
Under Application Access, toggle the switches to grant access to specific apps, such as:
Mapal One
Reputation
Engagement
Flow Learning
Once all configurations are set, select Create.
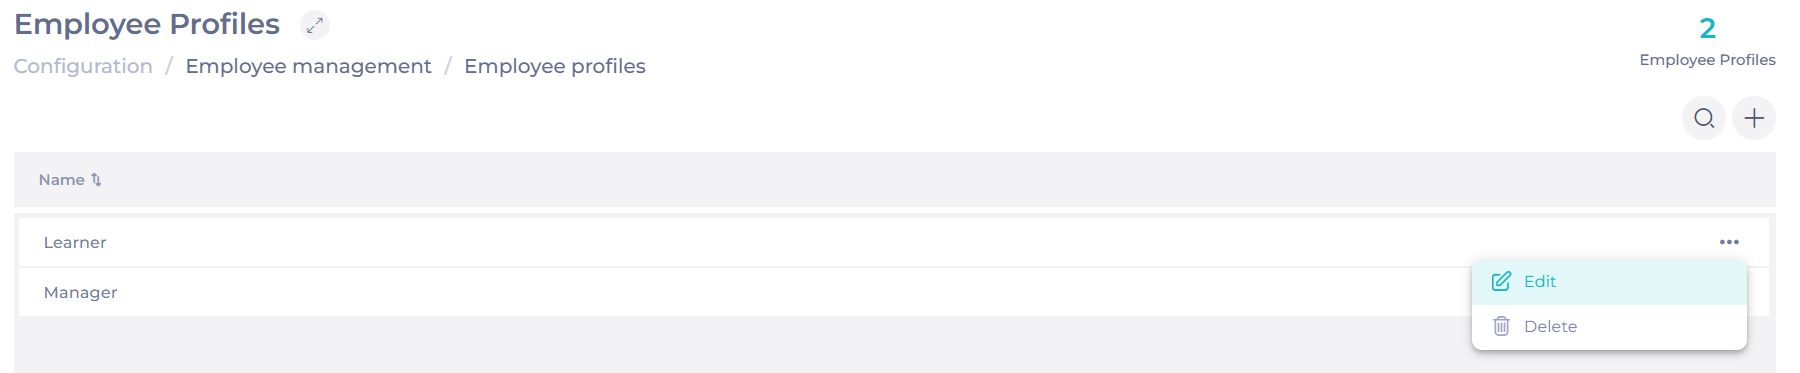
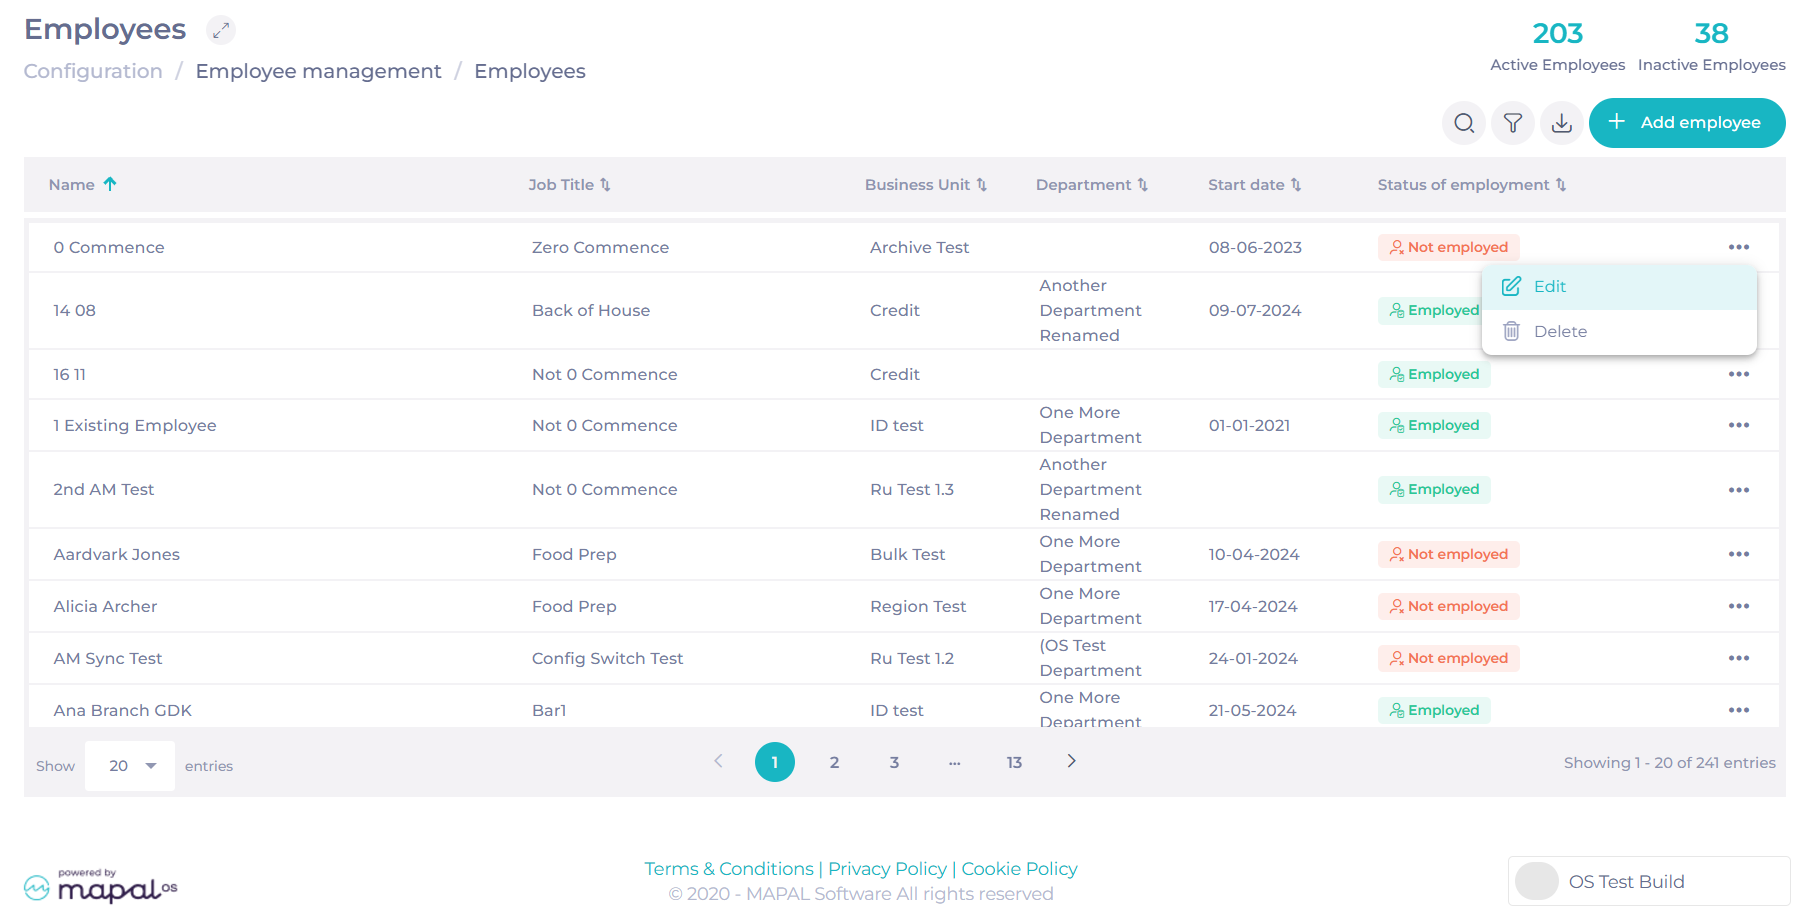
Edit an Employee Profile
In the Employee Profiles list, select the three dots icon next to the profile you want to edit.
Select Edit to open the Edit Employee Profile window.
Adjust the parameters as needed.
Select Update to save the changes.
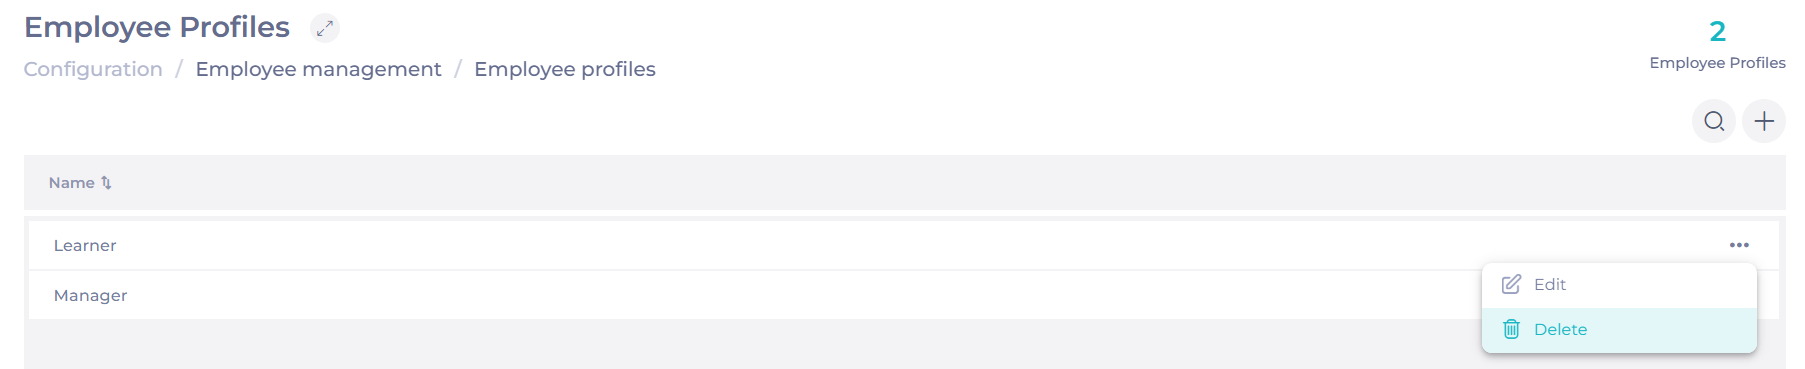
Delete an Employee Profile
In the Employee Profiles list, select the three dots icon next to the profile you want to delete.
Select Delete.
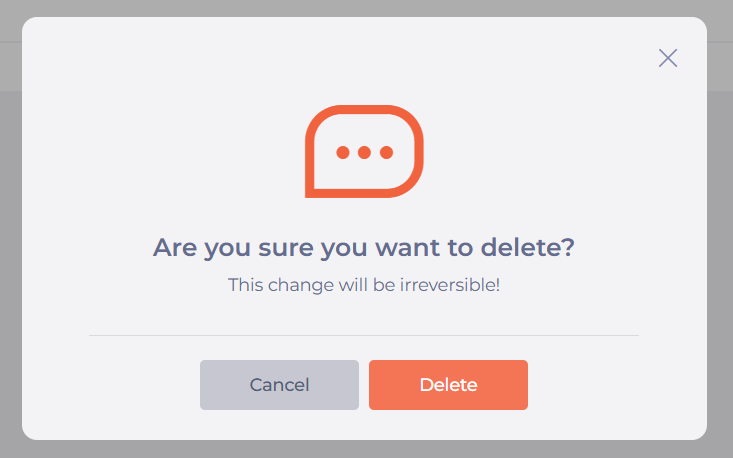
Confirm the action in the pop-up window by selecting Delete.
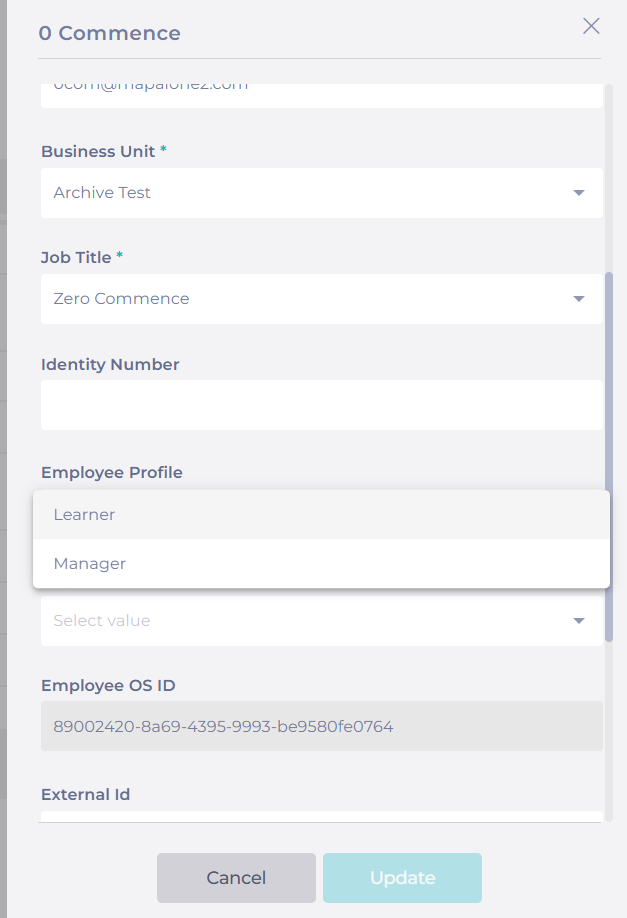
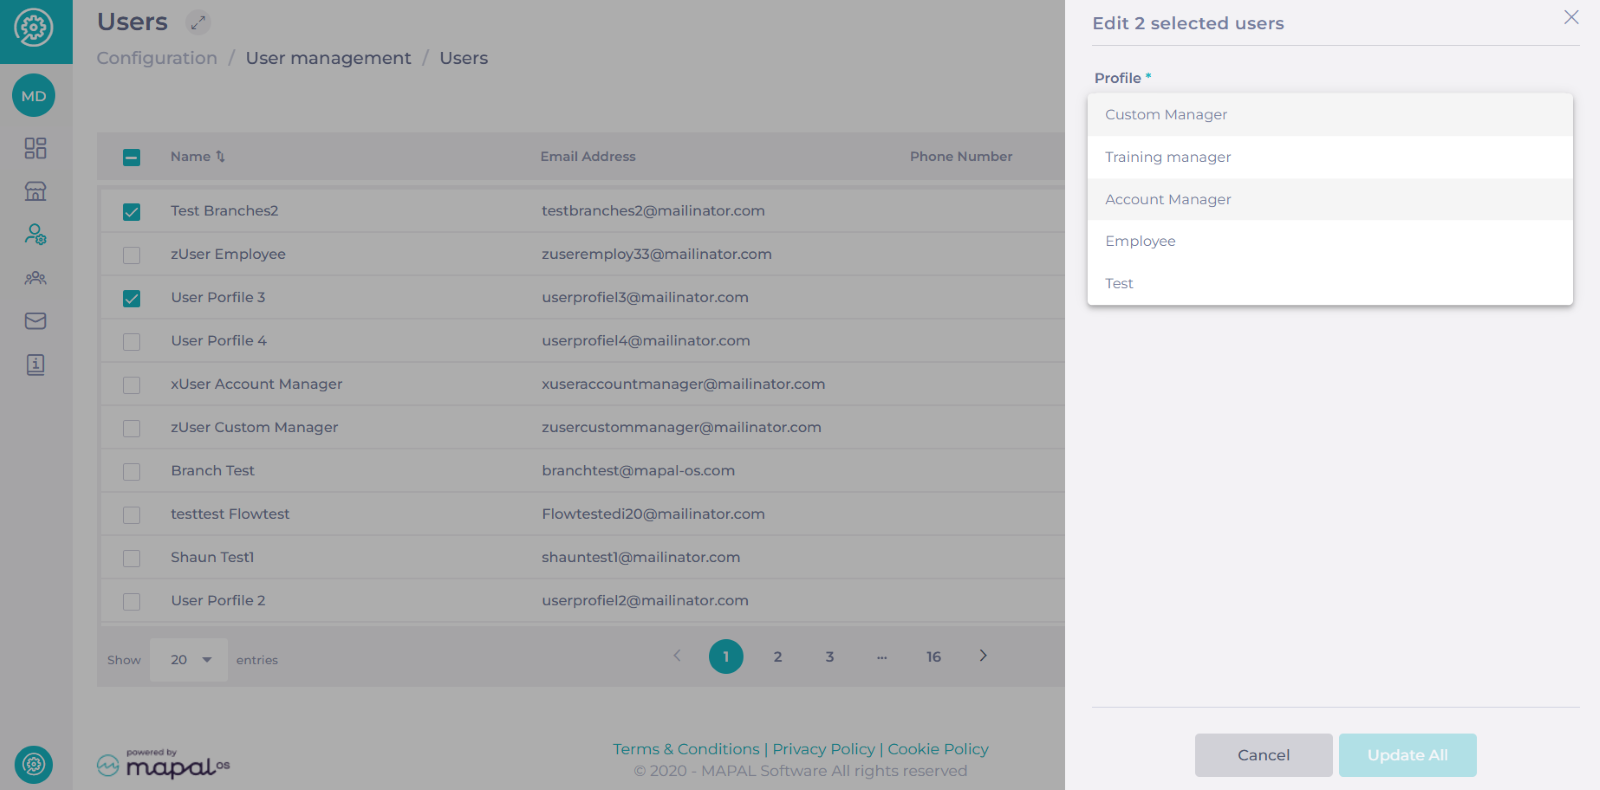
Assign an Employee Profile
Navigate to Employee Management > Employees.
Either create a new employee or edit an existing one by selecting the Edit option.
Select the appropriate Employee Profile from the dropdown menu.
Once the profile is assigned, select Update to save changes.
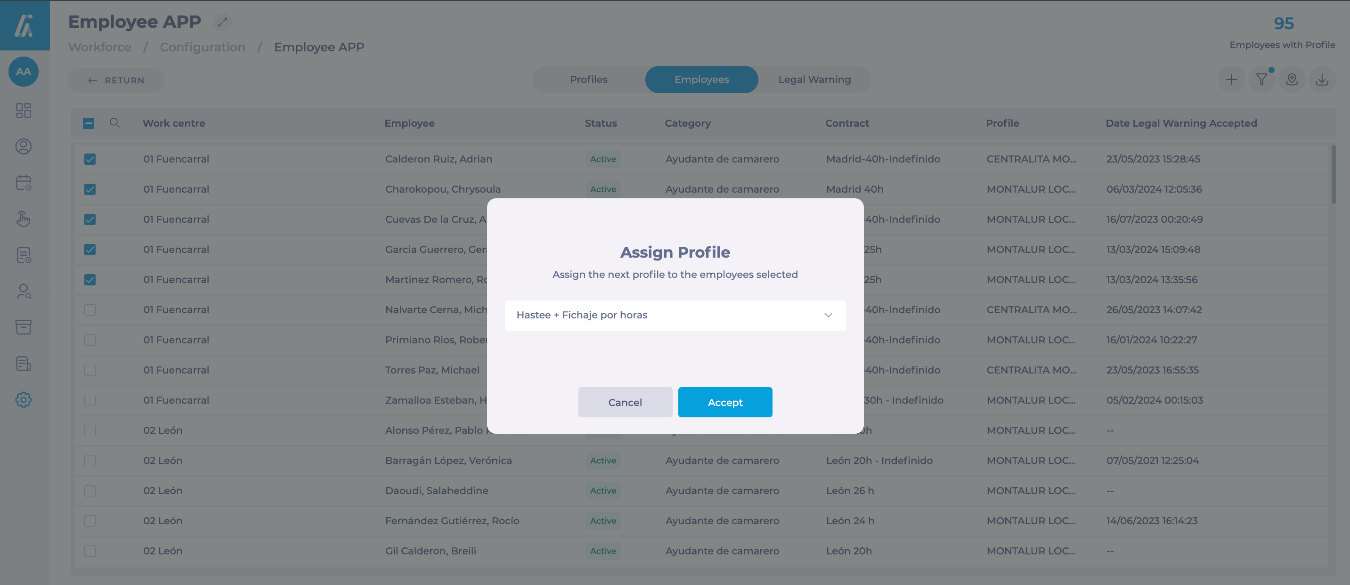
Workforce Related Permissions
Once migrated to Mapal OS, employees will no longer be able to log in to GIR Staff. Instead, they can access equivalent functionalities through Mapal One. To enable this:
Ensure the Workforce Application Access switch is toggled on in the Employee Profile.
Workforce-related permissions assigned to profiles are managed in Workforce under Configuration > Employee App.
Manage tasks locally ("management mode"), manage actions with location (create, copy, activate/deactivate). Can see and acknowledge procedure updates is available to your tenant.
When you are done granting accesses to that profile, you can go back to Mapal OS and assign the profile to the respective user or users.
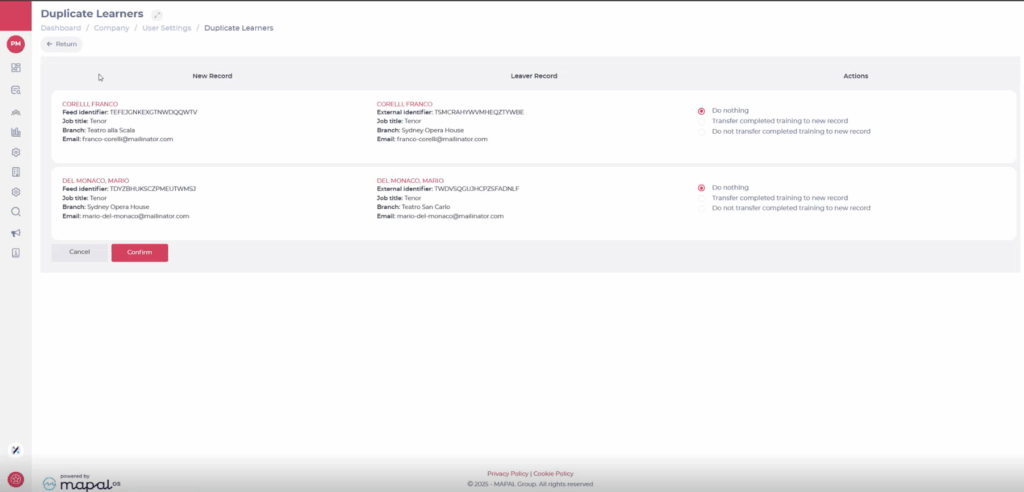
Note: The Duplicate Learners is available only for platforms where Mapal OS is the source of truth..
You'll see a list of learner records (synced from OS) that match an existing leaver record in Flow.
The match is based on name, email address, and company.
Click into a learner to compare profiles and view any existing training.
You will be given three options:
Do nothing: Take no action now. The learner will stay in the duplicate list and you can return to it later.
Transfer completed training to new record: This merges the two profiles. Completed training from the leaver is copied to the new active profile.
Do not transfer completed training to new record: Confirms that the profiles should remain separate and removes duplicates from the list.
Note: You can only transfer training from one leaver profile per new learner. If multiple leavers are listed, you’ll need to choose one and mark the others as “Do nothing” or “Do not transfer”.
After selecting an option, click Confirm to finalise the action.
The duplicate will be removed from the list (unless you chose Do nothing).
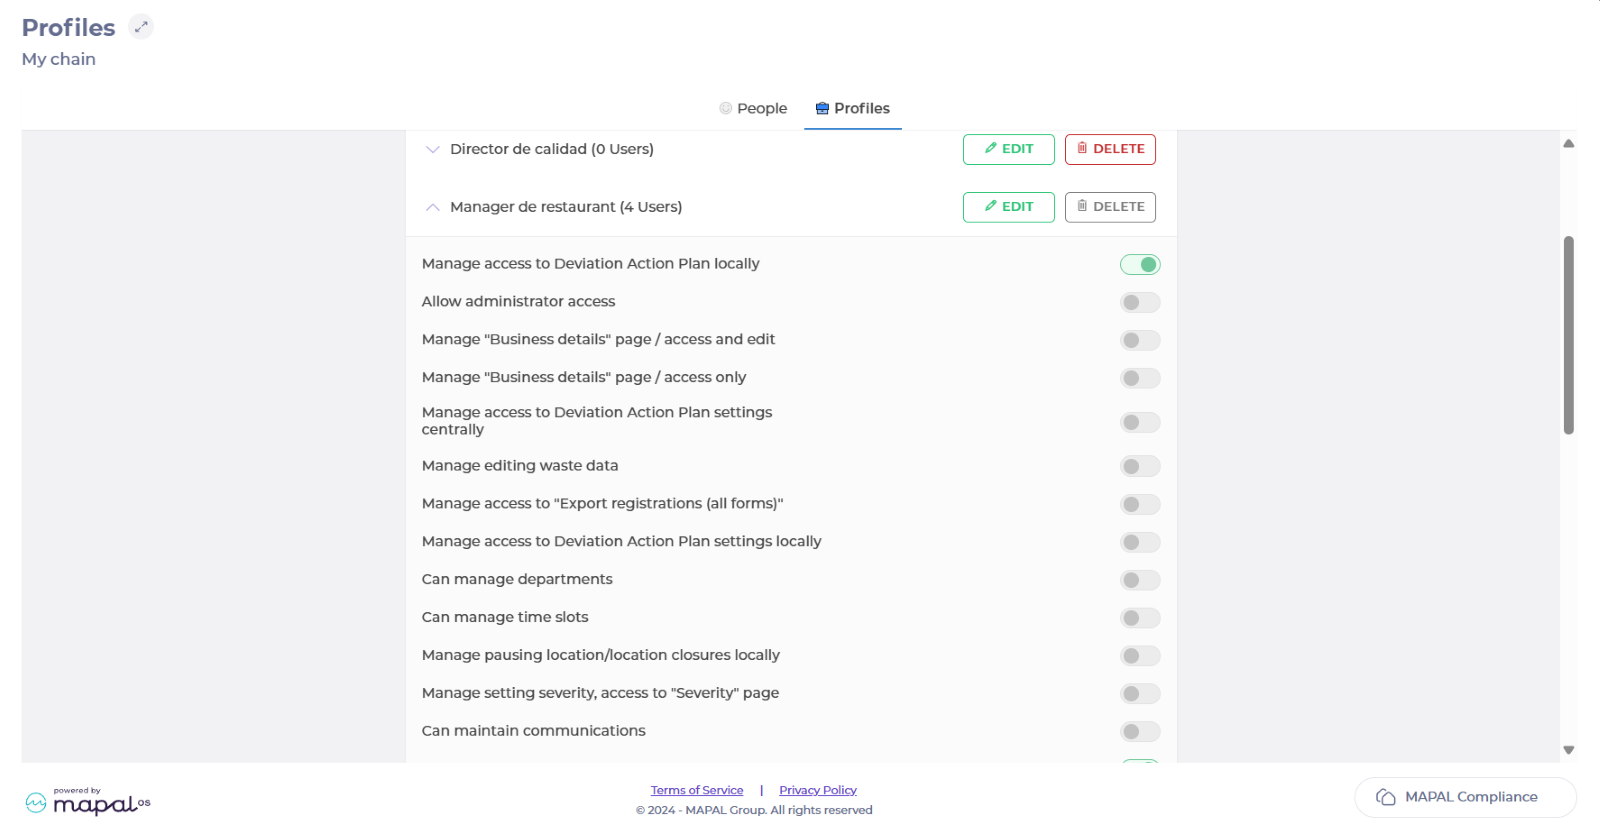
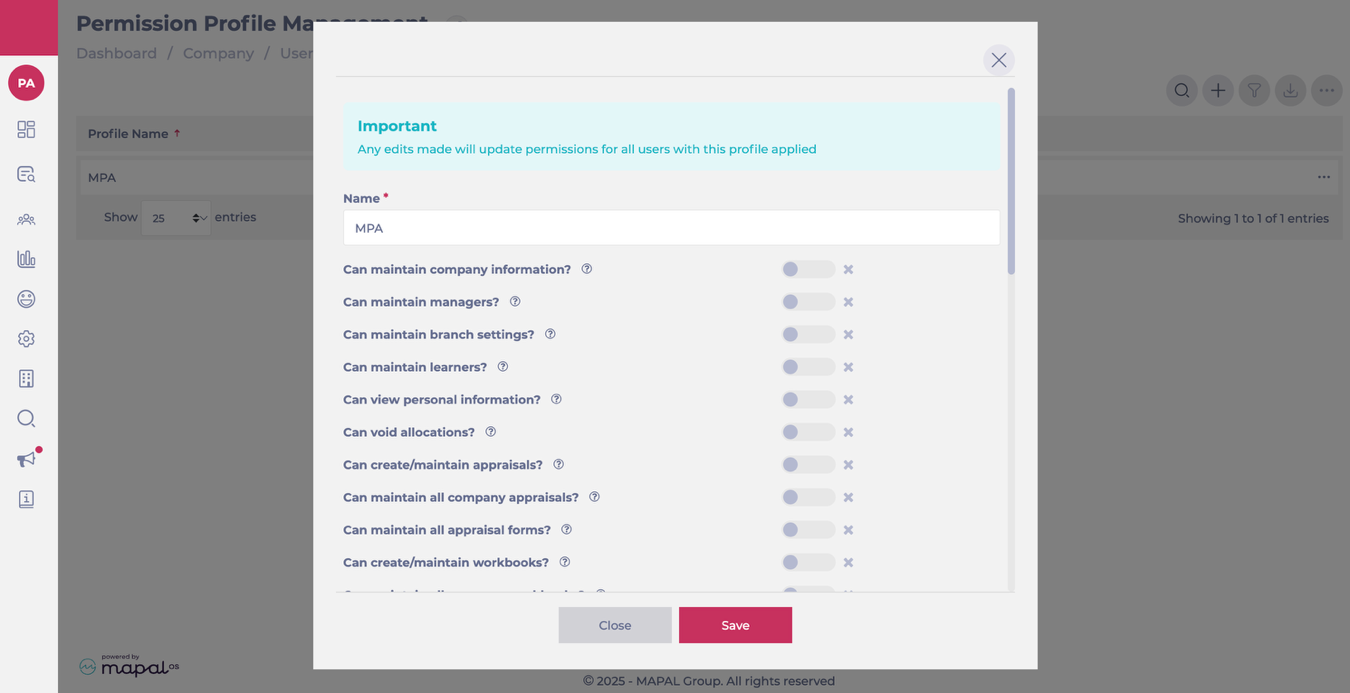
Toggle the controls to enable and disable specific permissions as needed.
Select Save.
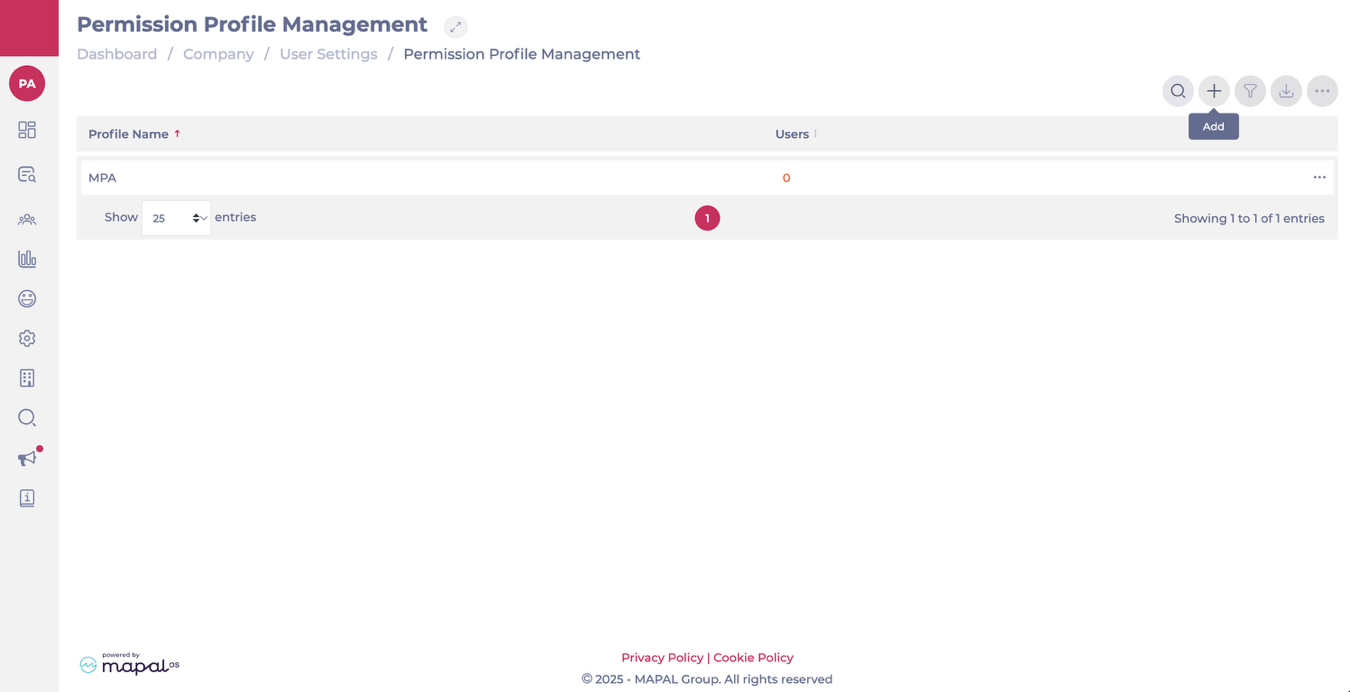
Edit an existing profile
Select the desired profile from the list.
Adjust the permission toggles as needed.
Select Save.
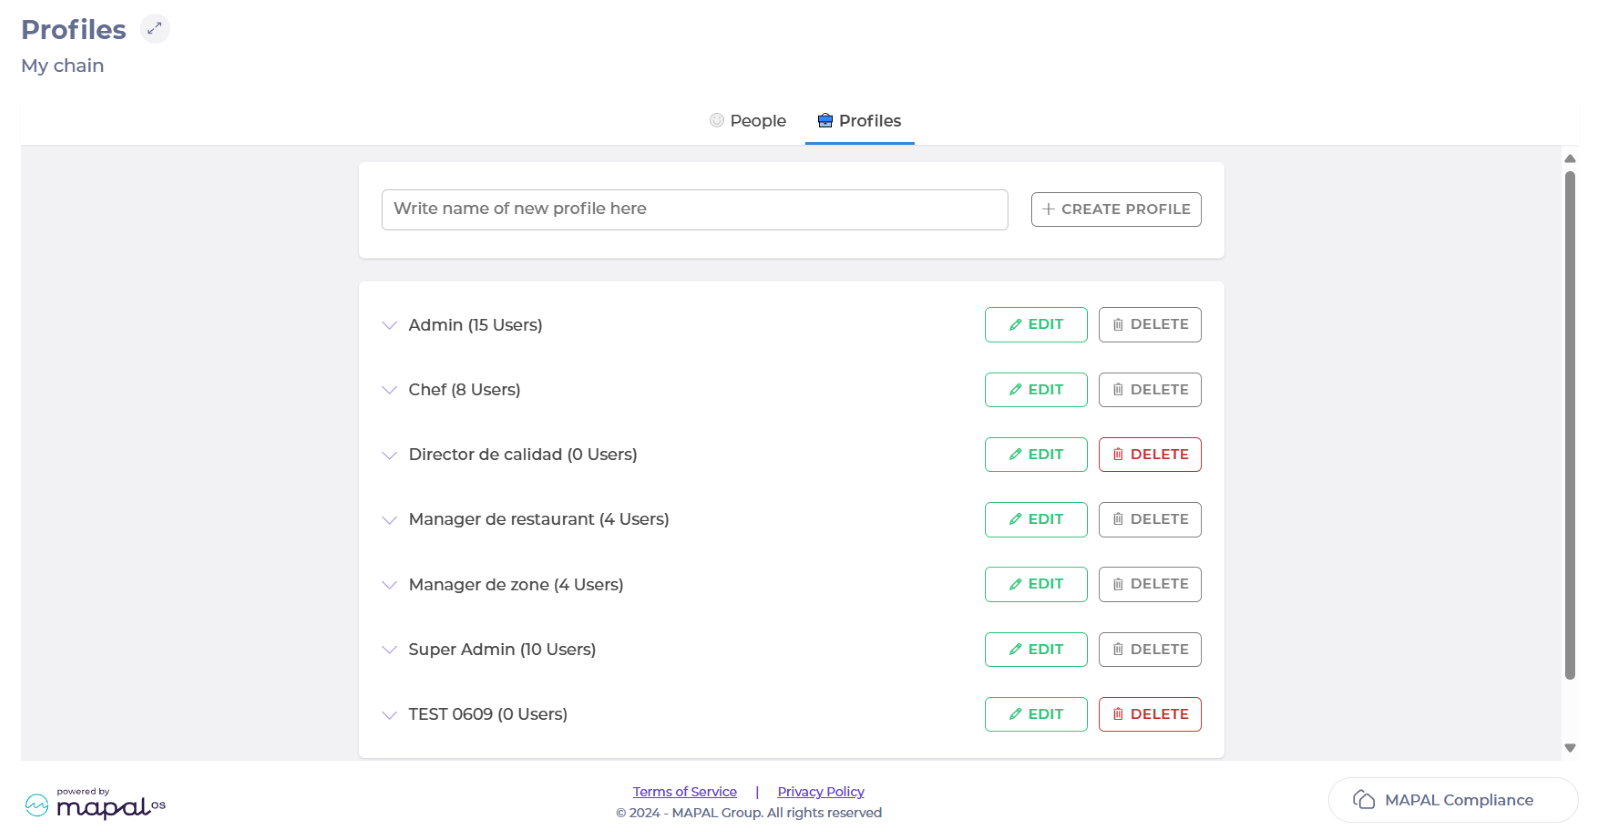
Permissions
The following permissions are available from the permission profile screen:
Can maintain company information?: can configure the platform.
Can maintain managers?: can edit current training manager permissions.
Can maintain branch settings?: can edit individual branch settings e.g., reporting levels, address etc.
Can maintain learners?: can add/remove learners and edit their profiles.
Can view personal information?: can view details such as email address etc. if they are provided.
Can void allocations?: can remove modules from learner profiles.
Can create/maintain appraisals?: can assign appraisals to learners and complete appraisals which are assigned to them as well as unassigned appraisals.
Can maintain all company appraisals?: can view all appraisals including those assigned to others.
Can maintain all appraisal forms?: Can add/edit appraisal template forms.
Can create/maintain workbooks?: can assign workbooks to learners and complete workbooks which are assigned to them as well as unassigned workbooks.
Can maintain all company workbooks?: can view all workbooks including those assigned to others.
Can maintain all workbook forms?: can create workbook forms in the back end of the system.
Can maintain competences?: can assign and complete competences for your learners.
Can maintain external training?: can assign and complete/sign off external training for your learners.
Can maintain noticeboard?: can assign noticeboard items on Flow.
Can maintain hosted SCORM modules?: can add, edit and delete SCORM (external) modules on the platform.
Can assign learning?: can use the assign learning tool to send learning to your employees.
Can edit assigned learning due dates?: can change these on a learner’s profile.
Can view assigned learning?: can view the courses/learning that has been assigned.
Can maintain module downloads/custom questions?: you can add bespoke downloads and bespoke questions into your Flow modules (can be done at a branch level).
Can access module builder?: can view and access the module builder tab as well as edit modules.
Is a module builder superuser?: more permissions under the module builder tool.
Can access learning calendar?: can view the training calendar and add sessions for your own company.
Is a learning calendar superuser?: can view the training calendar and add sessions for multiple companies.
Can maintain goals documents?: can assign and complete goals for your learners.
Can maintain goals templates?: can create goals templates in the back end of the system.
Can maintain news for learners?: can send news items to employees.
Can maintain news for managers?: can send news items to training managers.
Can create/maintain a career map?: can build career maps on the system.
Can maintain Knowledge Checks forms?: can add/edit knowledge check templates.
Can create/maintain Knowledge Checks?: can view Knowledge Checks MGMT page, can view Knowledge Checks list and bulk assign to reviewers, can access and add Knowledge Checks for learners, can assign knowledge checks in assign learning and through learner's profile.
Can create Challenge Leaderboards: can create Challenge Leaderboards using the uploaded Challenge modules.
Can maintain all Collection forms: can add/edit Collection template forms.
Can view/assign collections: can view collections MGMT page, can view collections list, can access and add collections for learners, can assign collections in Assign learning and through learner's profile.
Can maintain External Links: can add/edit external links.
Create an employee
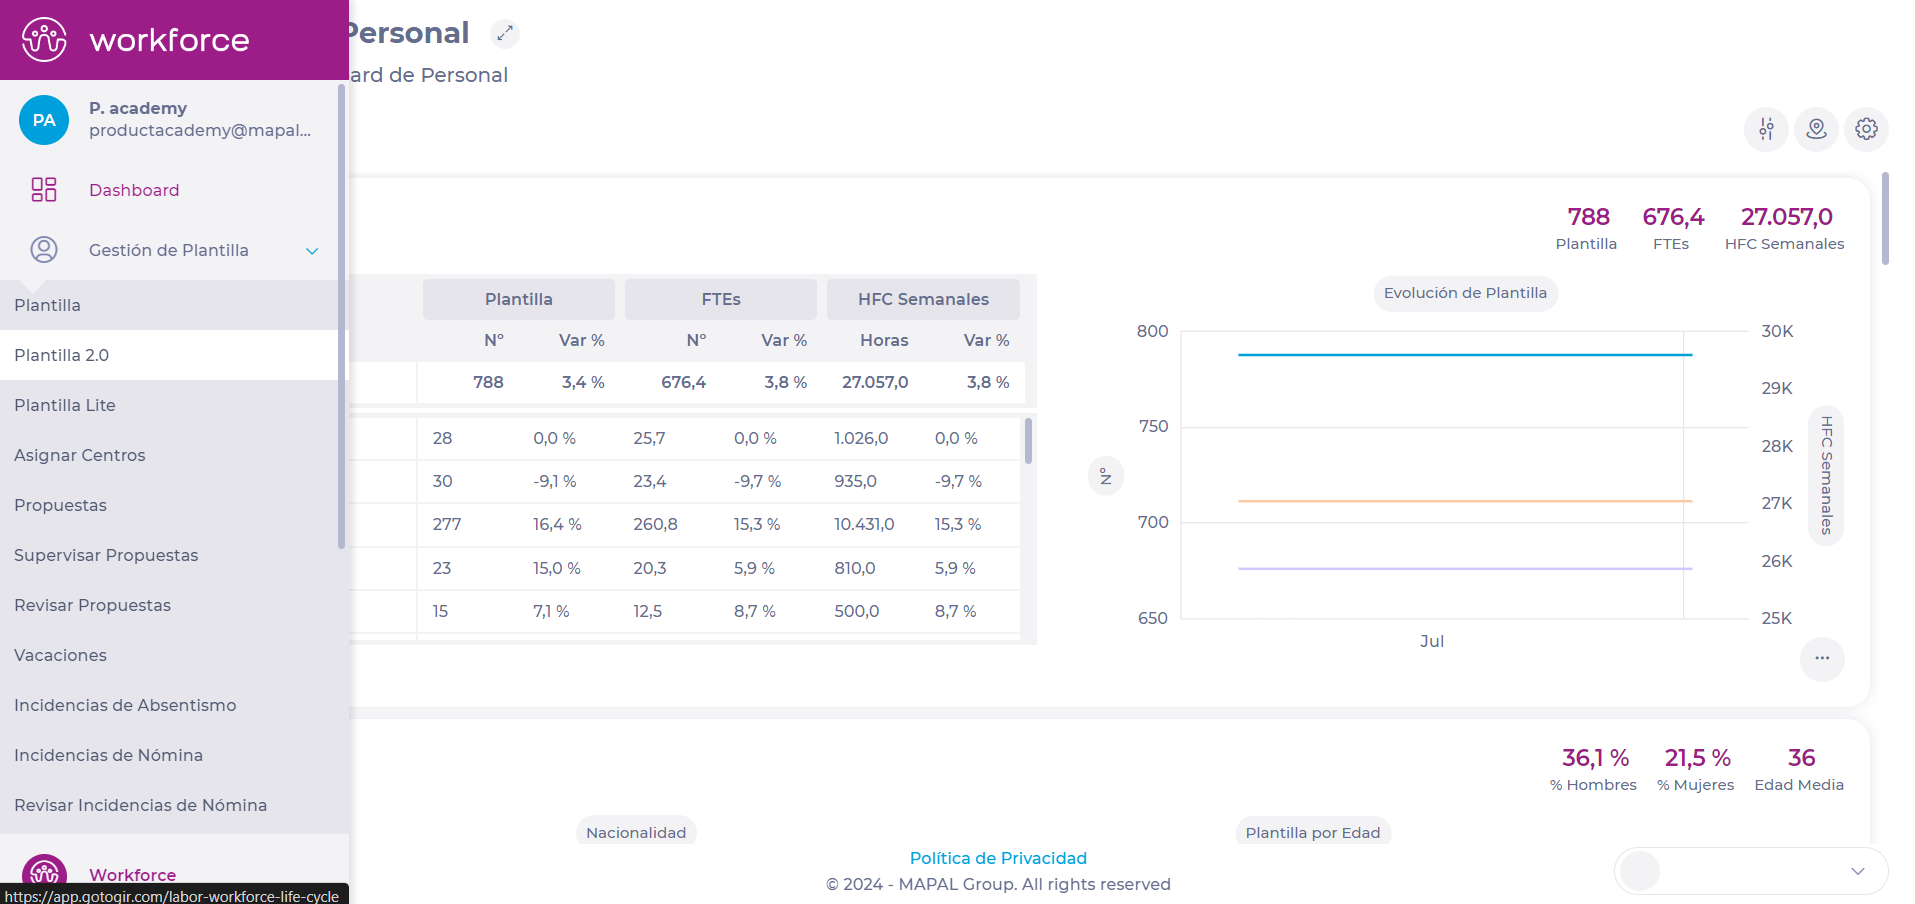
Start from: the Workforce platform.
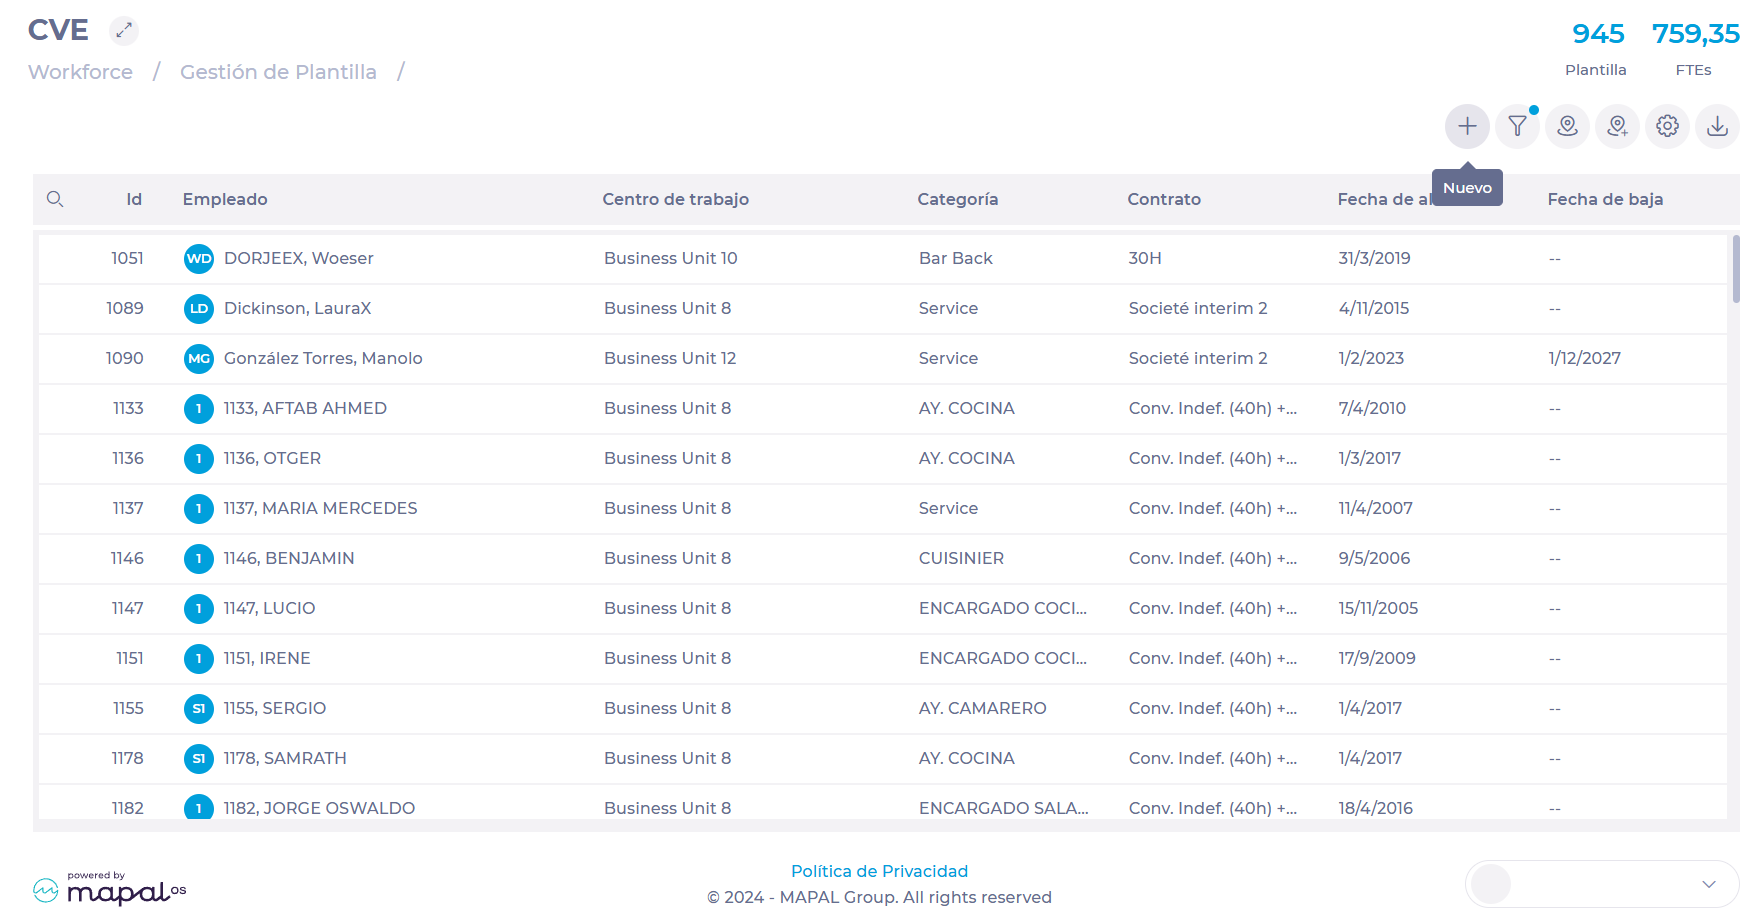
Select Workforce Management > Workforce 2.0 .
Select New+ in the Workforce 2.0 (CVE) screen.
Select the country for which you want to create the employee, in case you have business units in more than one country.
In the New Employee screen, you can add information in 3 steps:
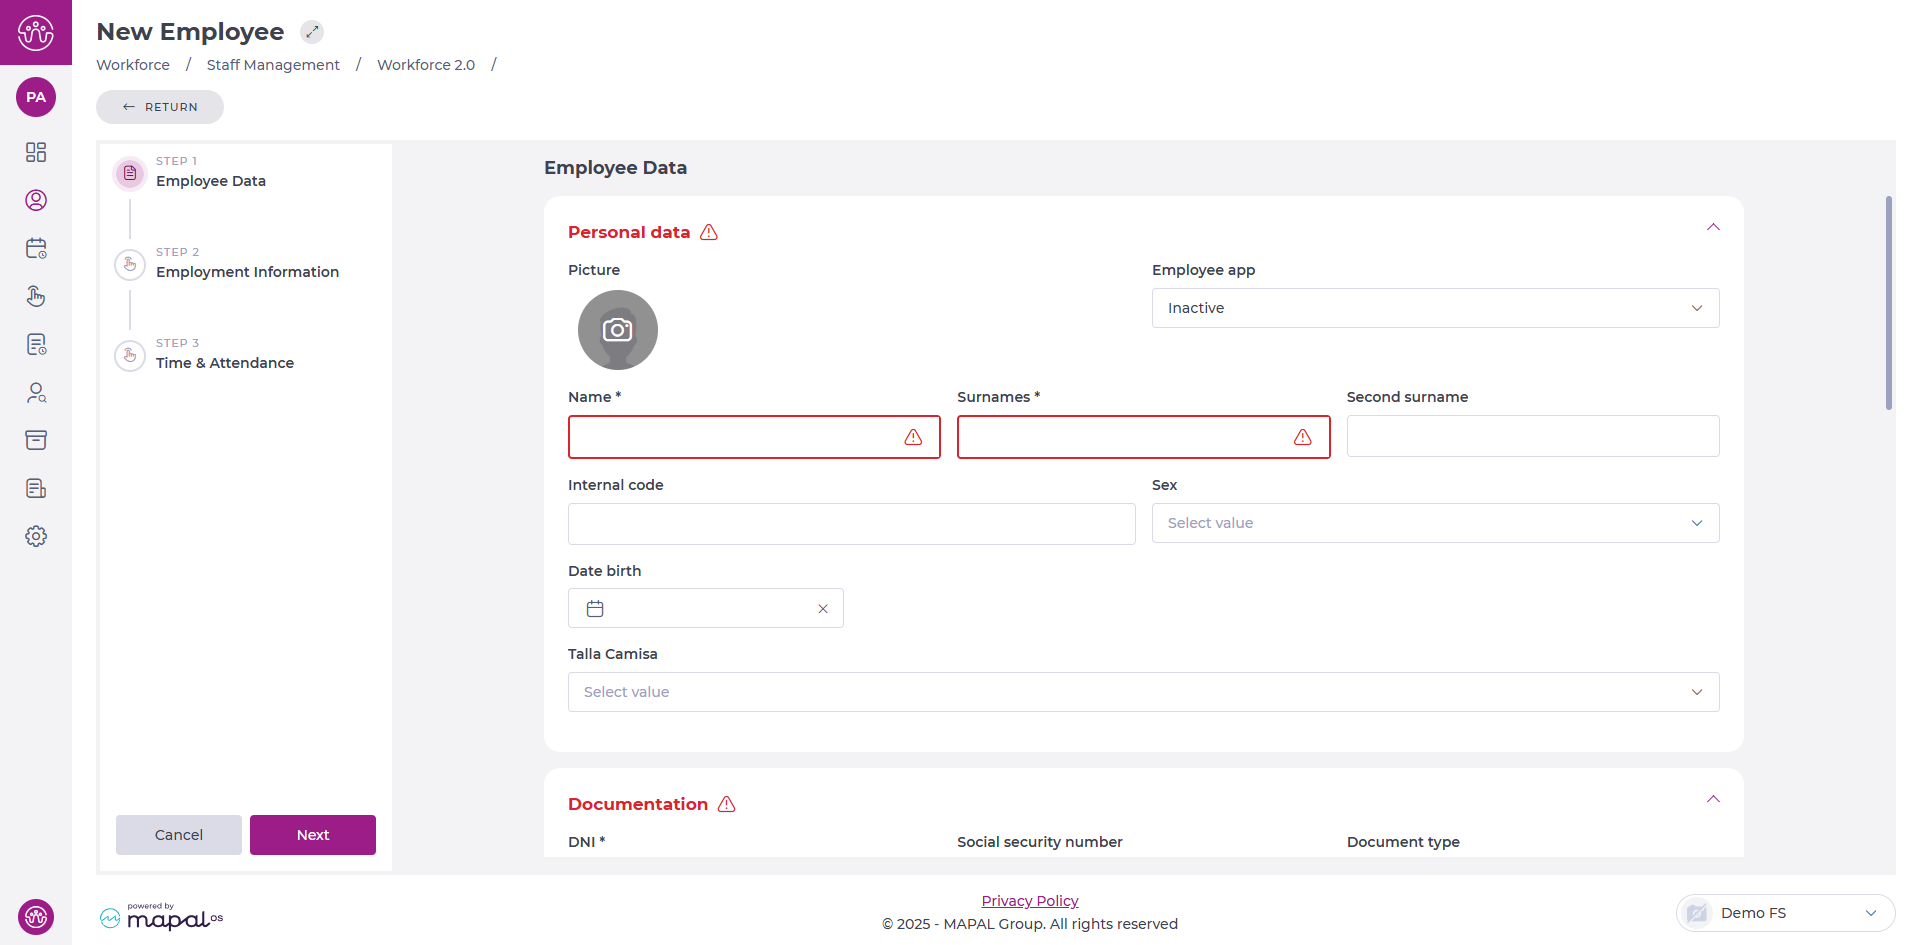
Employee data
Fill in the new employee's personal data, taking into account the settings applied in Workforce > Configuration > Employee Record, in terms of field requirements and visibility; we can also activate the GIR Staff profile for the new employee and apply a specific profile to him/her.
Select Next to proceed to the next step once you have completed the information.
Note: mandatory fields are marked with an asterisk (*).
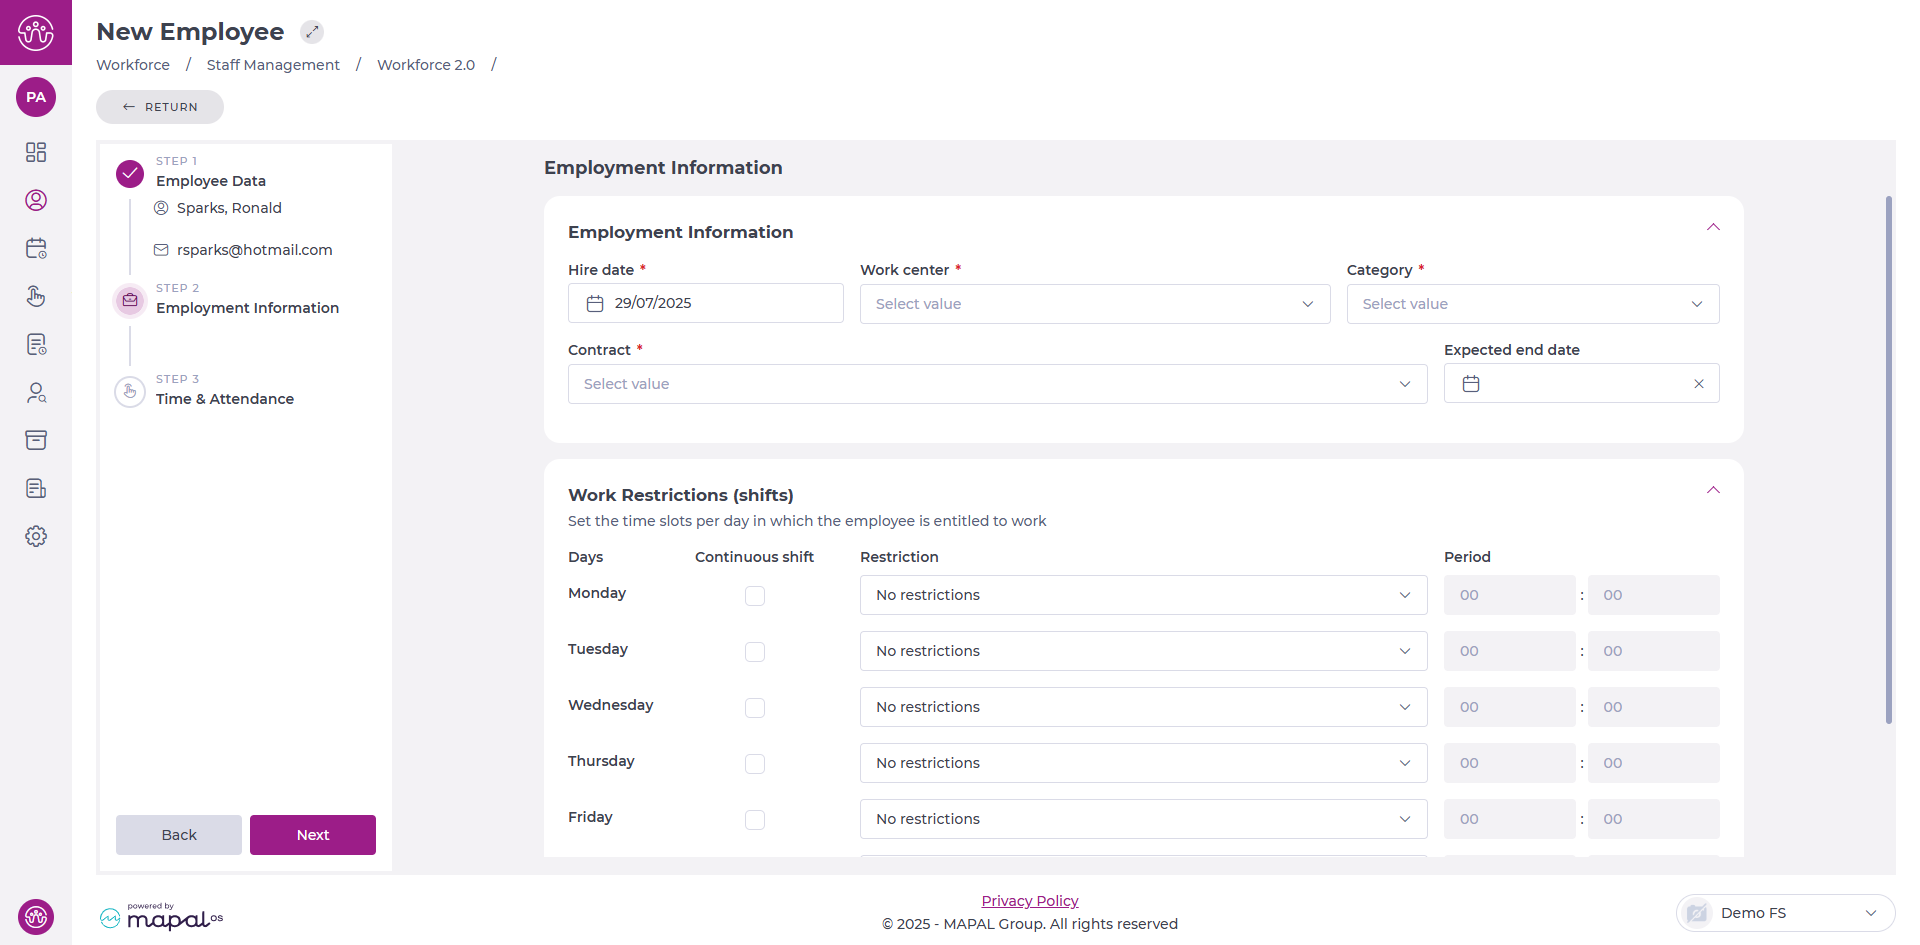
Employment Information
Fill in the data related to the employee's contract, hire date, work centre and category. You can also configure shift restrictions by days of the week, taking into account holidays and holiday eves.
You can also set up split shifts or shifts with different start times.
Select Next to proceed to the next step once you have completed the information.
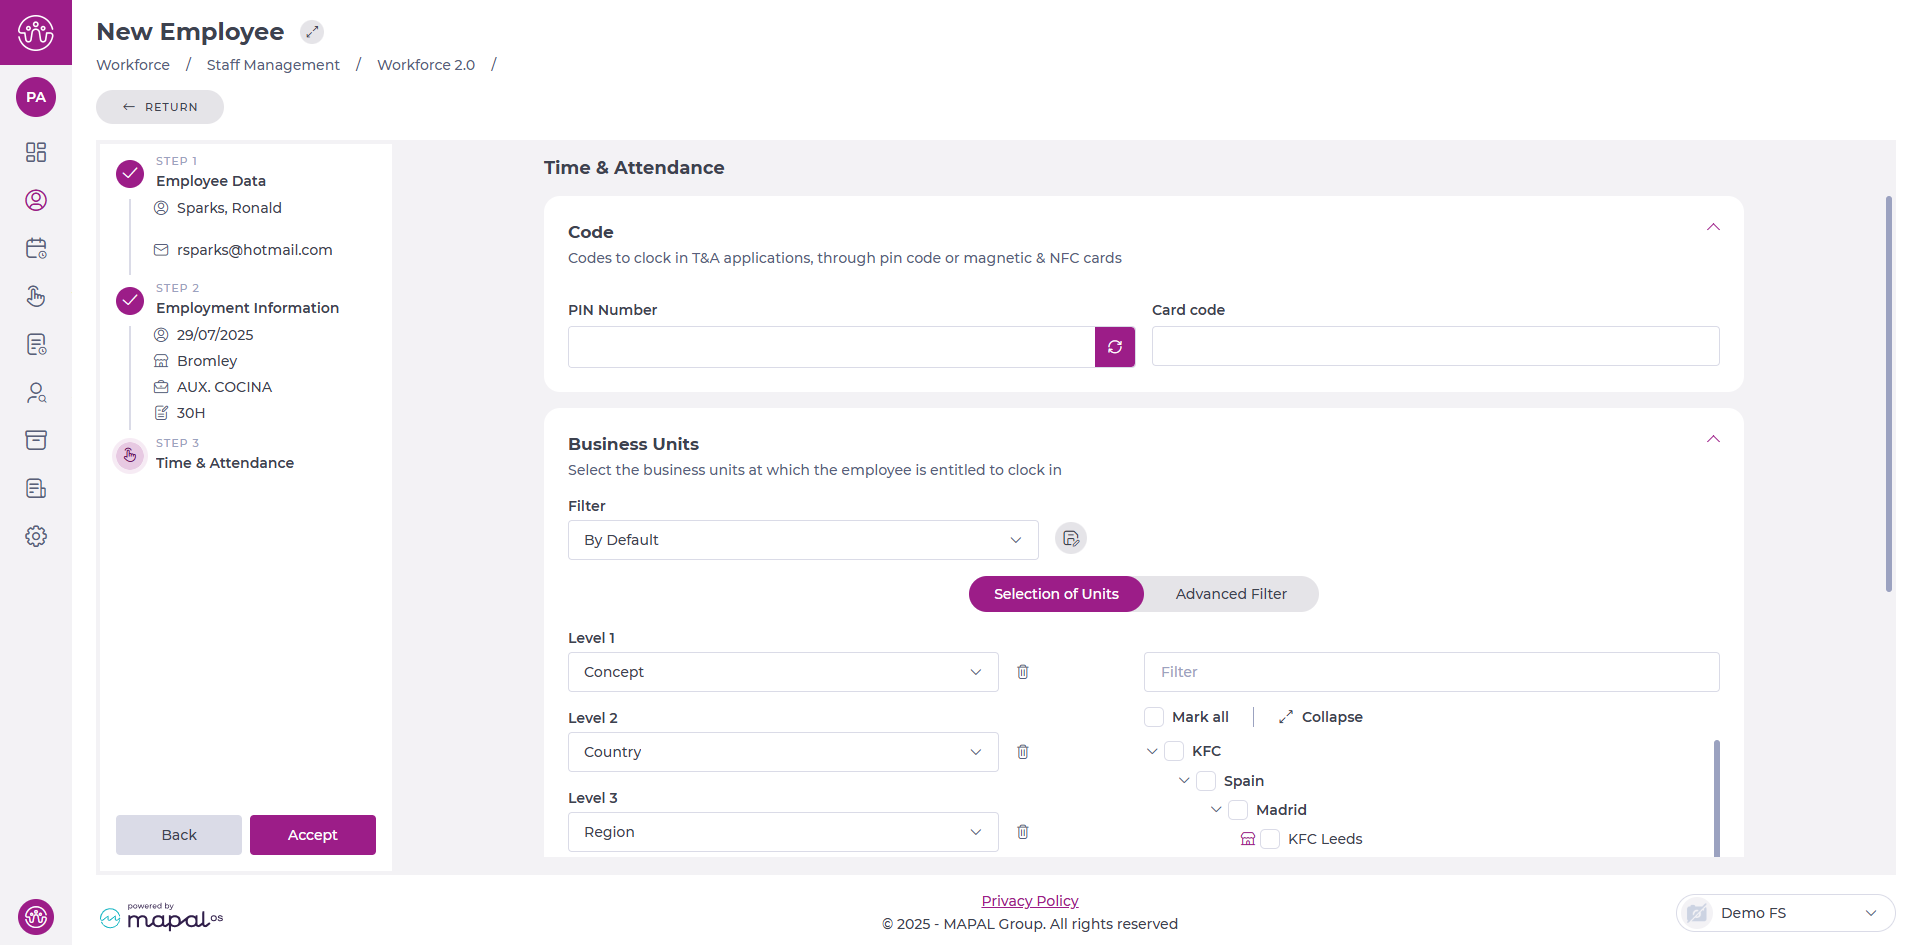
Time & attendance
Configure the codes for clocking in the T&A applications, either by PIN code or magnetic and NFC cards. You can also select the business units in which the employee can clock in.
Select Accept to save the new employee's settings once you have completed the information in this step.
Manage users in Mapal OS
Start from: the Mapal OS dashboard.
Select the Open button on Configuration.
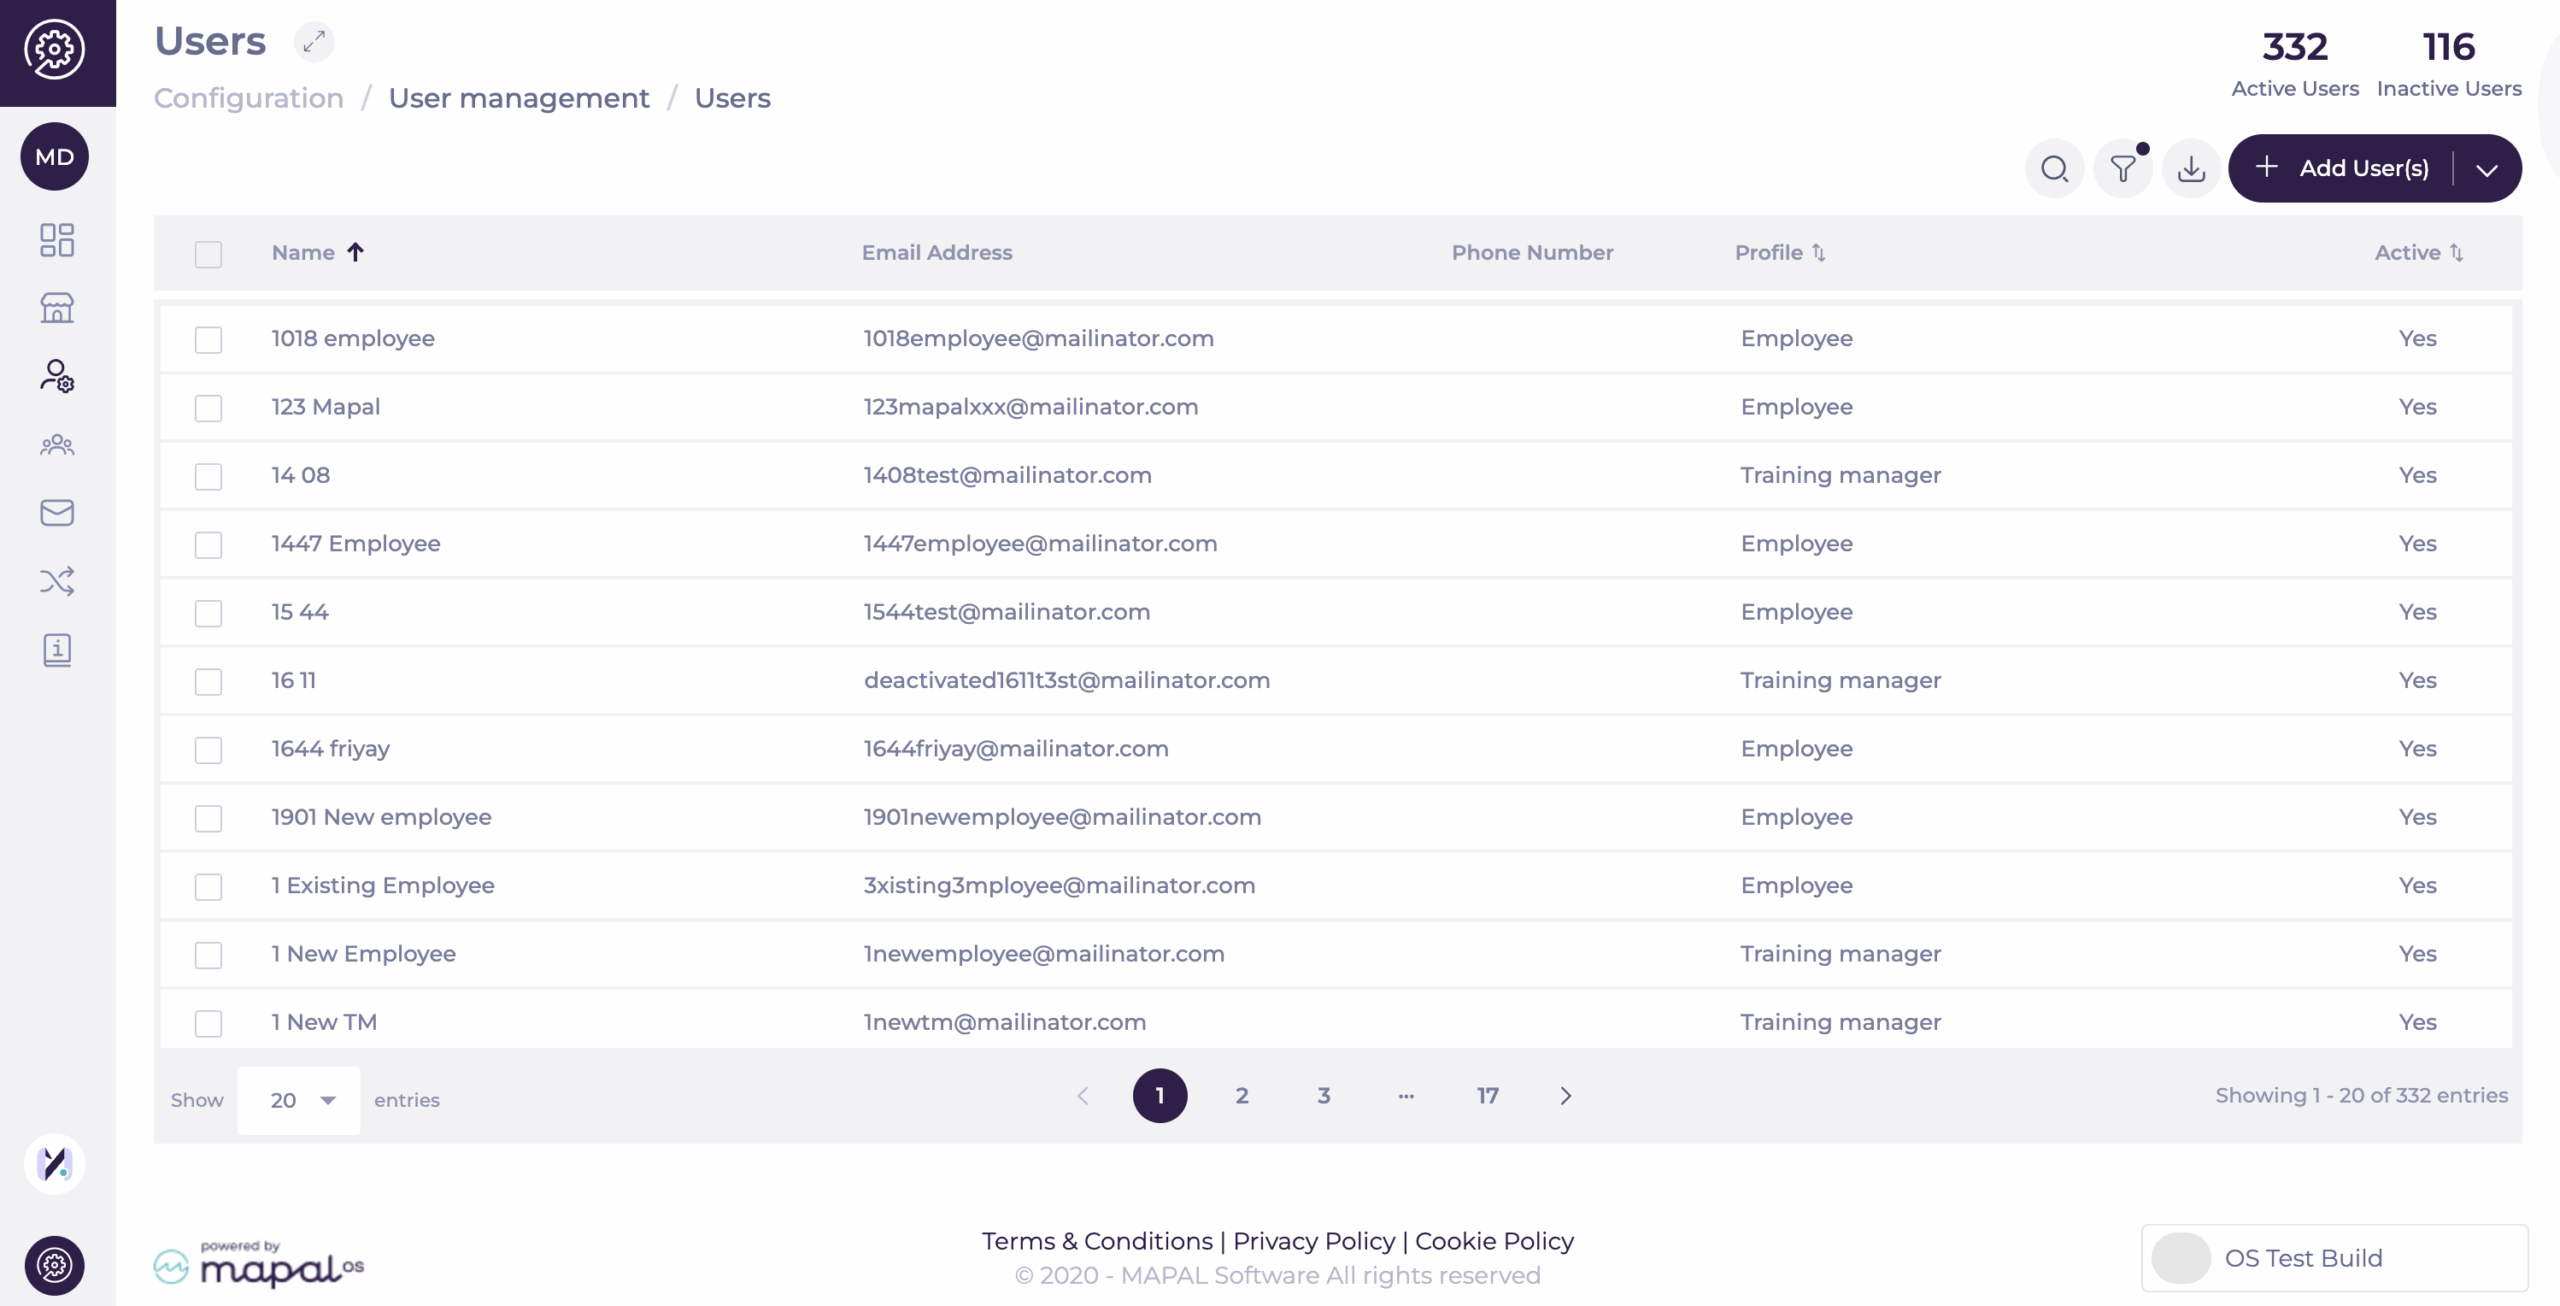
Select User management > Users in the main menu.
Select the user whose settings and details you wish to edit, by clicking on their name. You'll be taken to the user information page, where you can edit its details.
Note: The Users page shows only active users by default. A coloured dot in the filter button indicates that a filter is applied. This speeds up navigation and reduces clutter, especially in large accounts. You can still adjust or remove the filter at any time to display inactive or all users.
Details
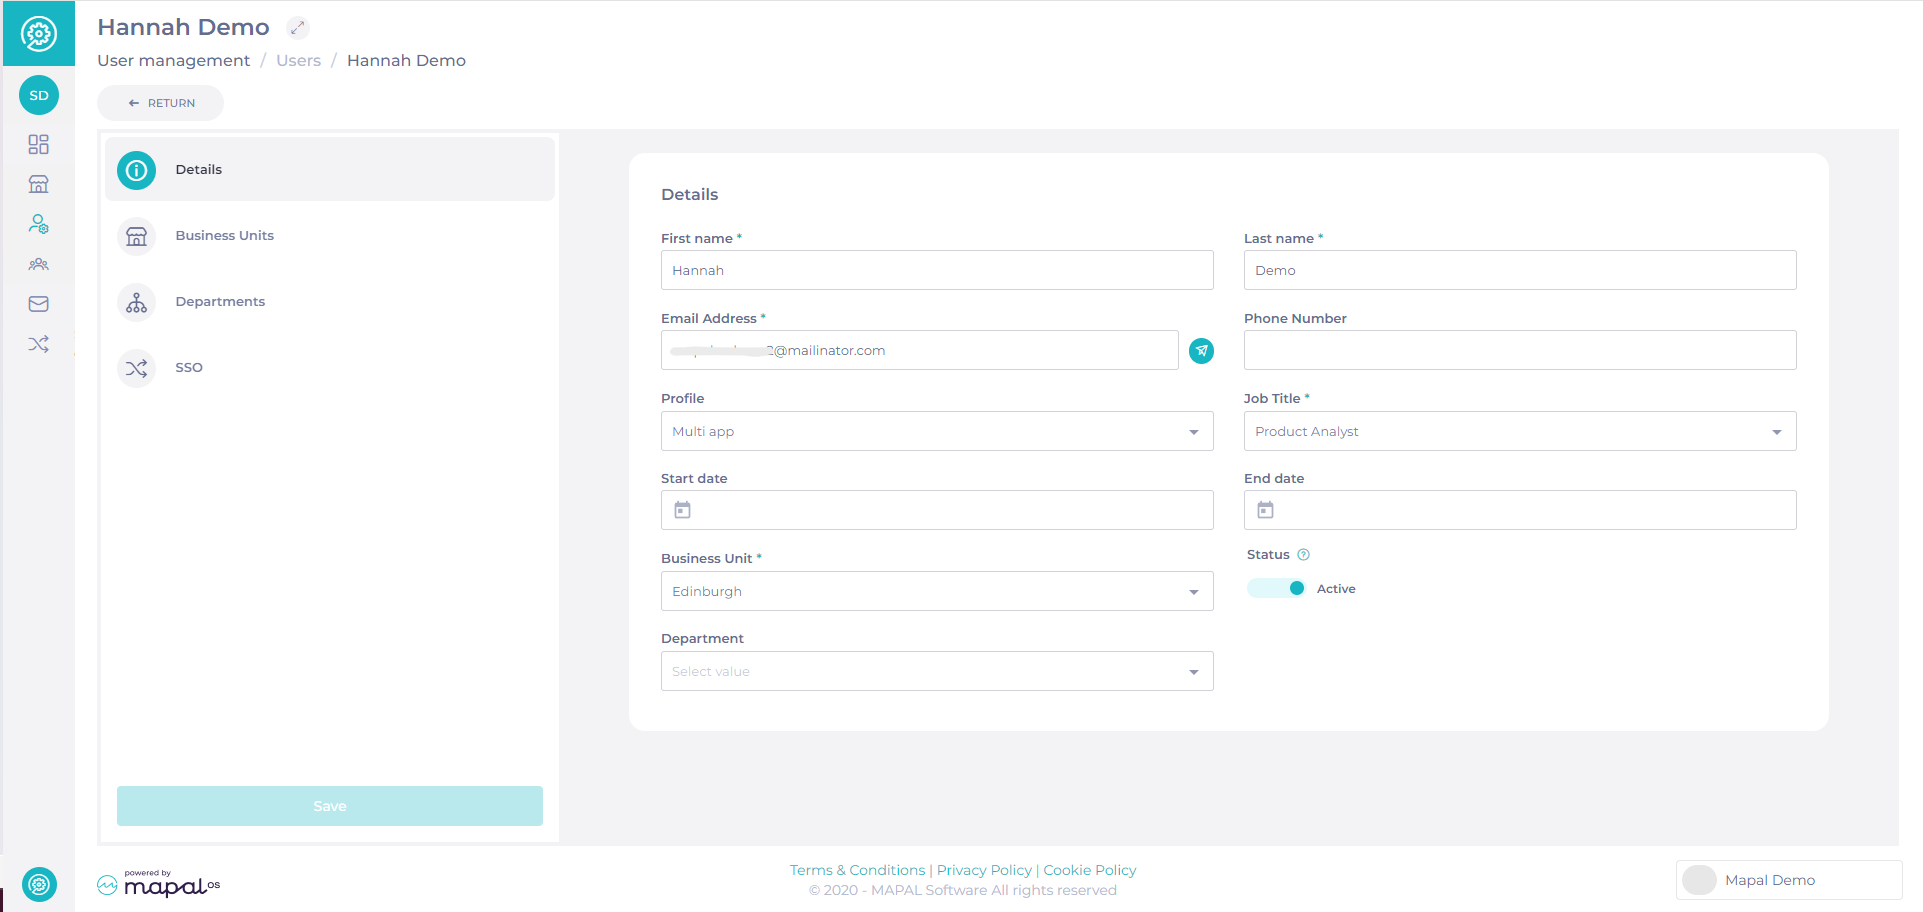
Complete or edit the user details on the Details tab on the form that appears.
Complete the relevant fields:
First name
Last name
Email address
Phone number
Profile - determines the user's access to configuration and products.
Job title
Start date
End date
Business Unit - select which Business Unit the user is assigned to.
Status - select if this user is active, so they have access to the operator.
This tab enables you to choose which Business Units the user has access to.
Add Business Units individually
Select Business Units.
Select the relevant business units to add to the list, or just select allow access to all business units.
Select Save when you have finished.
Notes: Users can also select select the checkboxes for multiple business units.
Departments
This tab enables you to choose what Departments the user has access to.
Select Departments and use the Add (+) button to open up Add Department.
Select the relevant departments to add to the list, or just select allow access to all departments.
Select Done when you have finished.
SSO
Select the SSO tab to see the user’s SSO source and Identifier* (these are non-editable fields).
For more information on SSO, you can contact your Customer Success Manager at Mapal.
Notemandatory fields are marked with an asterisk (*).
Activating a user in Mapal OS
Navigate to User Management > Users.
Find the user and open their Details screen.
Use the Status toggle to activate or deactivate the user.
Note: If an email address is updated for an Employee or User, the old email remains in the system but becomes inactive. This process applies to all employees, including those with extra permissions (e.g., Training Managers in Flow Learning).
Resending a user welcome email
If a user needs to access the system or reset their password, you can resend their Welcome Email.
Locate the Email field in the user’s Details.
Click the Send icon to resend the welcome email.
The email will be sent to the user's inbox immediately.
Exporting a list of users
Navigaqte to User management > Users.
Select the Export button at the top of the page.
The system will generate a CSV file with the users visible to you.
Exports follow permission-based visibility rules:
Only users whose permission profiles include the same or fewer permissions than your own will be included in the export.
Users with higher-level access are automatically excluded.
Users without an assigned profile (no permissions) remain visible.
This ensures consistent security and respects the same visibility limits that apply within the user management interface.
Configure your user account or change your password
Note: actions performed on the Easilys platform are subject to user access permissions. If you are unable to carry out the actions described in the articles, it may be because you do not have the necessary permissions activated on your user profile. Contact the Support team, or your administrator, for help.
Managing users through Mapal OS
For users on Mapal OS, your user accounts should now be managed on the Mapal OS dashboard. You can find out more at Manage users in Mapal OS.
Note: if you're not sure whether you are on Mapal OS, contact your line manager or Mapal support.
Managing users via Easilys site settings
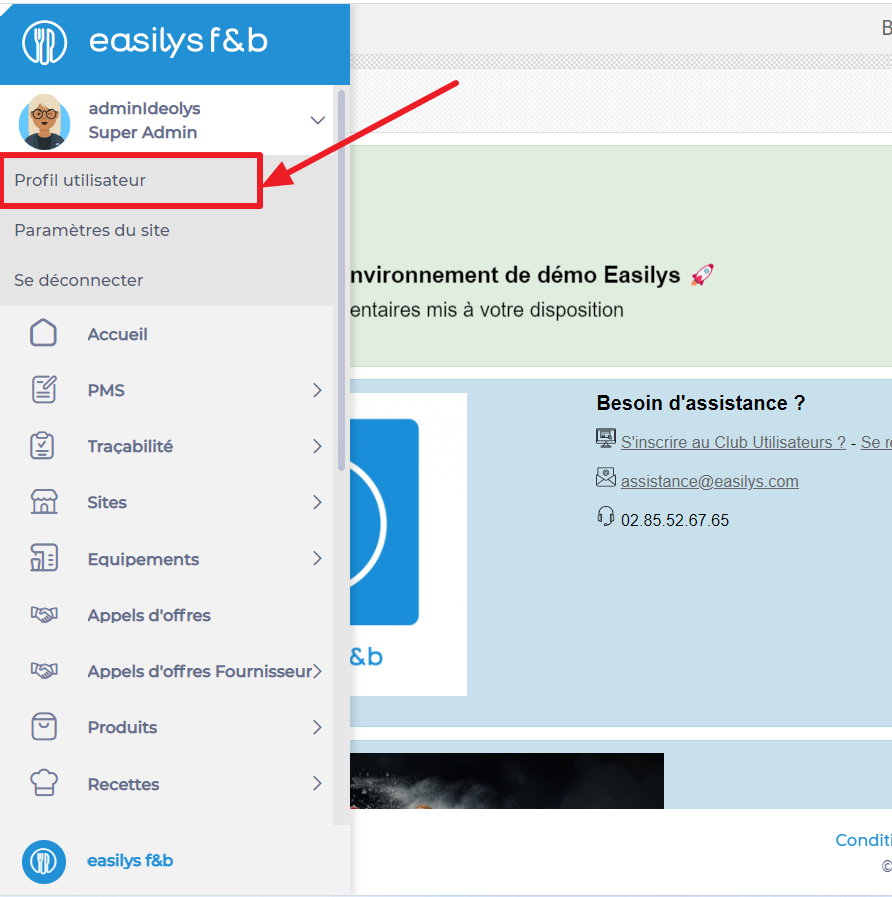
Start from: the Easilys menu
Select the small camera icon or your avatar.
Select the Profil utilisateur (User profile) tab.
Edit information
In the "Mes informations" (My info) box, select Mettre à jour (Update).
Nom d’utilisateur: This is your username. When logging in, you must enter this in the "Identifiant" section.
E-mail: Enter your email address to use it as an identifier. This process will allow you to reset your password in case you forgot it, provided that the corresponding option is activated. Additionally, this address will allow you to receive notifications if you use a validation system for claims or orders, and if your account is associated with a validator profile.
Edit the password
In the "Mon mot de passe" (My password) box, select Mettre à jour (Update). The "Mettre à jour mon mot de passe" (Update my password) window appears on the screen.
Enter your new password, confirm it by writing it again and select Mettre à jour (Update).
Edit the display options
In the "Mes préférences d’affichage" (My display preferences) box, select to switch the display to tablet mode.
Go back to the Easilys menu home screen
Selectto close your account settings and go back to the home screen.
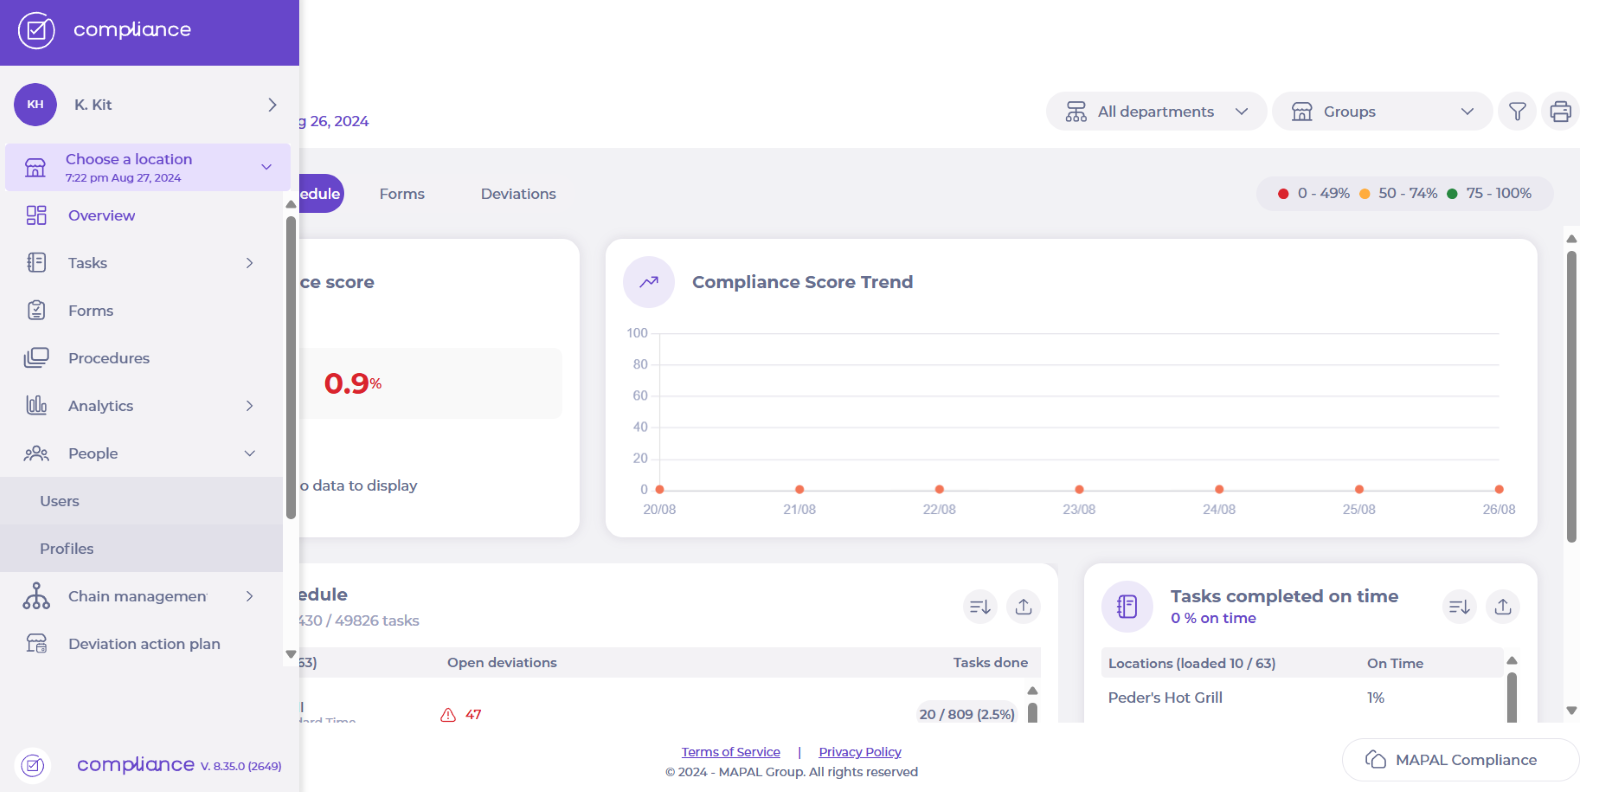
Access your profile in Compliance
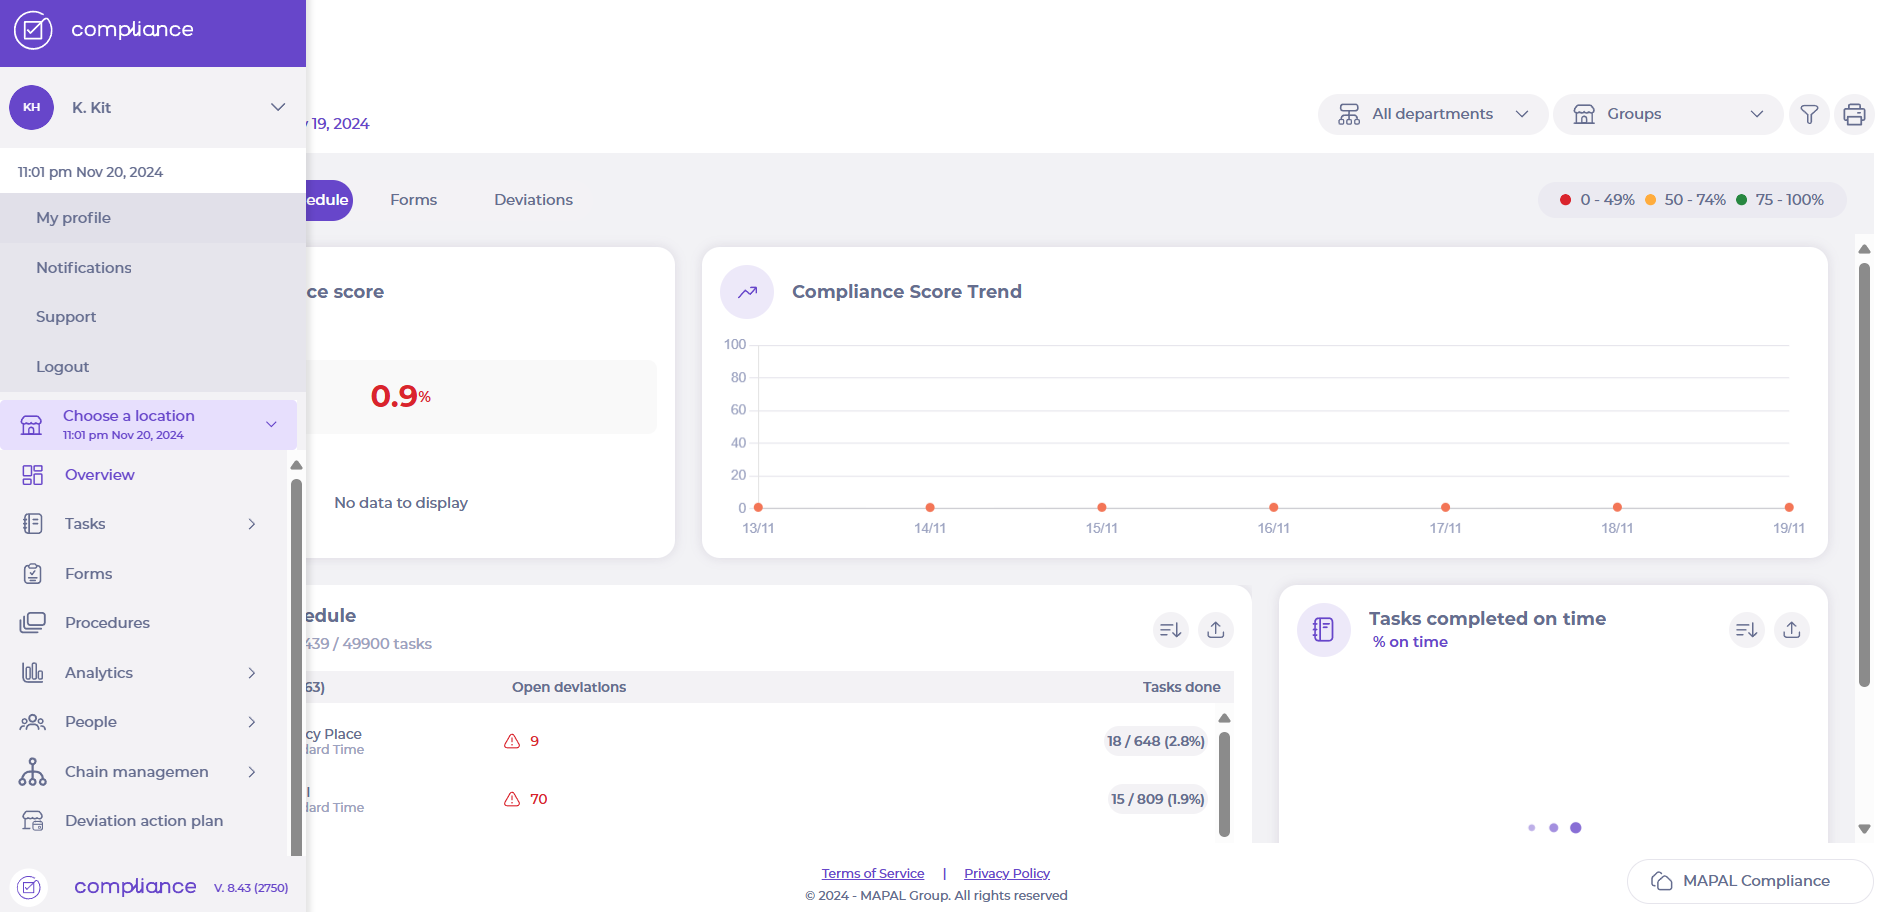
Start from: The Compliance overview.
On the main menu, select Your Name > My Profile.
Your profile page will appear, featuring four tabs with various options and functionalities:
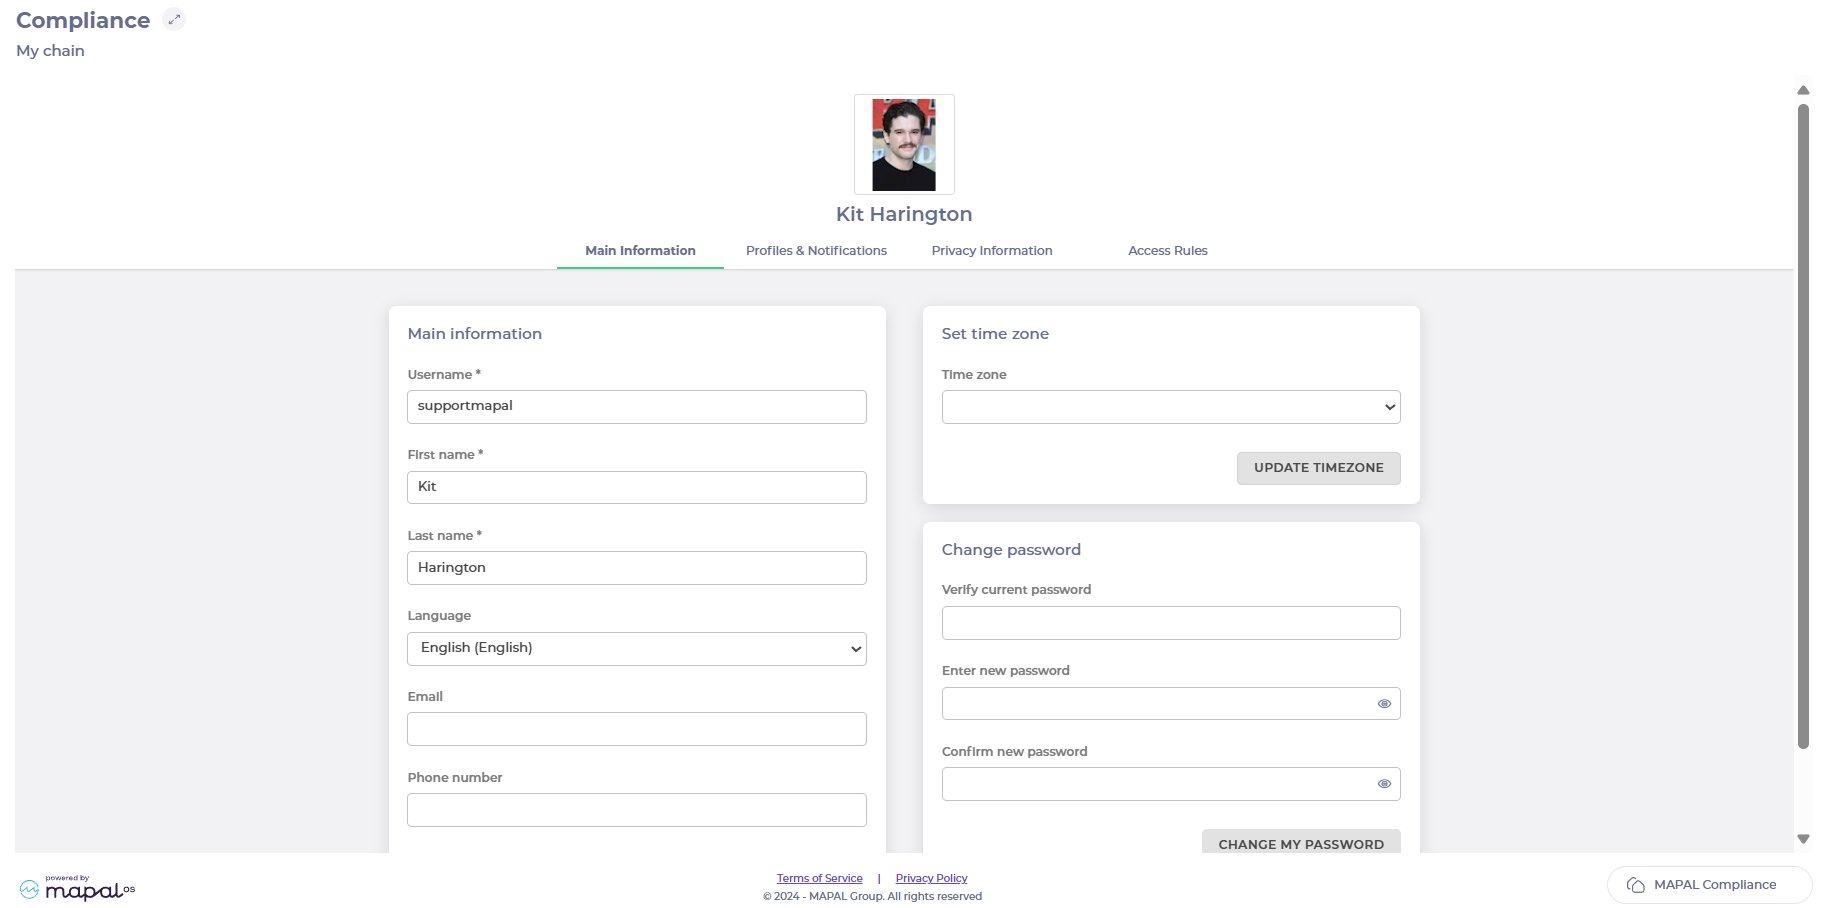
Main information
This is the primary tab where you can view and update your personal details, such as:
First Name
Last Name
Contact information
Time zone
Preferred language
Additionally, you can change your password for accessing Compliance from this tab.
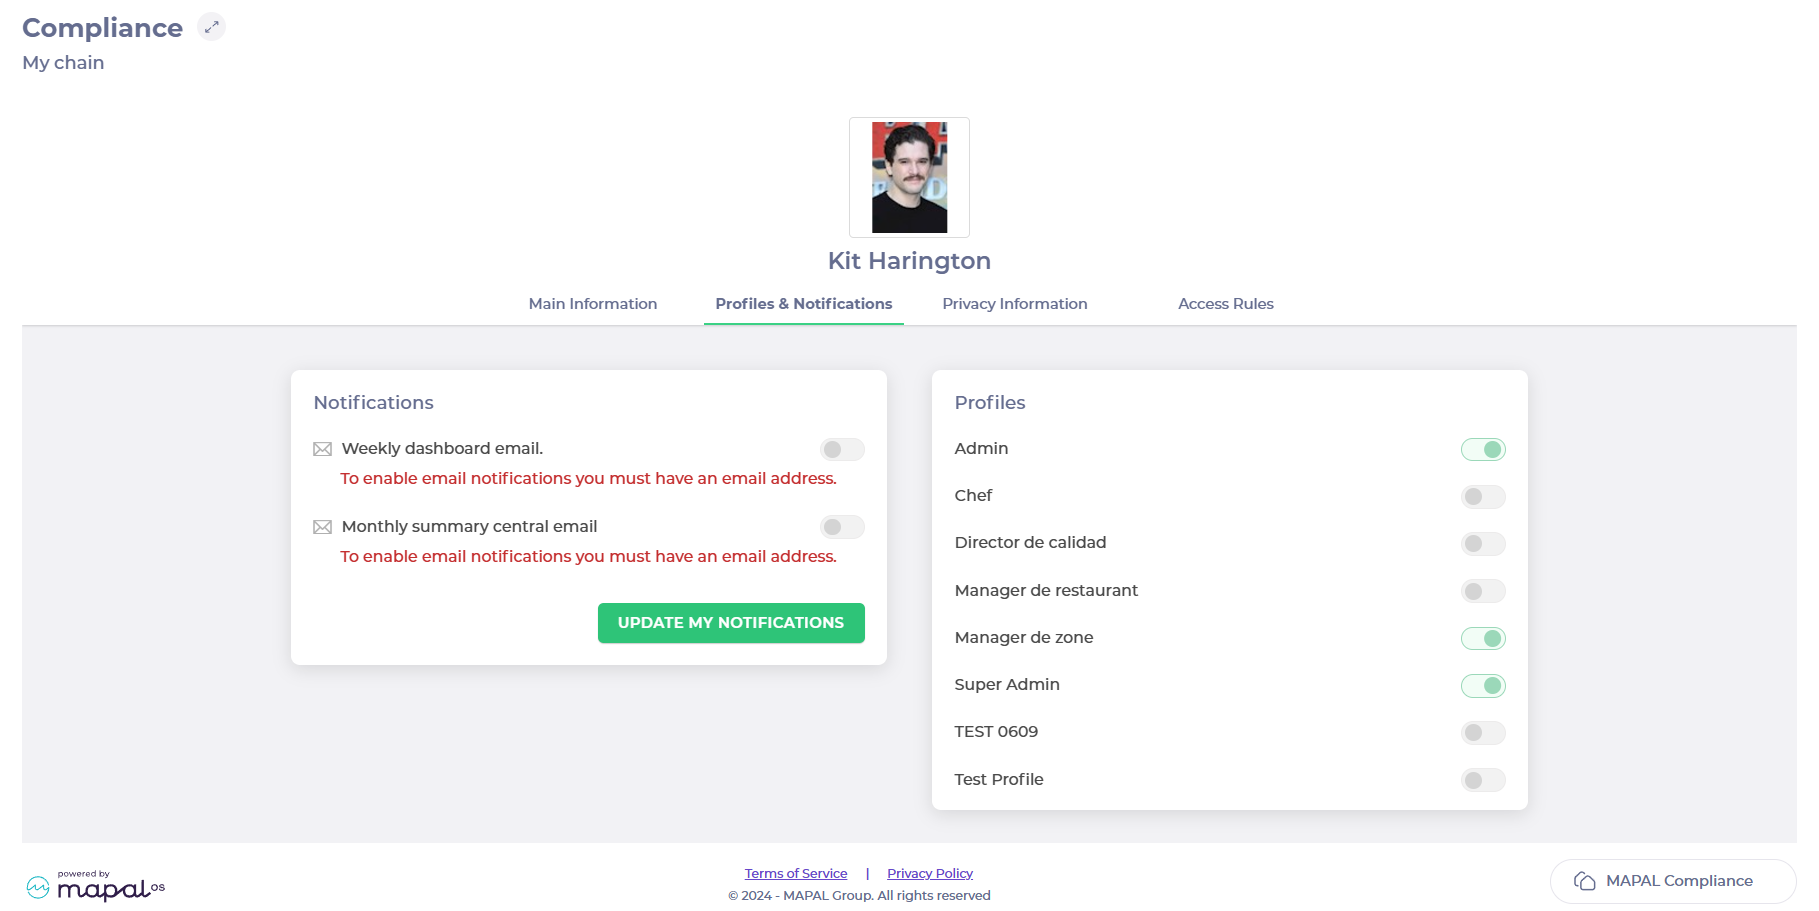
Profiles & Notifications
Notifications:Enable or disable email notifications, such as weekly dashboards, to do lists, monthly summaries, etc.
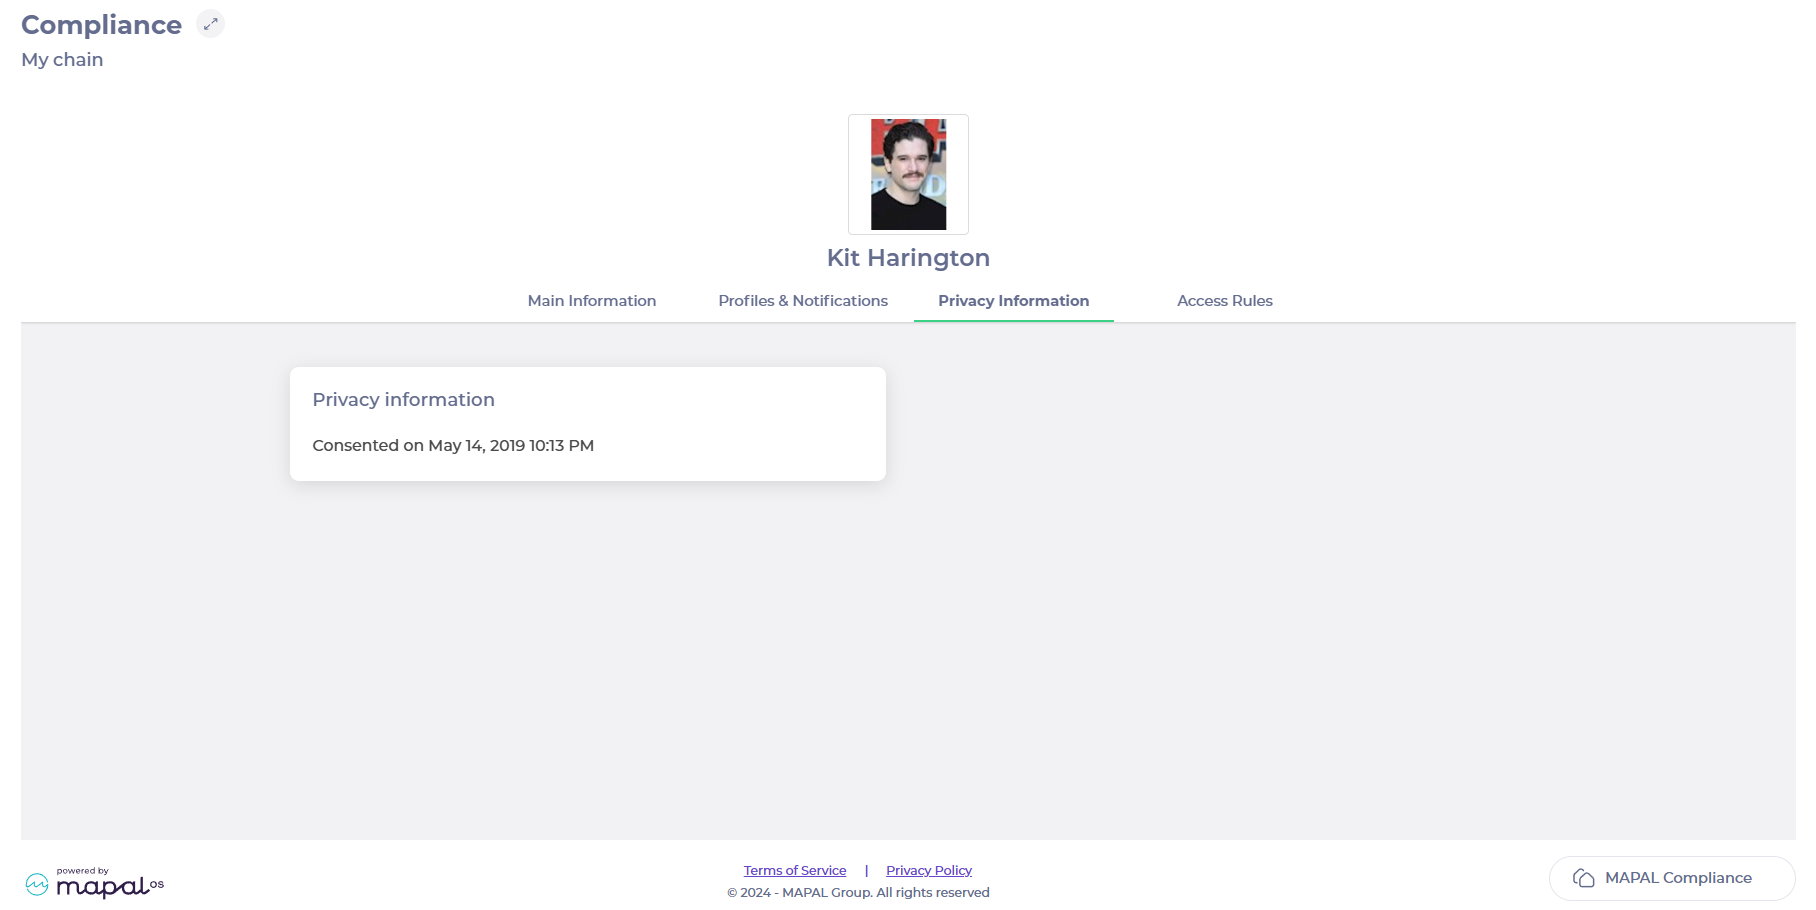
This tab provides a record of when you gave consent to Compliance's Privacy Policy. It is purely informational and cannot be edited.
Access Rules
This tab displays a list of forms available for your account. Use the toggles beside each form to enable or disable their visibility, ensuring easy access to the forms relevant to your role.
Assign Business Units to employees
Start fromthe Workforce platform.
Select Workforce Management > Workforce 2.0 from the main menu.
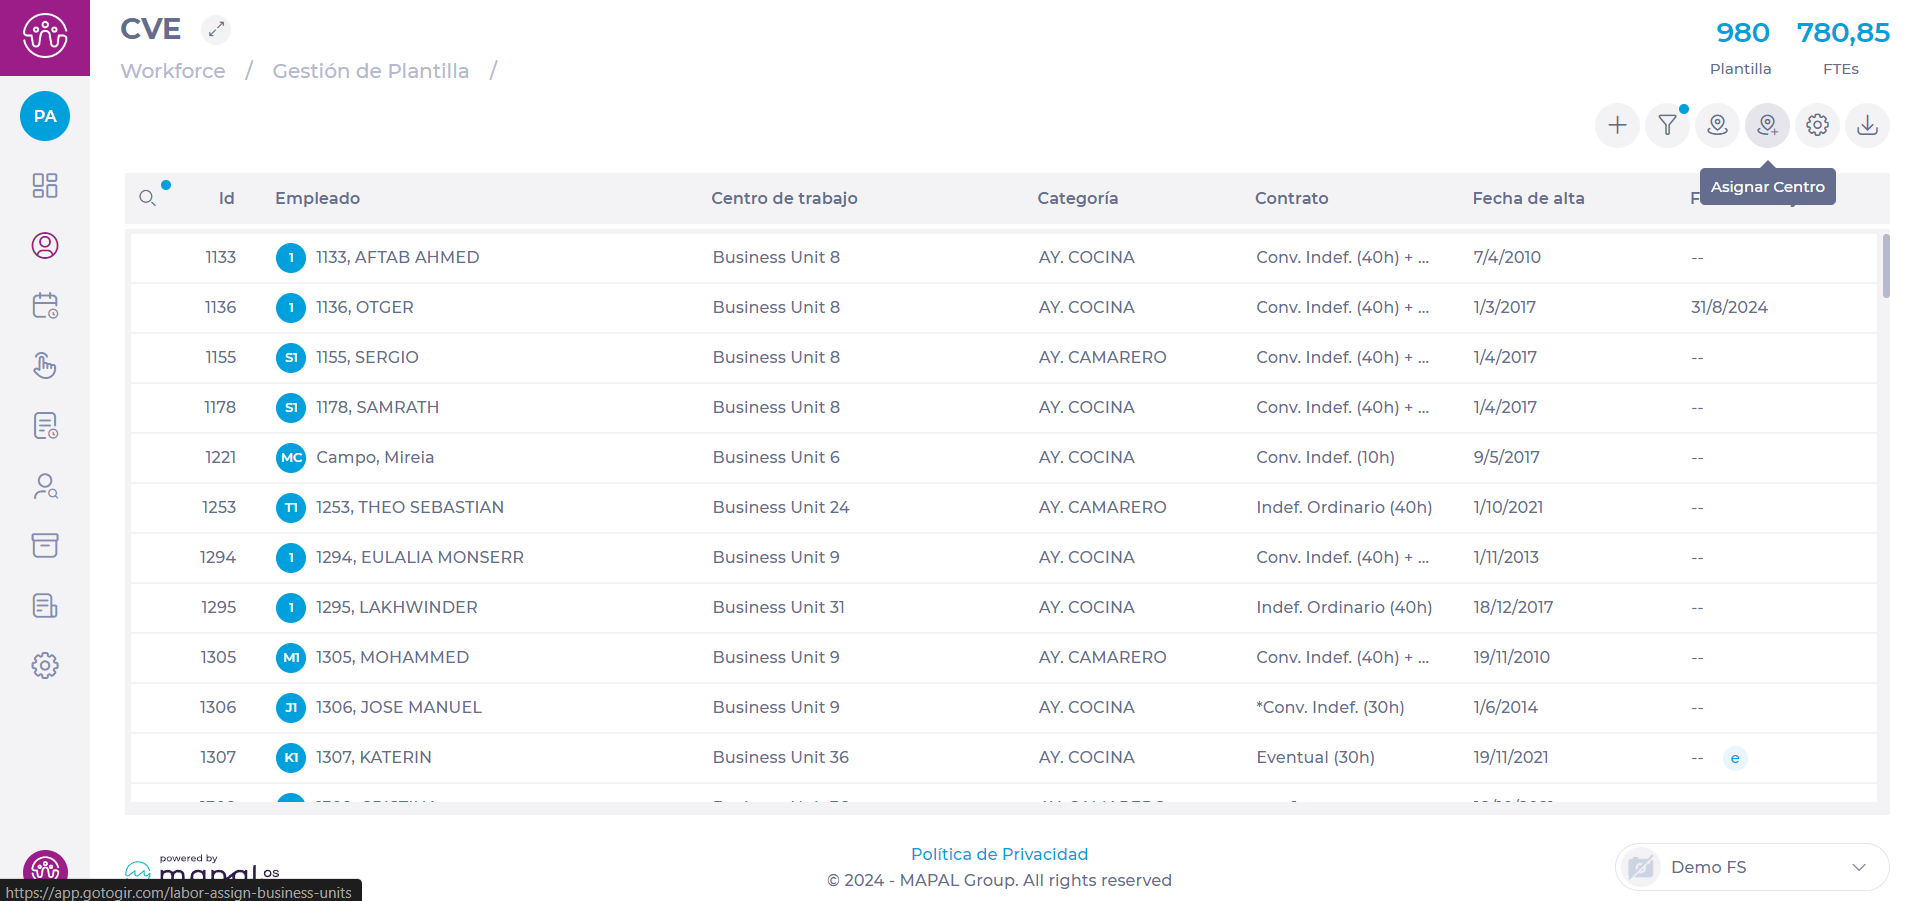
On the Workforce 2.0 (CVE) screen, you will see a complete list of employees, as well as a series of buttons at the top to perform specific actions.
Select Assign Business unit.
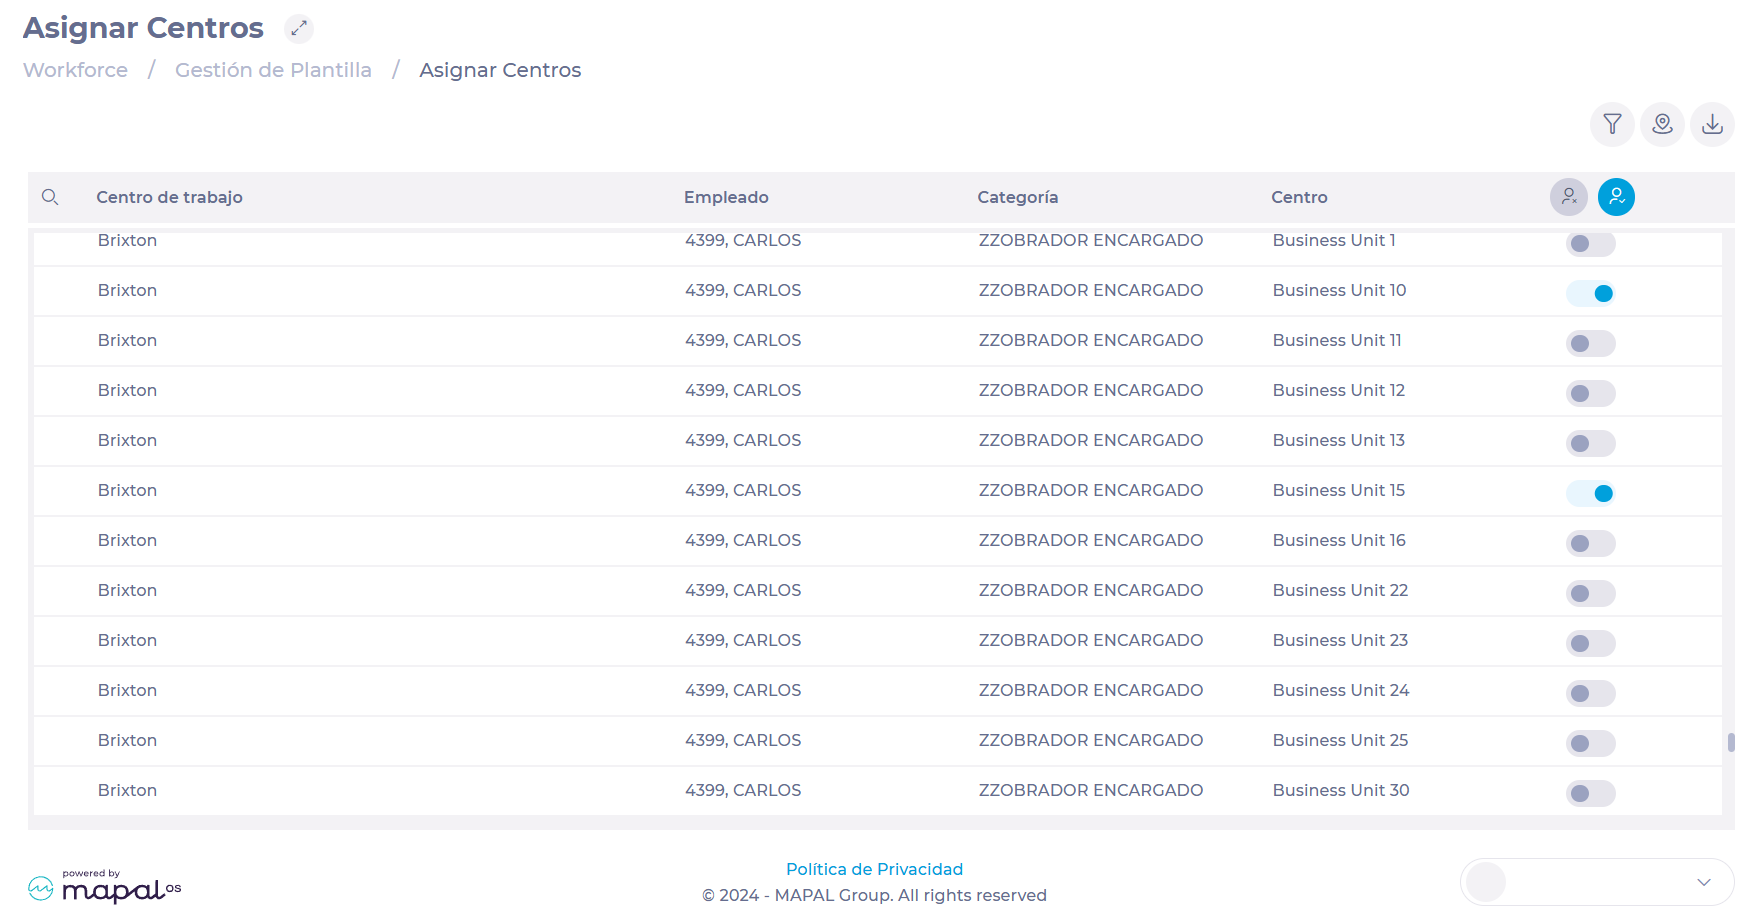
This will take you to the Assign Units screen, where you will view a list of all employees, the category that corresponds to each employee and the business unit they belong to. At the end of the row, you will see a switch that indicates whether an employee is enabled (coloured switch) or disabled (gray switch) for a business unit.
Search for the employee in the list or use the Filter or Filter by Business Unit functions.
The Filter function allows you to narrow your search to specific workplaces, category groups, categories, contract groups, contracts, or specific employees.
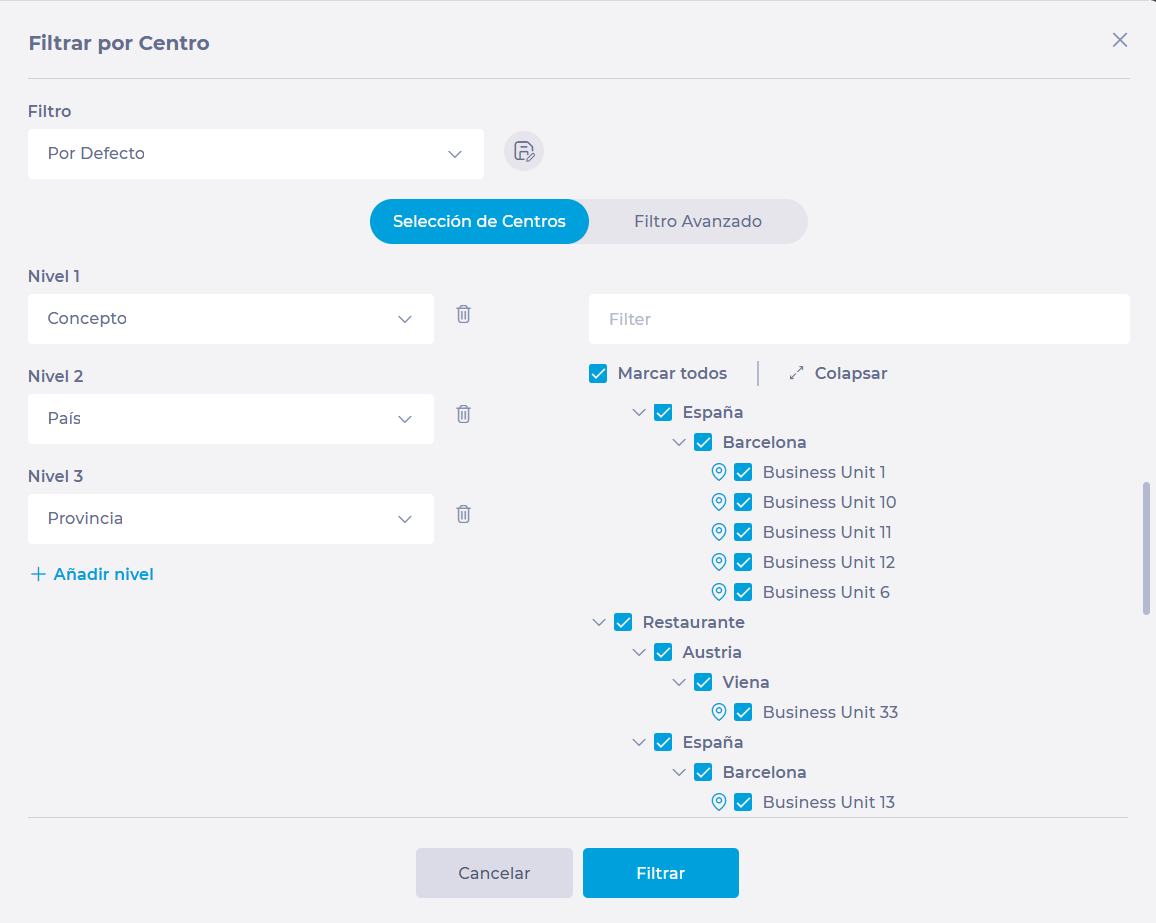
The Filter by Business Unit function allows you to narrow your search to a business unit or a selection of business units under specific criteria that you set.
Once you locate the specific employee, locate the row corresponding to the business unit you wish to assign and select the switch to enable that employee in the business unit.
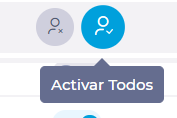
Noteyou can use the Enable all or Disable all button to make a bulk assignment according to the filter you have set.