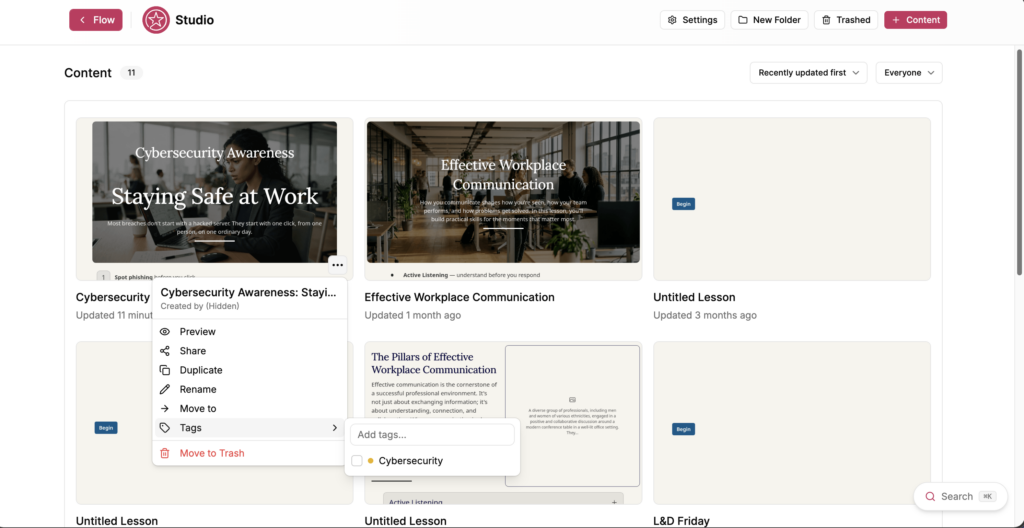
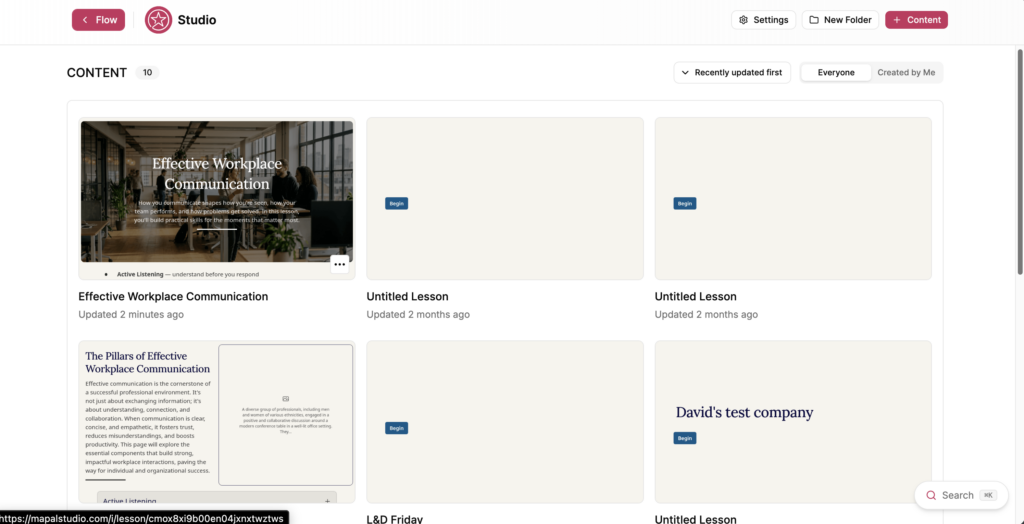
Select the action menu (...) on the lesson you want to tag.
Select Tags.
Select the tags you want to apply. A tick appears beside each applied tag.
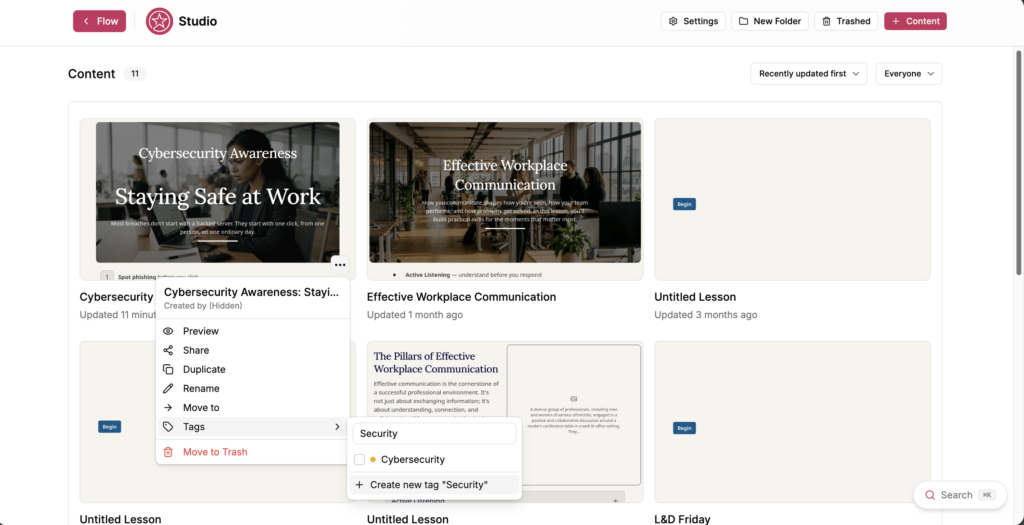
To create a tag, enter a name in Add tags..., then select Create new tag "[name]".
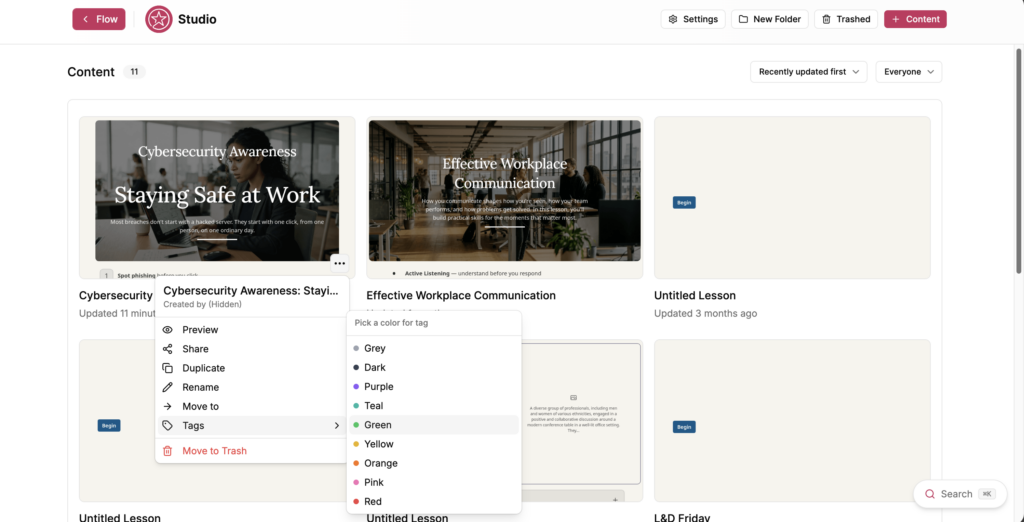
Choose a colour for the tag from Pick a color for tag. The available colours are Grey, Dark, Purple, Teal, Green, Yellow, Orange, Pink and Red.
Tags are shared across the teamspace, so a tag you create is available to everyone working in it.
Rename or recolour a tag
Select Settings on the Studio dashboard.
Select Default Settings.
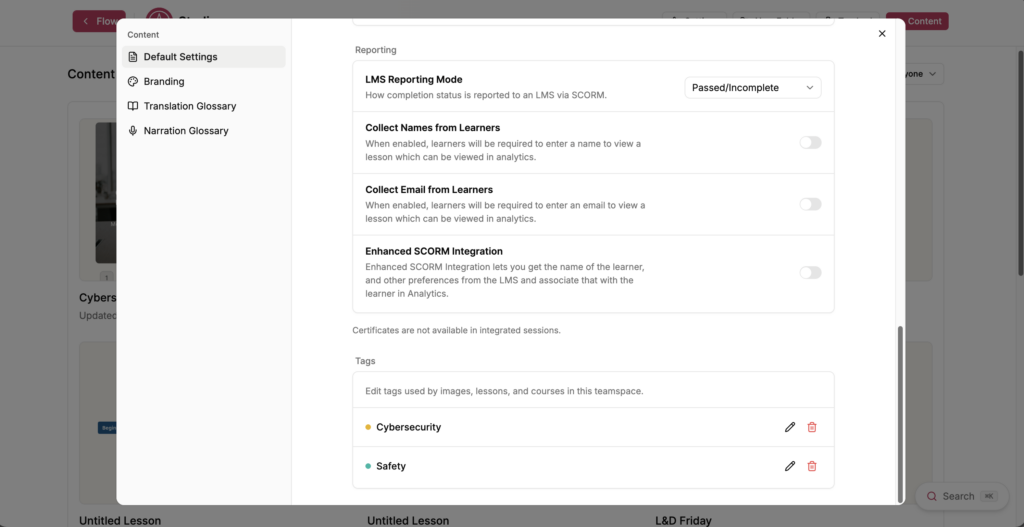
Scroll to Tags.
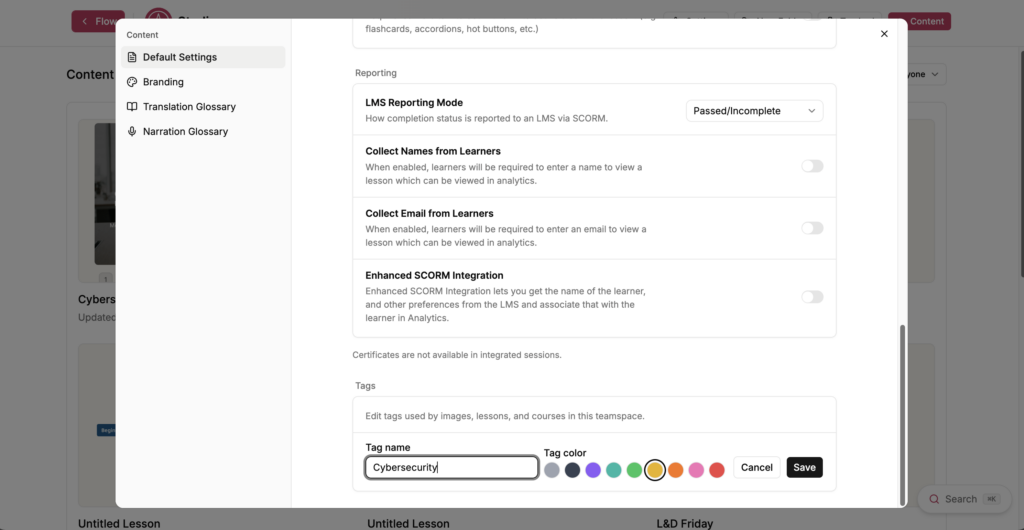
Select the edit icon beside the tag you want to change.
Edit Tag name, select a colour under Tag color, or both.
Select Save.
Renaming a tag updates it everywhere it is applied. Select Cancel to leave the tag unchanged.
Delete a tag
Select Settings on the Studio dashboard.
Select Default Settings.
Scroll to Tags.
Select the bin icon beside the tag you want to delete.
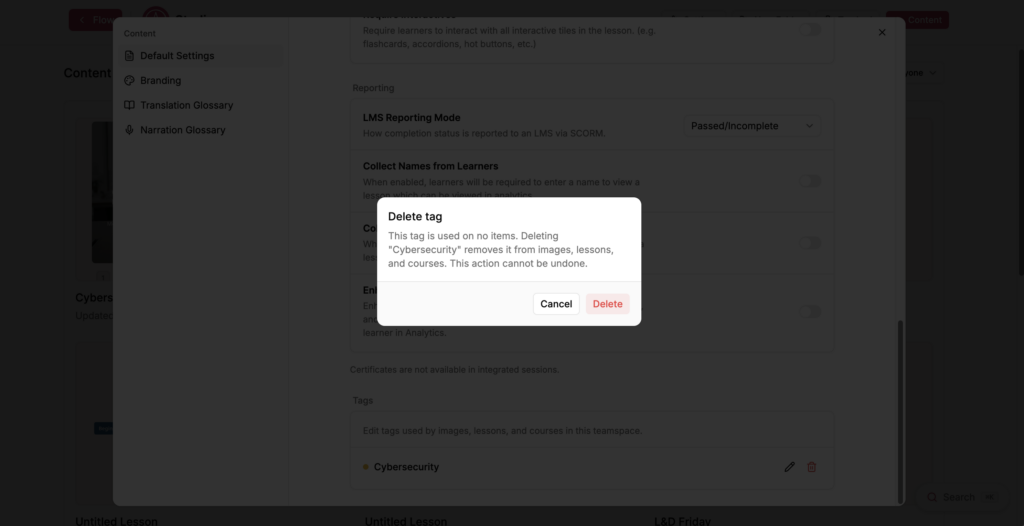
The Delete tag window opens and tells you how many items use the tag.
Select Delete.
Note: Deleting a tag removes it from the images, lessons and courses that use it. This action cannot be undone.
Creating themes in Studio
Start from: The Flow Learning dashboard.
Navigate to Learning & Development > Studio.
Select your specific lesson.
Create a theme
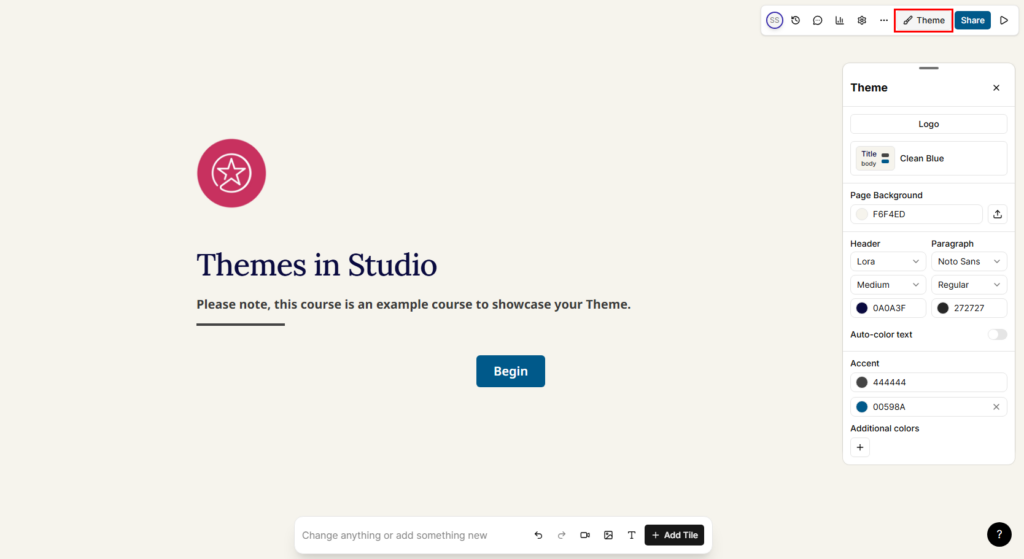
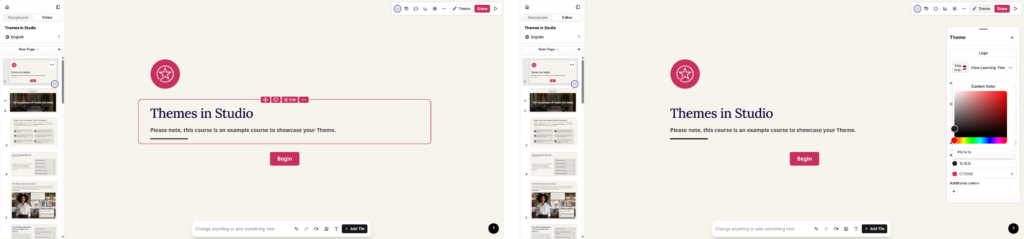
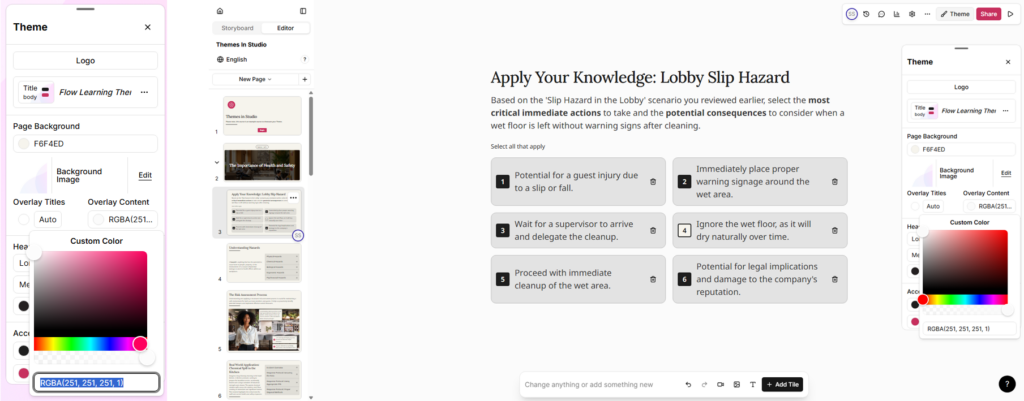
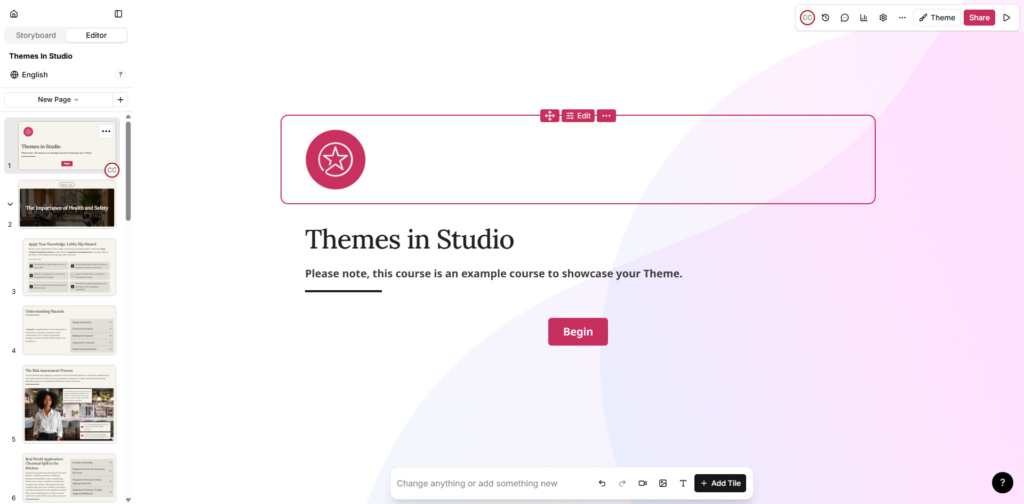
Once inside your lesson editor, select Theme.
The Theme panel opens. If you have not created a theme yet, Studio applies a default theme, such as Clean Blue.
Note: We recommend starting from any default Studio theme.
To create a new theme, change any element of a default theme, which then lets you save it as a new theme:
Choose one of your brand colours. Studio works in hex codes.
Change any of the existing colour options.
Select Save new at the bottom of the Theme panel.
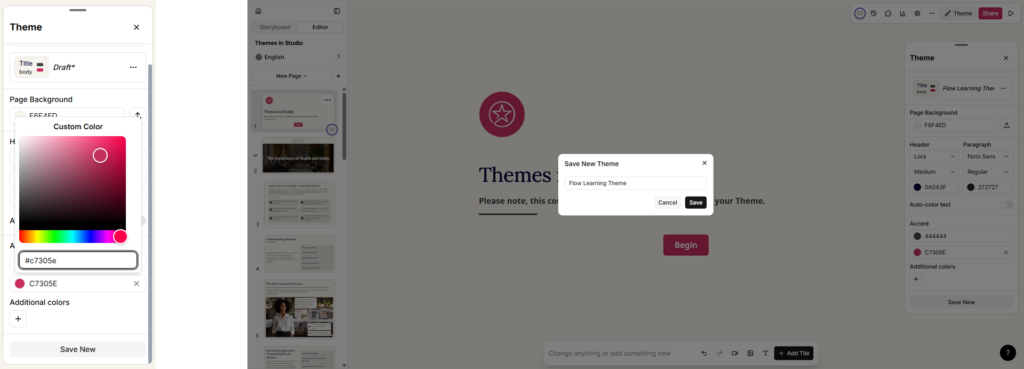
For example, when you change the second accent colour to #c7305e, the theme becomes a new draft because a change has been made to an existing theme.
Select Save new.
Enter a name for your theme and select Save.
This creates a duplicate of the Clean Blue theme with the colour change applied. You can now change the other elements.
Note: Save your changes each time you make one.
Set your colours
The second accent colour changes all buttons, icons, and the selection outlines shown when you edit the lesson.
The first accent colour changes all components, which take a tint of that colour, as well as the line strikes under titles.
Set your font colours
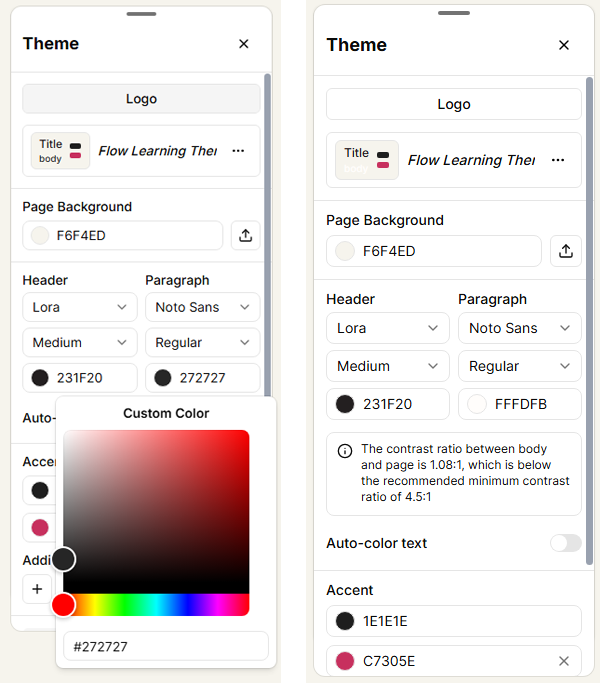
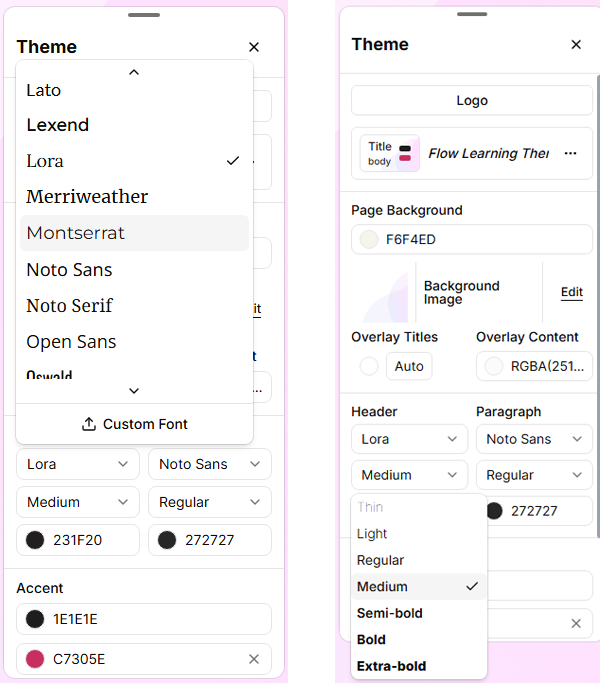
Choose the colour you want for your Header font, which covers all titles and subtitles, and your Paragraph font.
Note: If you choose a colour with low contrast against your Page Background Colour, Page Background Image, or your components, Studio flags it. Make sure your text meets the minimum contrast ratio requirement.
Set your page background
Your Page Background Colour should provide enough contrast with your text colour.
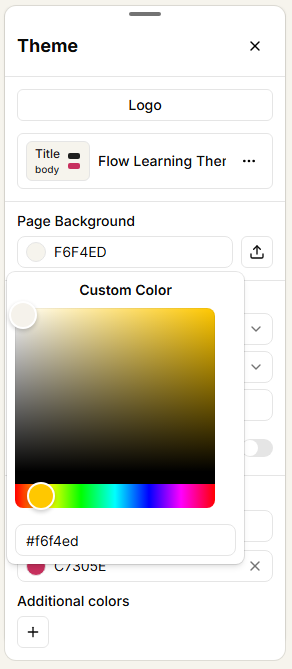
Go to Page Background.
Copy and paste your chosen colour hex code.
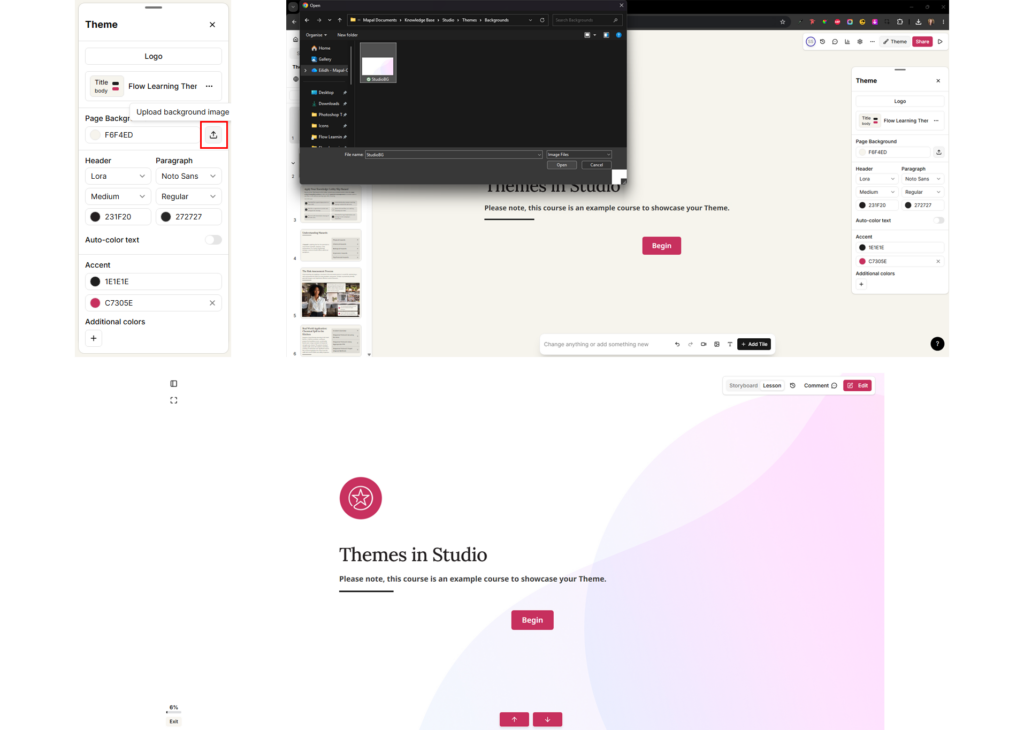
You can also upload a page background image. This applies to every page, so we recommend a background image that is not too distracting or busy, keeping your content visible and legible.
Select the upload icon.
Locate and select your image.
Select Open. The image is applied to your lesson.
Overlay titles and content
Below Page Background, you can set the Overlay Titles colour to change the background colour of the introduction pages and section dividers only.
Enter your hex code and press Enter. The colour updates to RGBA format, for example RGBA 255, 255, 255, 1.
To keep your background image visible on these pages, set the final number in the brackets to 0. This sets the colour's opacity to zero, for example RGBA 255, 255, 255, 0.
You can also set the Overlay Content colour to match your Page Background colour in the same way, with the opacity set to 100%.
Set your fonts
Studio has two font options: one for Headers (all titles and subtitles) and one for body copy (your main content). Studio includes built-in fonts to choose from, such as Montserrat. You can also select the font weight, for example regular, bold, or italic.
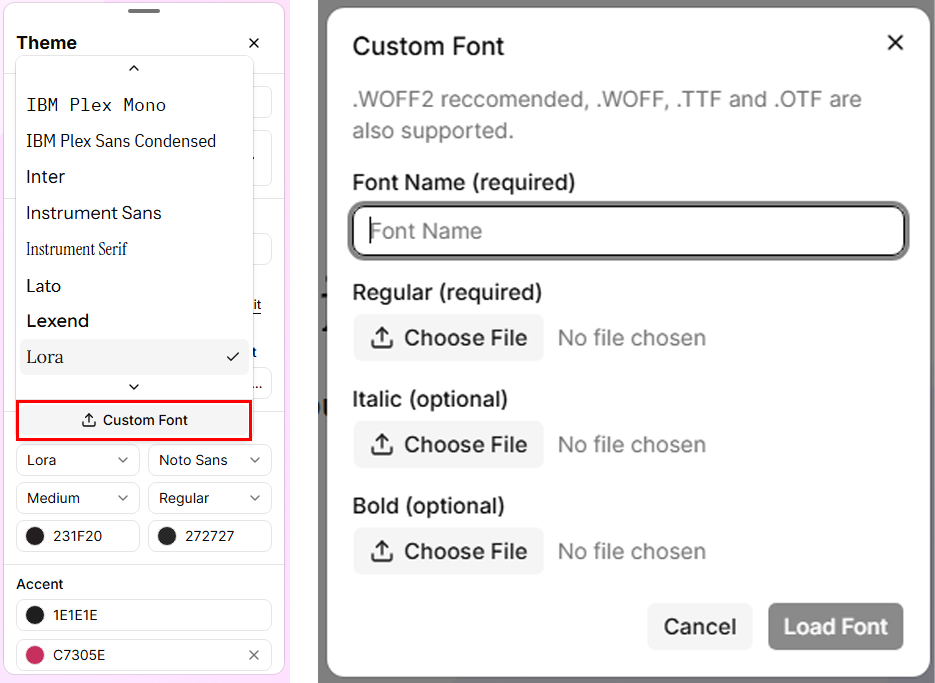
Upload a custom font
If your brand font is not in the list, you can upload it:
Select the font dropdown, then select Custom Font.
Upload the Regular font file. This is required.
Select Load Font.
You do not need to upload the bold or italic versions, as Studio generates these for you.
Note: We do not recommend uploading a font that you do not have a commercial licence for. Lesson and course pages do not request fonts from Google's servers. If your organisation needs this confirmed as part of a data protection assessment, contact your Customer Success Manager.
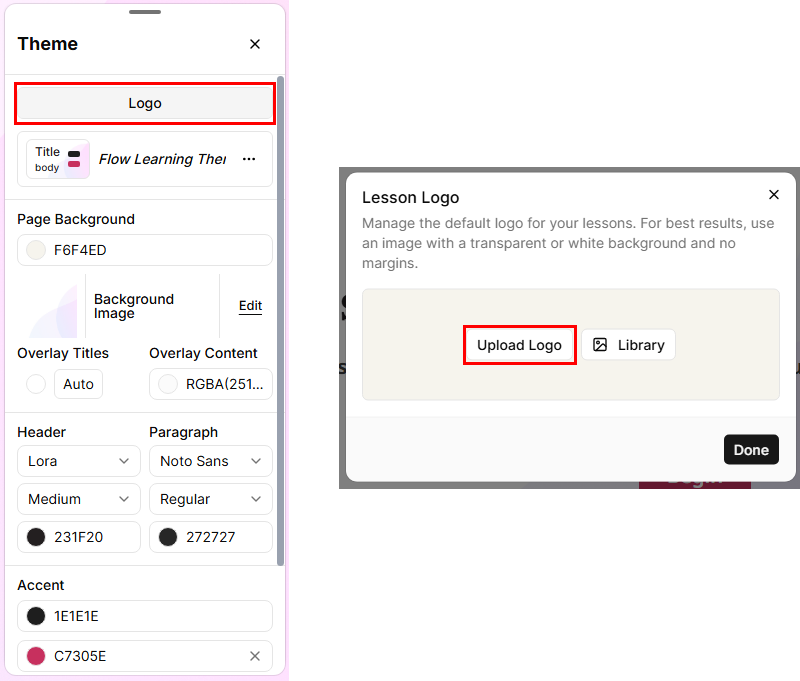
Upload your logo
Select Theme > Logo > Upload Logo.
Note: In Studio, logos are uploaded per lesson. They are not attached to the theme.
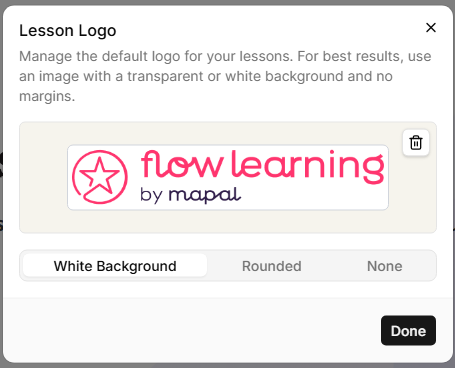
Once uploaded, your logo can appear in three ways:
White background: adds a white background to your logo. This only works if you upload your logo in PNG format with a transparent background.
Rounded: adds rounded edges to your logo in the preview.
None: no background is applied to your logo in the preview.
Note: If you set the visual style to None, your logo may lie on top of your content depending on your layout, which can make it or your content difficult to see. We recommend giving your logo a background colour, or using the White background option.
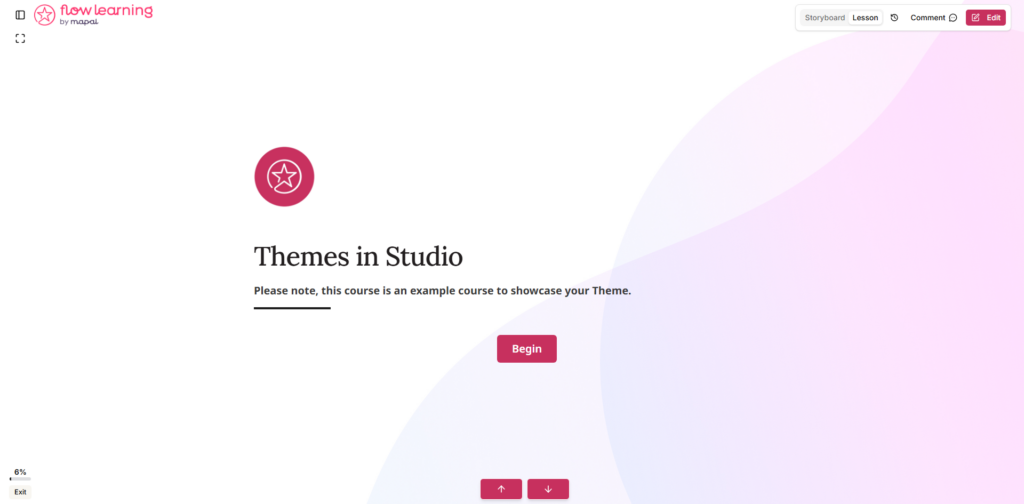
You can also add your logo as an image on your lesson landing page to introduce your course and reinforce your branding.
Apply and set a default theme
Your theme is now complete. When you create a lesson, you can select this theme to apply it.
To apply the theme automatically to any lesson you create, set it as the default:
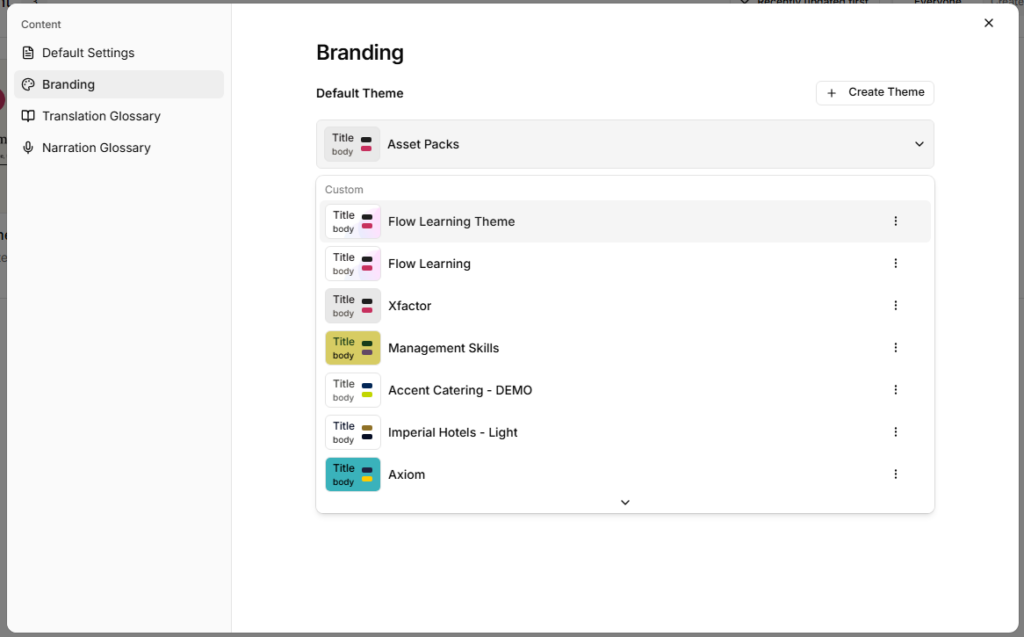
Go to your Studio dashboard and select Settings.
In the pop-up, select Branding.
Under Default Theme, select the dropdown and choose your new theme.
Completion settings in Studio
Start from: The Flow Learning dashboard.
Navigate to Learning & Development > Studio.
Select the specific lesson you want to configure.
Grading
Inside the lesson, select the Settings cog to access the lesson settings.
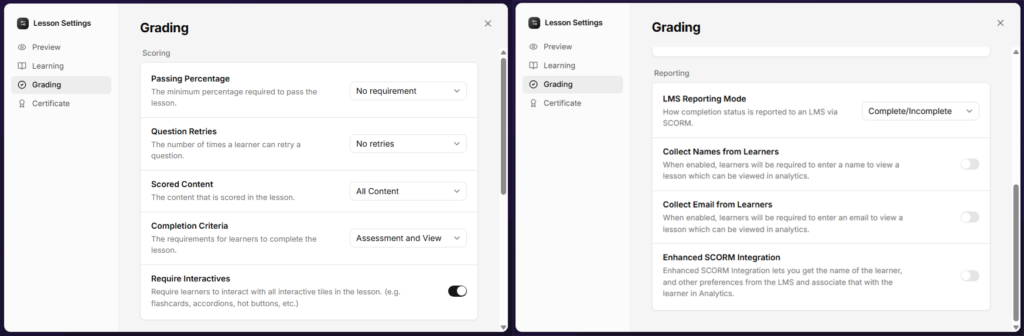
Select Grading. This section is split into two parts: Scoring and Reporting.
Scoring
Passing Percentage: Set the pass percentage mark if you add an assessment to your lesson. The Flow Learning standard is around 80%, but this depends on how many questions you include in your assessment.
Question Retries: Set how many times a learner can retake the questions within the lesson. This applies to all question tile types.
Scored Content: Set which content is assessed. If your questions are built throughout the lesson, select All content. If you have a dedicated section for questions, select Specific section and choose the section required.
Completion Criteria: Set how completion is logged. Assessment only logs completion via the question tiles that contribute to the score. Assessment and view logs the contributing question tiles and also requires learners to view every page of the content. Assessment and view works for courses without assessments as well.
Require Interactives: Toggle on if you want learners to interact with the interactive content for it to count towards completion. This ensures learners review all content.
Note:A quiz page counts as complete only after the learner submits an answer.
Reporting
The relevant setting in this section is LMS Reporting Mode. Set this to Complete/Incomplete, as this reports back to Flow Learning most reliably.
Assessment: all questions
You can set up Studio lessons to complete with a score based on all the questions that learners answer correctly. This can include all question tiles except the feedback tile. Questions do not have to be on their own page at the end of the lesson: they can be placed anywhere throughout the lesson.
The following settings are required for this completion type.
Lesson settings
Select the Settings cog.
Navigate to Learning and ensure Restart Lesson Button and Completion Dialog are toggled on.
Navigate to Grading.
Set your passing percentage. This depends on your content and how many questions you ask. For example, if you set up your lesson with 5 questions and want learners to answer a minimum of 3 correctly, your passing percentage is 60%. If you have 10 questions and want a minimum of 8 correct, your passing percentage is 80%. The Flow Learning standard is 80%, so we recommend 5 or 10 questions.
Set Question Retries to No retries.
Set Scored Content to All content.
Set Completion Criteria to Assessment and view. This ensures learners view all of the lesson content and the assessment content.
Toggle on Require Interactives.
Scroll to Reporting and set LMS Reporting Mode to Complete/Incomplete.
Question settings
Question tiles include a small interaction label. These labels are fixed and cannot currently be edited to make them more prominent. With this in mind, consider adding interaction guidance within the text of your questions, for example "Select the answer you think is correct". Keep this in mind whichever completion setting you use.
Once you have added your question content, ensure that all questions in the lesson are linked to the score:
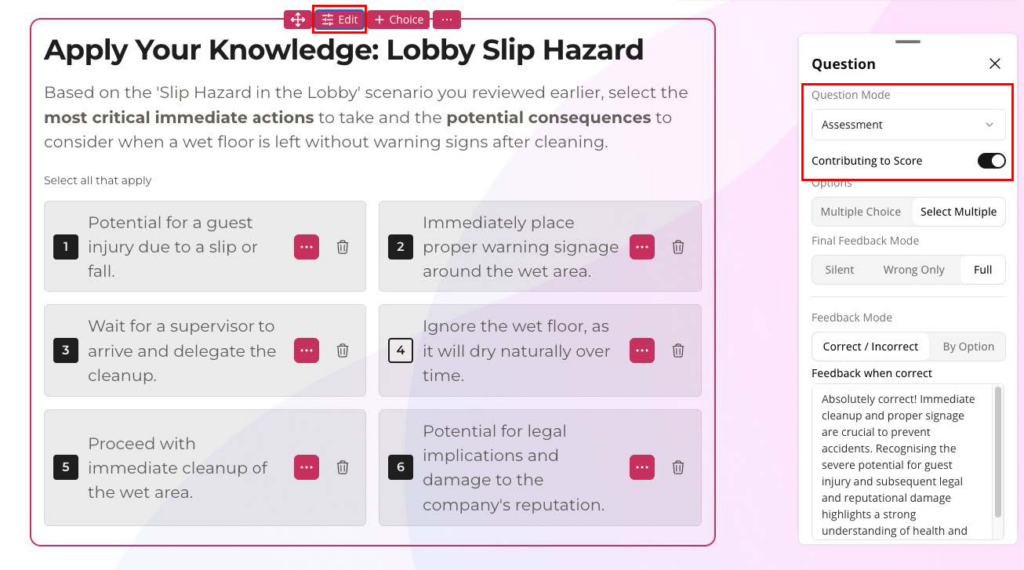
Select the question tile in the Editor, then select Edit. A panel opens.
Ensure Question mode is set to Assessment and toggle on Contributing to Score.
Formative questions throughout the lesson
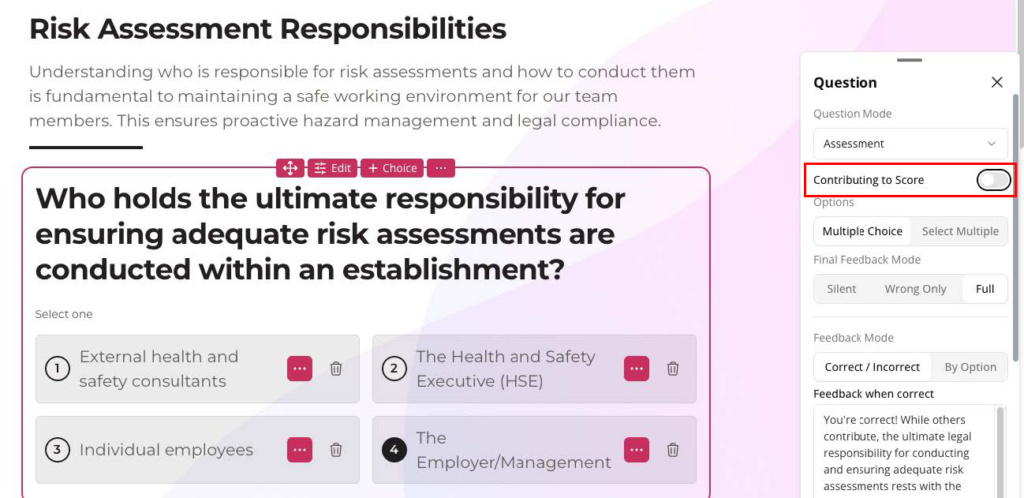
If you want practice exercises throughout your lesson that do not contribute to the assessment score, add question tiles as knowledge checks and toggle off Contributing to Score.
Our recommendations
Assessment only
We recommend using assessment questions whenever the learning requires evaluation. These are most effective placed at the end of a course, with a pass percentage of 80% (learners pass with 4/5 or 8/10).
Your pass percentage depends on the number of questions, the content you are building, and your company's policies. For example, an allergens-specific lesson will likely need a higher pass percentage of 90 to 100%.
Once the learner has completed or passed the assessment, the Completion Dialog appears. This is why we recommend placing your assessment on its own page at the end of your lesson: it gives learners a definitive end to their module.
Setting up an assessment page
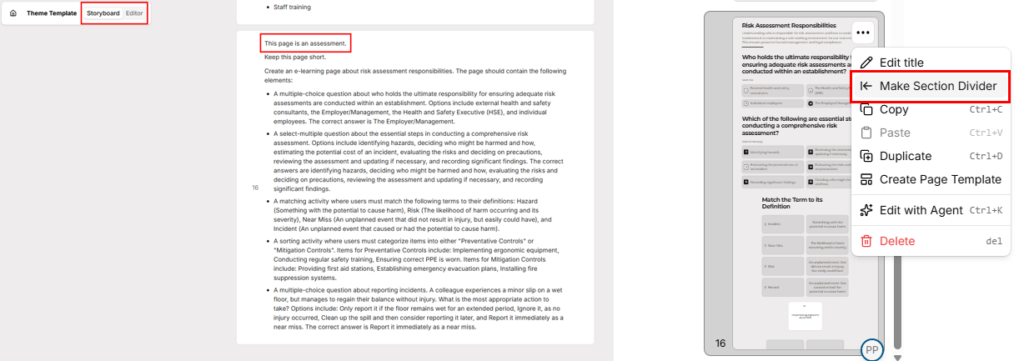
Select Storyboard.
Add a page with a prompt outlining that it is to be set up as an assessment, along with what you would like the assessment to include.
Make the assessment page its own section: select Editor, select the action menu (...) on your assessment page, then select Make Section Divider. This lets you select the section in your Scored Content setting.
Lesson settings
Select the settings cog.
Navigate to Learning and ensure Restart Lesson Button and Completion Dialog are toggled on.
Navigate to Grading.
Set your passing percentage.
Set Question Retries to No retries.
Set Scored Content to Specific section and select your assessment page.
Set Completion Criteria to Assessment only.
Toggle off Require Interactives.
Scroll to Reporting and set LMS Reporting Mode to Complete/Incomplete.
Question settings
As with Assessment: all questions, ensure that all questions in the lesson are linked to the score:
Select the question tile in the Editor, then select Edit. A panel opens.
Ensure Question mode is set to Assessment and toggle on Contributing to Score.
Formative questions throughout the lesson
If you are including an assessment page, we do not recommend using formative questions on the earlier pages of the lesson. If you do include formative question components (practice questions) outside your assessment page, ensure they do not have Contributing to Score toggled on.
Attainment
Attainment completion means the learner needs to interact with every selectable component in the lesson to complete it.
We recommend adding a Complete this lesson button on the final page, so the course completes once the learner reaches the final page rather than when they complete the last interactive component.
Lesson settings
Select the Settings cog.
Navigate to Learning and ensure Restart Lesson Button and Completion Dialog are toggled on.
Navigate to Grading.
Set your passing percentage to No Requirement.
Set Question Retries to No retries.
Set Scored Content to All content.
Set Completion Criteria to Assessment and view. This ensures learners view all of the lesson content and the assessment content.
Toggle on Require Interactives.
Scroll to Reporting and set LMS Reporting Mode to Complete/Incomplete.
With these settings, learners receive a prompt to complete all interactive components on the page before they can move on.
Question settings
If you have any question tiles in your lesson, ensure that Contributing to Score is toggled off in the question settings.
View history for a Studio lesson
View lesson history
Open the lesson you want to review.
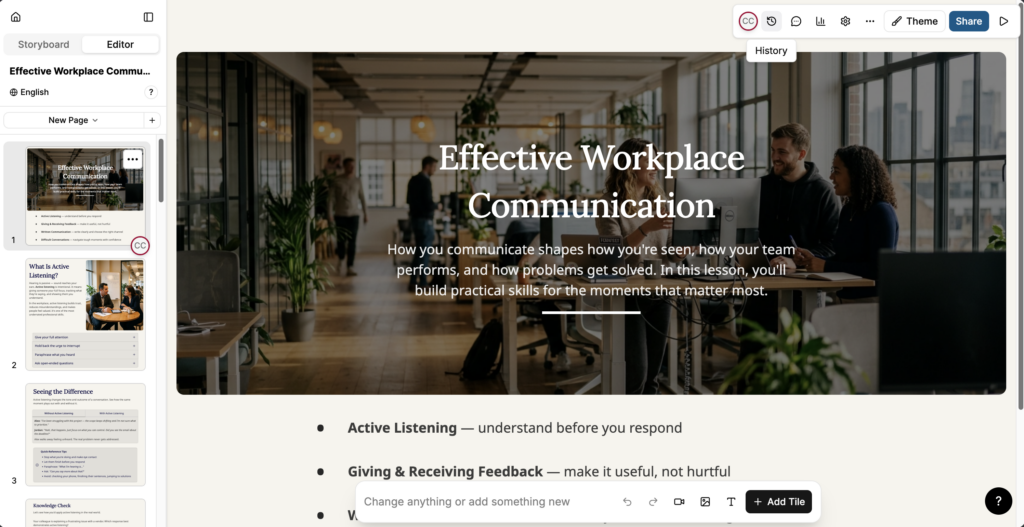
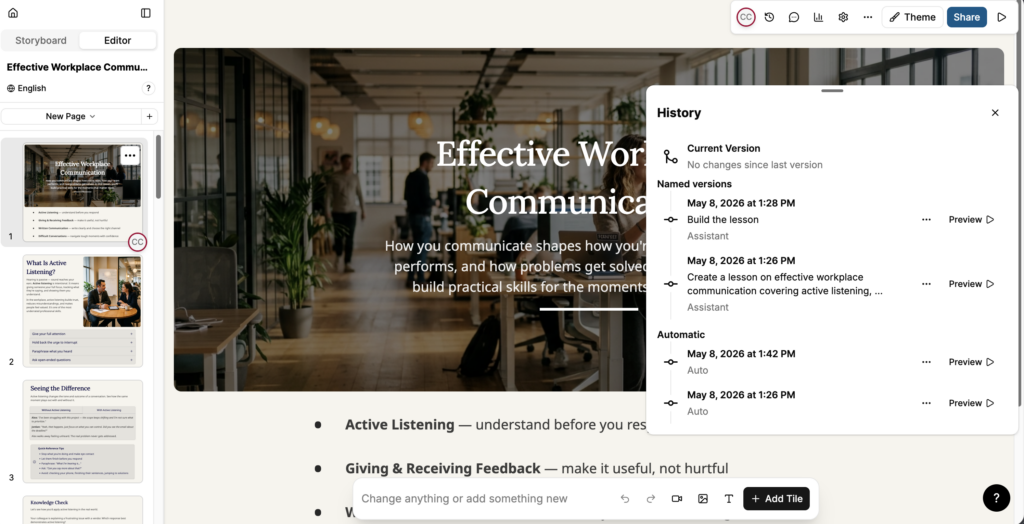
Select the History icon in the toolbar.
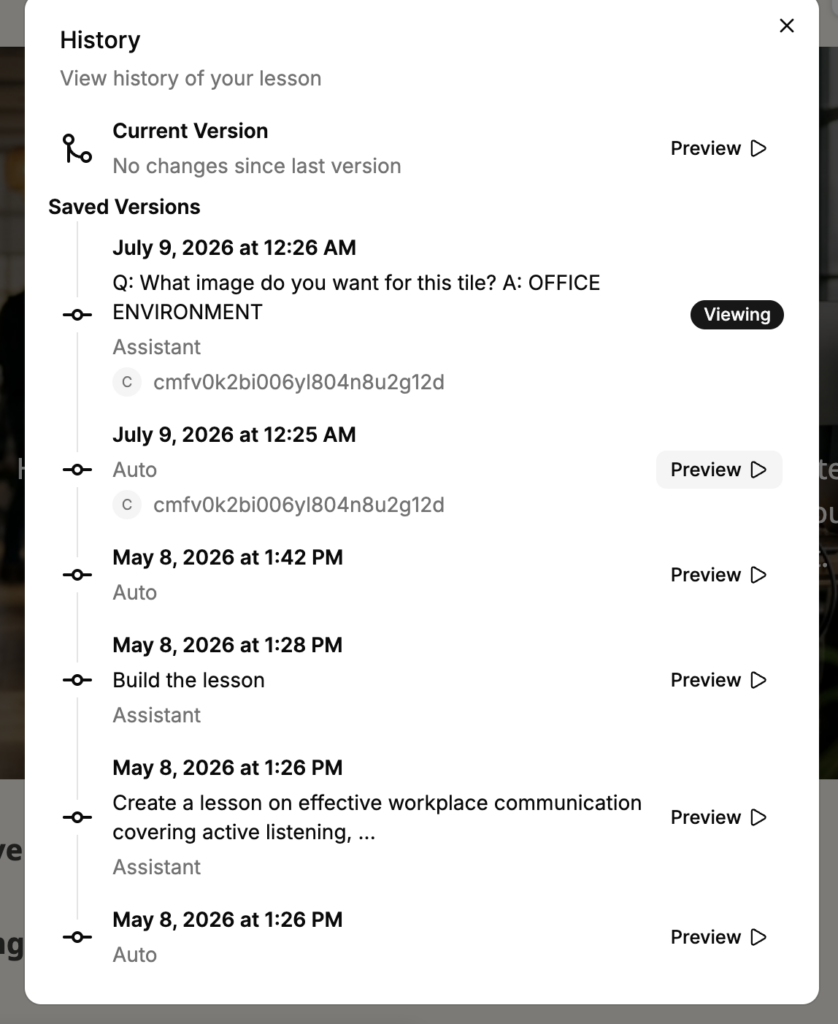
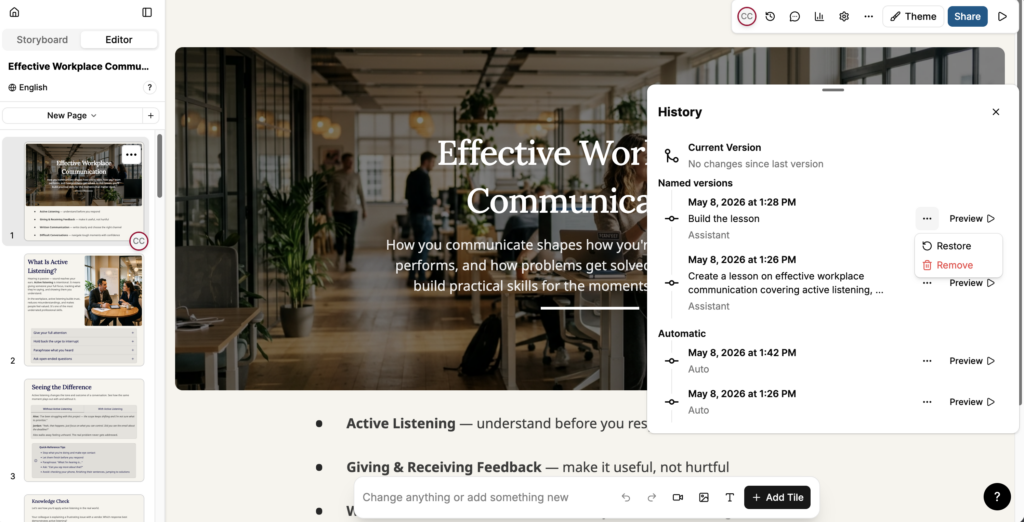
The History panel opens, showing three sections:
Current Version: the version you are currently editing. The panel indicates whether there are unsaved changes since the last version.
Named versions: versions created by a specific action, such as generating a lesson, building a lesson, or a targeted AI interaction. Each entry shows the date, time, a description of the change, and the editor responsible.
Automatic: versions saved automatically by Studio. Each entry shows the date and time.
Preview a previous version
In the History panel, find the version you want to review.
Select Preview next to the entry to open a read-only preview of that version.
Note: Previewing a version does not change the current lesson. Close the preview to return to the current version.
Restore a previous version
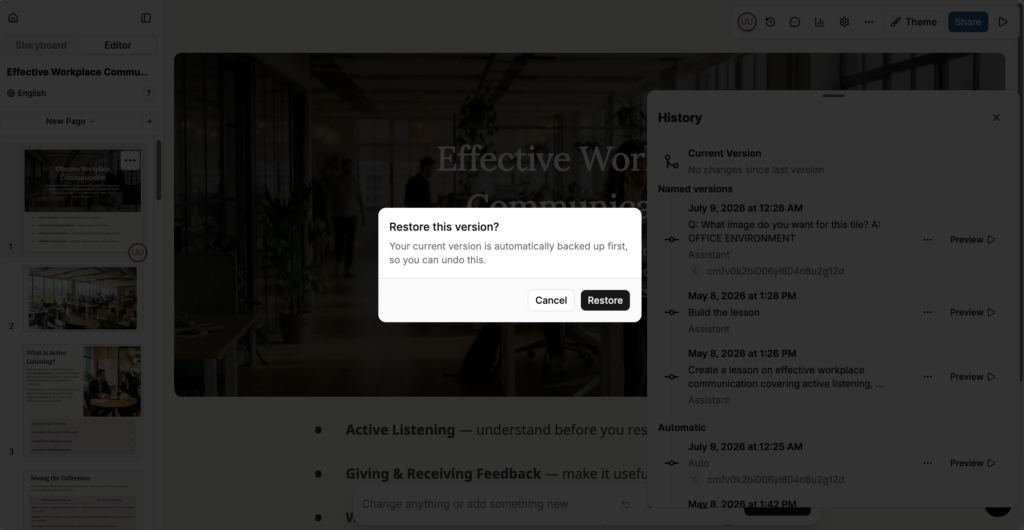
In the History panel, select the action menu (...) next to the version you want to restore.
Select Restore.
A verification message appears. Select Restore to confirm.
The lesson content is replaced with the content from the selected version.
Note: Restoring a version replaces the current lesson content with the content from the selected version. Any unsaved changes to the current version are lost. Preview the version first to confirm it is the one you want to restore.
Remove a version
In the History panel, select the action menu (...) next to the version you want to remove.
Select Remove.
The selected version is deleted from the history and cannot be recovered.
Note: Removing a version is permanent. If you may want to restore the version later, preview it first before removing.
Export analytics from Studio
Start from: The Flow Learning dashboard.
Access analytics in Studio
Navigate to Learning & Development > Studio.
Select the lesson or assessment you want to review.
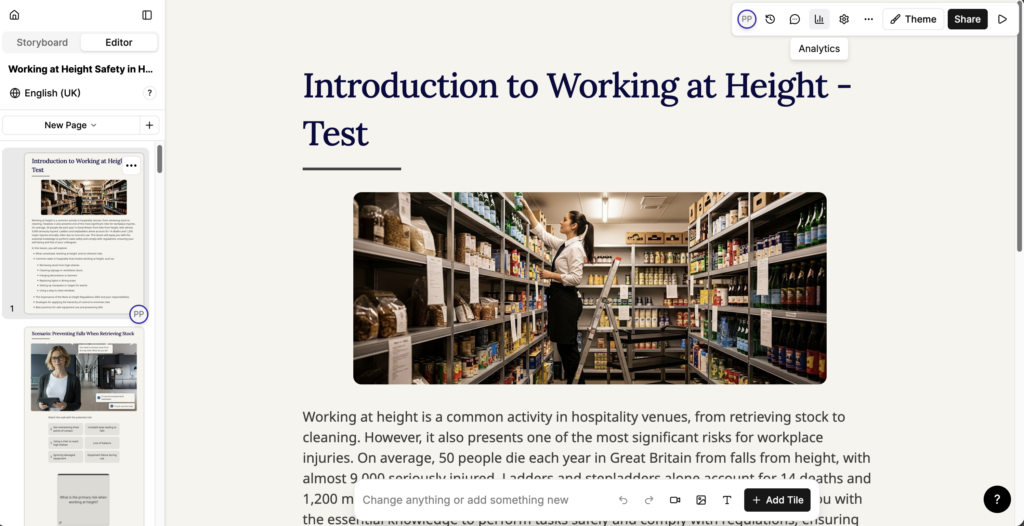
In the editor, select Analytics (bar chart icon).
The Analytics window opens.
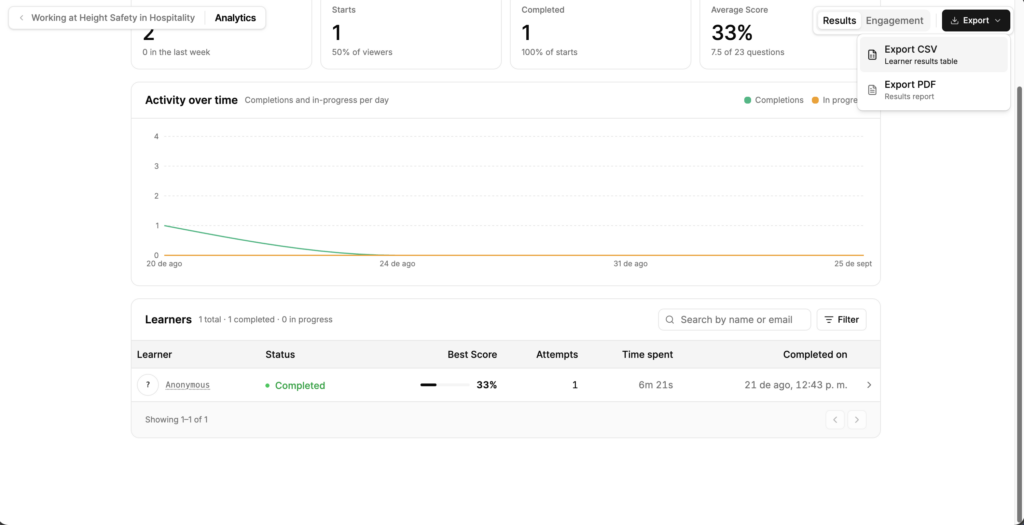
Review Results analytics
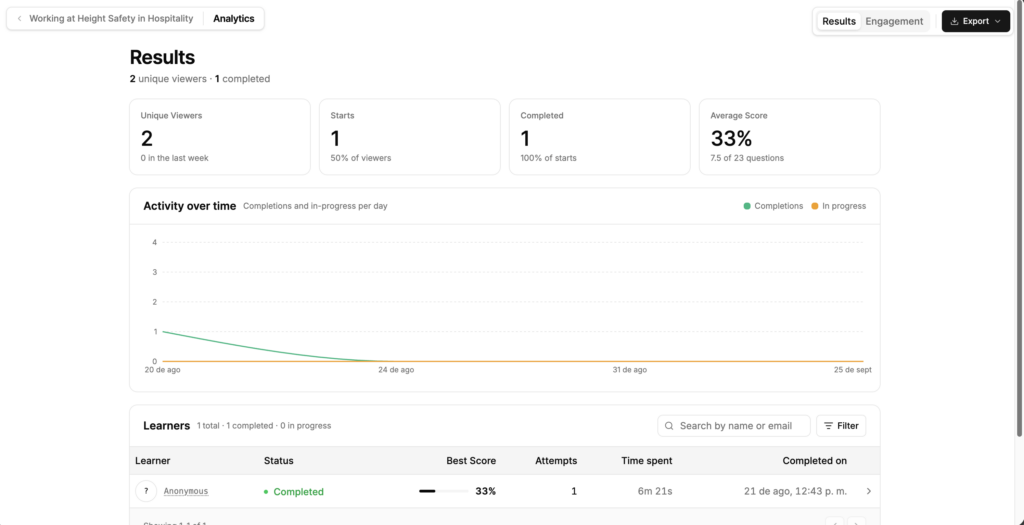
Select Results. Review the summary metrics:
Unique Viewers: the number of learners who opened the lesson, with the number from the last week.
Starts: the number of learners who began the lesson, as a percentage of viewers.
Completed: the number of learners who finished the lesson, as a percentage of starts.
Average Score: the average score across learners, with the average number of questions answered correctly.
Review Activity over time to see completions and in-progress lessons per day. Review the Learners table for learner-level detail: Learner, Status, Best Score, Attempts, Time spent and Completed on.
Select Search by name or email to find a specific learner.
Select Filter to narrow the list.
Select a learner's row to open their individual results.
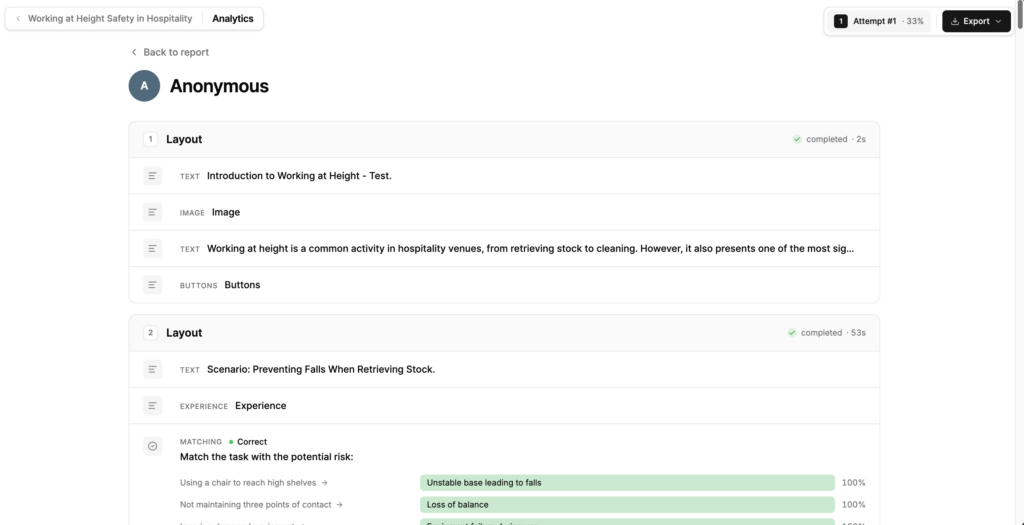
Review an individual learner's report
In the Learners table, select a learner's row.
The learner's report opens, showing each page in turn with its completion status and the time spent on it.
Review each question to see the learner's answer and whether it was correct.
Where a learner has more than one attempt, select the attempt to review.
Select Back to report to return to the Results screen.
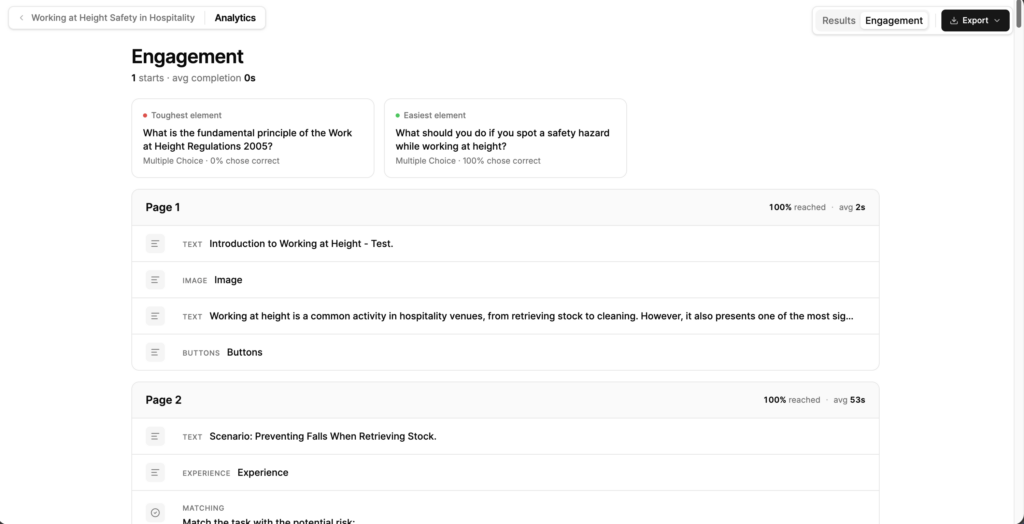
Review engagement
Select Engagement.
Review Toughest element and Easiest element to see which question learners found hardest and easiest, with the percentage who answered correctly.
Review each page in turn. Every page shows the percentage of learners who reached it and the average time spent on it.
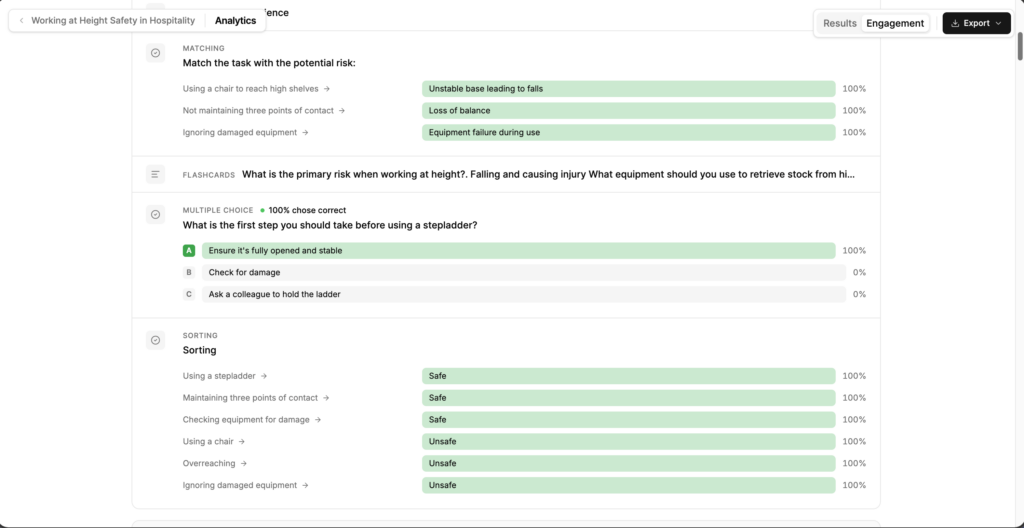
Review the elements within each page. Every element shows its type, such as TEXT, IMAGE, MULTIPLE CHOICE, MATCHING or SORTING.
For question elements, review how learners answered. Each option shows the percentage of learners who chose it, and the correct option is highlighted.