Automatically enter responses with Smart Tender

Start from: The Easilys menu

What is Smart Tender?

Smart Tender is an exclusive machine learning feature built into the Easilys Supplier Portal. It automates the tender response process by intelligently analysing your existing data and past interactions with clients.

How it works

Smart Tender configuration

Smart Tender offers flexible configuration options so it can adapt to your preferred workflow:

Once your configuration is set, click Validate to launch the Smart Tender pre-fill process. The system will populate the tender fields with suggestions, helping you save time while maintaining consistency with your product catalogue and pricing.

Note: You can run Smart Tender multiple times and modify all pre-filled proposals before submission.

Generate a schedule with optimization

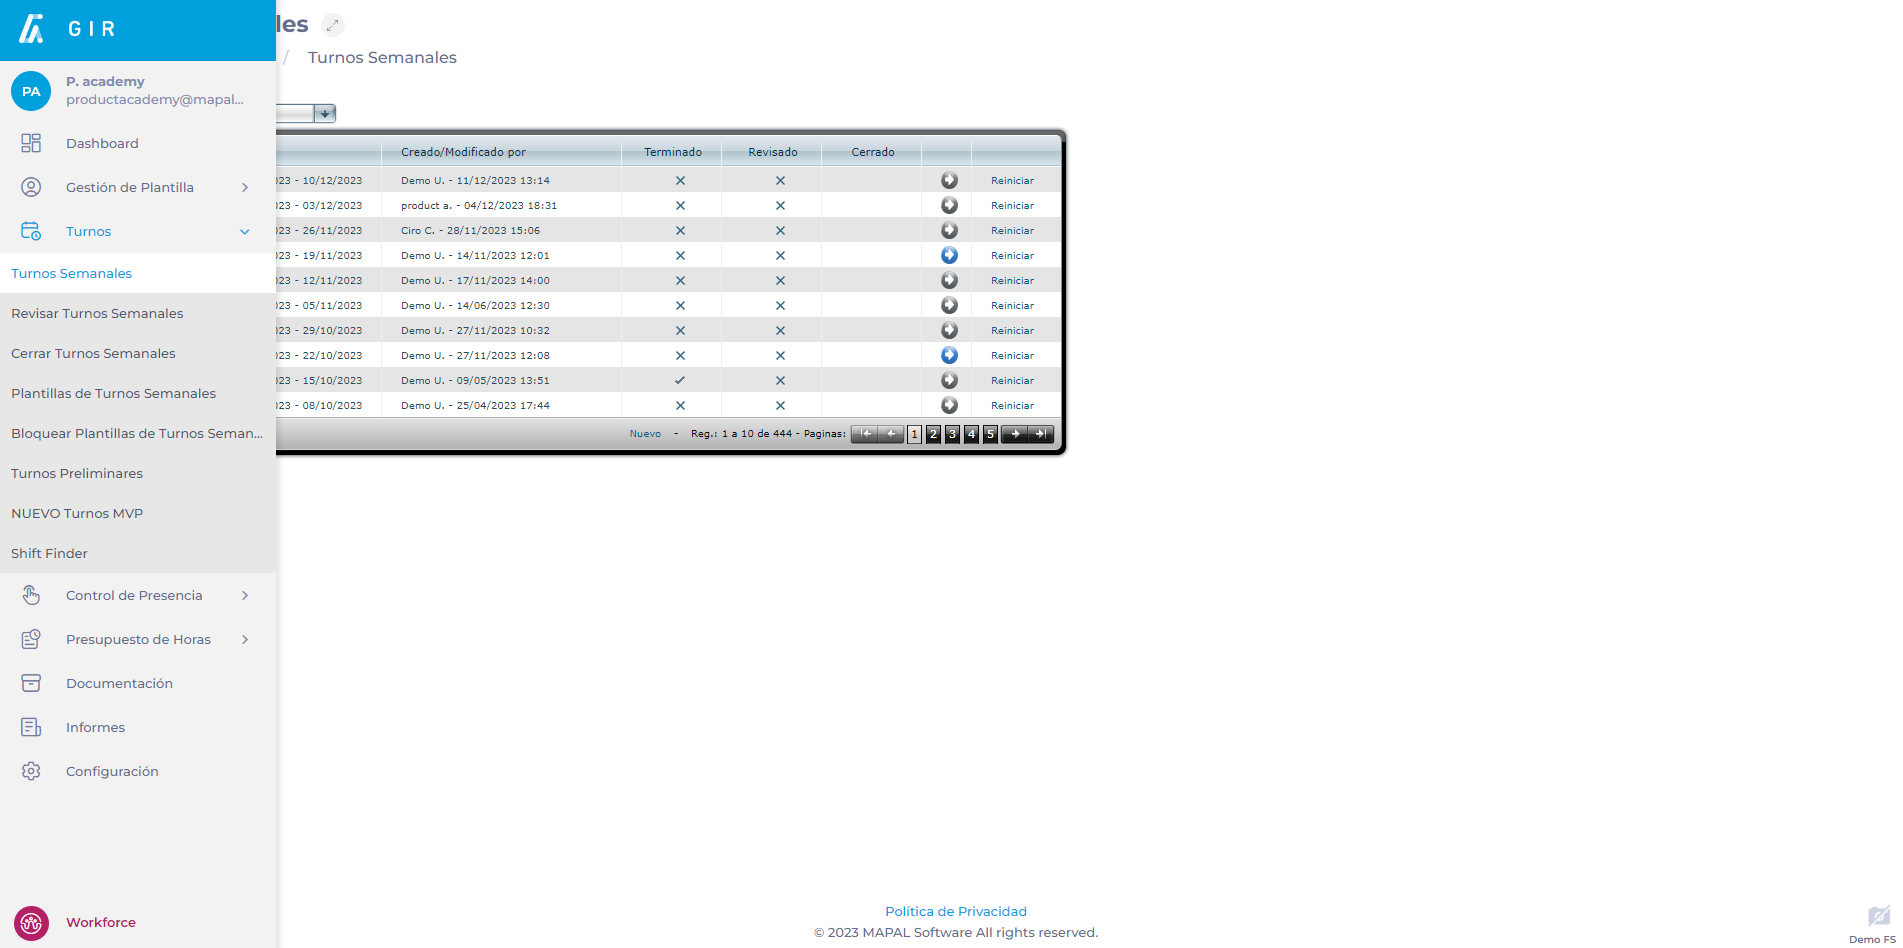
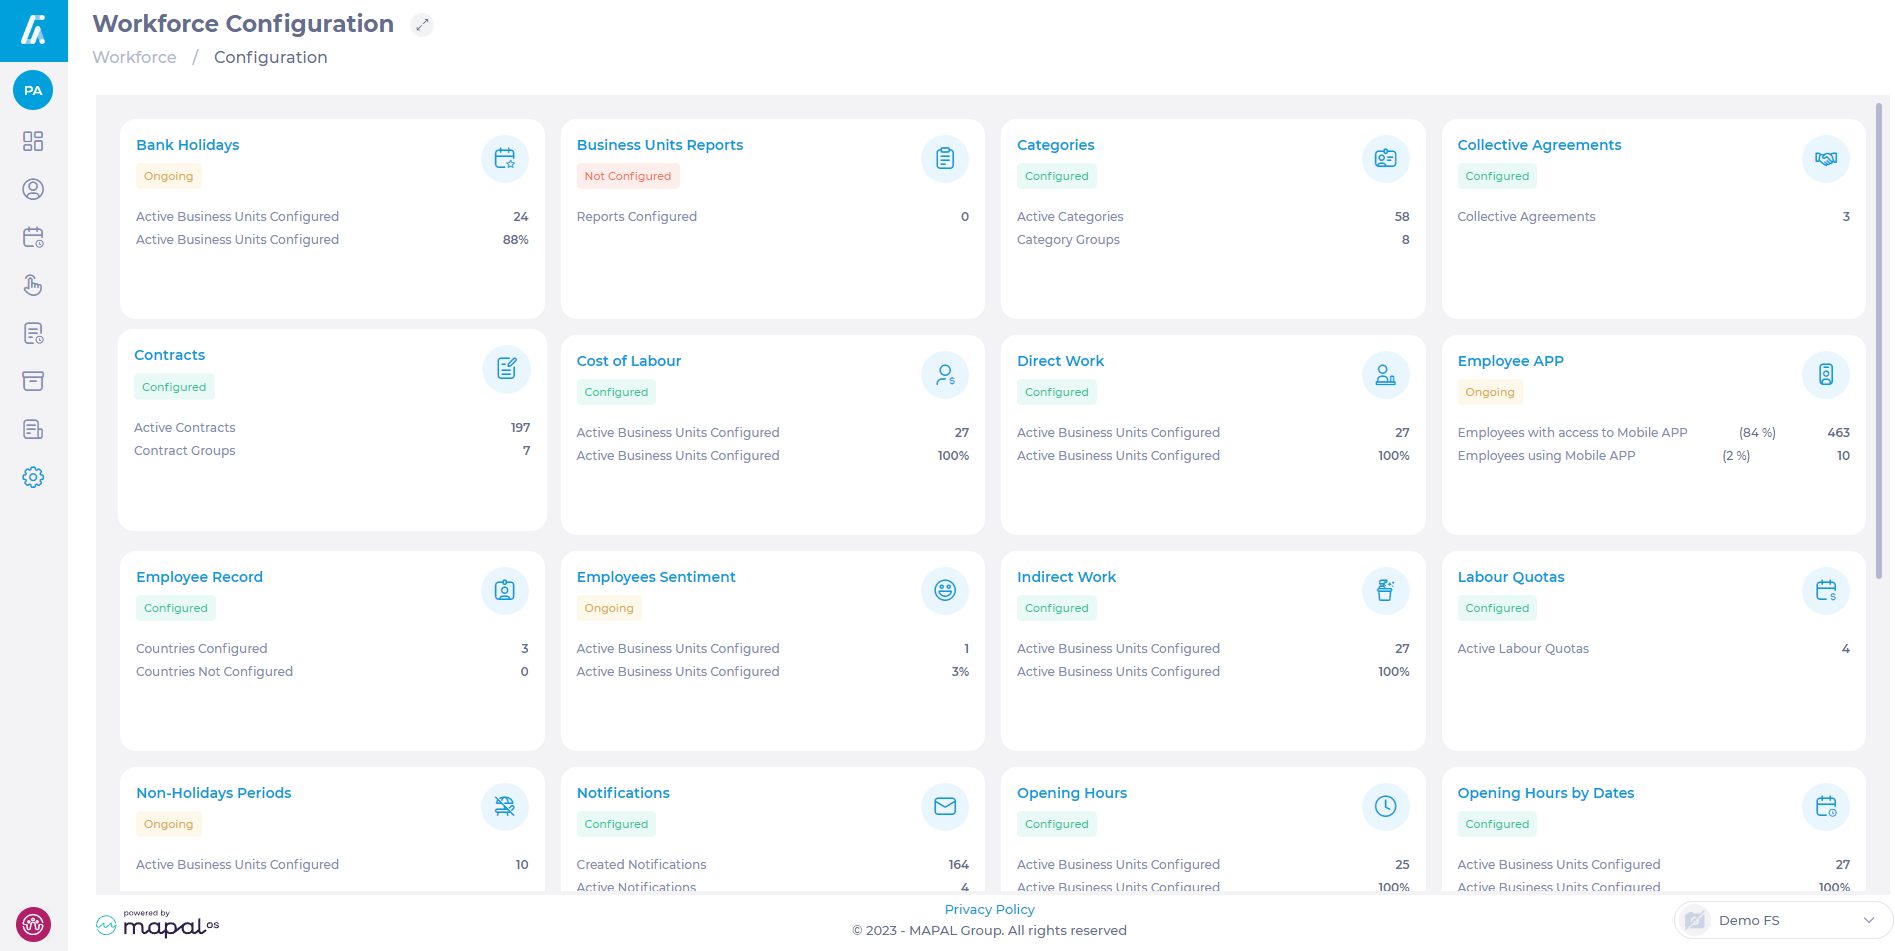
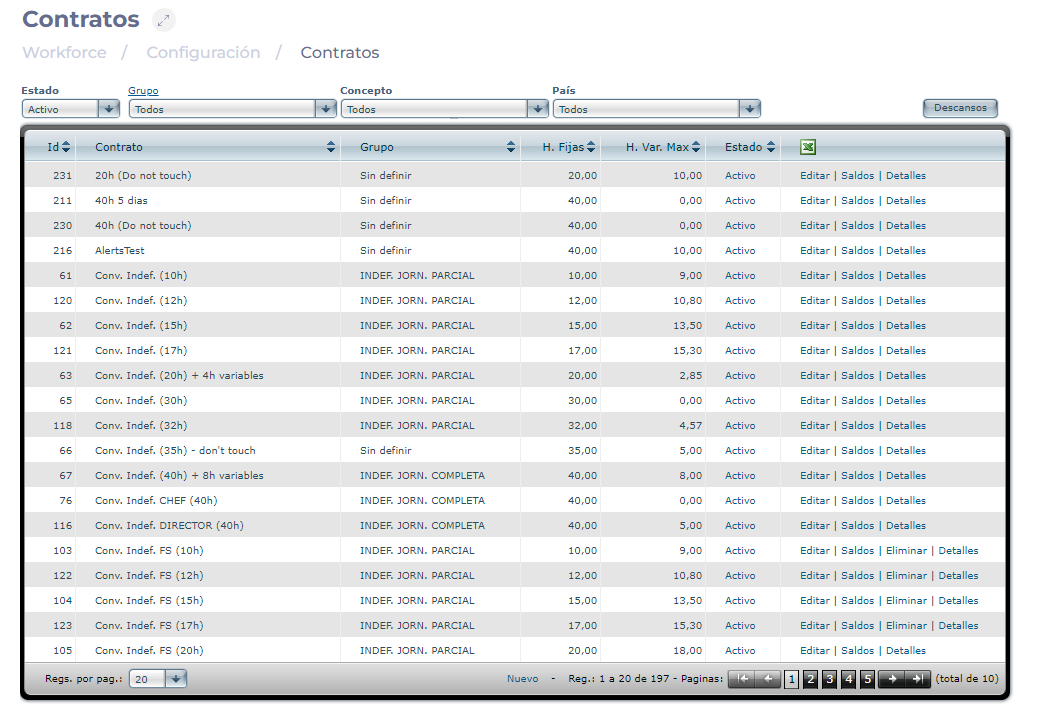
Start from: The Workforce dashboard.

Conditions to use the optimization feature

To ensure compatibility with the GIR2 shift planner, optimization in the new scheduler follows specific conditions:

  • Available only in weekly view: Optimization applies to the currently selected week only.

  • Limited to a single business unit: Users cannot optimize shifts across multiple business units simultaneously.

  • Requires a complete week: If any days are missing, the optimizer cannot provide an optimal solution.

  • Uses the ASTE1 optimization engine, the same one used in GIR2.

  • Week status must be "Ongoing": Only weeks in this status can be optimized.

  • One optimization per business unit per user at a time: A user cannot launch another optimization for the same week and center until the previous one is completed. However, optimizations for different weeks or business units can run simultaneously.

Key configurations for best optimization results

To achieve the best possible outcomes, the following elements must be properly configured:

Business Unit Opening Hours

  • The system relies on well-defined opening hours to determine when the business is operational.

  • Ensures shifts are not scheduled outside business hours or in night-rate periods.

To know more, see Set up working hours.

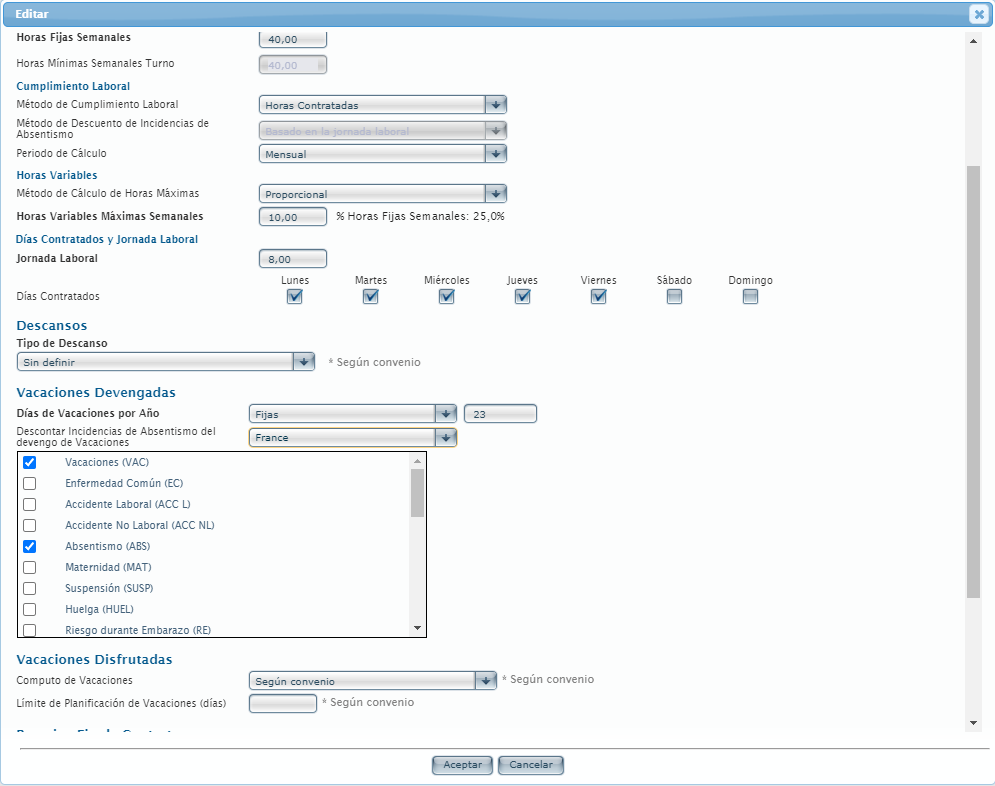
Employee Contract Restrictions

  • Defines the number of workdays per week, contractual working hours, and whether variable or overtime hours can be used.

  • Considers scheduling restrictions for specific days.

To know more, see Set work restriction periods for an employee and Create new contracts.
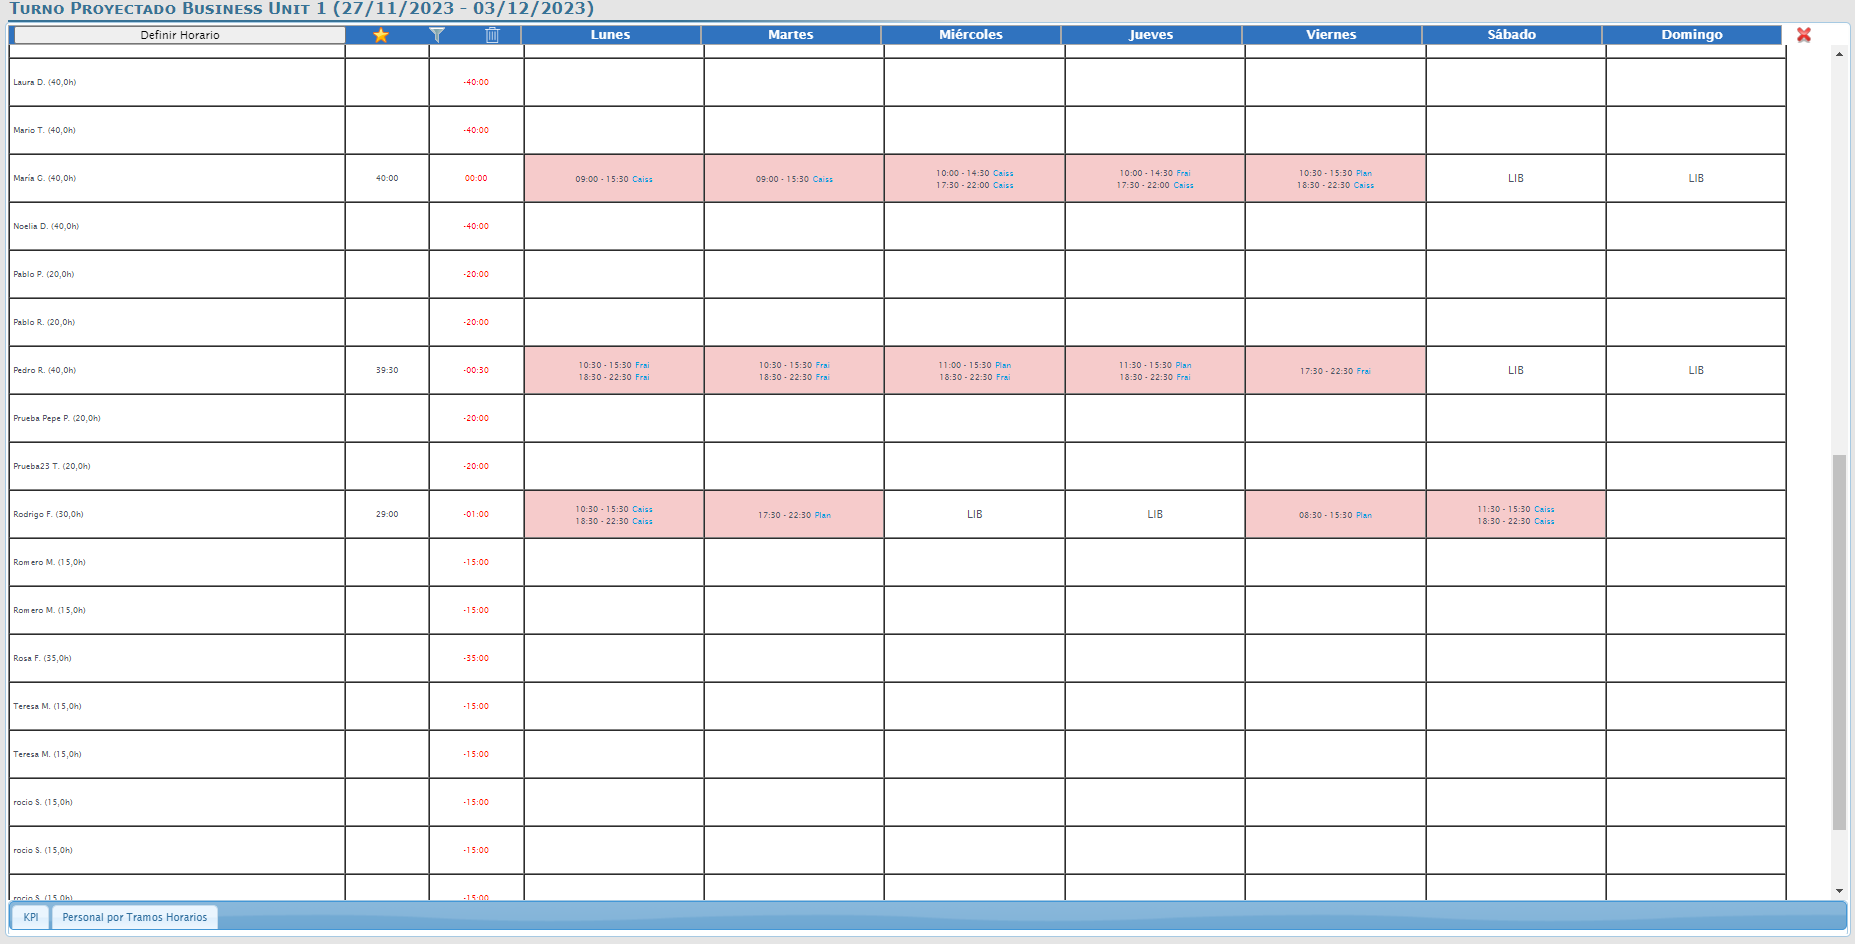
Work Assignments

  • Ensures shifts align with staffing requirements, minimizing understaffing (which affects service quality) and overstaffing (which increases costs).

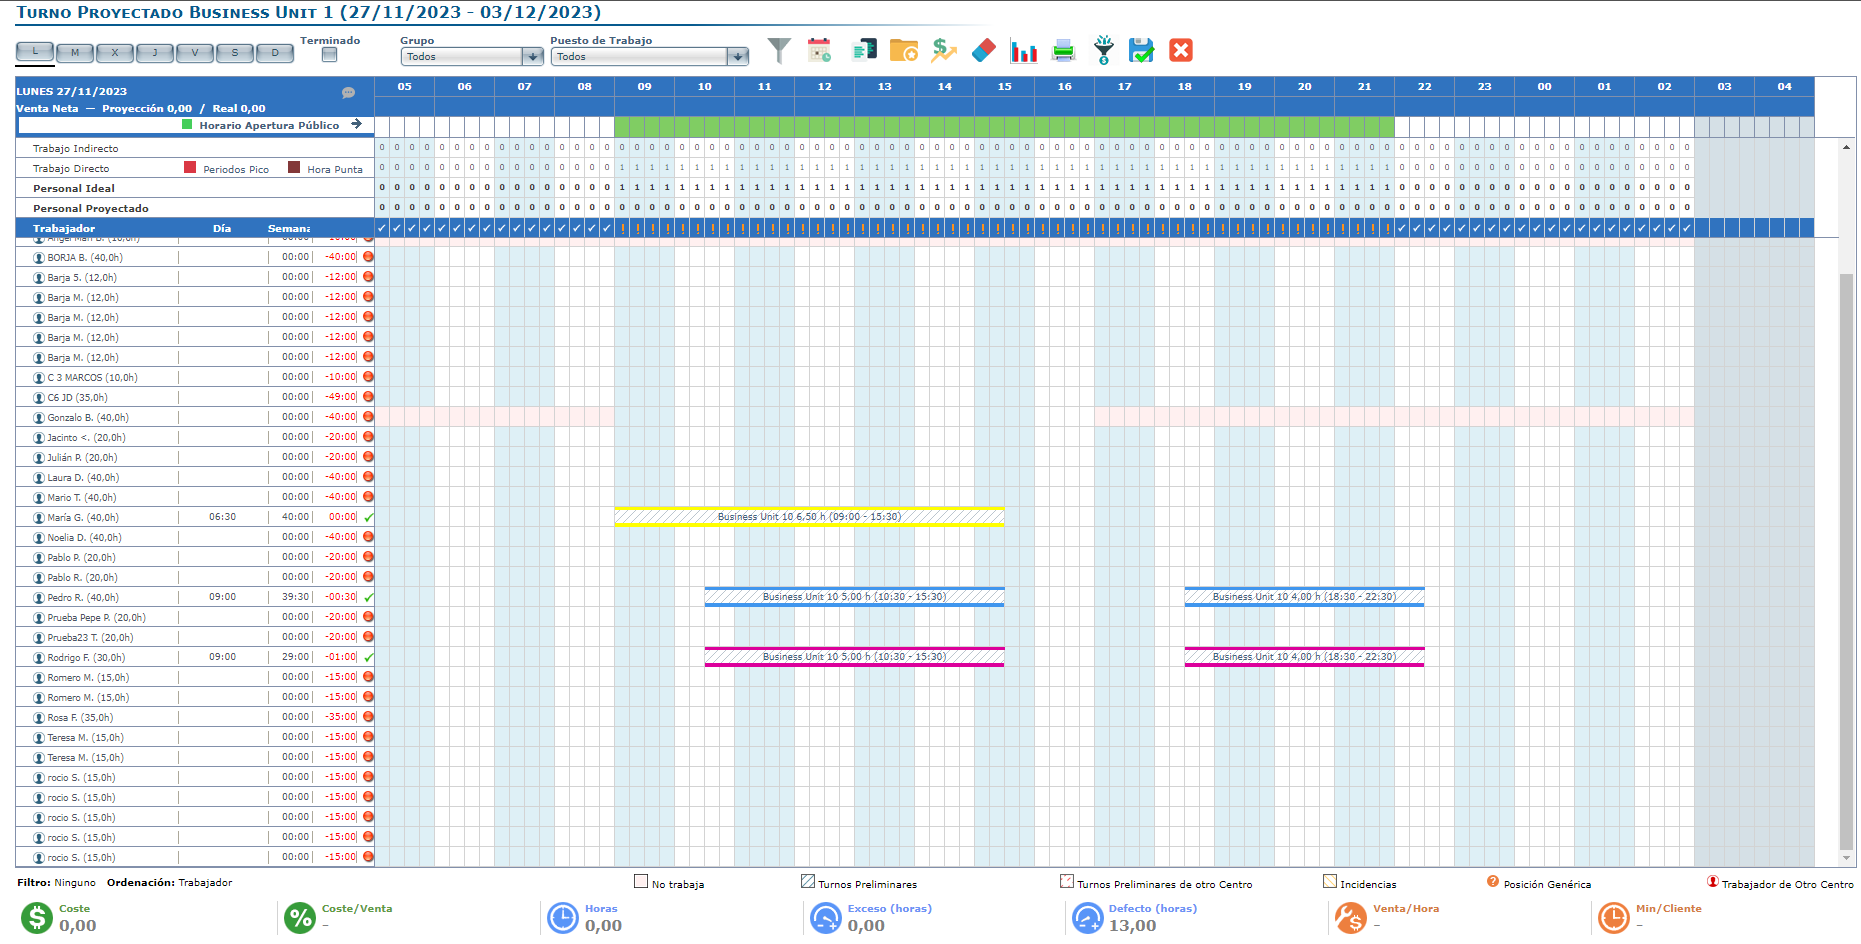
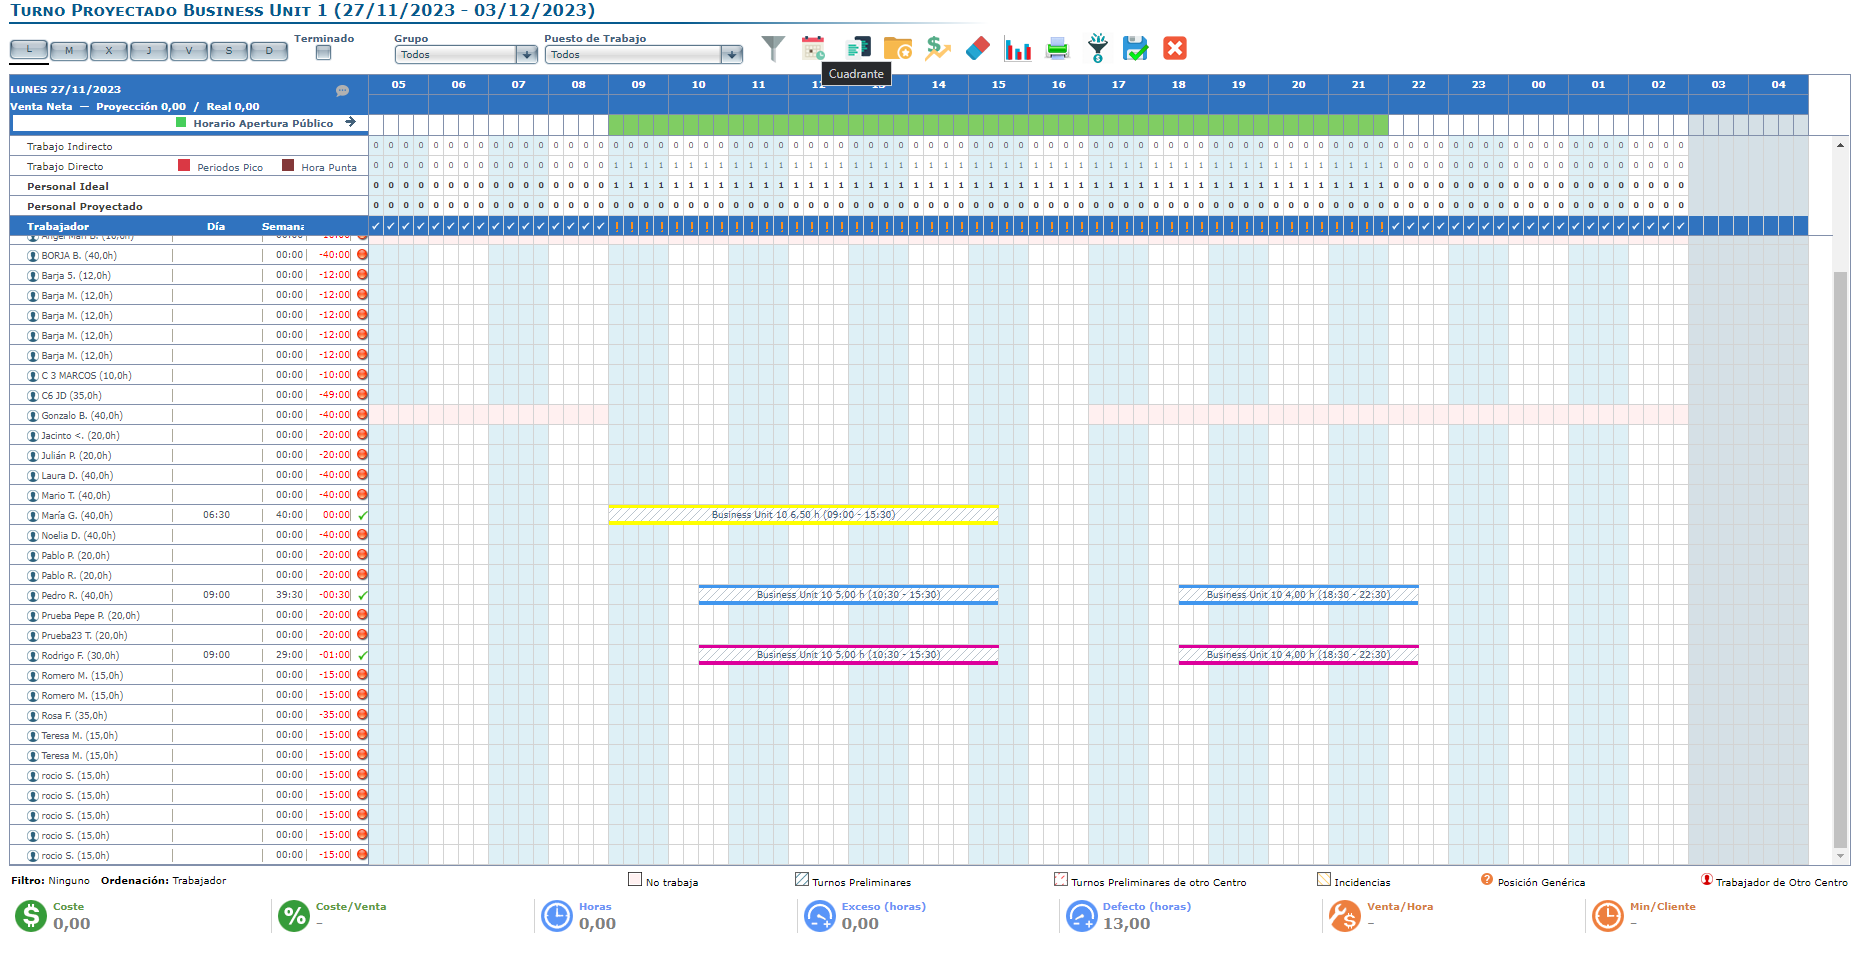
How to use optimization

  • Navigate to Scheduling > Scheduler 2.0

  • Configure the following Parameters

    • Select the start date and end date

Note: You must select a full week

  • Select a Business Unit. 

Note: You must select a single Business Unit

  • Select Accept

To know more about the Parameterization, see Access the scheduler.

  • Once in the grid, ensure you are in the Weekly view. 

  • When these conditions are met, the Optimizer button becomes available in the upper-right corner.

Using the optimization panel

Selecting Optimizer opens a panel where users can configure their optimization settings.

Optimization method

Currently, the system supports Free Optimization, which automatically generates the best possible schedule based on existing data.

Configuration options

Users can customize the optimization process by selecting any combination of the following options:

  • Enable additional hours: Allows variable hours to be scheduled beyond fixed contractual hours.

  • Enable overtime: Permits scheduling overtime hours if necessary.

  • Respect fixed time off: Ensures employees’ contractual rest days are maintained.

  • Respect planned shifts: Keeps already scheduled shifts unchanged in the optimized result.

  • Prioritize peak-time staffing: Ensures experienced employees are scheduled during high-demand periods.

  • Assign shifts for all fixed hours: Ensures employees reach their fixed contractual hours, even if it results in a less optimized schedule.

Note: These settings can be used together without conflicts to refine the final schedule.

Processing and applying the optimized schedule

Once settings are confirmed, the optimization request is sent for processing. During this time:

  • No other optimizations can be launched for the same business unit, week, and user.

  • A Processing indicator appears on the Optimization button.

  • Users can continue working on other weeks, business units, or exit the scheduler.

Once complete, users receive a notification when they return to the same center and week, indicating that the solution is ready to apply.

Applying or discarding the optimized schedule

When optimization is complete, users have two choices:

  • Apply the optimized schedule: The new shift plan is immediately implemented.

  • Discard the optimized schedule: The solution is permanently removed (to recover it, a new optimization must be run).

If the applied schedule is unsatisfactory, users can:

  • Manually adjust shifts.

  • Delete the entire schedule and rerun optimization for a fresh plan.

View shifts

Start from: The Workforce module.

  • Select Scheduling > Weekly ROTAs from the main menu.

Interfaz de usuario gráfica, Tabla<br><br>Descripción generada automáticamente

  • Select the Work Center where the shift you wish to view is located.

  • Select the Arrow icon to view shift details.

Tabla<br><br>Descripción generada automáticamente

View shifts by line

In the Projected Shift screen, you will be able to see the default shift by lines.

In this screen you will be able to identify:

  • A toolbar where you can select the day of the week, Group, and Workstation for which the schedule will be displayed.

  • A daily sales projection on which the schedule is made; as well as the opening and non-computable hours previously configured in the Schedule.

    • Indirect Work: personnel required every quarter-hour according to the table configured in Indirect Work. Indirect work is work that is not related to sales, for example: opening and closing the store, receiving orders from suppliers.

    • Direct Work: personnel required every quarter-hour according to the table configured in Direct Work. Direct work is labor that is directly related to the sale.

    • Ideal Staff: number of workers per quarter-hour resulting from the sum of indirect and direct labor.

    • Projected Staff: number of workers every quarter-hour with shift projected by us.

  • In the Employee line, the difference between the Projected and Ideal Staff will be indicated, the identifying symbols are as follows:

    • V-shaped check: Projected and Ideal Staff are the same.

    • !: there are no workers to cover the shift with the Center open to the public.

    • In case of differences, the amount of excess (+) or shortage (-) of employees projected according to the ideal will be shown.

  • In the Day column, the hours worked during the day are indicated, as well as the Absenteeism and Vacation Incidents with abbreviations for those workers and days that have been recorded.

  • In the Week column, the hours worked during the week for each worker, as well as the excess or shortage of hours, are recorded.

Interfaz de usuario gráfica, Aplicación, Tabla, Excel<br><br>Descripción generada automáticamente

View shifts by quadrants

From the Projected Shift screen, select Quadrant to access the shift screen via quadrant.

Gráfico, Tabla<br><br>Descripción generada automáticamente
In this screen, you will be able to identify:

  • A column with the Scheduled Hours, where you can see the weekly shift of each worker.

  • A column that indicates the Weekly Hours that each worker has configured.

Note: The data in this column will appear in negative and in red if not all hours are scheduled during the week.

  • If there is an Incident, the worker will have zero programmable hours and the abbreviation of the incident in question will appear in the boxes indicating the days.

  • The Star icon allows you to save turns as favorites and use them at another time.

  • The Filter icon allows you to sort the workers and filter them by category, job position, groups, etc.

  • The Set Schedule button will open a pop-up window to set a new schedule or choose one of your favorites.

Imagen que contiene gabinete<br><br>Descripción generada automáticamente


Create new contracts

Start from: The Workforce module.

  • Navigate to Configuration > Contracts.

  • Select New to create a contract.

  • Define a Name for the new contract.

  • Select a Group for the new contract (useful in order to be able to group them in a report).

  • Select a Concept for the new contract (if there are different brands in the same operator, a contract can be specified to be used for a specific brand).

  • Select a Country to determine the region of the new contract (relevant if we have sites in several countries).

  • In Contracted Hours and Labor Compliance define:

    • Fixed hoursthese are the hours that the employee must work at least during the week.

    • Variable hoursthese are the maximum number of supplementary hours that the employee may work, once these hours are exceeded, they would be overtime.

    • Workdaythe number of hours that the employee must work per day.

  • In Contracted Days you can establish the days the employee can work.

  • In Breaks you can set a break in minutes over a number of hours worked. It must be previously configured.

  • In Vacations are defined:

    • Maximum vacation days for this contract.

    • The possibility that this number varies depending on seniority.

    • The possibility that certain absenteeism incidents may be deducted from vacation accruals, such as ERTE, leave of absence, or suspension.

  • In Taken Vacations you can define:

    • How vacation is computed (working days or calendar days).

    • The limit of days that the employee can choose as vacation days.

  • In Termination Prior Notice, the days of notice of the employee, the company, and the duration in days of the trial period for the new contract are defined.

  • Shift Scheduling Alerts may or may not be mandatory. If an alert is mandatory and is not complied with, it will not be allowed to print or finish a shift. They are defined, for example:

    • The employee's weekly days off.

    • The maximum daily or weekly hours that an employee may work.

    • The minimum hours of rest between workdays.

    • The minimum and maximum hours that a shift must last. - The minimum hours that a split shift must contemplate. - The minimum and maximum hours between split shifts.

  • In Labor Compliance Calculation there are 3 types:

    • Standard

    • Working days

    • Based on working days and days off

It is advisable to use the Standard for employees who work 7 days a week, and the Working Days for office workers who are free on Saturdays, Sundays, and holidays.


You can create as many contracts as necessary and parameterize them according to the needs of each position or work center.

Set up complementary (variable) hours

Start from: The Workforce module.

  • Select Configuration > Contracts from the main menu.

  • In the contracts tab, select Edit in the specific contract you want to edit OR New to create a new contract.

Note: To simplify the search for existing contracts on the list, you can also Filter by Status, Group, Concept, and Country.

  • In the popup window, set the Fixed Hours Weekly for the contract or make sure they are set up properly.
  • Scroll down to Variable Hours and select the Maximum Hours Calculation Method. It can be proportional (A maximum percentage of hours based on the total weekly hours) or Fixed for the labour compliance period (a fixed amount of hours weekly).
  • Set a percentage or fixed number for the Maximum Weekly Variable Hours for that contract.
  • Select Accept to save the changes OR Cancel to dismiss them.

Set up incidents that do not accrue holidays

Start from: The Workforce module.

From the Collective Agreements configuration

  • Navigate to Configuration > Collective Agreements.

  • Select New to create a new agreement OR Edit to modify an existing agreement.

  • On the agreement setup screen, navigate to Accrued Vacations.

  • Sets the number of Vacation Days per Year. They can be fixed, according to age (days or years), or imported values.

  •  Under Deducted leaves from vacation rights, choose a parameter from the drop-down list .

Notes: If the parameter is left Undefined, you will not be able to continue with the configuration.

  • When you choose a parameter, a list of absence incidents will be displayed. Select all applicable incidents.

Interfaz de usuario gráfica<br><br>Descripción generada automáticamente

  • Select Accept to save the changes OR Cancel to discard them.

From the Contracts configuration

  • Navigate to Configuration > Contracts.

  • Select New to create a new contract OR Edit to modify an existing contract.

Notes: You can facilitate the search for an existing contract by using the Status, Group, Concept, and Country filters.

  • On the contract setup screen, navigate to Accrued Vacation.

  • Sets the number of Vacation Days per Year. They can be Fixed, According to Seniority (days or years), Imported Values, or According to Collective Agreement.

  • Under Deducted leaves from vacations rights, choose a parameter from the drop-down list.

Notes: If the parameter is left set to No, you will not be able to continue with the incident configuration.

  • When you choose a parameter, a list of absence incidents will be displayed. Select all applicable incidents from the list.

  • Select Accept to save the changes OR Cancel to discard them.

Enter purchase commitments for inherited products

Start from: The Easilys menu.

Inherited supplier products are not in your price lists. In fact, these products are managed by a parent site in its own price lists. You have access to them for orders because the parent site shares its data with you. So you do not need to create a new price list for the commitment period. However, you will need to enter the commitments again when you enter a new commitment period.

If you notice any issue with an inherited supplier product, contact your administrators to report it.

Tip: Use the Tab key on your keyboard to move from one commitment box to another. Perfect for saving time when you have several commitments to enter!

When you place an order and receive the product, the total of your current purchases is displayed in front of the commitment box or in the "Purchase progress report" available on the PRICE LISTS or PURCHASABLE ITEMS screen.

Respond to client tenders via the supplier portal

Notes:actions performed on the Easilys platform are subject to user access permissions. If you are unable to carry out the actions described in the articles, it may be because you do not have the necessary permissions activated on your user profile. Contact the Support team, or your administrator, for help.

Start from: The supplier portal login page.

Suppliers wishing to participate in client tenders can request access to the Easilys Supplier Portal. Once your access has been granted:

  • Visit the Supplier Portal.
  • Enter your username and password as provided by the customer support team.
  • Click Log in to access your Supplier Portal.


Note: If you are a supplier and would like access, please contact our support team to request login credentials and information on how to get started.

Select a tender

Once logged in, the Call for tenders - Home dashboard will display, here:

  • Select the client whose tenders you would like to respond to from the dropdown list.

  • A list of available tenders for that client will appear.
  • Choose the tender with the status Consultation to open the tender details.
  • Click on the Responses tab (located at the top-right of the tender details page) to begin entering your responses.


Switch between clients

To respond to tenders from different clients:

  • Go to the sidebar menu on the left-hand side.
  • Click on your username.
  • Select Change client from the menu.

  • You will be redirected to the Call for Tender - Home screen, where you can choose another client.

src="src="src="src="src="

Manually enter responses in the Supplier Portal

Notes:actions performed on the Easilys platform are subject to user access permissions. If you are unable to carry out the actions described in the articles, it may be because you do not have the necessary permissions activated on your user profile. Contact the Support team, or your administrator, for help.

Start from: The Easilys menu.

Note: Manually filling in responses can be time-consuming. Easilys offers a powerful time-saving tool called Smart Tender to automatically pre-fill your responses. To learn more, see Automatically enter responses with Smart Tender.

  • Navigate to Call for Tenders.
  • Select a tender from the list.


  • Select the Responses tab.
  • Select a requested product from the list. The product details will appear on the right-hand side of the screen.
  • Select Propose a product at the bottom right of the product details panel.

  • Fill in the required information. Note: Fields marked with ?? are mandatory to validate the response.
  • Select Save at the bottom right to confirm your proposal.

  • If the buyer has allowed multiple proposals per product, you’ll see an option to Propose another product midway down the screen. You may repeat this process to suggest additional options.

Note: Whether you can submit one or several product options depends on how the buyer has configured the tender. You may be allowed to propose either new products or products that are already listed with your client in Easilys, depending on the tender settings.

Quickly update prices in bulk

If you need to update pricing for several products at once, click Update prices. This allows you to export your current proposals into a spreadsheet, make changes in bulk, and reimport the file—saving time and ensuring accuracy.

src="src="src="src="src="src="

Manage menu plans for menu pre-design

Start from: The Easilys menu.

Menu plans

Menu plans defined in the Menu pre-design screen allow you to list all the recipes needed to meet the requirements of a group of customers for meals and days within a given period, and to generate customer-specific menus. They serve the following purposes:

Important: Before creating your menu plans, you must configure rules using the Smart Specification screen to indicate if certain products, recipes, allergens, or ingredients must be excluded from menus for certain clients.

Create a menu plan

Add recipes to a menu plan

The first week of the plan will display with all relevant services and meal components based on the selected templates. You can now start assigning recipes to each area for all weeks in the plan.

The idea is to place the main recipe first—the one you want most clients to receive. Follow this with alternative recipes for clients who cannot receive the main one due to their smart particularity rules.

Note:

Verify the menu plan

With the simulation function, you can check if the recipes in the plan will generate valid menus for each client site.

To investigate issues:

In the Contextual Issues panel:

Click the eye icon to view or edit the rule.

To fix issues:

Note: Recipes added after a simulation are highlighted with a yellow background. This distinction remains visible as long as a new simulation is not run or the page is not exited.

Apply the menu plan to menus

Once the plan is complete, you must apply it to update the corresponding templates across all relevant sites.

Note: If you change the menu plan after applying it, you must apply it again to update the templates on the child sites. This will overwrite previous versions.