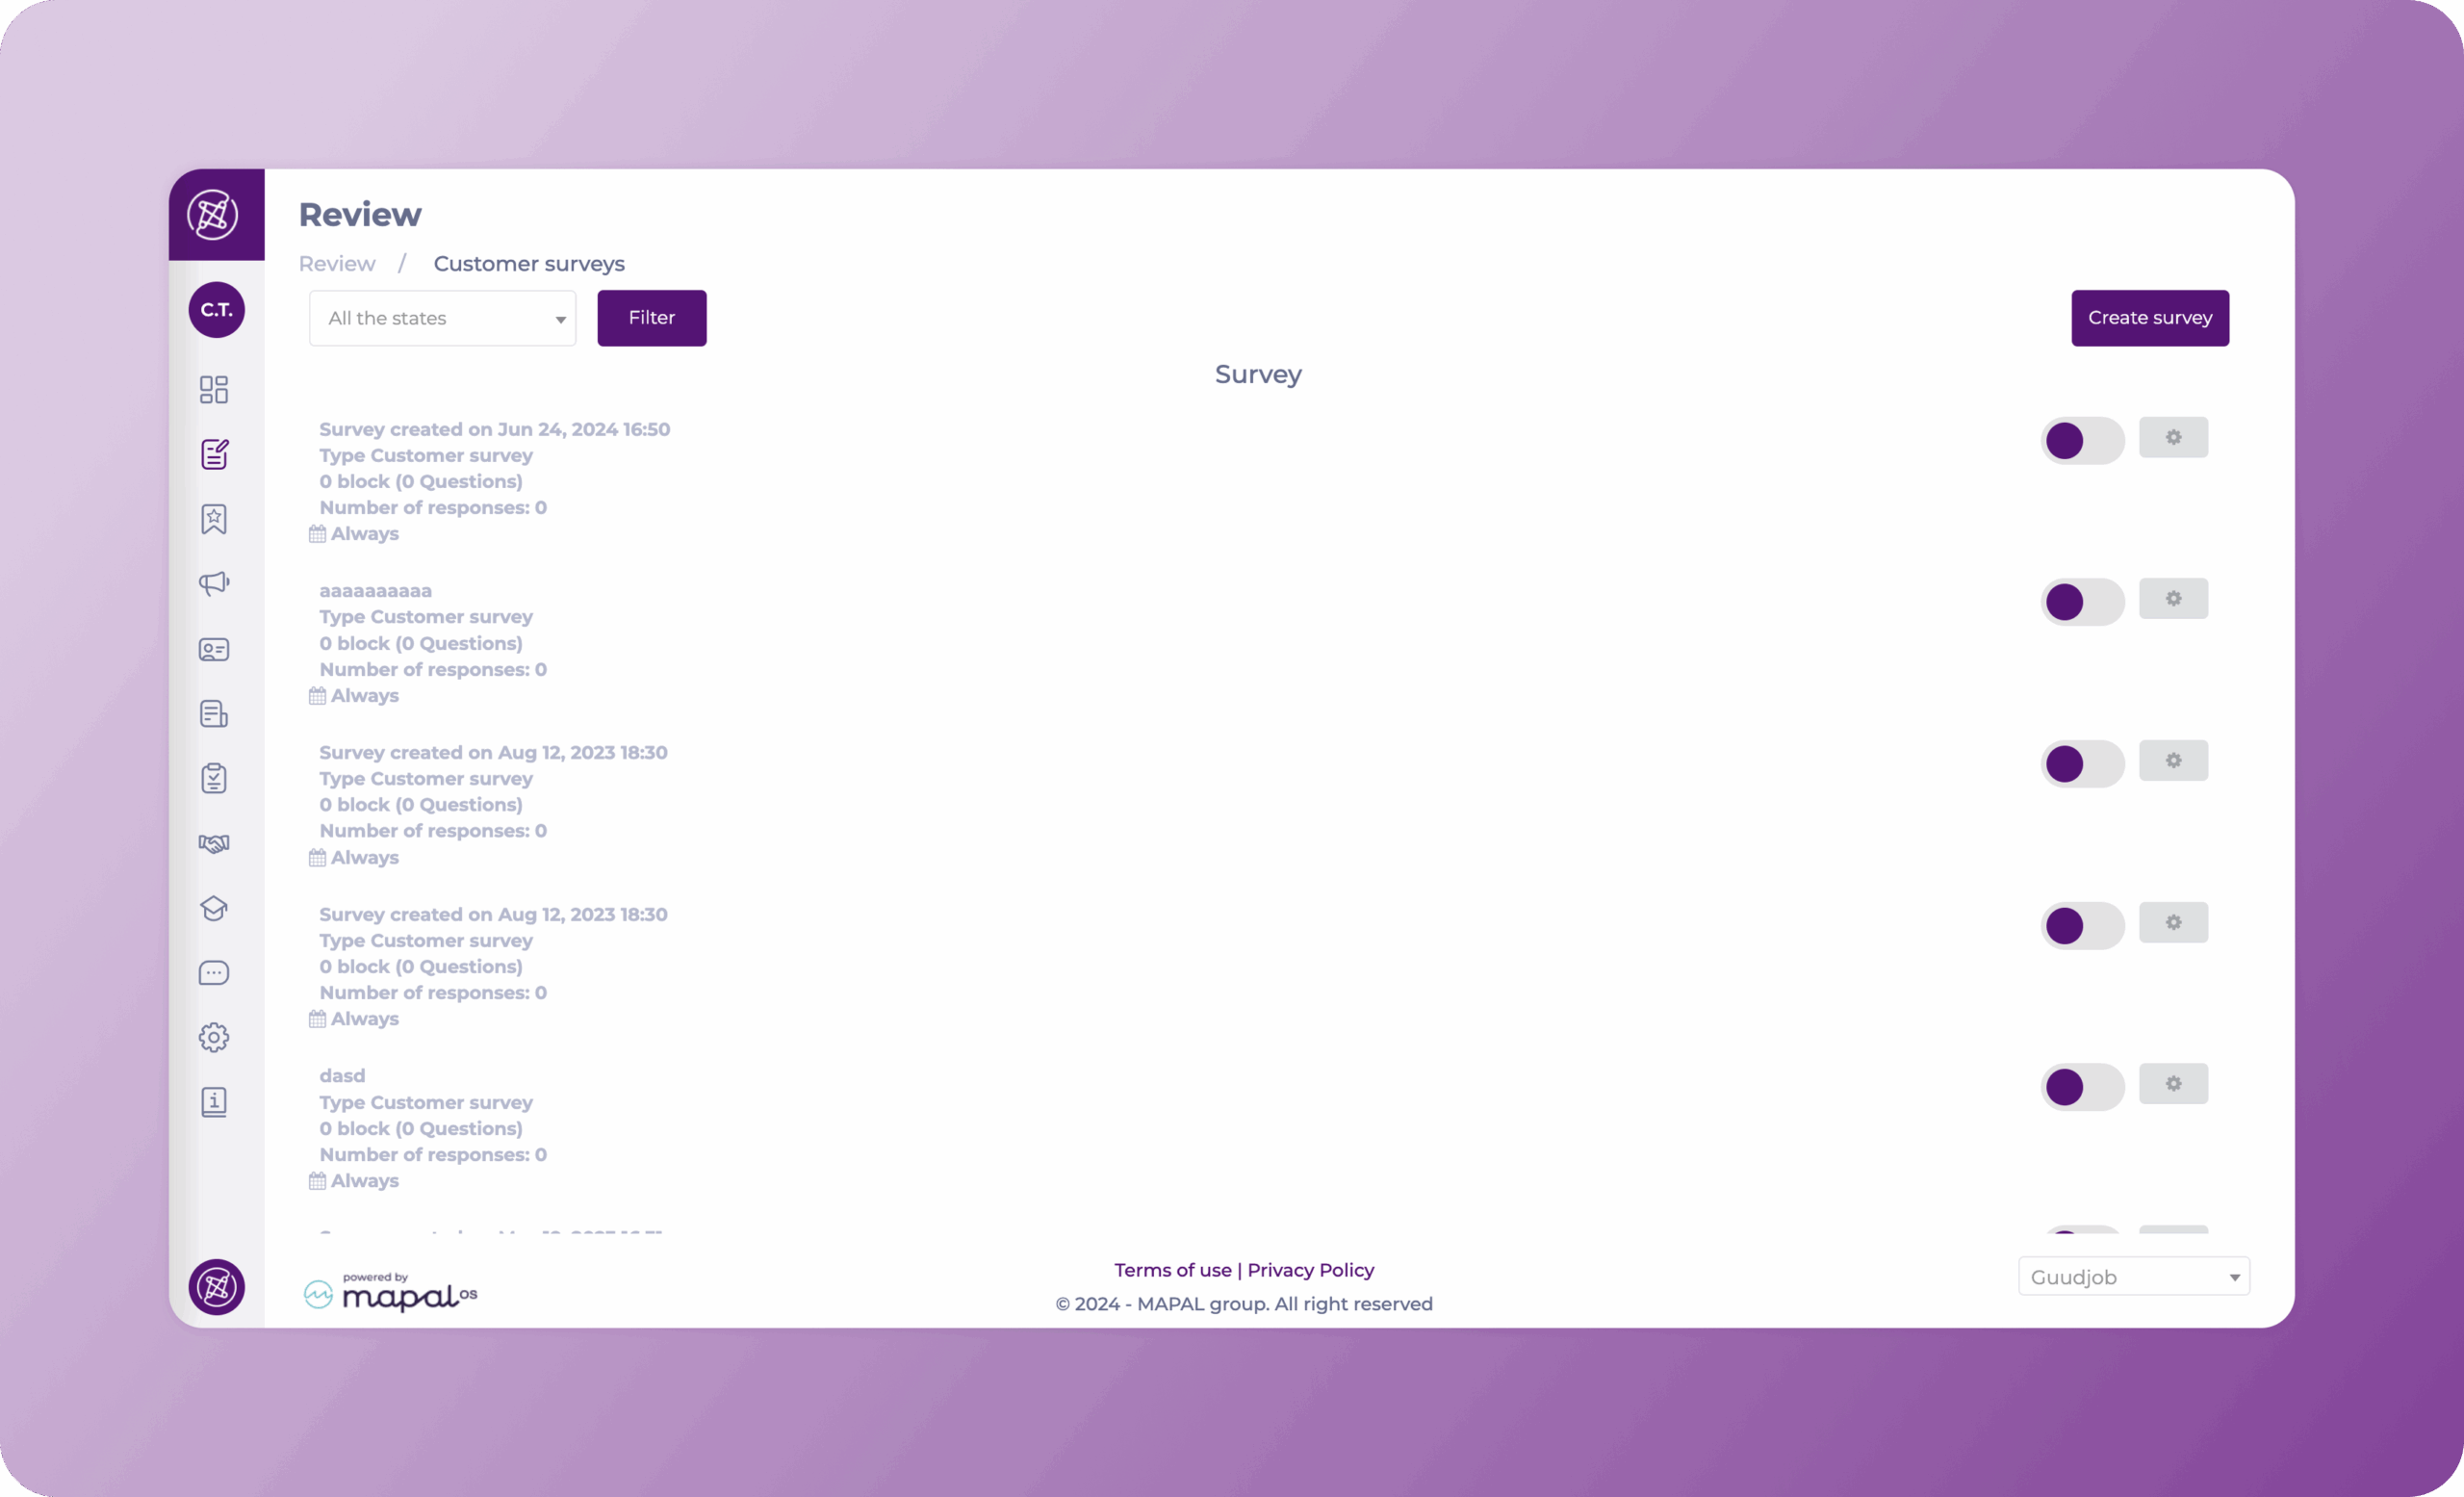
Crear una encuesta de opinión de clientes

Empezar desde: El panel de participación.

  • Navegar a Reseña > Encuesta de clientes.
  • Seleccionar Crear encuesta.

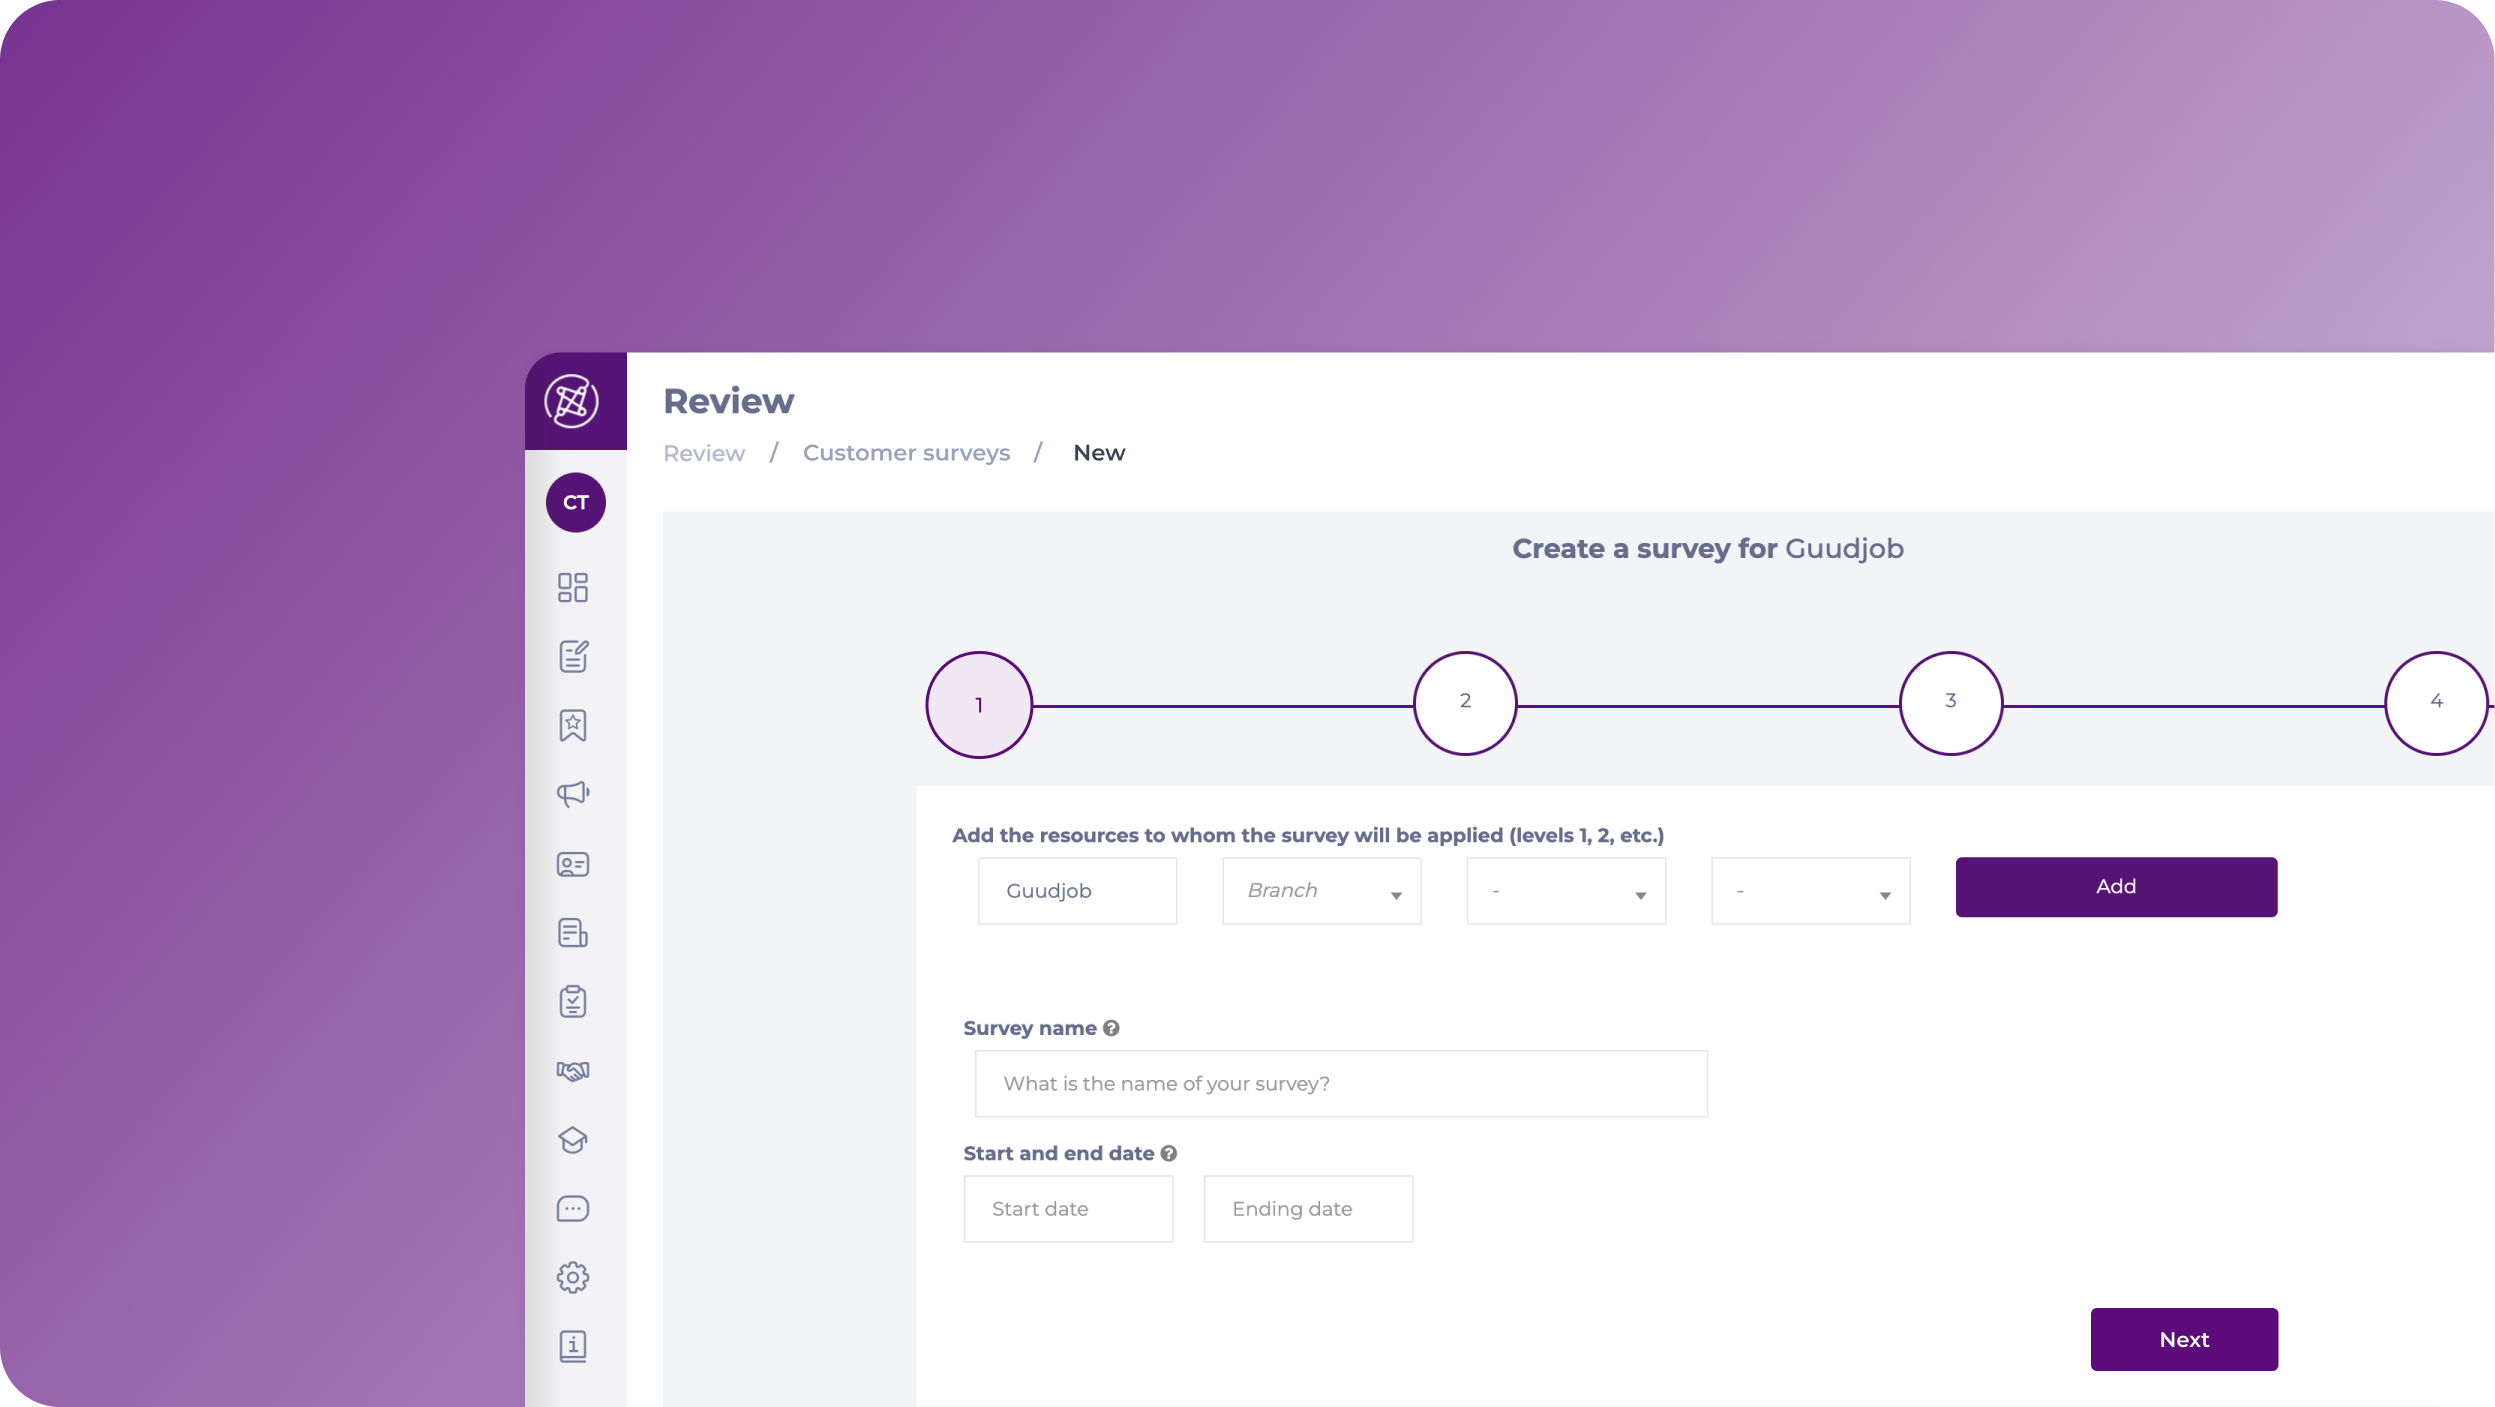
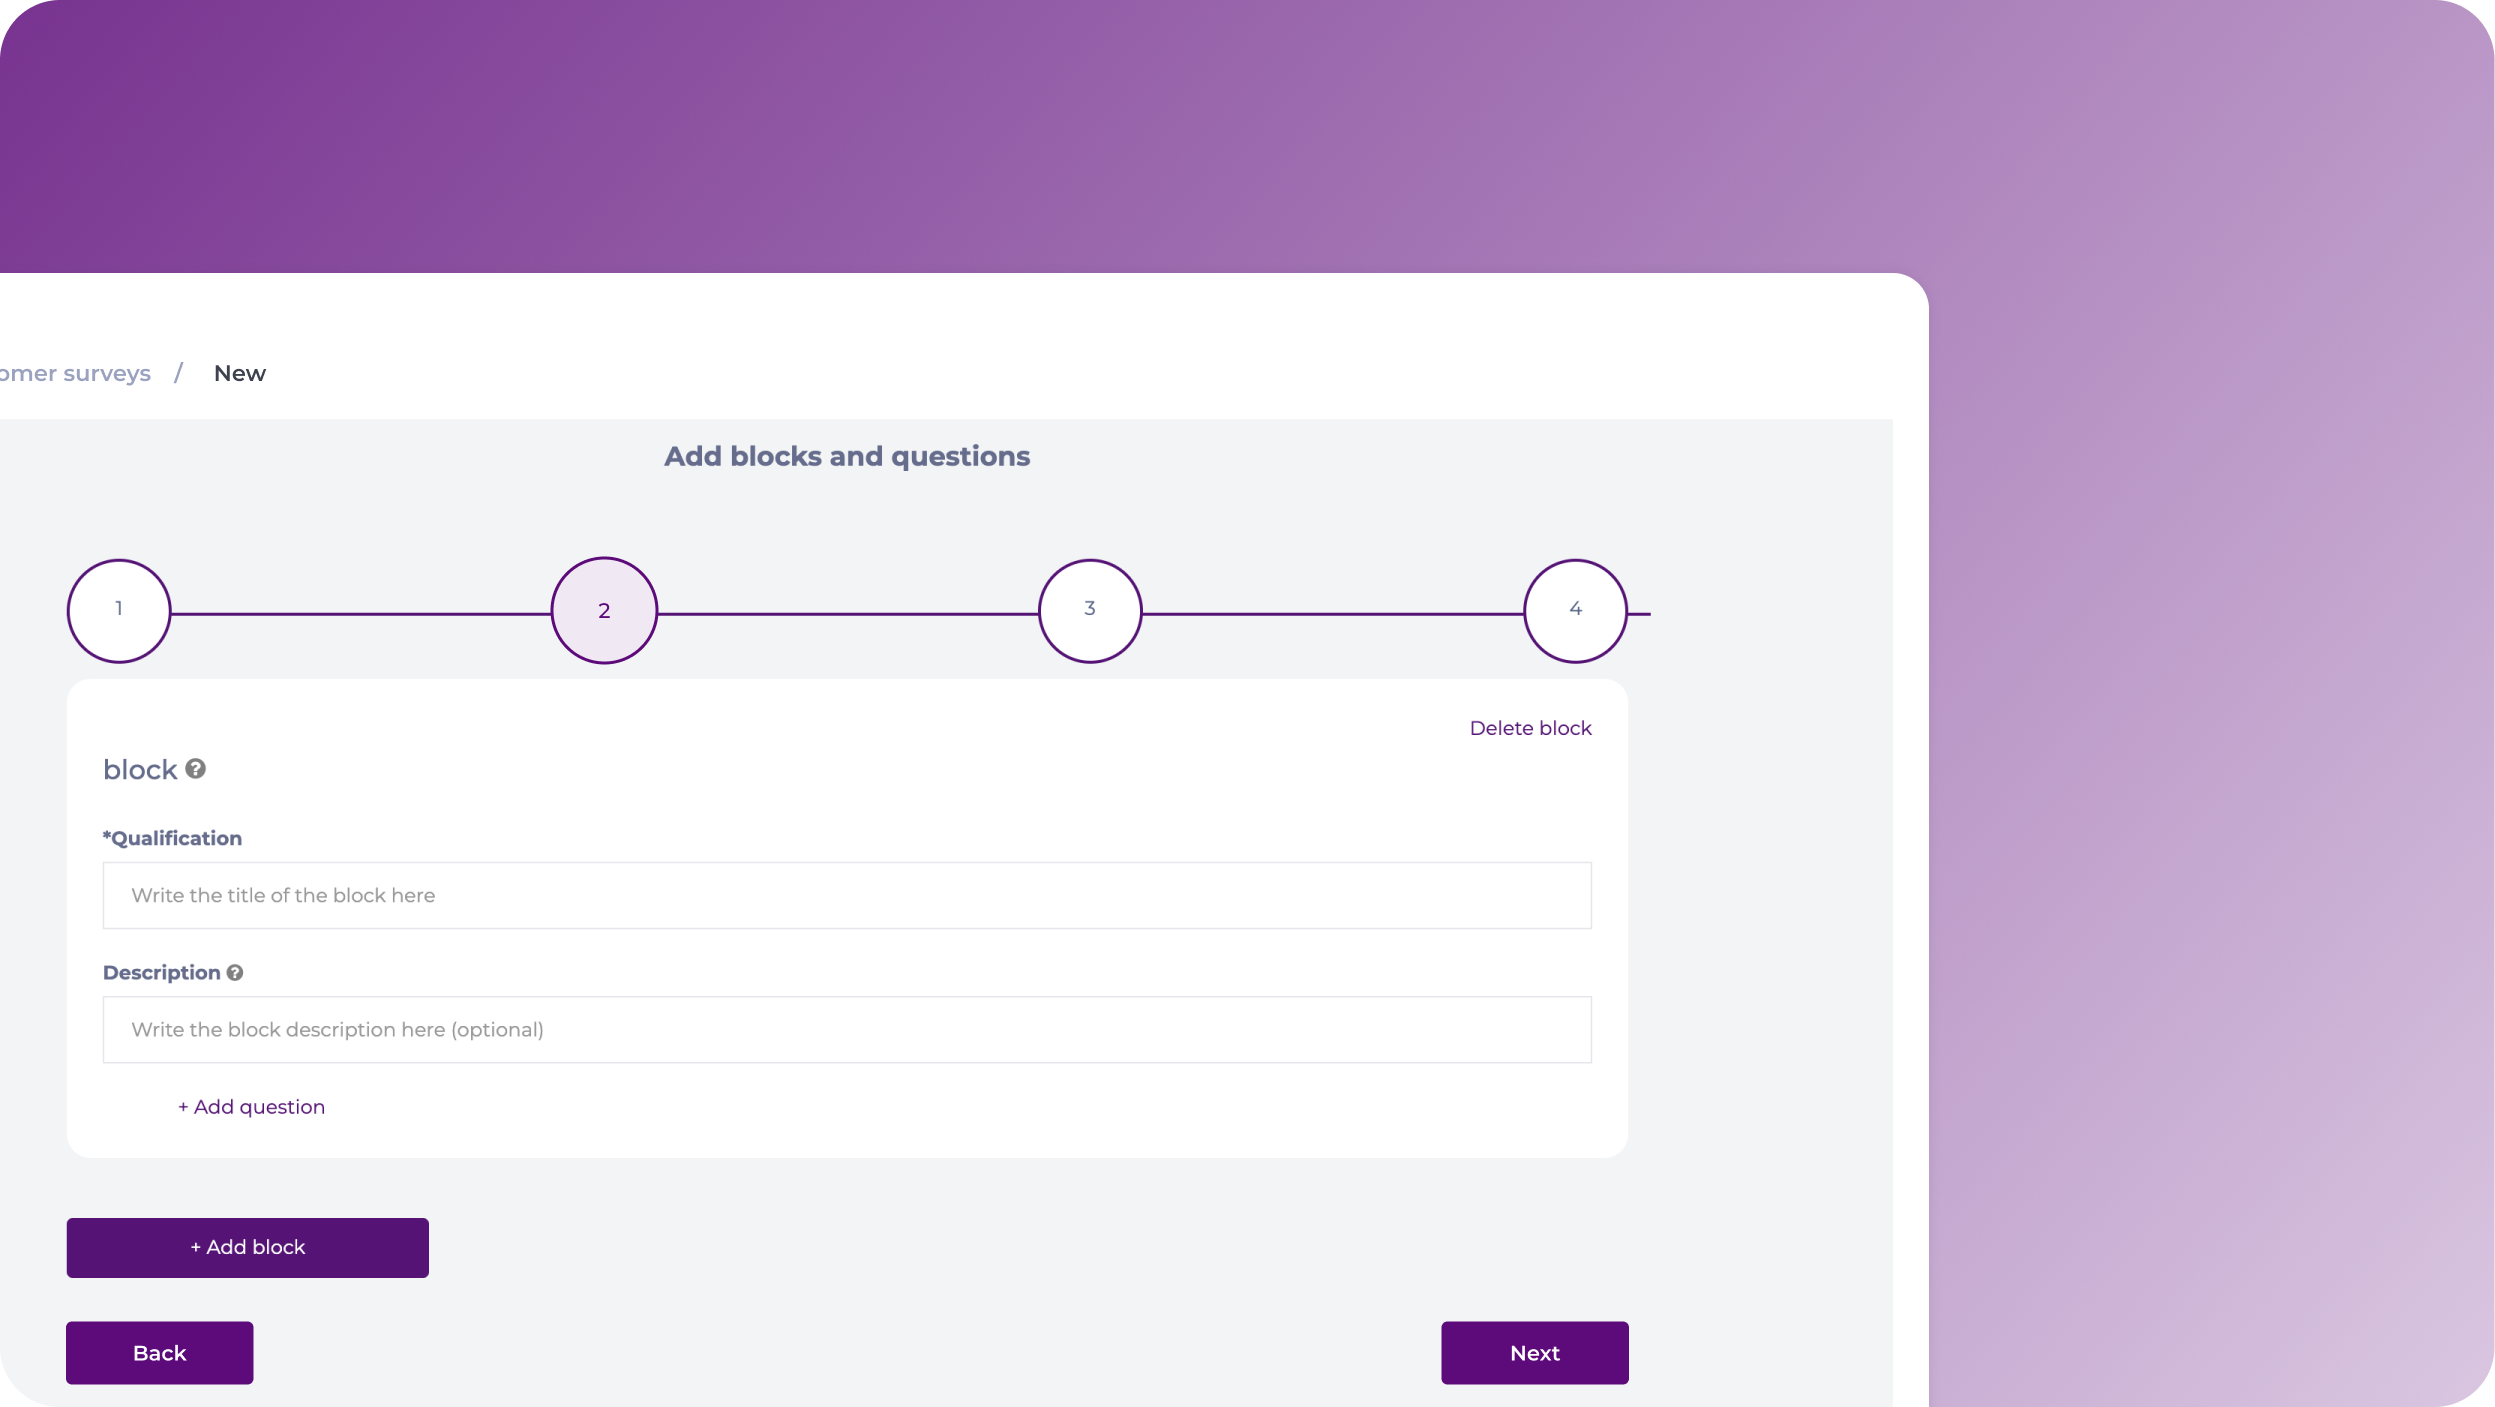
Aparecerá la página "Crear una encuesta". Aquí deberá completar cuatro pasos:

Paso 1

El primer paso es donde se colocan todas las configuraciones generales.

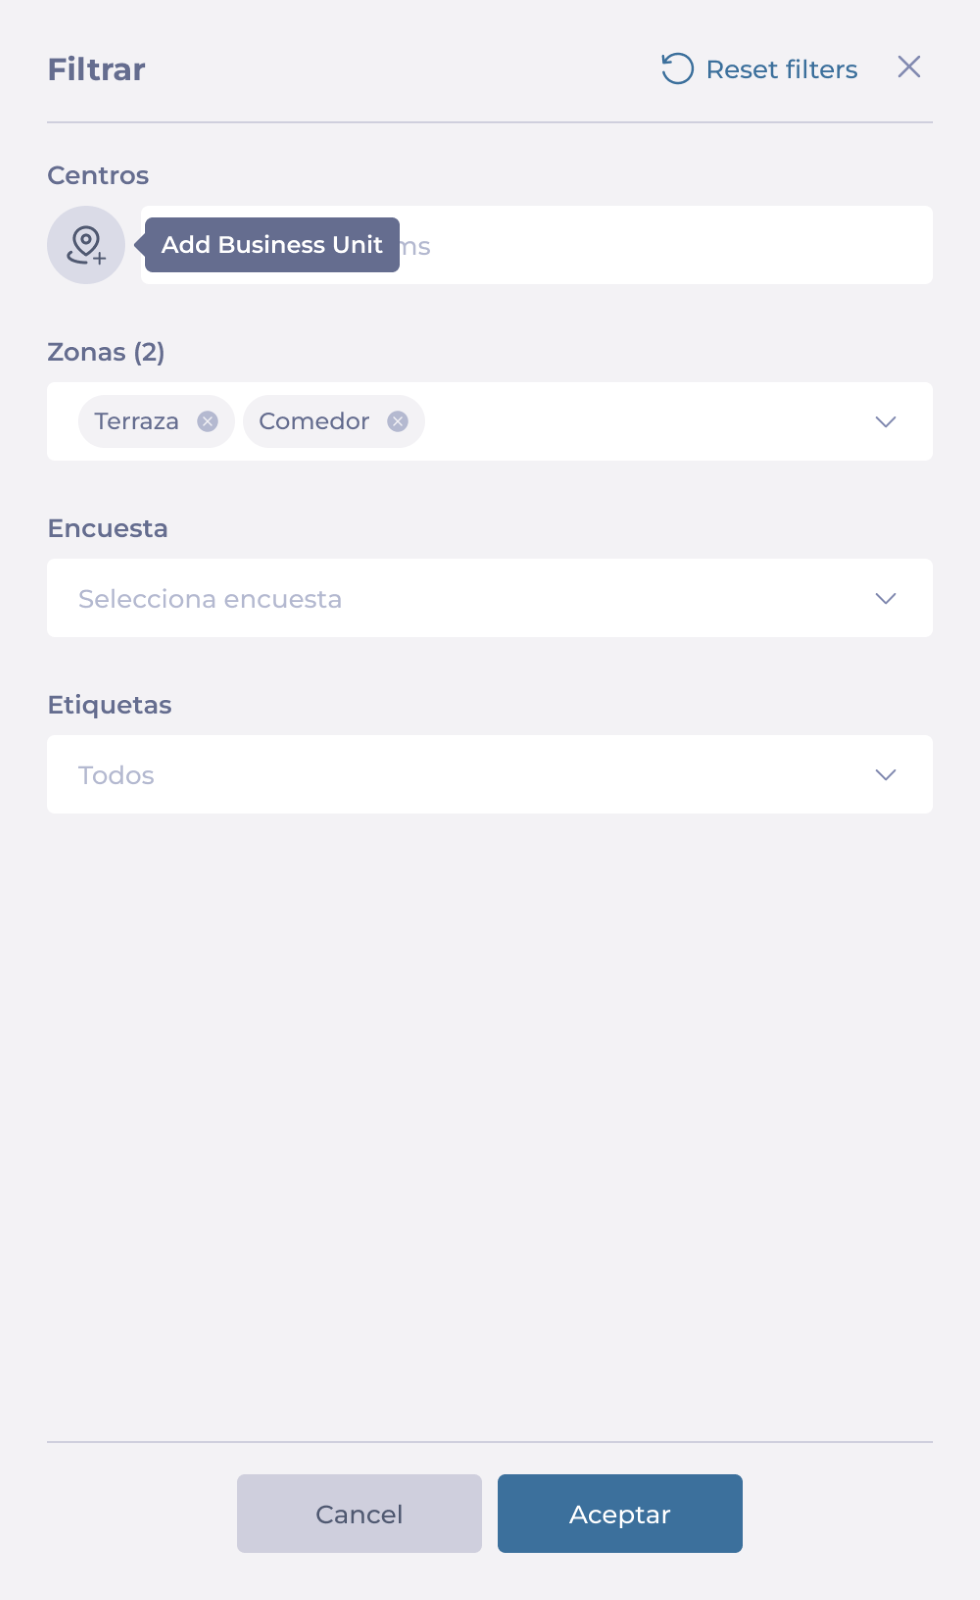
  • Añade los recursos a los que se aplicará la encuesta, estas pueden ser ramas, secciones, etc.
  • Asignar un Nombre de la encuesta.
  • Establecer un Fecha de inicio y fecha de finalización para la encuesta.
  • Seleccionar Próximo.

Paso 2

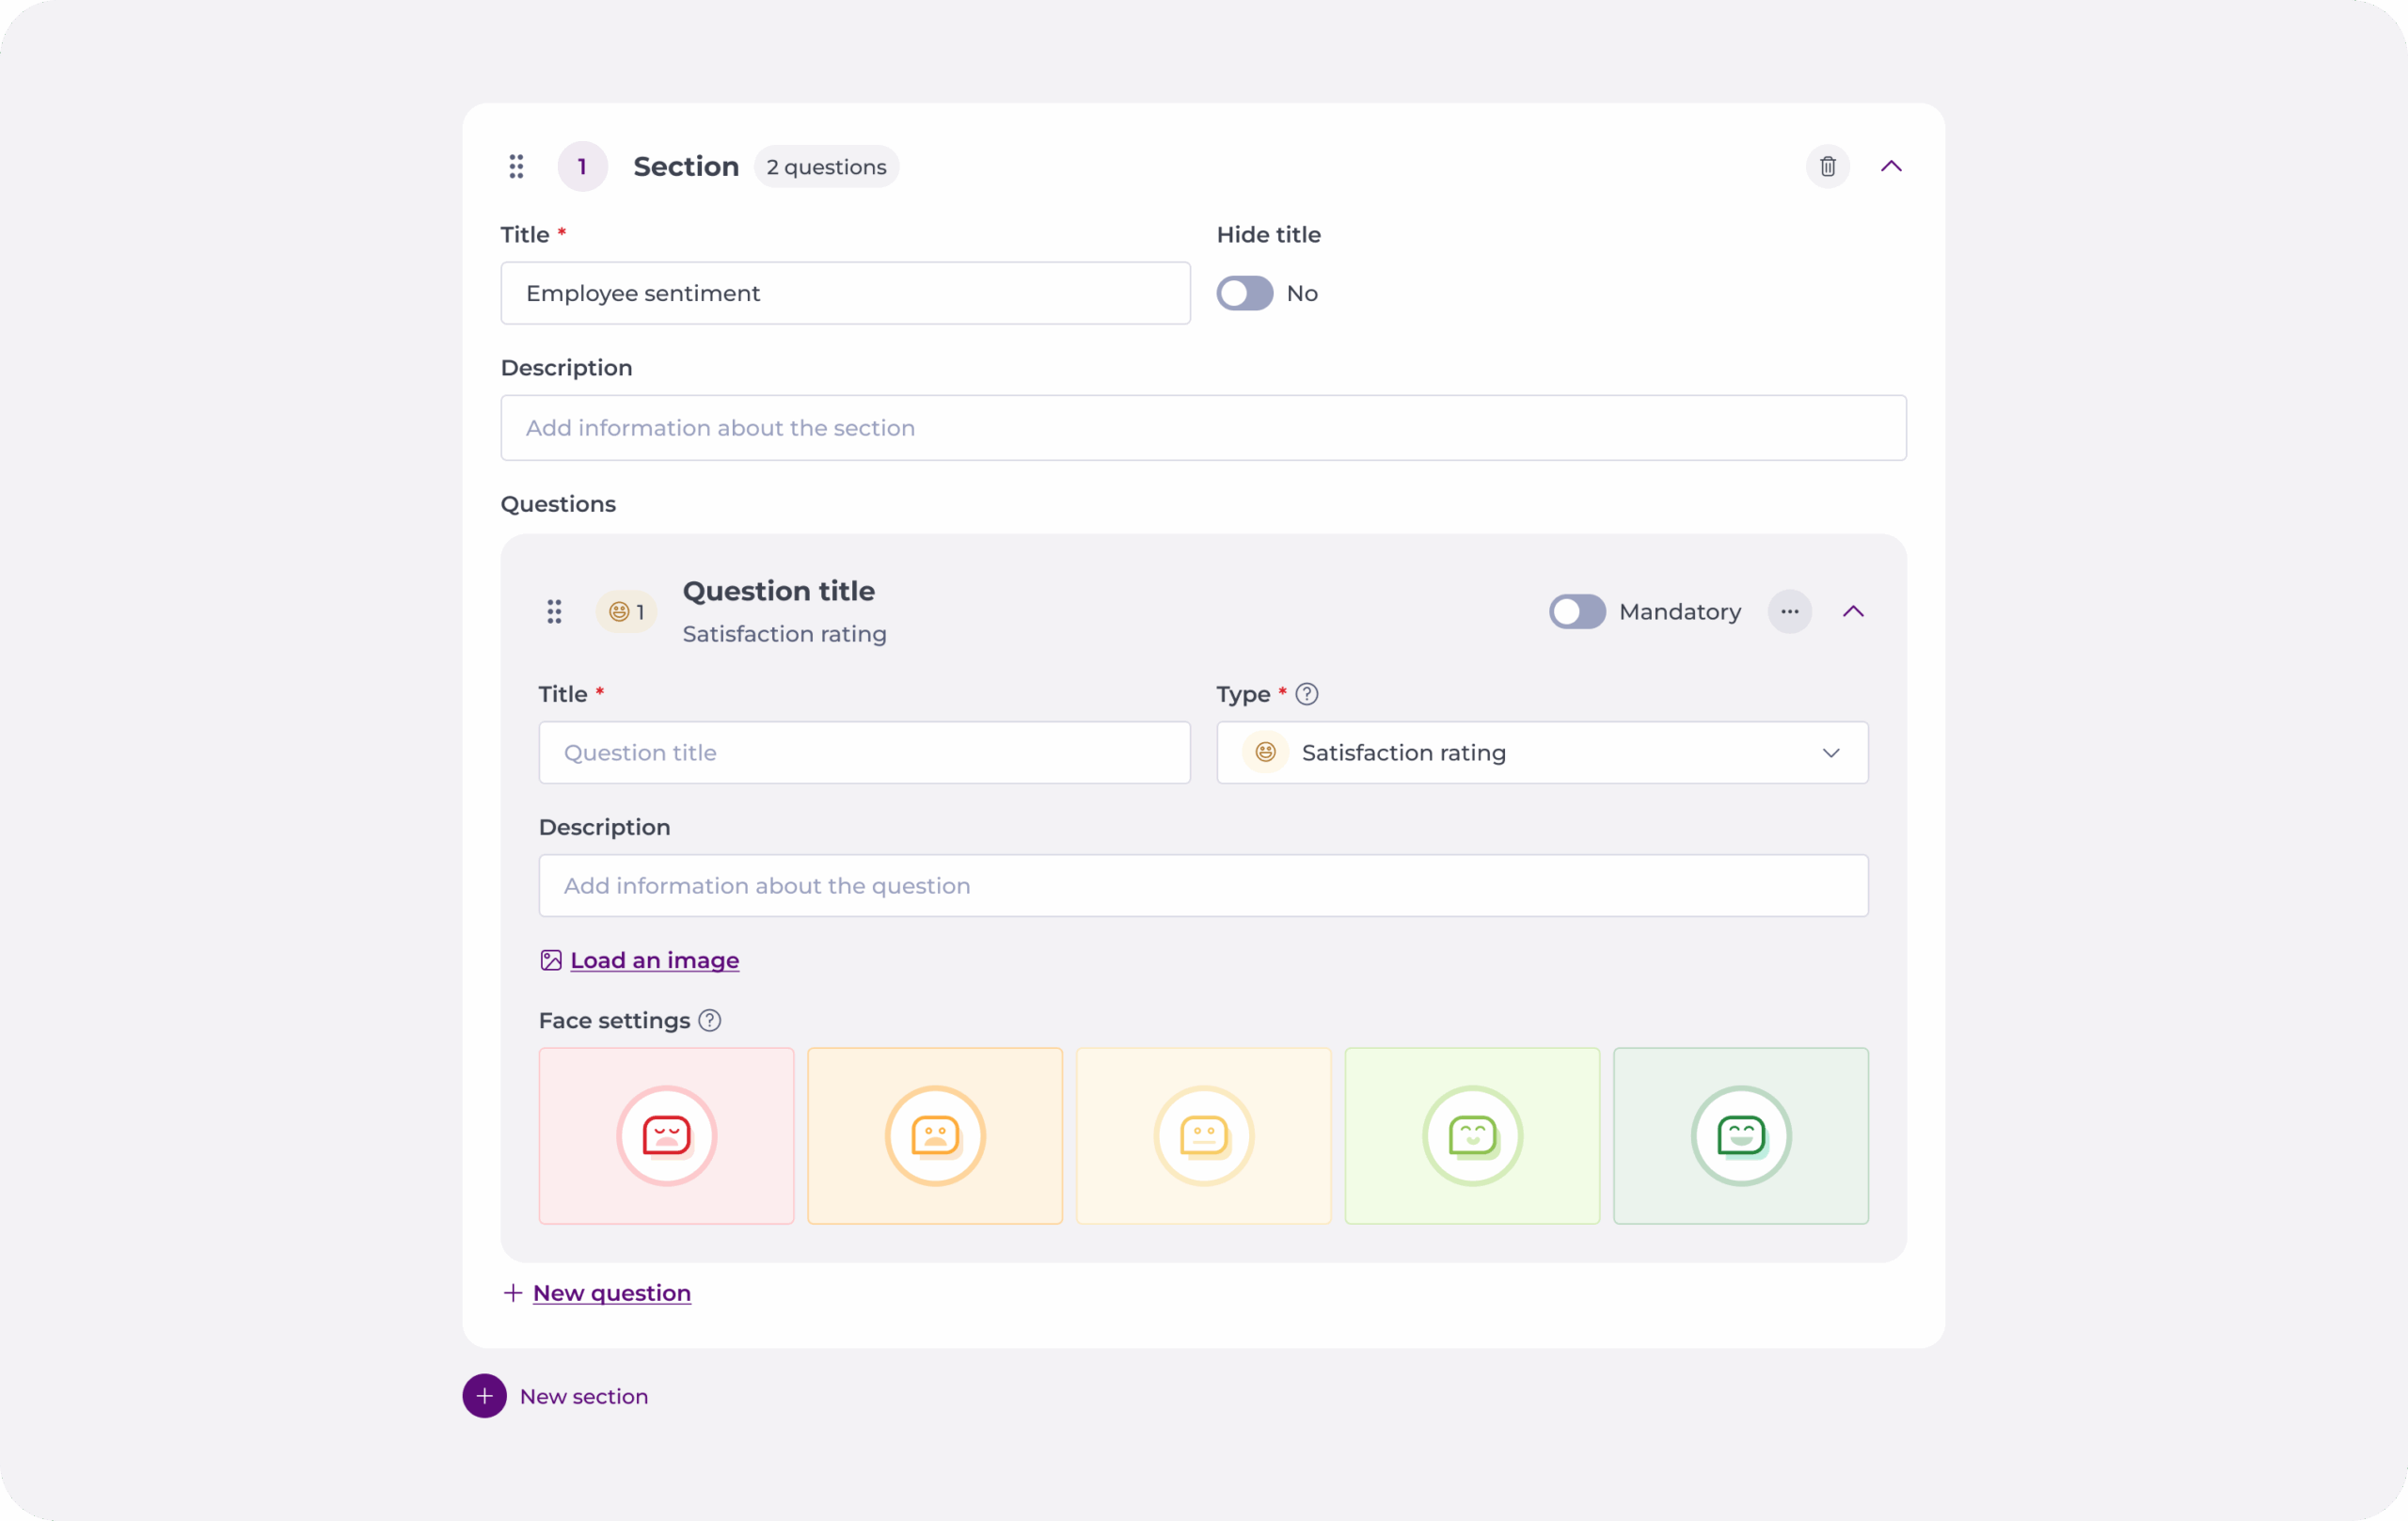
En esta sección podrás configurar los bloques y secciones para la encuesta.

  • Agregar un Título y un Descripción A tu bloque.
  • Seleccionar + Agregar pregunta para comenzar a crear las preguntas bajo ese bloque.
  • Para las preguntas necesitarás configurar:
    • Título
    • Descripción
    • Tipo de pregunta
    • ¿Es obligatorio?
    • Imagen (opcional)
  • Una vez que termines de configurar la pregunta, puedes seleccionar + Agregar pregunta para crear más preguntas bajo ese bloque, o + Añadir bloque para crear un nuevo bloque con diferentes preguntas.

Notas: Puedes utilizar el Eliminar bloque y Eliminar pregunta Botones para eliminar elementos.

  • Cuando se complete la configuración de preguntas y bloques, seleccione Próximo.

Paso 3

En esta sección podrás obtener una vista previa de tu encuesta y comprobar su funcionalidad.

Si las preguntas y el bloque están configurados correctamente, puedes presionar Próximo; si desea realizar cambios, seleccione Anterior.

Paso 4

El paso 4 consiste en activar la encuesta. No es necesario realizar ninguna acción. Serás redirigido automáticamente a la sección de Encuestas, donde podrás ver tu nueva encuesta.

Distribuir encuestas en Reputación

Empezar desde: El panel de reputación.  

  • Seleccionar Configuration > On site desde el menú principal.  


  • Seleccionar Survey Distribution.  


The Survey distribution grid is divided into Business Units (Work Centers) and Zones (Areas within that work center), providing a clear structure for managing survey assignments. 

Surveys can be assigned to those specific zones within the business unit, such as Kitchen, Bar, Bathroom, etc. 

  • To assign a survey to a zone, select Editar on the Zone’s row. 

  • In the sidebar, you can set up the Survey assigned to the zone and the Distribution channels for the survey (QR, Mail, and/or PDF). 

Notas: Si seleccionas Editar on the Business Unit’s row, you can set up the surveys for all the zones available in that Business Unit.  


Zone Management 

Each business unit contains multiple zones. The grid shows you each zone with the surveys assigned, the distribution channels (QR code, email, PDF), and associated tags. 

  • Seleccione el Zone configuration button to Agregar, Borrar, o Editar a zone.  


Filtering Options 

  • Seleccionar Filtrar to open the sidebar.  

  • You can filter by specific Zones, Distribution Channels, y Etiquetas.  

  • Seleccionar Add Business Unit to quickly locate specific Business Units.  


You will now see the results of the filtering in the survey distribution grid.  

Bulk assignment and Distribution Channels activation 

Surveys can be assigned to multiple zones simultaneously using the bulk assignment feature. This allows for efficient management of large-scale survey distributions. 

  • Seleccionar the checkbox for the zones to which you want to assign a survey. You can select the checkbox at the header of the grid to select all.  

  • Once you have selected the desired zones, select the button Assign.  


  • In the sidebar, select the Survey you want to assign and the Distribution Channels. You can choose to Maintain the distribution channels as they are, or you can Activate/Deactivate them. 


  • Once you select Aceptar, a confirmation window will show up with the details of your selection and how many units it will affect.  

  • Seleccionar Yes, implement the changes to continue.  


Vista previa de encuestas en Reputación

Empezar desde: El panel de reputación.  

  • Seleccionar Configuration > On Site


  • Seleccionar Encuestas


You can preview surveys during creation or open existing surveys to preview them.  

  • Select the survey from the Surveys grid O seleccionar + New para crear una nueva encuesta. 


  • Once inside the survey configuration, select the Avance botón. 


  • In the preview window, you will be able to: 

    • Review colors, fonts, logos, and other design elements to ensure they match your branding and are displayed correctly. 

    • Run the survey in a pre-publication mode to identify any issues and ensure everything functions correctly. 

    • Confirm that all branching paths, conditional questions, and the overall order of questions are logical and coherent. 

  • You can always select Return to go back to the configuration and adjust as needed.  


  • Utilice el responsive panel to preview the survey in desktop, tablet, and mobile version.  


  • Seleccione el Reanudar button to start the survey again.  

If you are creating a new survey, follow all the steps for survey creation and then select Preview.  

To know more about survey creation, see Gestionar encuestas en Reputación

Conectarse a Google My Business

Empezar desde: Google My Business.

Interfaz de usuario gráfico, Texto, Aplicación, Correo electrónico<br><br>Descripción generada automáticamente

  • Seleccione el 3 dots menu and locate Business Profile Settings.

Interfaz de usuario gráfico, Texto, Aplicación, Correo electrónico<br><br>Descripción generada automáticamente

Interfaz de usuario gráfico, Texto, Aplicación, Correo electrónico<br><br>Descripción generada automáticamenteInterfaz de usuario gráfico, Texto, Aplicación, Correo electrónico<br><br>Descripción generada automáticamente

  • Once you add Reputation as user to your location, go back to the Reputation module in Mapal OS.

  • Your business will now appear in the Business Units table. When the location is linked, it is displayed with the red Google icon.


Notas: To properly link the location to Reputation, you need to have the location verified in Google My Business. See Verify your business on Google.

Comprender la puntuación en reputación

Empezar desde: The Reputation module.

  • Seleccionar Score desde el menú principal.

Like the dashboard, the Scoring section shows the score out of 10, the variation from the previous year, and the difference in relation to the benchmark.
Logotipo<br><br>Descripción generada automáticamente con confianza baja

Parametrization

This feature allows you to filter by er and choose parameters such as the aspects evaluated and source. In this screen, you can configure aspects such as:

  1. Vista: offers the same options as in the main dashboard (general, by center, by aspect evaluated, by source, etc.)
  2. Período: select either a predetermined or choose one manually
  3. Frequency of time: choose if you want to see the results in weeks, months, or per quarter.
  4. Benchmark: select all centers or a previously created group.

After the parametrization is completed, you can see the different scoring indicators this feature offers you, based on your preferences.

Score

Imagen que contiene Gráfico<br><br>Descripción generada automáticamente

The score graph shows the total score, the variation versus last year, and versus the previous period.

Consistency

Gráfico, Gráfico de barras<br><br>Descripción generada automáticamente
Consistency shows you the variation between negative and positive reviews. Ideally, it should be kept high, which means you maintain positive reviews overall.

Benchmark

Imagen que contiene Gráfico<br><br>Descripción generada automáticamente

The benchmark information is similar in appearance to that in the score graph, except that it shows the difference between the selected benchmark and the total score.

Score - Evolution vs. previous year
Imagen que contiene Gráfico de líneas<br><br>Descripción generada automáticamente

The Score - Evolution vs. previous year graph, shows how the average score has evolved over the year (blue) compared to the previous year (grey). You can also see a specific score for any month by selecting it on the corresponding part of the graph.

Score - % variation vs. previous year

Escala de tiempo<br><br>Descripción generada automáticamente

The Score - % variation vs. previous year graph shows how the average score variation has evolved over the year compared to the previous year (bars) and the cumulative variation. Again, you can see scores for specific months by selecting a specific month.

Score - Evolution vs Benchmark

Gráfico, Gráfico de líneas<br><br>Descripción generada automáticamente

The Score - Evolution vs Benchmark graph shows how the average score has evolved over the year (blue) compared to the selected benchmark (orange).

Score - Consistency

Imagen que contiene Escala de tiempo<br><br>Descripción generada automáticamente

The Score - Consistency graph shows the variation between negative and positive reviews by month.

Comprender el análisis de fotografías

Empezar desde: The Reputation module.

  • Seleccionar Fotos desde el menú principal.

You’ll find two tabs in the Photos menu: Dashboard and Photos.

    • In Photos, you’ll find the photos that have been uploaded.

    • The Dashboard shows graphs that analyze the photos in which food or people appear.

The following graph shows the number of men and women that appear in the photos and average age.

 You’ll also find a breakdown of the types of food that appear most in the photos. 
Interfaz de usuario gráfico, Aplicación, Teams<br><br>Descripción generada automáticamente 
 

Comprender las métricas de gestión de reseñas

Empezar desde: The Reputation module.

  • Seleccionar Manage Reviews desde el menú principal.

  • You’ll find two tabs on this screen: Dashboard and Reviews.

Panel

The Dashboard shows a series of graphs and analytics related to the review responses.

The first card shows the percentage of reviews responded. You can see the data in absolute numbers and percentages for positive and negative reviews responded. 
Imagen de la pantalla de un celular con letras<br><br>Descripción generada automáticamente con confianza media 
The following card shows the average response time in days, also detailing the response time for positive and negative opinions.  
Interfaz de usuario gráfico, Texto, Aplicación, Chat o mensaje de texto<br><br>Descripción generada automáticamente 
You’ll also be able to see the percentage of reviews responded according to their rating, an average, and its evolution over time. 
Gráfico, Gráfico de líneas<br><br>Descripción generada automáticamente 
You’ll then see the percentage of reviews awaiting response according to their rating, as well as an average. 
Gráfico, Gráfico de barras<br><br>Descripción generada automáticamente 
It is also possible to see the reviews awaiting response in order of date submitted. On the right, you’ll see the evolution according to their valuation and, on the left, a dynamic graph that indicates the total number. 
Interfaz de usuario gráfico, Gráfico<br><br>Descripción generada automáticamente con confianza media 

Reseñas

In Reviews, you’ll find more information about actual reviews and be able to respond to them. 
Icono<br><br>Descripción generada automáticamente con confianza media 
On this screen, you’ll see a list of opinions with the following fields: 

  • Score 

  • Centre 

  • Fuente 

  • Fecha 

  • Review text 

  • Sentiment analysis by areas (the icon appears in green or red depending on the sentiment). 

  • Responded 


When you select Answer, you’ll see a box showing review details and analysis. Select the link icon next to General Information to open a tab to access the address of the review. Reputation will provide a suggested response, which you can modify if necessary.  

If the review is from Google, you can answer it directly from the app itself by selecting Answer. If the review is from another source, the option that will appear is to copy and open, this will copy the suggested answer and open the link of the review to answer it. 
 
Interfaz de usuario gráfica, Texto, Aplicación, Teams<br><br>Descripción generada automáticamente 
 
Notas: If you access the Configuration > Answers menu, you’ll be able to select a tone for your answers, include the name of the premises, or add a signature. 
Interfaz de usuario gráfico, Aplicación<br><br>Descripción generada automáticamente 

Crear y gestionar informes de reputación

Empezar desde: The Reputation module.

Reports creation in Reputation involves a series of steps and procedures that should be considered to properly create and visualize information.

Create a distribution list

Before creating a report in Reputation, venue managers must set up distribution lists. These are specific databases with the email addresses of those users who will be receiving and viewing the reports.

To create an email distribution list:

  • Navegar a Configuration > General > Distribution lists.

  • You will see a grid with details of all configured distribution lists, including the number of email addresses included in each of the distribution lists.

  • Seleccione el Nuevo + icon to create a new distribution list.

  • Assign a name and check the boxes for all users that should be included in such distribution list.

Notas: A distribution list can be edited by selecting the corresponding row in the grid and removed by selecting the trash icon displayed when hovering over the row.

Create reports

Once you have distribution lists created, you will be able to create a report and assign it to the distribution list.

To display Reports configuration:

  • Navegar a Configuration > Online > Reports.

  • Reports grid displays the following columns:

    • Report name: Assigned name on Report creation/last edition.

    • Periodicity: Frequency in which the report is sent to configured distribution list.

    • Benchmark group: Selected benchmark group.

    • Distribution list: List of users that will be receiving such report.

    • Activated: Whether the report is enabled or not. If disabled, no user will be receiving the report.

  • Seleccione el Nuevo + icon to generate a new report.

  • A New Report popup window will open displaying the following fields:

General data tab

  • Name of the report

  • Benchmark group (benchmark groups are configured in Reputation/Configuration/Benchmark Groups)

  • Periodicity to choose to send the report on a daily, weekly, monthly, or three-monthly basis

  • Distribution list

  • Content:

    • Servicio Nacional de Salud

    • Visibility

    • View by source

    • View by aspect evaluated

    • Reseñas

    • Score

    • CSAT

    • View by unit

    • View by brand

    • Ranking centers

  • Switch to choose whether the notifications for such report are enabled or not.

Selection of Units tab

  • Seleccione el Unidades de negocio you would like to visualize in the Report you are generating.

Once the report is created and enabled, an email with a link to the report will be sent, in the specified frequency, and to all users included in the selected distribution list.


Logs Screen

You can access a full history of all the reports that have been generated in Reputation through the logs screen.

To access this screen:

  • Seleccione el Logs icon from the Reports screen.

  • This screen displays a grid with the following information:

    • Data and time a report was sent.

    • Report name.

    • Email address it was sent to.

    • Last time that a specific report sent to a particular email address was viewed.

Notas: Sent emails contain a link with a token that allows you to identify that the report was accessed from that specific link. This is why it is recommended to add someone to a distribution list rather than sharing received link.

Logs can be filtered and exported into a .csv file. Exported .csv file will contain filtered data in the grid.

Interfaz de usuario gráfico, Aplicación<br><br>Descripción generada automáticamente

Configurar la aplicación de encuesta de reputación (en el sitio)

Empezar desde: The Reputation module.

Set up permissions

Once the On Site bundle is activated for an operator, the Permissions have to be set up to allow users to access the functionalities. 

To do this:

  • Navegar a Configuration > General > Roles.

  • On the Roles page, use the switch in the Activated column to enable or disable all the desired permissions regarding On Site.

After giving permissions in the operator, the On Site option will be shown under Configuration in the main menu. There, you will be able to set up new surveys, new steps for the surveys, and new zones and channels for distributing the survey.

Set up steps 

To create a structured and efficient survey process in Reputation, you need to manage individual survey steps first. Each step represents a unit within a survey, such as a question, message, image, or interactive element, and can be reused across multiple surveys.  

To learn more about setting up and managing steps in Reputation, see Gestionar pasos en Reputación

Set up surveys 

Reputation allows you to create and customize guest surveys, ensuring they are always relevant and aligned with business needs. You can select specific steps to tailor your survey, set up advanced logic for conditional branching, and add visually appealing designs.  

To know more about setting up and managing surveys in Reputation, see Gestionar encuestas en Reputación

Distribute surveys 

Reputation allows you to distribute surveys effectively to gather guest feedback. You can assign surveys to specific zones within a business unit, such as the kitchen, bar, or bathroom. Managers can also choose the distribution channels for these surveys, including QR codes, emails, or PDFs. 

To know more about distributing surveys in Reputation, see Distribuir encuestas en Reputación

Reputación de acceso

Empezar desde: Either the Reputation by Mapal (https://reputation.mapal-os.com/) or the Mapal OS web page (https://app.mapal-os.com/).

Access via the Reputation web page (legacy method)

Nota: select Forgot your password? to receive a reset password email.

Una persona sentada frente a una mesa con una computadora<br><br>Descripción generada automáticamente con confianza media

Acceso a través de Mapal OS

Nota: select Forgot your password? to receive a reset password email.


Ver Acceder a Mapal OS (como administrador) para obtener más información sobre cómo acceder y utilizar el panel de control del sistema operativo Mapal.

  • Once in the Mapal OS Dashboard, select the Abierto button in the Reputation box.

Interfaz de usuario gráfica, Sitio web<br><br>Descripción generada automáticamente