Distribute surveys in Reputation
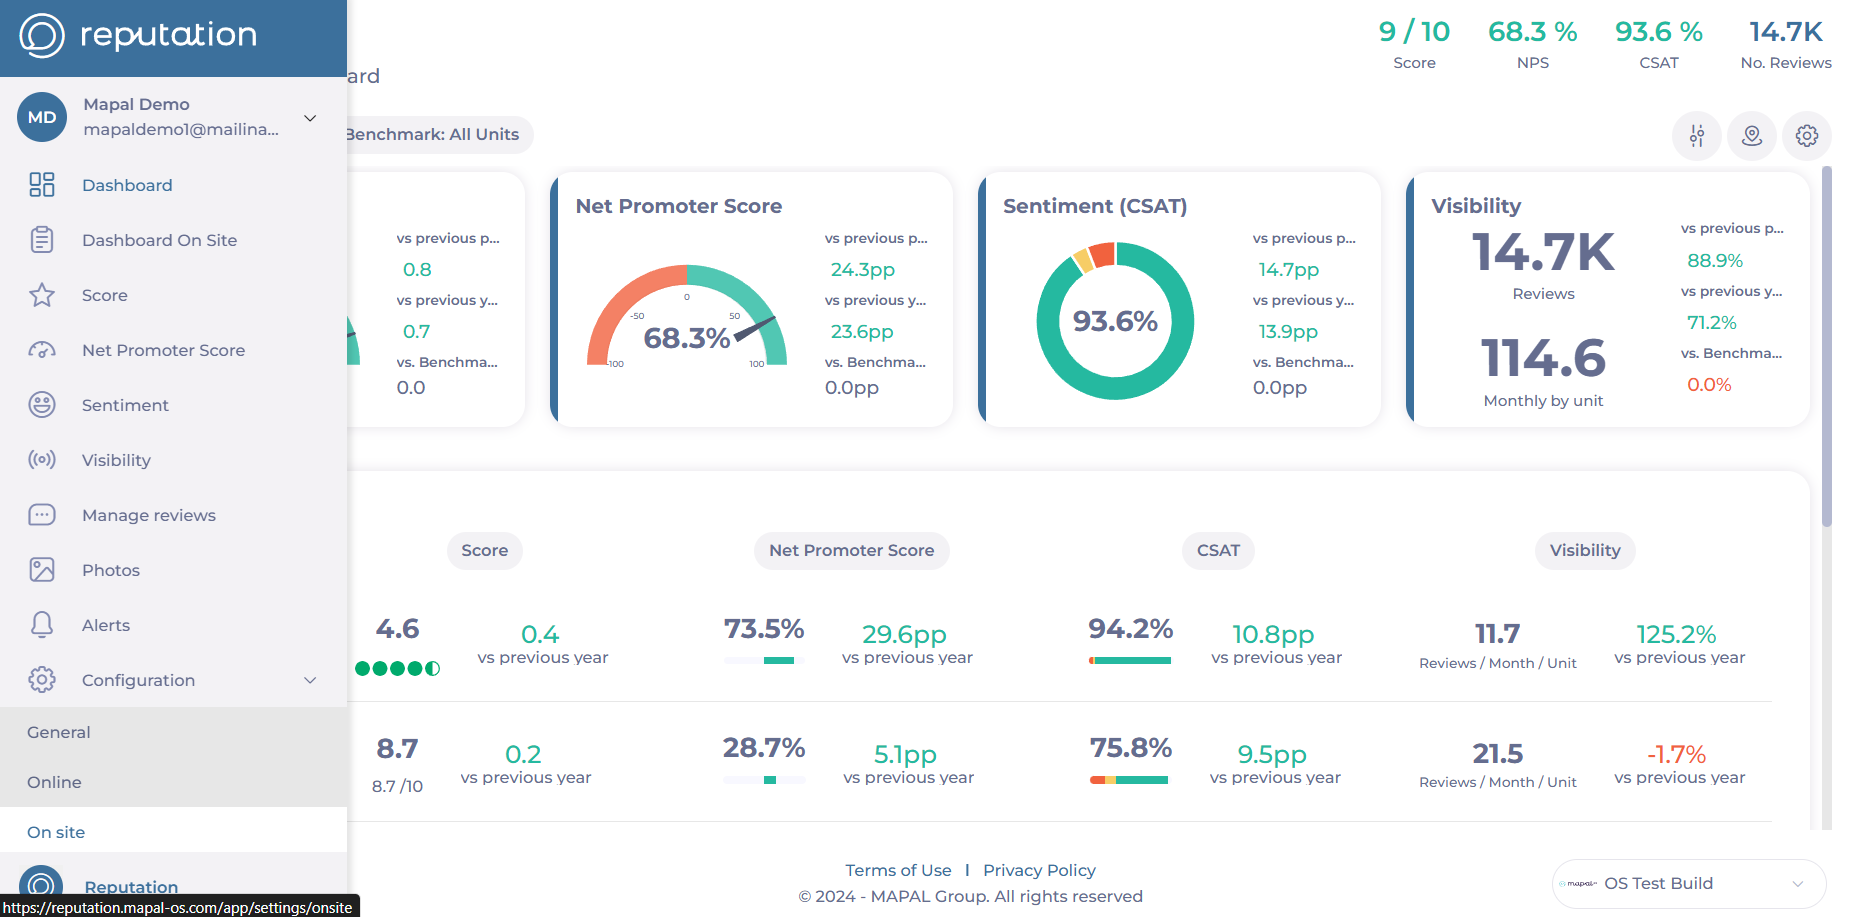
Start from: The Reputation dashboard.
-
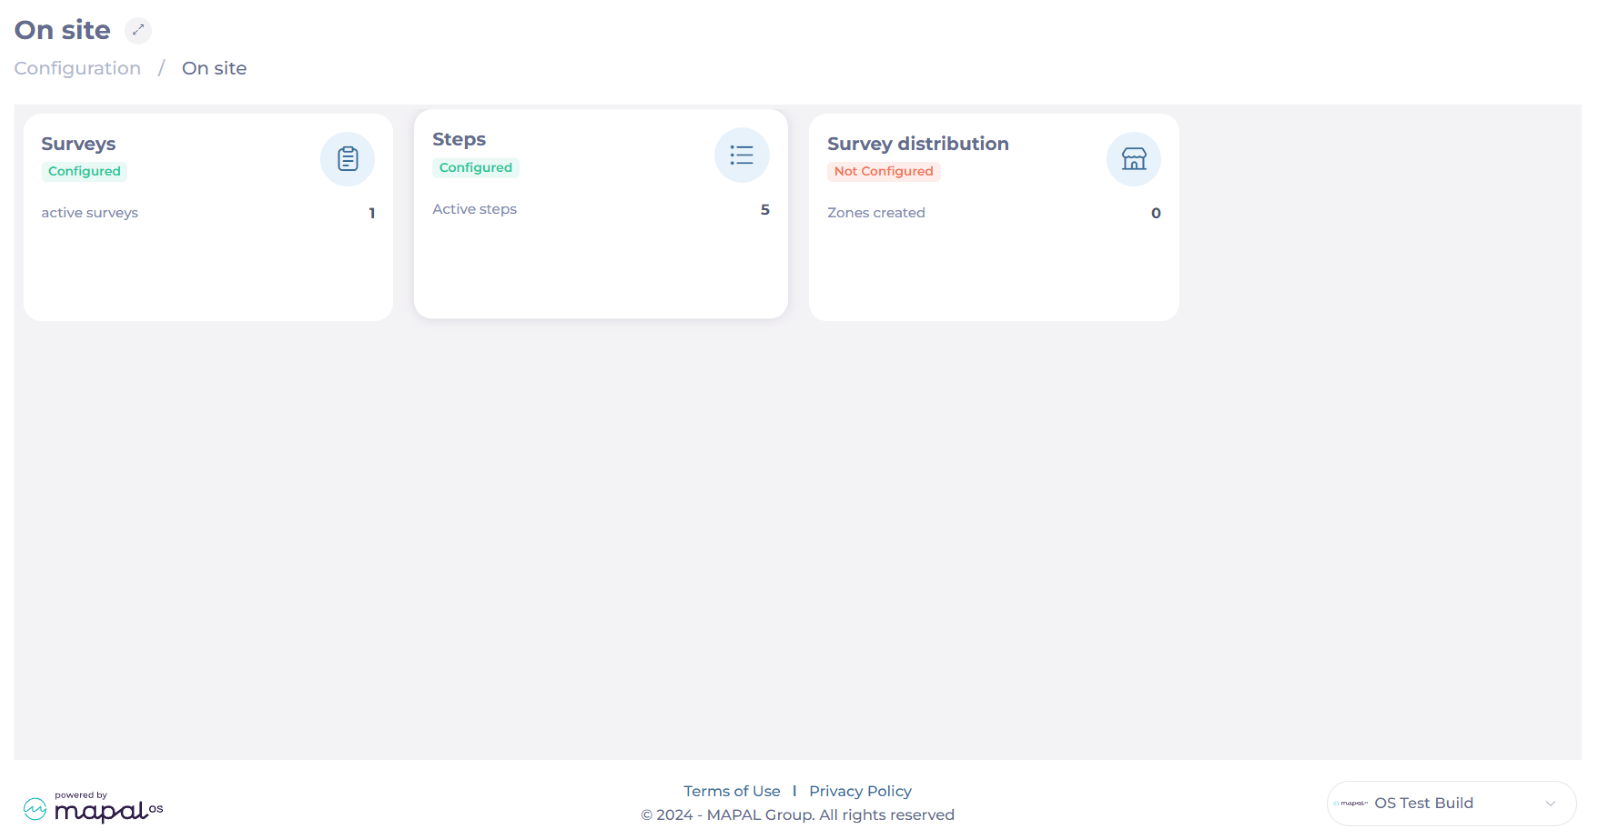
Select Configuration > On site from the main menu.
-
Select Survey Distribution.

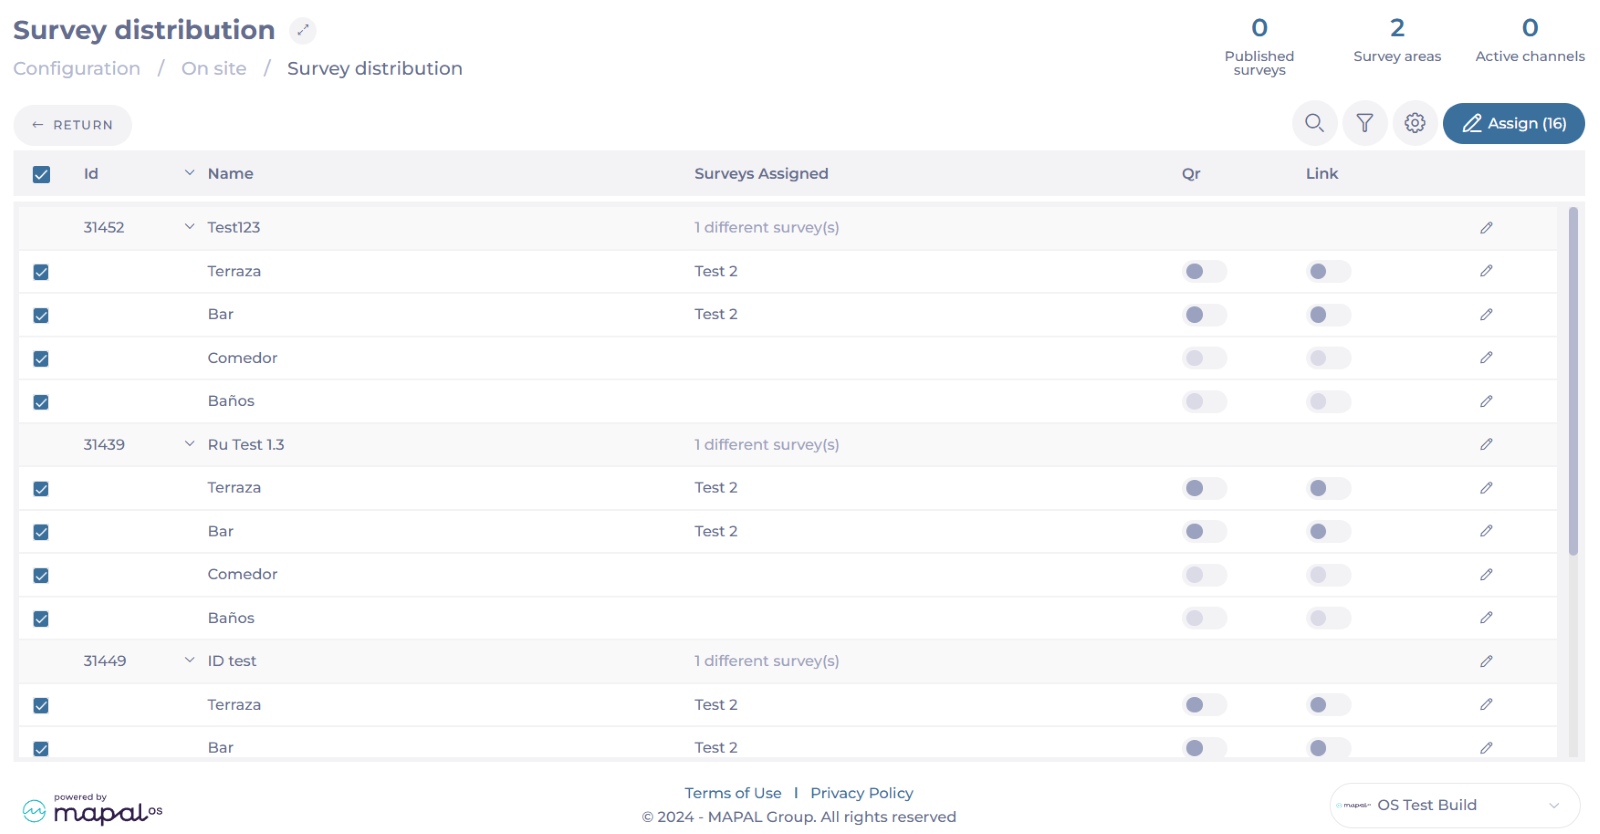
The Survey distribution grid is divided into Business Units (Work Centers) and Zones (Areas within that work center), providing a clear structure for managing survey assignments.
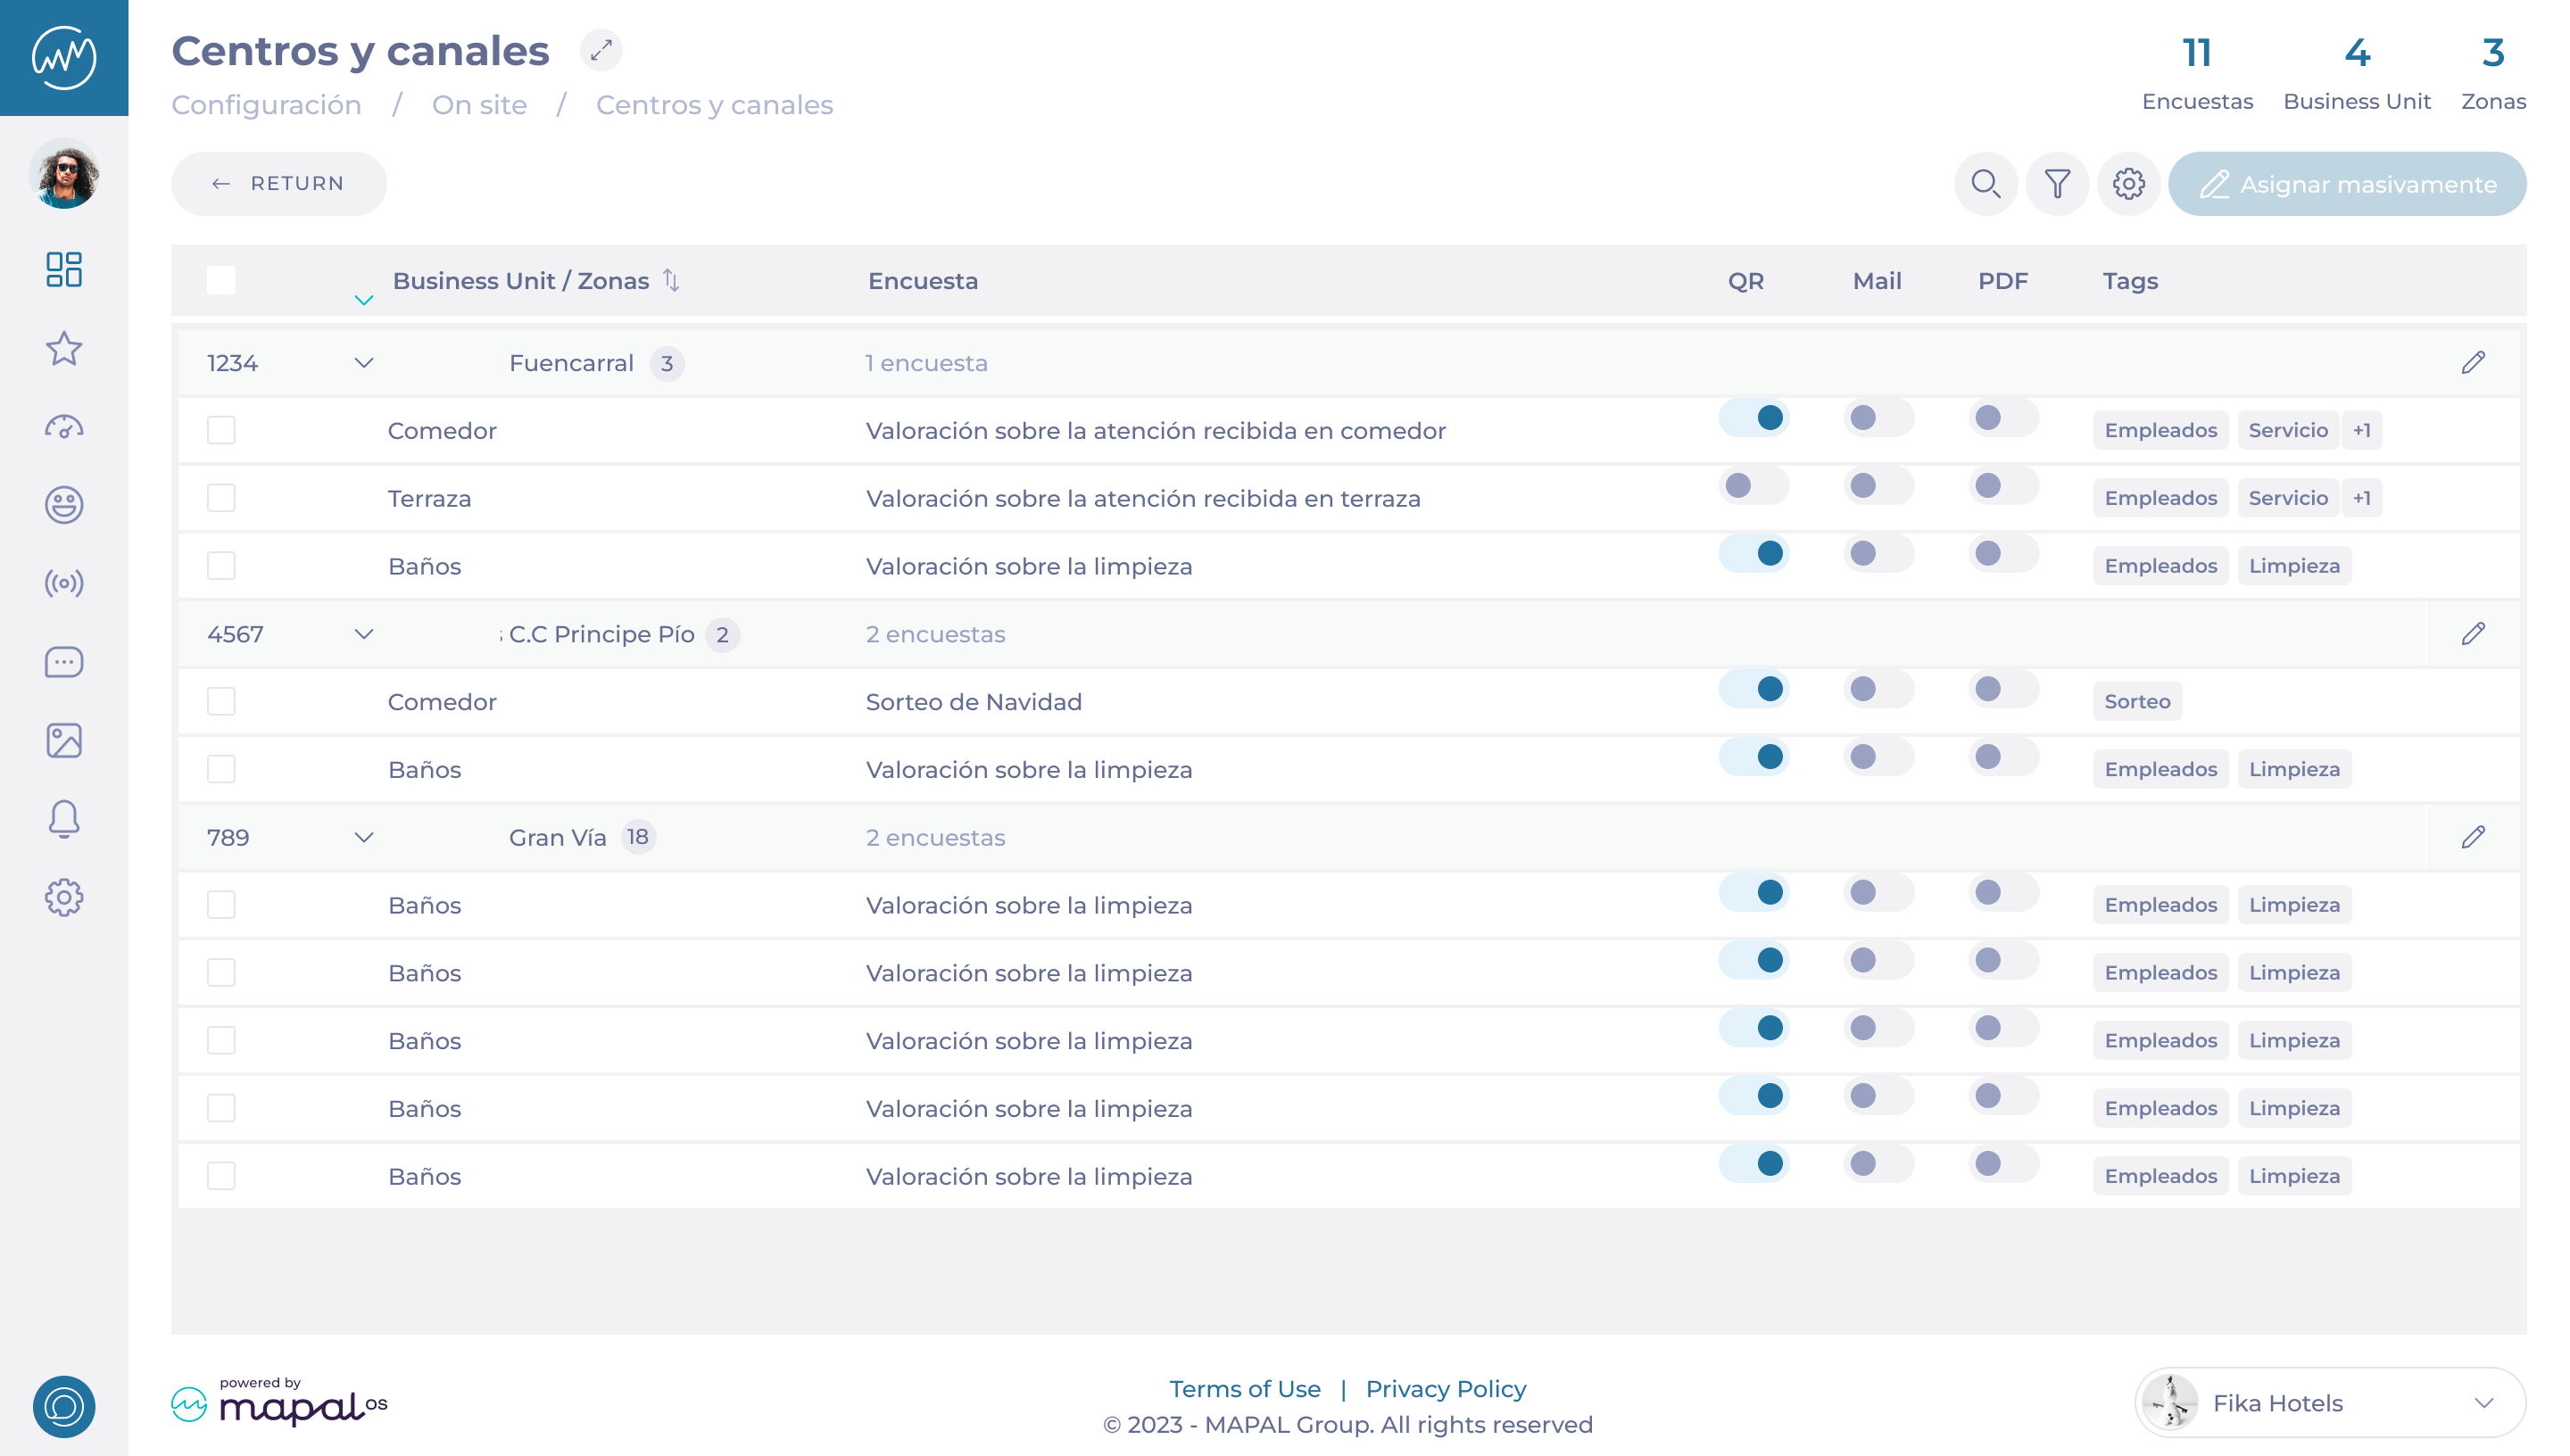
Surveys can be assigned to those specific zones within the business unit, such as Kitchen, Bar, Bathroom, etc.
-
To assign a survey to a zone, select Edit on the Zone’s row.
-
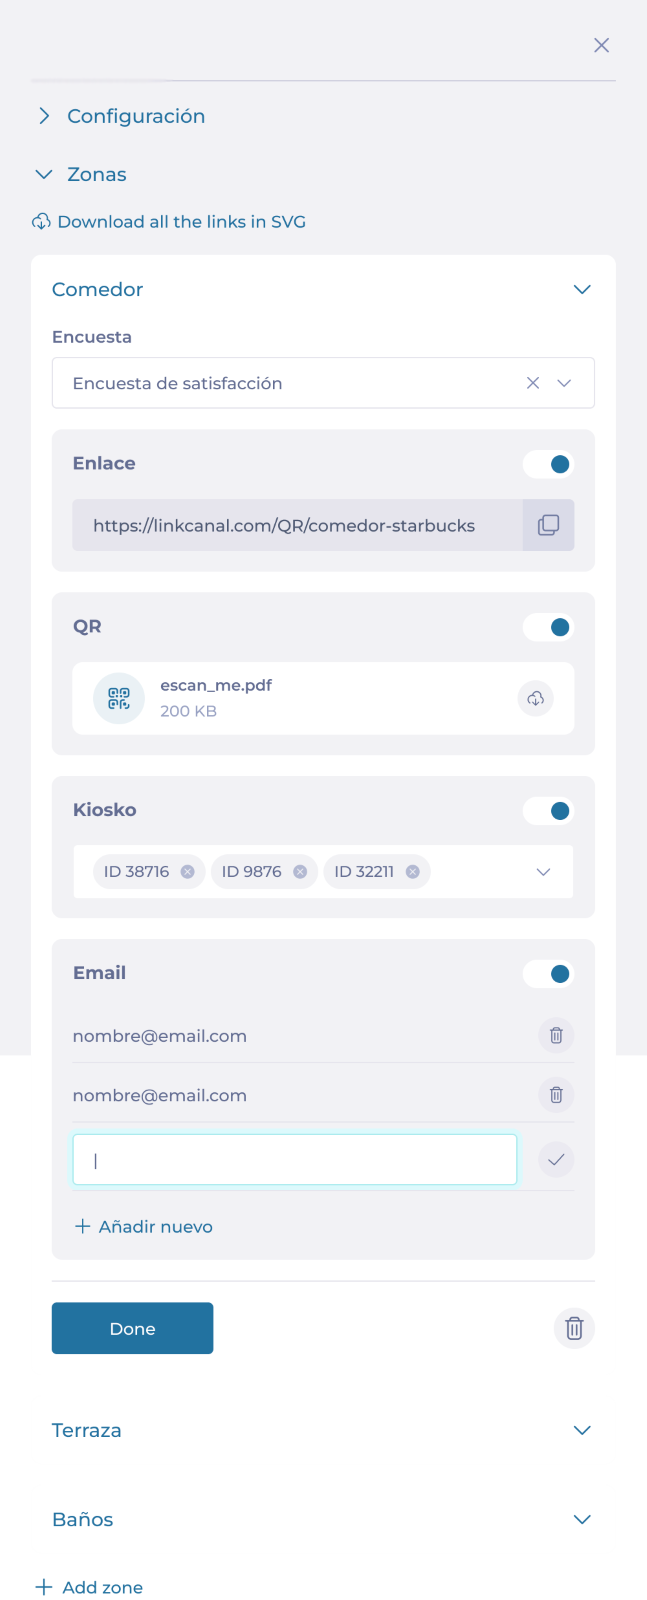
In the sidebar, you can set up the Survey assigned to the zone and the Distribution channels for the survey (QR, Mail, and/or PDF).
Notes: If you select Edit on the Business Unit’s row, you can set up the surveys for all the zones available in that Business Unit.
Zone Management
Each business unit contains multiple zones. The grid shows you each zone with the surveys assigned, the distribution channels (QR code, email, PDF), and associated tags.
-
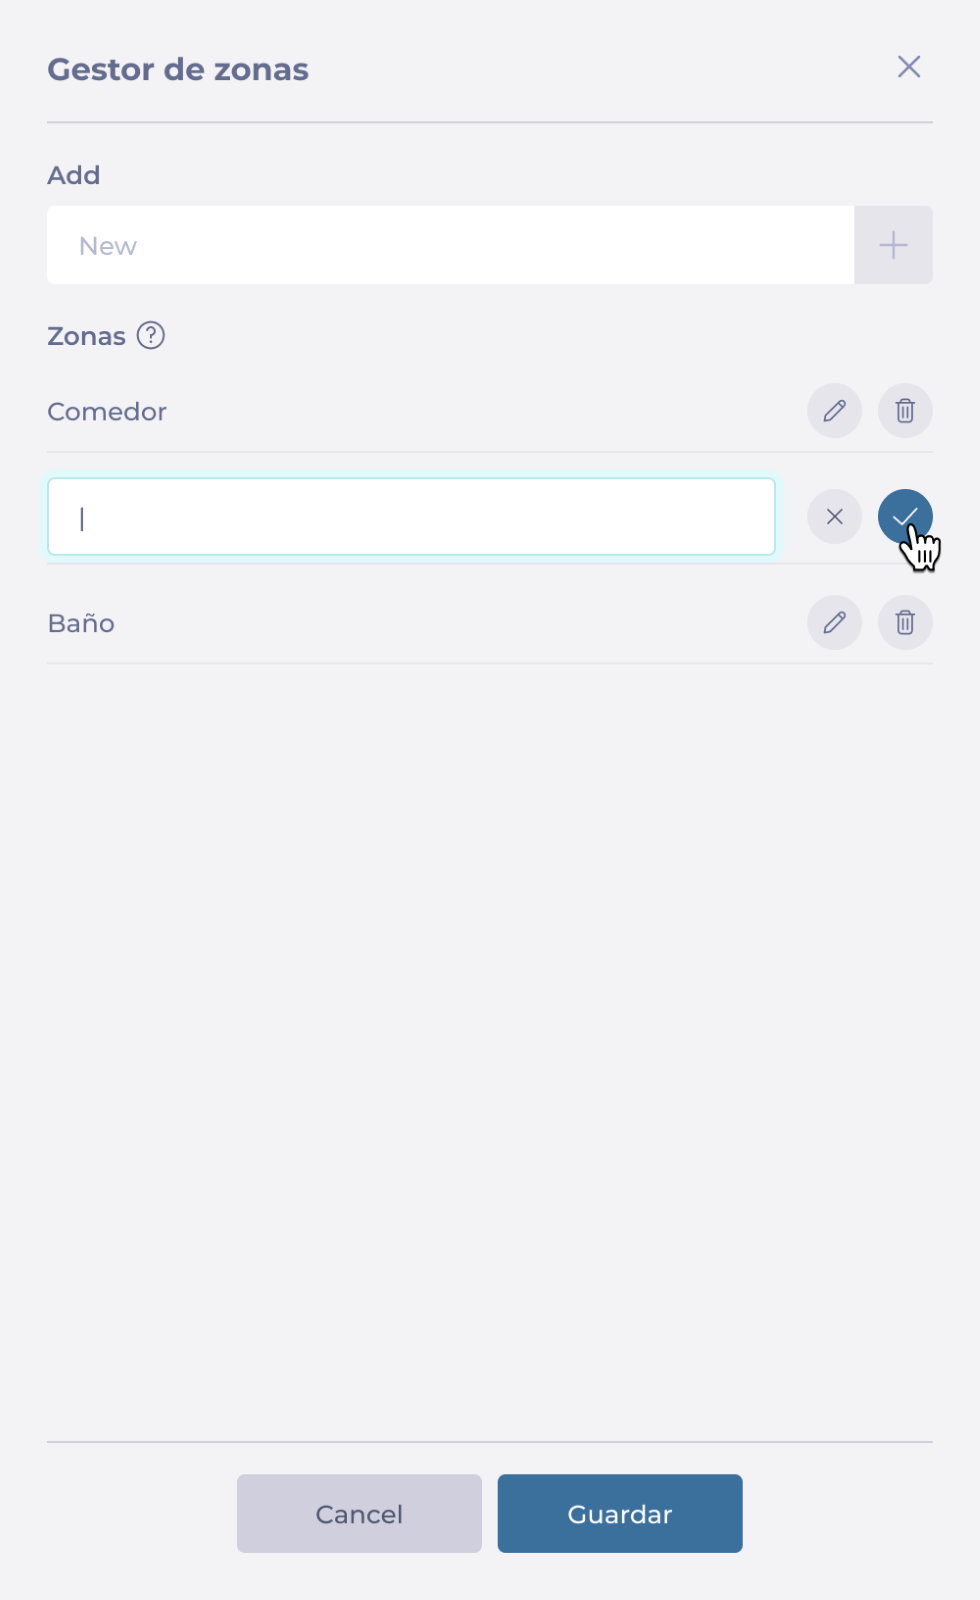
Select the Zone configuration button to Add, Delete, or Edit a zone.
Filtering Options
-
Select Filter to open the sidebar.
-
You can filter by specific Zones, Distribution Channels, and Tags.
-
Select Add Business Unit to quickly locate specific Business Units.
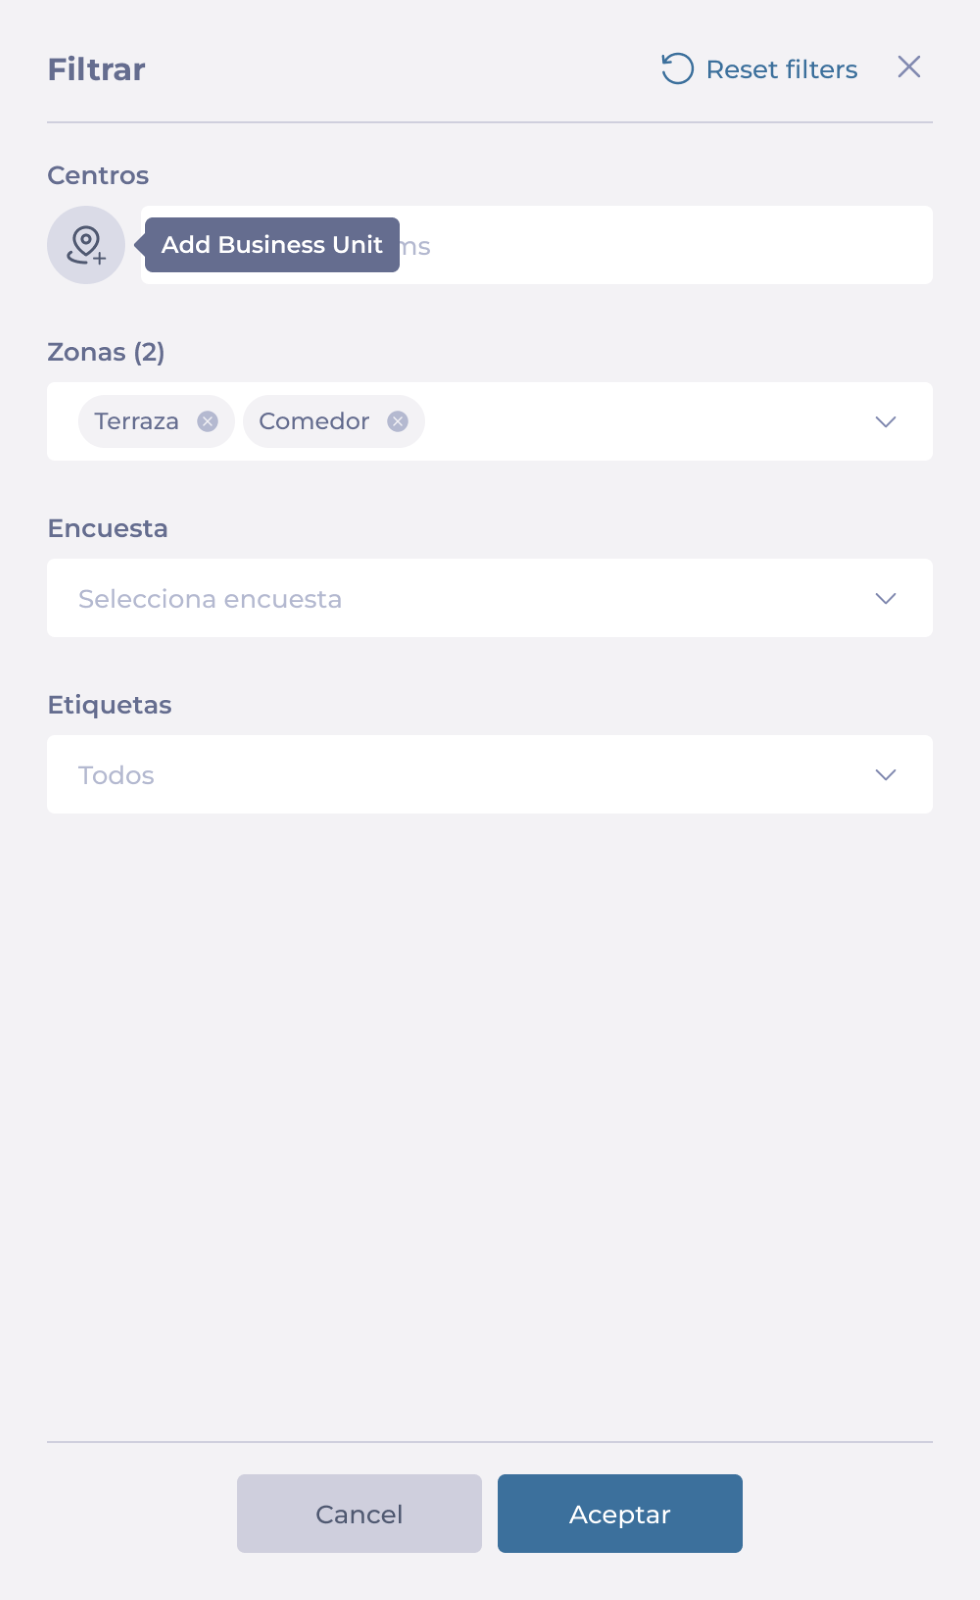
You will now see the results of the filtering in the survey distribution grid.
Bulk assignment and Distribution Channels activation
Surveys can be assigned to multiple zones simultaneously using the bulk assignment feature. This allows for efficient management of large-scale survey distributions.
-
Select the checkbox for the zones to which you want to assign a survey. You can select the checkbox at the header of the grid to select all.
-
Once you have selected the desired zones, select the button Assign.
-
In the sidebar, select the Survey you want to assign and the Distribution Channels. You can choose to Maintain the distribution channels as they are, or you can Activate/Deactivate them.

-
Once you select Accept, a confirmation window will show up with the details of your selection and how many units it will affect.
-
Select Yes, implement the changes to continue.

Preview surveys in Reputation
Start from: The Reputation dashboard.
-
Select Configuration > On Site.

-
Select Surveys.

You can preview surveys during creation or open existing surveys to preview them.
-
Select the survey from the Surveys grid OR select + New to create a new survey.

-
Once inside the survey configuration, select the Preview button.

-
In the preview window, you will be able to:
-
Review colors, fonts, logos, and other design elements to ensure they match your branding and are displayed correctly.
-
Run the survey in a pre-publication mode to identify any issues and ensure everything functions correctly.
-
Confirm that all branching paths, conditional questions, and the overall order of questions are logical and coherent.
-
-
You can always select Return to go back to the configuration and adjust as needed.

-
Use the responsive panel to preview the survey in desktop, tablet, and mobile version.


-
Select the Restart button to start the survey again.
If you are creating a new survey, follow all the steps for survey creation and then select Preview.
To know more about survey creation, see Manage surveys in Reputation.
Set up the Reputation survey app (On Site)
Start from: The Reputation module.
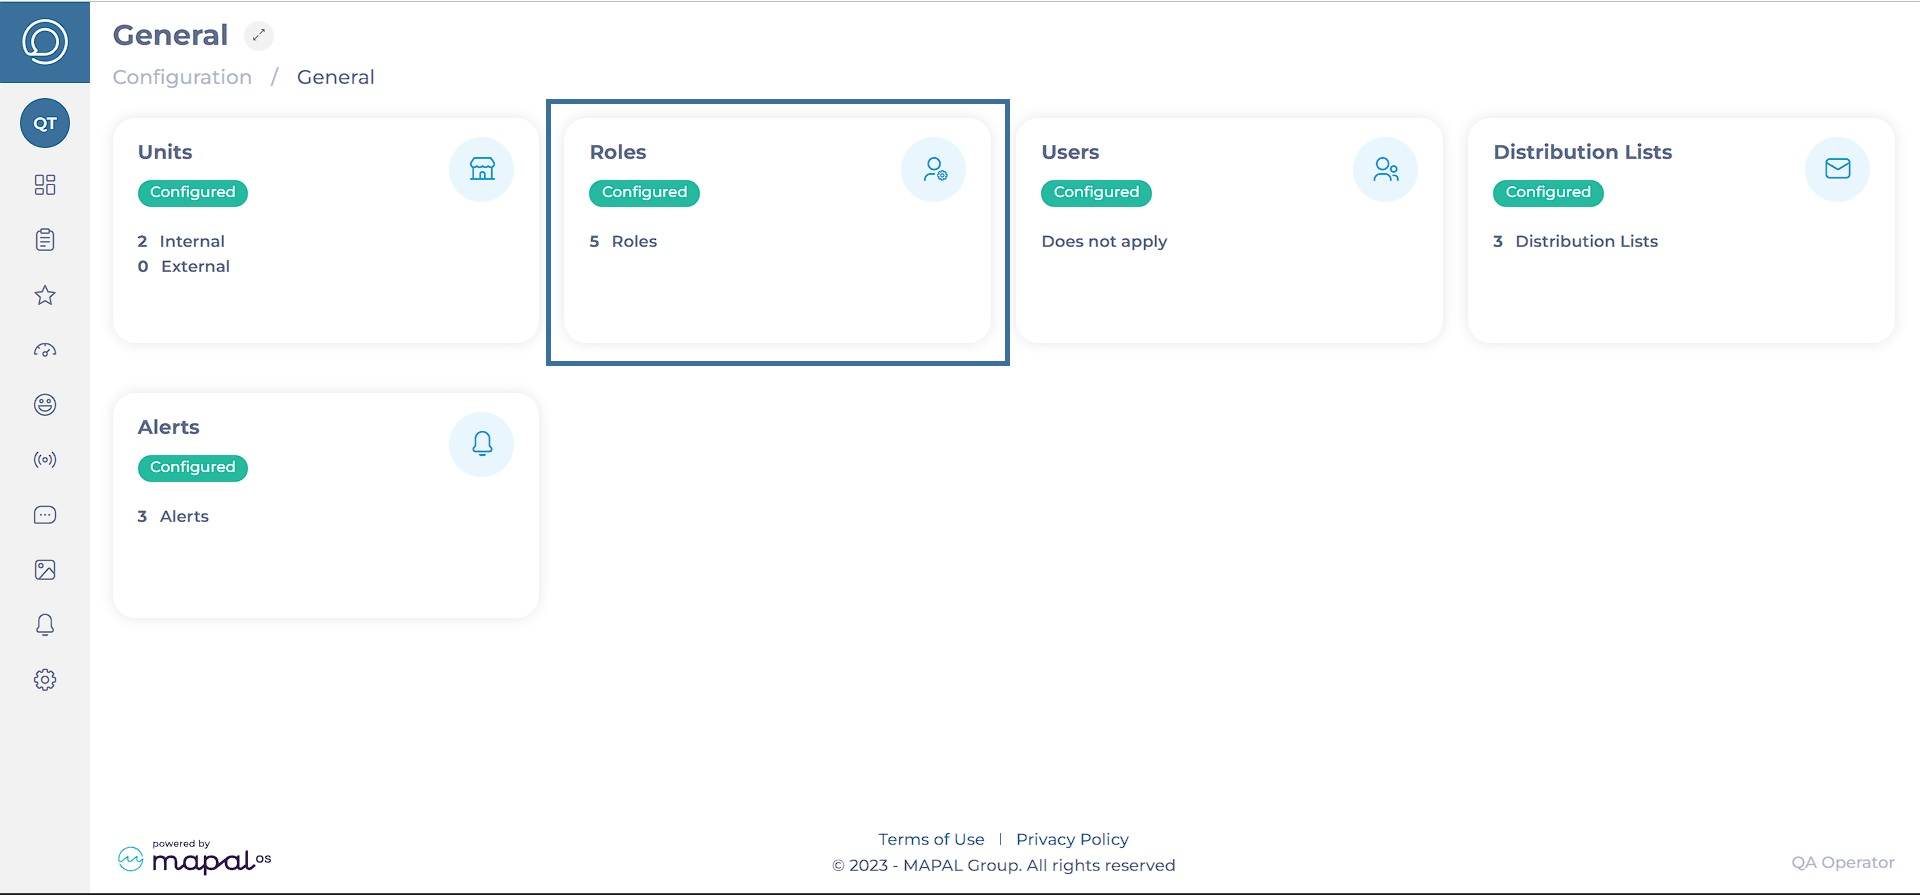
Set up permissions
Once the On Site bundle is activated for an operator, the Permissions have to be set up to allow users to access the functionalities.
To do this:
-
Navigate to Configuration > General > Roles.
-
On the Roles page, use the switch in the Activated column to enable or disable all the desired permissions regarding On Site.
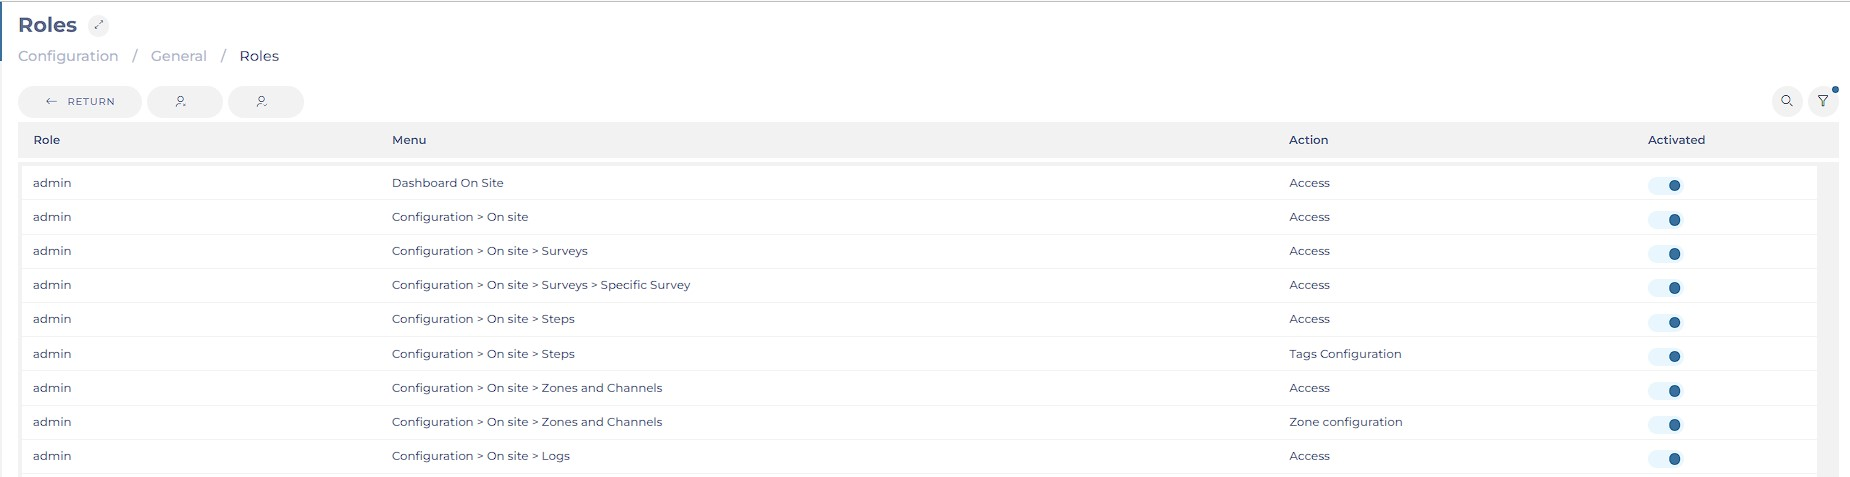
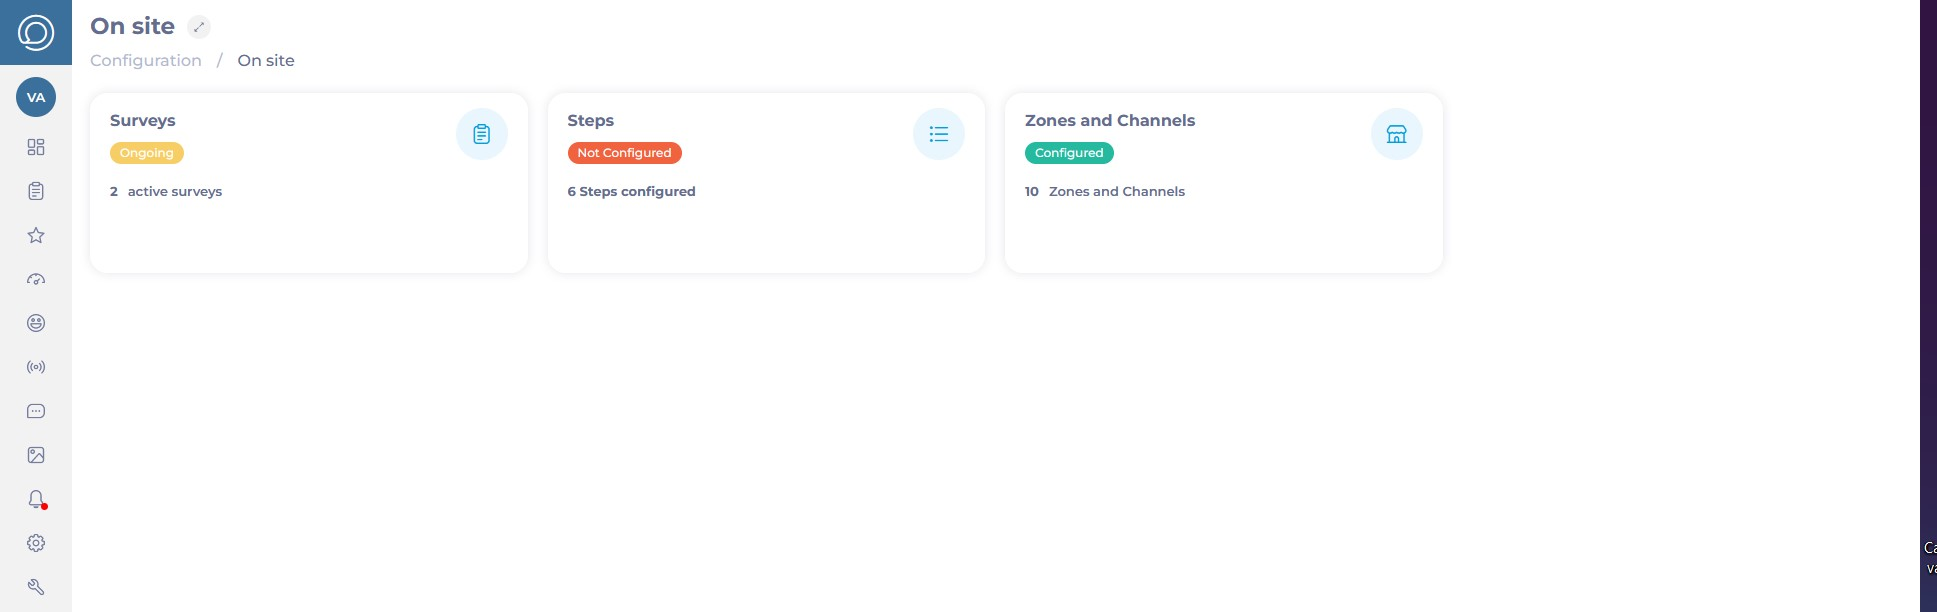
After giving permissions in the operator, the On Site option will be shown under Configuration in the main menu. There, you will be able to set up new surveys, new steps for the surveys, and new zones and channels for distributing the survey.
Set up steps
To create a structured and efficient survey process in Reputation, you need to manage individual survey steps first. Each step represents a unit within a survey, such as a question, message, image, or interactive element, and can be reused across multiple surveys.
To learn more about setting up and managing steps in Reputation, see Manage steps in Reputation.
Set up surveys
Reputation allows you to create and customize guest surveys, ensuring they are always relevant and aligned with business needs. You can select specific steps to tailor your survey, set up advanced logic for conditional branching, and add visually appealing designs.
To know more about setting up and managing surveys in Reputation, see Manage surveys in Reputation.
Distribute surveys
Reputation allows you to distribute surveys effectively to gather guest feedback. You can assign surveys to specific zones within a business unit, such as the kitchen, bar, or bathroom. Managers can also choose the distribution channels for these surveys, including QR codes, emails, or PDFs.
To know more about distributing surveys in Reputation, see Distribute surveys in Reputation.
Completing surveys in Smarthub
Start from: The main screen of Smarthub.
- Clock in or clock out.

Notes: The operator can configure the survey to be displayed when clocking in or out.
- Answer the questions one by one with the options presented to you.
Notes: You can navigate through the questions using the Previous and Next buttons.
Once you have completed the questions, you can either exit the system or return to the home screen, depending on the survey configuration.
Add a post-reco survey
Start from: The Engagement dashboard.
- Navigate to Recognition > Post-Reco Survey from the main menu.
- Select + New post-reco survey.
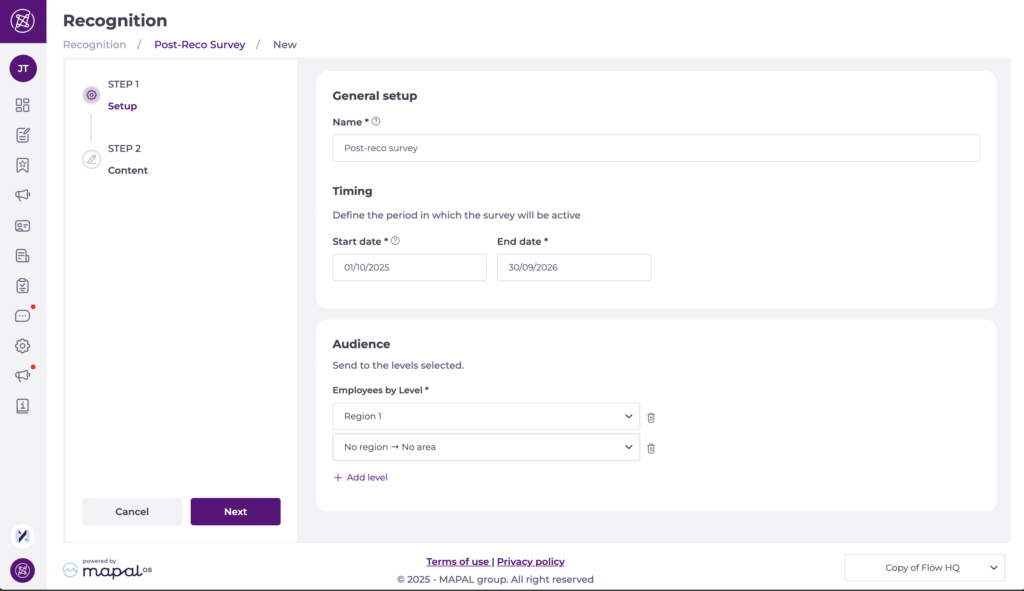
Step 1: Setup
- Complete the setup form:
- Name*: Assign a name to your survey.
- Start and End date*: Define the active period for the survey.
- Audience: Select one or multiple employee levels that will have access to the survey.
- Select Next to save changes and continue.
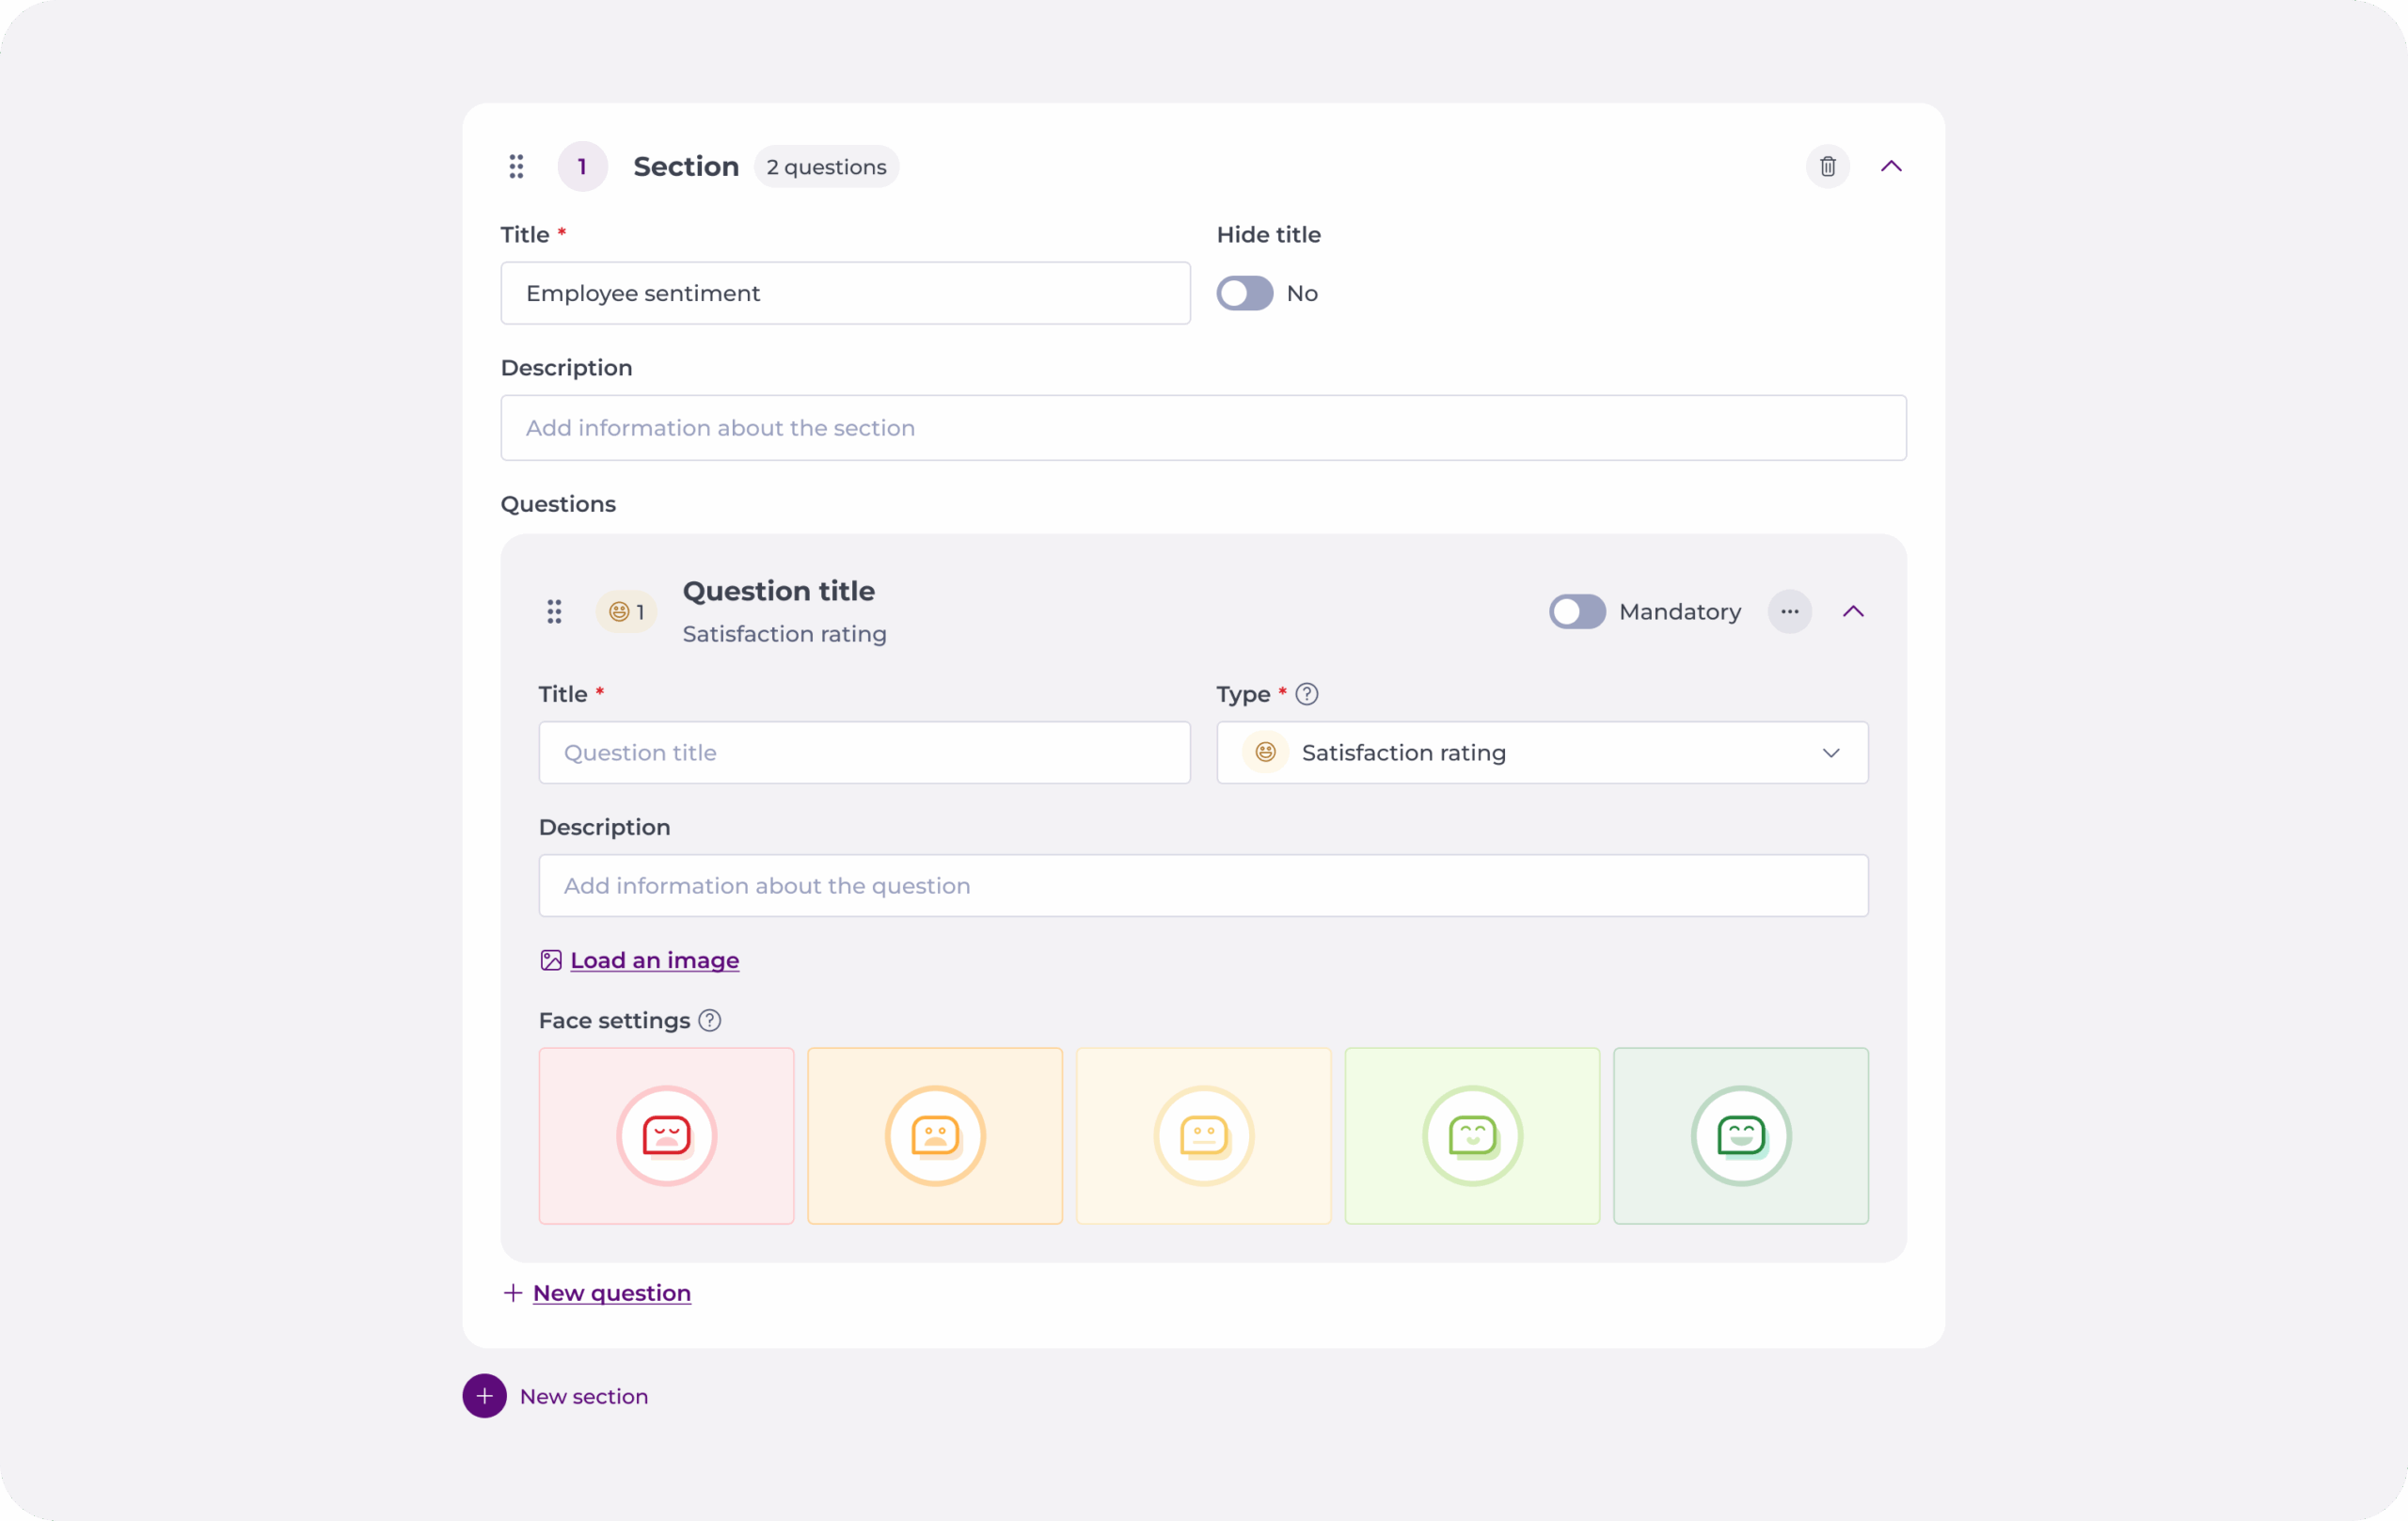
Step 2: Content
Sections
- Every Post-Reco survey starts with one section by default.
- To add another section, select + New section at the bottom of the page.
- Each section requires a Title* and can include an optional Description.
- Sections can be configured to appear only if a specific recognition reason is chosen. To do this, select the specific reason in Show if chosen.
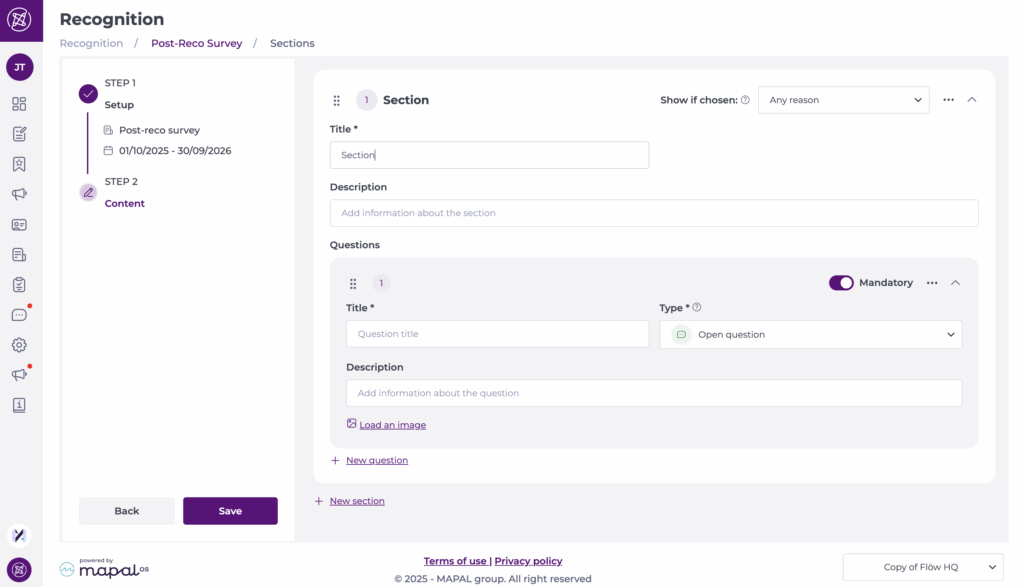
Questions
- Questions are added within sections.
- To add a question, select + New question at the bottom of the section.
- Configure each question with:
- Title*: Assign a label to your question.
- Description: Add an optional description to improve the understanding of the question.
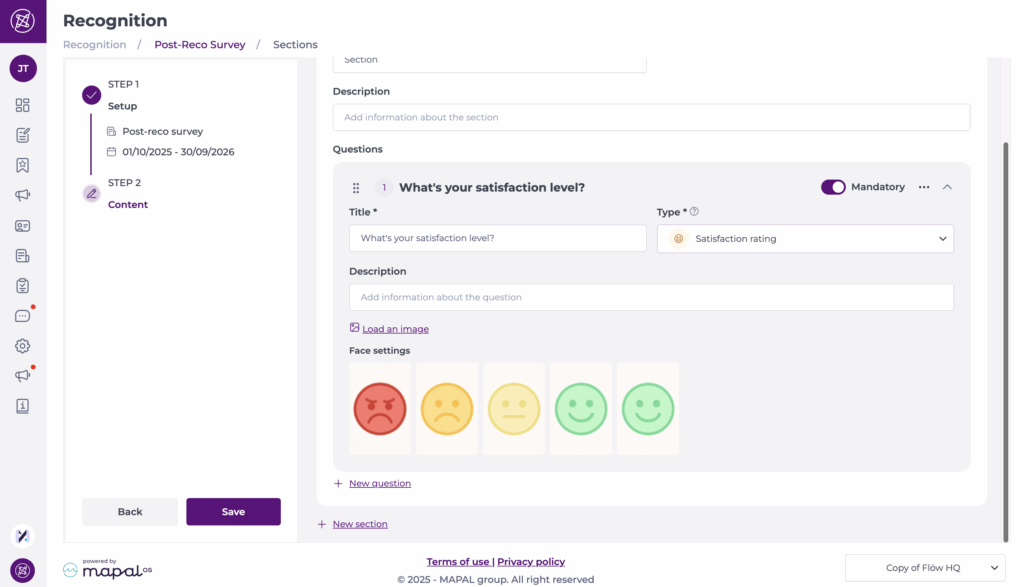
- Type: Open (text box), Satisfaction rating (1–5), or Single/multiple choice.
- Image: Optionally load an image to display with the question.
- Mandatory toggle: Enable if the question must be answered.
Once sections and questions are configured, select Save. The survey will appear in your list.
Activate a post-reco survey
- Back in the post-reco survey screen, locate the specific survey in the list.
- Toggle the button under Status to activate it.
- The survey is now live and ready for use.
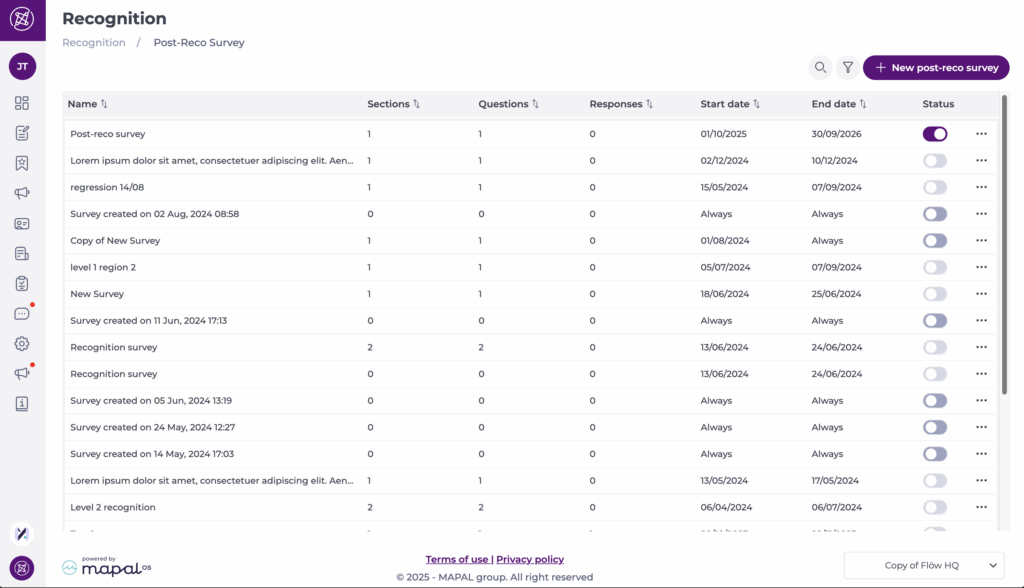
Manage the survey
Open the … menu beside the survey name for additional options:
- Delete
- See answers
- Duplicate
- Edit
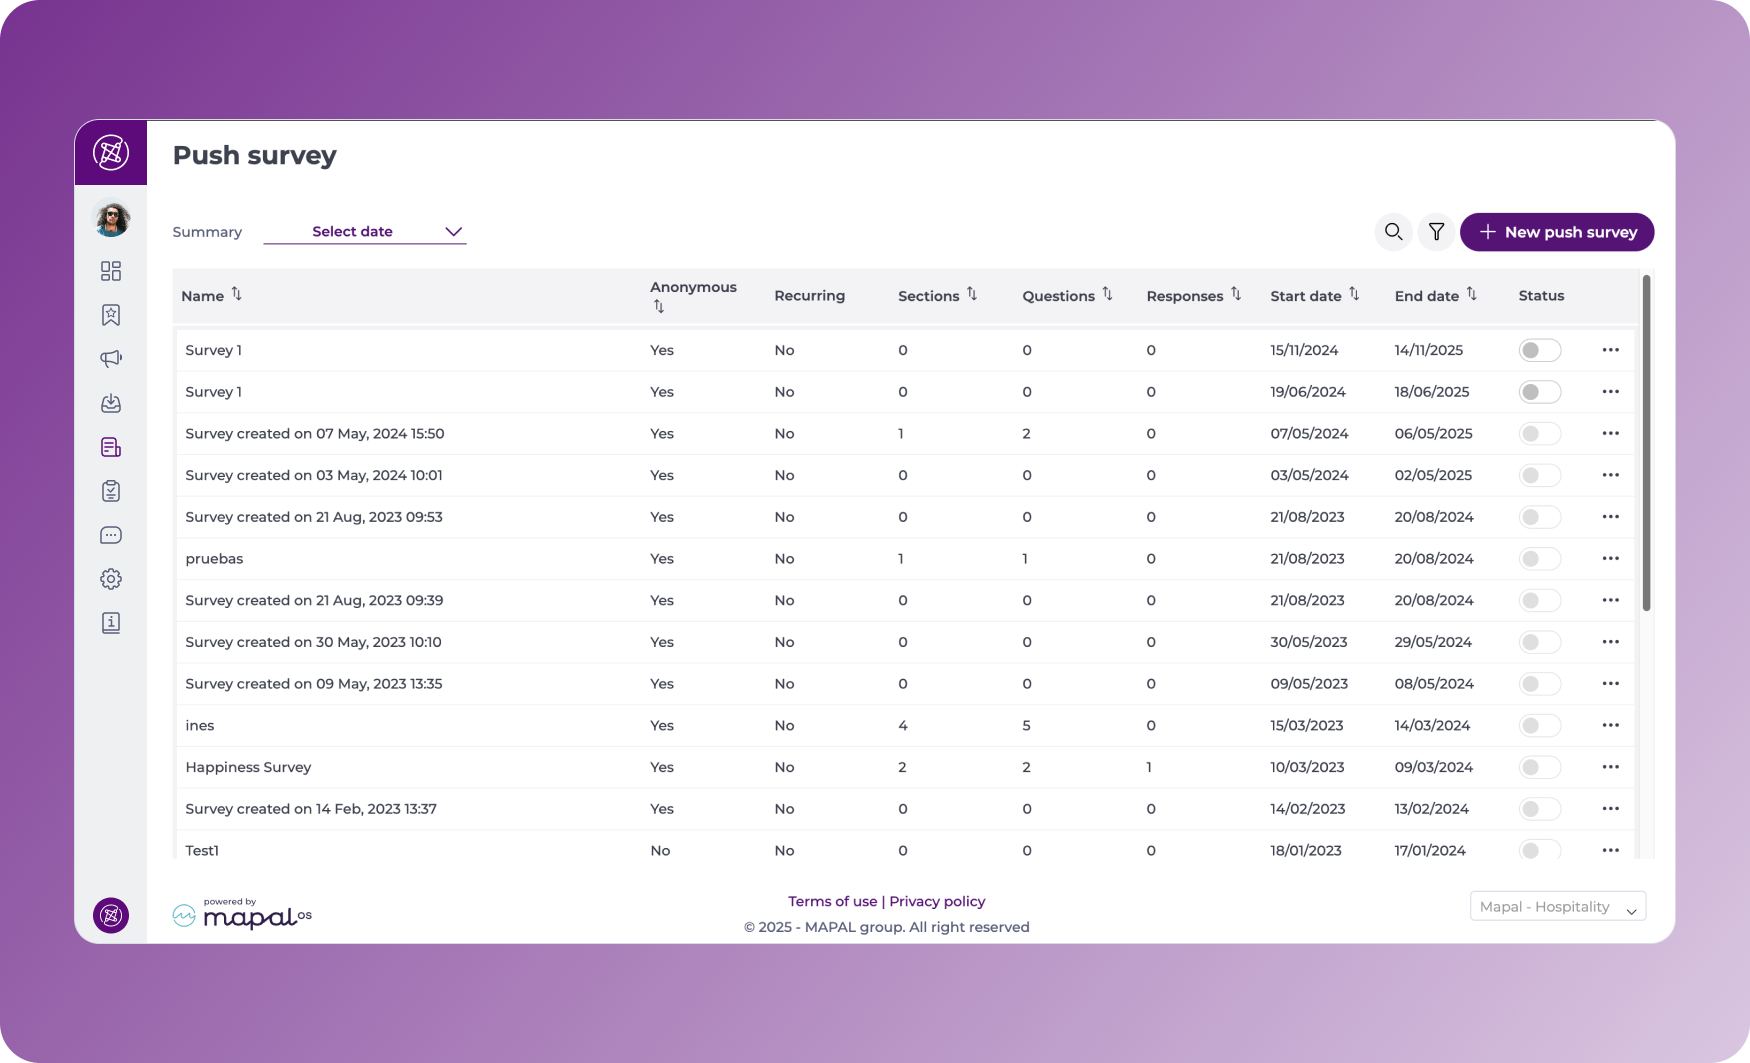
Generate push surveys using AI
Start from: The Engagement dashboard.
- Navigate to Push survey.
- Select + New push survey.
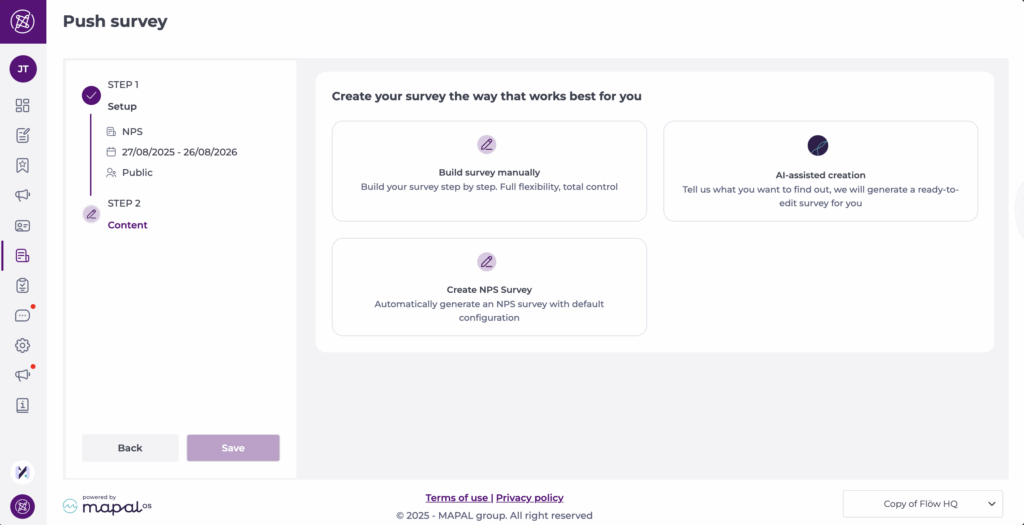
- Complete the setup of your Push Survey in Step 1 – Setup, as described in Create a new push survey.
- Once setup is complete, select Next.
- Here, you will have 3 options:
- Build survey manually: the classic manual setup of your survey. See Create a new push survey for more information.
- AI-assisted creation: Build a new survey from a prompt.
- Create NPS Survey: Automatically generate an NPS survey with default configuration.
Note: For the NPS option, you can edit scheduling, audiences, and general details such as the title, description, or load an image if needed. However, the question type is fixed, and you cannot add more sections or questions.
AI-assisted creation
- On the next screen, select AI-assisted creation.
- In the prompt field, describe the feedback you need (e.g., “Feedback from new hires”). Refer to the best practices tips below for more information.
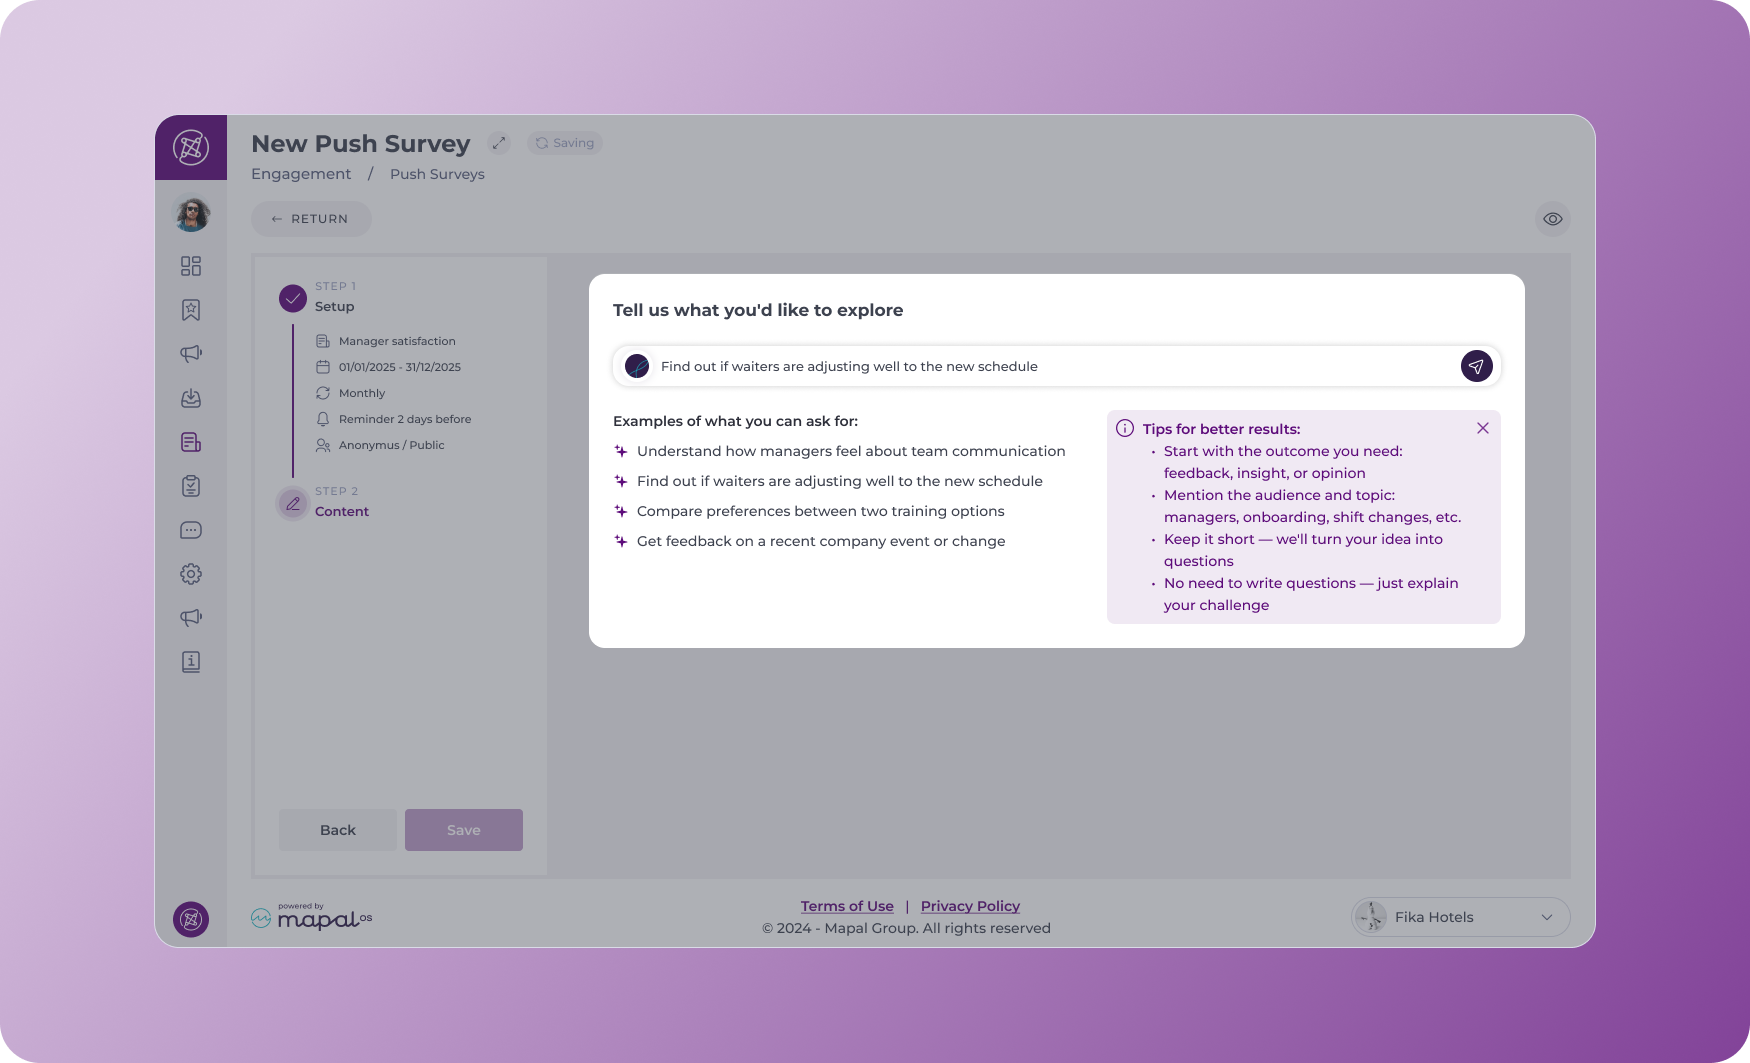
- Submit your prompt.
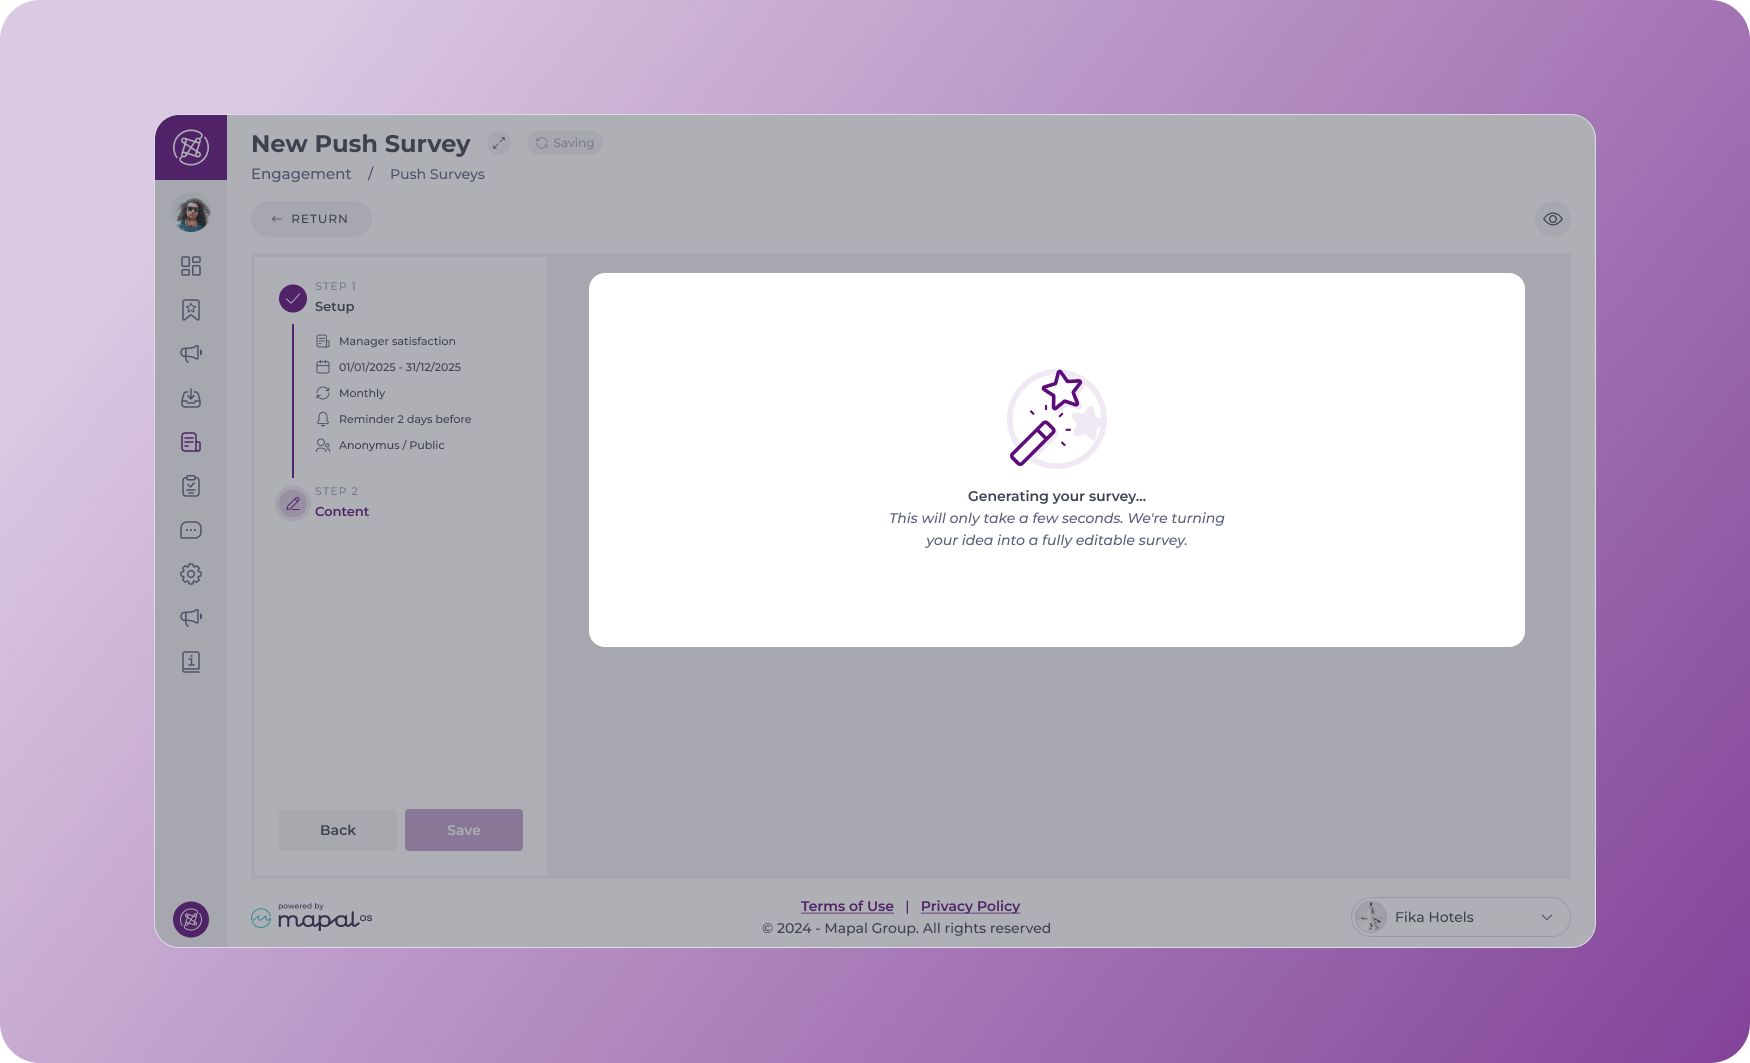
- A fully editable draft survey will appear in the builder.
- Review and customise the questions as needed.
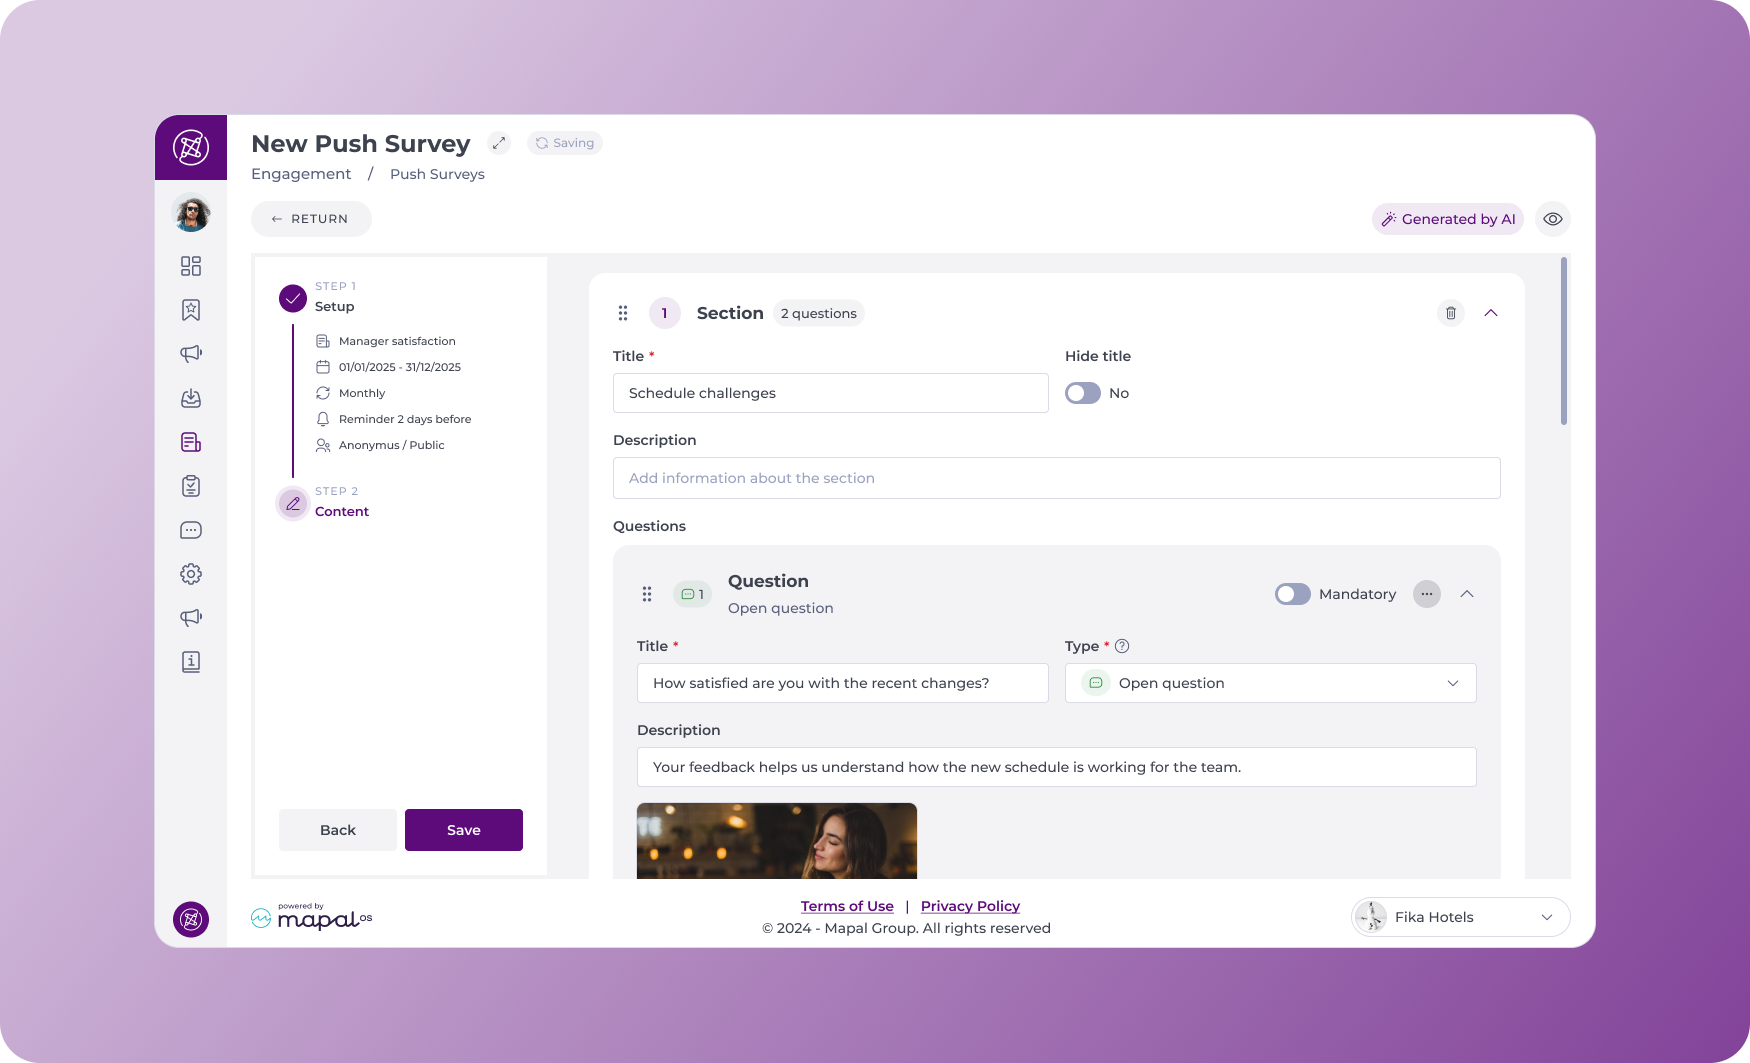
- Select Save to finalise your survey.
Note: AI-assisted creation is only available when starting a new survey. You cannot apply it to edits of existing surveys.
Best practices
- Use specific prompts like “Understand how managers feel about team communication” to generate more targeted questions.
- Always customise the draft survey to align with your team’s language and context.
- Use the AI-generated version as a starting point, not a final product, to maintain relevance and engagement.
- Regularly review survey responses to refine future prompts.
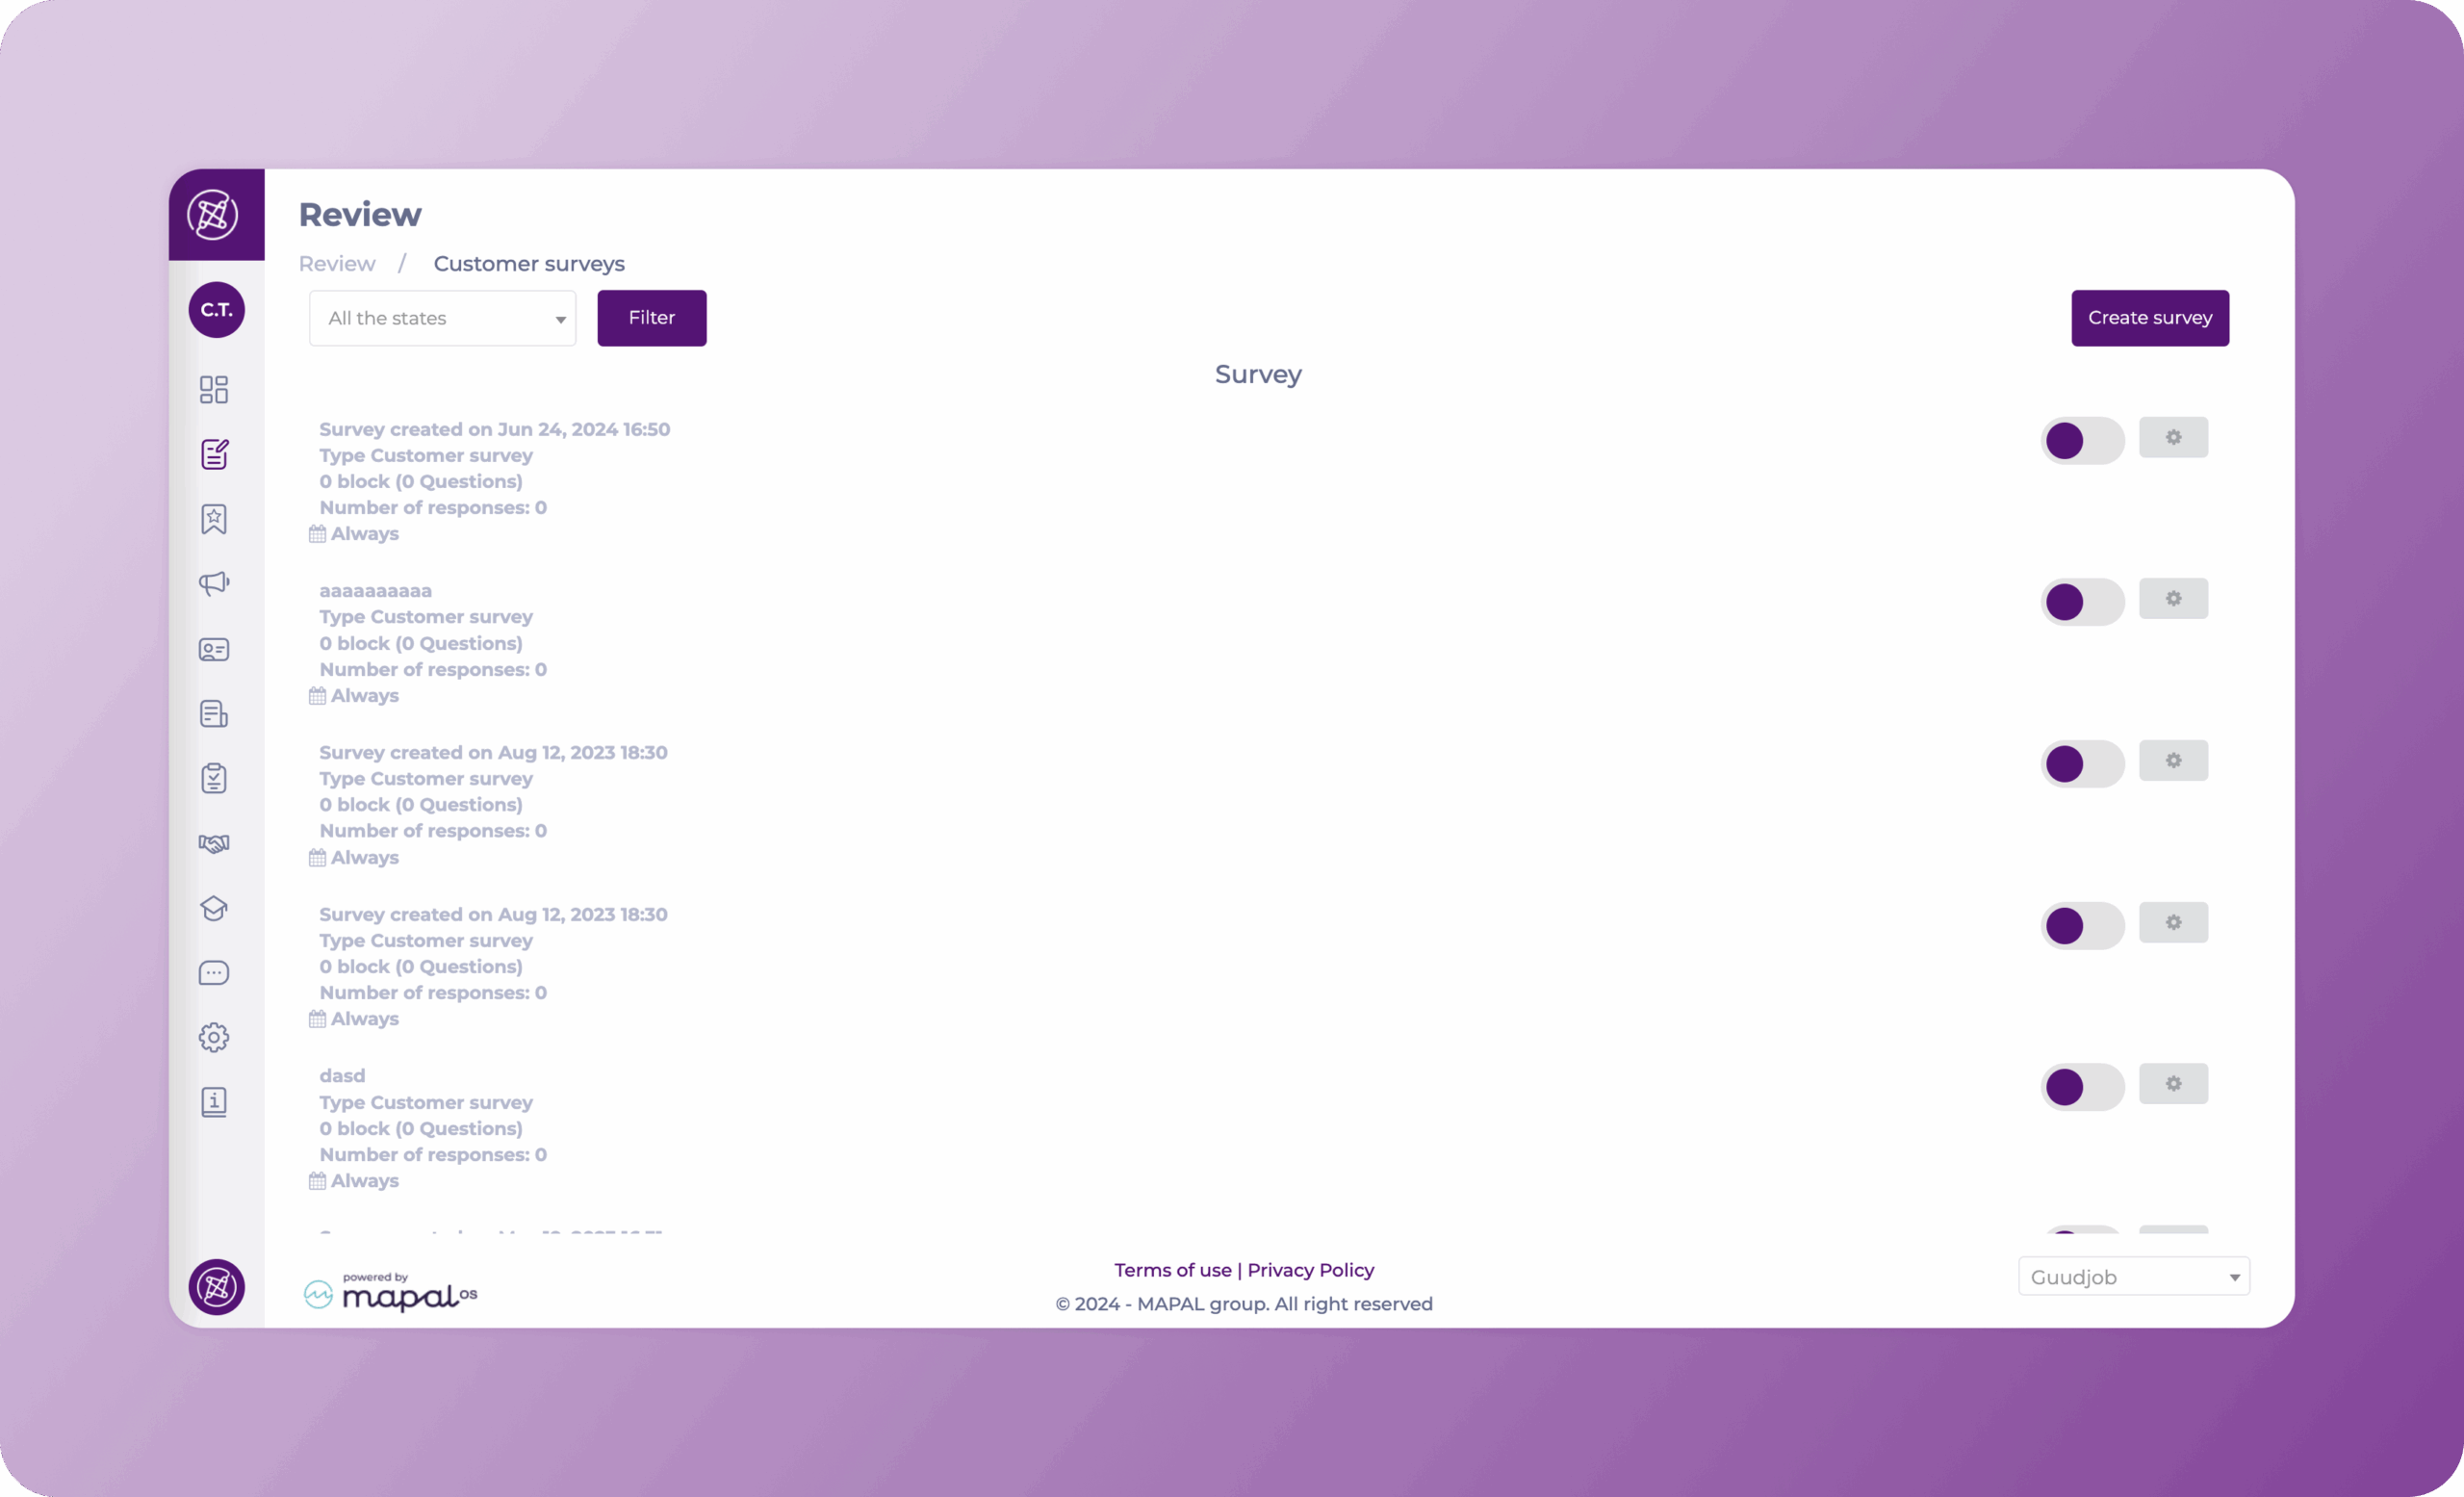
Create a customer review survey
Start from: The Engagement dashboard.
- Navigate to Review > Customer Survey.
- Select Create Survey.
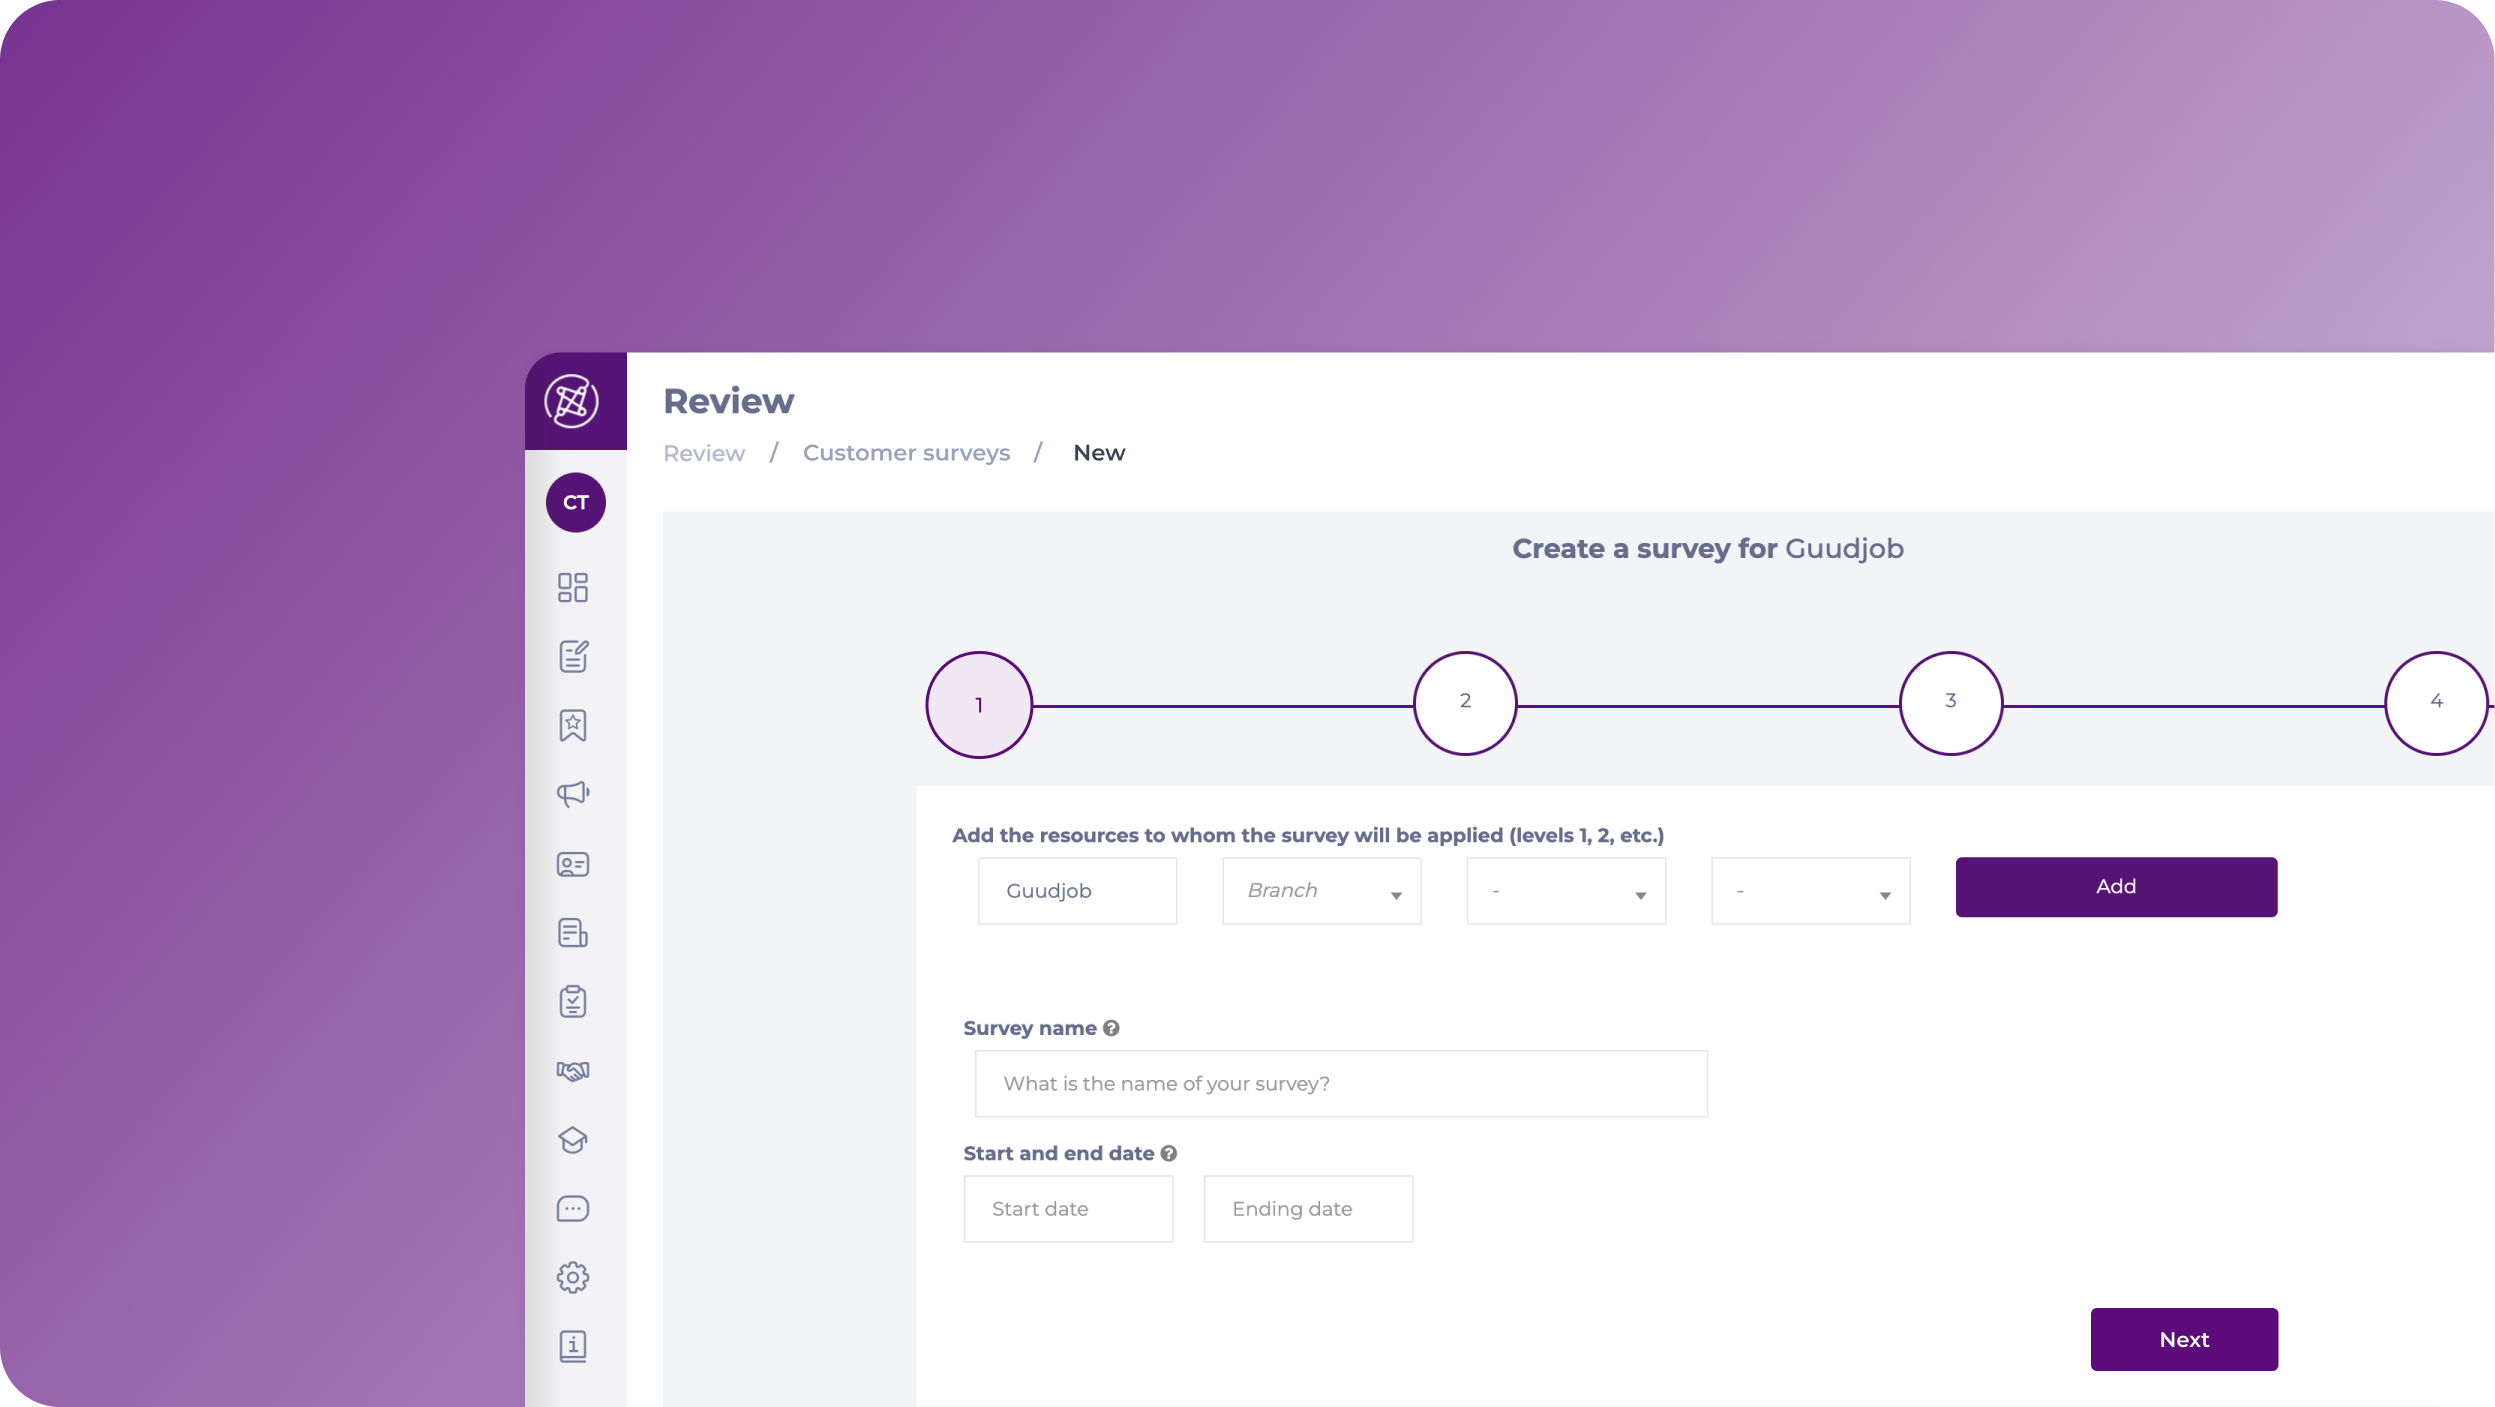
The Create a survey page appear. Here, you will need to complete 4 steps:
Step 1
The first step is where all the general settings are placed.
- Add the resources to whom the survey will be applied, these could be branches, sections, etc.
- Assign a Survey name.
- Set a Start and End date for the survey.
- Select Next.
Step 2
In this section, you can configure the blocks and sections for the survey.
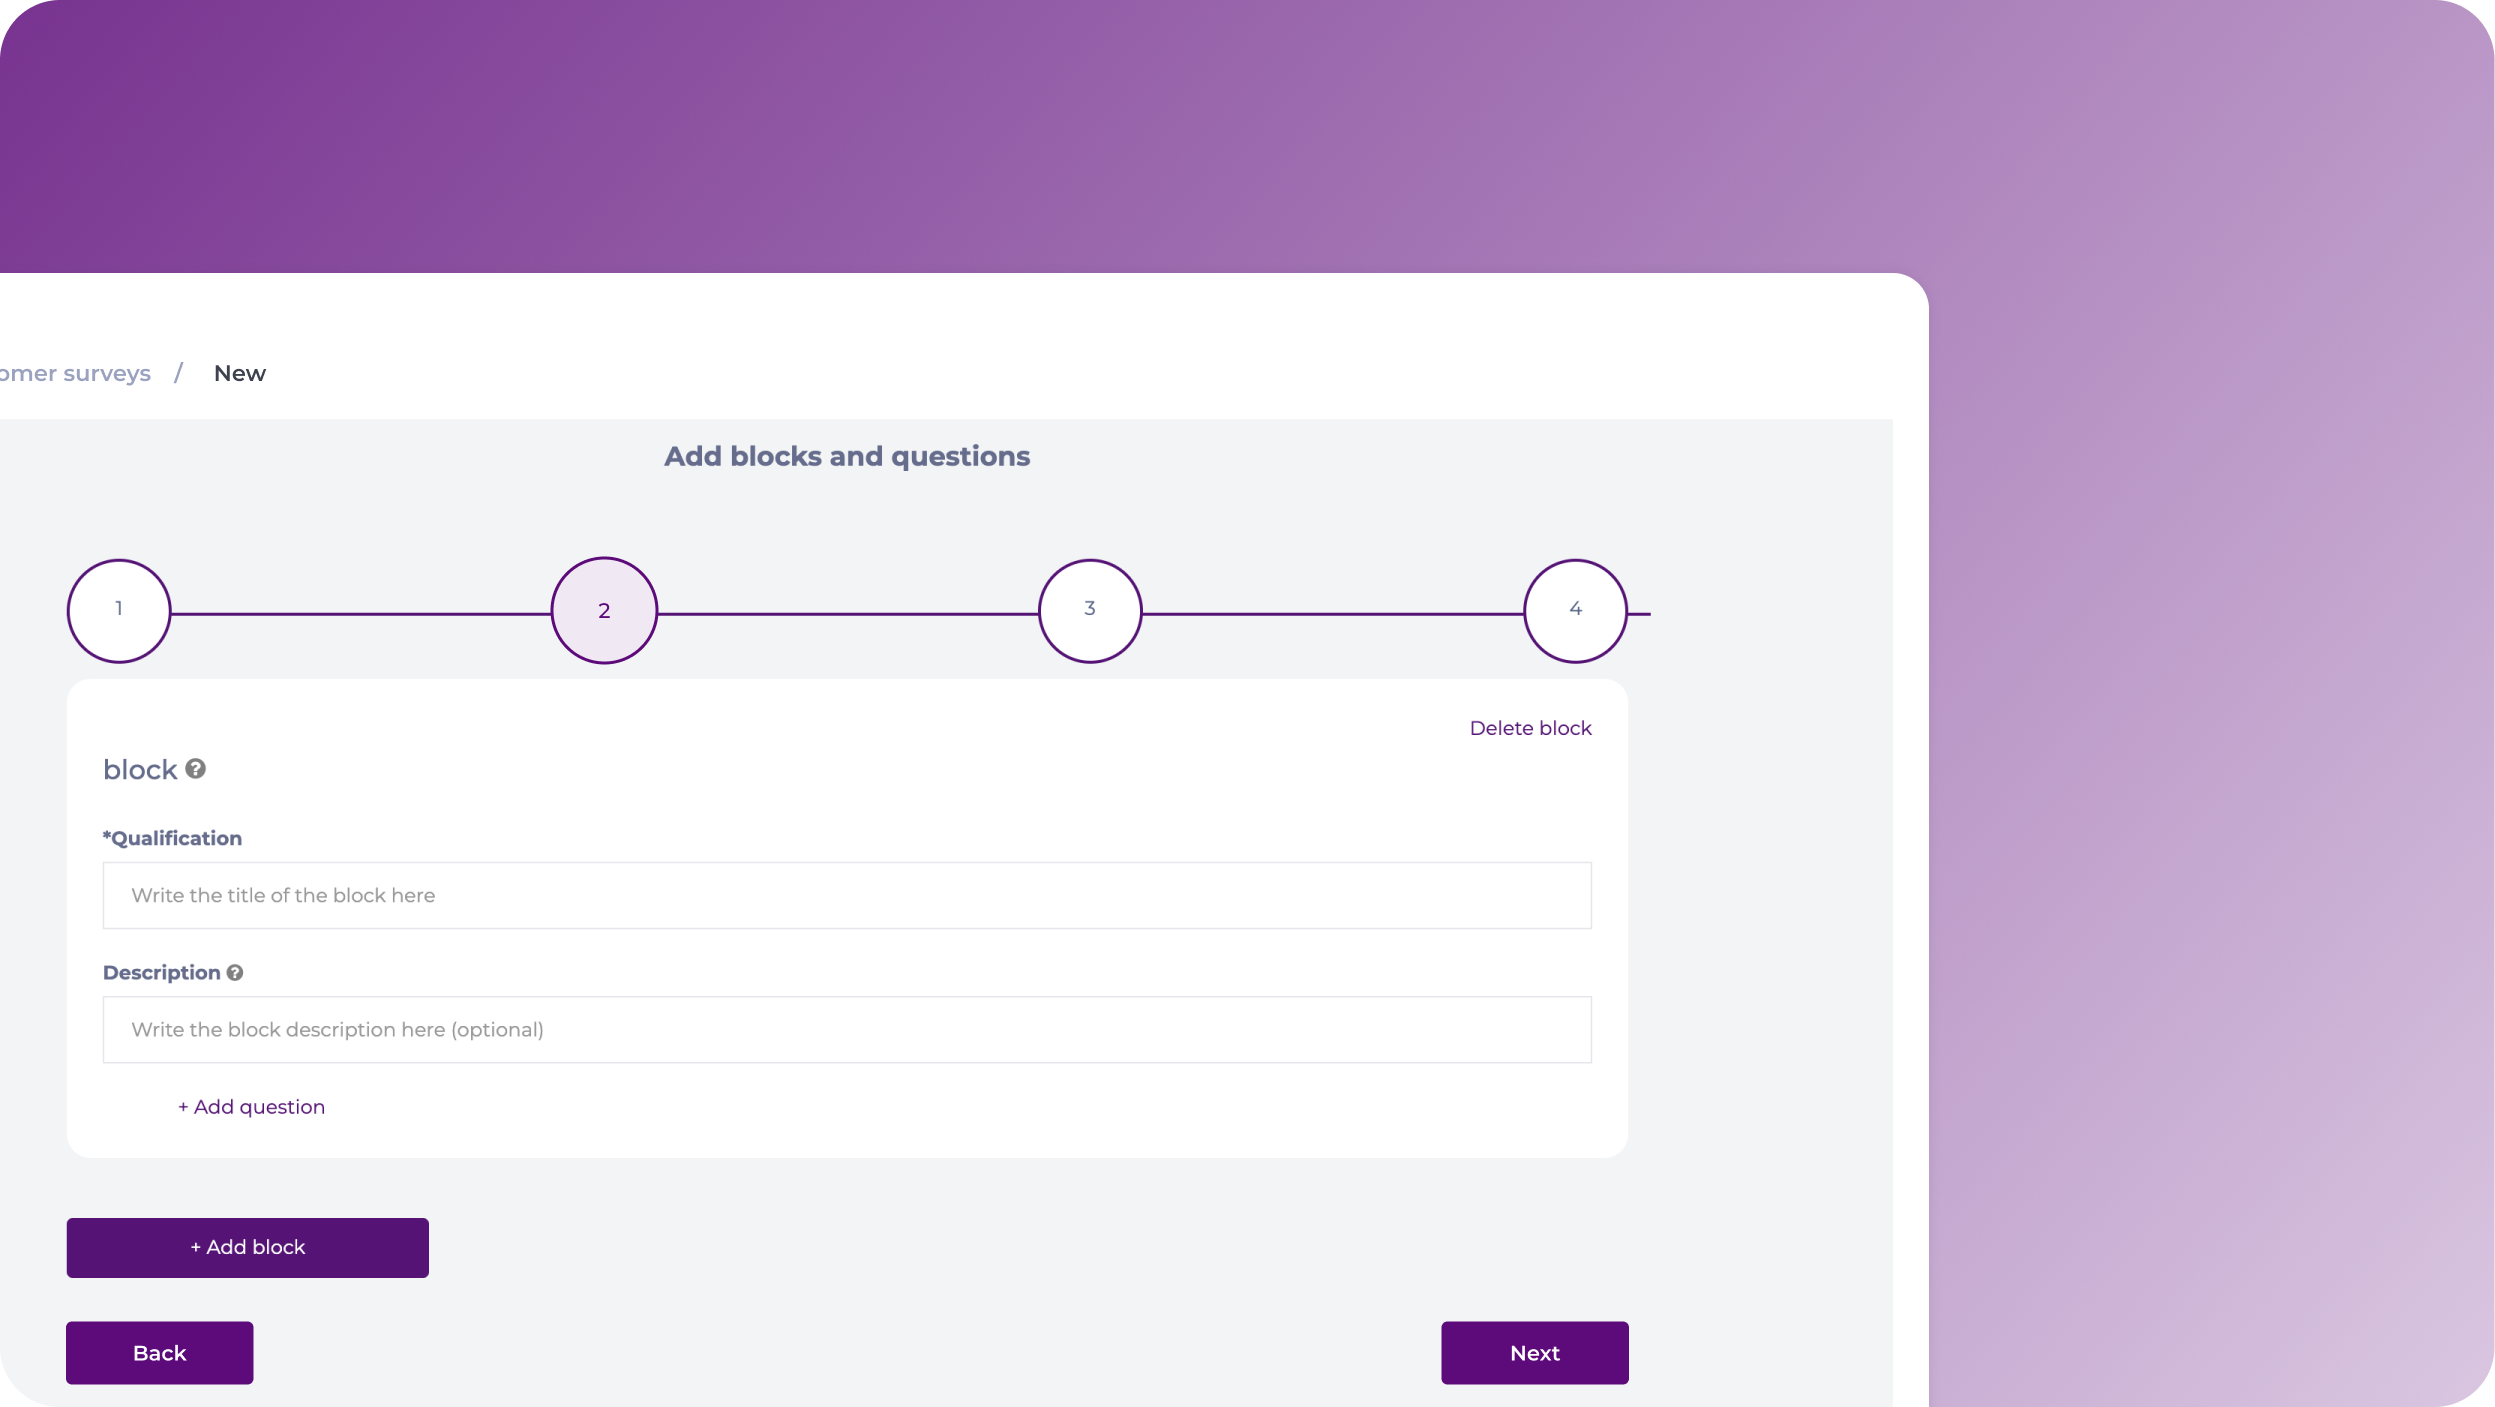
- Add a Title and a Description to your block.
- Select + Add question to start creating the questions under that block.
- For the questions, you will need to set:
- Title
- Description
- Question Type
- Is it Mandatory?
- Picture (optional)
- Once you finish configuring the question, you can select + Add question to create more questions under that block, or + Add block to create a new block with different questions.
Notes: You can use the Delete block and Delete question buttons to remove elements.
- When the configuration of questions and blocks is completed, select Next.
Step 3
In this section, you can preview your survey and check its functionality.
If the questions and block are configured correctly, you can press Next; if you want to make changes, select Previous.
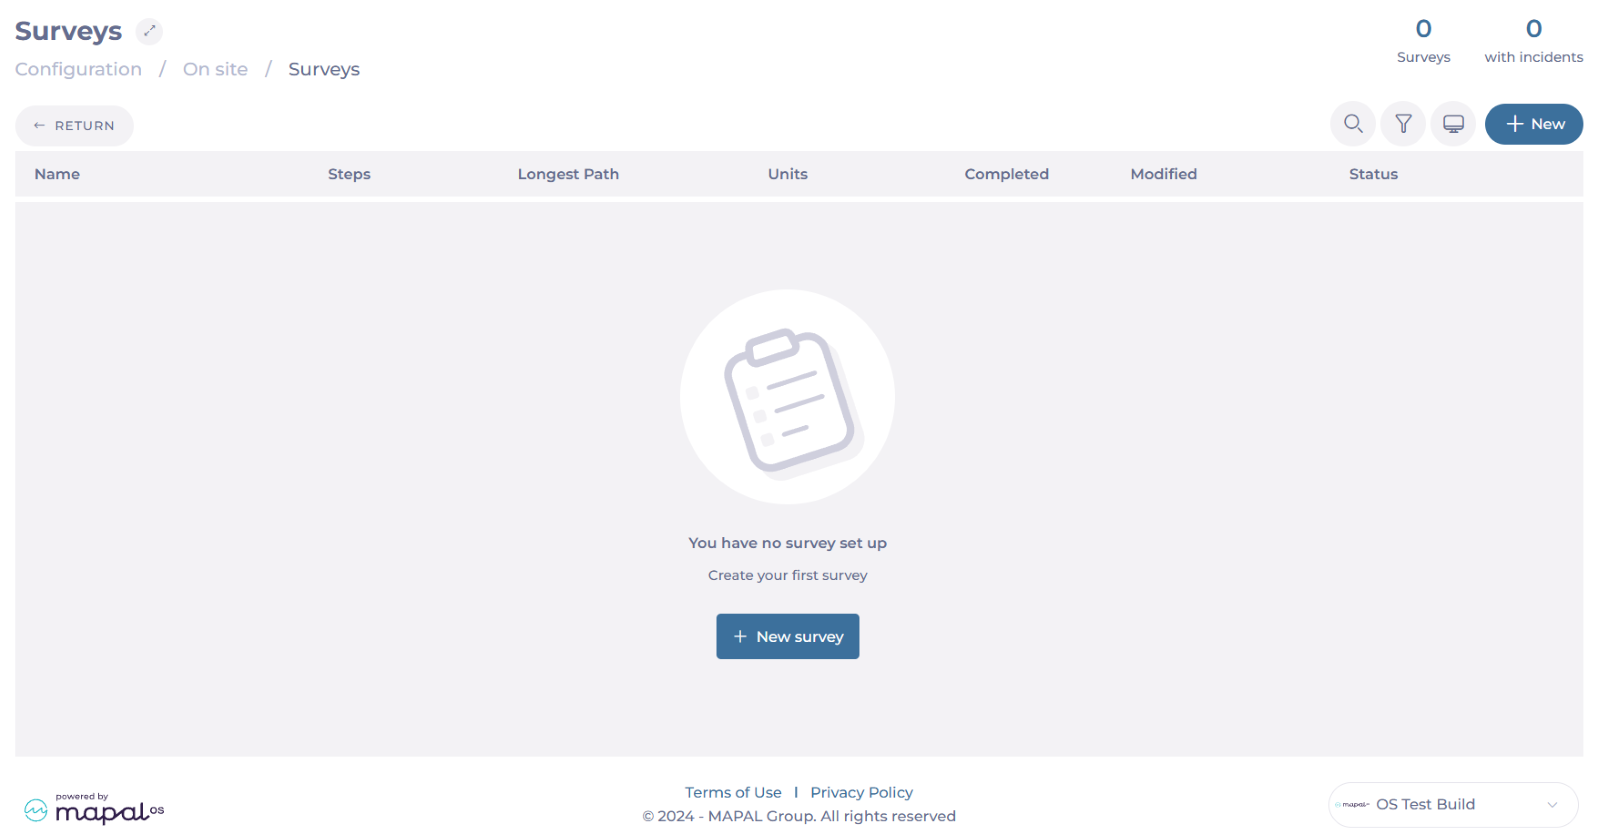
Step 4
The step 4 consists of the activation of the survey. No action is needed. You will be automatically redirected to the Surveys grid, where you will be able to see your new survey.
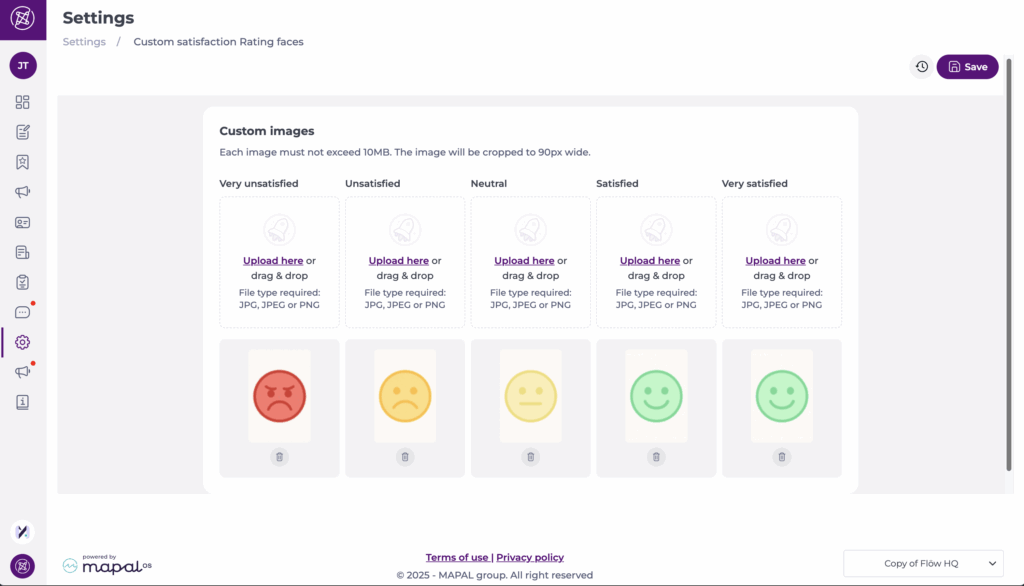
Custom satisfaction rating images
Level 0 Admins can configure custom satisfaction rating images that replace the default emoji icons when creating satisfaction rating questions in push surveys.
To set custom images:
- Navigate to Settings > Custom satisfaction Rating Images.
- Upload the images you want to use.
Notes: Each image must not exceed 10 MB. Images are automatically cropped to 90px wide.
Once uploaded, these images will apply automatically to all satisfaction rating questions in surveys.
Tip: Use consistent branded icons (e.g., stars, faces, company graphics) for a professional and recognisable customer experience.
Manage surveys in Reputation
Start from: The Reputation dashboard.
-
Select Configuration > On site from the main menu.
-
Select Surveys.
Create a survey
-
Select + New to create a survey.
-
Use the field Survey title to assign a name to your survey and select Accept to continue.

Add steps
Reputation allows users to create surveys tailored to gather specific feedback from customers. Surveys can be customized with various types of questions and formats to meet different business needs, such as Rating, NPS, Simple Option, Picture, or Personalized message.
To add steps to your survey:
-
Select the Logic tab at the top of the survey screen.
-
Select + Add from template.
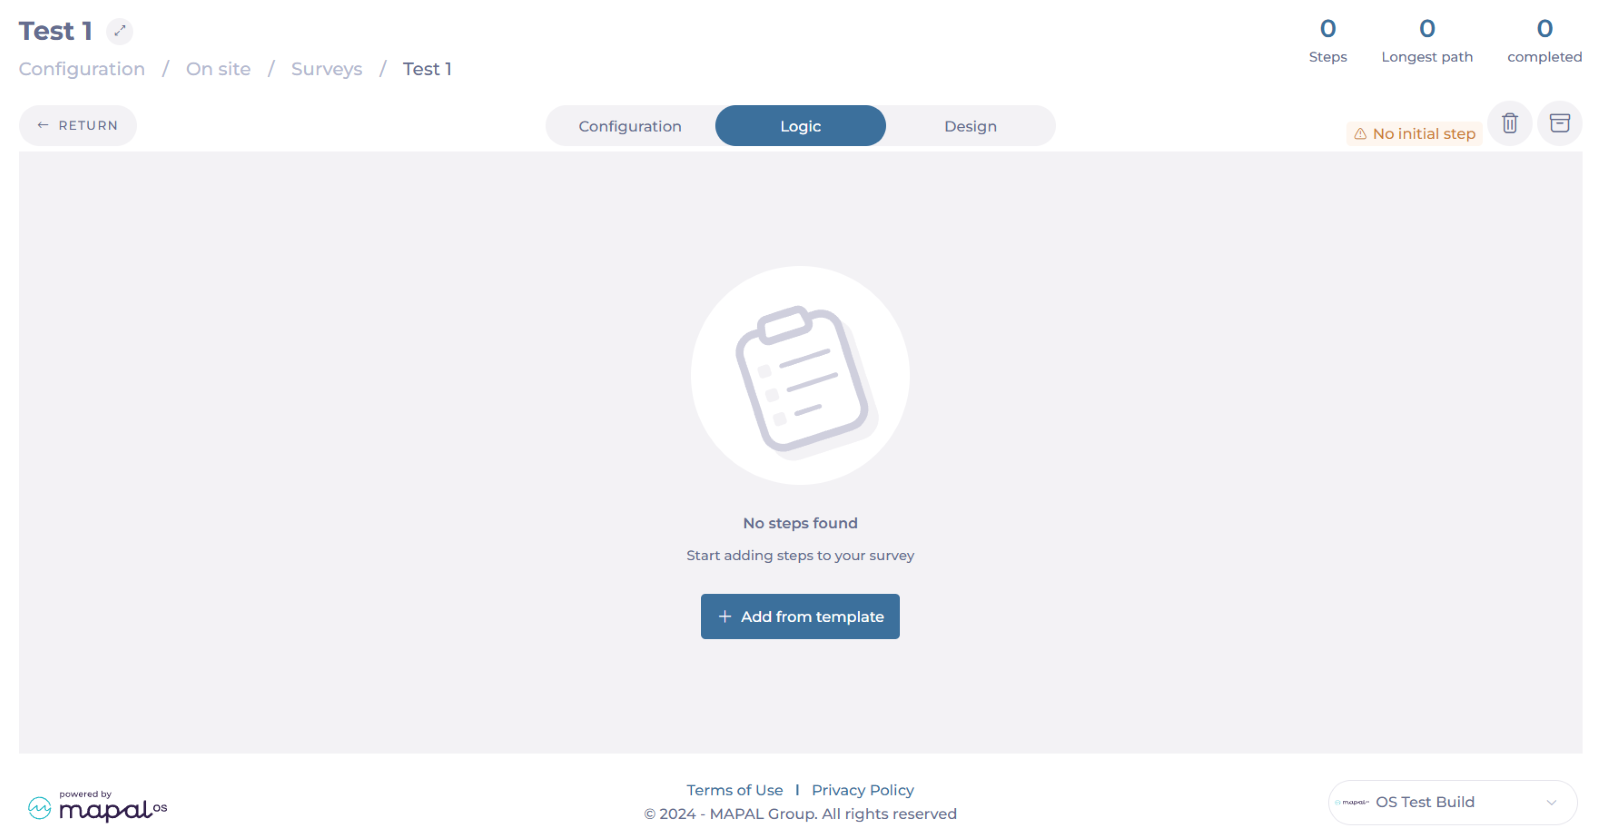
-
In the sidebar, select the step you want to add. You can use the Filter or the Search bar to easily find the step you are looking for.
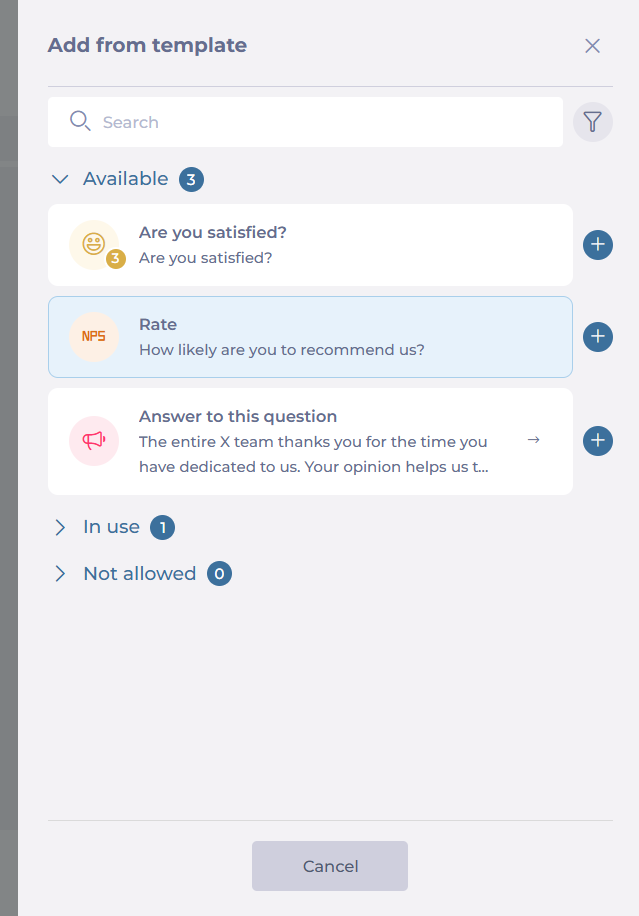
Notes: Steps should be configured before creating the survey. During survey creation, you can only select existing steps.
To learn more about how to set up steps, see Manage steps in Reputation.
Set up Logic
Advanced logic features in Reputation enable conditional branching within surveys. This means users can design surveys that adapt based on previous answers, ensuring more relevant and accurate responses.
To set up the logic:
-
Select the step you have just created. A sidebar will appear.
-
In Logic, you can set up simple or combinate rules for each step.

-
In Step details, you can add a weight to the step and see a preview.
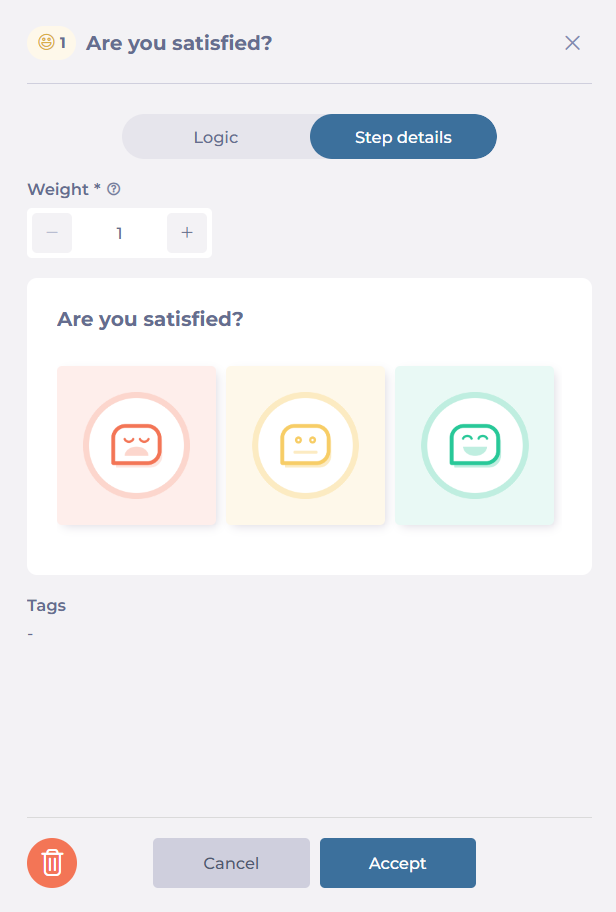
Notes: The weight is independent per survey (numerical value between 1 and infinity). The default weight is 1 and does not allow negatives. This weight value affects the final value of the step in the survey.
Set a Design
The design interface provides tools to craft visually appealing and user-friendly surveys. Users can incorporate branding elements and adjust layouts to match their business requirements.
To adjust a survey’s design:
-
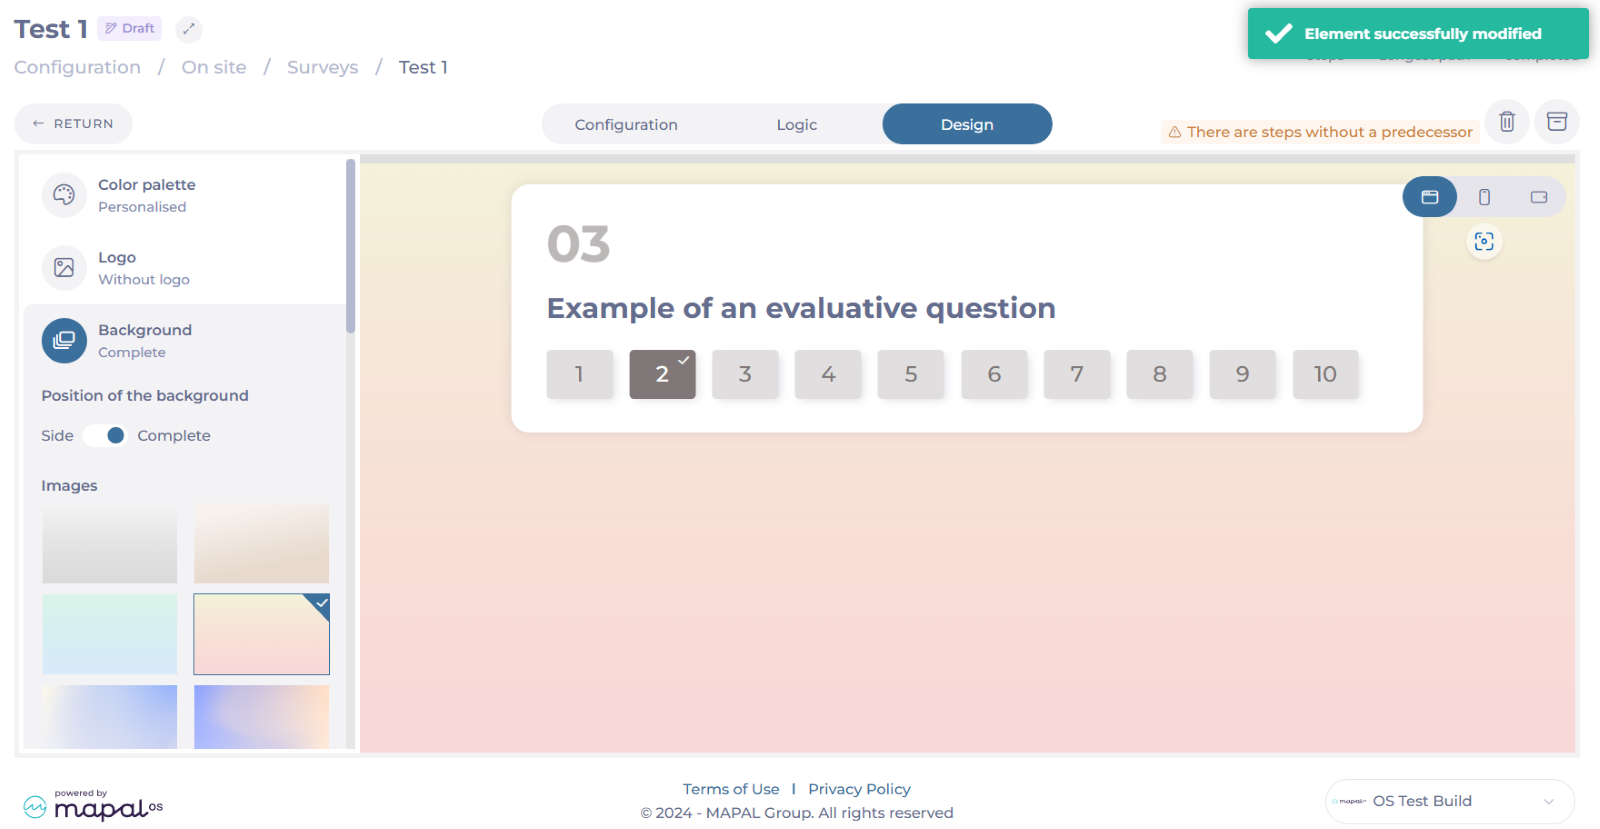
Select the Design tab.

-
Select a Color palette. You can choose from the existing palettes or create a personalized one.

-
You can upload a Logo to your survey. The supported files are .JPG and .PNG, up to 5 MB.

-
Select a Background for your survey. You have several options on the platform, and you can choose to show the background on full screen or just one side.
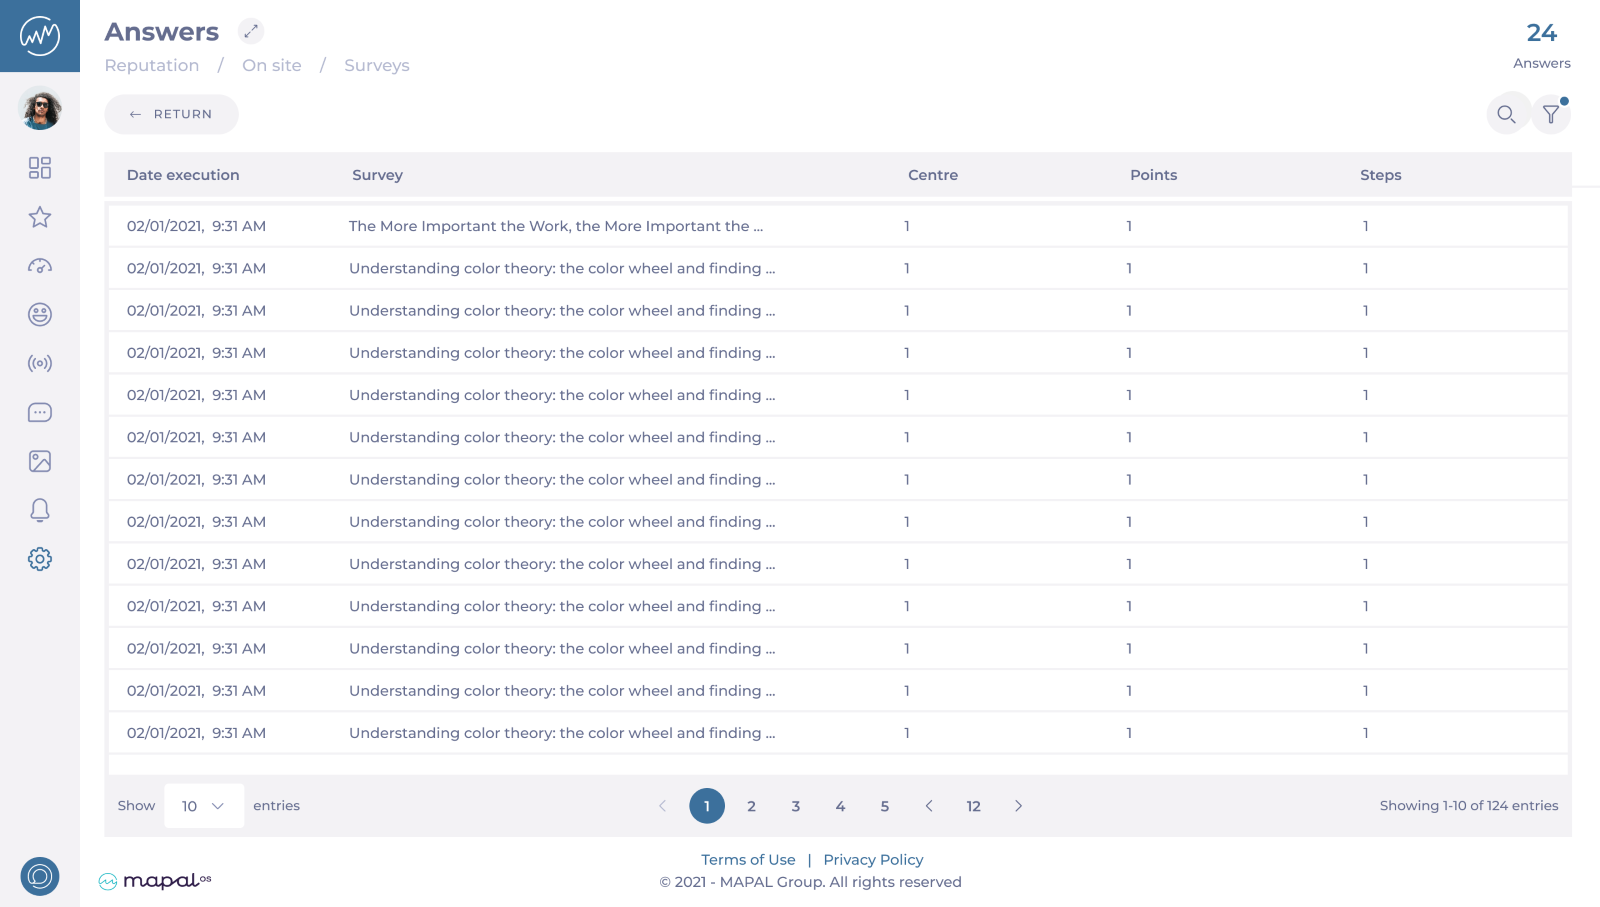
See Answers (view survey results)
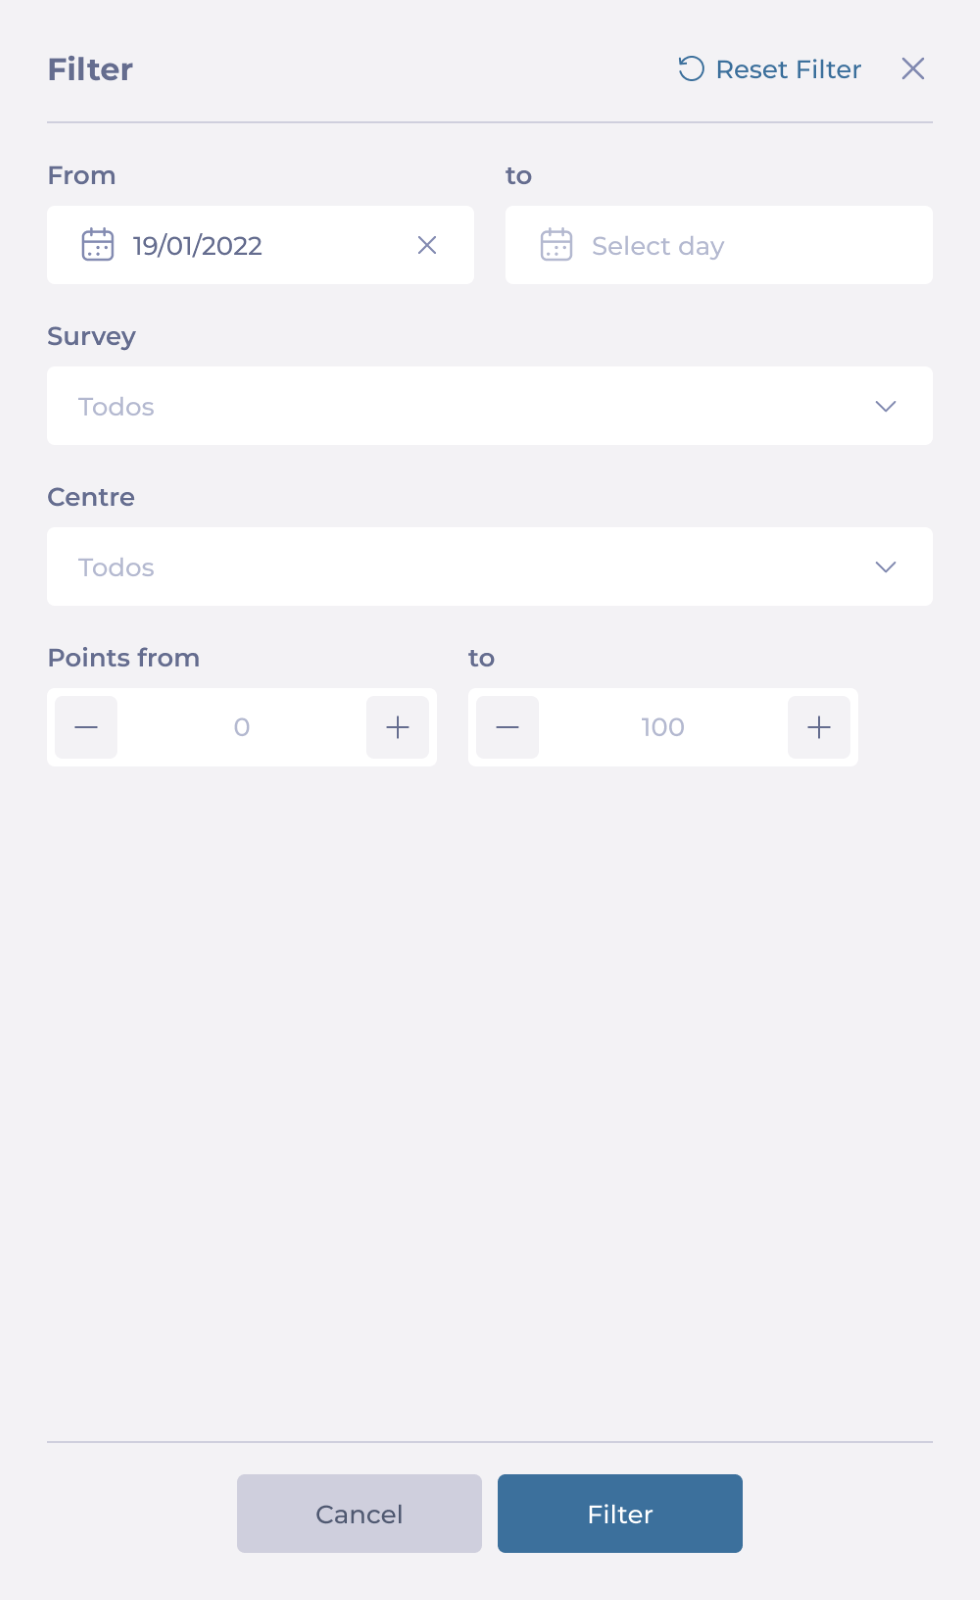
Once the survey is created and published, you can track the answers by accessing the Logs. This grid provides a detailed, organised overview of all responses, enabling you to easily track and assess feedback. You can apply Filters to view responses based on specific criteria such as date range, question type, centers, scores, and more.

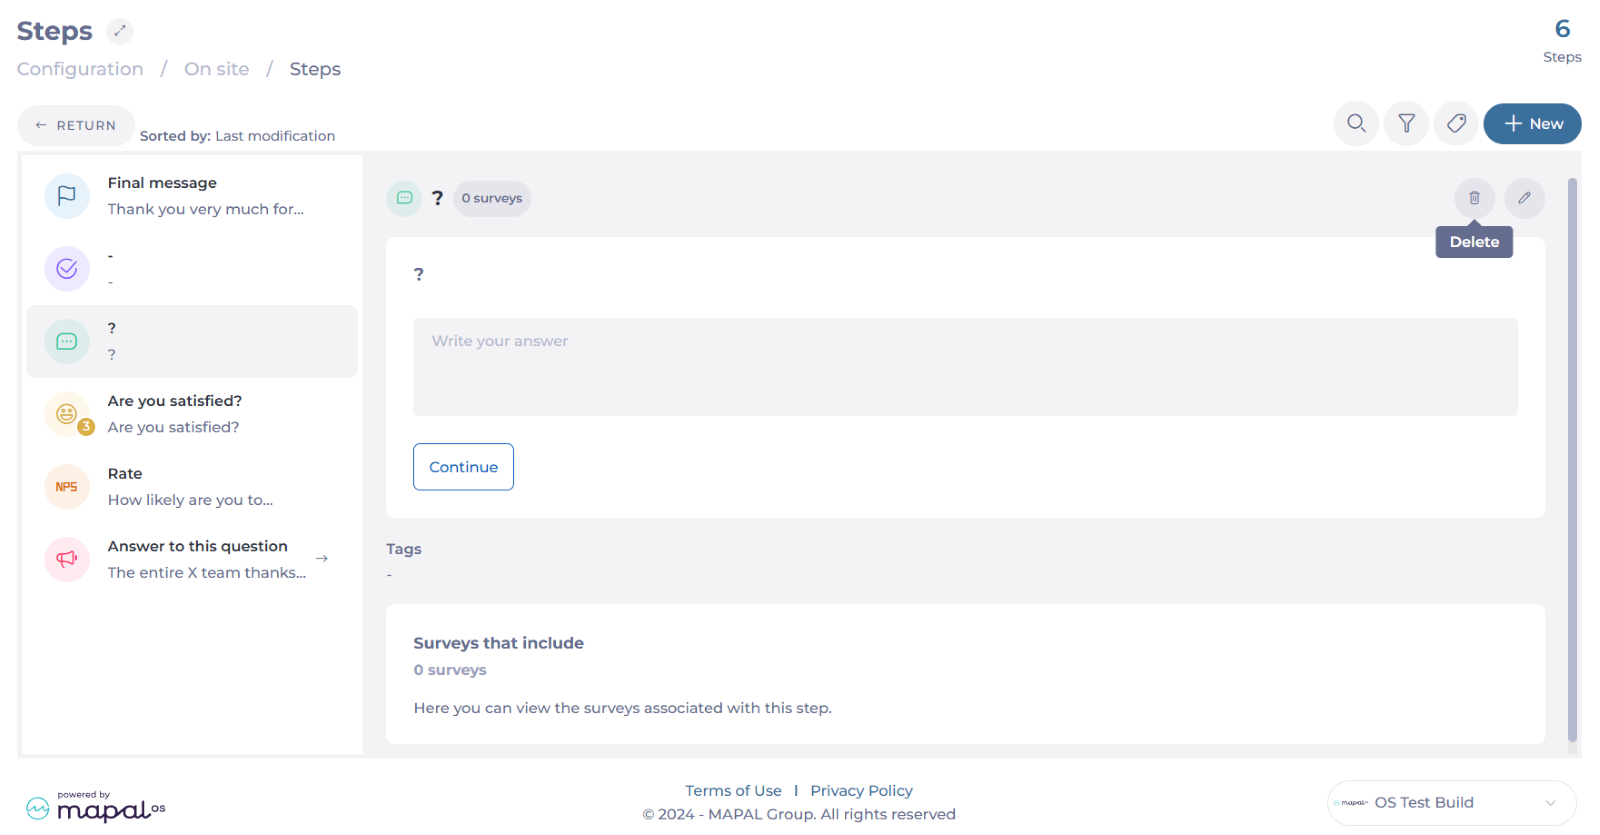
Manage steps in Reputation
Start from: The Reputation dashboard.
-
Select Configuration > On site from the main menu.

-
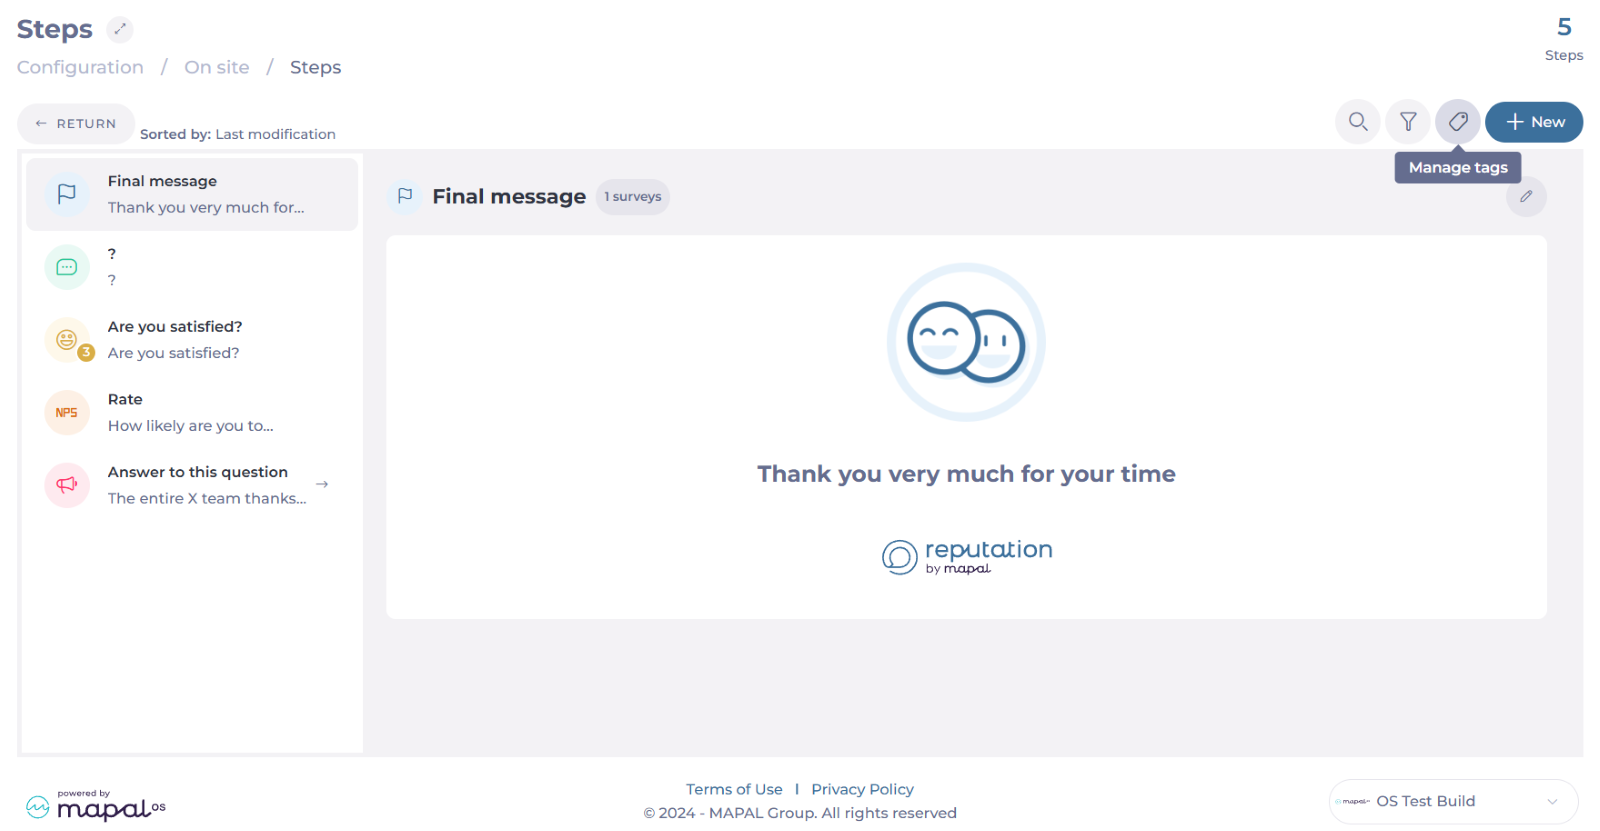
Select Steps.
-
In the Steps screen, you will be able to see all the previously created steps and their details. Here, you can also:
-
Create new steps
-
Manage tags
-
Edit steps
-
Delete steps
-
Create new steps
-
Select + New.

-
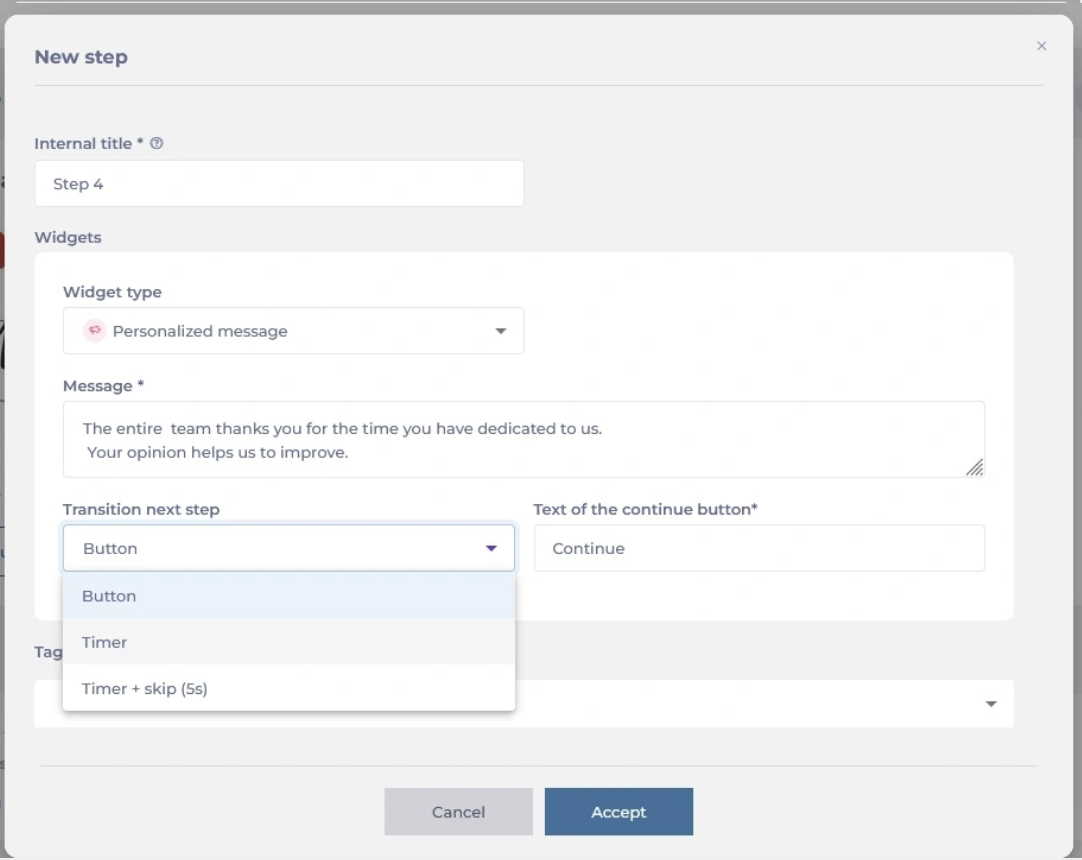
Assign an Internal title. This will only be visible on the platform, not to clients in the survey execution.
-
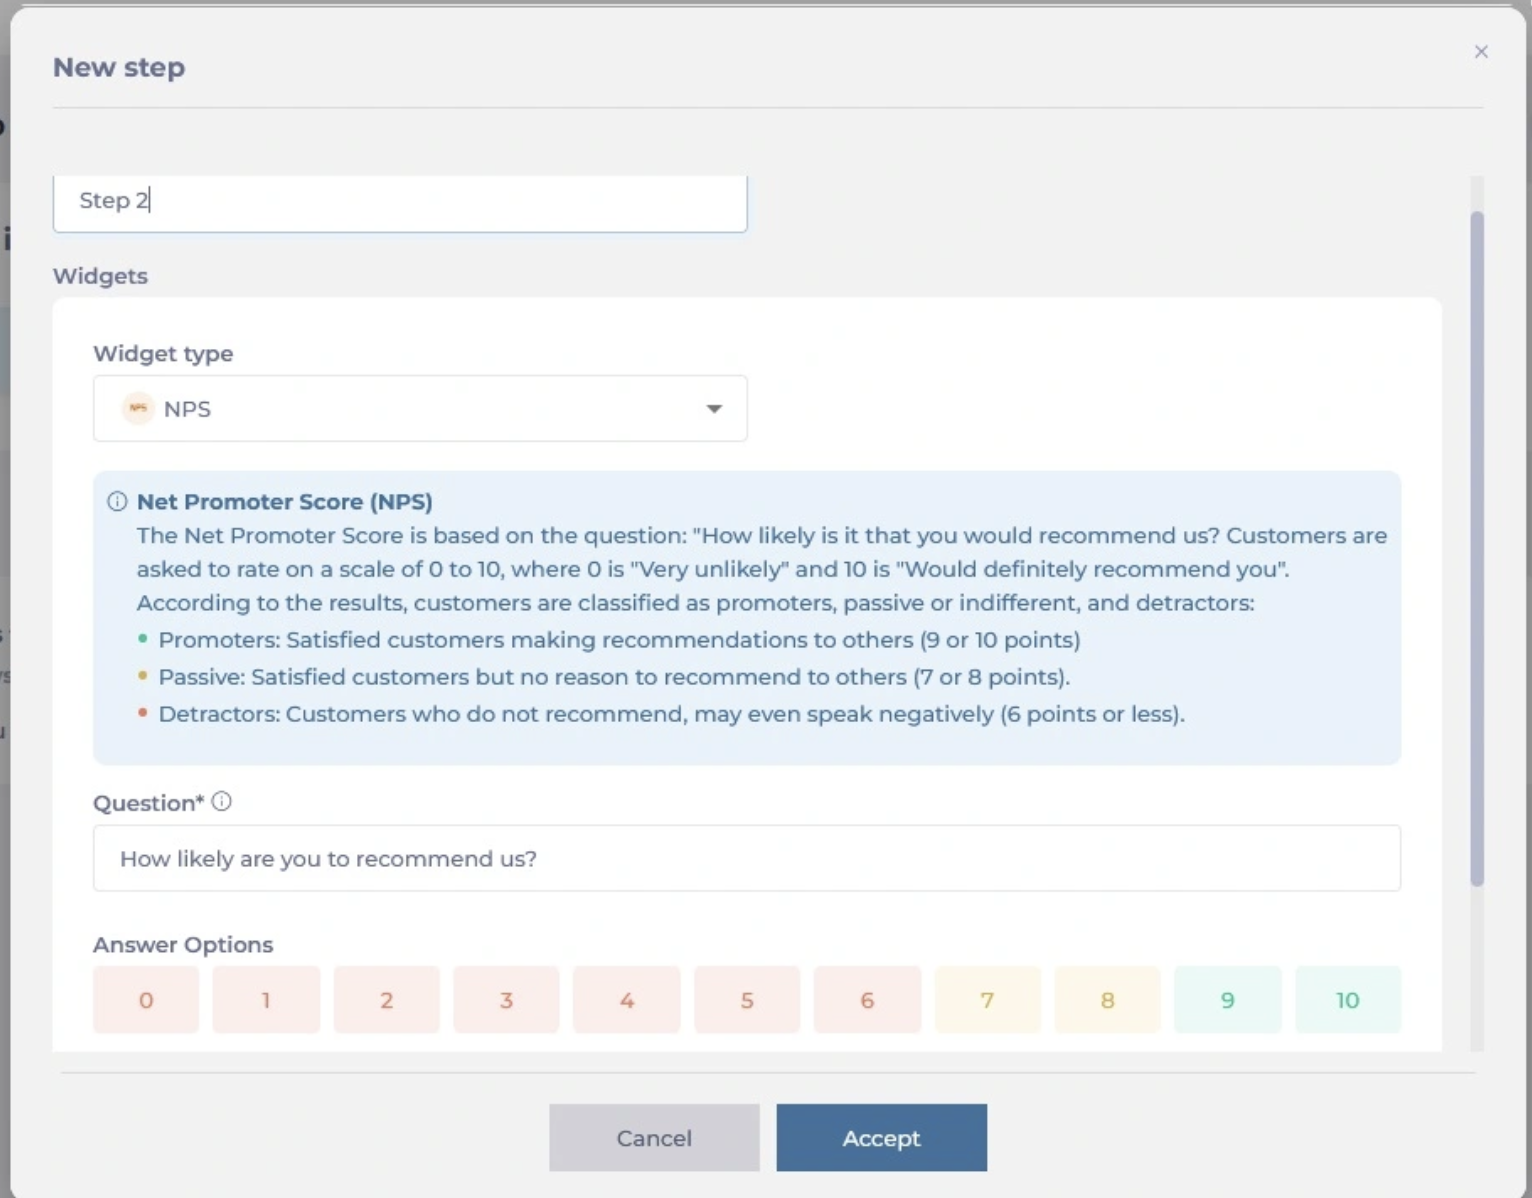
Use the Widget type dropdown to select a question type. Question types can be:
-
Rating: Collect scores using smiley faces or numeric values. Configurable with either 3 or 5 smiley faces, or numeric scales ranging from 0 to 10.
-

-
NPS (Net promote Score): Measure customer loyalty by capturing NPS results. This step can be included only once per survey to maintain metric integrity.
-
Simple Option: Allow respondents to choose from multiple options and create branching paths based on their selection. Options can be enhanced with images.

-
Picture: Include images in the survey, with options to add headers and footers for additional context.

-
Personalized message: Display custom messages based on the text input.
-
Select what will be the Transition to the next step. Transitions define how respondents move from one step to the next, and they can be:
-
Button: Adds a button for moving to the next step. You can customize the text of the button.
-
Timer: Automatically advances after a specified time, with options for immediate or delayed transition.
-
Timer + Skip: Includes a timer and a "Skip" button that appears after a set time, allowing respondents to move to the next step faster if needed.
-
-
Once you complete this setup, select Accept to save the new step.
Manage tags
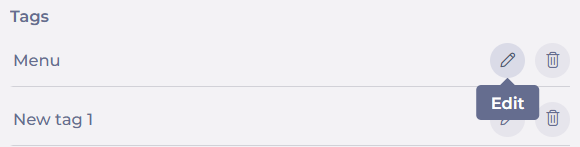
You can attach tags to steps for categorization and filtering. This is particularly useful for grouping steps by category, such as “menu” or “service.”
To configure tags:
-
Select Manage tags. This will open a sidebar.
-
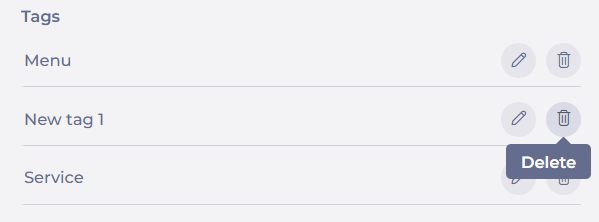
Write the name of your new tag in the text field and press +.

-
Select Edit to rename your tags.
-
Select Delete to remove your tags.
Edit steps
-
Select the specific step you want to edit.
-
Select the Edit button.

-
Make the required changes. You can change the internal title, the question type, the question, and the tags.
Notes: If you selected the Button transition, you can change the text of the button; however, you can't change the transition originally assigned to the step. If you need to change the transition, delete the step and create a new one.
-
Select Accept to save your changes OR Cancel to discard them.
Delete steps
-
Select the specific step you want to remove.
-
Select the Delete button.
-
A confirmation message will appear. Select Accept to confirm deletion OR Cancel to go back.

Take surveys about your company
Start from: The Mapal One dashboard.
-
Select Company > Surveys from the main menu.
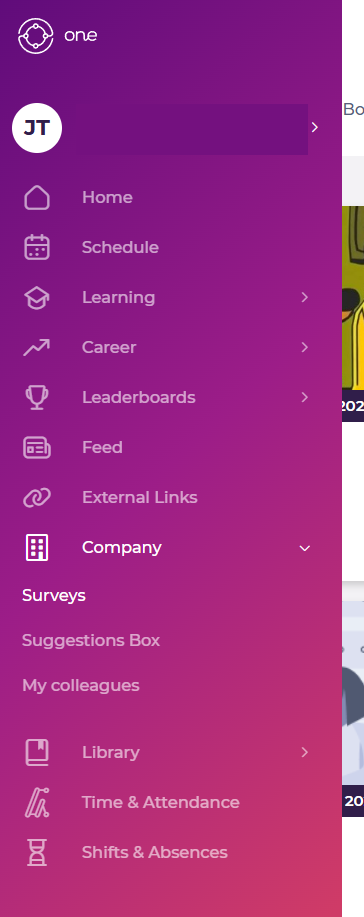
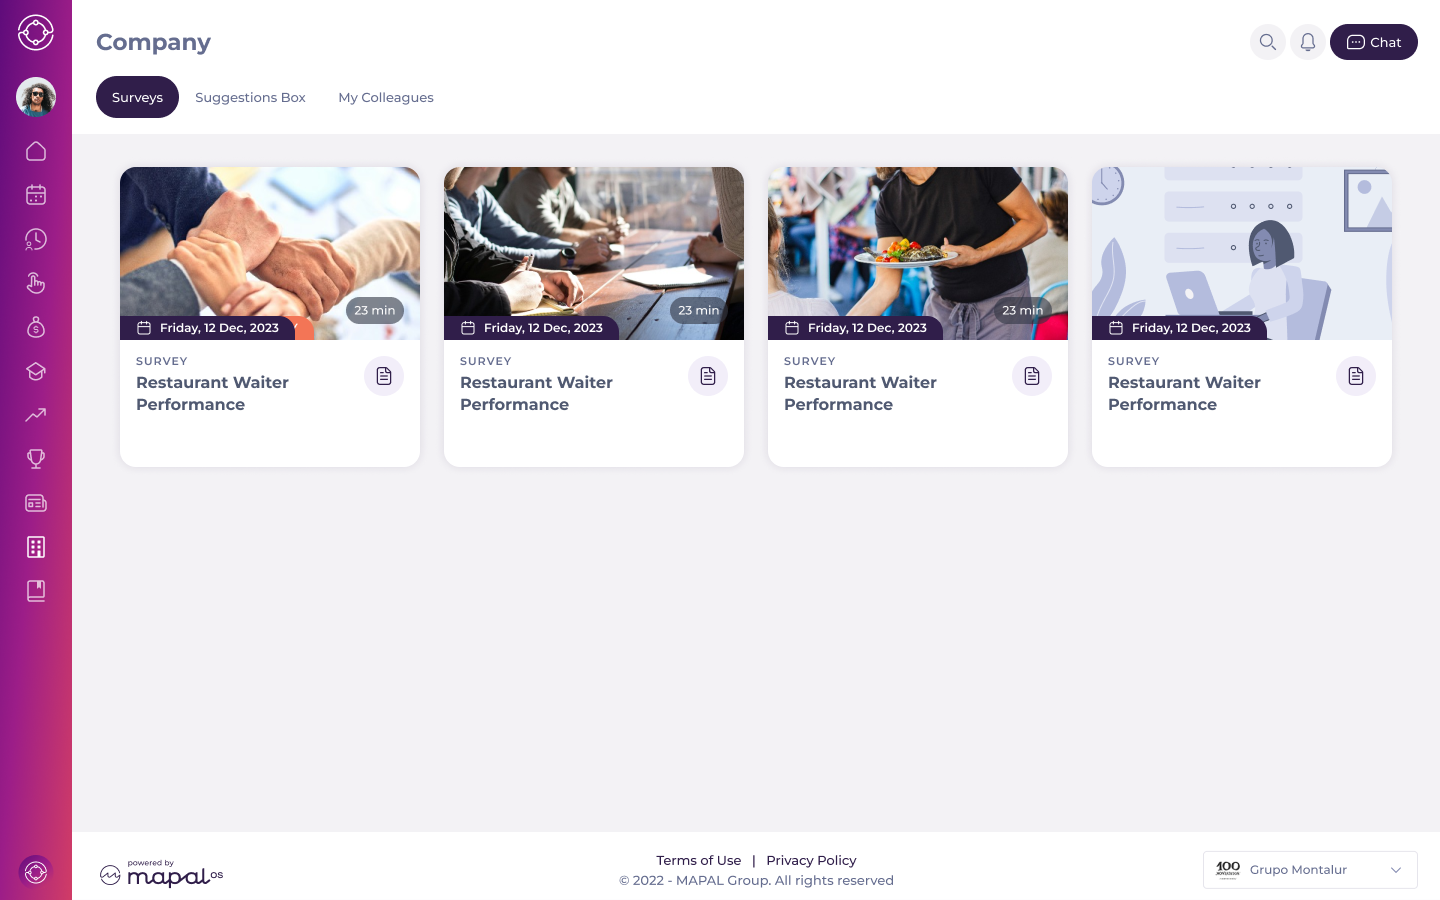
You will see a screen with all the available surveys for you.
-
Select a specific tile to access a survey.
-
Complete the survey by responding to a mix of questions.
Notes: Surveys can have different question types such as NPS, face ratings, multiple select, single select, and open text questions. Also, there could be different including eNPS (employee Net Promoter Score), social surveys, and feedback forms.
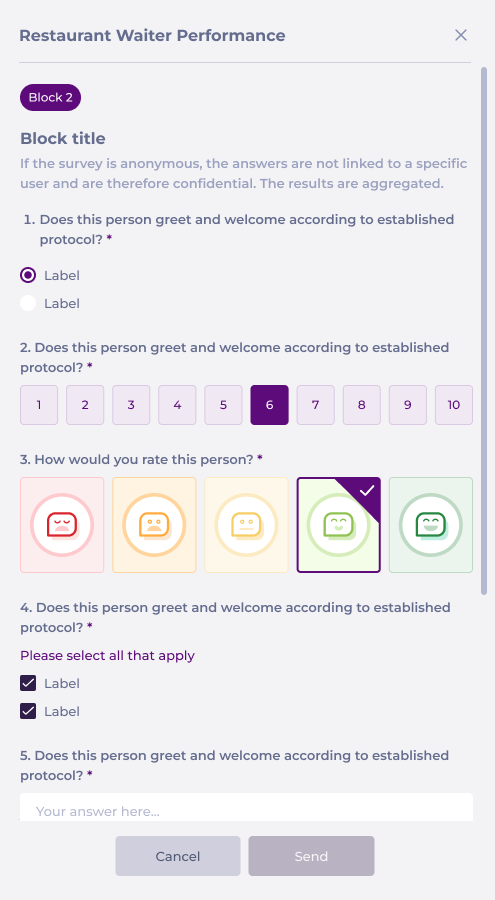
-
Once all questions are answered, select Send to submit your feedback so it can be recorded and analyzed.