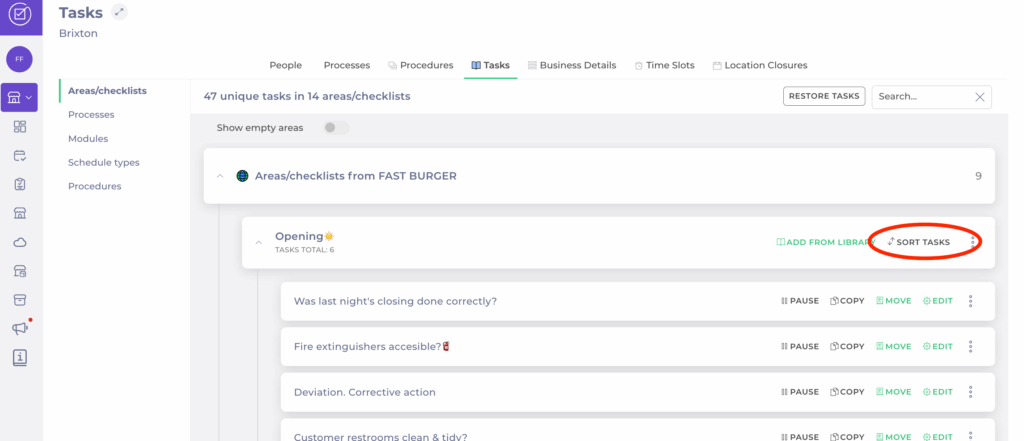
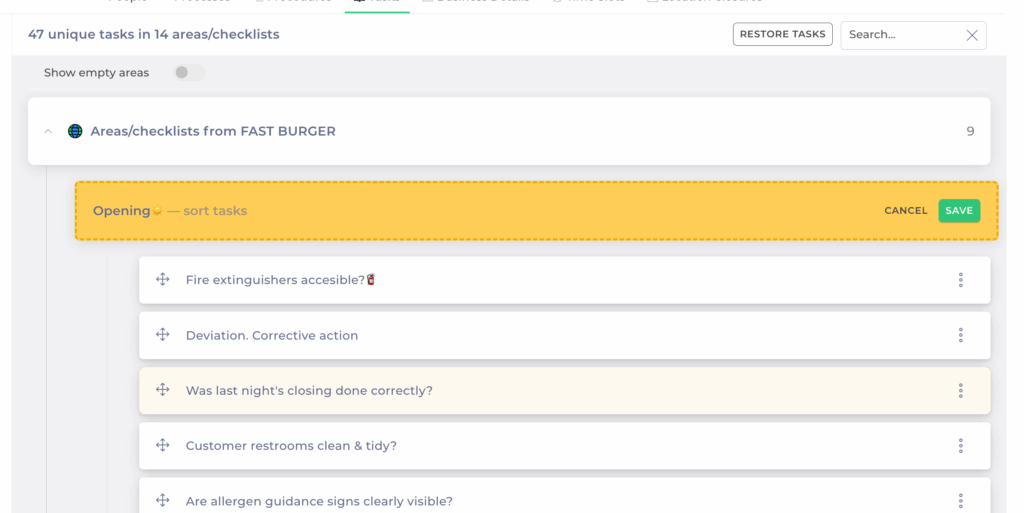
In the task list, drag and drop to change the order of tasks.
Once you have reordered, select Save to register the changes.
Notes: Changes take effect immediately for your site. Central templates remain unchanged.
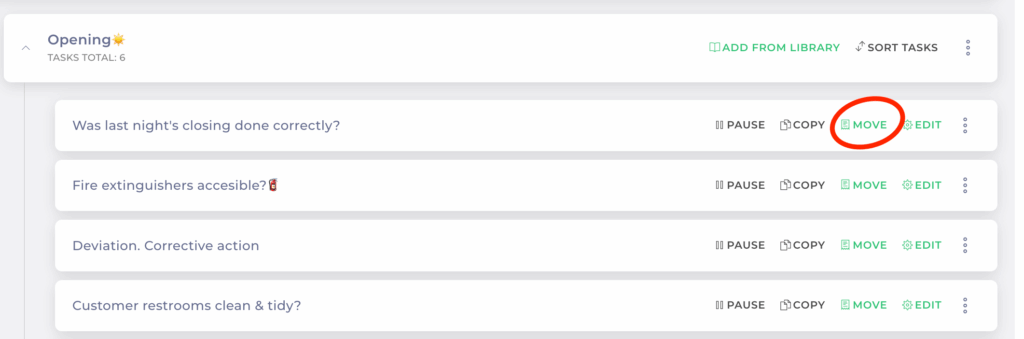
Move tasks between checklists
You can also move tasks between checklists at the local level:
Locate the task you want to move.
Use the Move option.
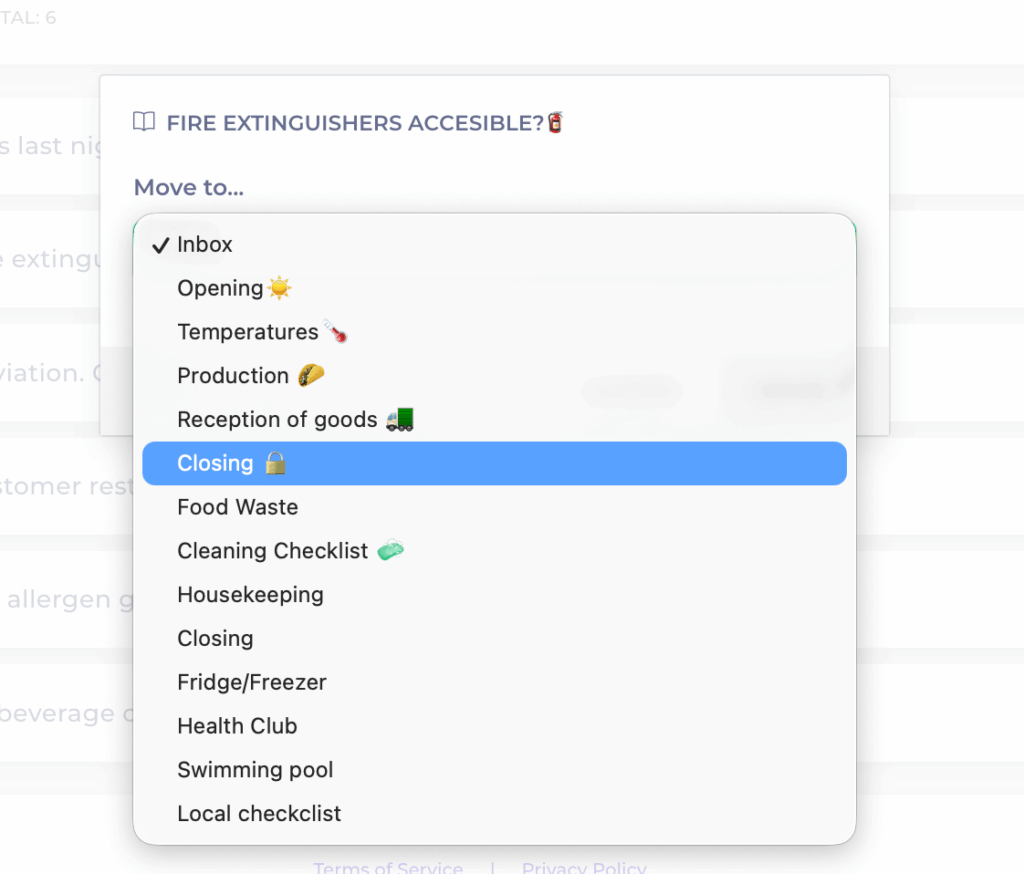
Choose the destination checklist from the dropdown.
Select Move.
Manage time slots at a local level
Start from: The Compliance local overview.
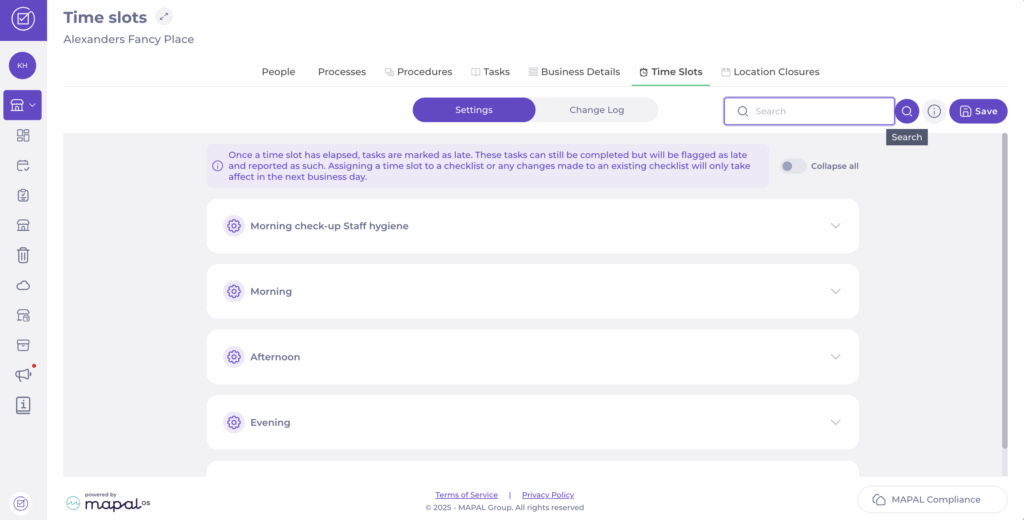
What are time slots?
Time slots define specific periods during the day (for example, Morning, Afternoon, Evening) and determine when checklist tasks should be completed.
While tasks can still be answered at any time, those completed after their assigned time slot will be marked as late. Only tasks completed within their designated time slot are counted as Answered in time in the central overview tile.
Adjust time slots
Navigate to My Location > Time slots.
Use the Search button to find a specific time slot from the list; for example, Evening.
Once you find the time slot, set the start (From) and end (To) time for it.
Select Save to register the changes.
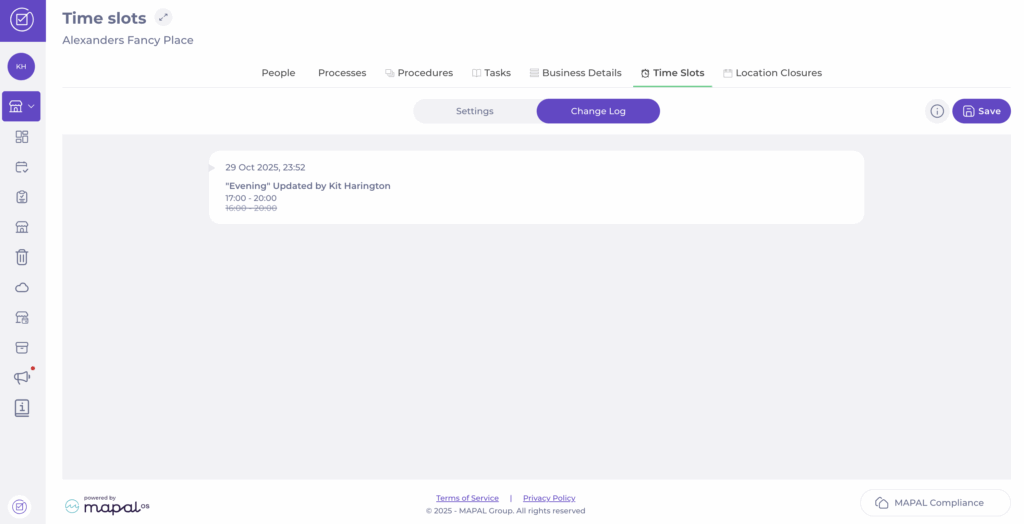
Track changes in time slots
Select the Change Log tab in the Time slots screen.
A list with all changes made to your time slots will appear. Here, you will be able to see:
Date and time the change was made.
Name of the time slot modified.
Name of the user who modified it.
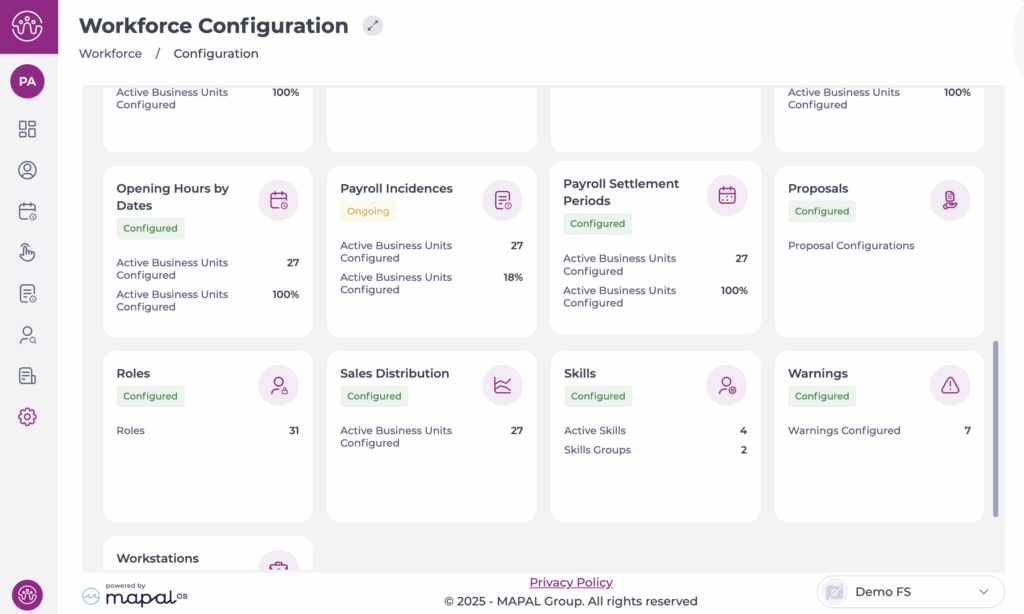
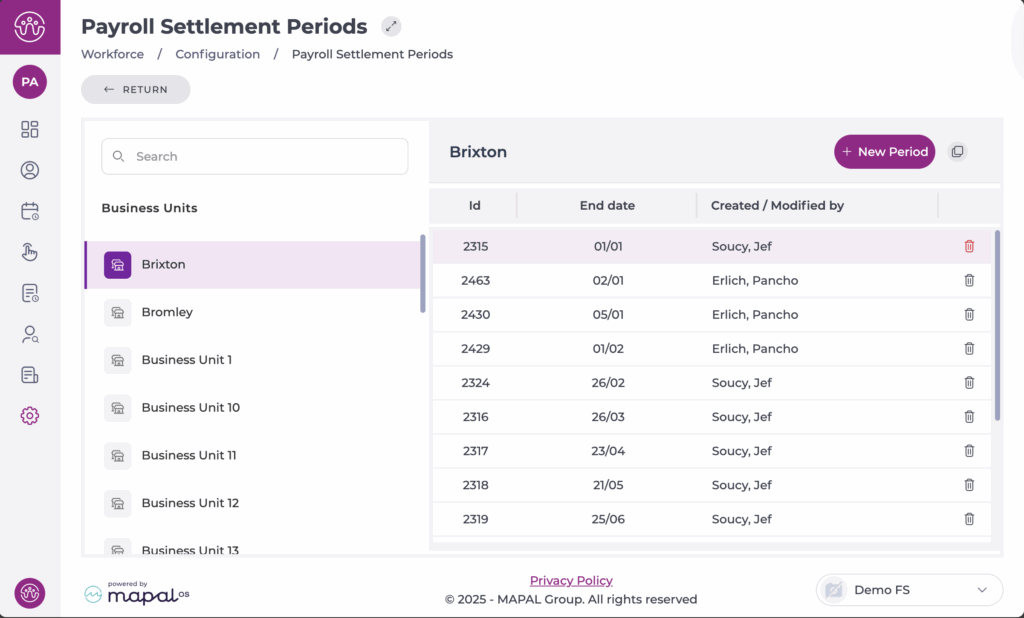
Manage Settlement Periods in GIR 3
Start from: The Workforce dashboard.
Navigate to Configuration > Payroll Settlement Periods.
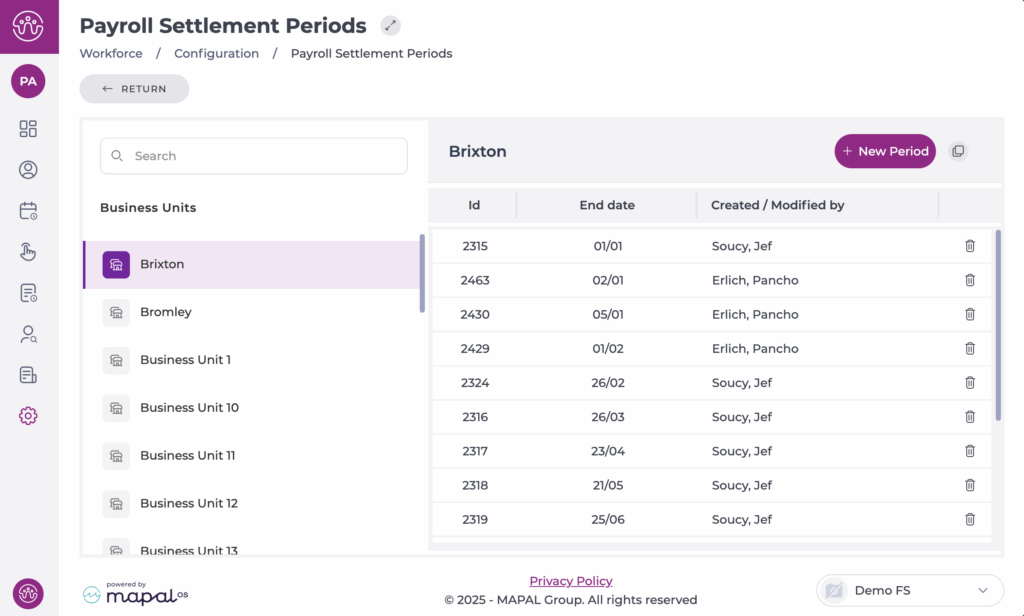
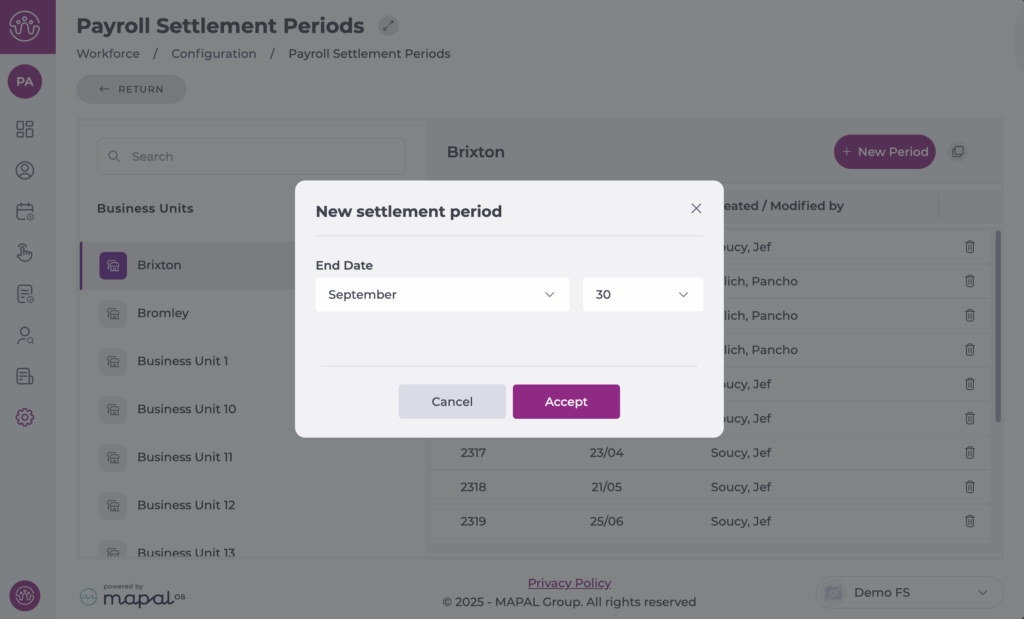
Create a new Payroll Settlement Period
Select the Business Unit from the list.
Select the + New Period button in the top-right corner of the table.
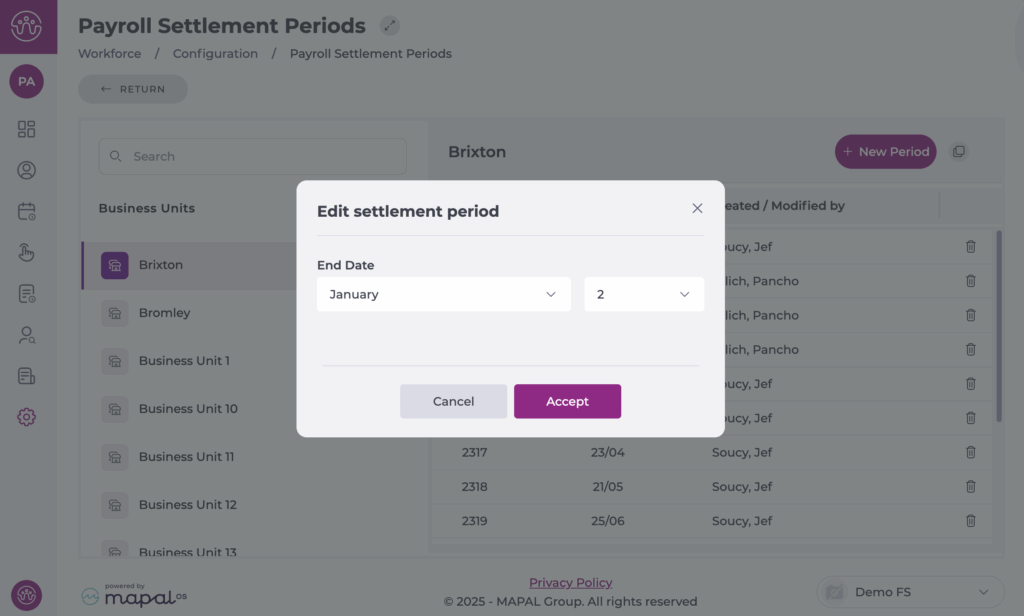
Define the end date of the new period (day and month).
Example: If the previous period ended on 09/02, creating a 7-day period means the next one will start automatically on 10/02.
Note: The start date is calculated automatically based on the previous period’s end date. Overlaps are not possible, the system only lets you create valid periods.
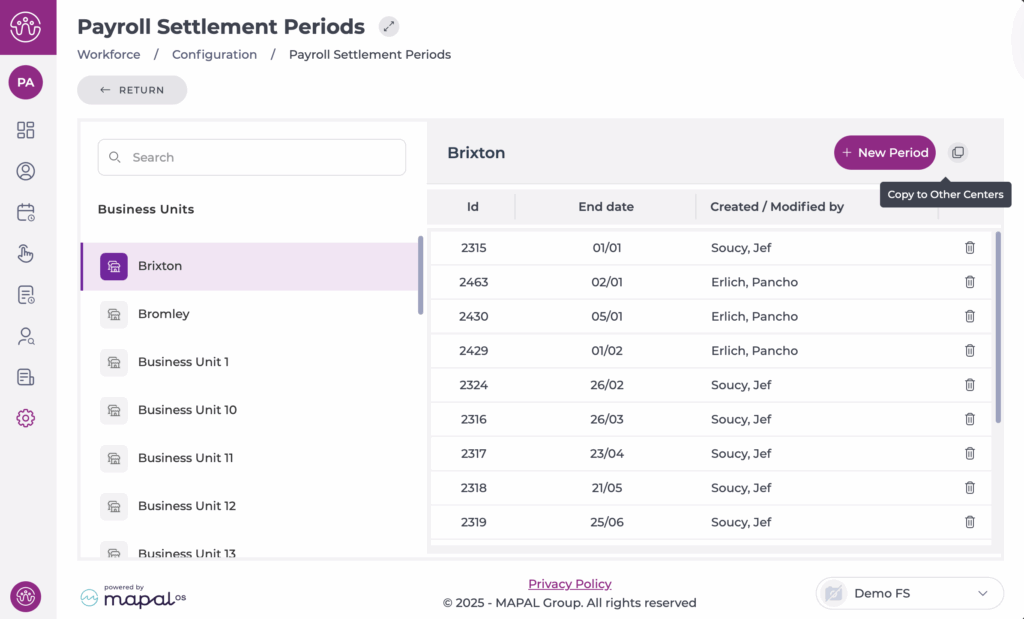
Copy Settlement Periods to other sites
You can copy settlement periods from one centre to others using the Copy button in the top-right corner of the table.
Select the origin Business Unit from the list.
Select Copy to Other Centers.
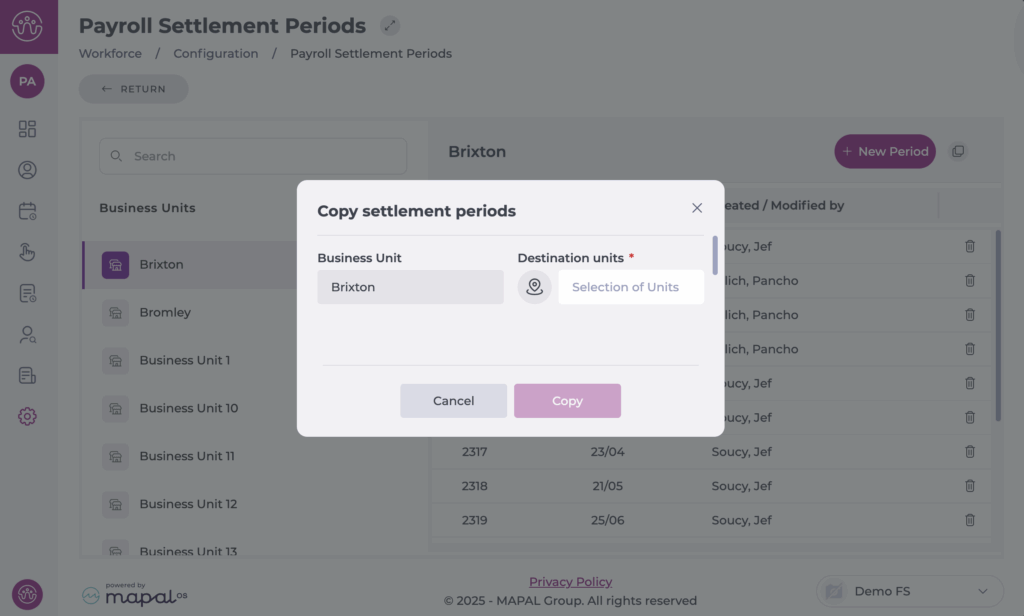
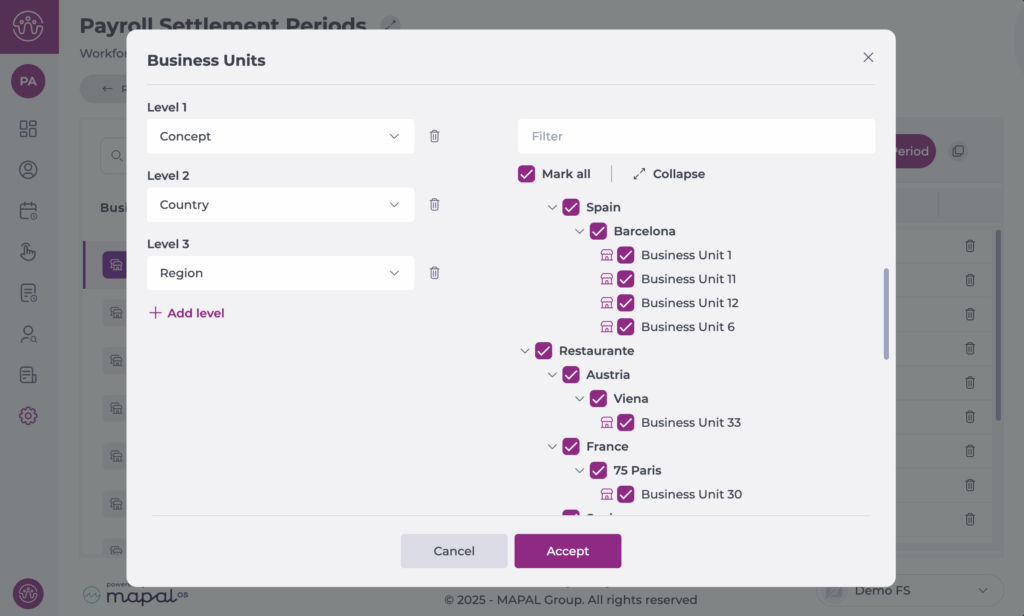
Choose the Destination Unit(s) and select Accept.
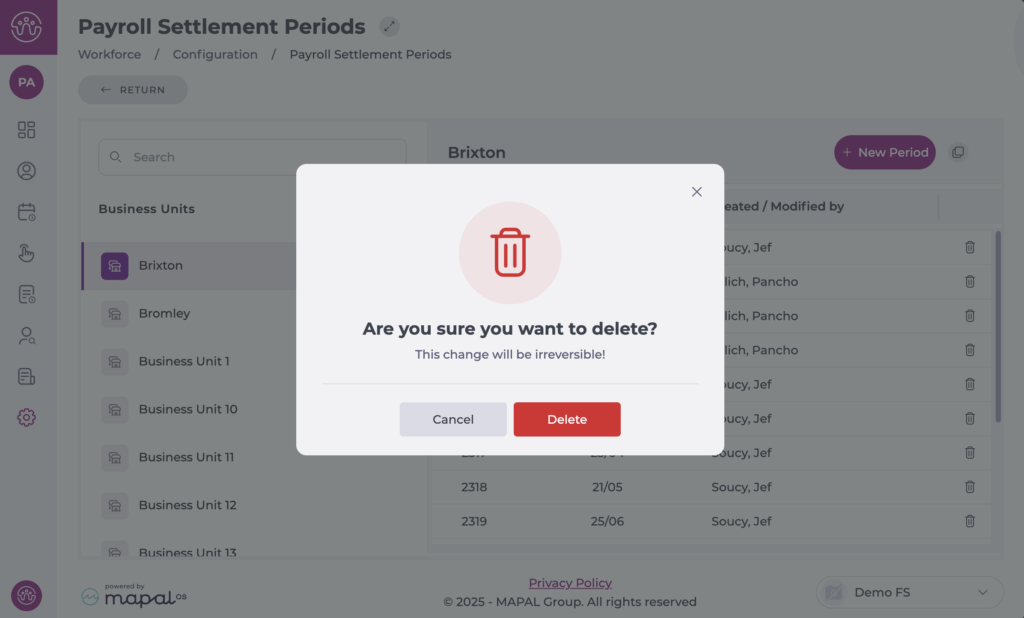
Once selected, press Copy. Once you confirm the copy, all existing periods at the destination centre are overwritten with the new ones.
Note: this action deletes all previously created settlement periods at the destination centre.
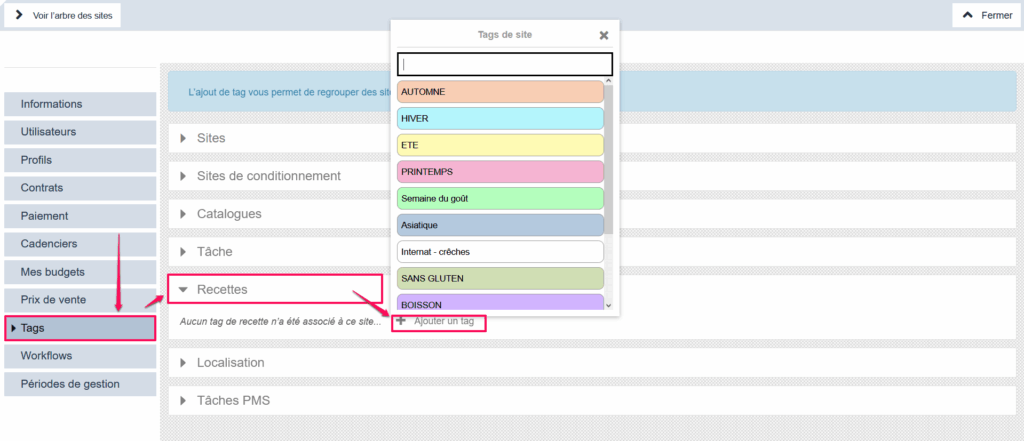
Use the "Recipes" tag to limit the visibility of certain recipes on certain sites. The tag allows you to filter the list of recipes and especially to set up catalogs to make available to sites bearing the same tag in their settings.
A site bearing the "SUMMER RECIPES" tag will only be able to see recipes from the parent site bearing this same tag. It will be able to see its local recipes in addition. This is therefore indeed a functionality allowing administrators to offer recipes adapted to this or that child site.
Tags of the "Recipes" type apply to recipe sheets from the RECIPES MANAGEMENT screen (RECIPES section) and site settings.
Define which tasks should be visible on which sites
Start from: The Easilys menu.
1. CREATE THE TAGS
Select the tabs Sites > Administration of tags.
Select Add a tag in the "PMS Task" section.
Create the tags you need.
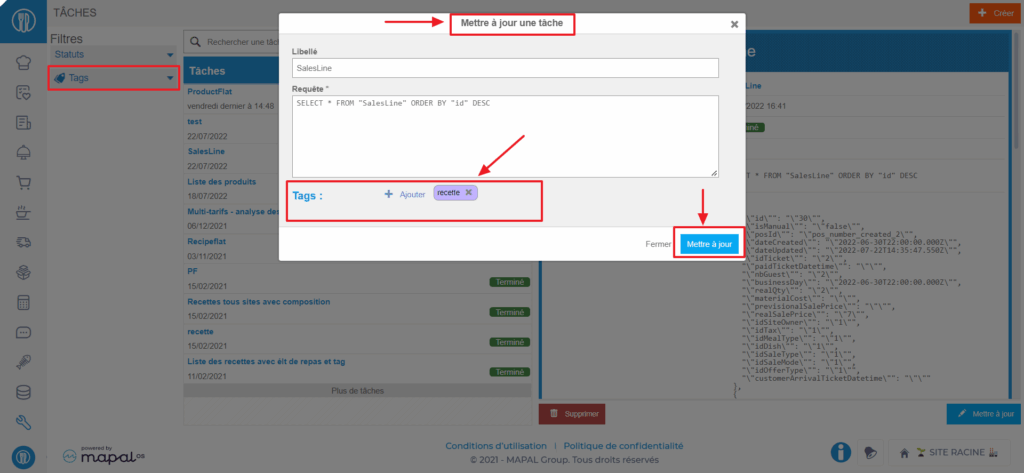
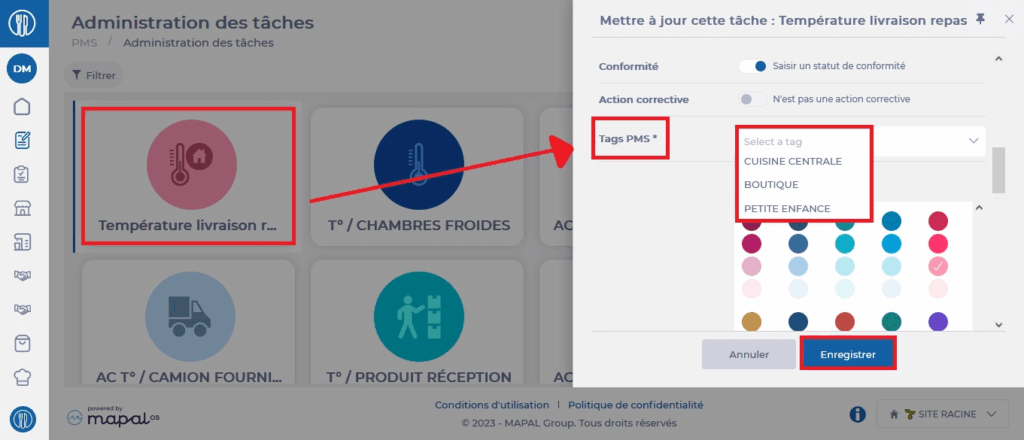
2. ADD THE TAGS TO TASKS
Go to the site where all tasks are administered.
Select the tabs PMS > Tasks administration.
Select a task. The task details are displayed on the right side of the screen.
Select Edit.
Add the tag(s) to the "PMS Tags" line.
Select Save.
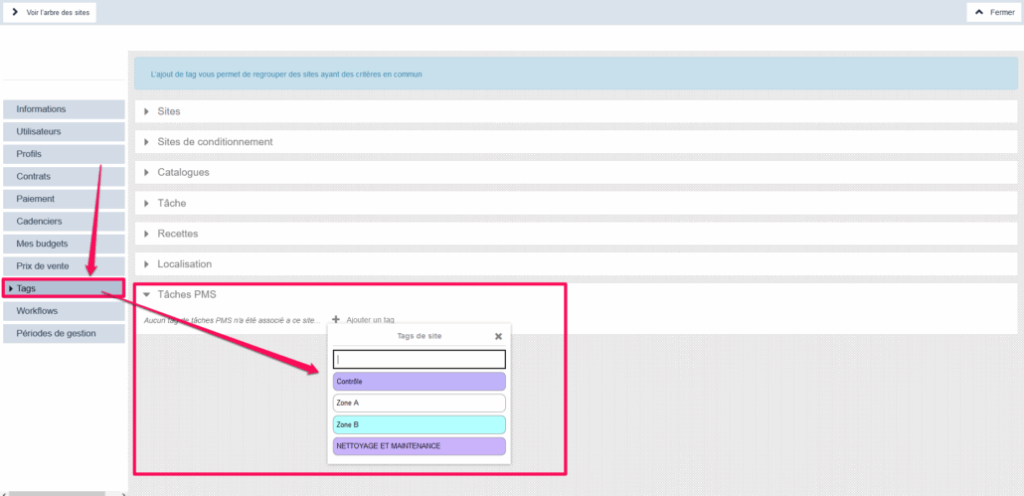
3. ADD THE TAGS ON THE SITES
Go to the site settings on which you want to add a "PMS Task" tag.
Select the "Tags" tab.
Add the "PMS Task" tag(s) that the site needs to see the PMS tasks that concern it.
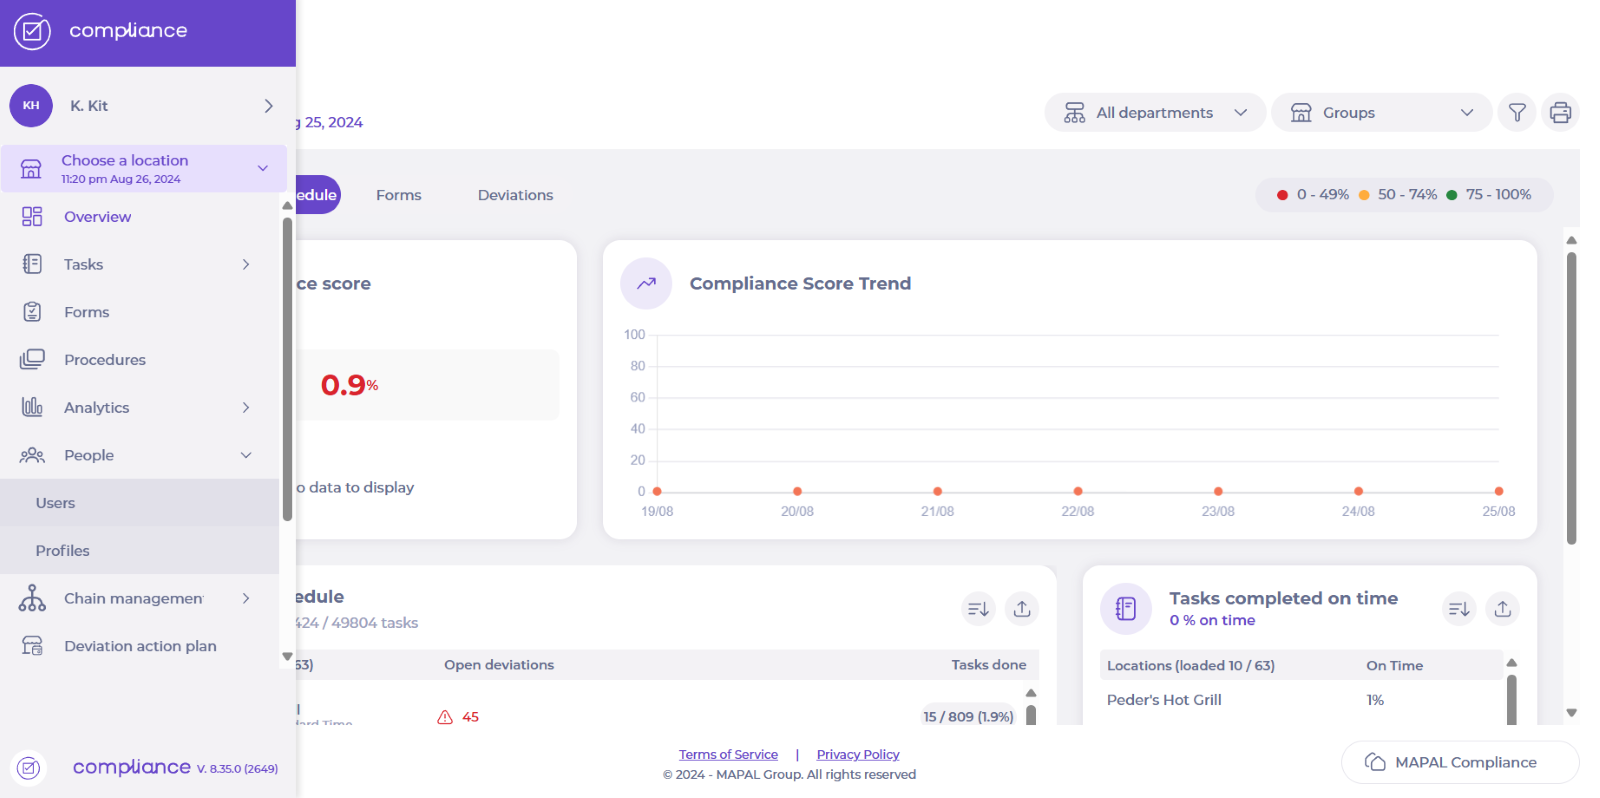
Export locations to Excel
Start from: The Compliance overview.
Navigate to Chain management > Locations.
Here, you can use the Filters to find the specific locations you want to export. The available filters are:
Status
Groups
Category
Search
Notes: You can use the Reset filters button to start over the search.
Select the XLSX icon at the top right corner of the page.
After loading for a few seconds, the icon will change to the word "Download". Select Download to get the file.
You will now have an XLSX file with the details of all the filtered locations:
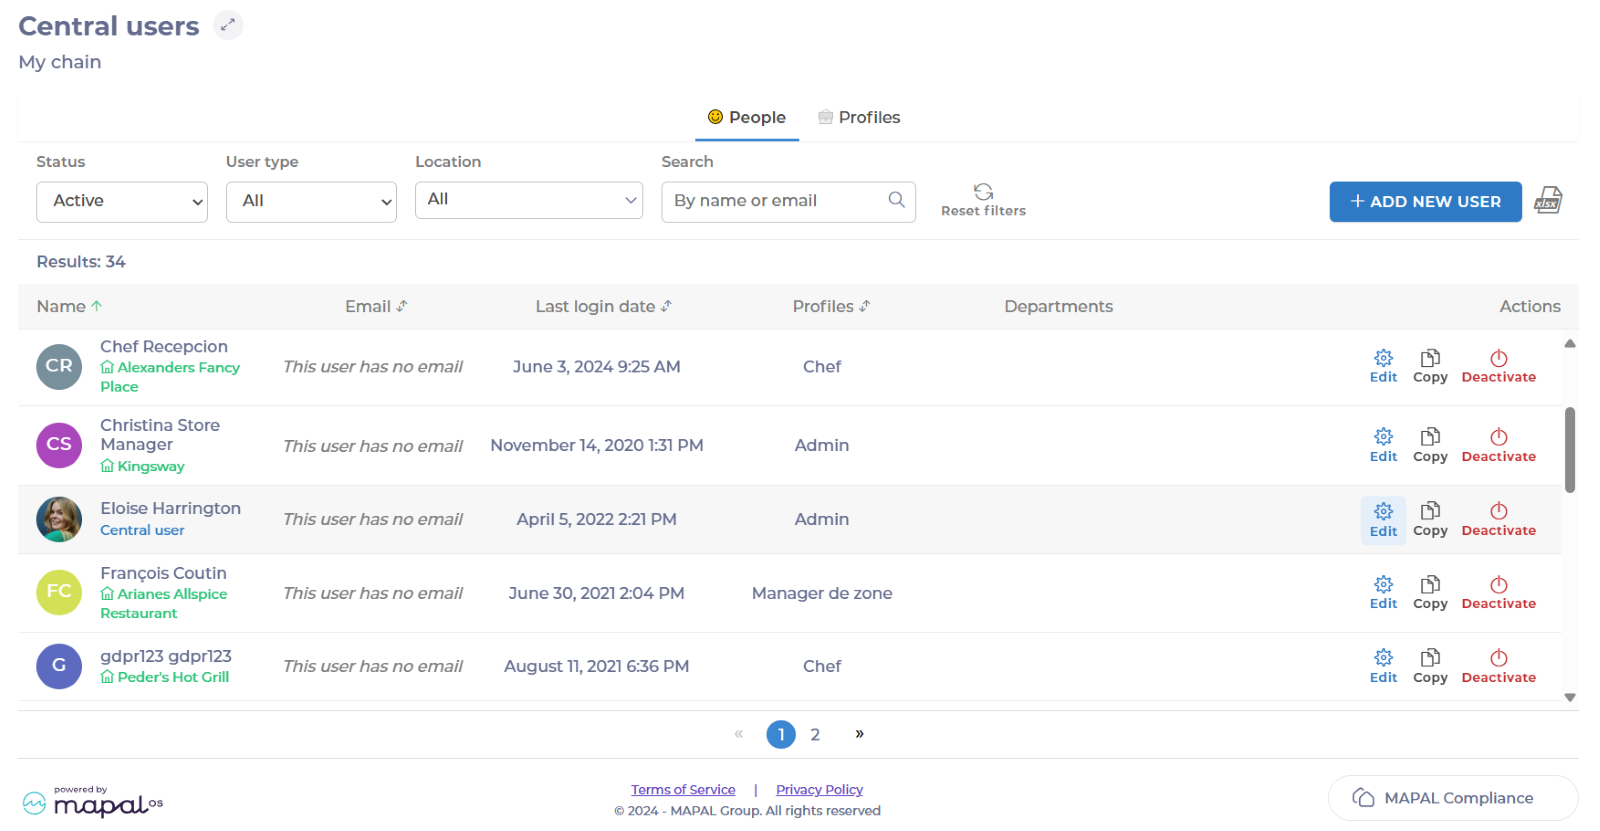
Add a business group to a user
Start from: The Compliance dashboard.
Select People > Users from the main menu.
Find the central user you want to add groups to and select Edit.
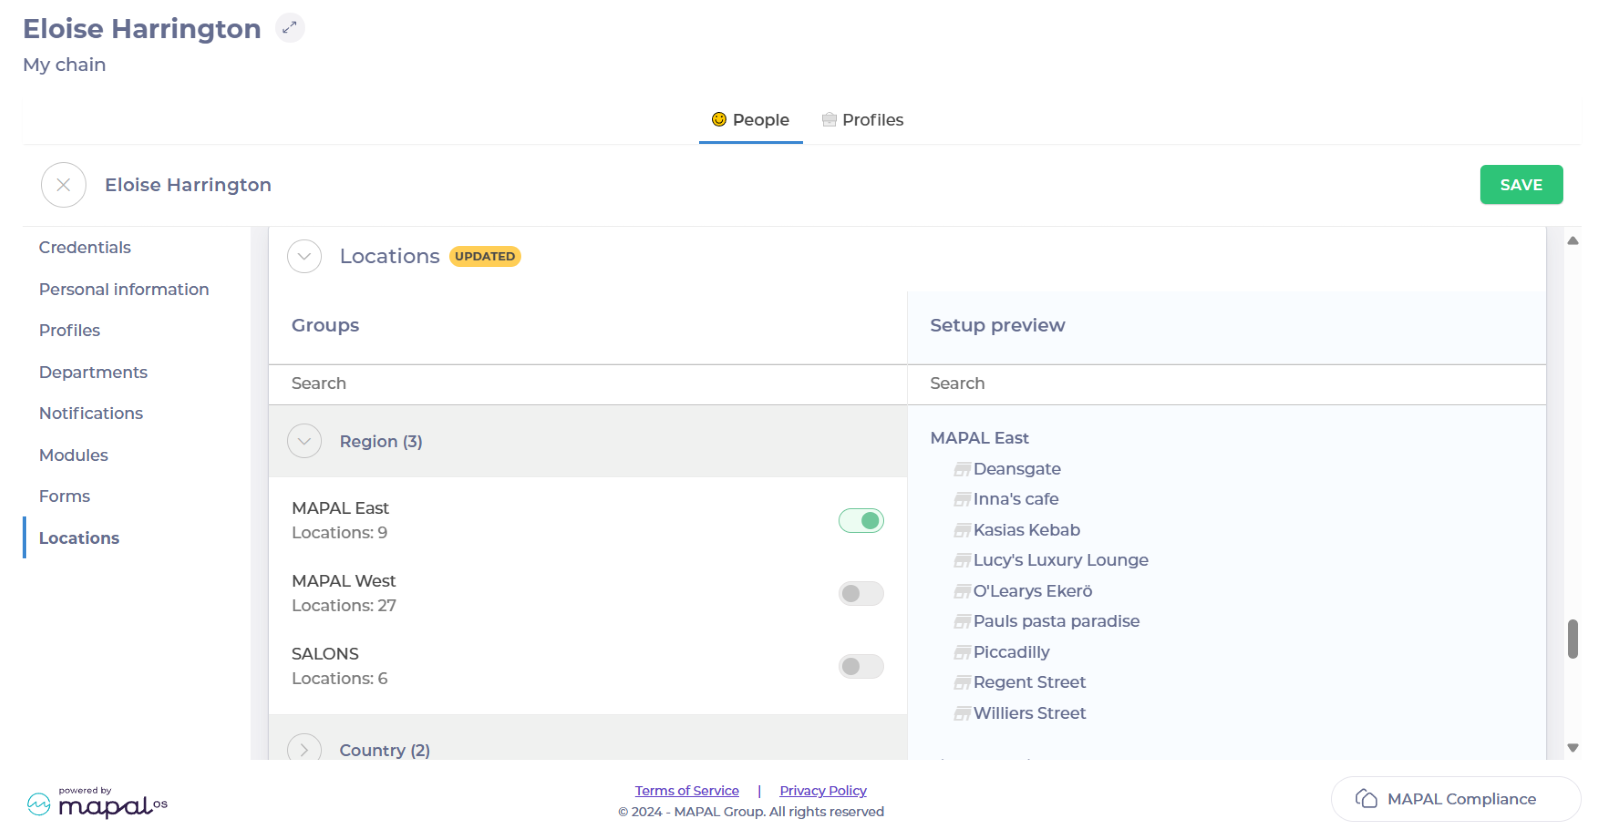
Select Locations in the left-hand menu. Now you will see all the options to add different groups on a user.
Toggle on the group or groups you want to add.
Select Save.
Notes: The user needs to log out and in to be able to see the new locations.
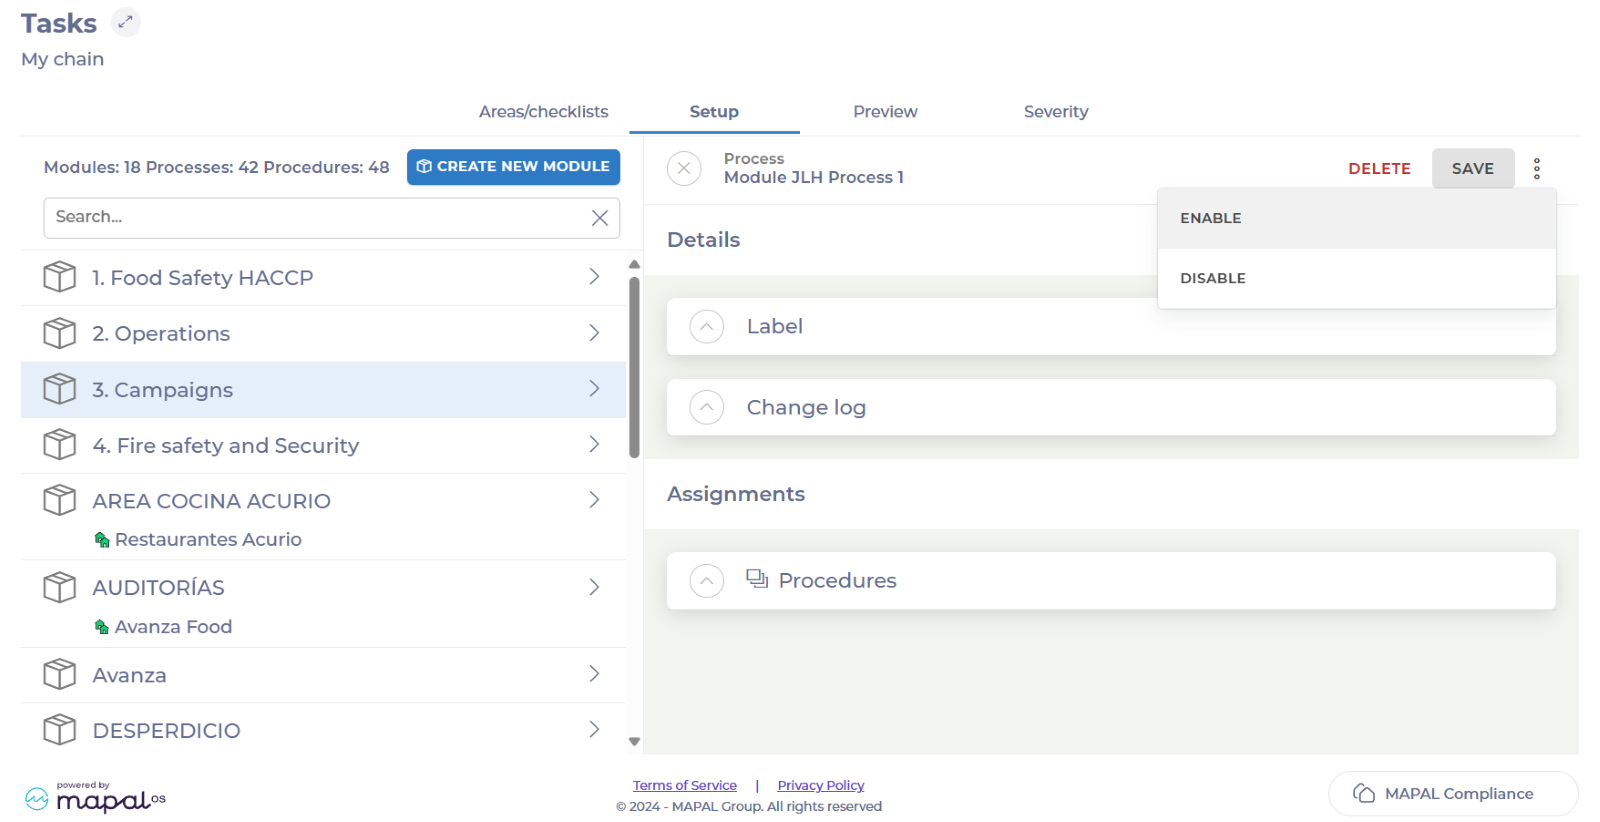
Activate a process on a group
Start from: The Compliance dashboard.
Select Tasks > Setup from the main menu.
Select the specific module.
Scroll down to Processes and select the specific process.
Once inside the process, select the three dots button in the top right corner.
Select Enable.
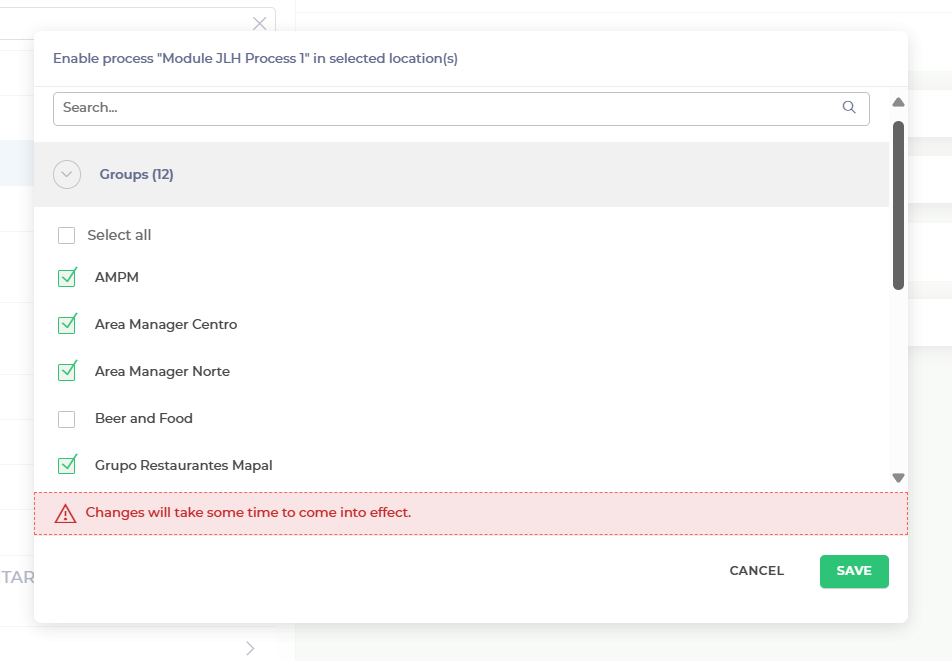
Search and select all the respective groups you want to add the process to.
Select Save.
The process will be now assigned to all the groups selected.
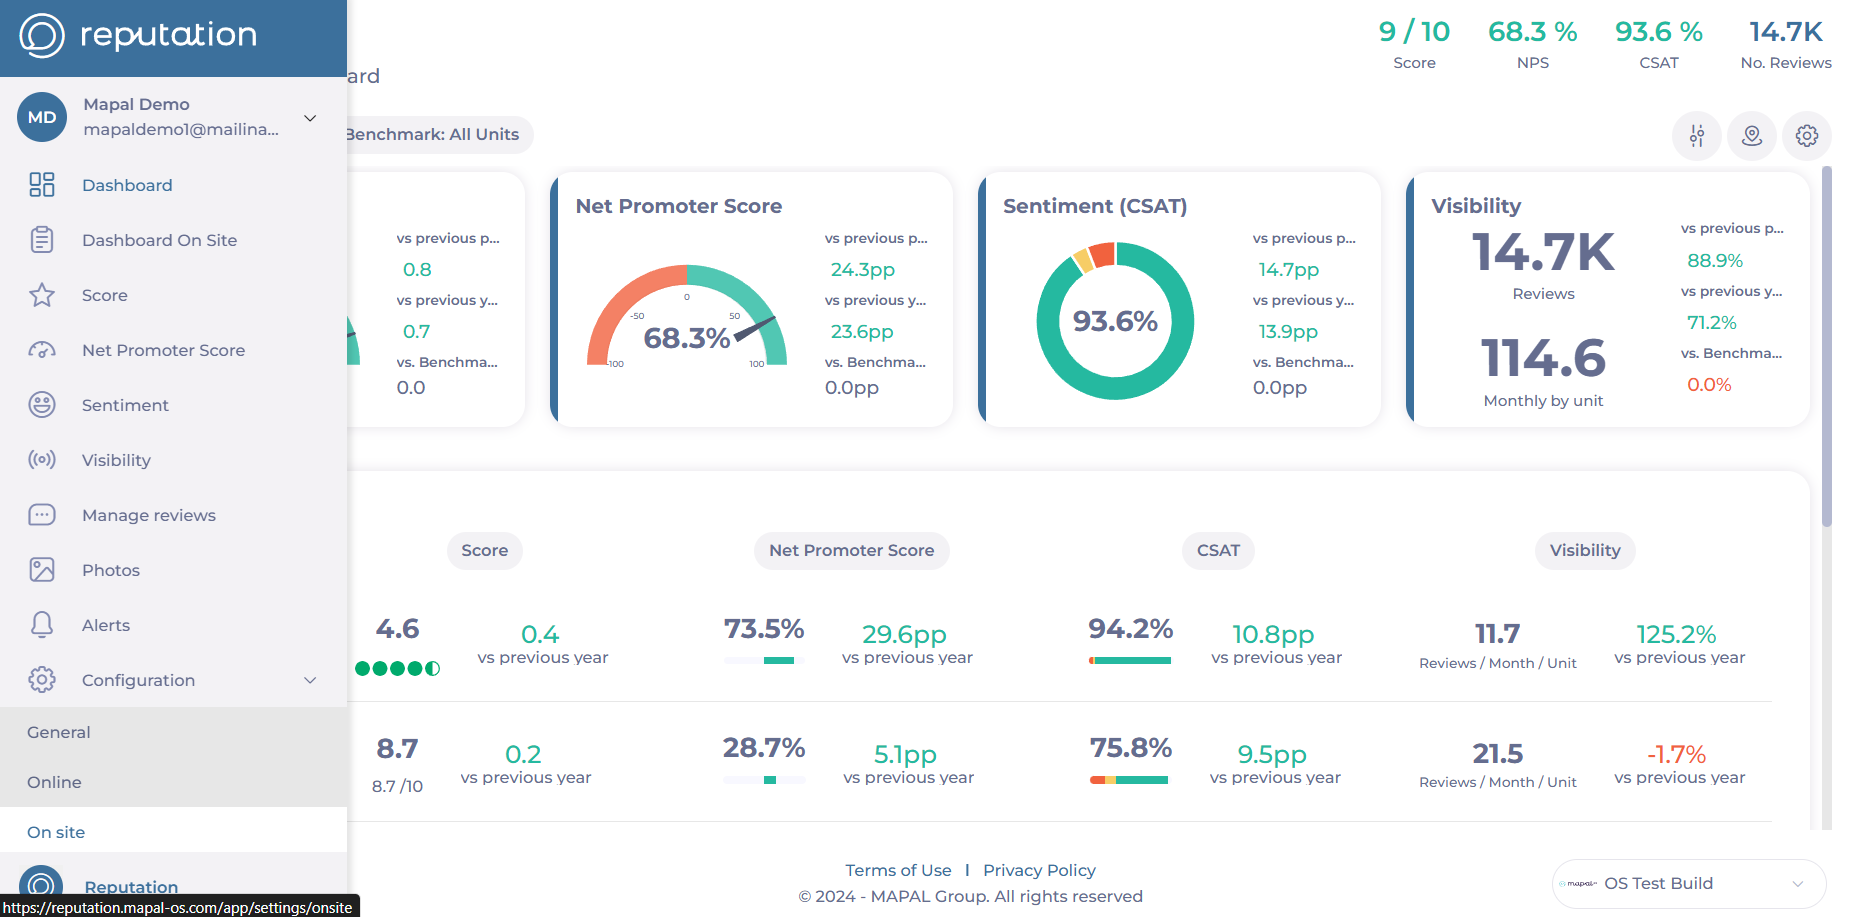
Distribute surveys in Reputation
Start from: The Reputation dashboard.
Select Configuration > On site from the main menu.
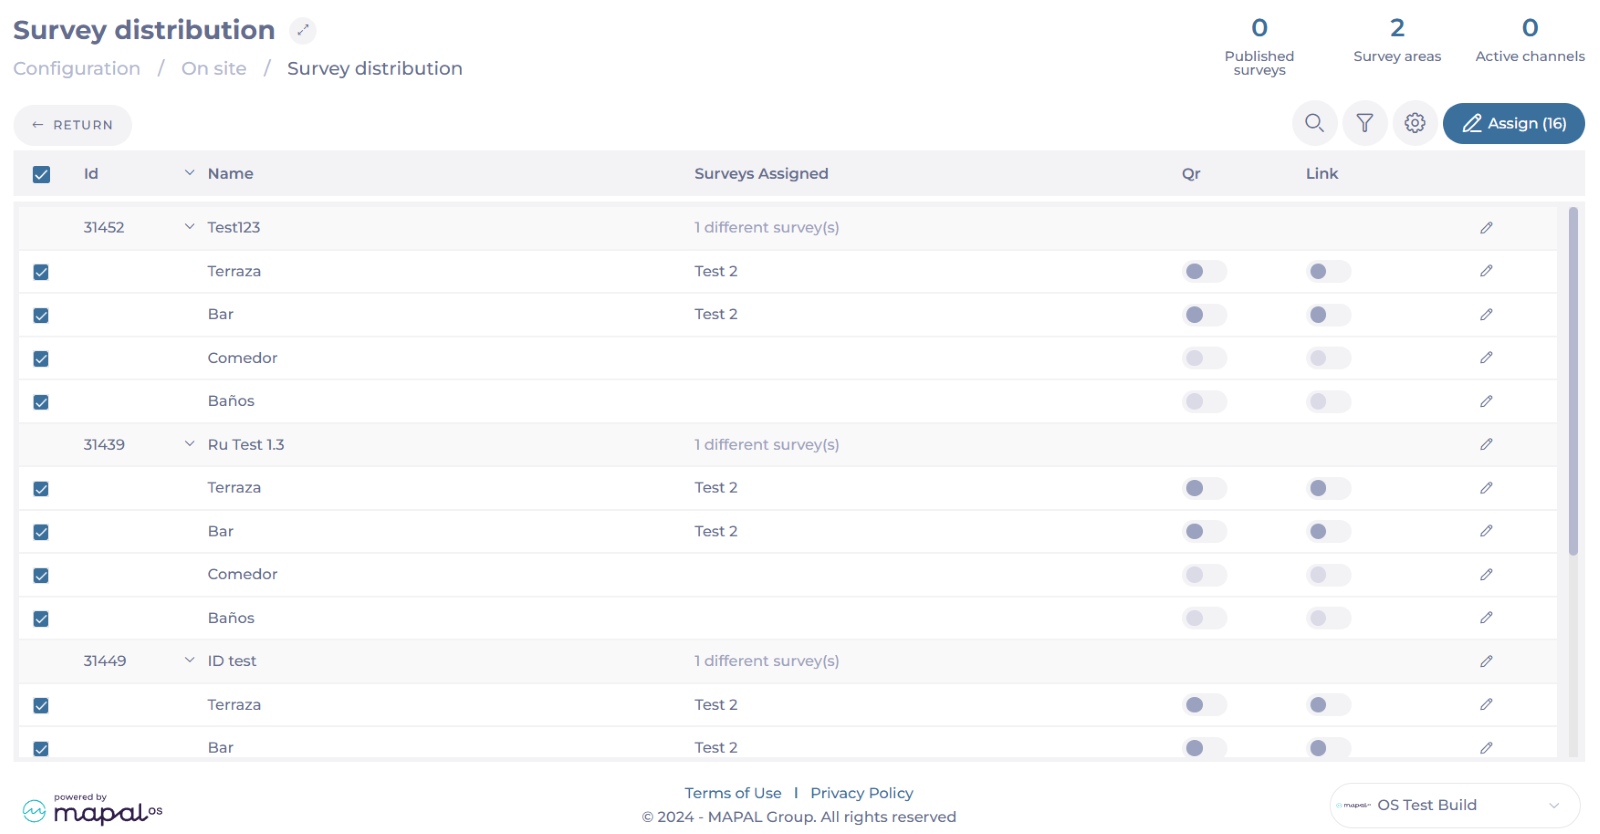
Select Survey Distribution.
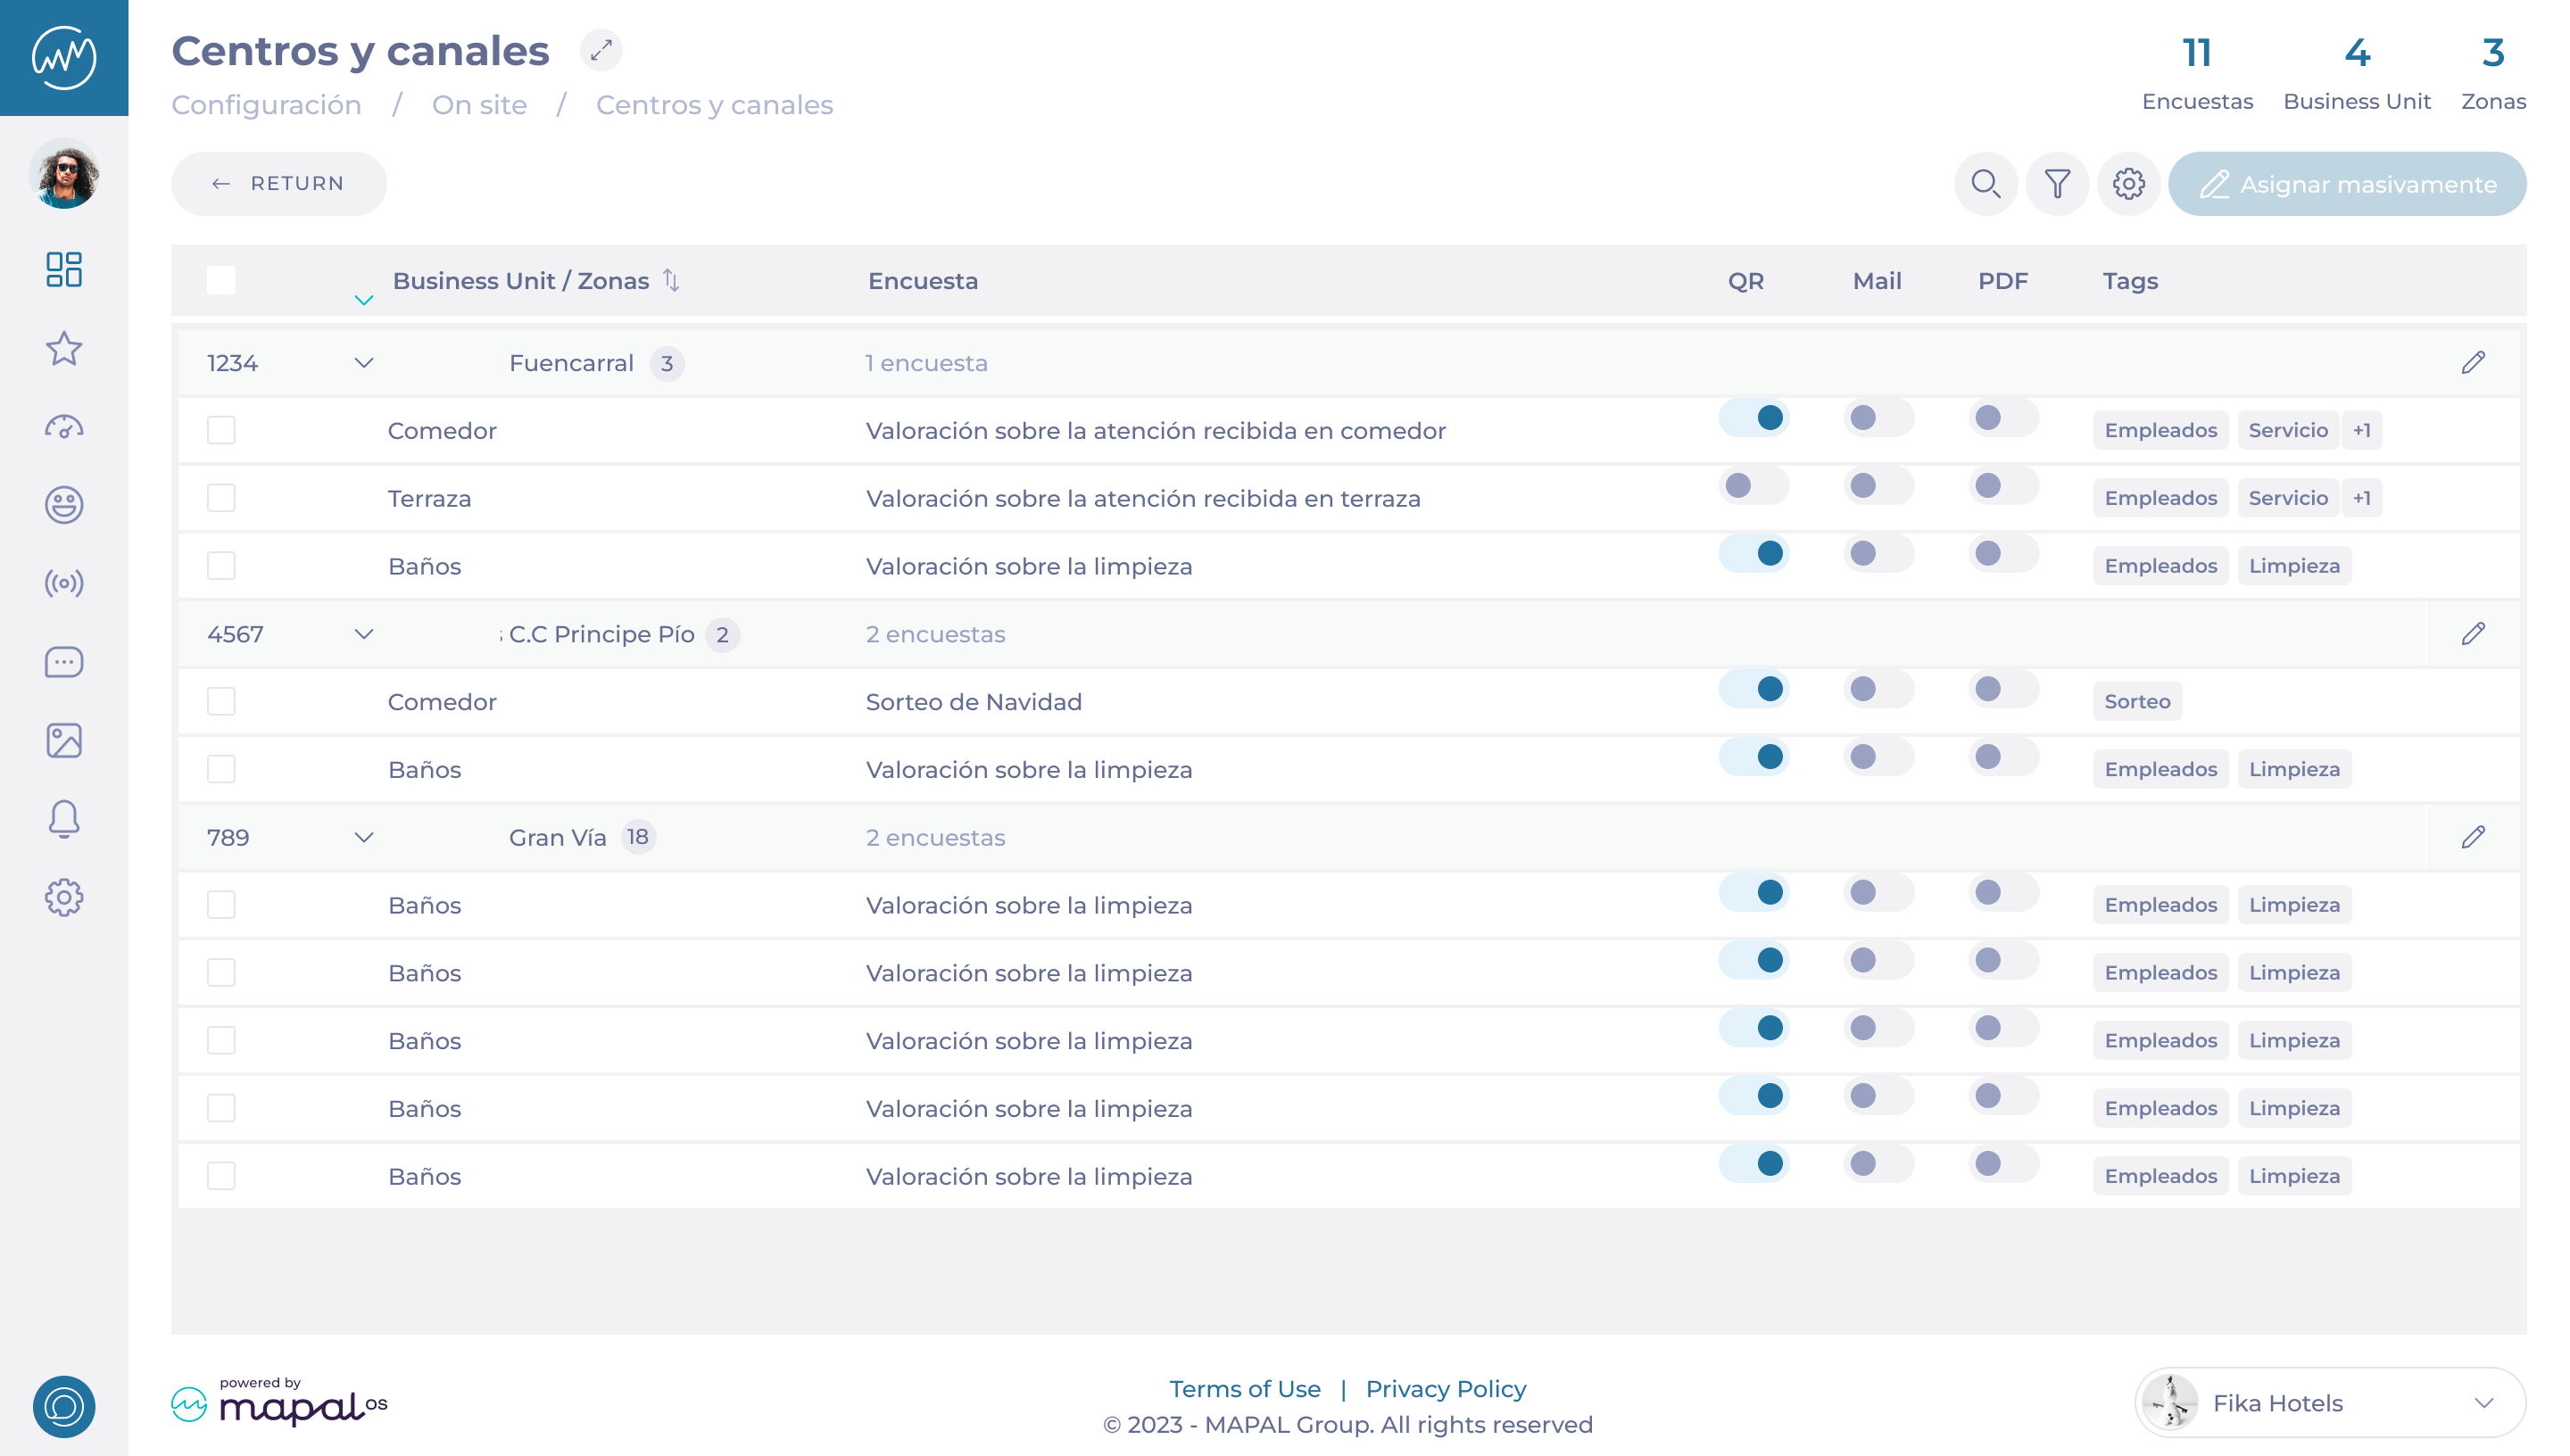
The Survey distribution grid is divided into Business Units (Work Centers) and Zones (Areas within that work center), providing a clear structure for managing survey assignments.
Surveys can be assigned to those specific zones within the business unit, such as Kitchen, Bar, Bathroom, etc.
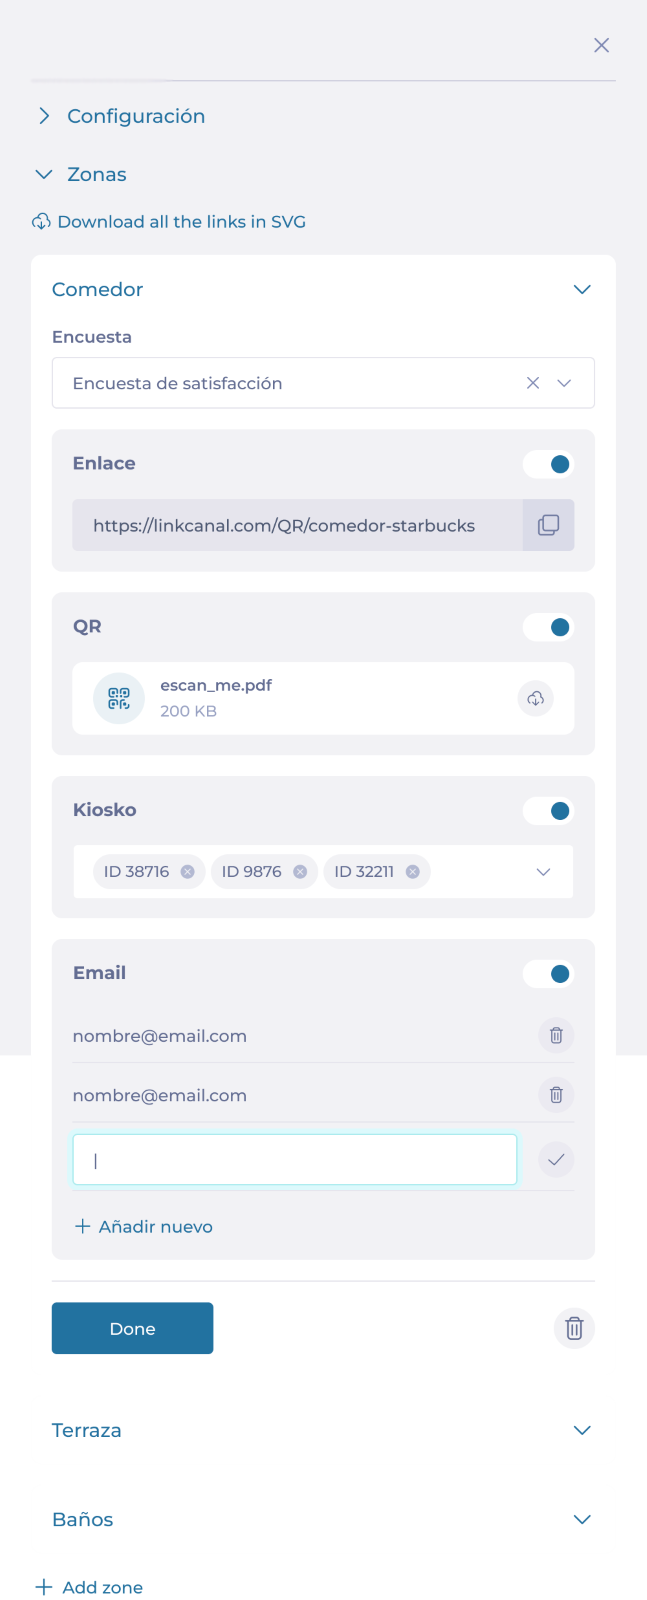
To assign a survey to a zone, select Edit on the Zone’s row.
In the sidebar, you can set up the Survey assigned to the zone and the Distribution channels for the survey (QR, Mail, and/or PDF).
Notes: If you select Edit on the Business Unit’s row, you can set up the surveys for all the zones available in that Business Unit.
Zone Management
Each business unit contains multiple zones. The grid shows you each zone with the surveys assigned, the distribution channels (QR code, email, PDF), and associated tags.
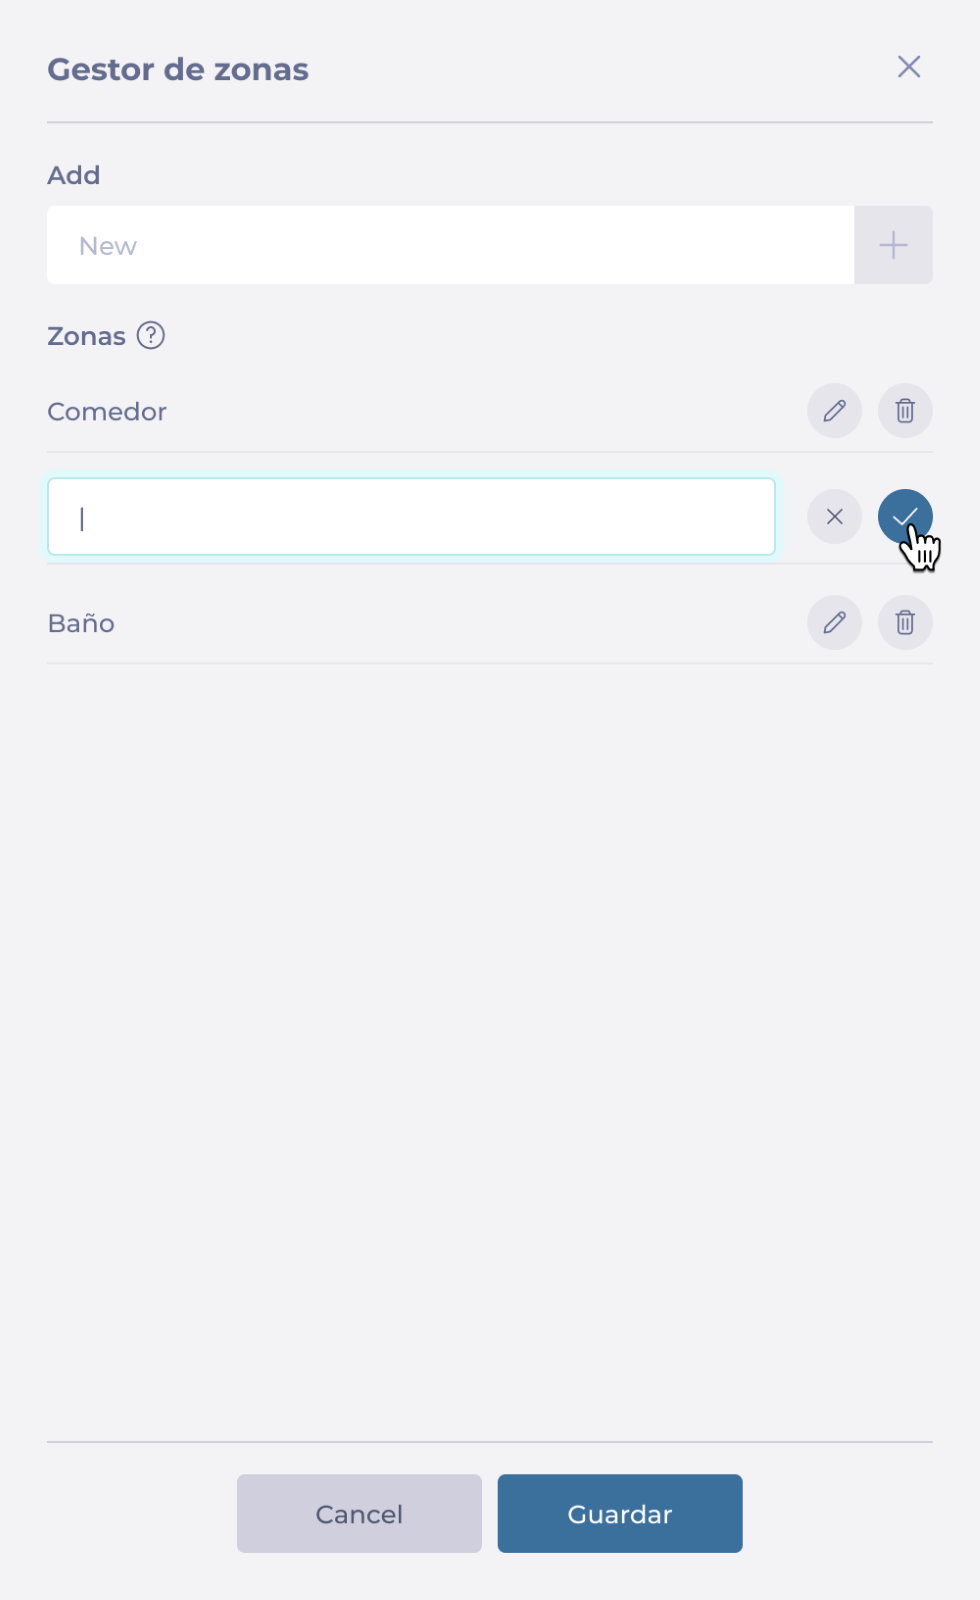
Select the Zone configuration button to Add, Delete, or Edit a zone.
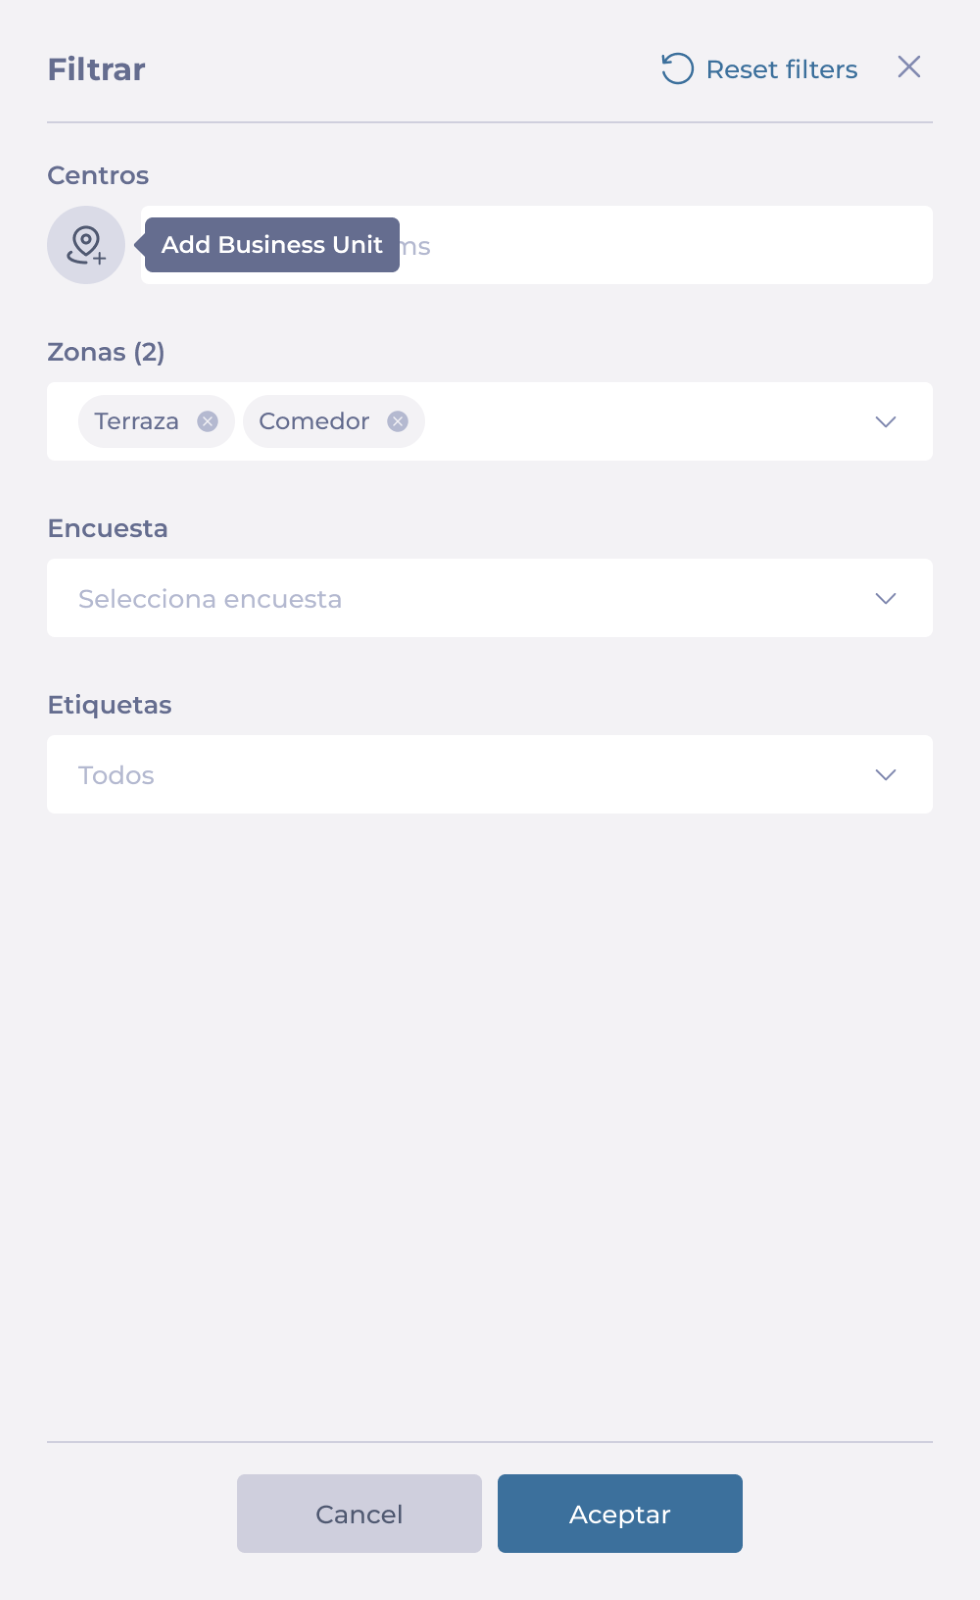
Filtering Options
Select Filter to open the sidebar.
You can filter by specific Zones, Distribution Channels, and Tags.
Select Add Business Unit to quickly locate specific Business Units.
You will now see the results of the filtering in the survey distribution grid.
Bulk assignment and Distribution Channels activation
Surveys can be assigned to multiple zones simultaneously using the bulk assignment feature. This allows for efficient management of large-scale survey distributions.
Select the checkbox for the zones to which you want to assign a survey. You can select the checkbox at the header of the grid to select all.
Once you have selected the desired zones, select the button Assign.
In the sidebar, select the Survey you want to assign and the Distribution Channels. You can choose to Maintain the distribution channels as they are, or you can Activate/Deactivate them.
Once you select Accept, a confirmation window will show up with the details of your selection and how many units it will affect.
Select Yes, implement the changes to continue.
Preview surveys in Reputation
Start from: The Reputation dashboard.
Select Configuration > On Site.
Select Surveys.
You can preview surveys during creation or open existing surveys to preview them.
Select the survey from the Surveys grid OR select + New to create a new survey.
Once inside the survey configuration, select the Preview button.
In the preview window, you will be able to:
Review colors, fonts, logos, and other design elements to ensure they match your branding and are displayed correctly.
Run the survey in a pre-publication mode to identify any issues and ensure everything functions correctly.
Confirm that all branching paths, conditional questions, and the overall order of questions are logical and coherent.
You can always select Return to go back to the configuration and adjust as needed.
Use the responsive panel to preview the survey in desktop, tablet, and mobile version.
Select the Restart button to start the survey again.
If you are creating a new survey, follow all the steps for survey creation and then select Preview.