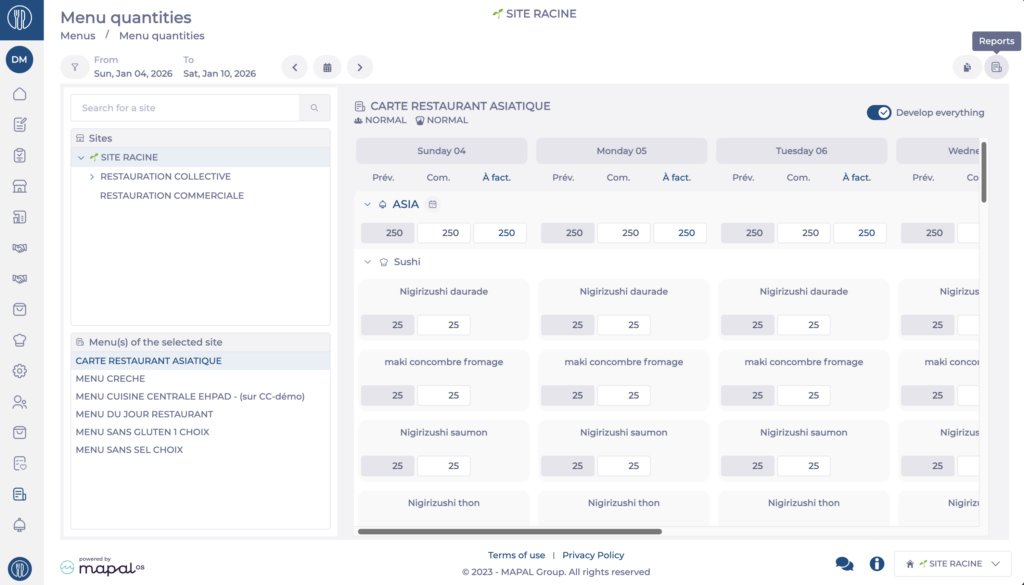
Select a menu in the menu list for the selected site.
Select the Reports icon.
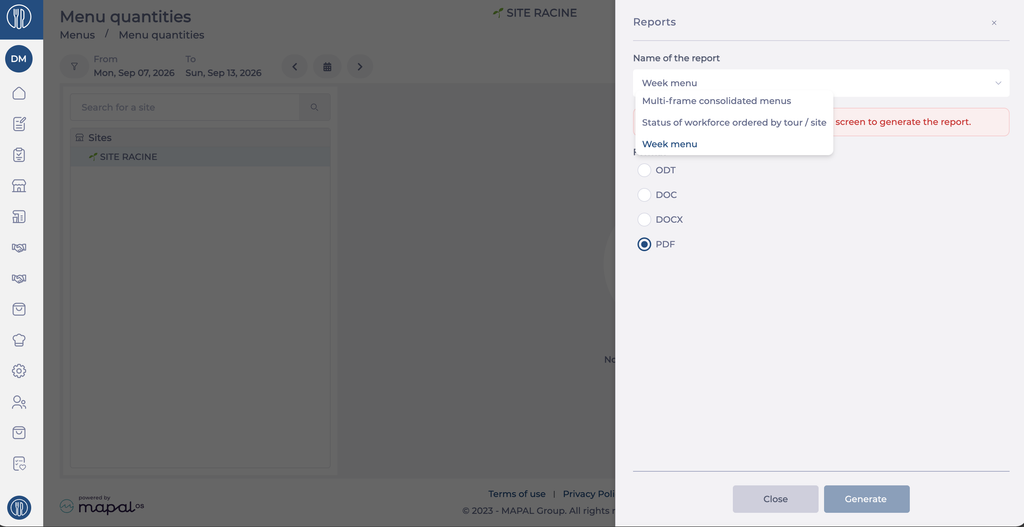
The Reports panel opens. The report options appear on the right of the screen.
Note: these reports were previously available from the Menus module only. They are now available from Menu quantities for faster access.
Choose a report
Select a report in the Name of the report dropdown.
The configuration fields update to match the report you select. Complete the fields for your chosen report as described below, then select Generate.
Select Close to leave the panel without generating a report.
Week menu
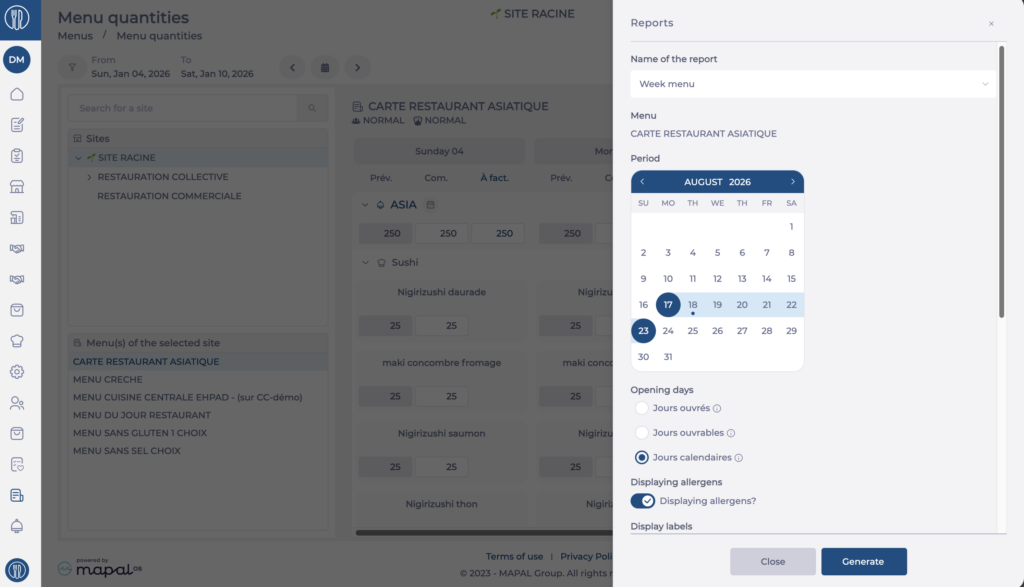
The Week menu report shows the menus planned over a given period for a selected site and menu.
Select Week menu in the Name of the report dropdown.
Select the start date and the end date in the Period calendar.
Under Opening days, select the type of days to include: Working days, Business days or Calendar days.
Enable Display allergens? to include allergens in the report.
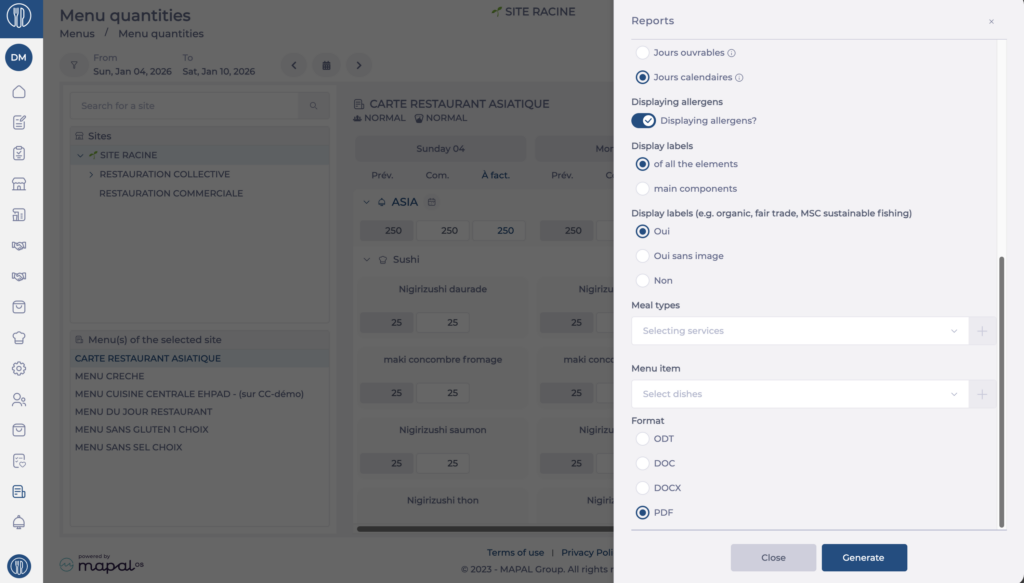
Under Display labels, select of all items or of main items.
Under Display labels (for example organic, fair trade, MSC sustainable fishing), select Yes, Yes without image or No.
Optional: select one or more meal types in the Select meal types field.
Optional: select one or more menu items in the Select menu items field.
Under Format, select ODT, DOC, DOCX or PDF.
Select Generate.
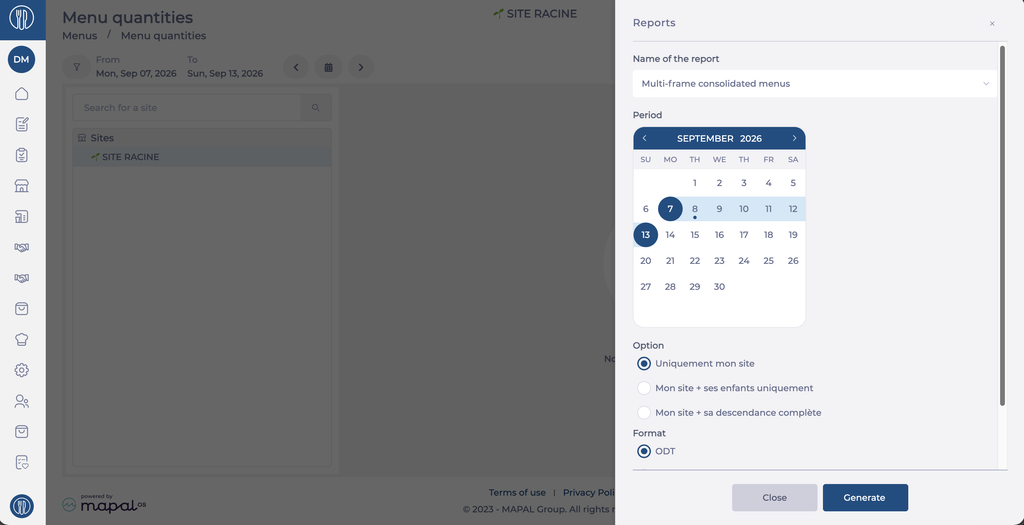
Multi-frame consolidated menus
The Multi-frame consolidated menus report consolidates menus across your site or its child sites for a given period.
Select Multi-frame consolidated menus in the Name of the report dropdown.
Select the start date and the end date in the Period calendar.
Under Option, select the scope of the report: My site only, My site and its children only or My site and its child sites.
Under Format, select ODT, DOC, DOCX or PDF.
Select Generate.
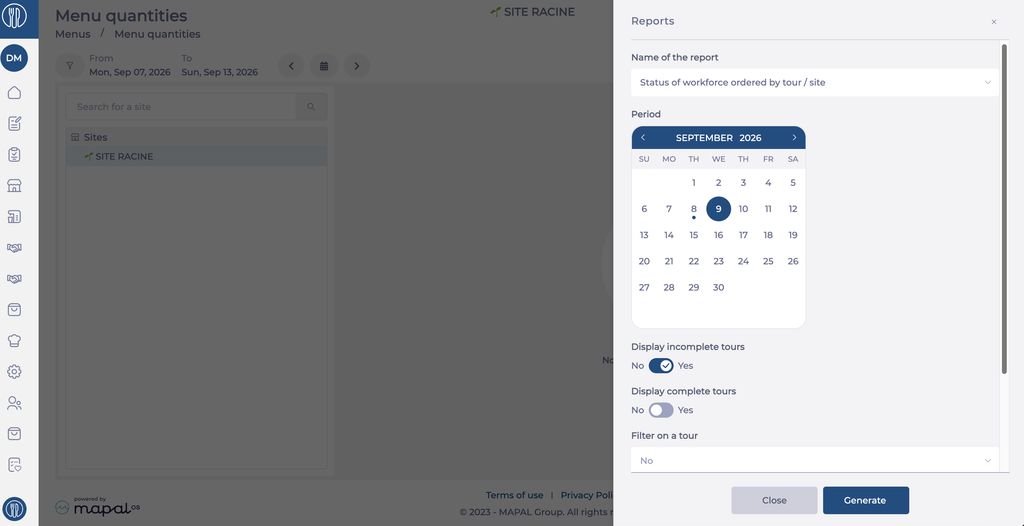
Status of workforce ordered by tour / site
The Status of workforce ordered by tour / site report shows headcounts organised by delivery tour and site for a given period.
Select Status of workforce ordered by tour / site in the Name of the report dropdown.
Select the start date and the end date in the Period calendar.
Set Display incomplete tours to Yes or No.
Set Display complete tours to Yes or No.
Under Filter on a tour, select No, or select a specific tour to restrict the report.
Under Format, select ODT, DOC, DOCX or PDF.
Select Generate.
Generate purchase progress reports (Purchasable items and Price lists)
Start from: The Easilys menu.
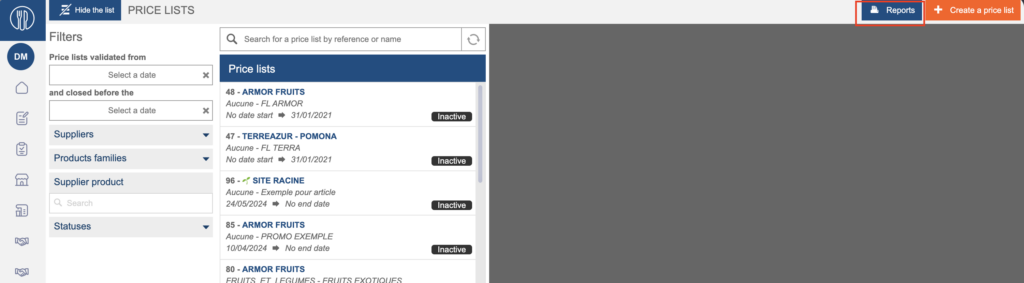
Generate the report from the Price lists screen
Navigate to Products>Price lists.
Select Reports.
Choose Purchase progress report.
Select the format you want in order to generate the report.
Download the report.
Generate the report from the Purchasable items screen
Navigate to Products>Purchasable items.
Select Reports.
Choose Purchase progress report.
Select the format you want in order to generate the report.
Download the report.
Download reports on Workbooks
Start from: The Flow Learning dashboard.
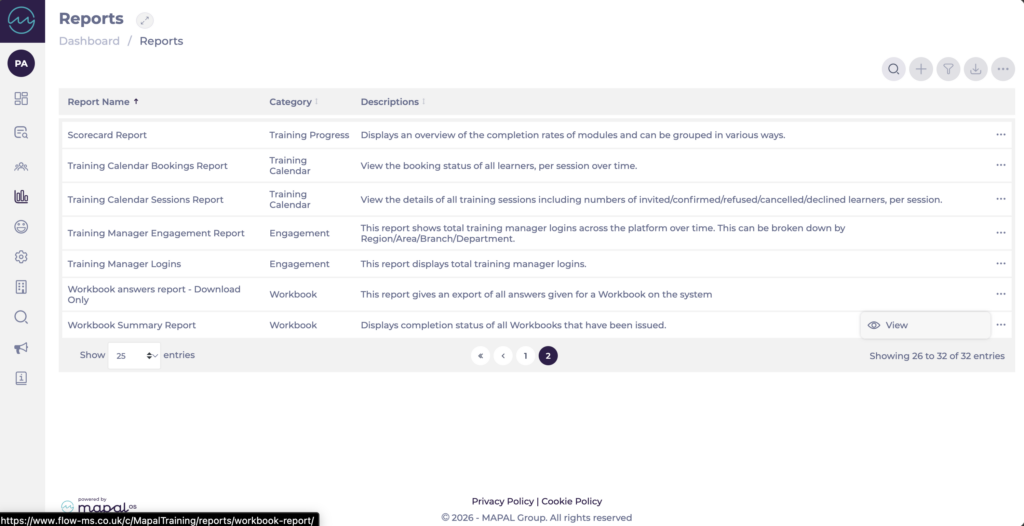
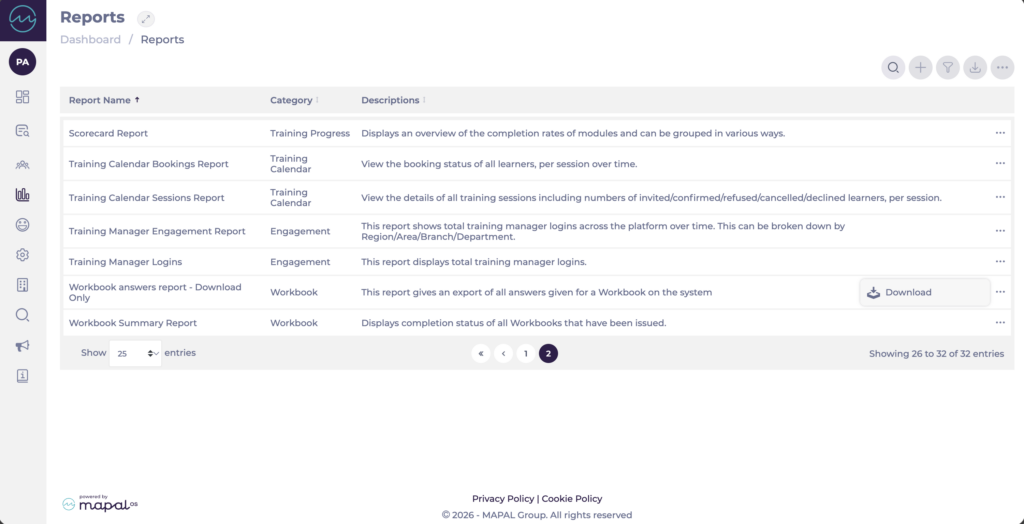
Navigate to Reports.
Workbook Summary Report
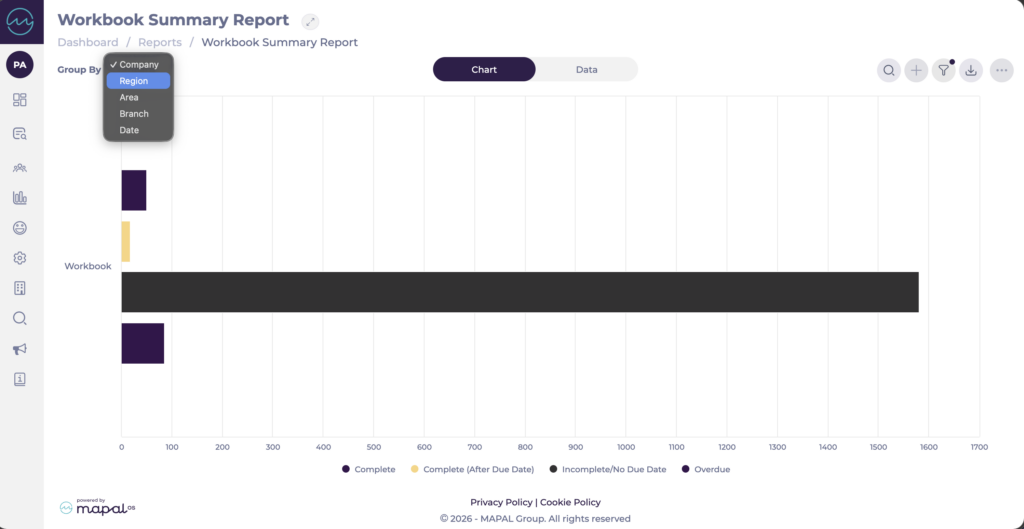
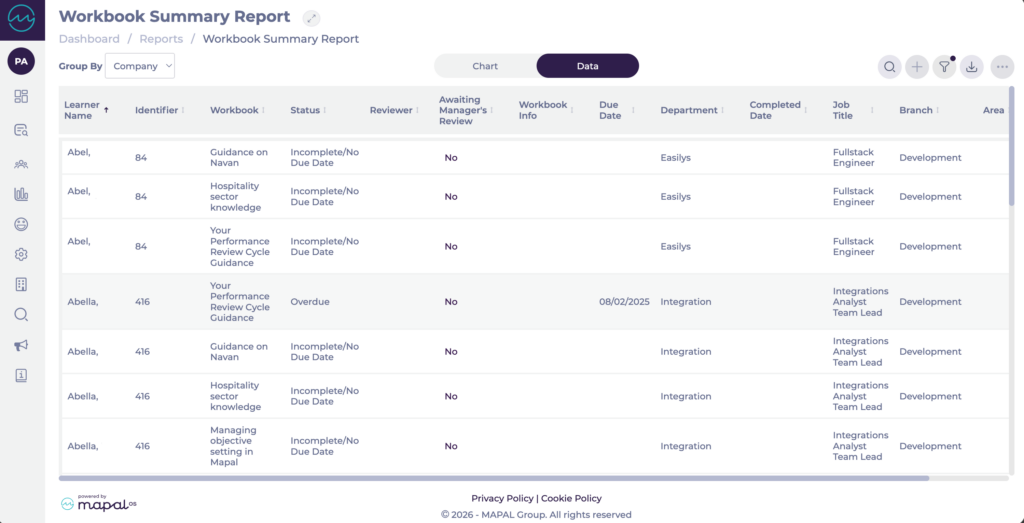
The Workbook Summary Report displays the completion status of all workbooks that have been issued. It is available in both a chart view and a data view, making it easy to monitor progress across your organisation.
Locate Workbook Summary Report in the reports list and select View.
Toggle between Chart and Data to switch views.
Chart displays a visual breakdown of completion statuses across workbooks. Use the Group By dropdown to organise results by Company, Region, Area, Branch, or Date.
Data displays a detailed table with the following columns: Learner Name, Identifier, Workbook, Status, Reviewer, Awaiting Manager's Review, Workbook Info, Due Date, Completed Date, Department, Job Title, Branch, and Area.
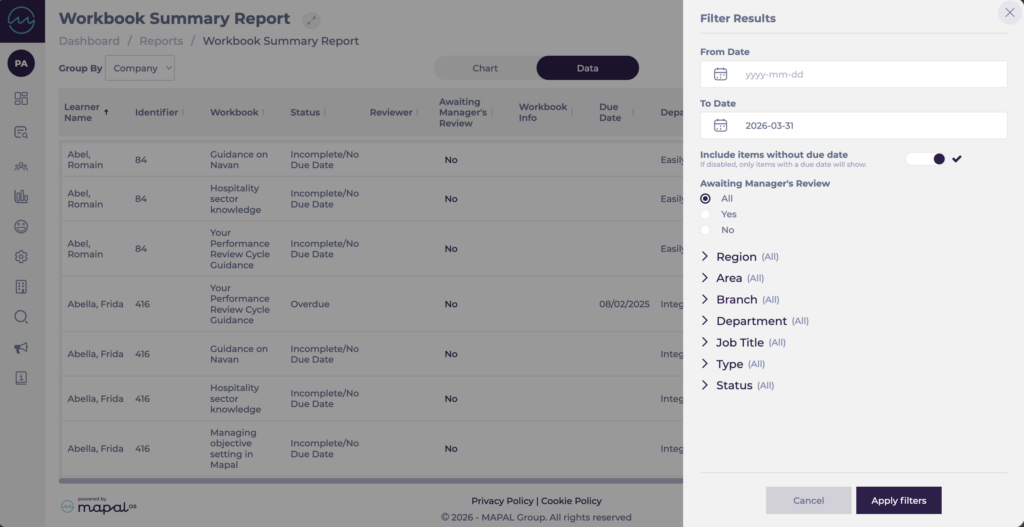
Select the filter icon to refine results by From Date, To Date, Awaiting Manager's Review, Region, Area, Branch, Department, Job Title, Type, or Status. Enable Include items without due date to include workbooks with no due date set.
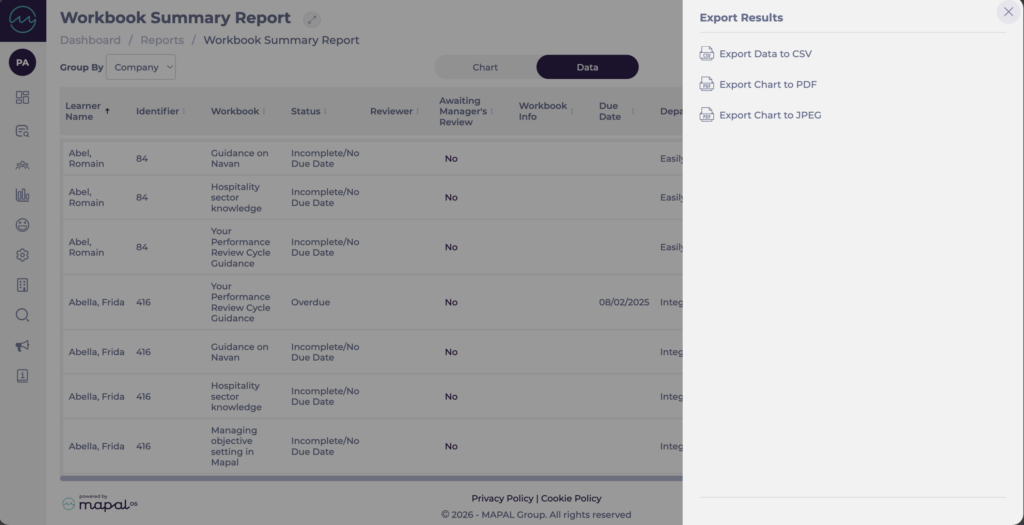
Select the download icon to export the report. Options are Export Data to CSV, Export Chart to PDF, or Export Chart to JPEG.
Workbook answers report
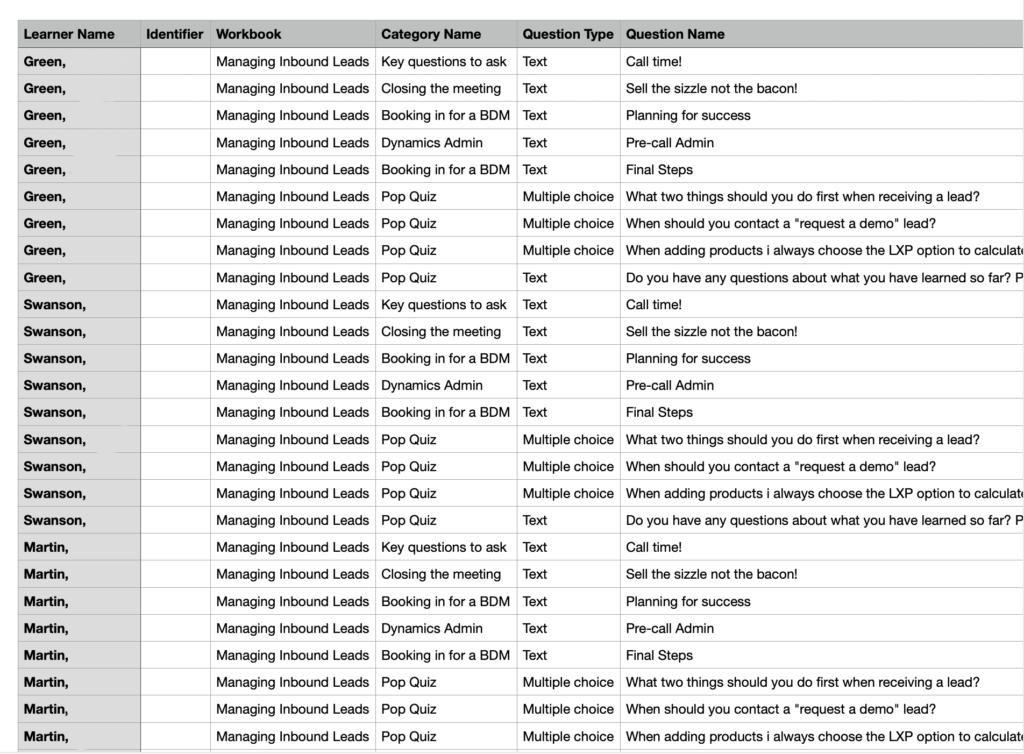
The Workbook answers report provides a CSV export of all learner responses across workbook question types. Each row in the export represents one learner response, making the file straightforward to manipulate and report on outside Flow Learning.
The export includes: Learner Name, Identifier, Workbook, Category Name, Question Type, and Question Name.
Locate Workbook answers report – Download Only in the reports list and select Download.
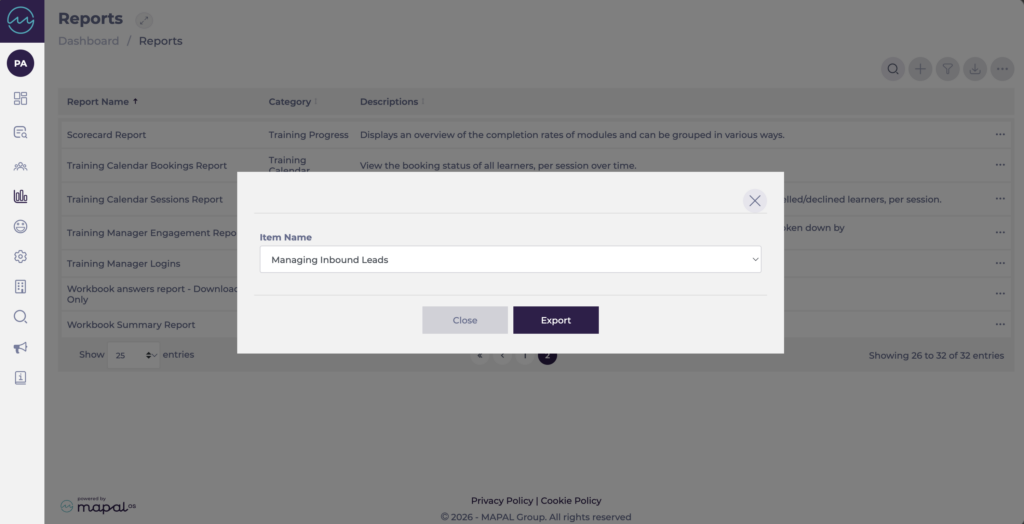
In the Item Name dropdown, select the workbook you want to export.
Select Export to download the CSV file.
Note: This report is download only and cannot be viewed directly in Flow Learning.
Configure report visibility in Weekly ROTAs
Start from: the Workforce module.
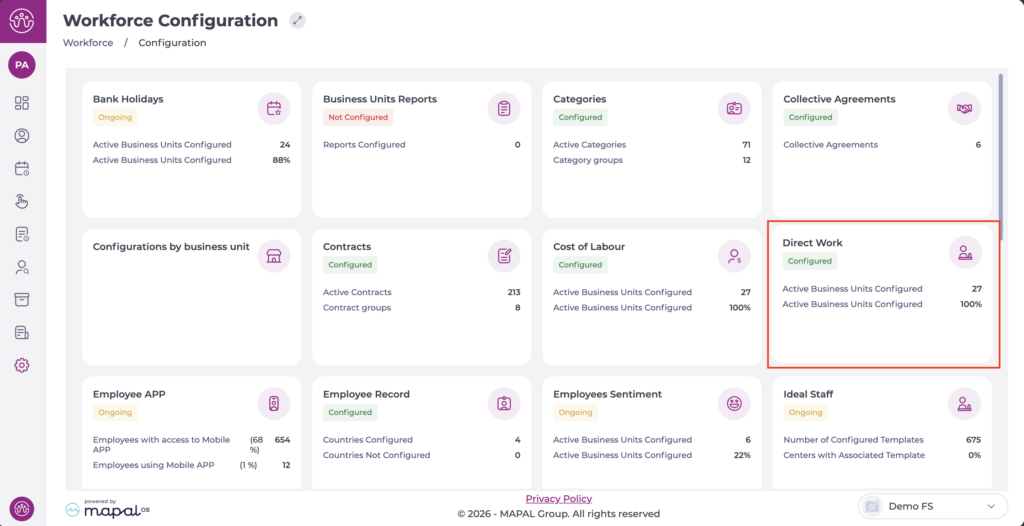
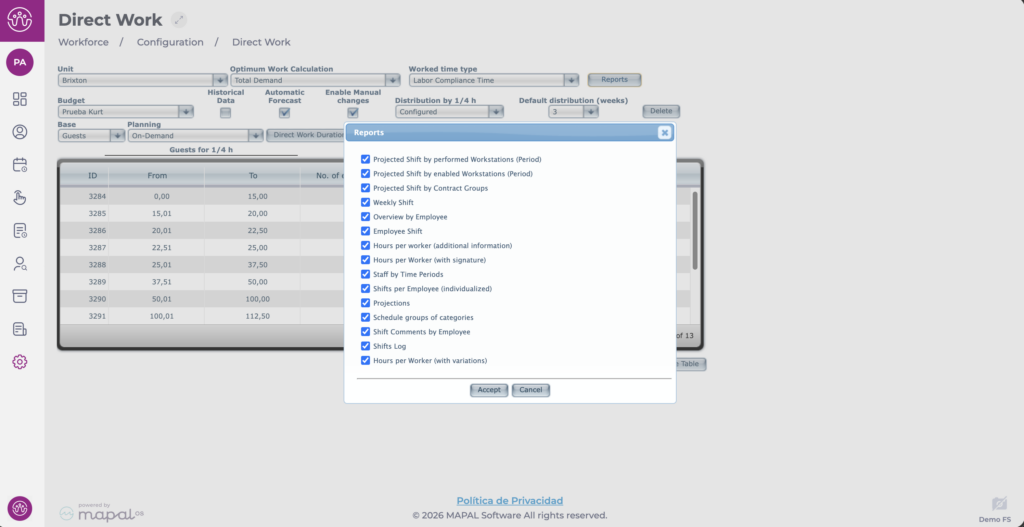
From the main menu, go to Configuration > Direct Work.
Select the Business unit for which you want to enable report visibility from the dropdown.
Select Reports and enable the required reports.
Select Accept to save your changes or Cancel to discard them.
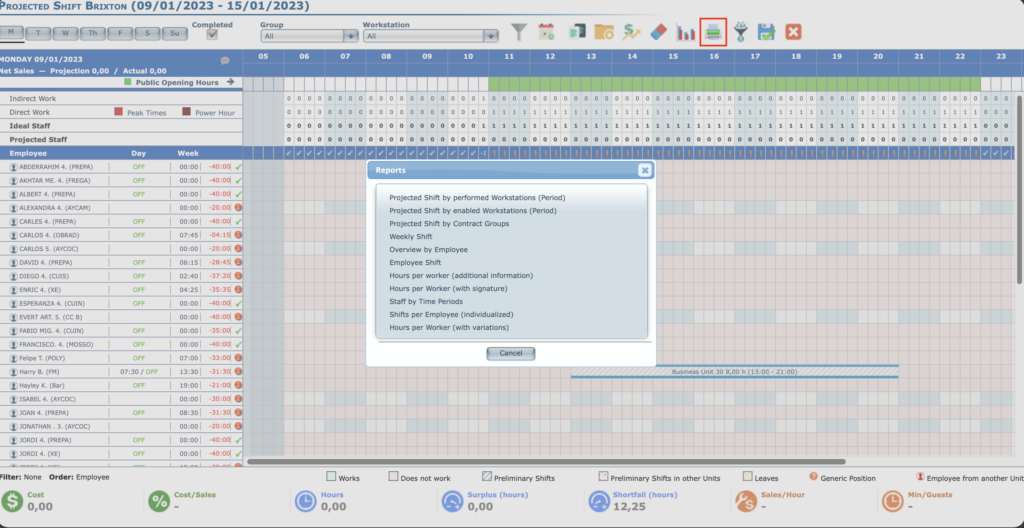
Once configured, the reports will be available from Weekly ROTAs > Reports.