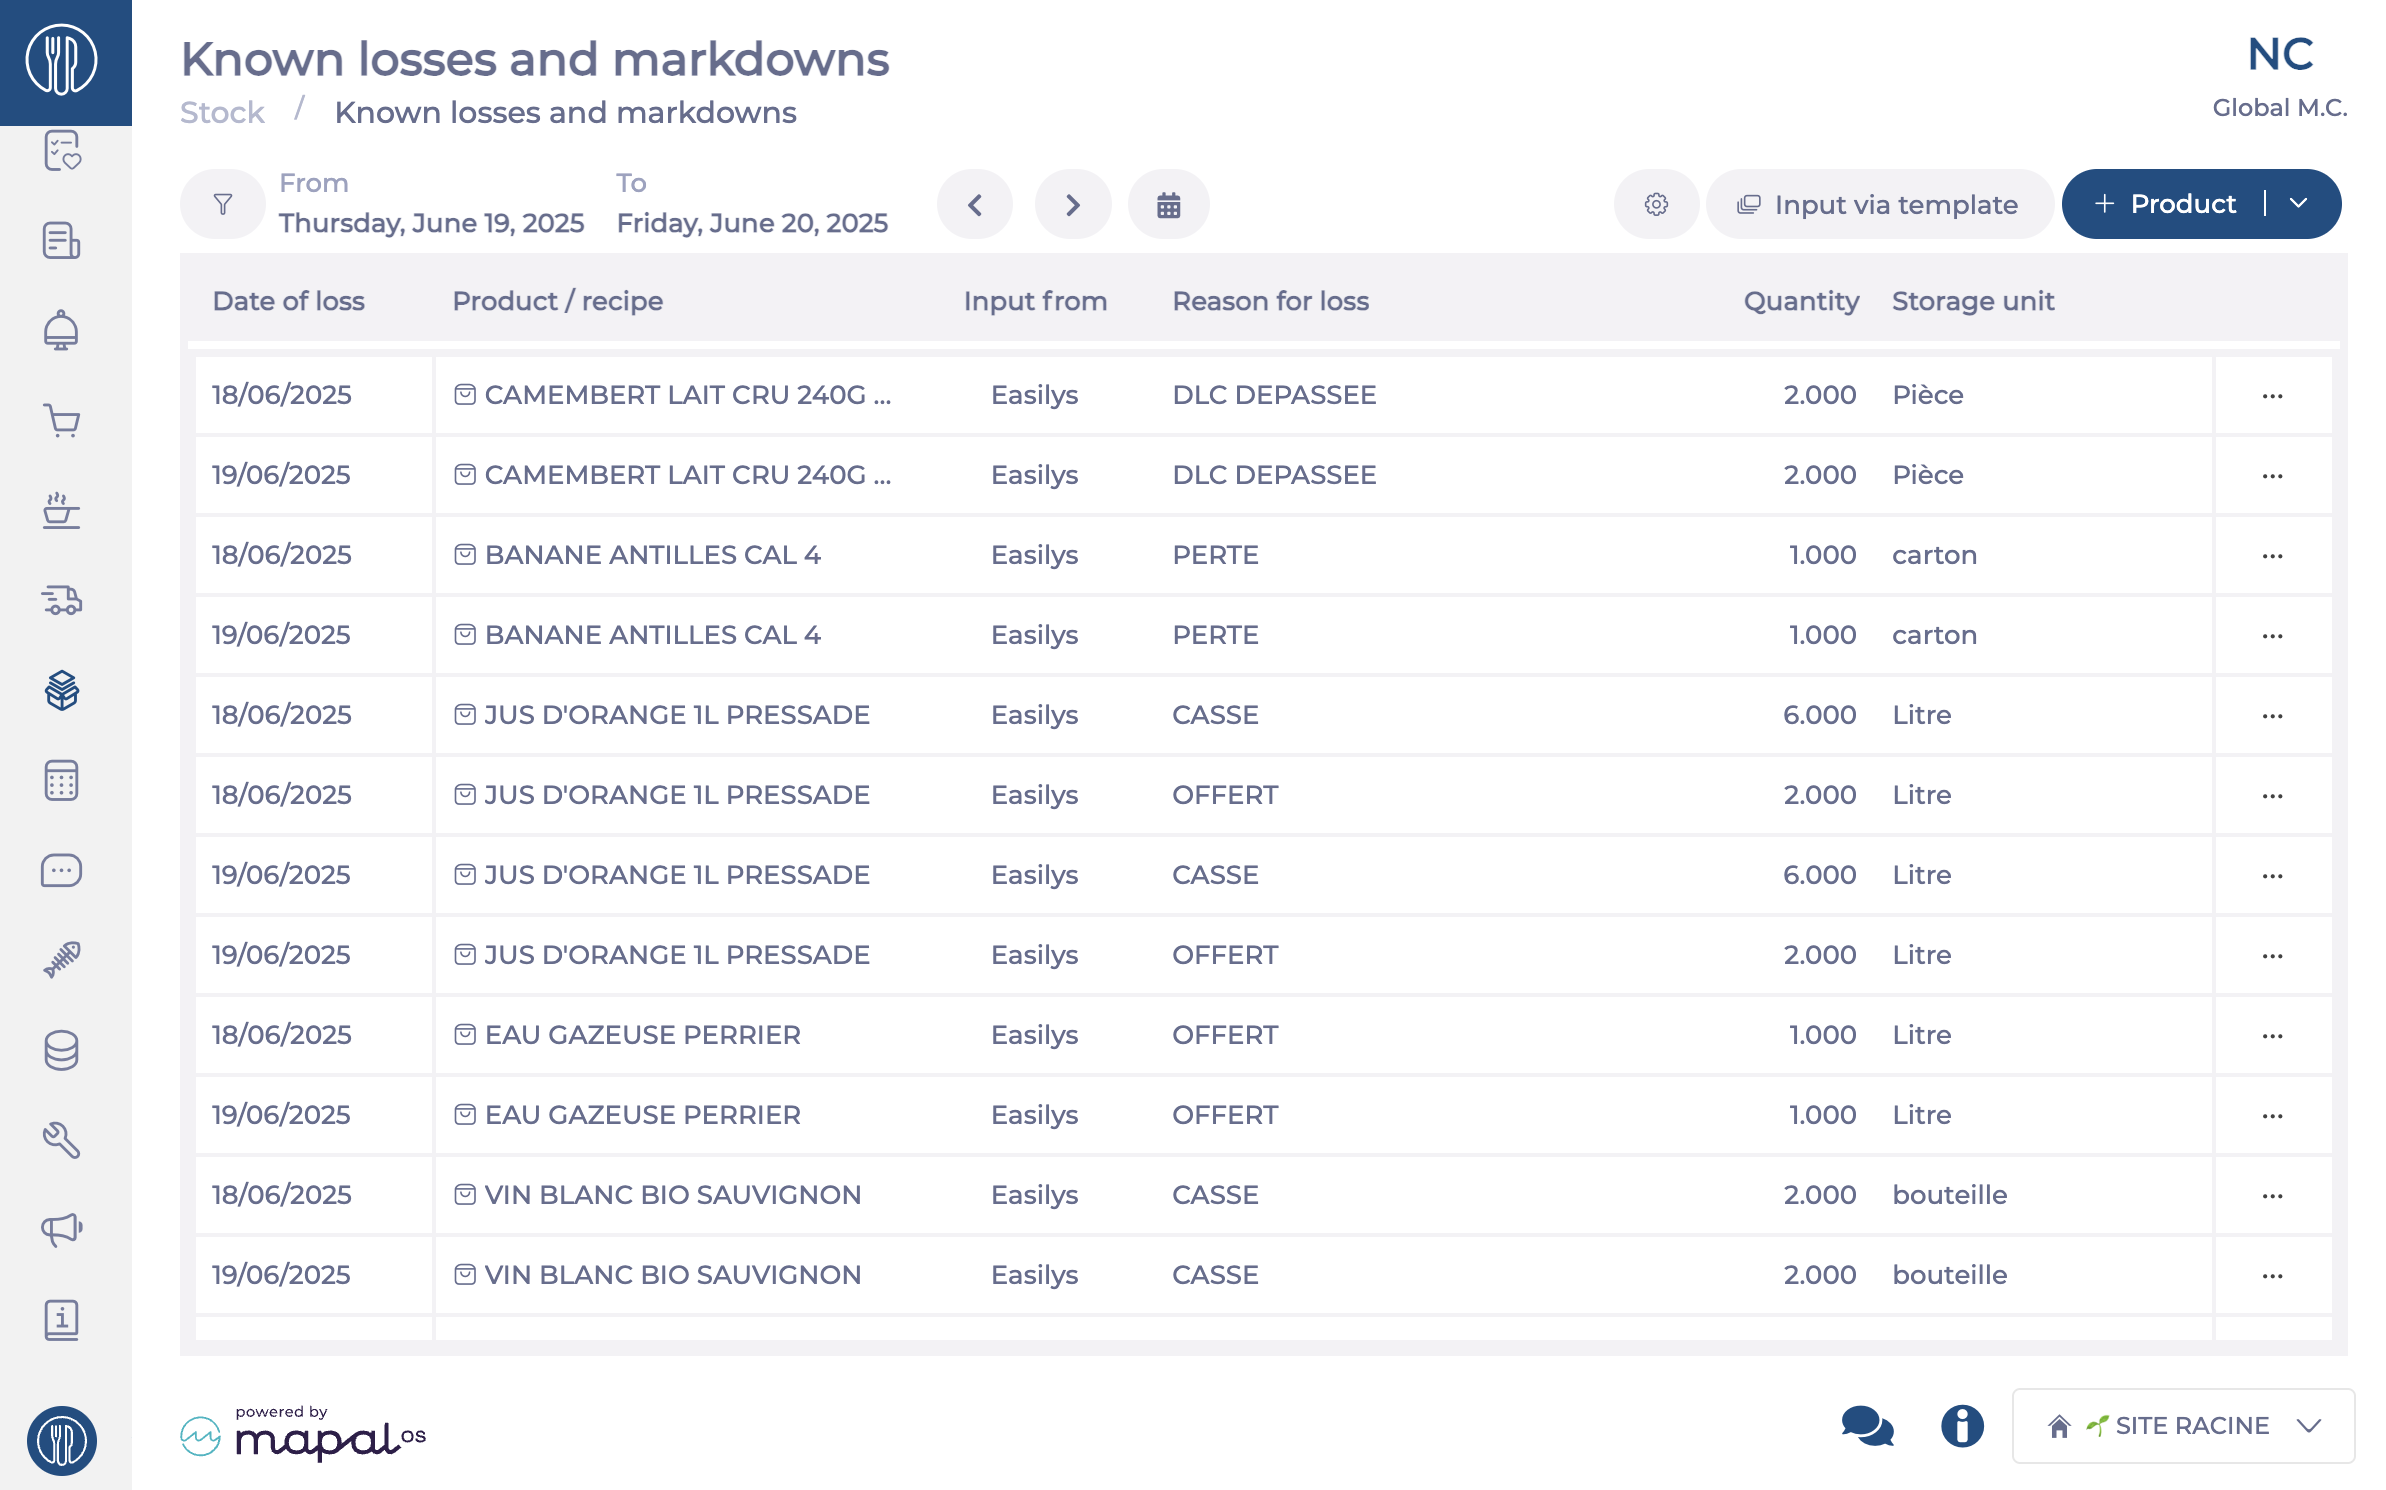
Product and recipe losses can be entered from this screen, either manually or using loss templates. When you report a recipe loss, the industrial products used in the recipe will be deducted from stock. The losses entered on this screen will be automatically destocked during the following night.
Note: Depending on the type of POS and integration, this screen may also be automatically populated from loss data reported by the till.
1. Add non-template losses
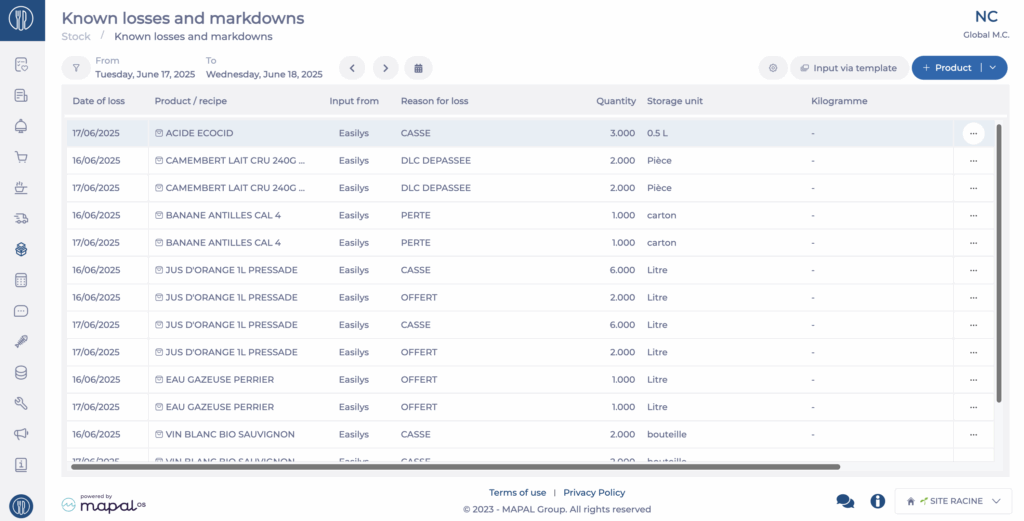
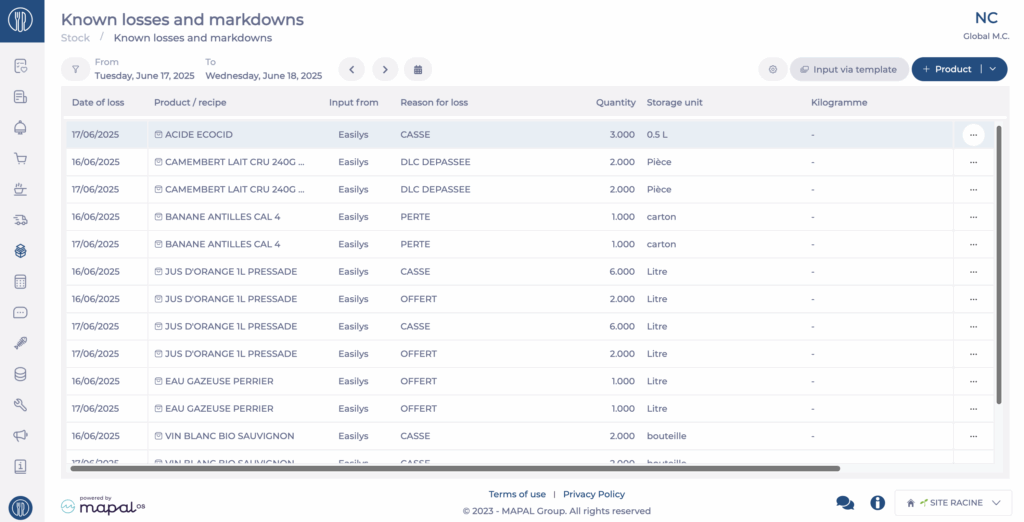
Go to Stock > Known Losses and Markdowns from the main menu.
Click + Product then choose Industrial Product or Recipe depending on the type of loss.
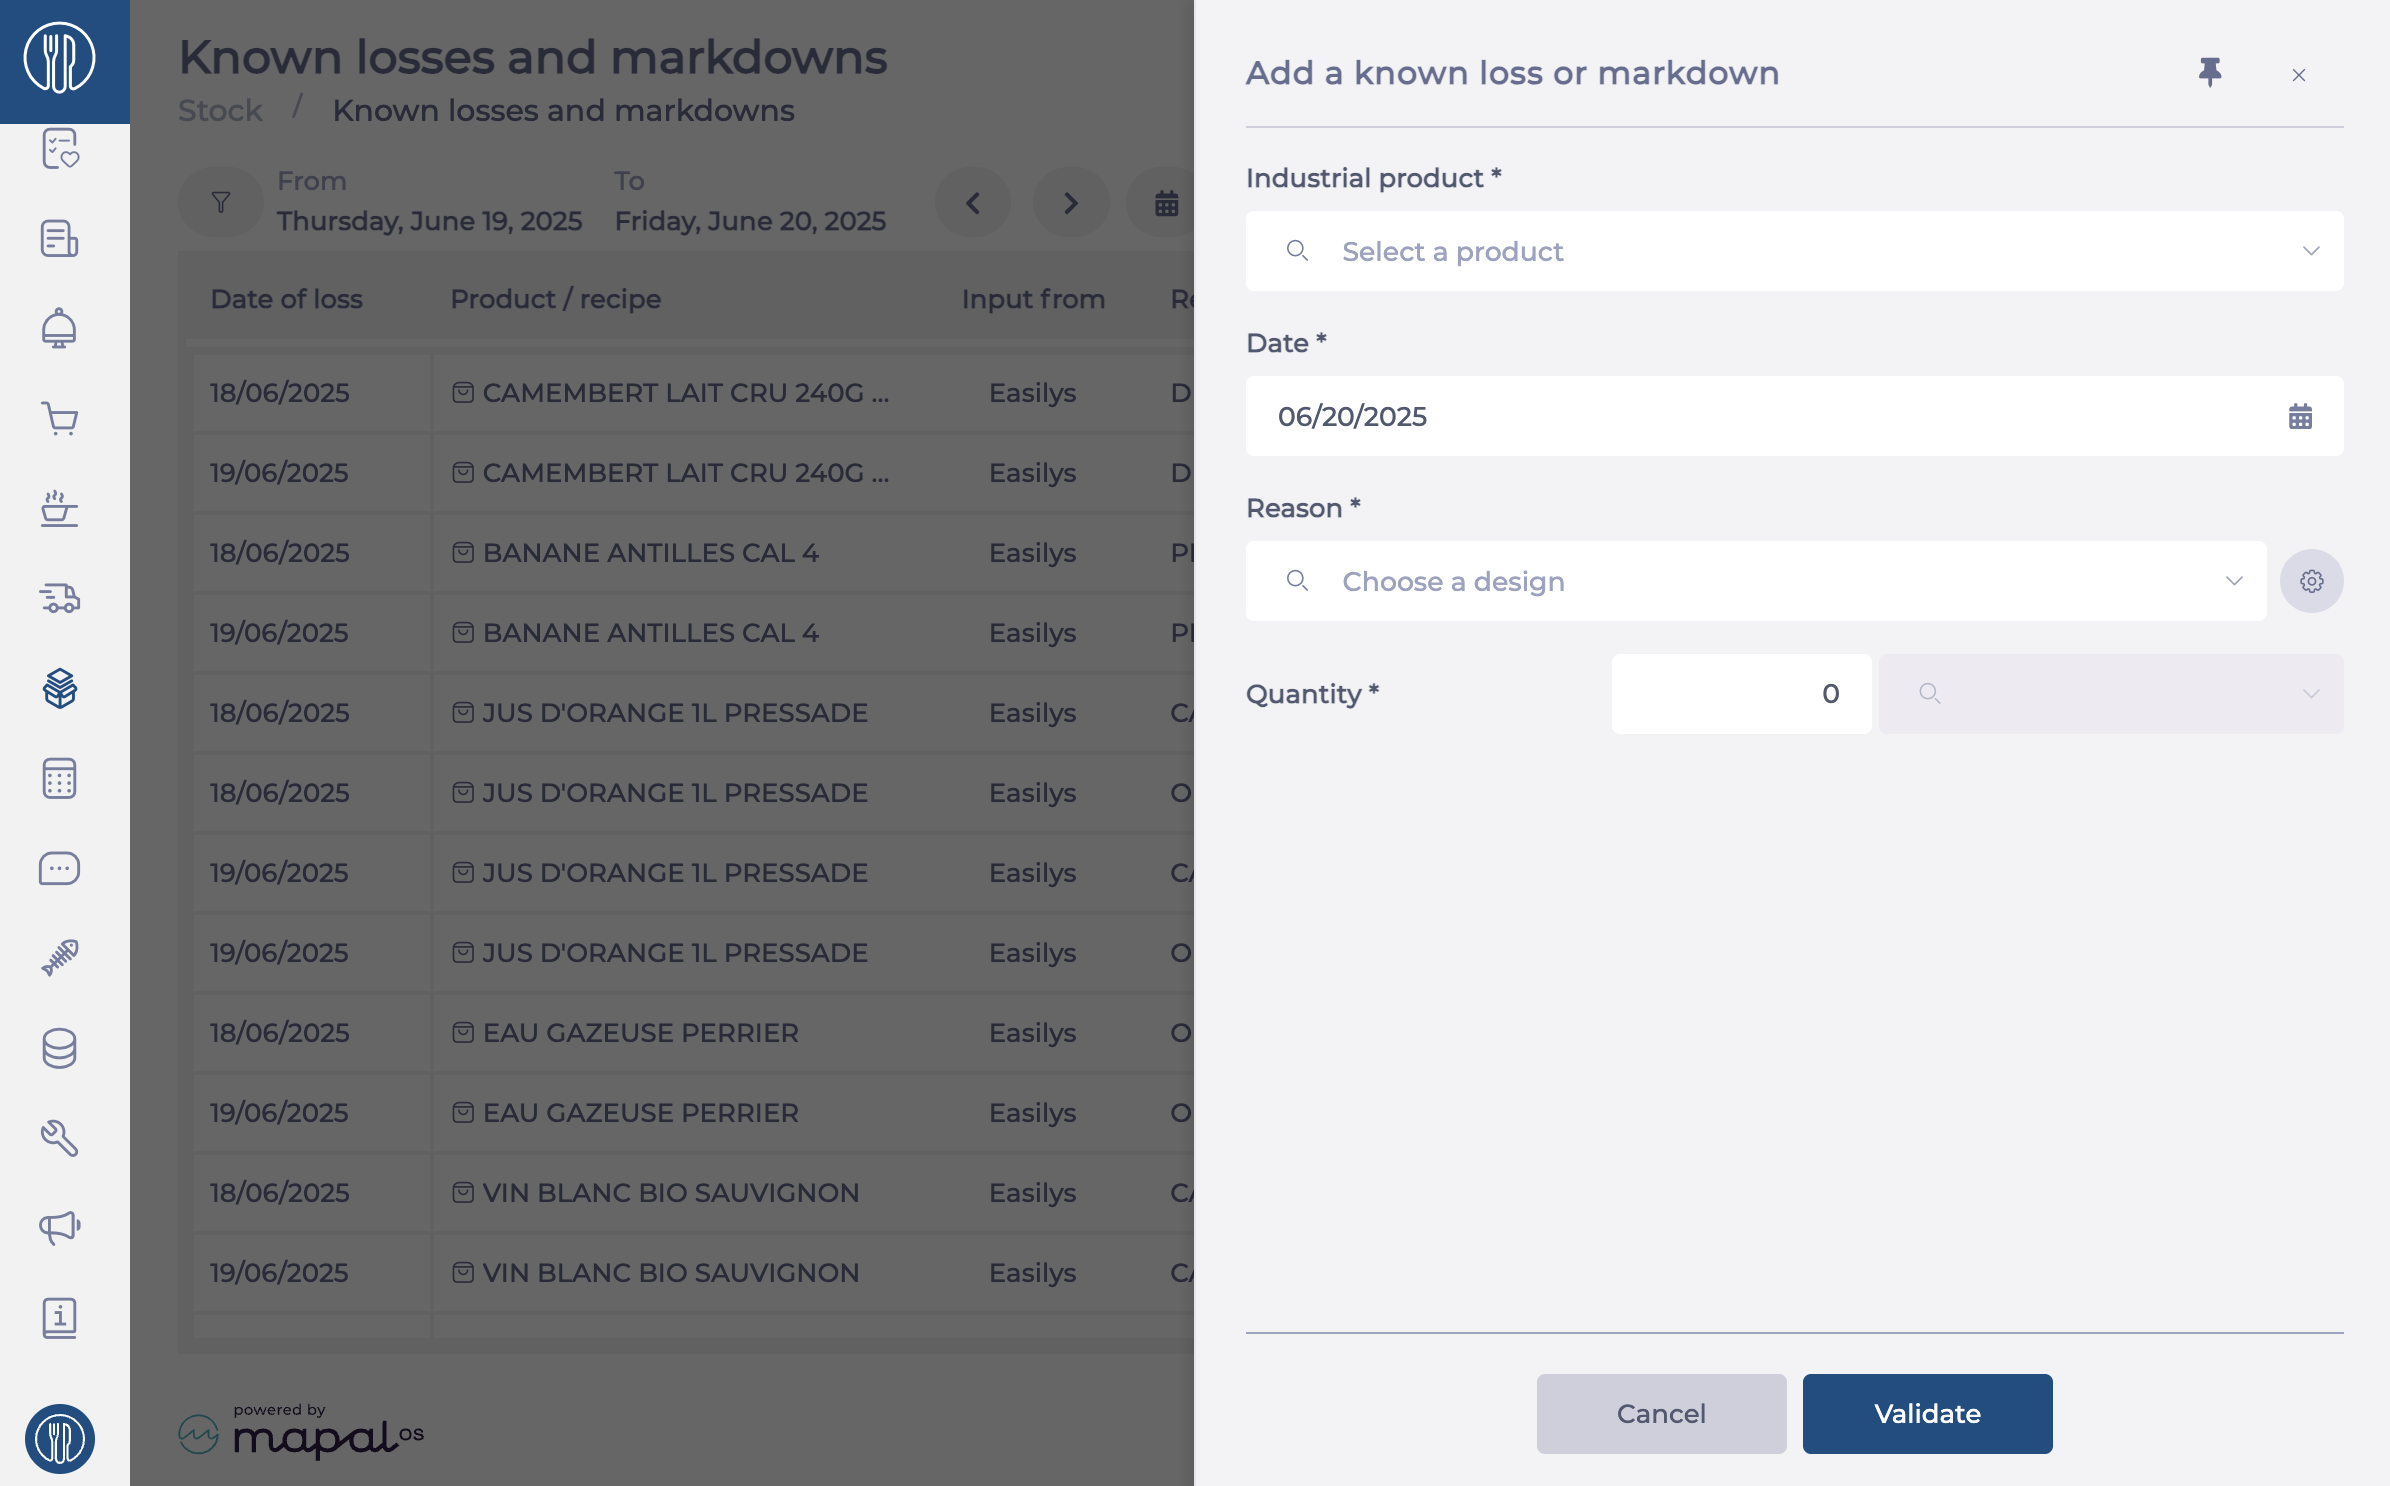
In the side panel that opens, enter:
The name of the recipe or product
The date of the loss
The reason
The quantity and unit
Select Validate
Your loss will appear in the list with the status “To be deducted”. The corresponding products will be removed from stock overnight.
2. Enter losses using templates
Using templates is useful when you want predefined lists of products that can be declared as losses. To use templates, you must have already created loss templates. If not, refer to the article Create and manage templates for known losses and markdowns.
Go to Stock > Known Losses and Markdowns from the main menu.
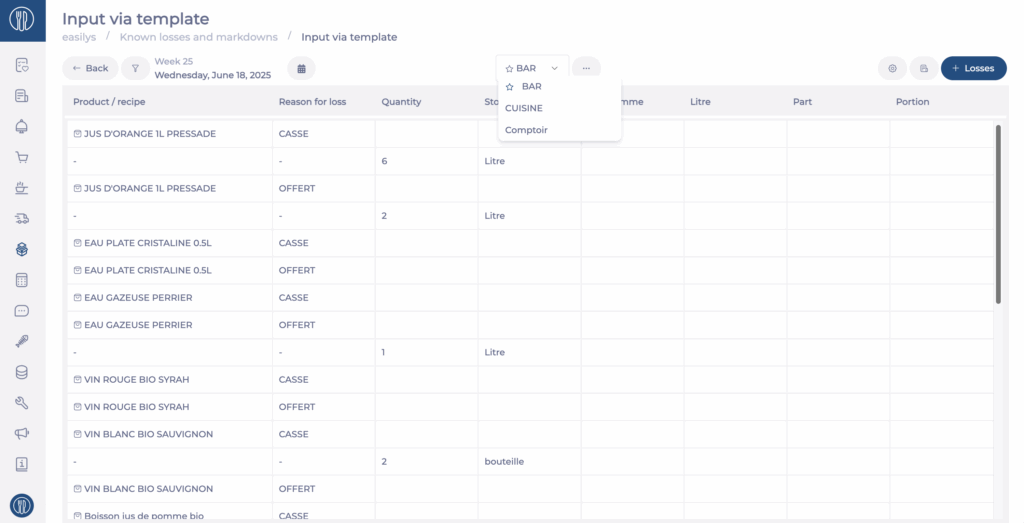
Select Input via template
Select the desired Date.
Choose the loss template you want to use.
Click + Losses in the top right corner of the screen.
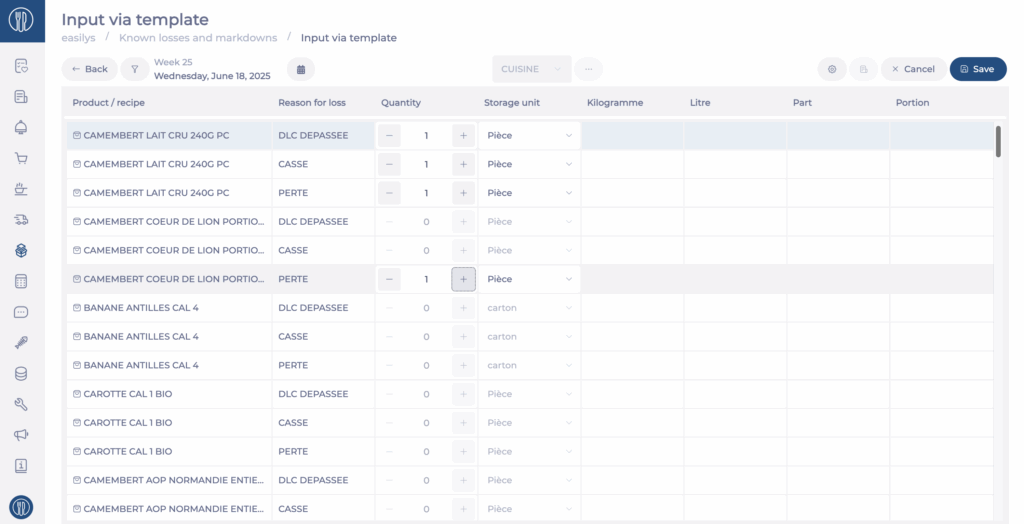
You can now enter the loss quantities for each item in the list, along with the loss reason.
To enter losses: For a product:
Click the + icon in the Quantity column for the relevant rows.
You may also choose the storage unit if multiple units are available.
Multiple storage units are available for an industrial product only if it is linked to multiple supplier products. In that case, the choice is given if those supplier products have different units of storage.
For a recipe:
Click the + icon in the column corresponding to the recipe’s unit (Kilogram, Portion, etc.).
Select Save
Note: If you want to provide your teams with a paper copy showing the item lists per template for manual recording during the day, you can print the loss recording report as explained in the article Use the loss recording report.
To return to the screen listing all losses, click Back. Losses entered via templates will appear with the status "To be deducted". The corresponding products will be removed from stock overnight.
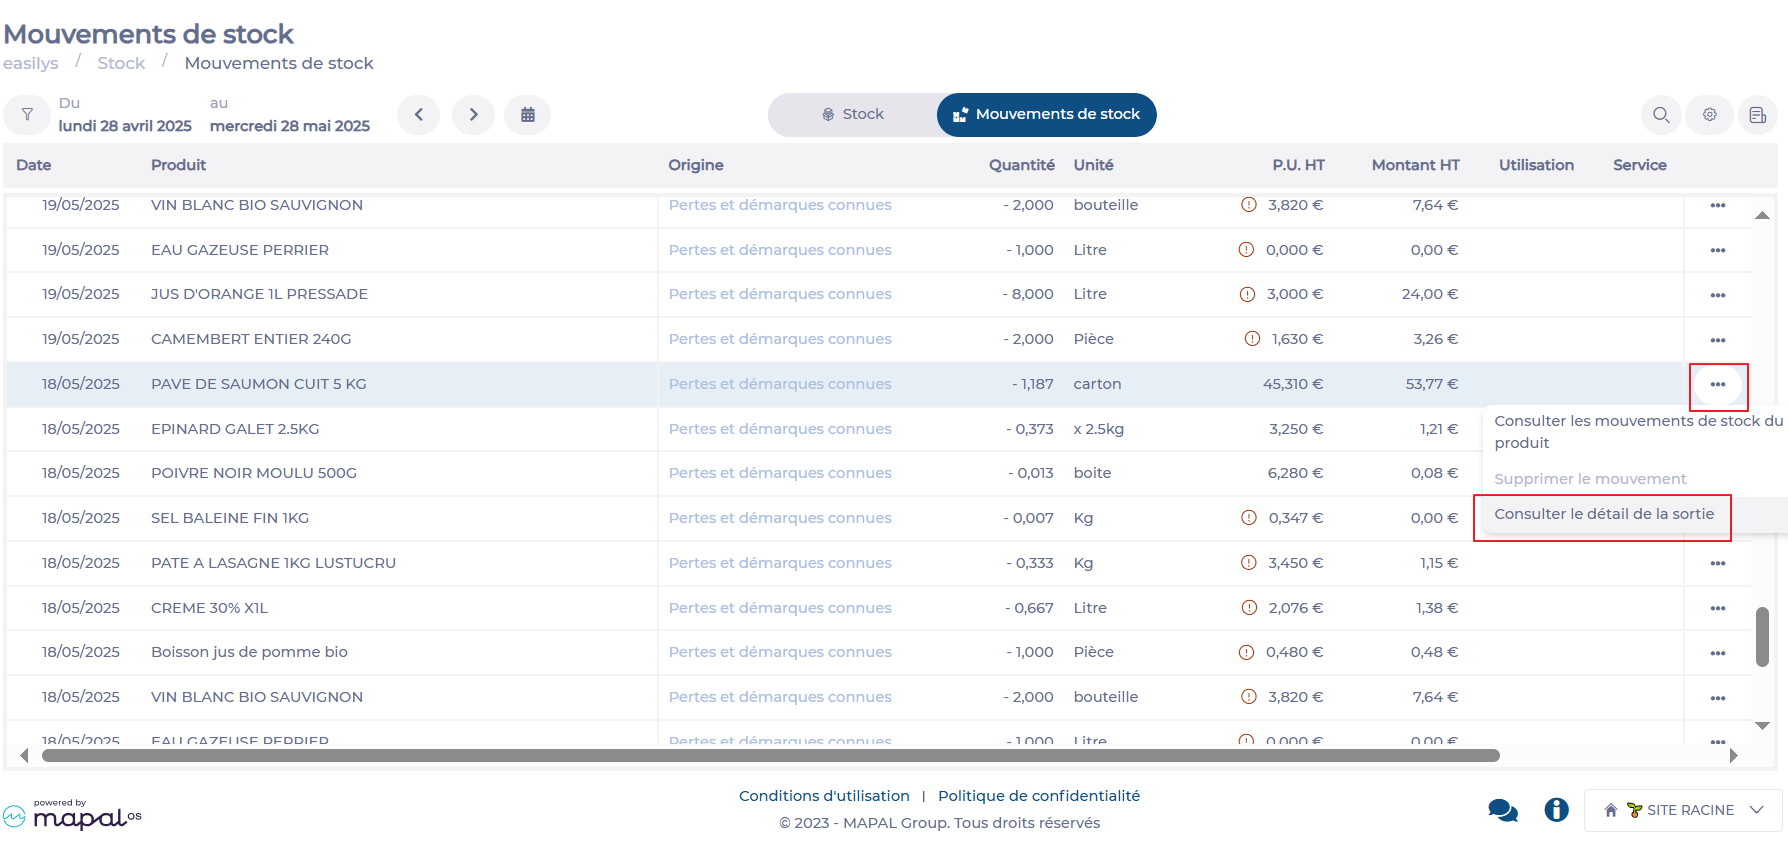
Identify the known losses and markdowns responsible for a stock withdrawal
Note: Actions on the Easilys platform depend on your user access permissions. If you cannot perform the actions below, this may be due to restrictions on your user profile. Contact the support team or your administrator for assistance.
Target a movement with the origin “Known losses and markdowns” using the filter if needed.
Select the loss movement for which you want to know the cause. To do this, either click directly on “Known losses and markdowns” on the line or use the … button to access the View detailed POS withdrawal function
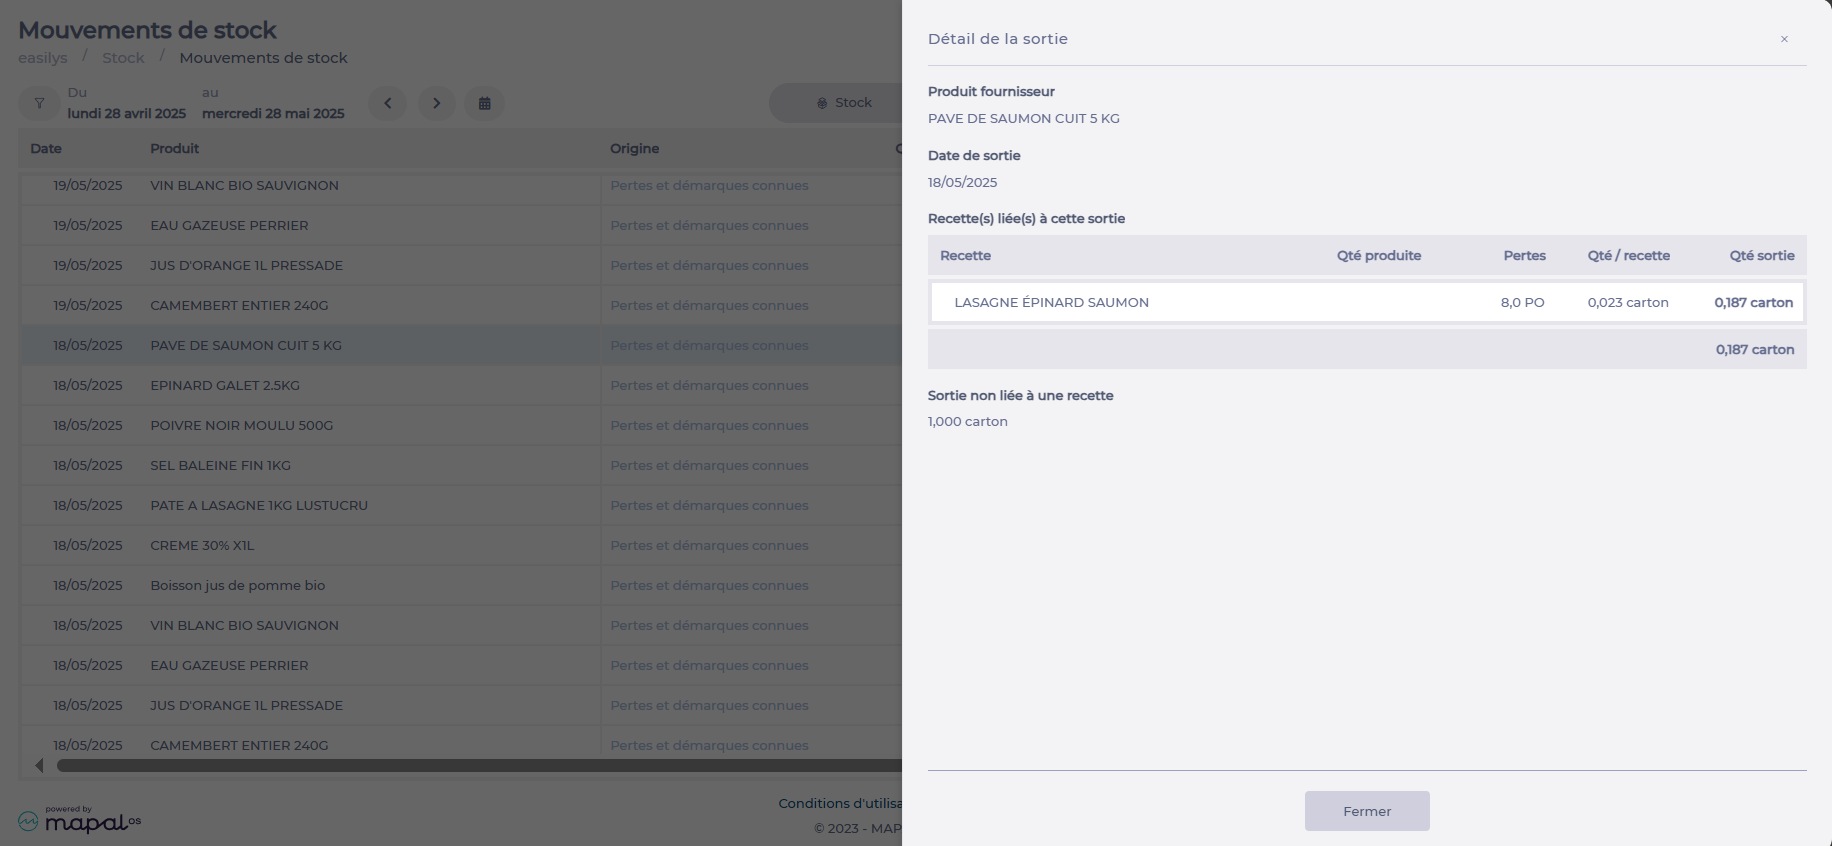
The “Detailed POS withdrawal” panel then appears. It shows:
The name of the Supplier product taken out of stock
The Release date
If this outflow is linked to the declaration of a lost recipe, the list of recipes related to this outflow is displayed with:
Names of the recipes
Number of recipes lost
Quantity of product per unit of recipe
Quantity of product taken out for the quantity of recipe lost
If all or part of this withdrawal is not linked to the loss of a recipe but is a direct product loss, then the corresponding quantity is shown.
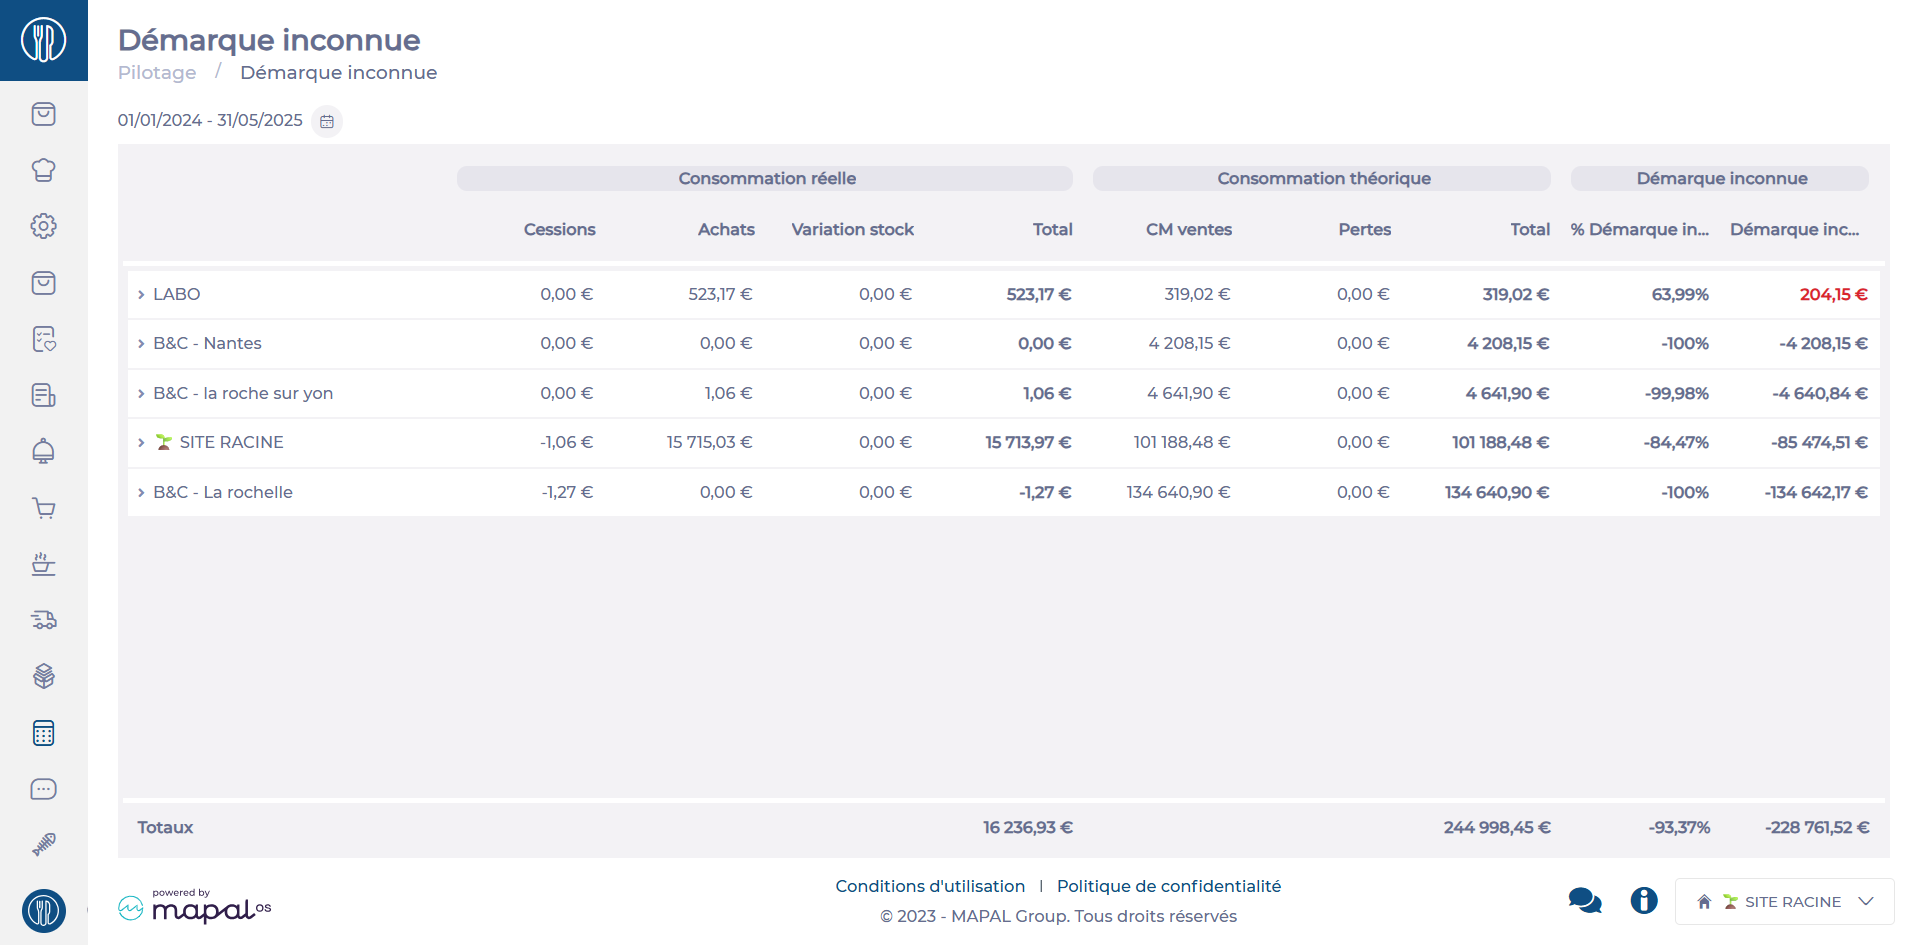
Manage shrinkage in the inventory
Start from: The Easilys menu.
Navigate to Management > Shrinkage.
This feature is particularly useful for:
Identifying high-loss points: Detect sales points with significant losses that may indicate theft, management errors, or inefficiencies.
Comparing performance: Compare inventory shrinkage between centers to identify trends or areas for improvement.
Prioritizing corrective actions: Focus efforts on problem areas and implement tailored solutions, such as strengthening controls or training teams.
Interpreting Shrinkage Rates
Very high rate
A very high shrinkage rate signals a serious issue, which could be caused by:
Inventory errors or unreported spoilage/losses.
Internal or external theft.
System management problems (e.g., software misconfiguration or supplier delivery discrepancies).
High rate
A shrinkage rate that is still significant but less critical. It may indicate:
Small but frequent thefts.
Minor management errors.
Undeclared breakage or losses.
Negative rate
Negative shrinkage is rare but possible, indicating that physical stock exceeds theoretical stock. This may be caused by:
Errors during receipt or inventory counts.
Poorly documented returns from suppliers or customers.
Low rate
A low shrinkage rate is acceptable and reflects good management practices, such as:
Rigorous stock control.
A well-defined loss management process.
A trained and vigilant team.
Product details per site
The detailed breakdown of shrinkage per center provides a list of products contributing to inventory losses. This helps:
Identify causes: Detect thefts, breakage, or other issues.
Prioritize corrective actions: Focus on addressing losses for sensitive items.
Optimize purchases and stock: Avoid overstocking or unsold products.
Monitor trends and anomalies: Respond quickly to unusual patterns or events.
Manage the reasons for known losses and markdowns
Note: Each action within the Easilys application depends on your user access permissions. If you are unable to perform the actions described in this article, it may be due to access restrictions on your user profile. Contact the Support Team or your administrator for further assistance.
Start from: The Easilys menu.
You can manage the reasons for known losses and markdowns so they better reflect operational realities. This management can be done either from the loss record panel or from the template management screen.
Method 1: From the Loss Entry Panel
Go to Stock > Known Losses and Markdowns.
Click + Product, then choose either Industrial Product or Recipe.
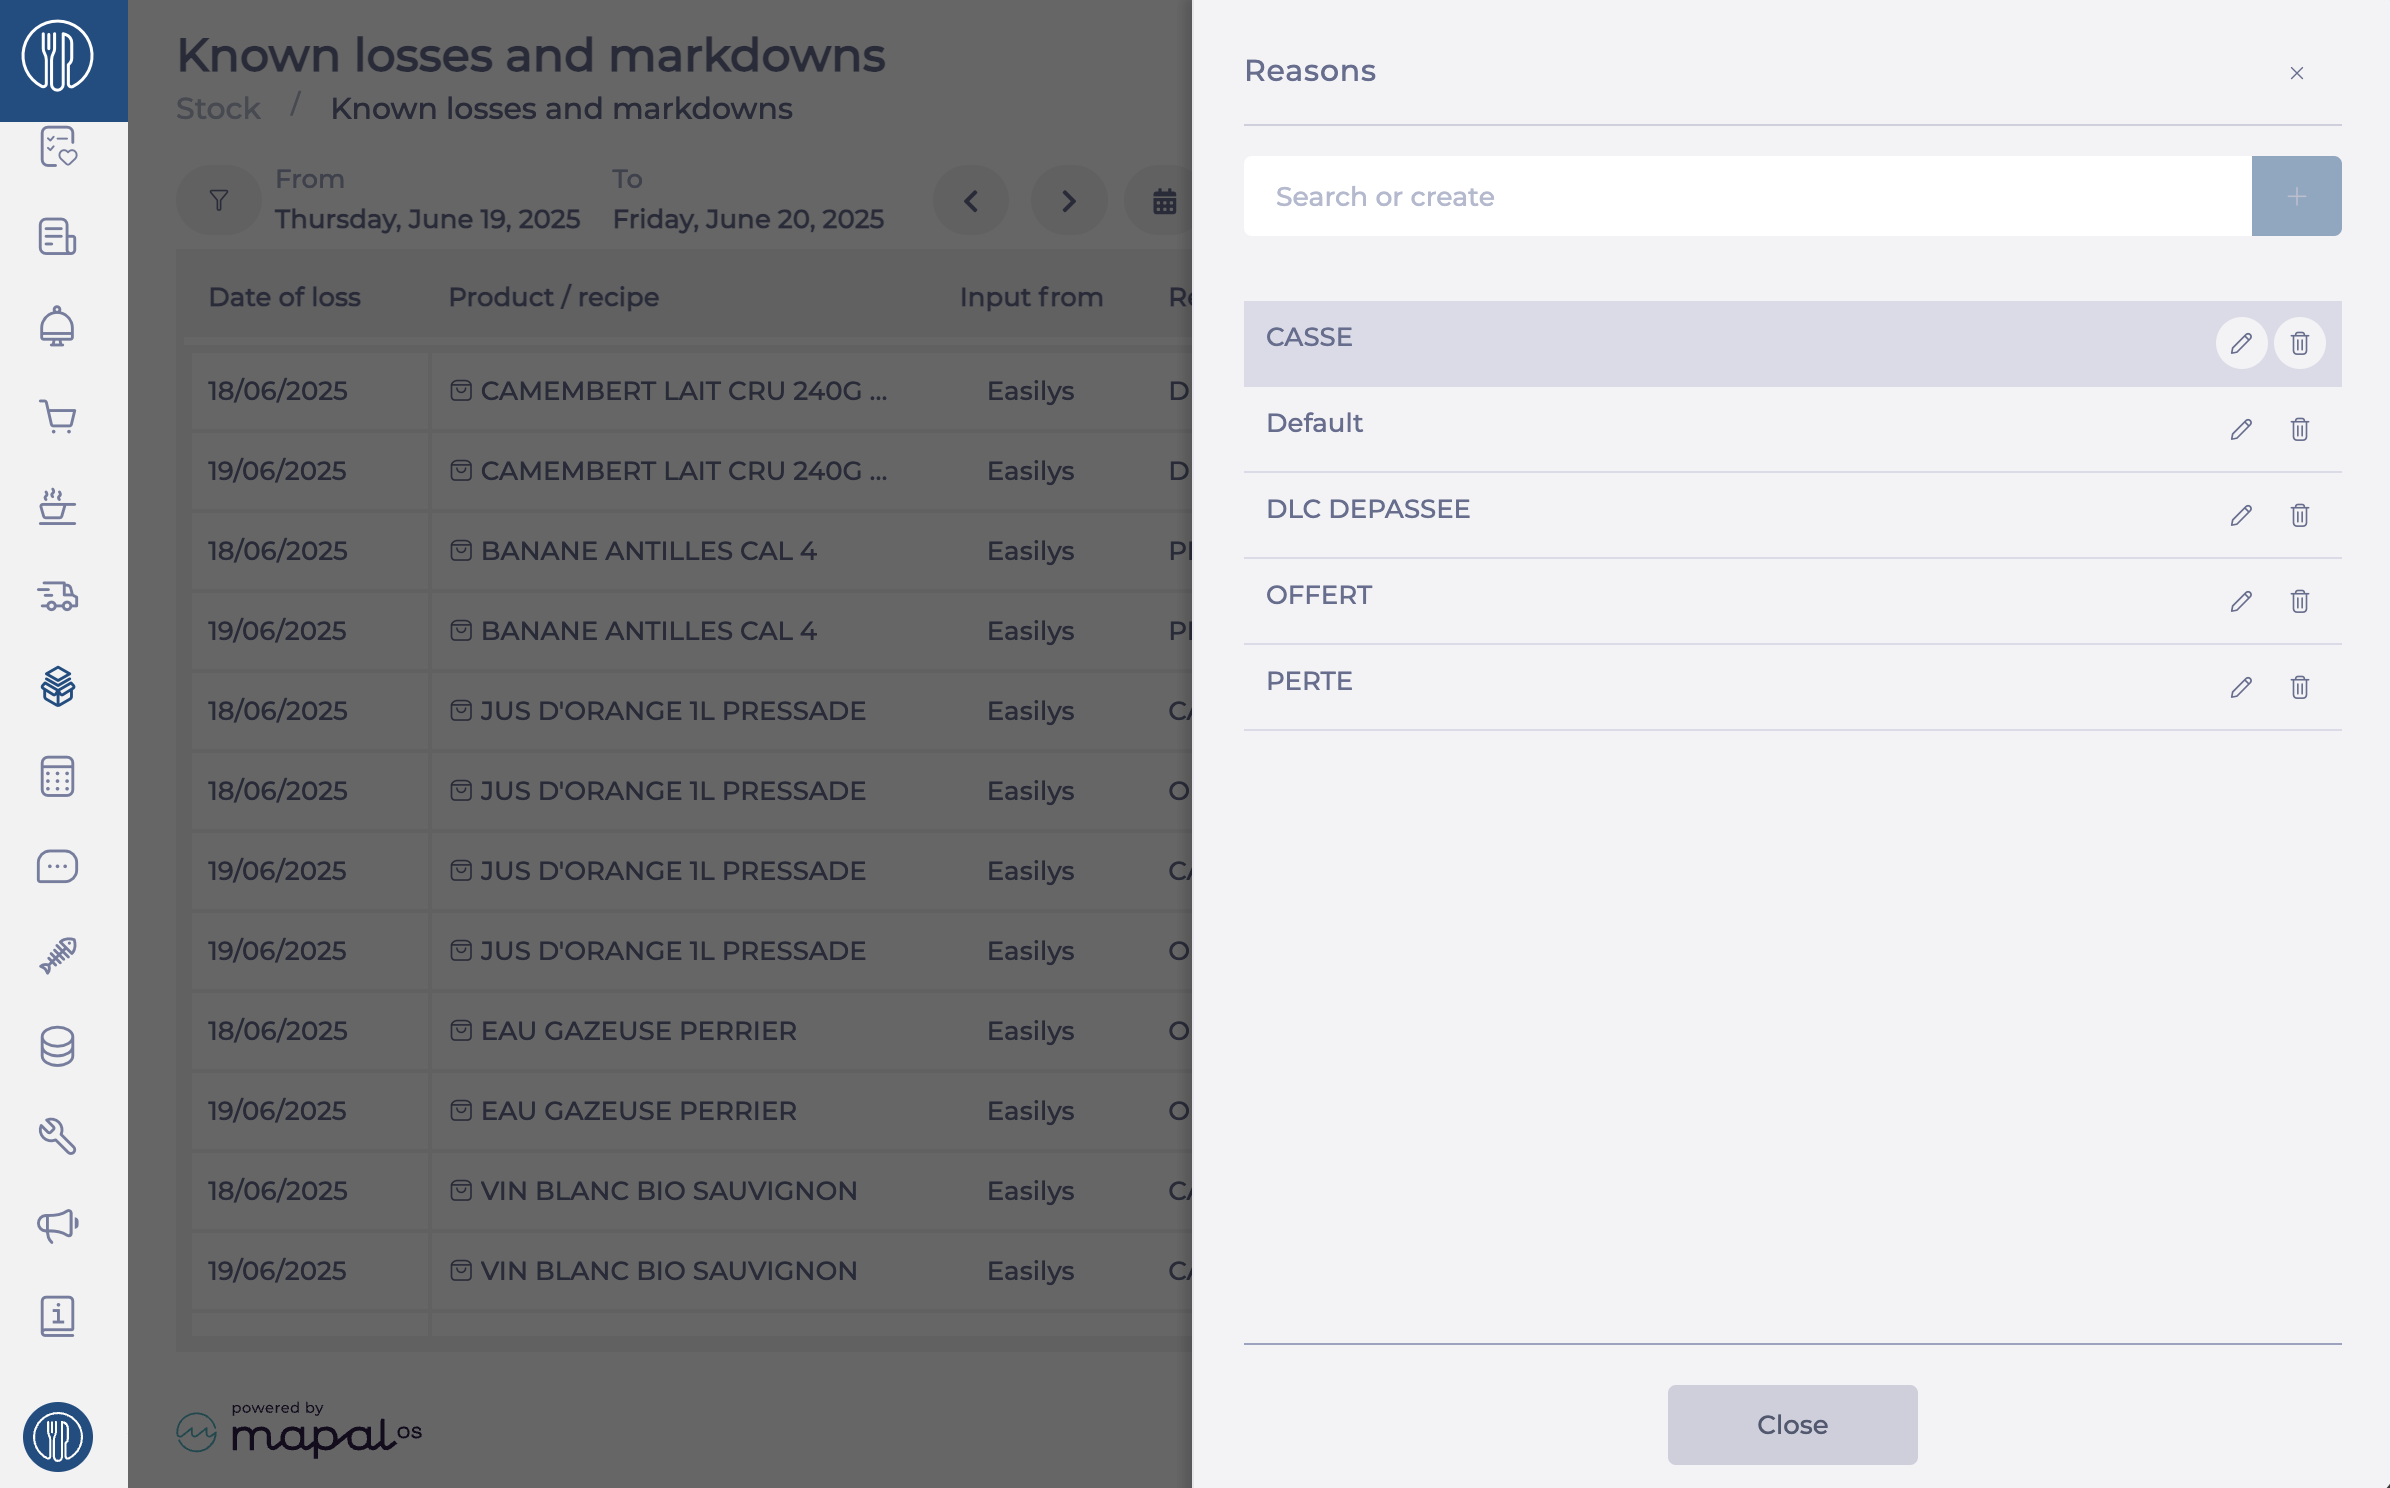
Click the gear icon next to the “Reason” field.
A management panel will appear, allowing you to:
Delete a reason by clicking the bin icon.
Edit a reason by clicking the pencil icon.
Create a new reason by typing the label into the search bar, then selecting +.
Once finished, select Close at the bottom of the panel.
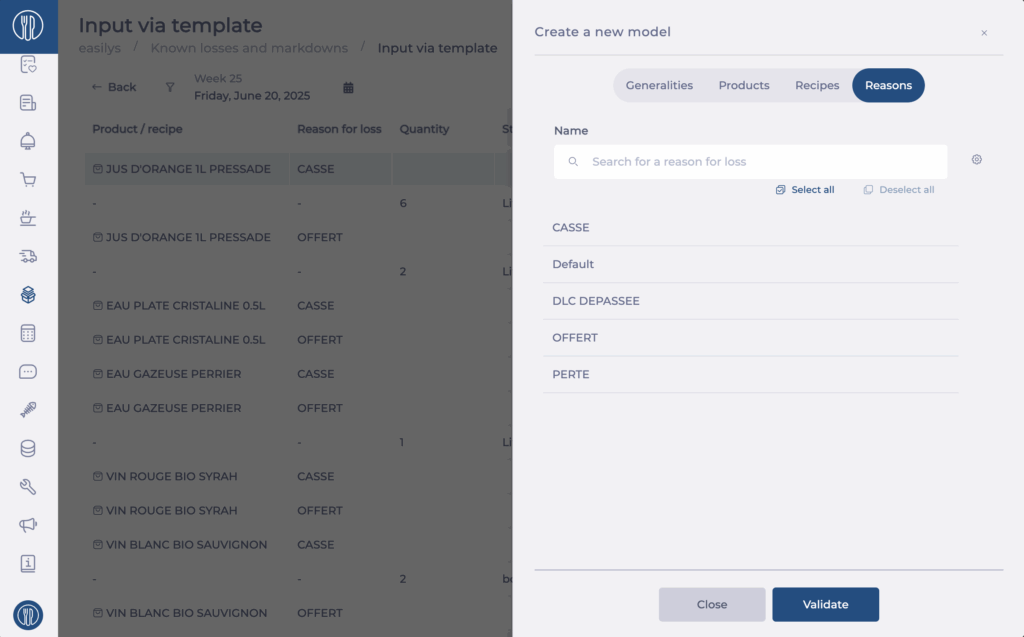
Method 2: From Template Management
Go to Stock > Known Losses and Markdowns.
Click Input via template.
Click the three dots above the loss table.
Select + New model or Modify.
Go to the Reasons tab.
Click the gear icon next to the label search bar.
You can now:
Delete a reason by clicking the bin icon.
Edit a reason by clicking the pencil icon.
Create a new reason by typing it into the search bar and selecting +.