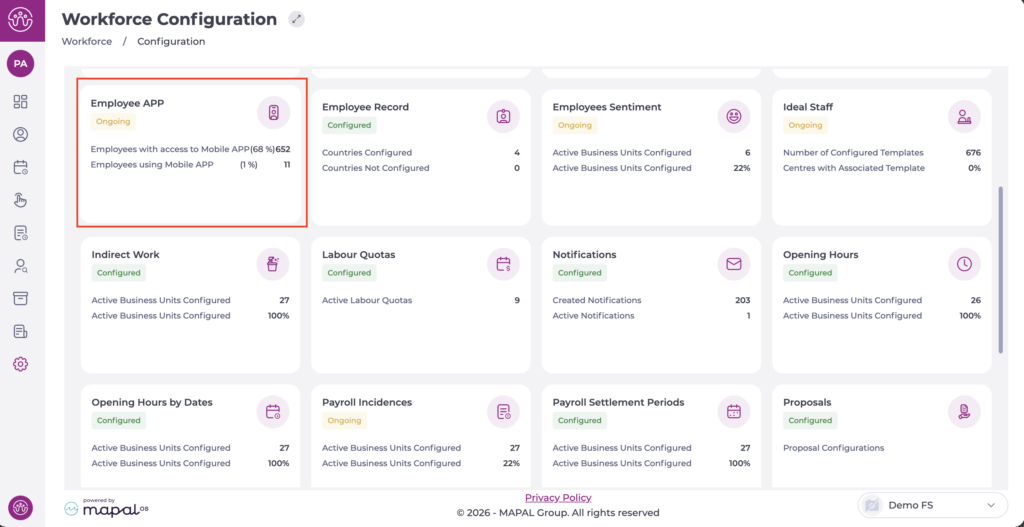
Select Configuration > Employee APP from the main menu.
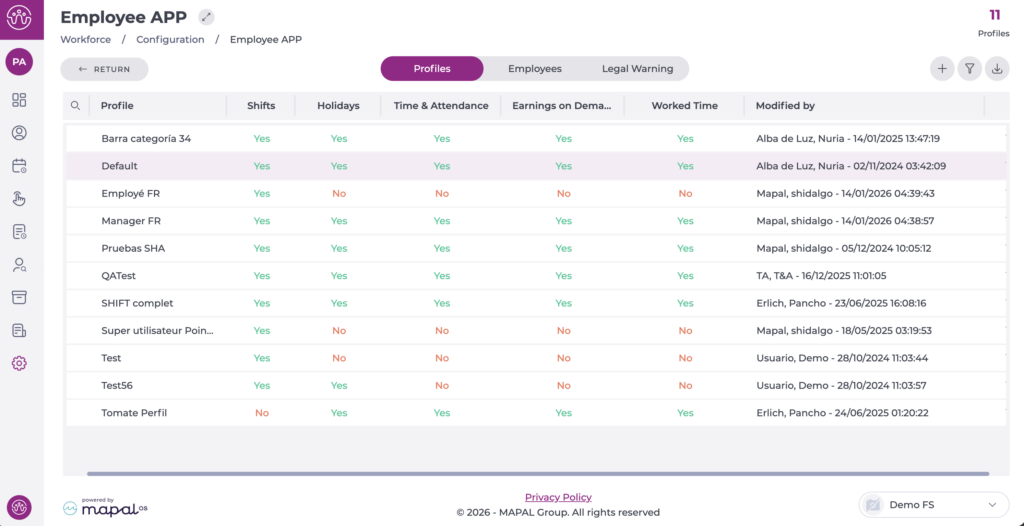
On the Profiles tab, you can see the list of profiles already created.
Select the profile you want to edit.
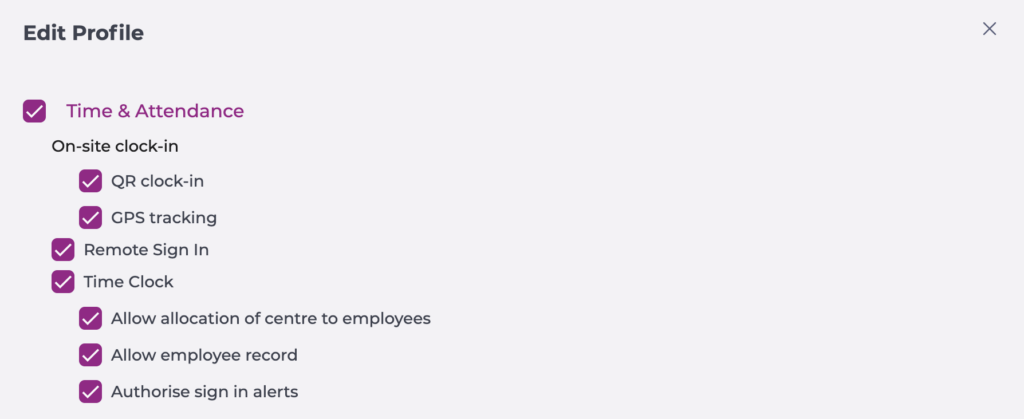
In the pop-up window, begin editing the Time & attendance section by enabling the corresponding checkbox.
Select QR clock-in if you want the employee to be able to clock in/out by scanning the QR code with their mobile app.
Select GPS tracking if you want the employee to clock in/out based on their geolocation.
Enable the Remote sign in option to allow shift recording from any location.
Enable the Time Clock section on profiles that need permission to register employees on the Smarthub.
Allow allocation of centre to employees.
Allow employee record, either by code or fingerprint registration.
Authorise sign in alerts: To validate a clock-in even when it breaches an alert established in contracts or collective agreements.
Select Accept to save the configuration you have defined OR Cancel to discard the changes.
Clock-in models
There are different clock-in models for recording shift entry and exit. Below is a description of each of the available systems and their different methods.
Smarthubs
This is a standalone clock-in device whose request must be managed through the Onboarding Consultant or the Account Manager, as it requires special processing.
As additional configuration, it must be connected to the internet, either by cable or network. If you have any questions, you can review the Configure network settings on Smarthub.
It has different clock-in methods:
Fingerprint reader.
Clock-in with DNI/NIE number (as indicated on the employee record; this is a numeric-only field).
Clock-in with DNI number and PIN code (in this case, configurable on the employee record).
QR code scanning*: the employee must use a mobile phone to scan the code.
*The QR code is a dynamic code that changes every 30 seconds.
POS App
To use the clock-in system, the application must be installed on the client's device. It is recommended to consult with the Onboarding Consultant or the Account Manager, as it may require a special request.
Note: The device can be a computer or tablet, but it must have Windows 10 or 11. Additionally, TeamViewer credentials will be required to carry out the installation.
It has different clock-in methods:
Fingerprint reader: a fingerprint reader connected to the terminal will be required.
Clock-in with DNI/NIE number (as indicated on the employee record; this is a numeric-only field).
Clock-in with DNI number and PIN code (in this case, configurable on the employee record).
QR code scanning*: the employee must use a mobile phone to scan the code.
*The QR code is a dynamic code that changes every 30 seconds.
Mobile application
It is possible to download the Mapal One (or GIR Staff) application on a mobile phone to use this functionality.
It has different clock-in methods:
GPS clock-in.
Remote clock-in.
QR code scanning*: a Smarthub or POSAPP must be installed.
*The QR code is a dynamic code that changes every 30 seconds.
Note: In the case of the mobile application, the configurations in Workforce must be carried out according to the selected method.