


Note: Chaque action effectuée sur l'application est payante. Si vous ne parvenez pas à effectuer les actions recommandées dans les articles que vous consultez, cela peut signifier que les droits nécessaires ne sont pas activés pour votre profil utilisateur. Contactez l'équipe d'assistance ou votre administrateur pour en savoir plus.
Départ de : Le menu Easilys.
The CONTROL ON RECEPTION screen is designed for use on cell phones or tablets.
It enables you to check receipts directly in terms of quantity, record best-before dates and batch numbers, and the origin of products, so that you can later access the Receptions screen, where the receipt slip will already be pre-completed with the information supplied by the supplier. This will enable you to later access the Receptions screen, where the receipt slip will already be pre-completed with the information entered during the incoming inspection, to validate the prices proposed by the supplier and enter the products into stock.
1. Select the Supplier orders > Control on reception onglets.
2. You have a list of all the receptions scheduled for D-Day.

You can select a period to view receptions scheduled for other days.
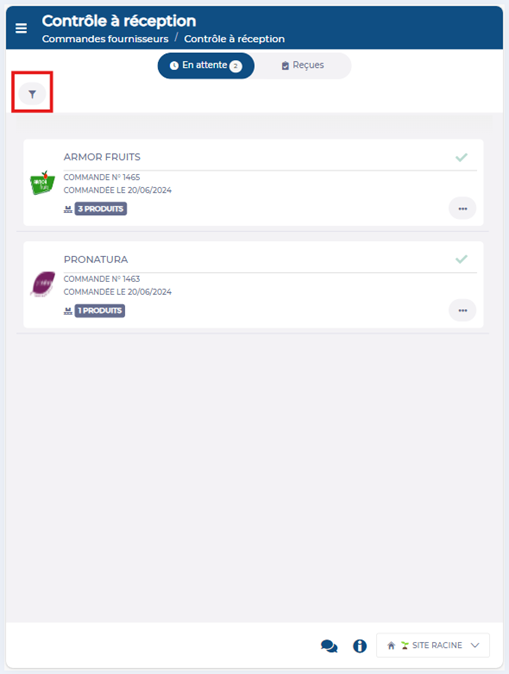
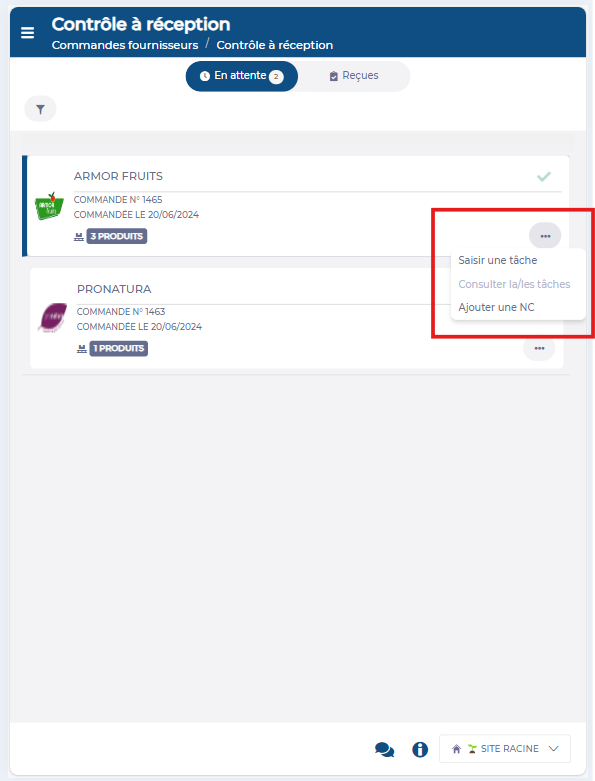
3. Select a reception. By clicking on ??, you can sign off the arrival of the delivery and no longer see it in the expected deliveries. By clicking on the... icon, you can enter tasks for the complete reception (not specific to one product), such as saving the truck temperature or the delivery note photo.
4. You can then access the list of expected products.
5. To sign off incoming checks, select a product.

You can use the... icon to add a product, and switch from order units to billing units. Using the scan function on your mobile device, you can also scan product barcodes to find them more easily in the list.
6. You can see the panel for incoming inspection of this product.

7. Enter the quantity actually received.
8. Validate whether the quantity received matches the quantity viewed on the supplier's delivery note.
9. Add any batches with their DDM or DLC Data.

7. Select Sauvegarder au bas du panneau.
8. Select ?? visible on the right of the product to save it as processed.
9. Repeat these actions for each product in the reception.

10. Return to the list of receptions to be processed by selecting the arrow at the top left of the screen.
Once you've completed the physical incoming goods inspection, you'll need to go to the RECEPTIONS screen to validate the prices of the goods and enable them to be entered into stock in the right quantity, at the right price, and with the necessary information to ensure traceability.