


Note: any action that can be performed on the application is subject to a right.
If you are unable to carry out the recommended actions in the articles you are viewing, it might indicate that the required permissions are not enabled for your user profile. Reach out to the Support team or your administrator for further information.
Gestion des unités commerciales via Mapal OS
Pour les utilisateurs de Mapal OS, vos unités commerciales devraient désormais être gérées depuis le tableau de bord Mapal OS. Pour en savoir plus, rendez-vous sur Gérer les unités commerciales dans Mapal OS.
Note: si vous n'êtes pas sûr d'être sur Mapal OS, contactez votre responsable hiérarchique ou le support Mapal.
Managing sites via Easilys site settings
Commencer à partir de: le menu Easilys
-
Select the small camera icon or your avatar (1).
-
Sélectionnez le Paramètres du site (Site's parameters) (2).
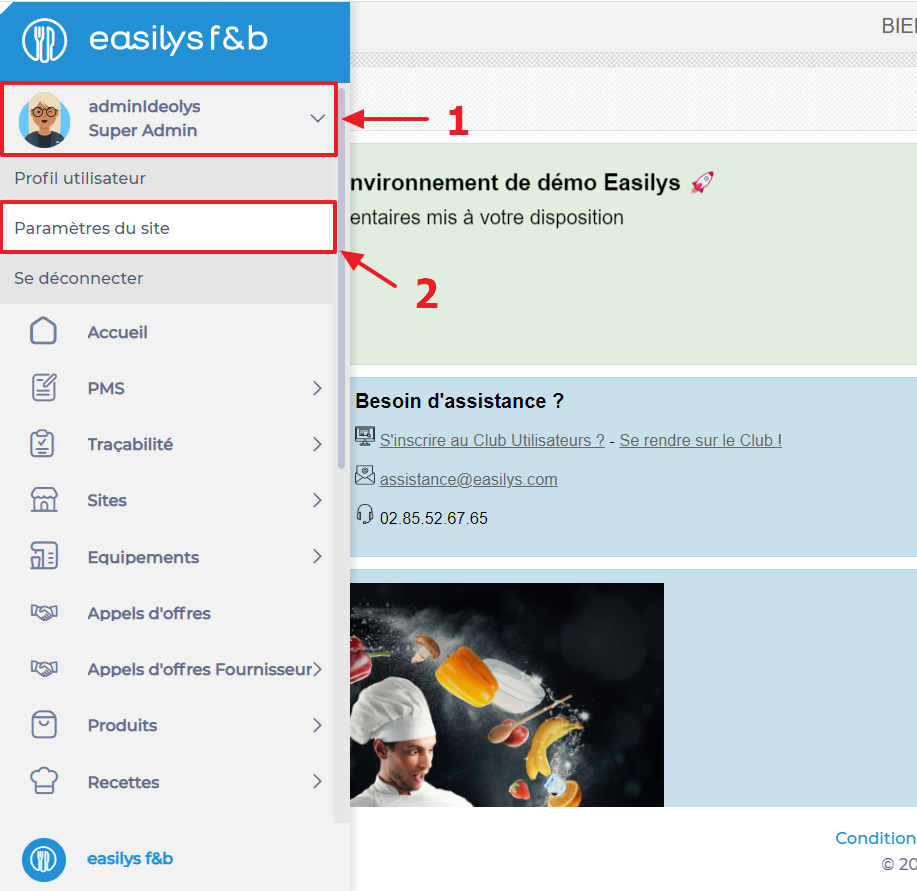
You are directly redirected to the "Informations” (Information) tab of the site settings.
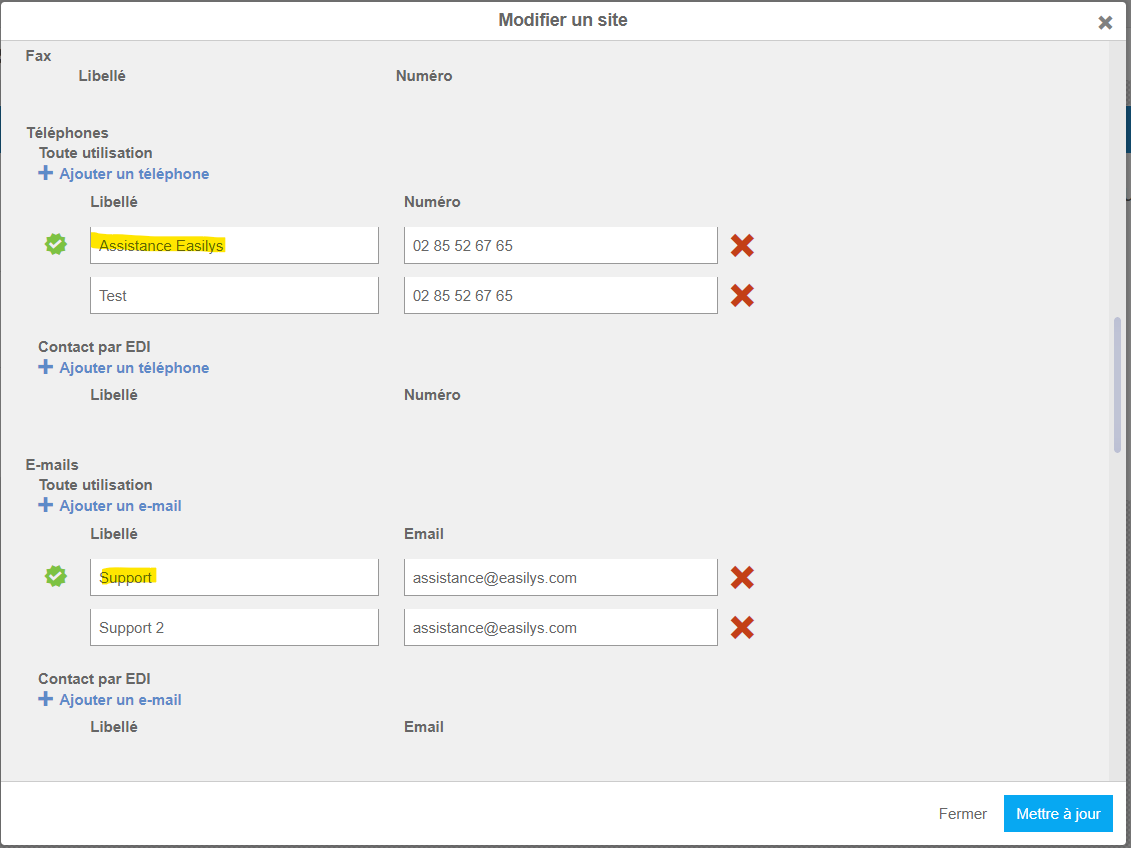
Complete site information
-
In the "Coordonnées" (Contact details)* section, select Mettre à jour (Mise à jour).
*The name is a little misleading, this area will allow you to update much more than just your site's contact details. You can activate or deactivate certain operating options, for example.
-
Complete the information sheet that appears on your screen.
You can add the site's main e-mail address and telephone number, which will be distinguished by a pictogram. The first e-mail address and telephone number will always be defined as "main".
-
Sélectionner Mettre à jour (Update) when finished.
Program closing days
You can tell Easilys which days your establishment will be closed. The application will then take them into account in various reports and screens such as supplier orders and production reports.
- Select the start date of your closure period from the calendar on the right, next to "Coordonnées" (Contact details).
- The "Période de fermeture" (Closing period) window appears on the screen.
- Enter the end date of your closing period and select Créer (Créer).
- Repeat for each closing period.
?
Add or modify the site logo
-
In the "Identité” (Identity) section, select Mettre à jour le logo (Update logo) to add a logo.
-
Sélectionner Appliquer sur les enfants (Apply to children) if you want the logo used on this site to be used on children's sites too.