Manage employee profiles in Mapal OS

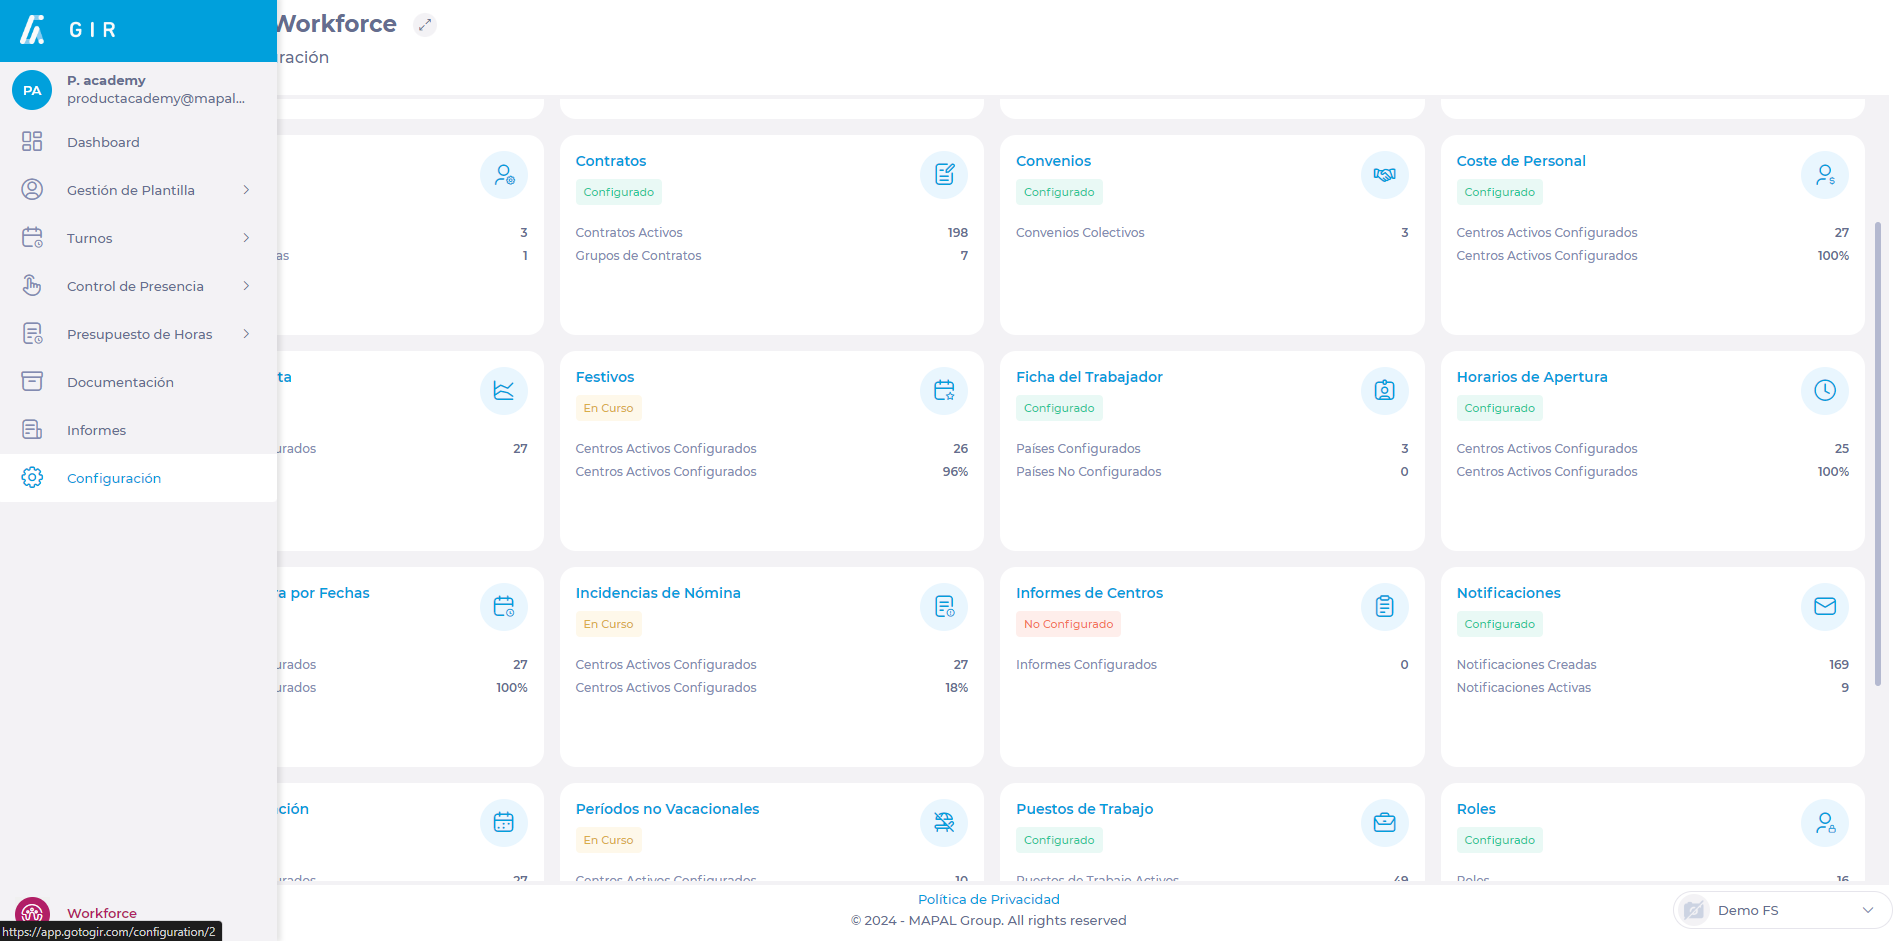
Start from: The Configuration dashboard.
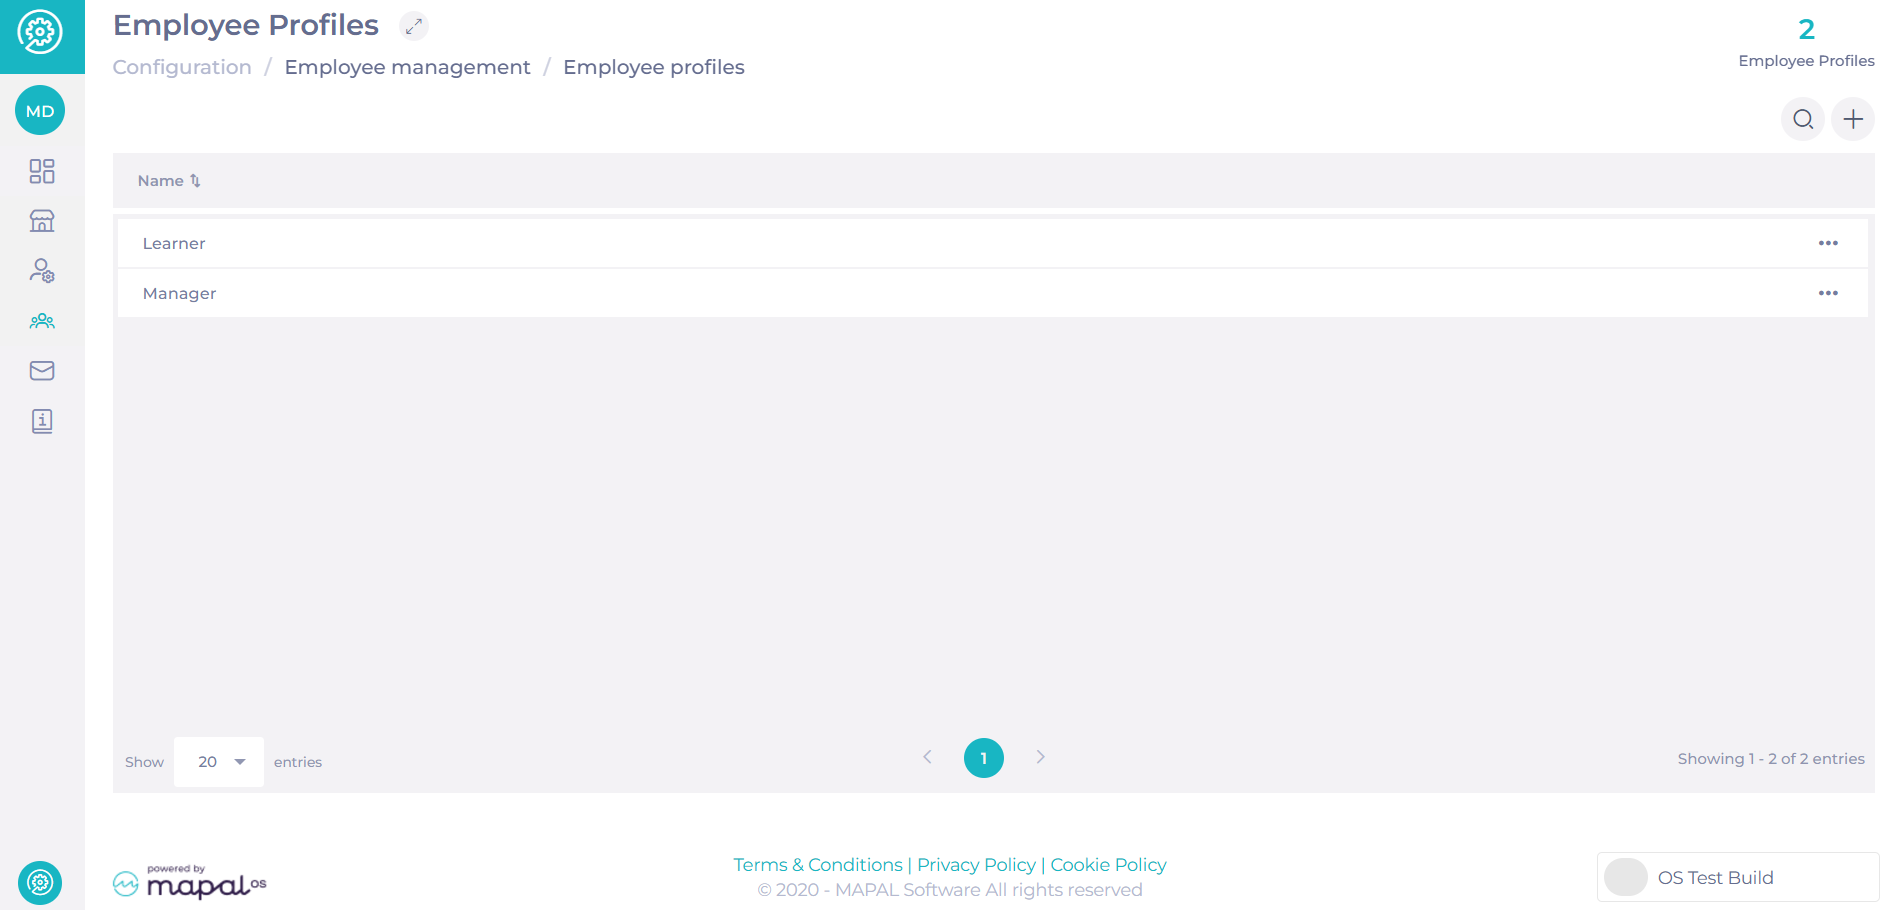
Employee Profiles

Assigning Employee Profiles allows managers to grant team members access to specific tools, apps, and resources within the Mapal OS ecosystem, streamlining operational efficiency and role-based access.

Create an Employee Profile

  • Select Employee Management > Employee Profiles from the main menu.

A screenshot of a computer<br><br>Description automatically generated

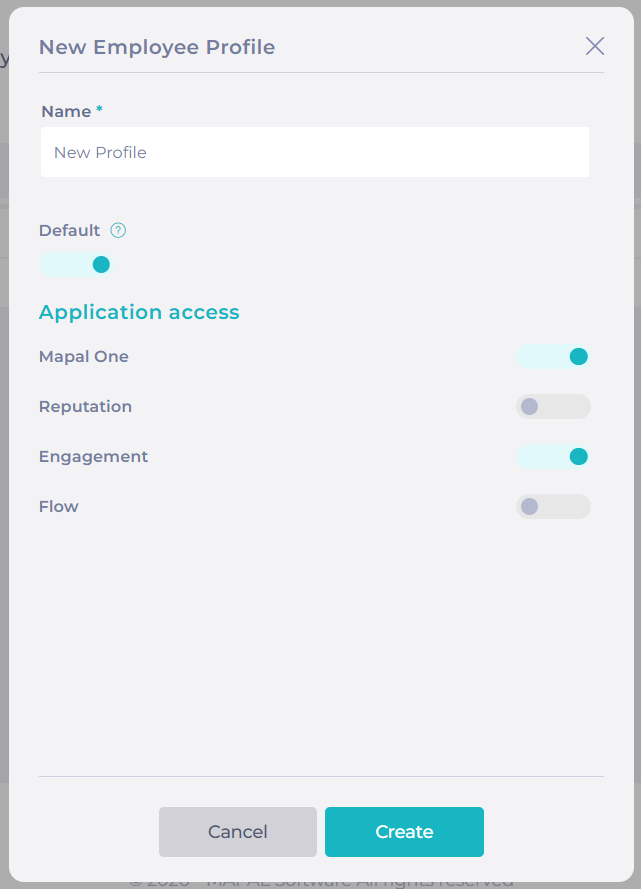
  • Select + Add to open the New Employee Profile window.

  • Fill in the Name field (mandatory).

  • Toggle the Default Profile option if you want this profile to be the default for new employees.

  • Under Application Access, toggle the switches to grant access to specific apps, such as:

    • Mapal One

    • Reputation

    • Engagement

    • Flow Learning

  • Once all configurations are set, select Create.

A screenshot of a computer<br><br>Description automatically generated 

Edit an Employee Profile

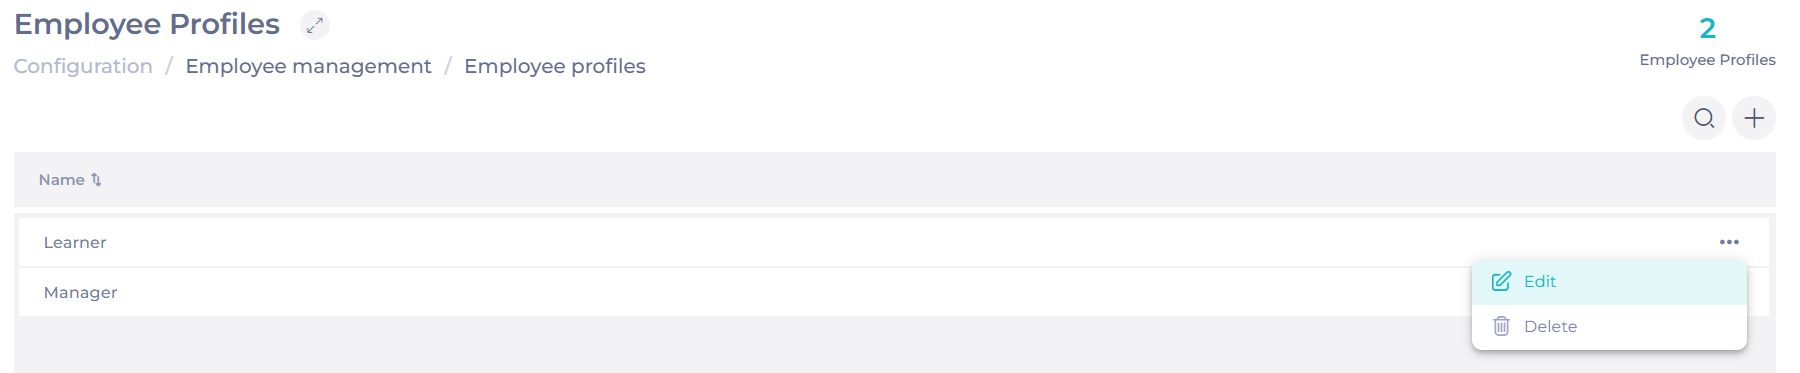
  • In the Employee Profiles list, select the three dots icon next to the profile you want to edit.

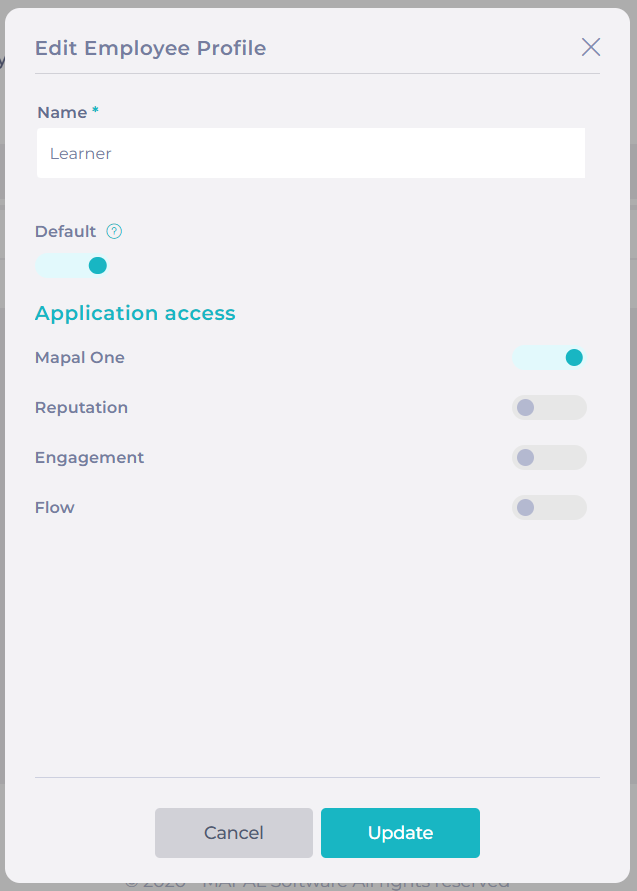
  • Select Edit to open the Edit Employee Profile window.

  • Adjust the parameters as needed.

  • Select Update to save the changes.

A screenshot of a computer<br><br>Description automatically generated

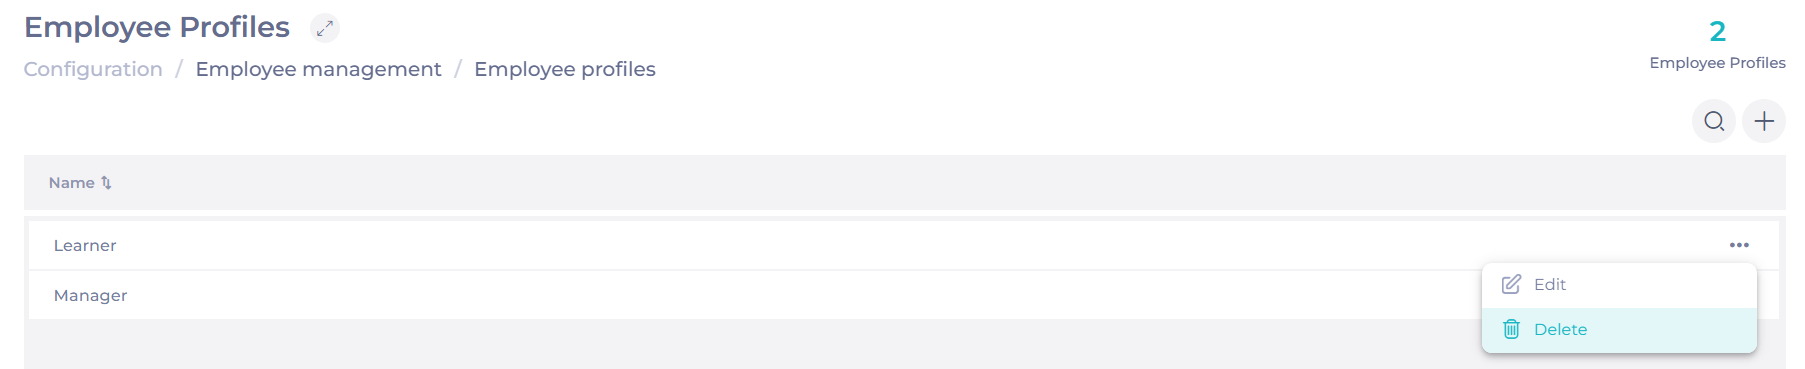
Delete an Employee Profile

  • In the Employee Profiles list, select the three dots icon next to the profile you want to delete.

  • Select Delete.

A white background with a couple of lines<br><br>Description automatically generated with medium confidence

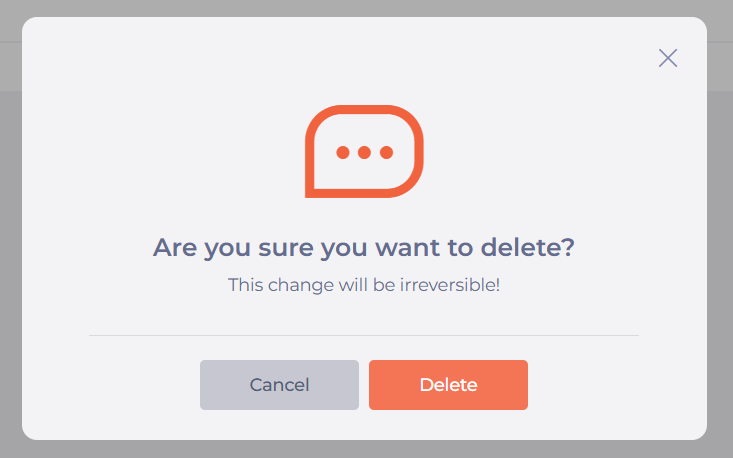
  • Confirm the action in the pop-up window by selecting Delete.

A screenshot of a computer<br><br>Description automatically generated

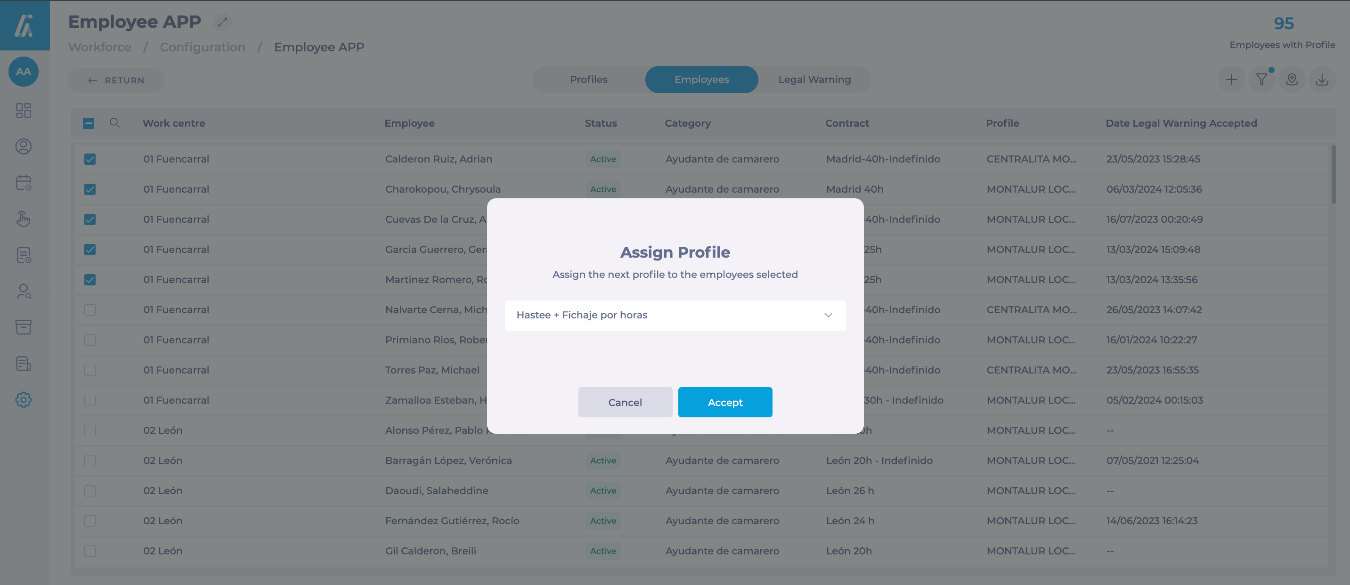
Assign an Employee Profile

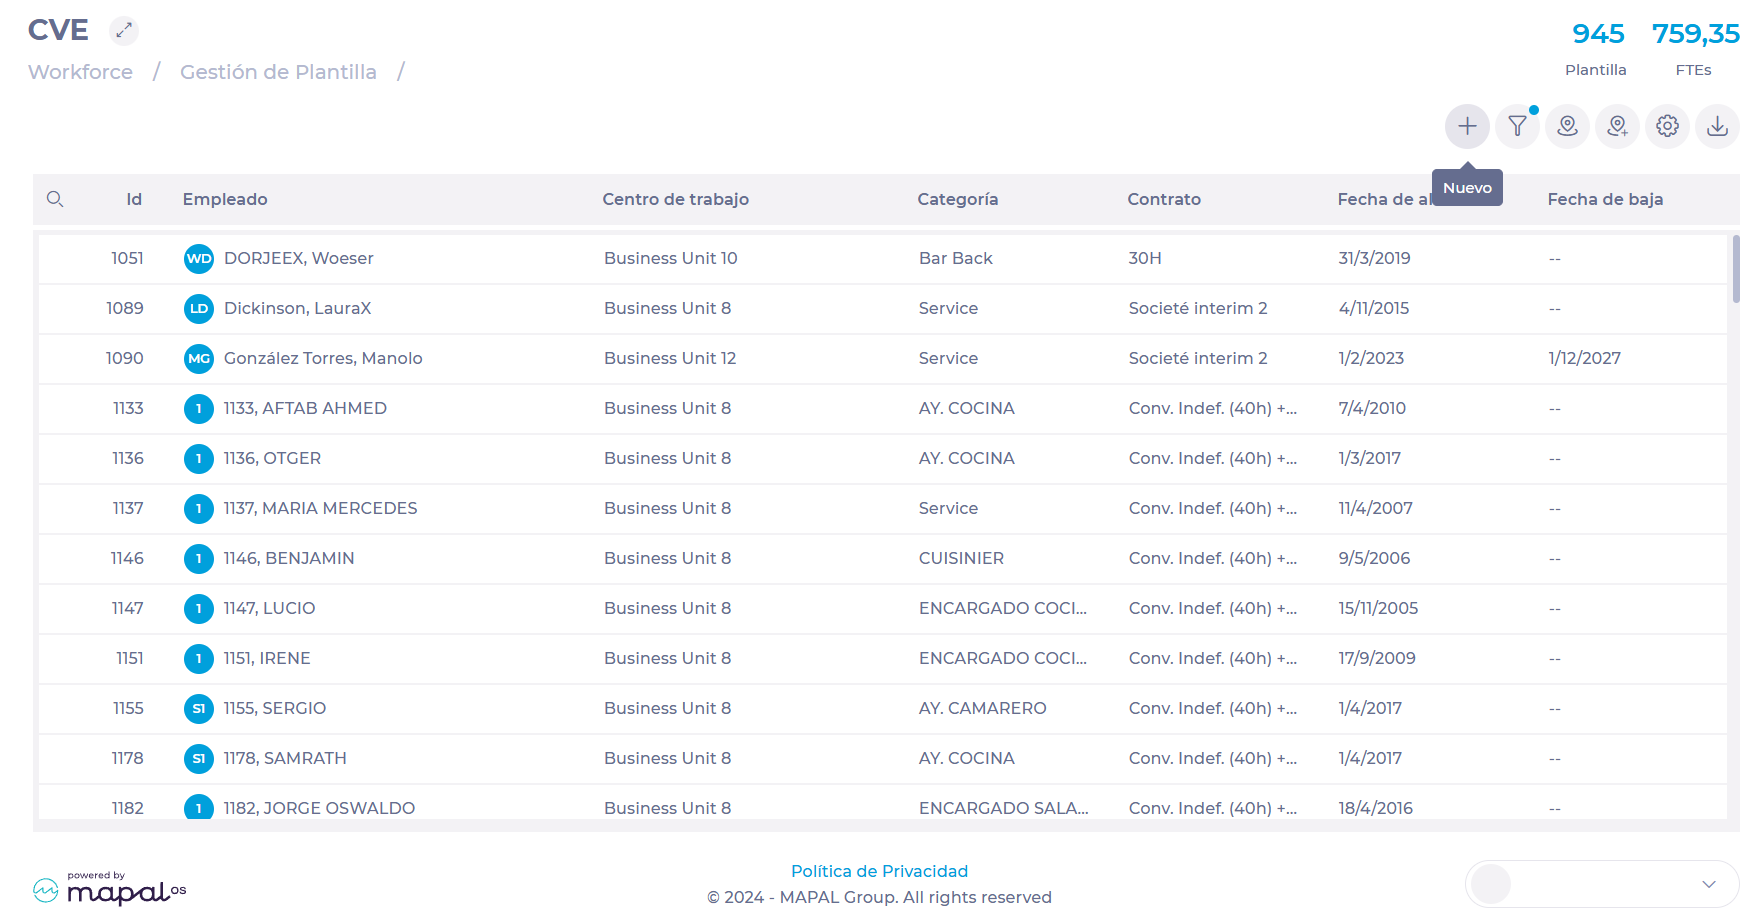
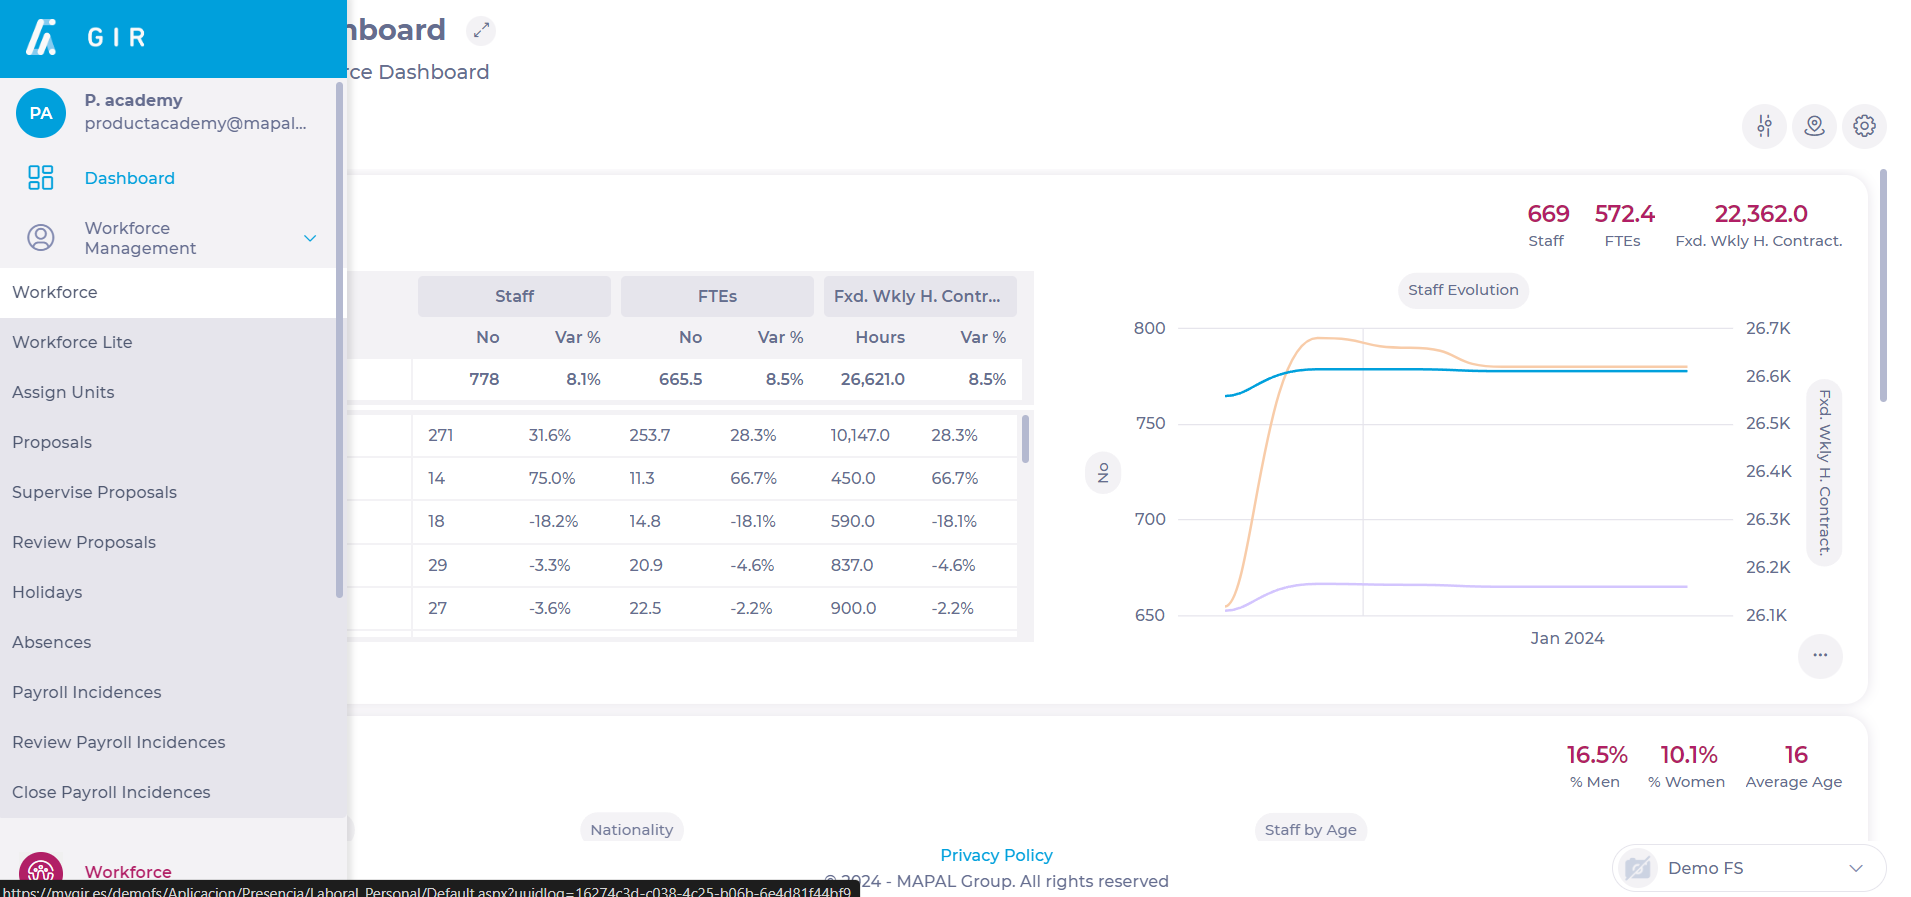
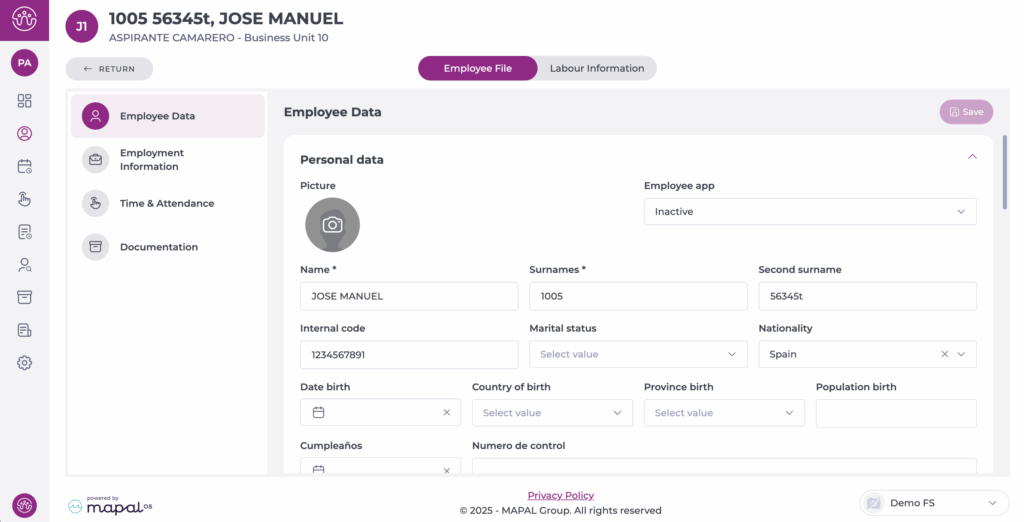
  • Navigate to Employee Management > Employees.

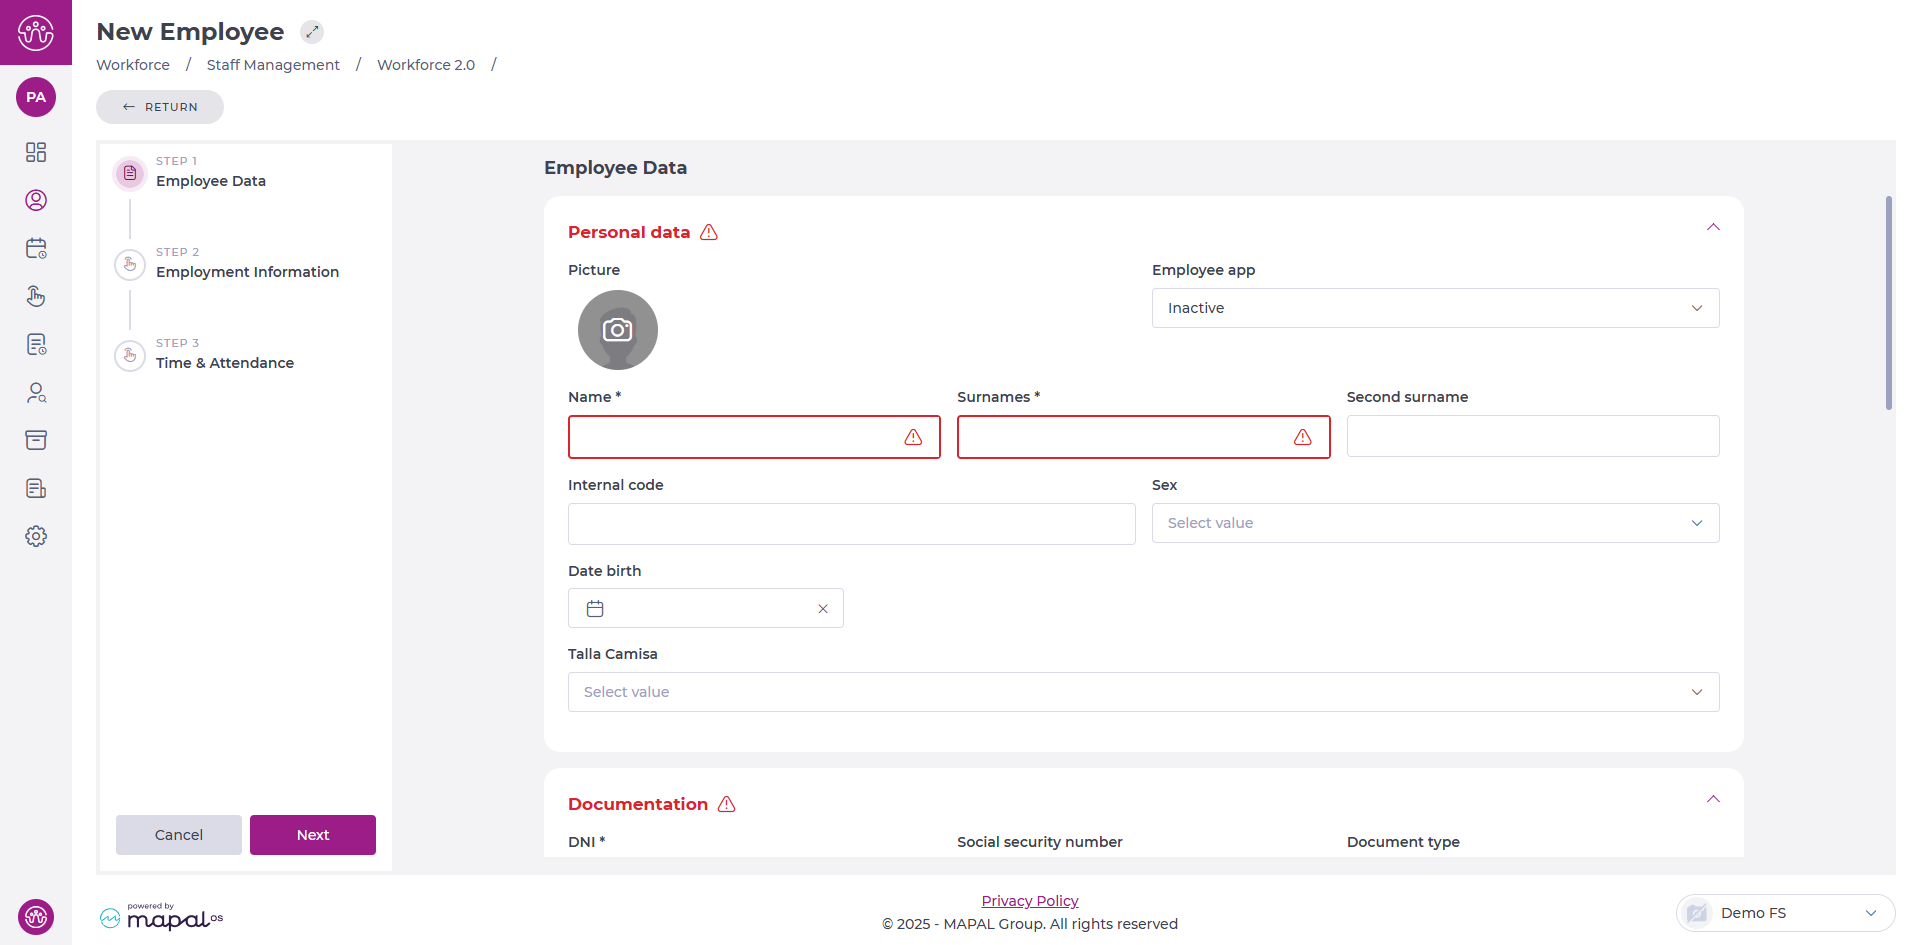
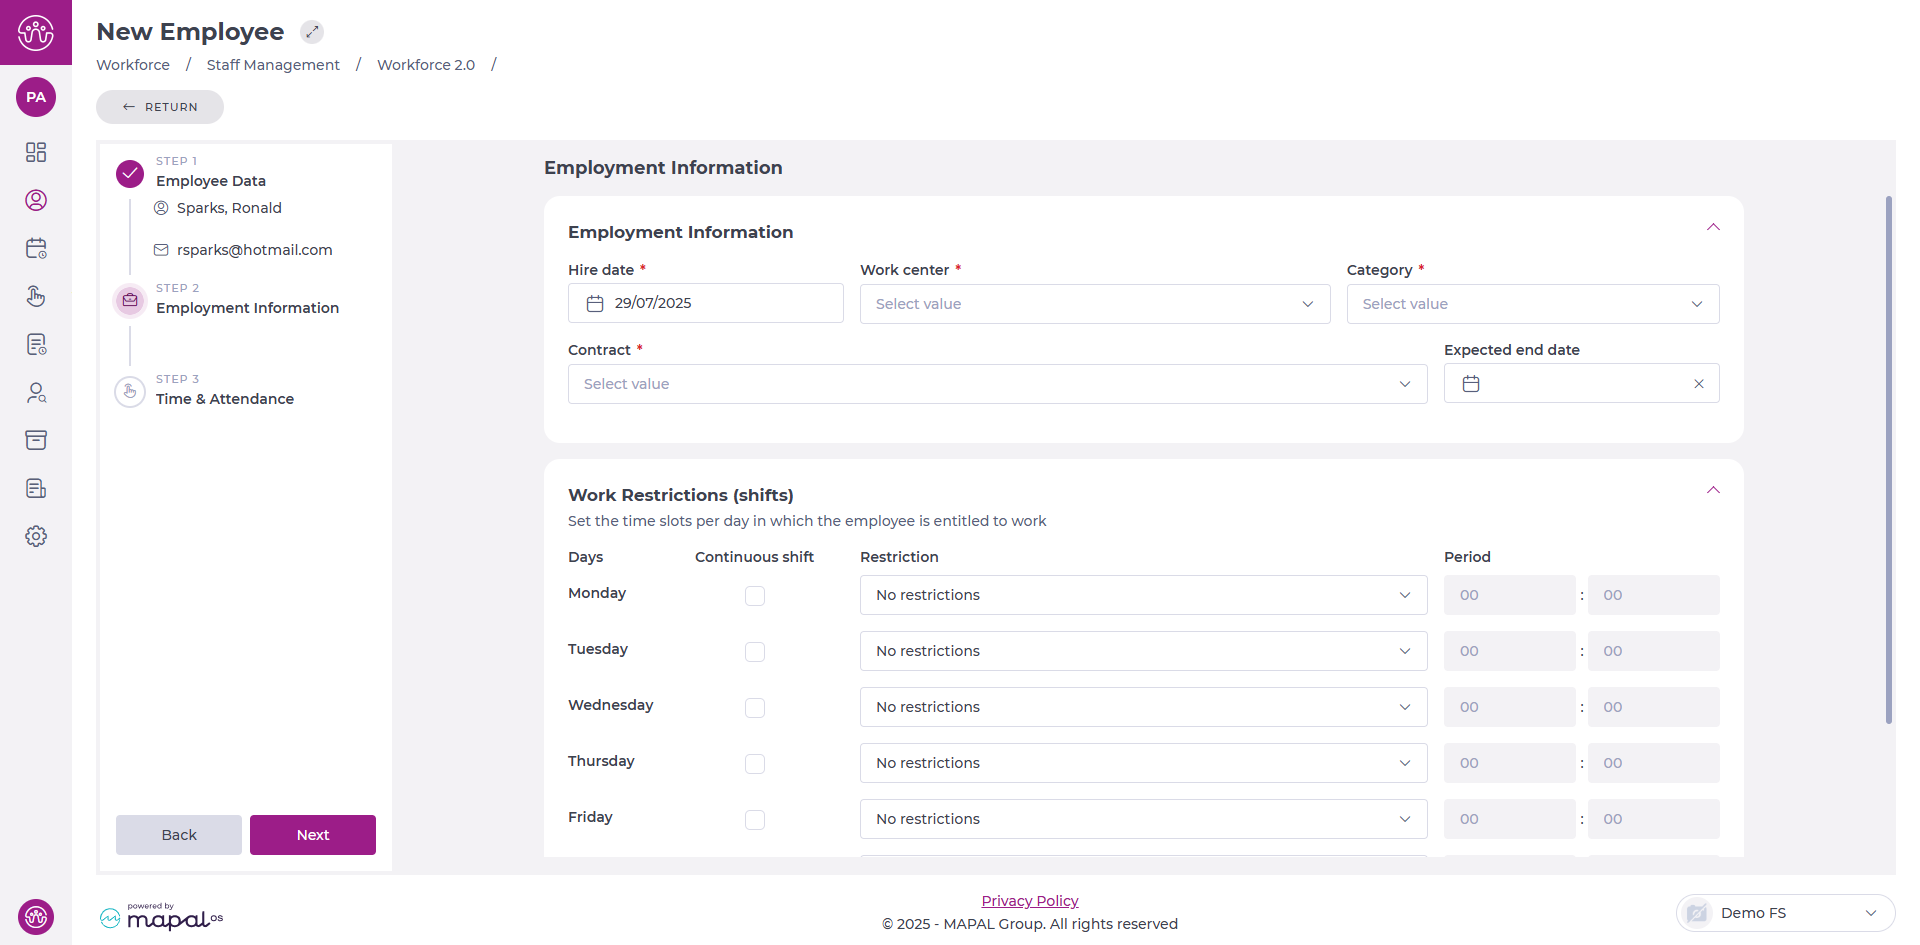
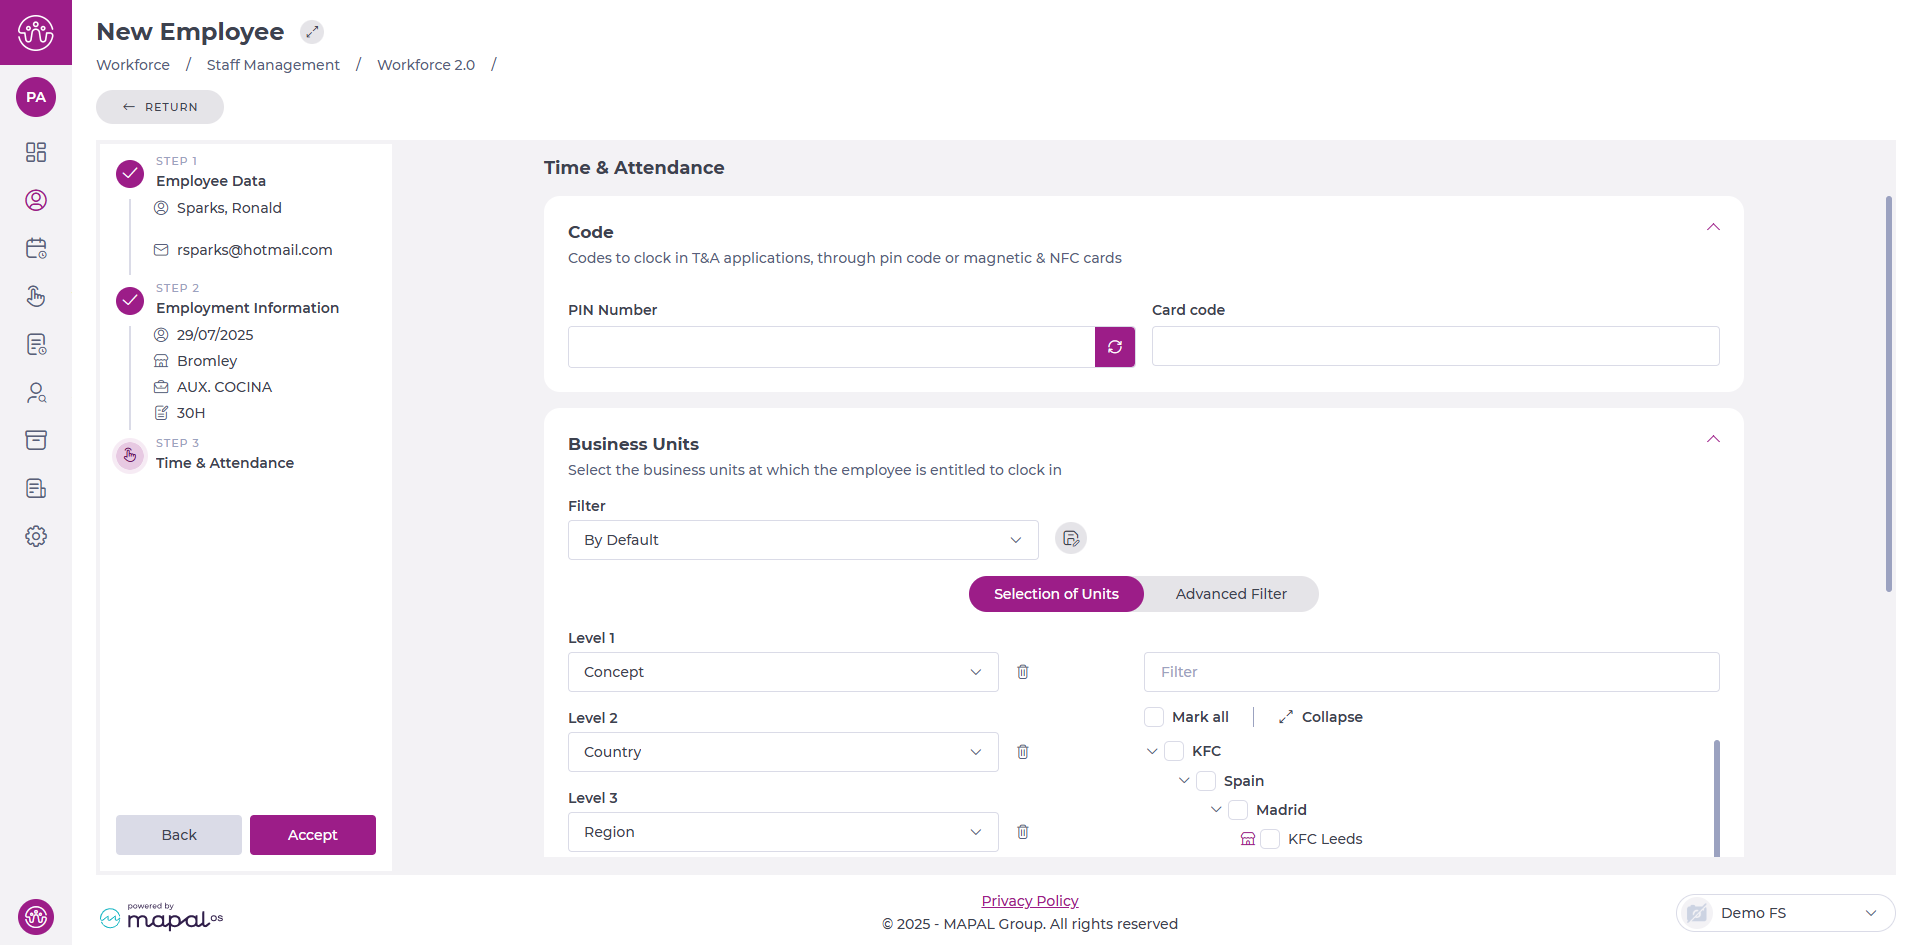
  • Either create a new employee or edit an existing one by selecting the Edit option.

To create a new employee, see Add a new employee to an operator in Mapal OS.

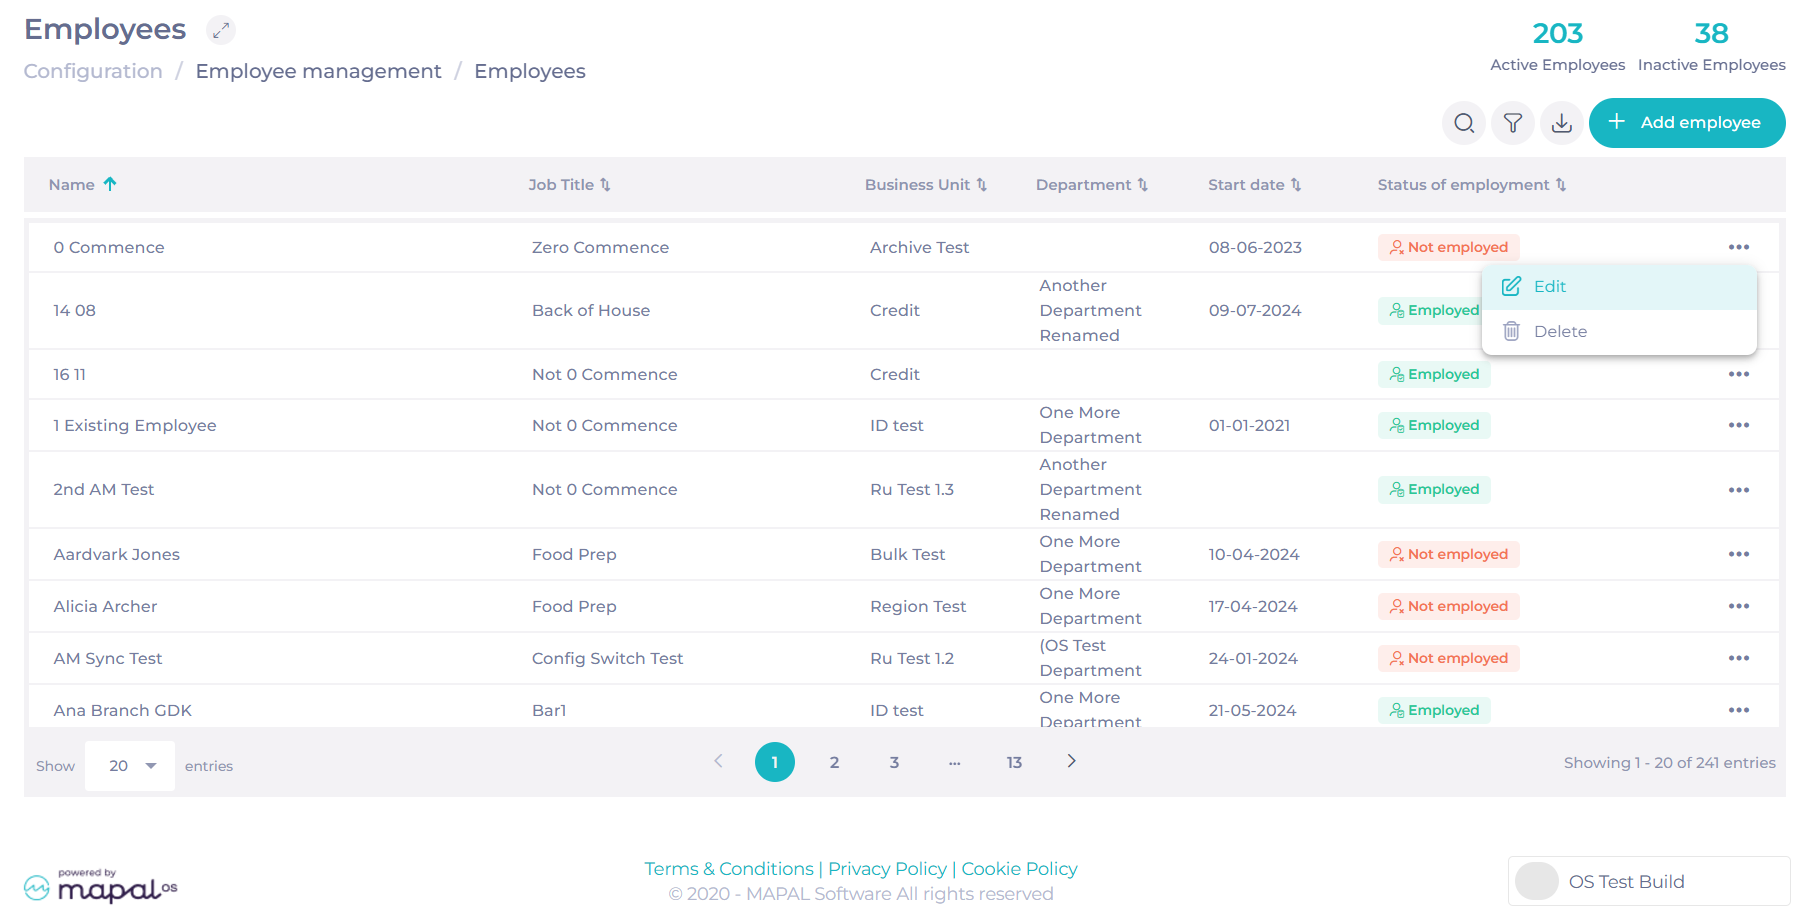
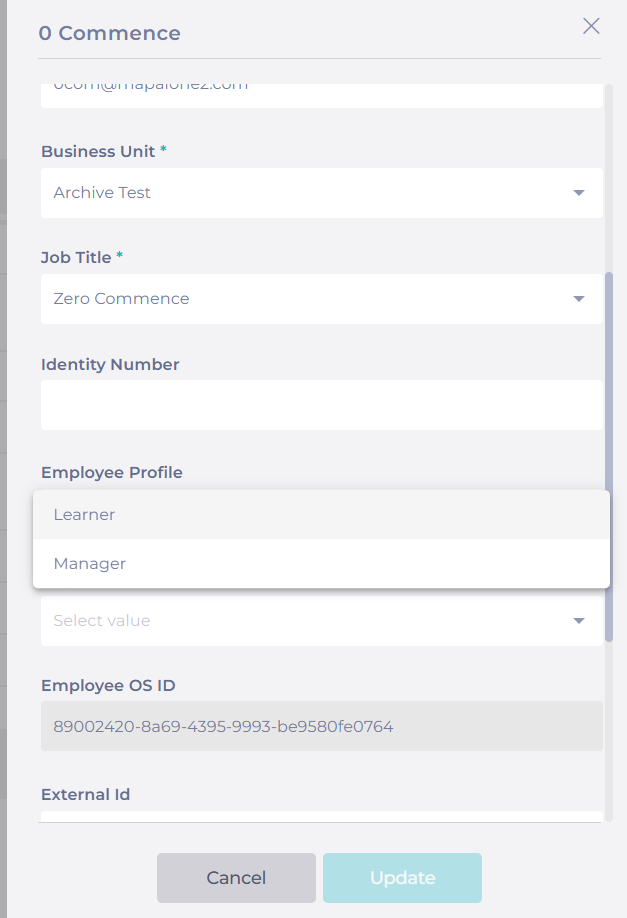
  • Scroll down to the Employee Profile field.

  • Select the appropriate Employee Profile from the dropdown menu.

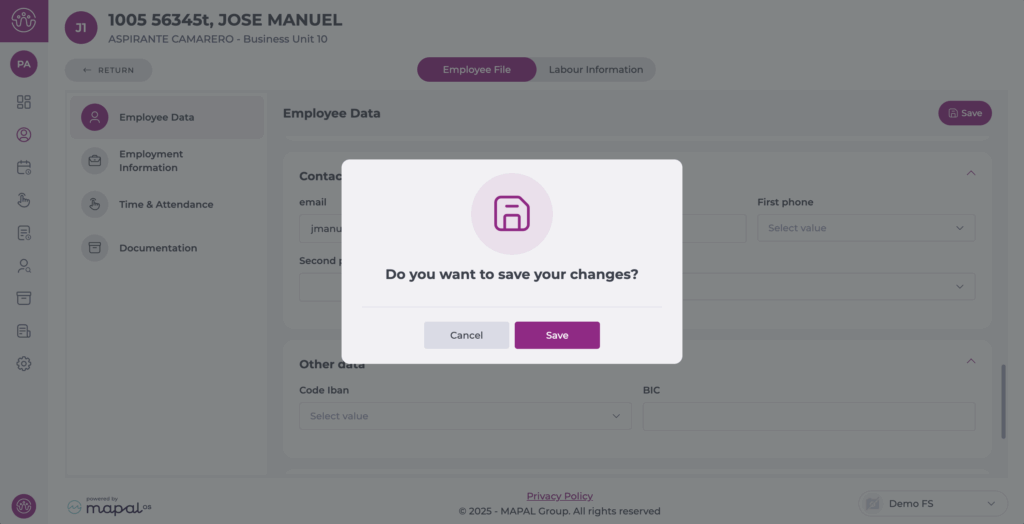
  • Once the profile is assigned, select Update to save changes.

A screenshot of a computer<br><br>Description automatically generated

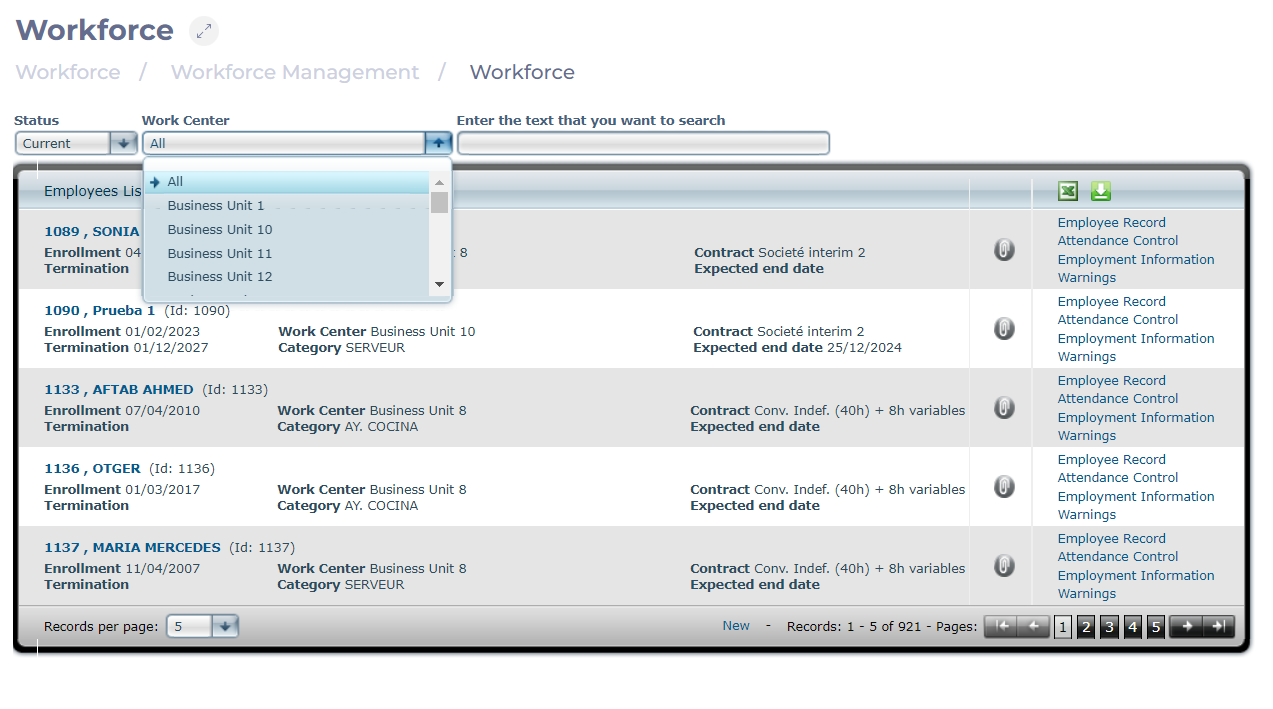
Workforce Related Permissions

Once migrated to Mapal OS, employees will no longer be able to log in to GIR Staff. Instead, they can access equivalent functionalities through Mapal One. To enable this:

  • Ensure the Workforce Application Access switch is toggled on in the Employee Profile.

  • Workforce-related permissions assigned to profiles are managed in Workforce under Configuration > Employee App.

For more details on managing these permissions, see Assign an app profile to an employee.

Make a field mandatory in the employee record

Start from: The Workforce module.

  • Navigate to Configuration > Employee Record.

  • In the list of fields, locate the field you want to define as mandatory.
  • In the field row, look for the Mandatory checkbox and check it.

Notes: Make sure the field is also marked as Visible and Editable so that it can be easily located and modified on the tab as needed.Tabla<br><br>Descripción generada automáticamente con confianza media
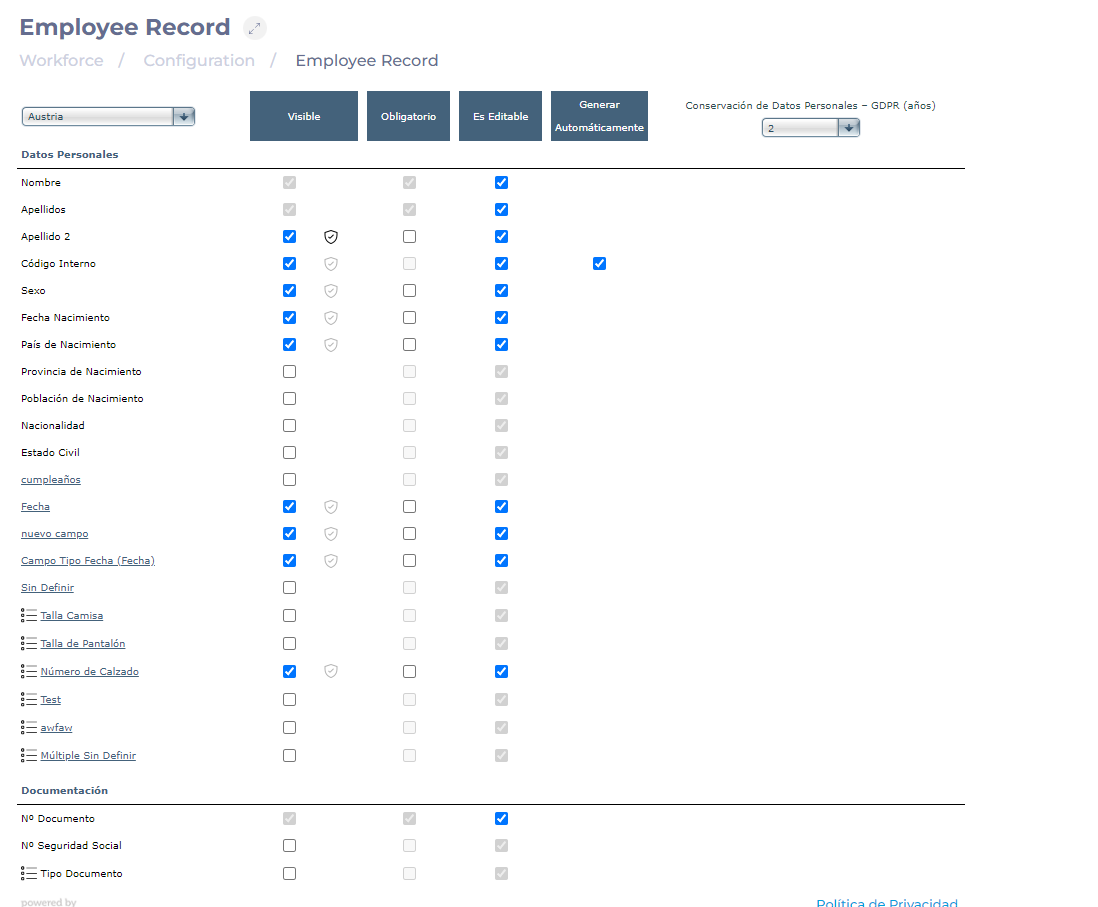
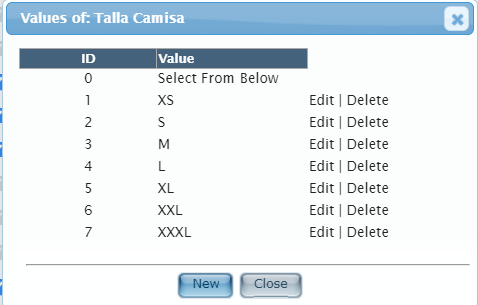
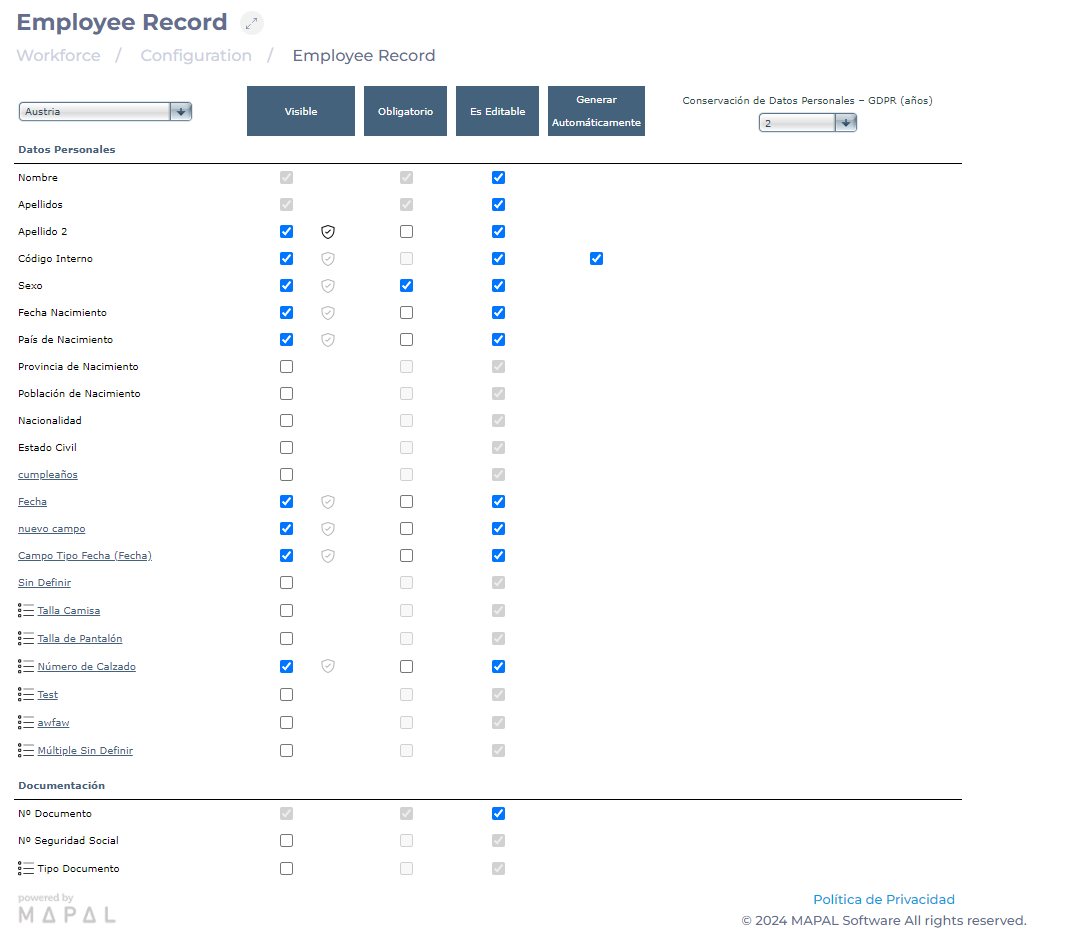
If you want to create a new field for the worker's record, see Add a new field to the employee record.

Create an employee

Start from: the Workforce platform.  

  • Select Workforce Management > Workforce 2.0 .
  • Select New+ in the Workforce 2.0 (CVE) screen.

  • Select the country for which you want to create the employee, in case you have business units in more than one country.  

In the New Employee screen, you can add information in 3 steps:


Employee data

  • Fill in the new employee's personal data, taking into account the settings applied in Workforce > Configuration > Employee Record, in terms of field requirements and visibility; we can also activate the GIR Staff profile for the new employee and apply a specific profile to him/her. 
  • Select Next to proceed to the next step once you have completed the information.  

Note: mandatory fields are marked with an asterisk (*). 


Employment Information

  • Fill in the data related to the employee's contract, hire date, work centre and category. You can also configure shift restrictions by days of the week, taking into account holidays and holiday eves. 

You can also set up split shifts or shifts with different start times. 

Select Next to proceed to the next step once you have completed the information. 


Time & attendance

Configure the codes for clocking in the T&A applications, either by PIN code or magnetic and NFC cards. You can also select the business units in which the employee can clock in. 

  • Select Accept to save the new employee's settings once you have completed the information in this step. 

Assign Business Units to employees

Start fromthe Workforce platform.  

  • Select Workforce Management > Workforce 2.0 from the main menu.

On the Workforce 2.0 (CVE) screen, you will see a complete list of employees, as well as a series of buttons at the top to perform specific actions. 

  • Select Assign Business unit.

This will take you to the Assign Units screen, where you will view a list of all employees, the category that corresponds to each employee and the business unit they belong to. At the end of the row, you will see a switch that indicates whether an employee is enabled (coloured switch) or disabled (gray switch) for a business unit.  


  • Search for the employee in the list or use the Filter or Filter by Business Unit functions. 

The Filter function allows you to narrow your search to specific workplaces, category groups, categories, contract groups, contracts, or specific employees.  
  
The Filter by Business Unit function allows you to narrow your search to a business unit or a selection of business units under specific criteria that you set.  

Once you locate the specific employee, locate the row corresponding to the business unit you wish to assign and select the switch to enable that employee in the business unit.  

Noteyou can use the Enable all or Disable all button to make a bulk assignment according to the filter you have set. 


Add Compliance users on Mapal OS

Start from: The Mapal OS dashboard.

Add a new user in Mapal OS

  • Navigate to the OS Dashboard.
  • Select Configuration.
  • Select User Management > Users from the main menu.
  • Click Add User to create a new user.
  • Fill out the required details in the form, including:
    • First Name
    • Last Name
    • Email Address
    • Role / Profile
  • Go to the Business Units tab.
    • Select the relevant Business Units from the list.
  • Click Save to add the new user.

Configure Compliance-specific properties

  • Return to the OS Dashboard.
  • Select Compliance.
  • Once in Compliance, select People > Users from the main menu.
  • Locate and select the newly added user.
  • Edit the parameters as needed.
Notes: Some user properties will be greyed out, these can only be modified in the Configuration app.

Access logs within the scheduler

Start from: The Workforce module.

  • Select Scheduling > Scheduler 2.0 from the main menu.

Imagen que contiene Aplicación<br><br>Descripción generada automáticamente

  • Parameterize the scheduler to access the main grid OR close the parameterization window to access the tools directly.

To make the parameterization, see Access the scheduler.

  • Select the Detailed Information button .

Interfaz de usuario gráfica, Texto, Aplicación<br><br>Descripción generada automáticamente

  • From the drop-down menu, select Log.

Interfaz de usuario gráfica, Texto, Aplicación, Chat o mensaje de texto<br><br>Descripción generada automáticamente

  • In the Log screen, you will see a list of activities that have been performed within the shift planner. Here, you will be able to see details such as:
    • Date modified
    • Employee on whom the change was made
    • Business day on which the change was made
    • Work center on which the change was made
    • Action taken
    • User who made the modification

Interfaz de usuario gráfica, Aplicación, Tabla<br><br>Descripción generada automáticamente

  • You can use the Filter button to facilitate the search for specific actions in the list.

Interfaz de usuario gráfica, Aplicación, Teams<br><br>Descripción generada automáticamente

  • The Export button will allow you to download the log in .XLS or .CSV format.

Set up a mandatory rule for Agreements or Contracts

Start from: The Workforce module.

Mandatory Rule for Agreements

  • Navigate to Configuration > Collective Agreements.

  • To modify an existing agreement, select Edit in the row corresponding to the agreement.

  • To create a new agreement, select New.

  • In the pop-up window to create or edit an agreement, locate the section Shift Scheduling Alerts.

Shift Scheduling Alerts may or may not be mandatory. If an alert is mandatory and is not complied with, it will not be allowed to print or finish a shift. You can define, for example:

  • The employee's weekly days off.

  • The maximum daily or weekly hours that an employee may work.

  • The minimum hours of rest between work days.

  • The minimum and maximum hours that a shift must last.

  • The minimum hours that a split shift must contemplate.

  • The minimum and maximum hours between split shifts.

  • Enable the specific rule you wish to make mandatory by checking the Active checkbox.

  • Check the Mandatory field in the rule row to make the rule mandatory in the selected agreement.

  • Select Accept to save the changes OR Cancel to discard them.

Interfaz de usuario gráfica, Aplicación, Tabla<br><br>Descripción generada automáticamente

Mandatory rule for Contracts

  • Navigate to Configuration > Contracts.

Imagen que contiene interior, computadora, computer, escritorio<br><br>Descripción generada automáticamente

  • To modify an existing contract, select Edit in the row corresponding to the contract.

  • To create a new contract, select New.

  • In the pop-up window to create or edit a contract, locate the section Shift Scheduling Alerts.

Shift Scheduling Alerts may or may not be mandatory. If an alert is mandatory and is not complied with, it will not be allowed to print or finish a shift. You can define, for example:

  • The employee's weekly days off.

  • The maximum daily or weekly hours that an employee may work.

  • The minimum hours of rest between work days.

  • The minimum and maximum hours that a shift must last.

  • The minimum hours that a split shift must contemplate.

  • The minimum and maximum hours between split shifts.

  • Enable the specific rule you wish to make mandatory by checking the Active checkbox.

  • Check the Mandatory field in the rule row to make the rule mandatory in the selected agreement.

  • Select Accept to save the changes OR Cancel to discard them.

Interfaz de usuario gráfica, Texto, Aplicación<br><br>Descripción generada automáticamente


Add a new field to the employee record

Start from: The Workforce module.

  • Navigate to Configuration > Employee Record.

  • In the list of fields, locate those renamed as Undefined or Multiple Undefined.

Interfaz de usuario gráfica<br><br>Descripción generada automáticamente

  • Set a Name for the new field you are about to create. You can set translations for this field in several languages.

  • In the single field (Undefined), set whether you want it to be a Date Field. Otherwise, it will be a default text field.

  • Select Accept to save the new field OR Cancel to discard the changes.

  • For the multiple field (Multiple Undefined), after setting the name, select the List icon next to the name. Here you can define the multiple options that can be selected in this field.

  • Press New to create new options in the list. You must set an ID (order in the list) and a value (name) for each option.

  • Press Close when you have added or edited all the corresponding values.

  • Set whether the field will be visible and editable by checking the fields under the Visible and Editable columns.

To make the field mandatory, see Make a field mandatory in the employee record.

Manage or modify employee profile and personal data

Note: This screen is deprecated. For the current workflow and screenshots, please refer to the Workforce 2.0 version of this guide: Manage employee details .

Start from: The Workforce module.

Note: Only users with specific permissions can access employee records and edit the information on them.
 

Change an employee’s email address

Start from: The Workforce dashboard.

Note: Use the filter to narrow down your search when needed. For more information about how to use the filter, see Filter the employee grid.

The employee’s email address will be updated immediately when the record is saved.

Note: Saving the employee record will save all of the fields in the record. You will be prompted to enter a valid value for any incorrect fields before the changes are saved.