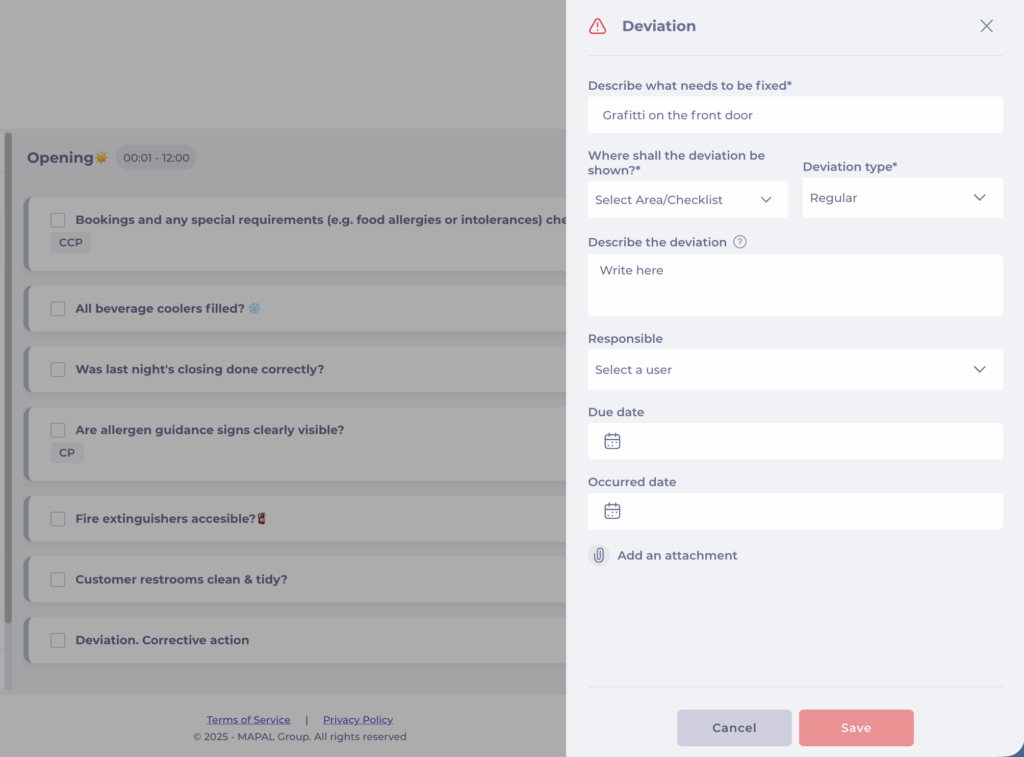
Create an ad hoc deviation
Start from: The Compliance local overview.
- Navigate to Daily Schedule.
- Select the Checklists view at the top of the screen.
- Select the + Open deviation button.
- On desktop, the button appears at the top of the checklist.
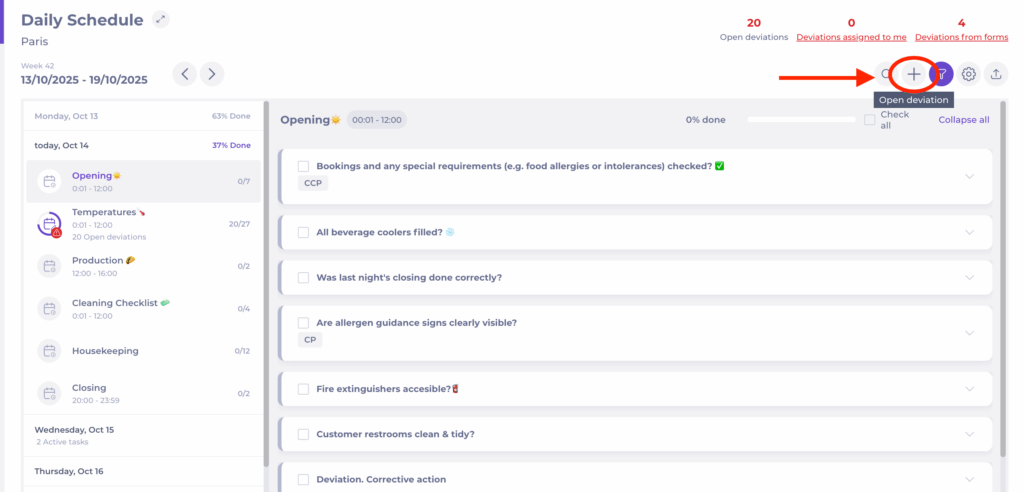
- On mobile, the option is available from the checklist action menu (three dots).

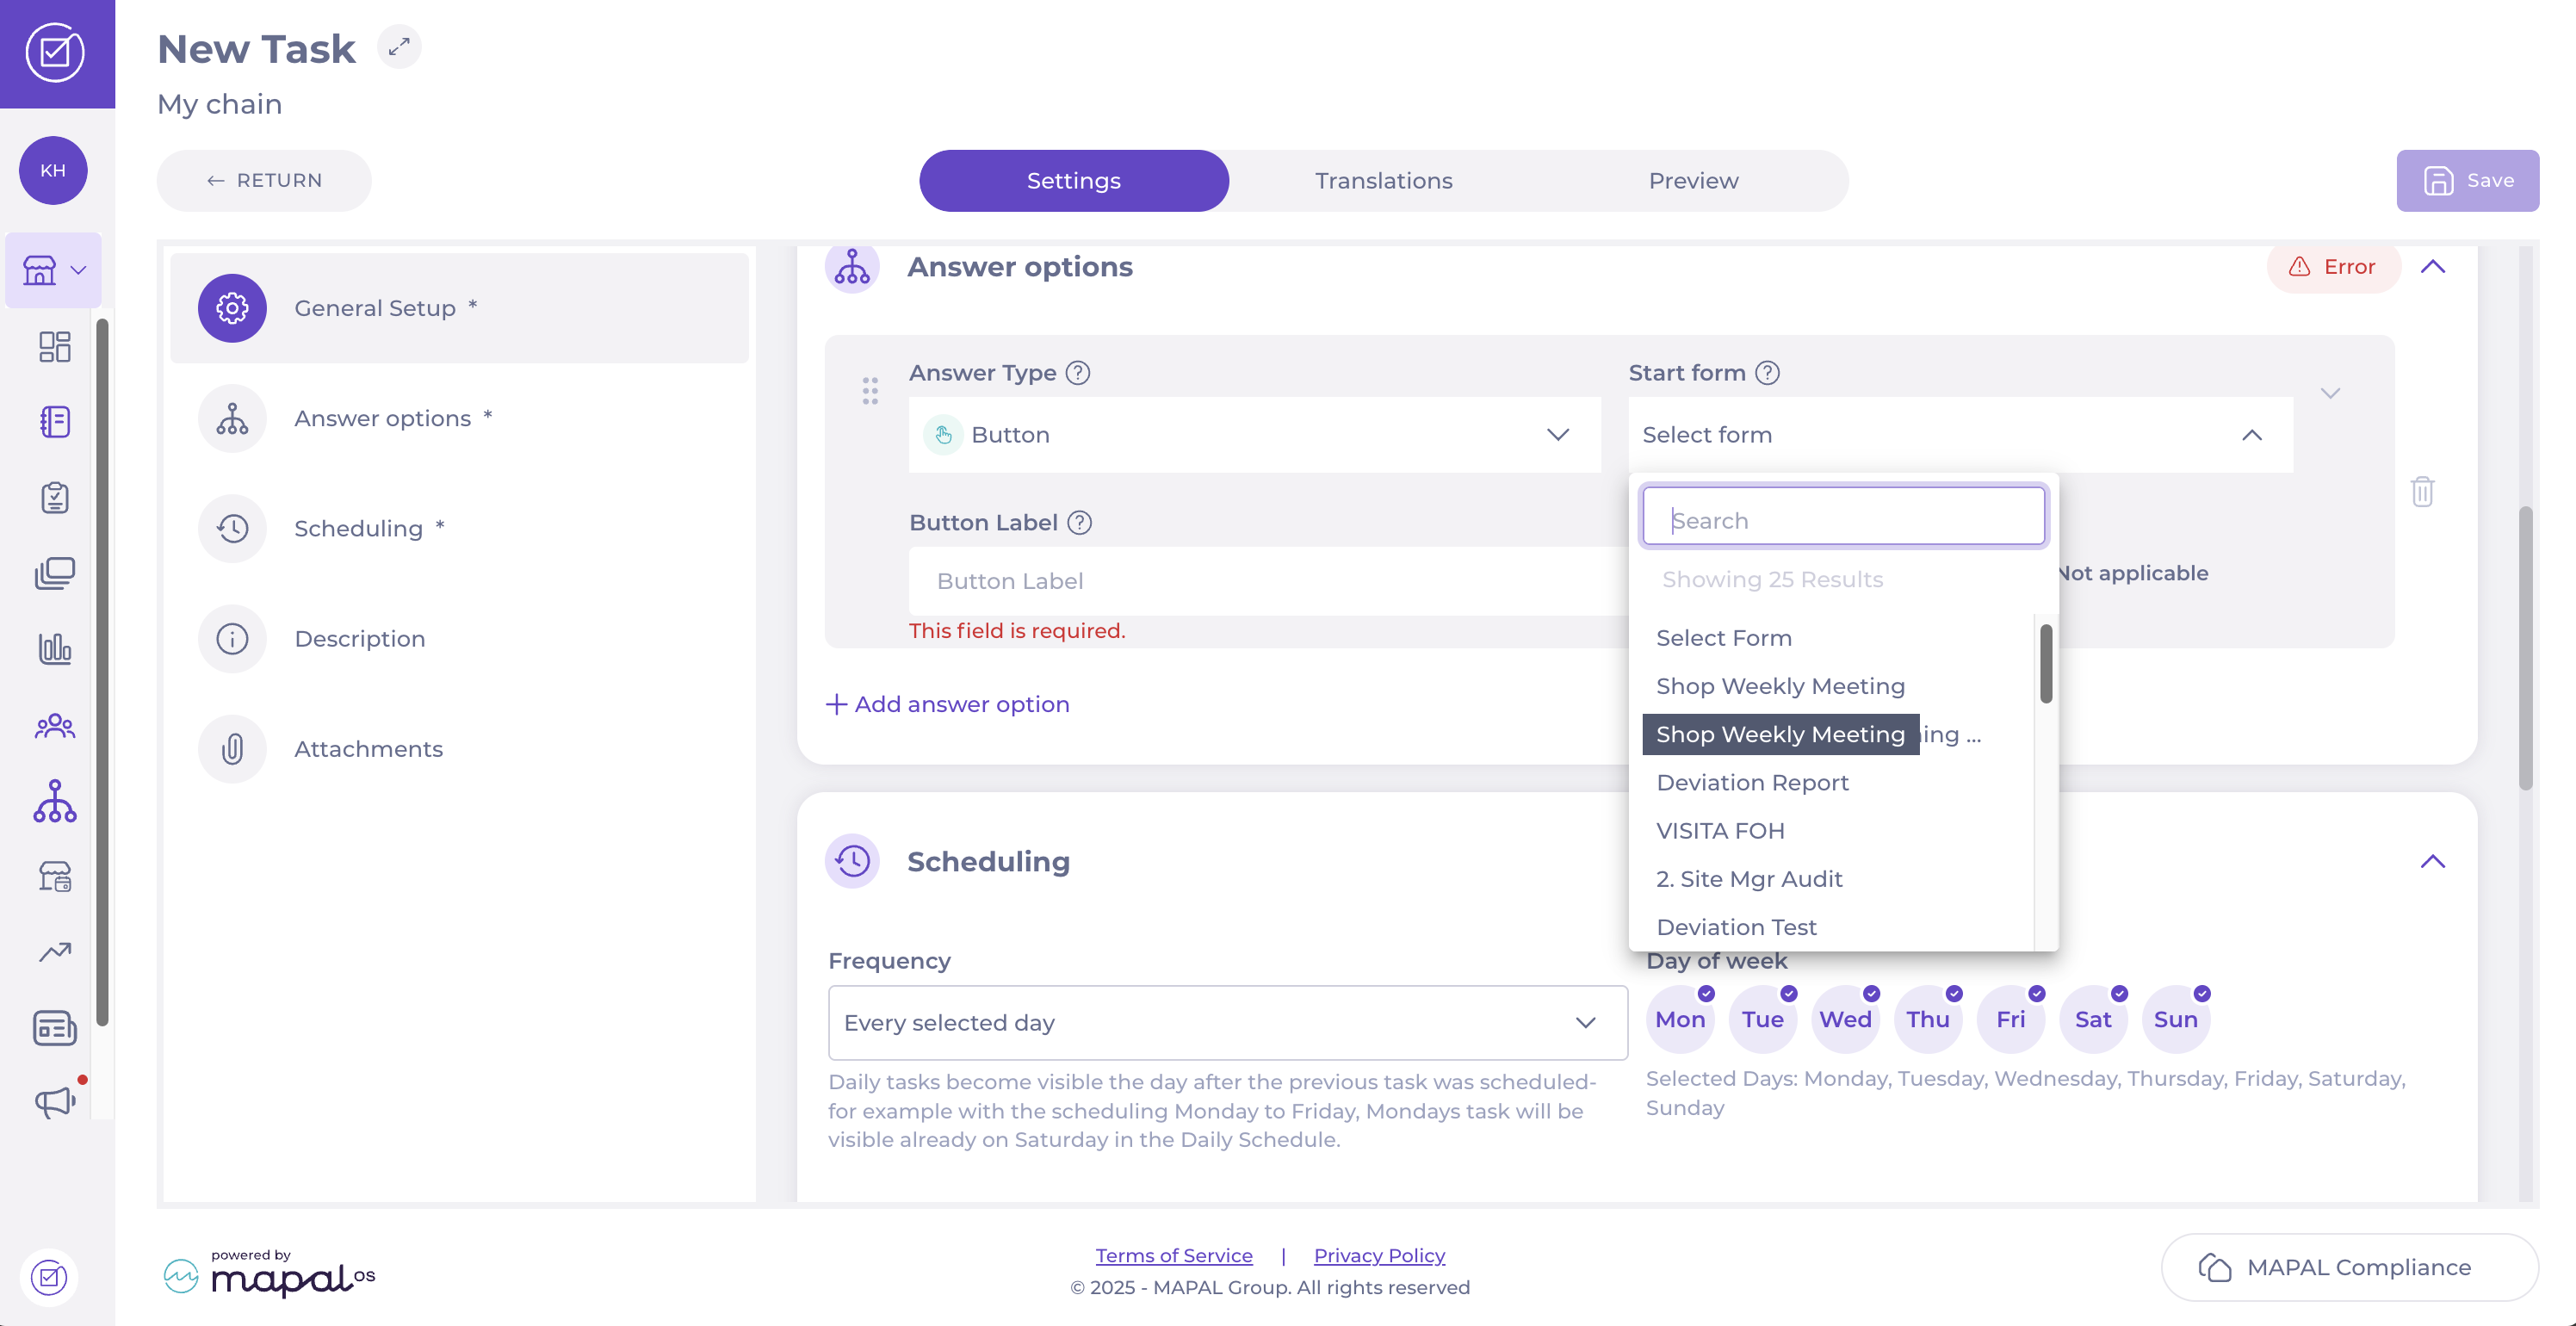
- Complete the required fields to describe the deviation:
- Describe what needs to be fixed*: give a short, clear name for the issue.
- Where shall the deviation be shown?*: Select the Area/Checklist where you want the deviation to appear.
- Deviation type*: Describe what type of deviation is this.
- Describe the deviation: explain what happened and how it was identified.
- Responsible user: assign who will handle the deviation.
- Due date: specify when the corrective action should be completed.
- Occurred date: specify when the deviation happened.
- Add an attachment: upload a file or picture to add more relevant information to the reported deviation.
- Select Save to create and publish the deviation.
The deviation will now appear in the selected checklist and can be managed like any other compliance deviation; tracked, resolved, and closed once the corrective action has been completed. To know more about how to respond to deviations, see Respond to deviation reports.


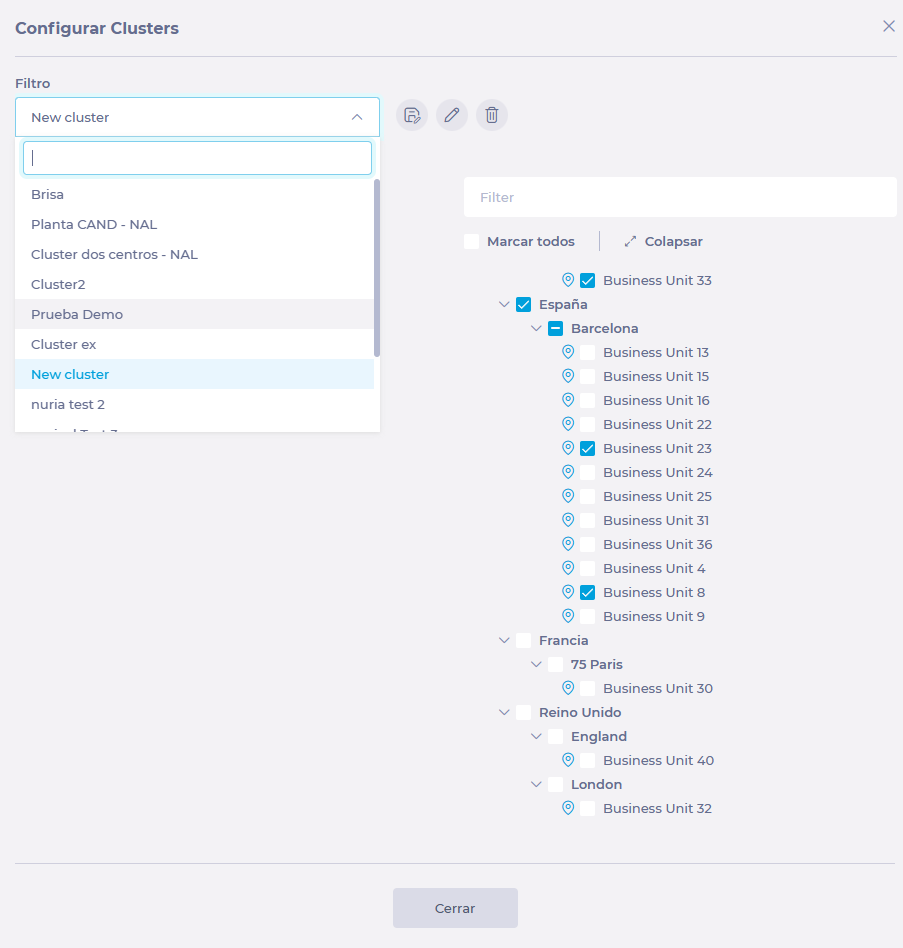
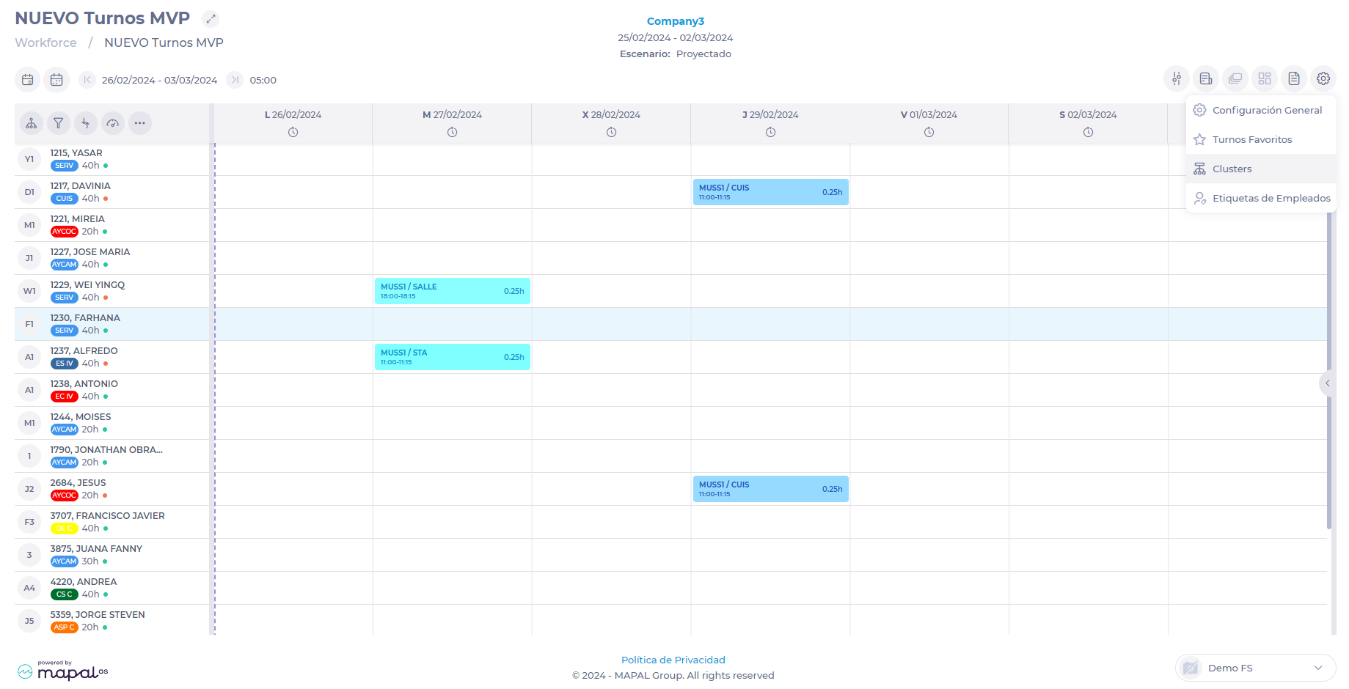 In the Configure Clusters window, you can select filters or clusters already created to facilitate the creation of a new group or edit an existing group.
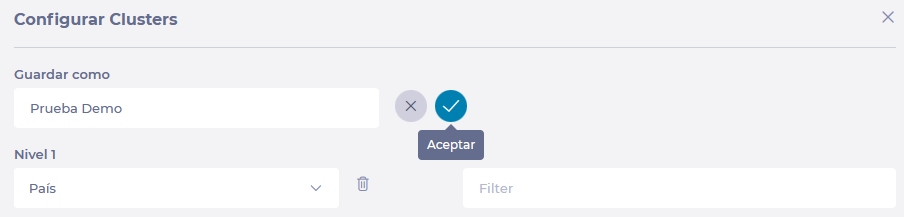
 Notes: You can use an existing cluster as a starting point. To do this, select the cluster from the Filter drop-down, select Save As, assign a new name and adjust the levels accordingly.
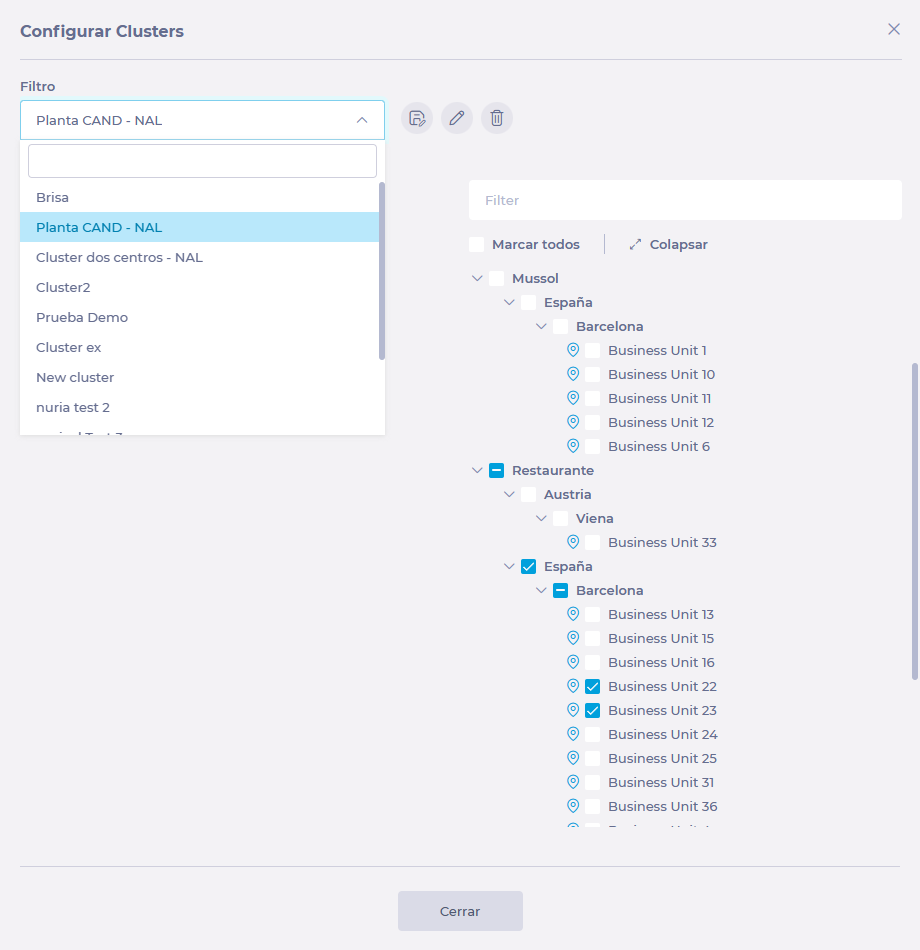 Once the cluster is created, you will be able to sort shifts according to this parameter. You can locate it by selecting Cluster in Business Unit Group and then selecting the name of the cluster you have created.