


Start from: The Analytics dashboard.
- Navigate to Configuration > POS – PLUs Mapping.
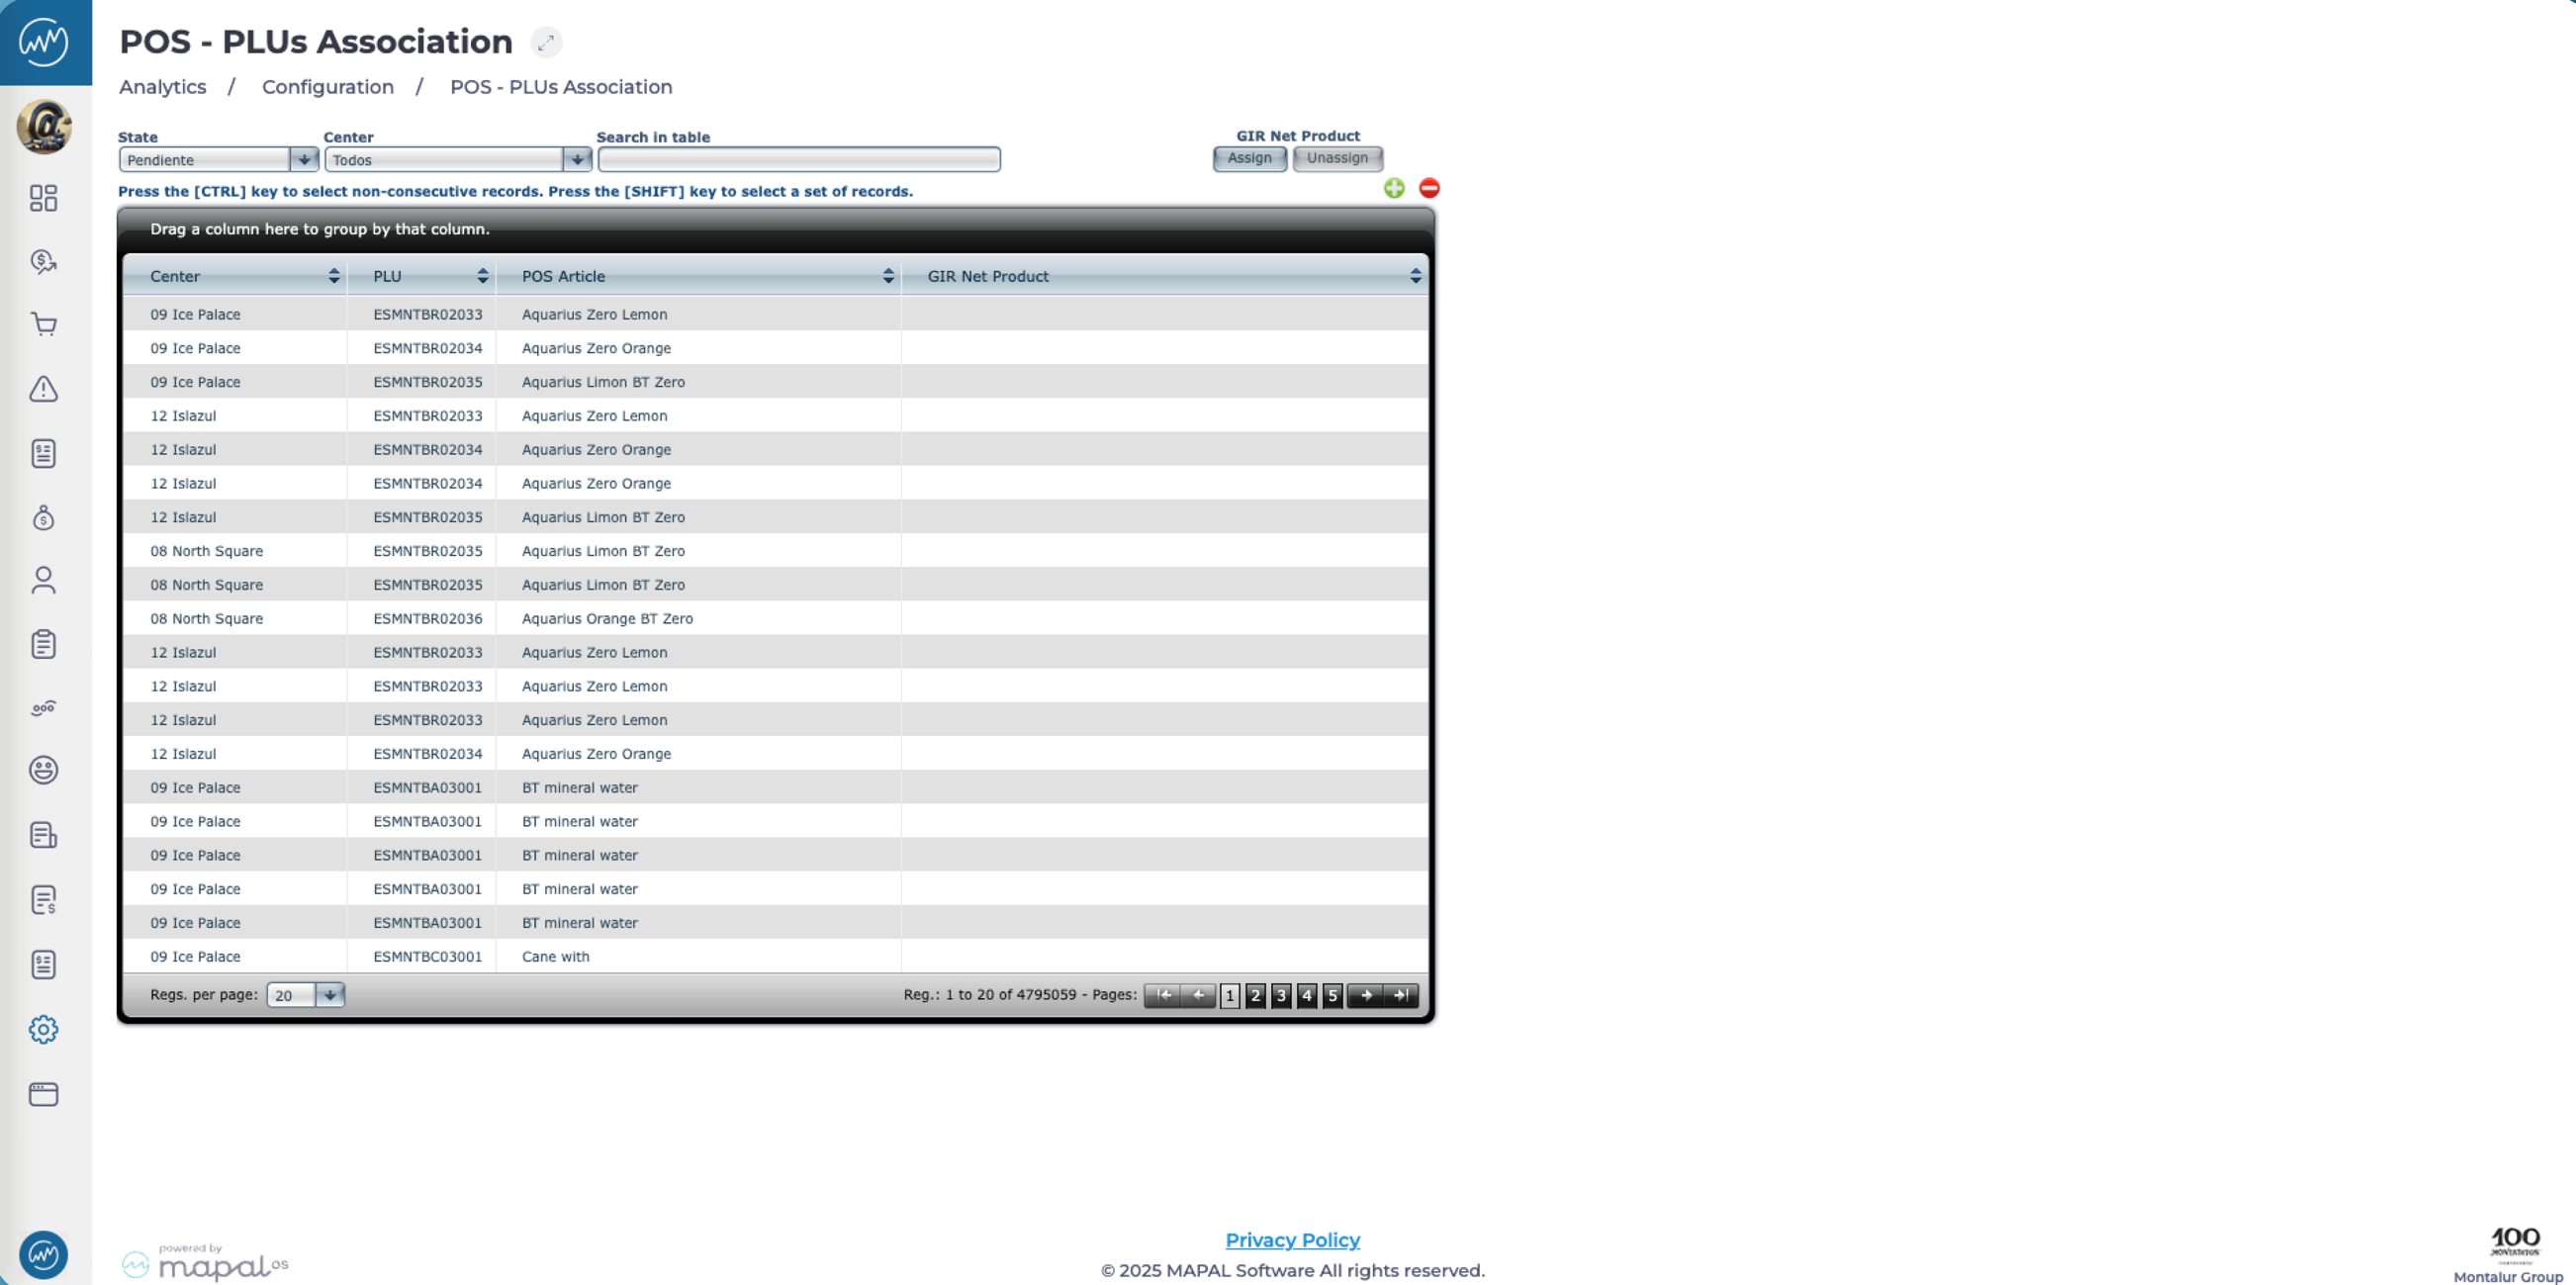
- Use the filtering tools at the top of the grid to refine your results:
- Status: Filter between Pending and Assigned entries.
- Unit: Select a specific Business Unit.
- Search in the table: Search for specific records directly from the search bar.
- Once filtered, the grid will display the relevant records in four columns:
- Unit: Indicates the business unit/sales centre.
- PLU: Displays the POS system’s PLU code.
- POS Article: Name of the item as recorded in the POS.
- Product GIR Net: The associated product in the GIR Net system.
- To group or sort information, drag a column header to the top of the table to group data by that field. This helps visualise and manage associations more easily.
- To map a product, select a PLU row and click Assign to link it with the correct GIR Net product.
- To unmap a product, select a PLU row and click Unmap to remove its association.