


Nota: Cada acción realizada en la aplicación tiene un coste. Si no puede realizar las acciones recomendadas en los artículos que está viendo, es posible que no se hayan activado los permisos necesarios para su perfil de usuario. Contacte con el equipo de soporte o con su administrador para obtener más información.
Empezar desde: El menú de Easilys.
Periods allow certain items in Easilys to be adapted to these periods.
For example, different take rates can be set for the same menu template, depending on the period selected.
So, if you offer two inputs, in your period A you'll set a Proposal rate of 50% for input 1 and a Proposal rate of 50% for input 2. In your period B, the catch rates will be 25% and 75%. It's not necessary to create two different menu templates to manage your two periods.
CREATE A NEW PERIOD
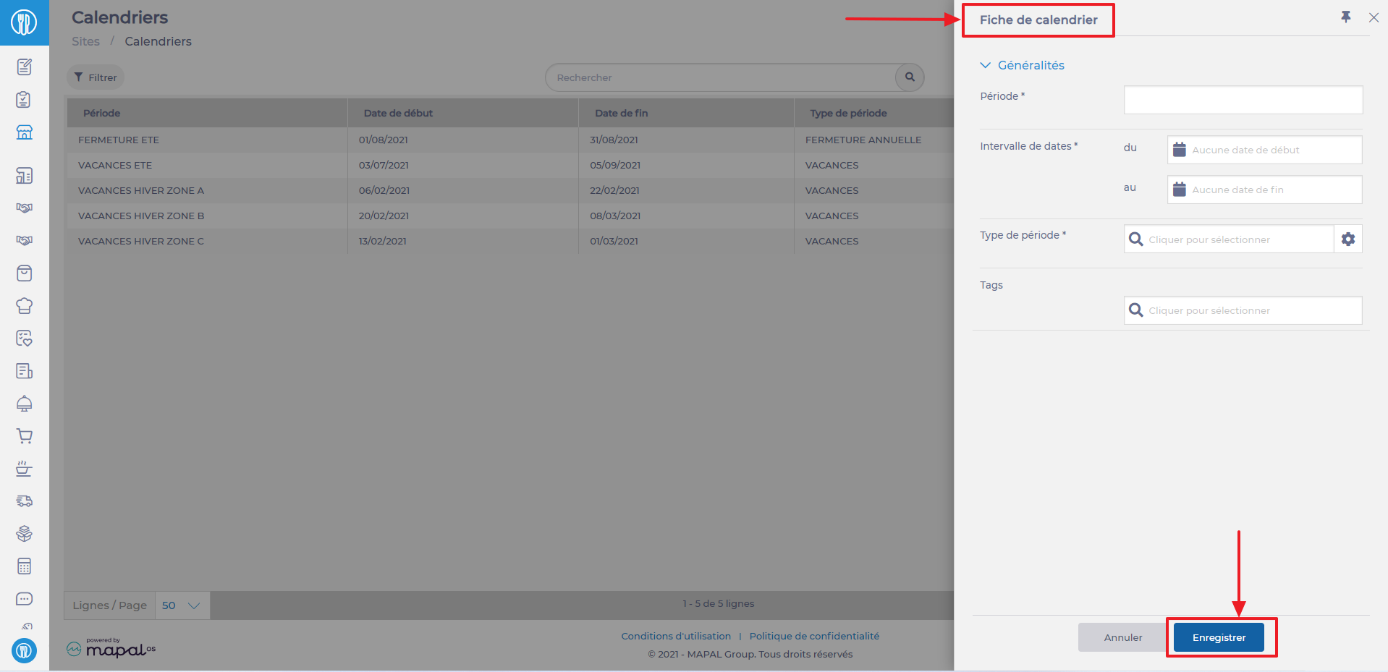
- Seleccione el Sites > Calendars cortina a la italiana.
- Seleccionar + Crear.

A blank “Calendar sheet” appears on the right-hand side of the View.
- Complete la información solicitada. Fields marked with an asterisk (*) are mandatory.
If you don't have any period types available, you can create them by selecting the small cogwheel. A period type matches, as it were, to a storage categorization for your periods.
Ejemplo: The SHORT HOLIDAYS period type allows you to link all the periods defined to manage short school holidays throughout the territory. We can then link all vacation periods for each school zone to this type of period.
- Add a location tag if you wish the period to be used only by sites bearing the same location tag. Location tags can be created from the TAGS screen (SITES section).
- Seleccionar Ahorrar to finalise period creation.
USE PERIODS
Once your periods have been created and attached to period types, you can go to the administration screens that can use the notion of period types. By entering a period type, the associated periods will be applied (respecting, of course, the location tags associated with the sites).
At present, period types can be used on:
- The “Menu template” screen (Menus > Menu template tabs)
- The “Tours” screen (Shipment > Tours tabs)
MODIFY AND/OR DELETE A PERIOD
- Select an existing period.
The “Period sheet” appears on the right of the screen.
- Seleccionar Modificar to change the period.
- Select the trash can icono to permanently delete the period.

Modifications or deletions can only be made from the site where the period was created.