

Start from: The Mapal OS Configuration module.
- Navigate to Documentation.
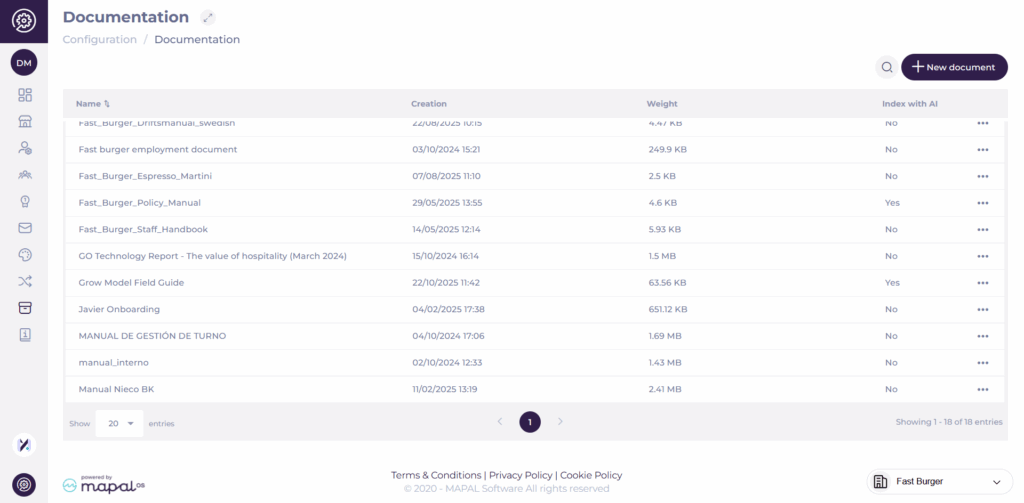
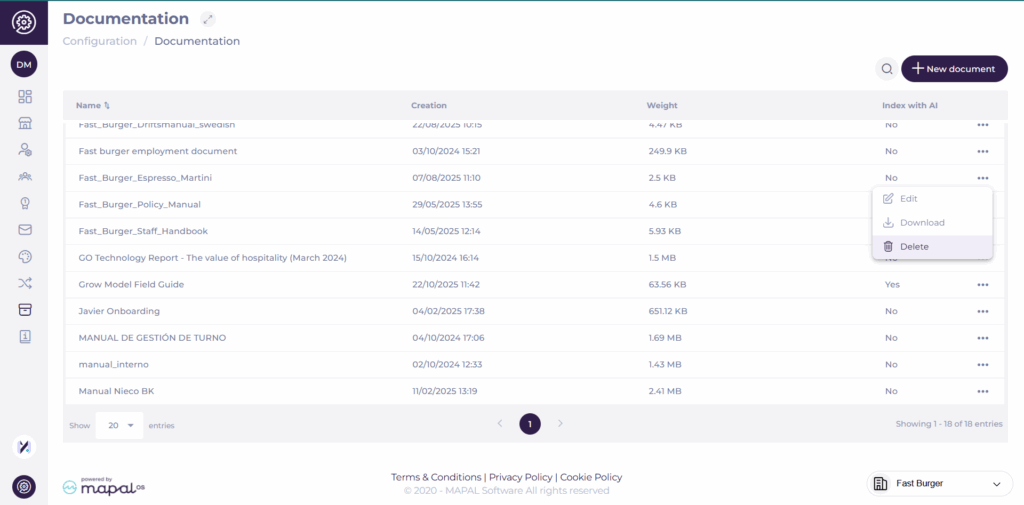
The purpose of this section is to have a single place to collect documentation. The screen shows you a grid with all the uploaded documentation, showing details such as the name, creation date, how big the file is and if it’s indexed with the AI.
Add new document
- Select + New Document.
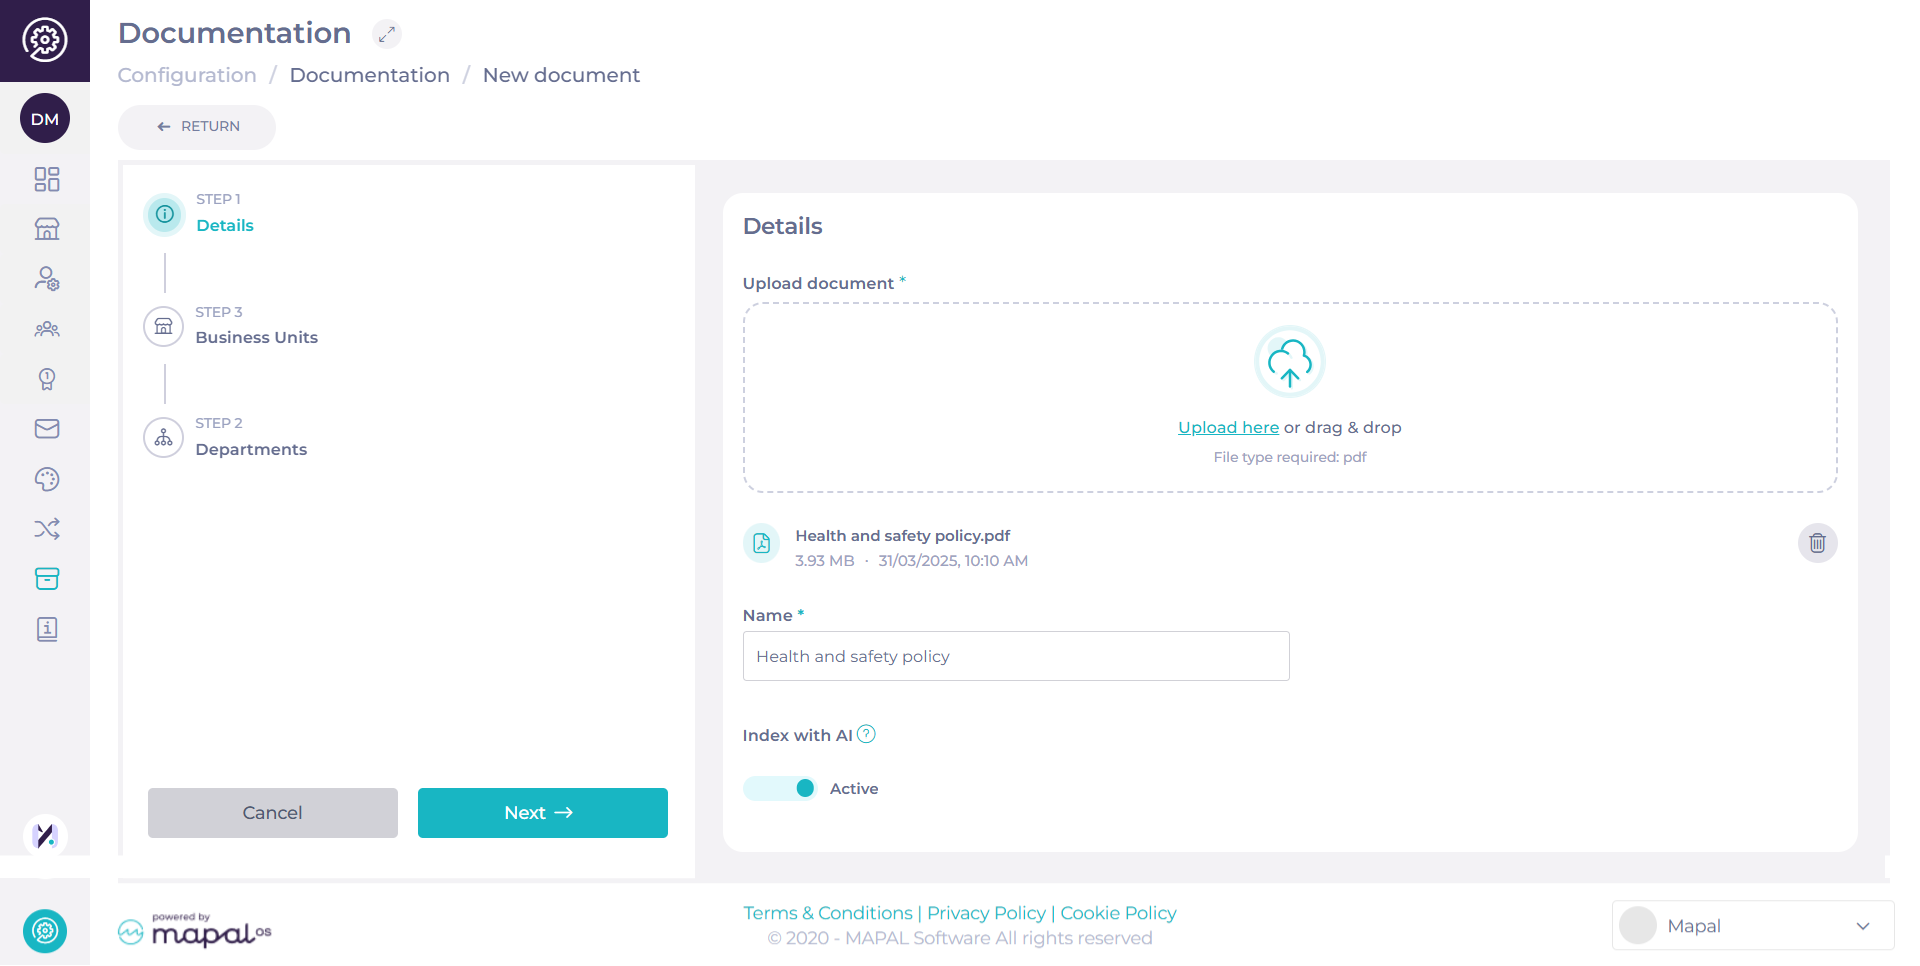
- Upload or drag & drop a file. The only file type allowed is .pdf.
- Assign a Name* to your file.
- Use the Index to AI toggle to decide if the file should be included in AI-powered answers.
- Tooltip: “This document will be used to feed the AI in order to answer users' questions. Maximum of 100 allowed.”
- Each operator can index up to 100 documents. Note: If the limit is already reached, attempts to enable indexing on a new or updated file will be blocked, and you’ll see the message: “Limit of 100 documents reached.”
- Best practice: Choose intentionally which documents are indexed to maximise relevance. Core policies, compliance guides, and frequently referenced resources are good candidates.
- Non-indexed documents remain fully available in the Documentation grid for users to search and access—they just won’t be used by the AI.
- Select Next.
Assign Access
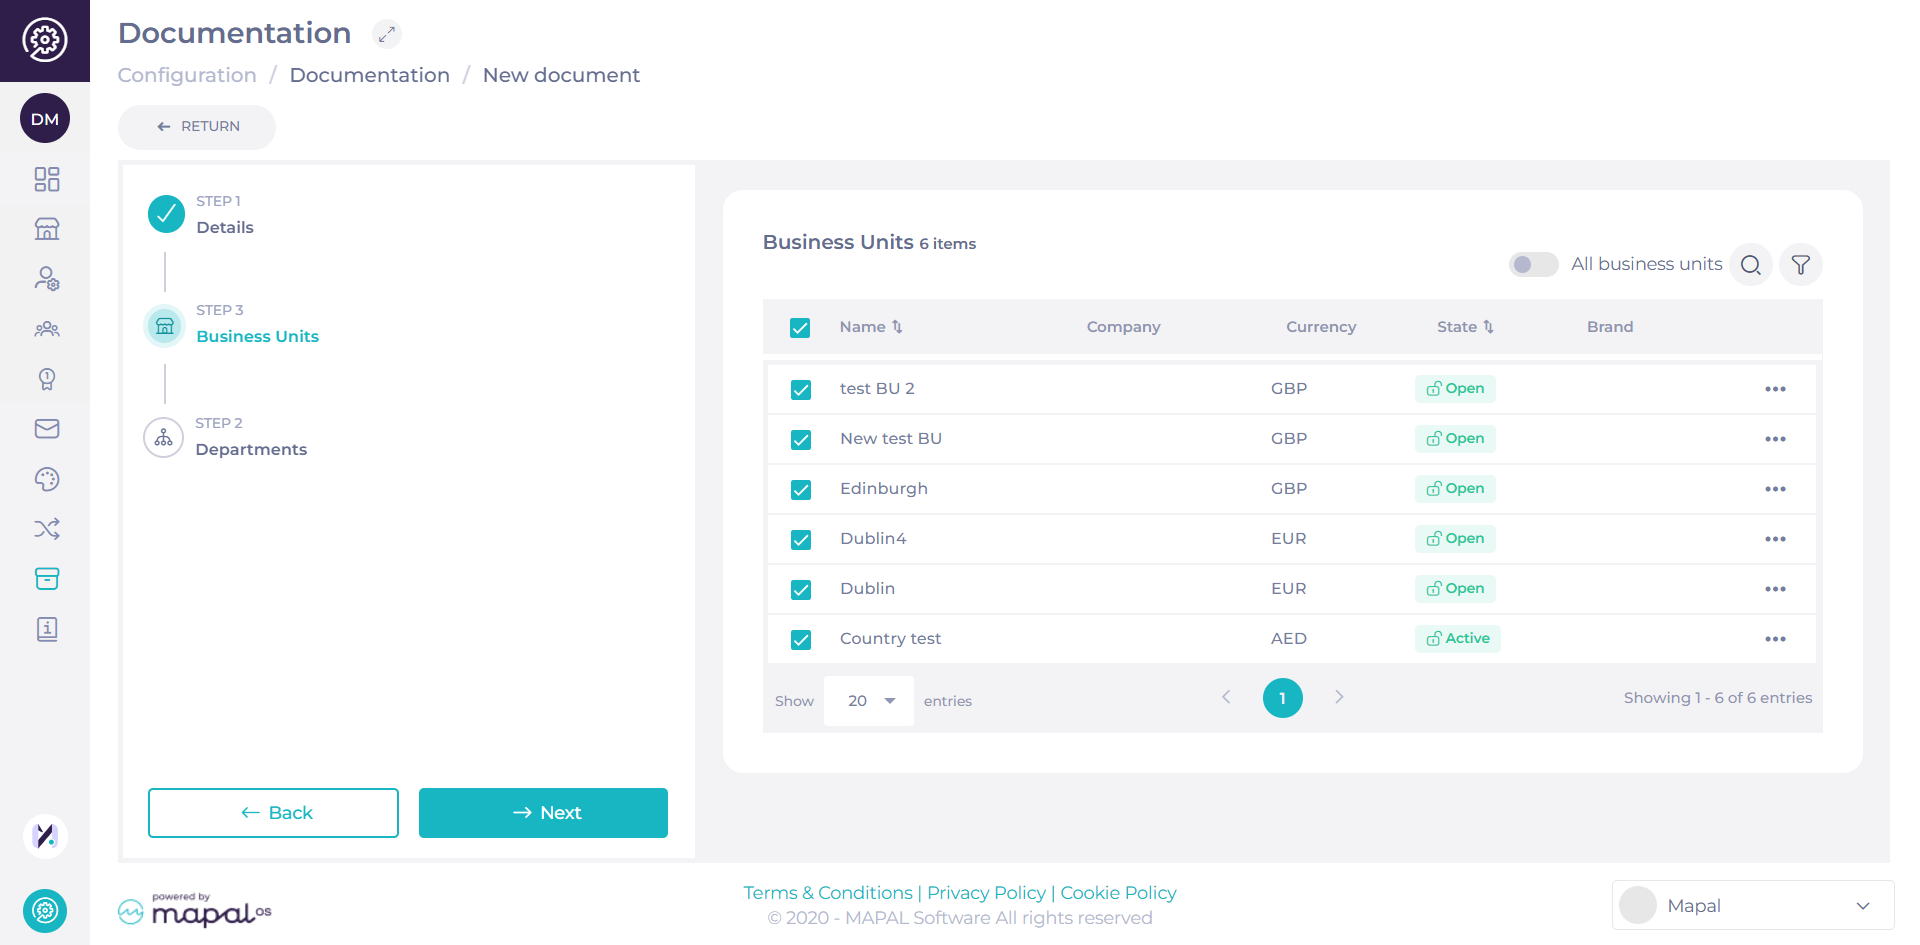
Option 1: Assign by Business Units
Select the Business Units that should have access to the document.
- Use the Search bar or Filter to locate specific units, or select All Business Units to share the document company-wide.
- Select Next to proceed.
Option 2: Assign by Category Groups
You can also toggle to Category Groups instead of Business Units to manage document access by category segmentation.
- Select the relevant Category Groups and press Next to continue.
Use this view to assign documents according to organisational categories such as regions, brands, or site groups. The access logic ensures that only users belonging to the selected Category Groups will see the document in their Documentation area.
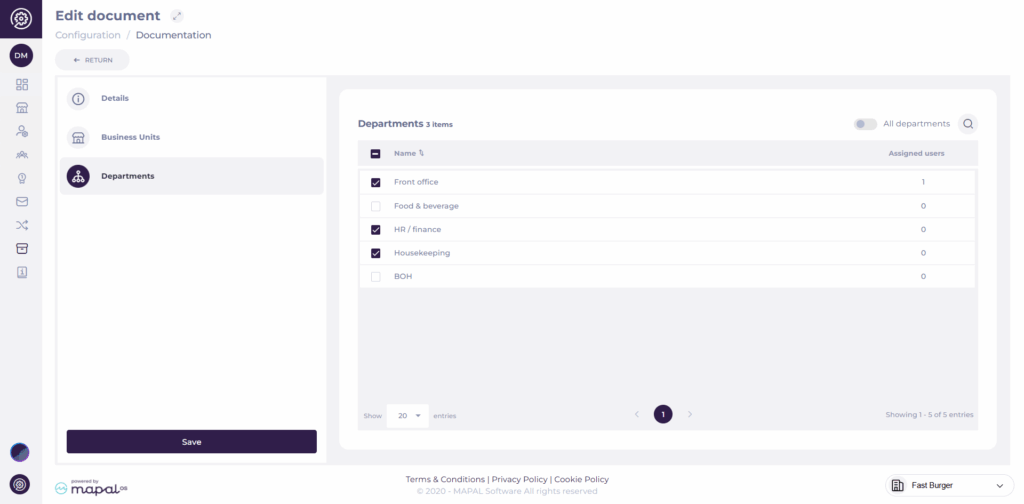
Assign to Departments
- Select one or multiple Departments to assign the document to.
- You can also use a toggle to apply to All Departments at once.
Note: Use the filter to display only selected departments for easier review. Filters support multi-select for Location, Country, Region, and City.
- Once you have selected the right department(s), select Save to complete the setup.
The document appears then in the Documentation grid.
Delete documents
You can remove outdated or unnecessary files directly from the Documentation page.
- Locate the document you want to delete in the grid.
- Select the three-dot menu (?) at the far right of the document’s row.
- Choose Delete from the dropdown menu.
- Confirm your choice in the pop-up window.
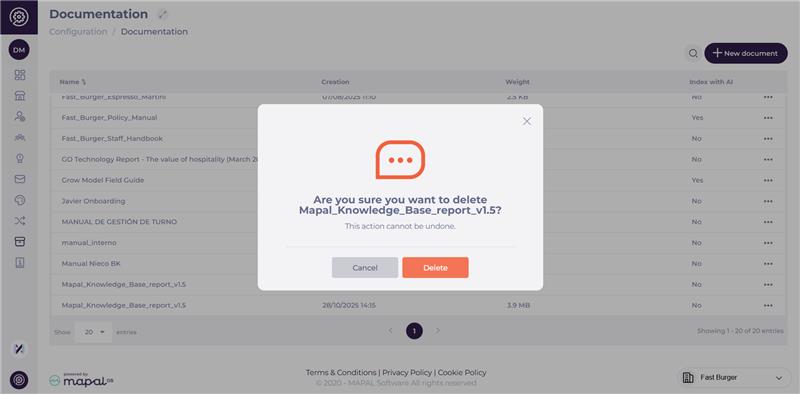
Once deleted, the document is permanently removed from the system and will no longer appear in the Documentation grid or in AI search results (if previously indexed).
Note: Deletion is irreversible. If a document needs to be replaced or updated, consider uploading a new version instead of deleting it.