Start from: The Mapal OS Configuration module.
- Select SSO Configuration from the main menu.
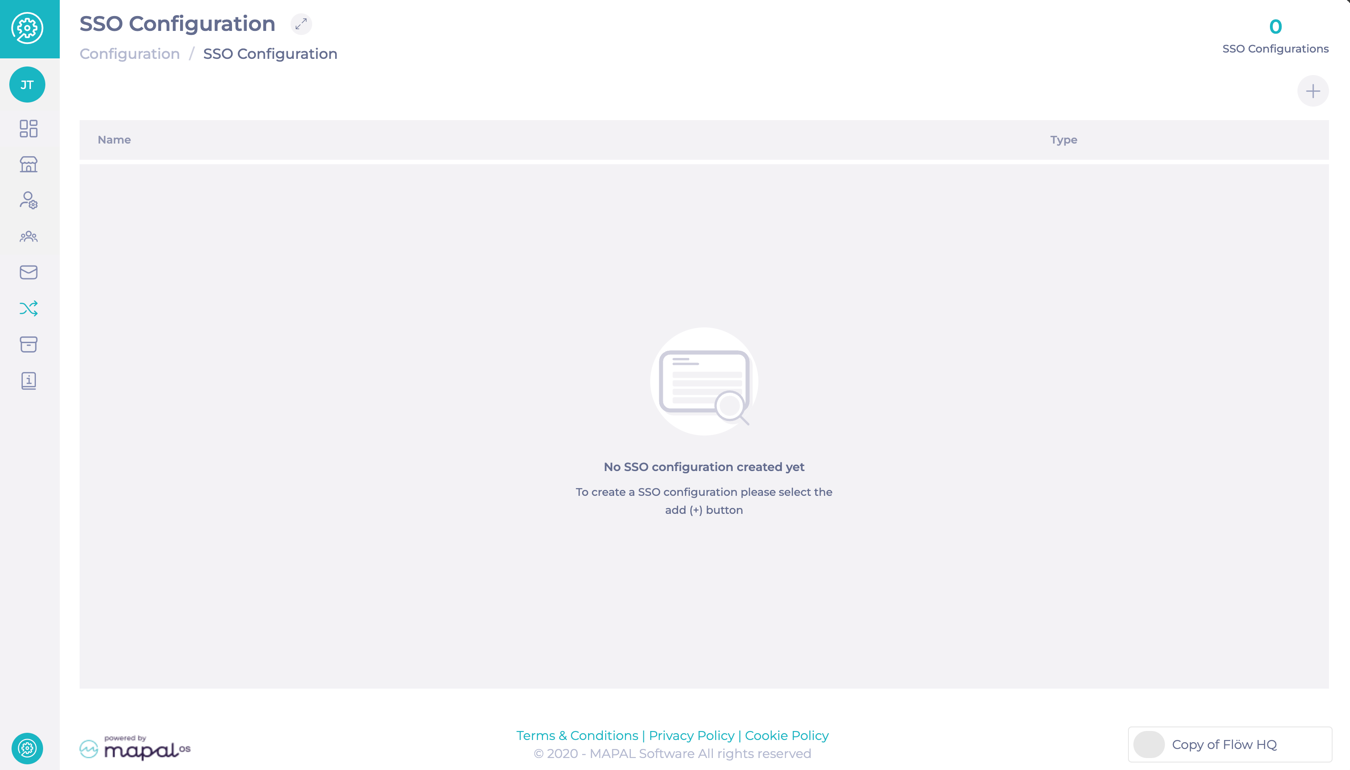
- Select + Add.
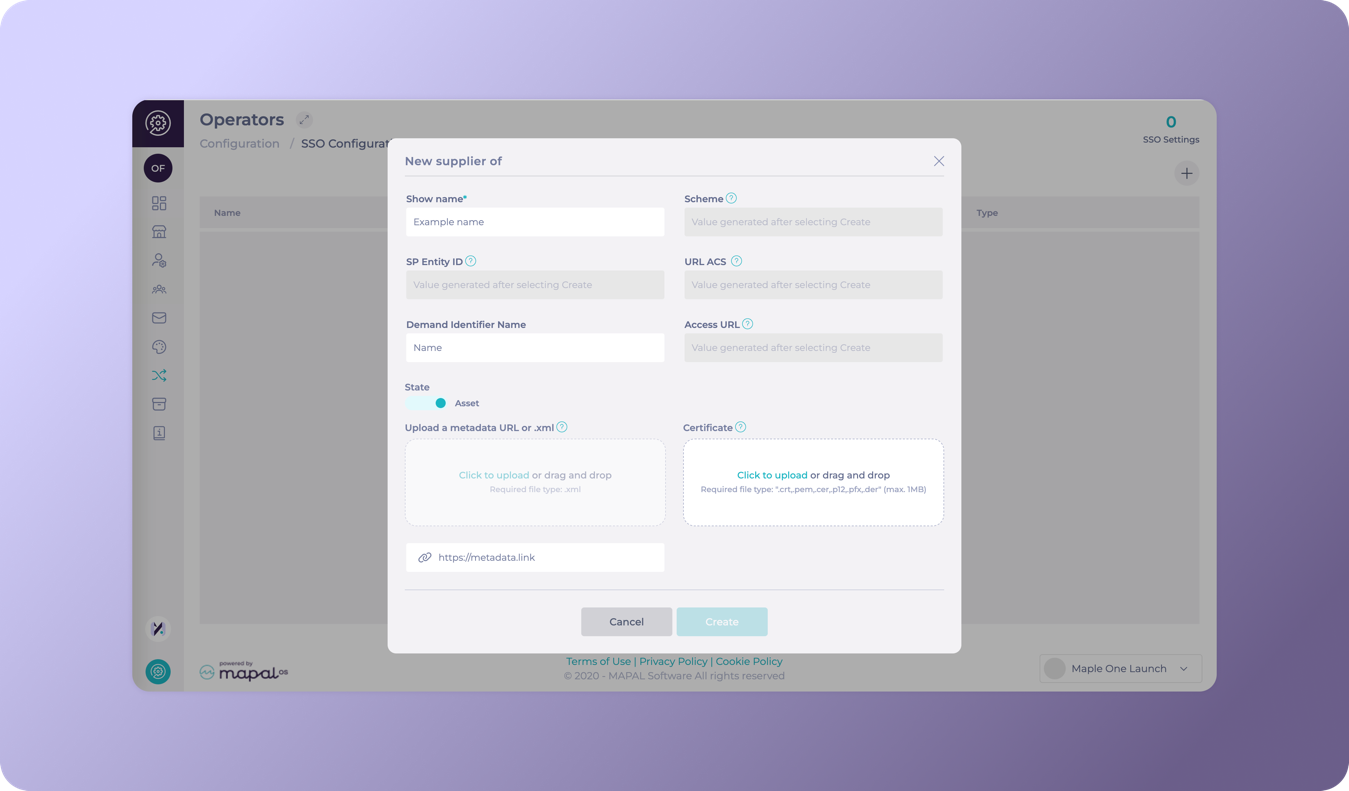
- In the New supplier of window, complete the following fields:
- Show name: Enter the name of the SSO.
- Demand Identifier Name: Enter the identifier used by the SSO provider.
- State: Choose the status.
- Upload Metadata: Provide the metadata URL or upload the .xml file (Required file type: .xml).
- Certificate: Upload the required certificate file (Accepted file types: .crt, .pem, .cer, .p12, .pfx, .der - Max size: 1MB).
- Select Create.
Note: If you enter a scheme that already exists, Mapal OS displays a validation message rather than a system error. Amend the duplicate entry to continue.
Greyed-out fields will automatically populate with the generated values (e.g., SP Entity ID, Scheme, URL ACS, and Access URL). The newly created SSO will appear on the list. At the top of the screen, a counter will show the total number of configured SSOs.
Log in with SSO
Once an SSO provider has been set up, users log in from the main Mapal login page by entering their email address and selecting Login. If their account is configured for SSO, they are automatically redirected to the SSO provider.
This makes the login experience simpler and more aligned with your organisation’s authentication policies.