


Note: Some companies choose to rename 'Workbooks' to something that works better for their company. If workbooks is part of your package and you are having trouble locating it on your system, please get in touch with us.
Start from: The Step 3: Sections page within a new workbook.
Sections
Using the previously created categories, you can now decide on the sections you wish to include in your workbook. Note: If you haven't already added categories, then you have to do that first before you can continue. See Understand workbook categories for more information.
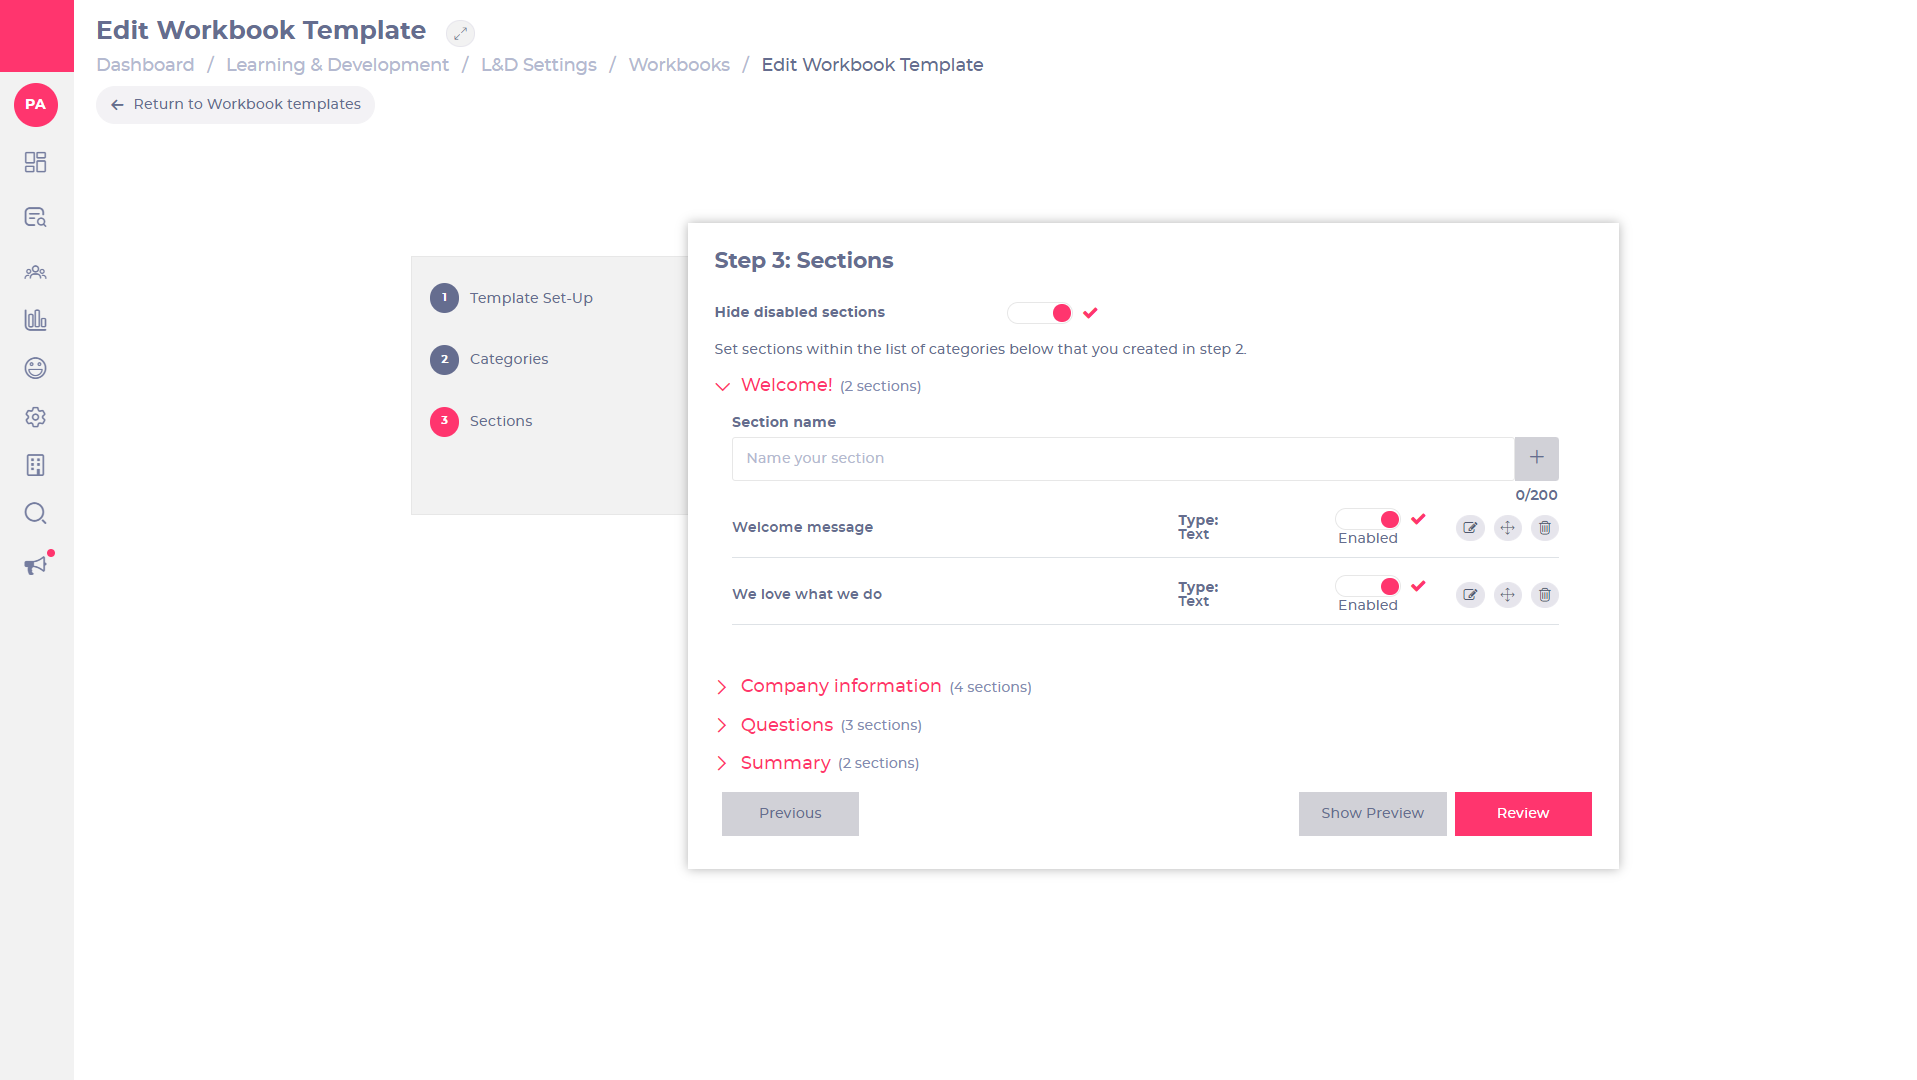
- Select the Hide disabled sections toggle to hide any disabled sections from the list. Note: If this toggle is off, disabled sections will still be visible within the list further down the page and therefore can be re-enabled or edited.
- Select
 beside the name of your previously added category to open the section options.
 - Enter a name for your section in the Section name field and Select
 to confirm and add. Each section added will appear in a list below this field.
Note: Once added in this list, the section will automatically be added as Type: text. You can update this in Edit Section below.
- Select the Enabled toggle to make the section visible. Sections which are not enabled will be hidden from the workbook when in use.
Note: You can disable a section at any time by switching the toggle to off. This will remove it from the list but won't delete it, so it can be enabled again in the future.
- Select Edit
 to edit the content for a section. See Edit section below for more details.
 - Select
 and drag each section up or down to re-order them.
 - Select Delete
 to delete a section.
 - Select Show Preview to review your edits. A Mapal One preview tab will open showing the workbook as a learner would view it. You must be signed in to the Mapal One learners portal in order to see the preview.
- Select Save & Continue to confirm your changes OR select Previous to return to the previous page.
Edit section
Once you have added the sections and decided on your order, you can then add additional details to make each section within your workbook unique to your company.
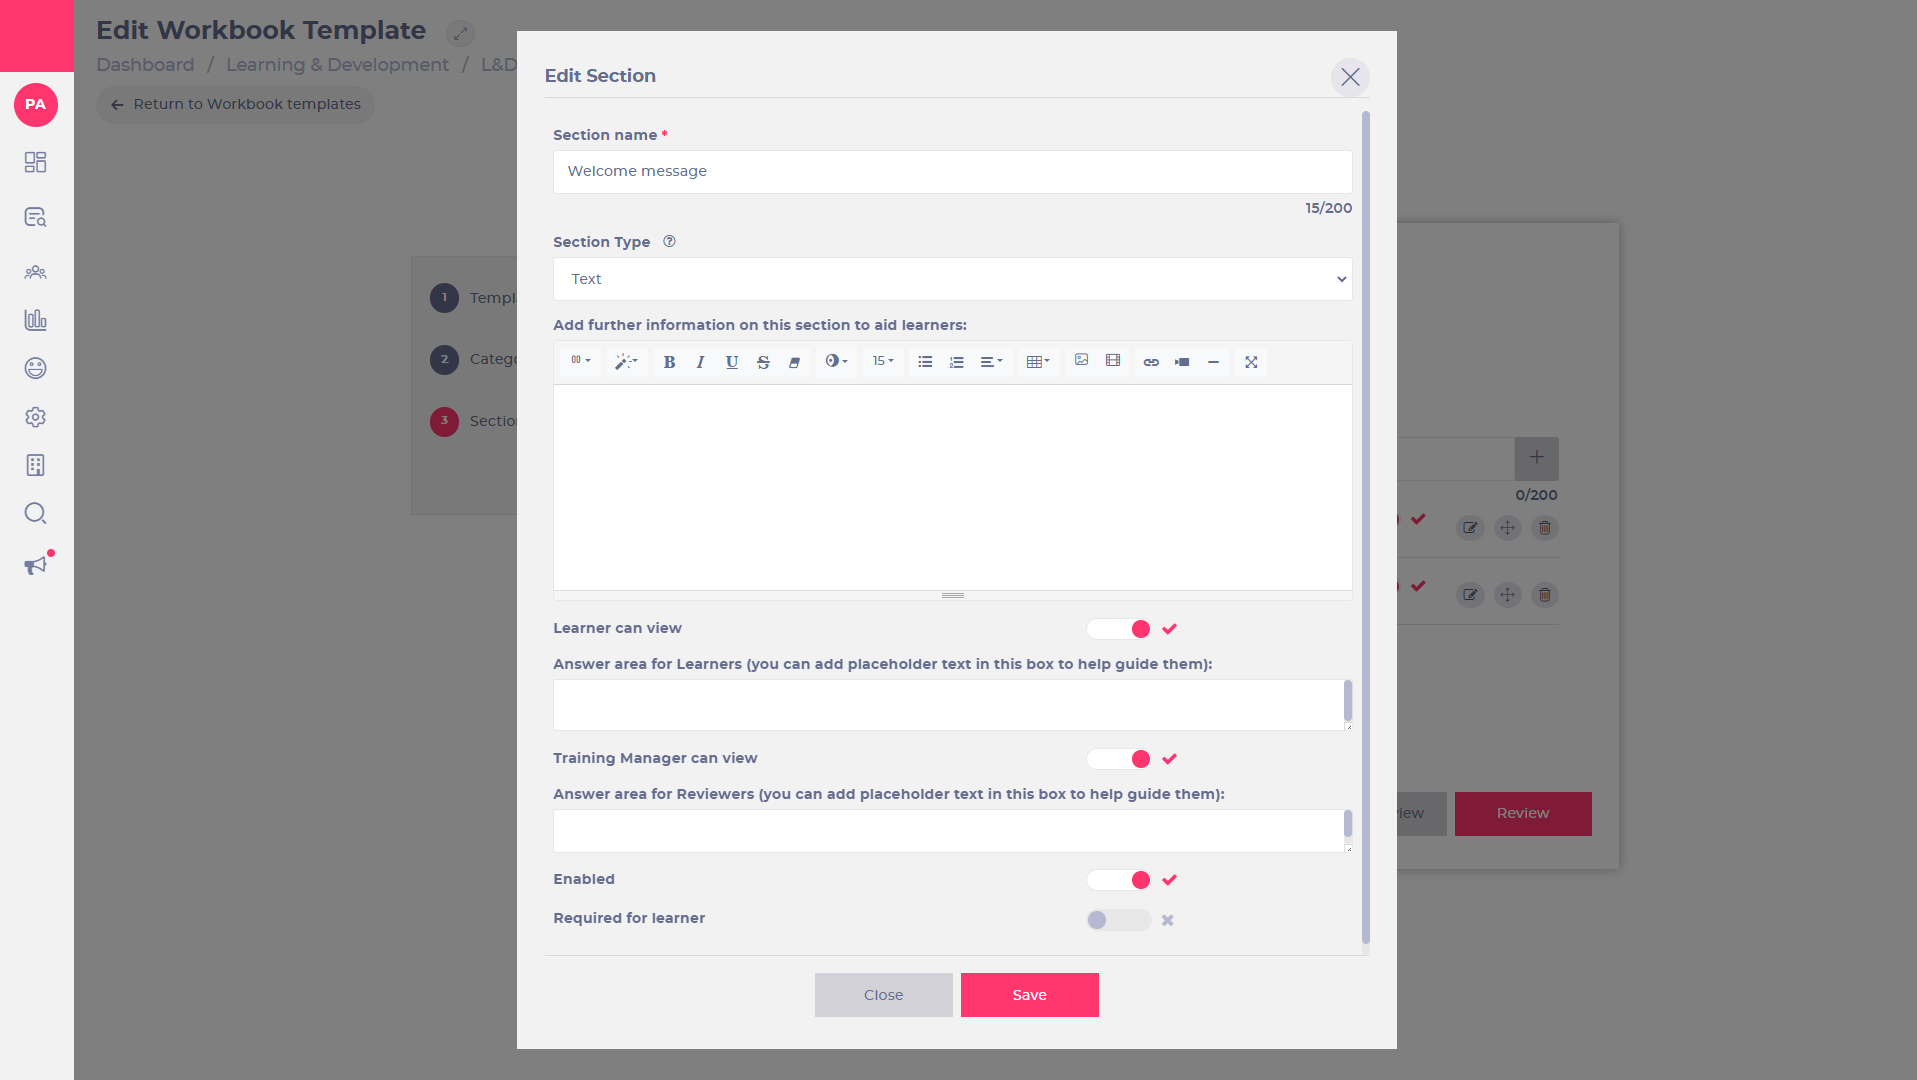
- Select Edit
 to open the content editor. This allows you to add text, images, videos, and live links to the section.
 - Use the Section name text field to edit the name for the section. Note: this field is required.
- Use the Section Type dropdown list to select the type of response required.
- TextThese are free-type text boxes that allow the learner to enter a full answer.
- Radio buttonsThese will display your own custom options for the learner to select from. The learner can select only one correct answer.
- Multiple choiceAllow the learner to select more than one correct answer.
- FileThe learner will be given the option to upload a file or document.
Each Section Type has different settings that will shape the content you choose. See below for more details:
Section formats
Select the type of content you require from the Section type dropdown list. Once you have decided on the right format, you can add more detailed content. The content options are as follows:
Text boxes
Enter your chosen content including images, videos, and live links in the text box.
- Select
 to choose between different column styles.
 - Select
 to choose between different text styles.
 - Select font and font size from the drop-down menus to create interesting font styles.
- Select
 to insert a table by selecting the number of cells you require.
 - Select
 to upload a picture.
 - Select
 to upload a video.
Note100MB max size. Supported file types are: MP4.
- Select
 to insert a link.
 - Select
 to embed a video URL (YouTube, Vimeo, Vine, Instagram, Dailymotion or Youku).
 - Select
 to insert a horizontal rule.
 - Select
 to enter full screen mode.
Radio buttons
This is where you add multiple-option answers to your section.

- Enter your question and all content in the Add further information text box. You can include images, videos, and live links, in the same way as a Text question.
- Enter your first answer option in the Radio button options: text box and select
 to add it to the list of options.
 - Enter your second answer option and Select