


Start from: Learning & Development > L&D Settings.
Cloning a collection
One easy way to create a collection is by cloning from an existing record.
- Select the Create and Maintain Collections panel under the Collections group.
- Select Clone from the menu on the right (with the three dots).
- Edit your cloned collection using the 'Adding a new collection' steps below.
Adding a new collection
- Select the Create and Maintain Collections panel under the Collections group.
- Select Add in the Collections page to open the Create Collection page.
The process of creating or editing a collection is split into steps. You can edit the collection in each step by selecting them from the steps panel.
Note: If changes are made to a Collection that is part of a Training Structure, the updated version will only be visible to new learners added to the system after the update was published. Learners already assigned the collection prior to the update, will not see the new version.
Step 1 - Details
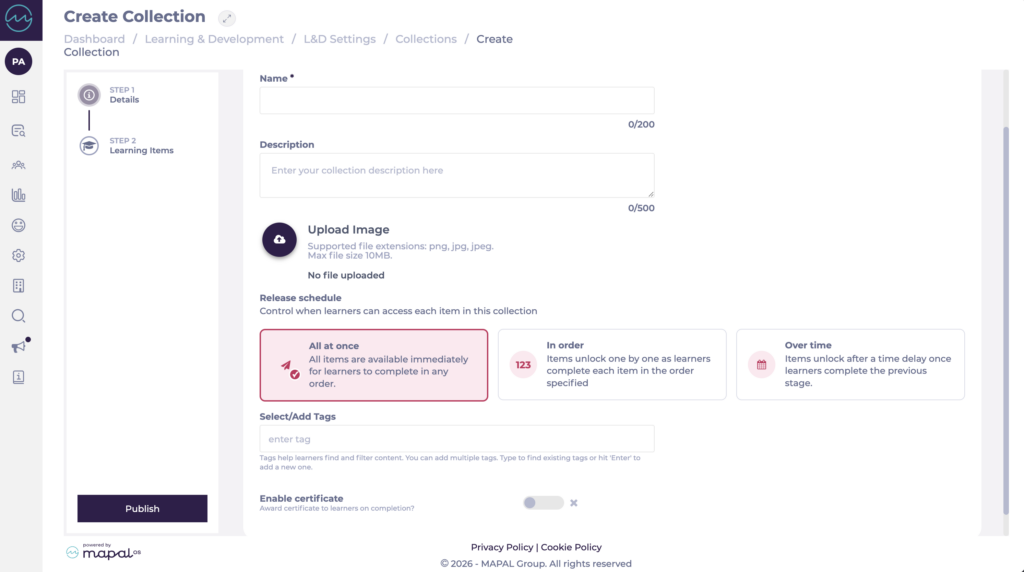
- Enter the name for the collection in the Name field.
Note: the Name field must be completed before moving to Step 2.
- Provide a brief description of the collection in the Description field.
- Select Upload Image to upload a thumbnail image to represent the collection.
Note: The name, description and thumbnail will be used to display the collection to learners when viewed within Mapal One.
- Under Release schedule, select how learners access the items in this Collection:
- All at once: all items are available immediately for learners to complete in any order.
- In order: items unlock one by one as learners complete each item in the order specified.
- Over time: items unlock after a time delay once learners complete the previous stage.
Note: Existing Collections retain their current behaviour. No changes are required for Collections already in use.
- Enter searchable tags in the Select/Add Tags field to describe the collection.
- Toggle Enable certificate to award certificates on completion. More details on this step below.
- Select Step 2 when you are happy with these details.
Step 2 - Learning Items
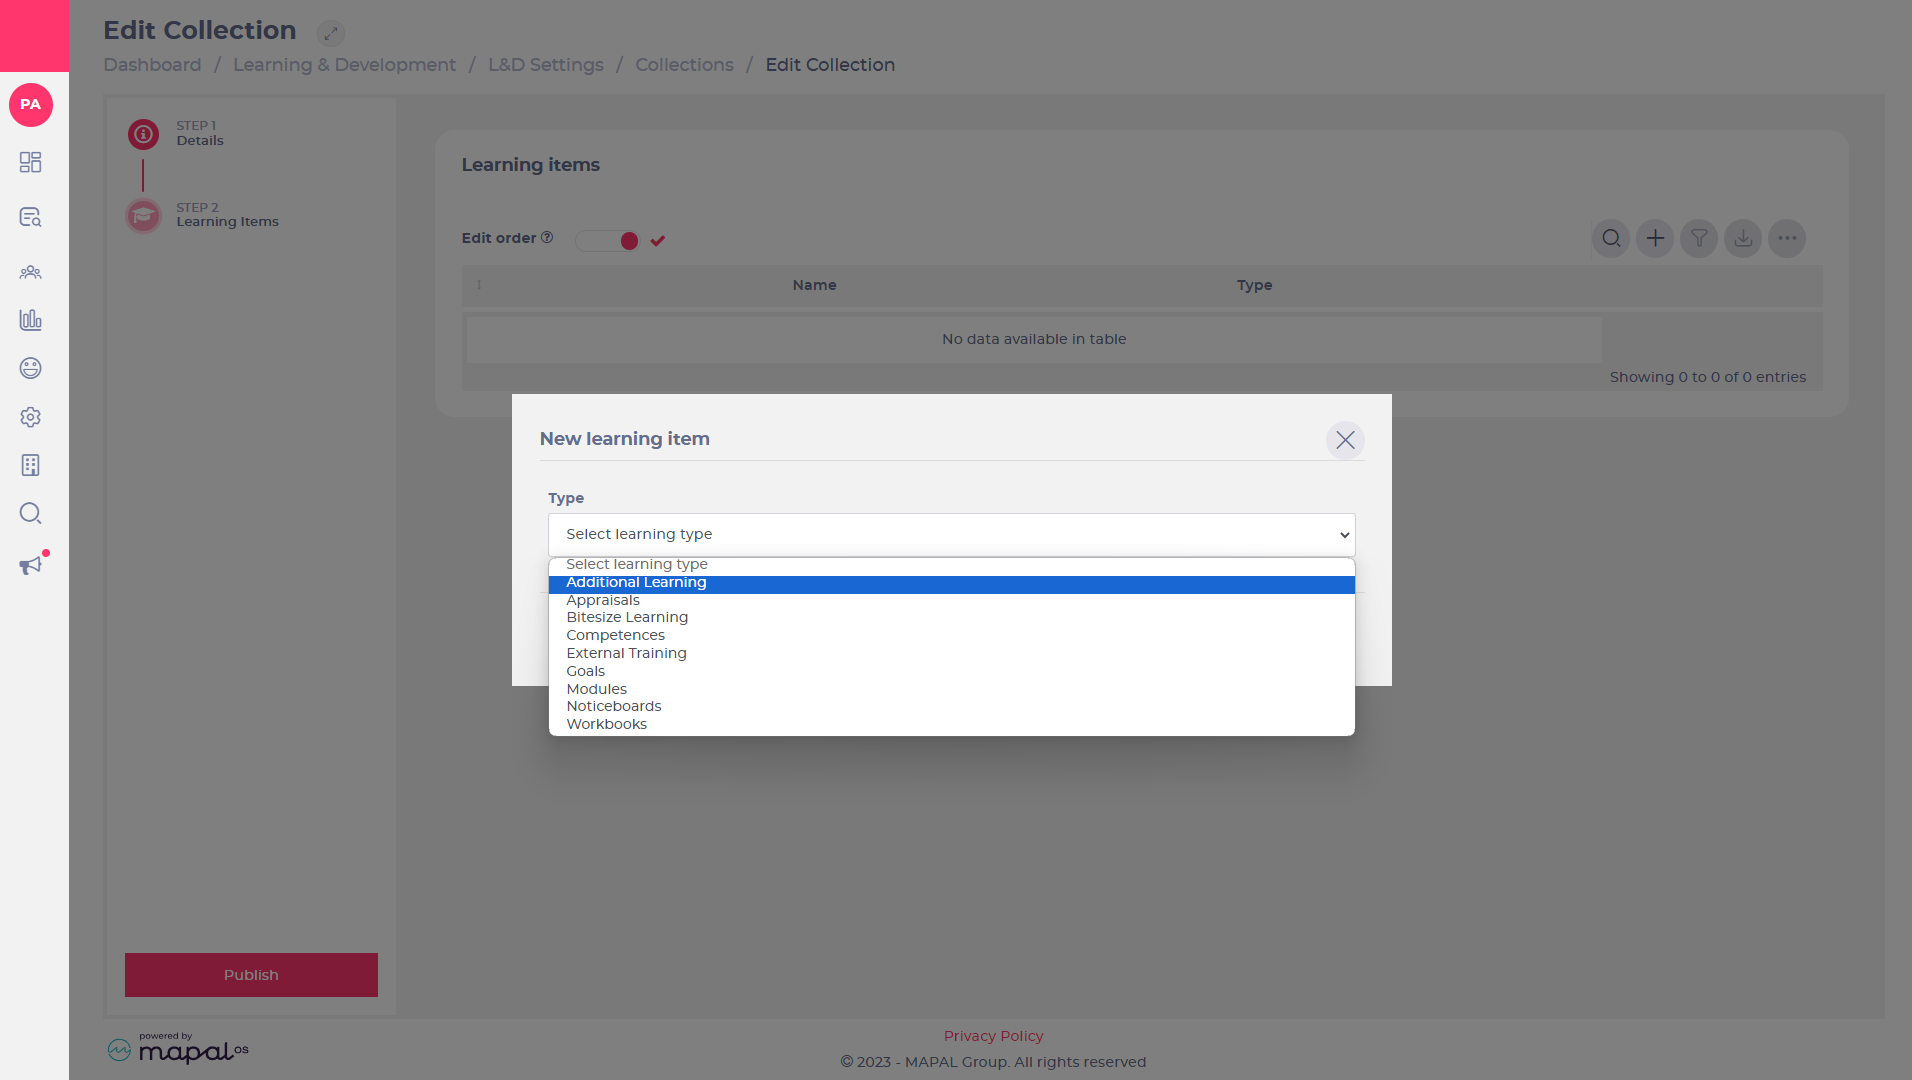
- Select Add to open the New learning item panel.
- Select from the Type dropdown list to display available learning of that type. You can select from the following learning types:
- Additional learning
- Appraisals
- Bitesize learning
- Competences
- External Training
- Goals
- Modules
- Noticeboards
- Workbooks
Note: Only active content appears in the Type dropdown. Inactive or archived items (across all content types) are excluded from builder views, item counts, and future assignments.
- Use Search to filter the available options.
- Select the check box for each required item and select Add to add them to the collection OR select Close to cancel adding and return to the previous page.
- You can repeat these steps as many times as you like to add learning of various types to the collection.
Note: You can add up to 25 learning items to each collection. Restricted SCORM modules can be added to a collection only by users with the relevant permission. Collections containing restricted SCORM modules can only be assigned by users with that permission, and cannot be added to Training Structures.
- You can edit the order the items appear in the collection by toggling Edit order and dragging on the items to reorder them.
- Select [...] > Delete on an item in the list to remove it.
- Once you are happy with the collection items and order, select Publish to save the collection and make it available to assign to learners.
Noticeboards in collections
Adding a Noticeboard into a Collection will NOT assign it to learners unless they already have that Noticeboard assigned to them (as dictated by branch, job title, department, etc.).
Archived Noticeboard items are automatically excluded from collections: they no longer appear in builder views or contribute to item counts. Republishing an archived Noticeboard restores it to any collection it was previously part of.
Find out more about how to add and remove Noticeboard items to branches.
Adding a certificate to a collection
You can add a certificate to a Collection so that learners receive it automatically in Mapal One upon successful completion. This is ideal for compliance, onboarding, or external proof of training.
To enable and upload a certificate:
- Go to L&D Settings > Create and maintain collections.
- Open an existing collection or create a new one.
- Scroll to the bottom and toggle Enable certificate.
- Select Upload to add a certificate template (PDF format).
Note: If you don’t have a custom certificate, a default Flow template is available via a link. The default template supports fields like learner, name, and certificate ID. If you upload your own template, make sure it supports these placeholders.
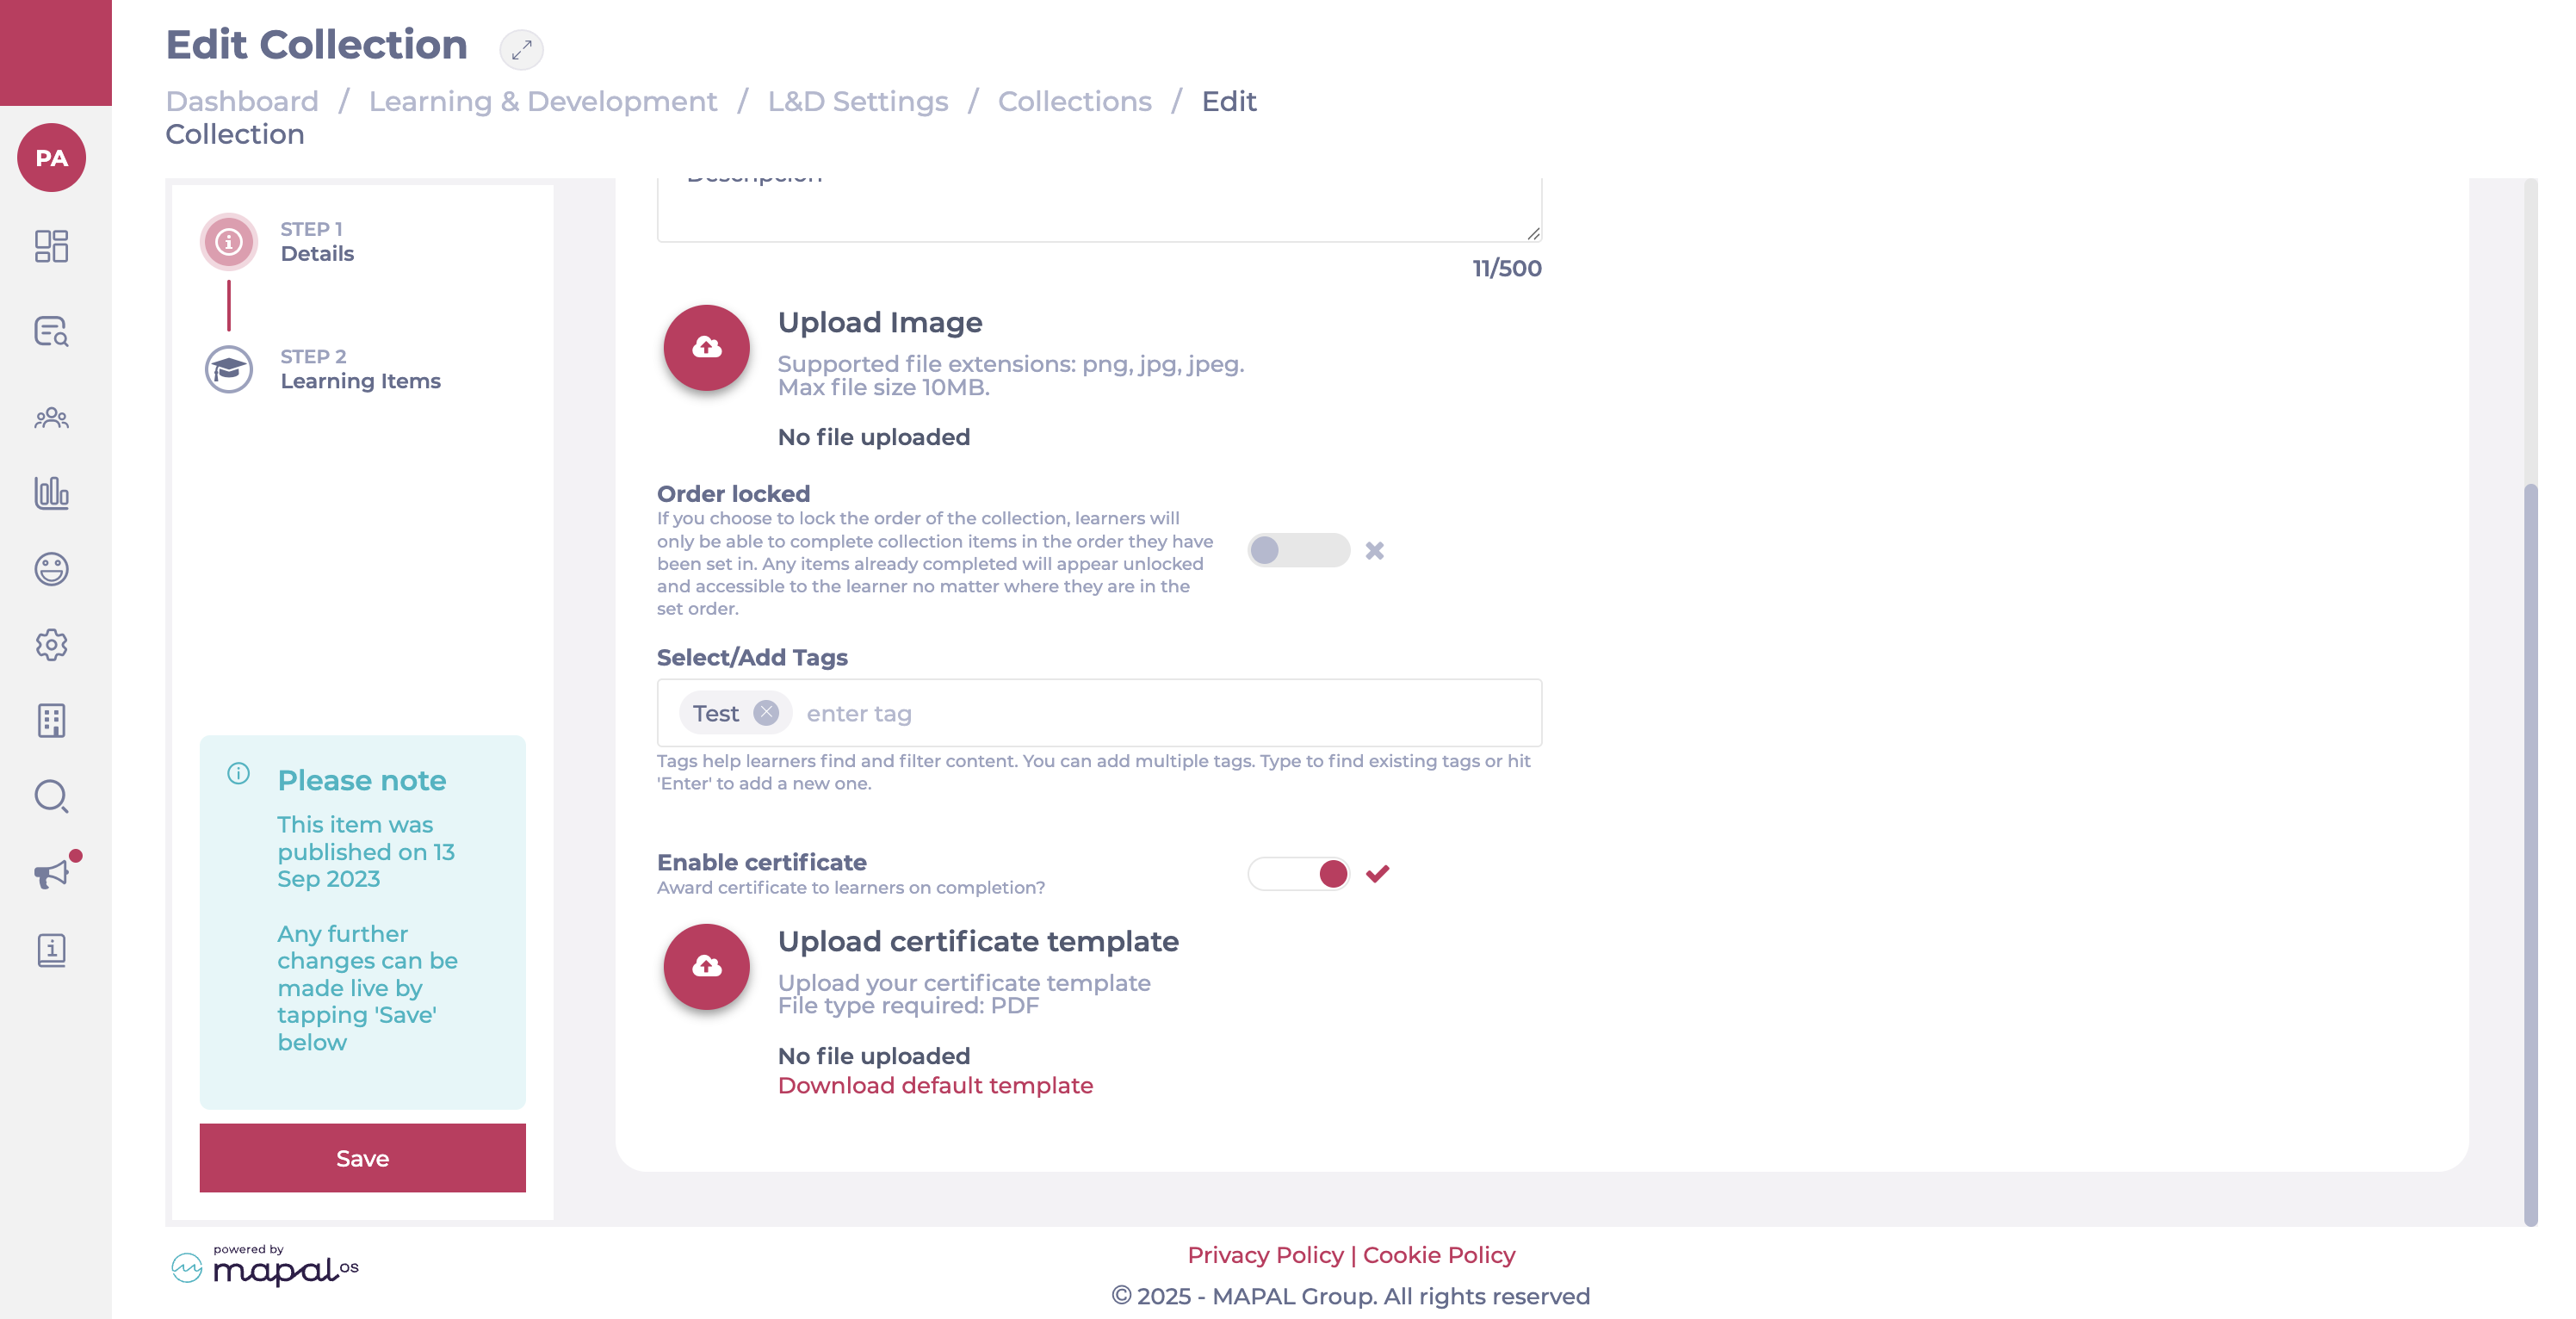
- Select Save.
Note: When you clone a collection, the certificate toggle setting is copied. However, the uploaded certificate file is not copied. You will need to re-upload it manually.
What happens next
- When a learner completes all items in the Collection, the certificate is issued automatically.
- The certificate includes: learner name, collection name, issue date, department, and external learner ID (if available).
- Learners can access certificates via Mapal One > Library > Certificates.
To know more, see Access certificates and other documents in Mapal One.
