


Start from: The Flow Learning dashboard.
Apply a tag to a lesson
- Navigate to Learning & Development > Studio.
- The Studio dashboard opens on Content.
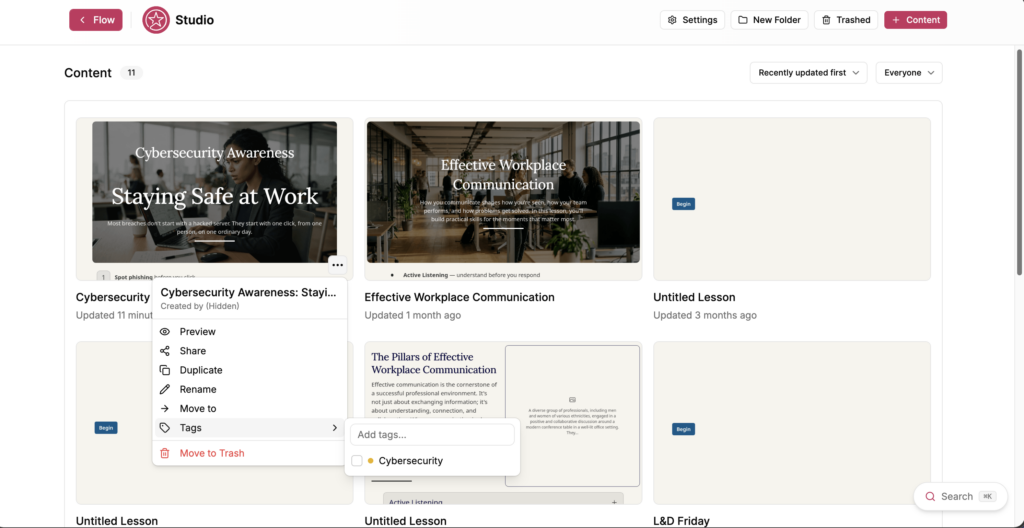
- Select the action menu (...) on the lesson you want to tag.
- Select Tags.
- Select the tags you want to apply. A tick appears beside each applied tag.
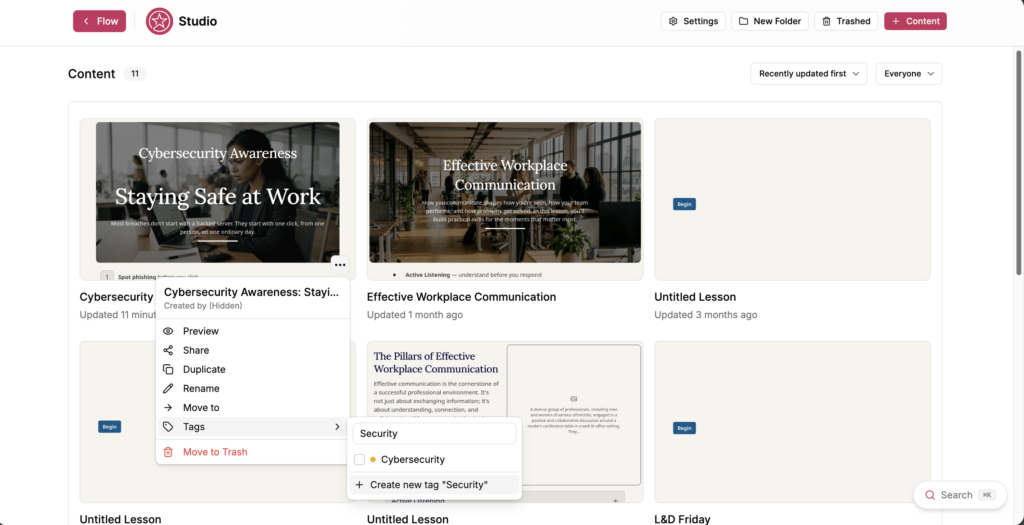
- To create a tag, enter a name in Add tags..., then select Create new tag "[name]".
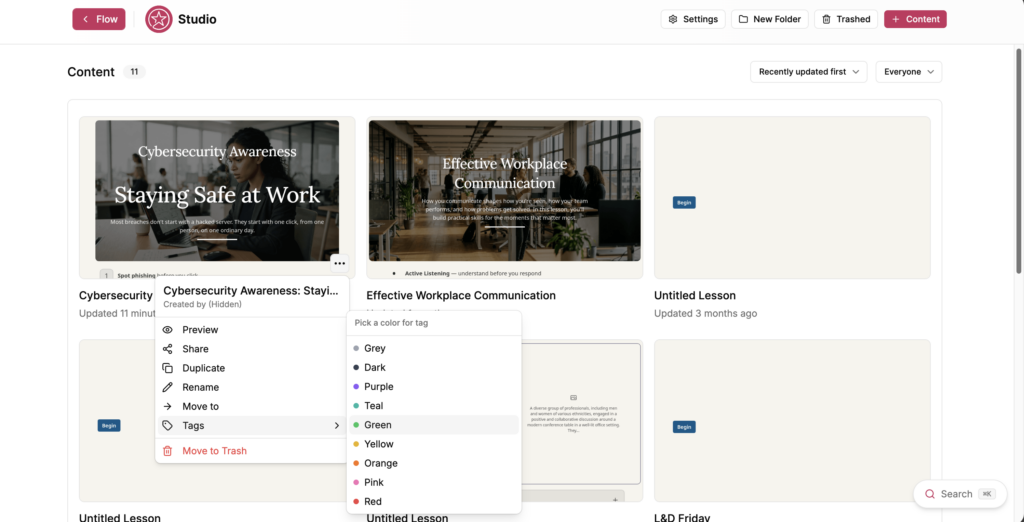
- Choose a colour for the tag from Pick a color for tag. The available colours are Grey, Dark, Purple, Teal, Green, Yellow, Orange, Pink and Red.
Tags are shared across the teamspace, so a tag you create is available to everyone working in it.
Rename or recolour a tag
- Select Settings on the Studio dashboard.
- Select Default Settings.
- Scroll to Tags.
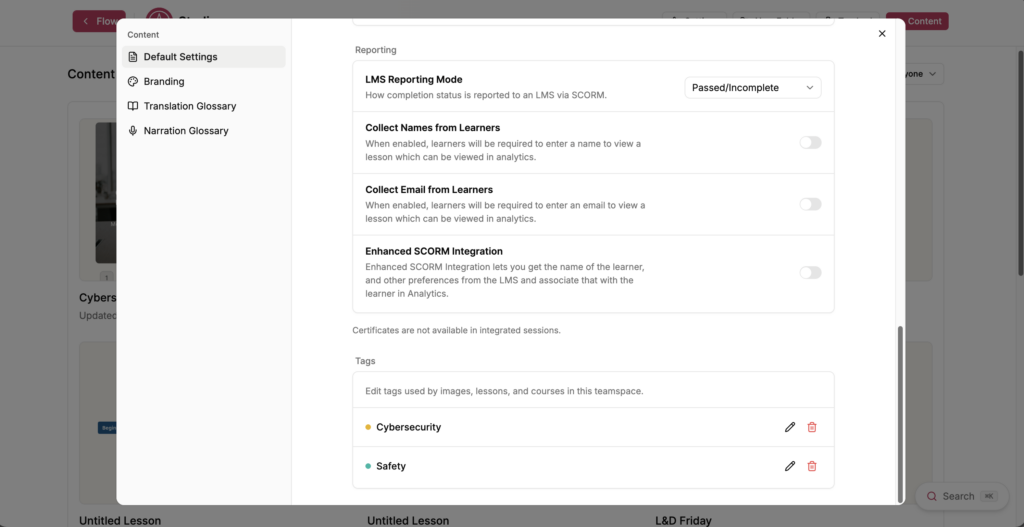
- Select the edit icon beside the tag you want to change.
- Edit Tag name, select a colour under Tag color, or both.
- Select Save.
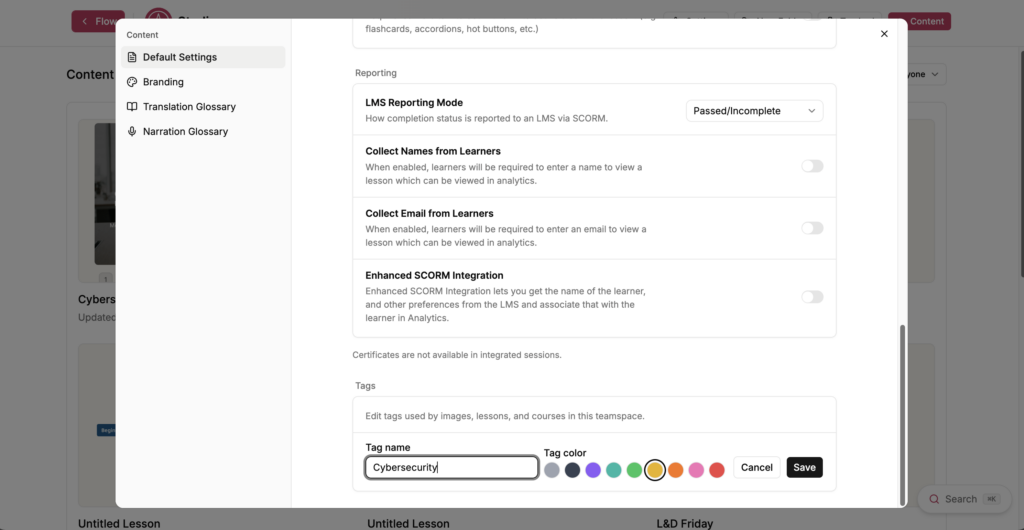
Renaming a tag updates it everywhere it is applied. Select Cancel to leave the tag unchanged.
Delete a tag
- Select Settings on the Studio dashboard.
- Select Default Settings.
- Scroll to Tags.
- Select the bin icon beside the tag you want to delete.
- The Delete tag window opens and tells you how many items use the tag.
- Select Delete.
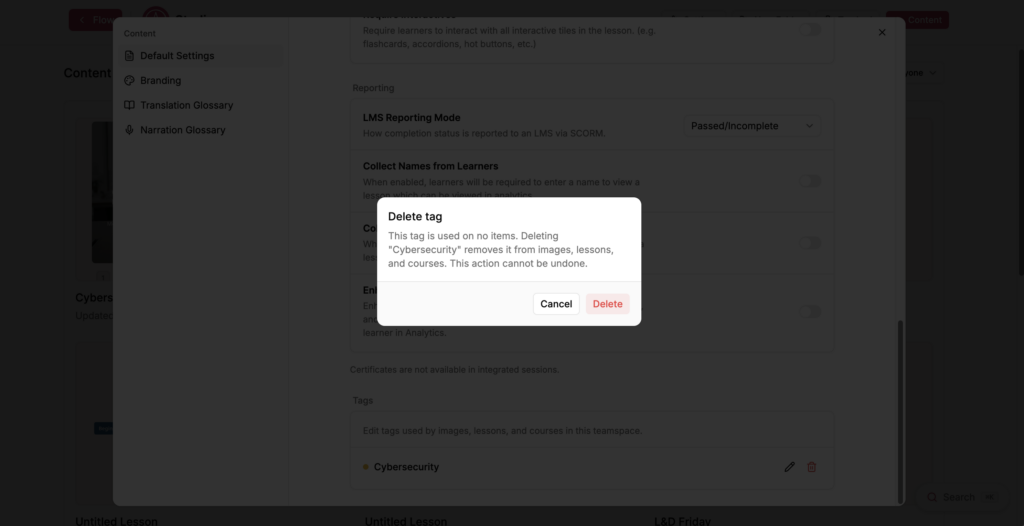
Note: Deleting a tag removes it from the images, lessons and courses that use it. This action cannot be undone.
