


Start from: The Flow Learning dashboard.
How the editor fits into the workflow
- Storyboard: the blueprint. Defines objectives, learners, writing style, outline, and branding. AI uses it to generate the first draft.
- Editor: the workshop. This is where you refine, customise, and build the final version — whether starting from AI’s draft or from scratch.
Edit a lesson
- Navigate to Learning & Development > Studio.
- The Studio dashboard opens. Select the specific lesson you want to edit.
Note: To know more about how to create a new lesson, see Generate a lesson using AI in Studio.
Layout of the editor
The Editor has four main spaces:
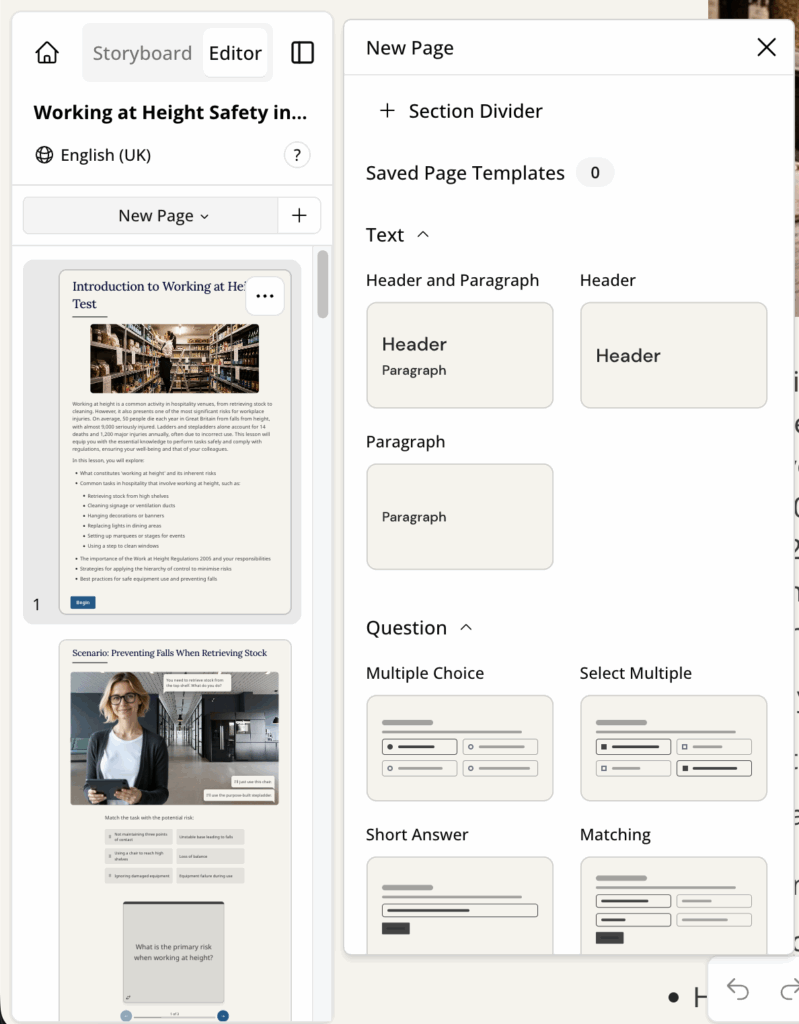
1. Left Sidebar – Pages & Sections
Your lesson’s navigation hub.
Here you can:
- Scroll through all pages.
- Add a page with + New Page.
- Insert Section Dividers to separate chapters or topics.
- Drag and drop to reorder pages.
- Create page templates for reuse.
Tip: Break long lessons into segments with Section Dividers. Learners engage better with “chunked” content.
2. Main Canvas – Page & Tile Editing
The central workspace. Each page is made of tiles — modular content blocks.
To add a tile:
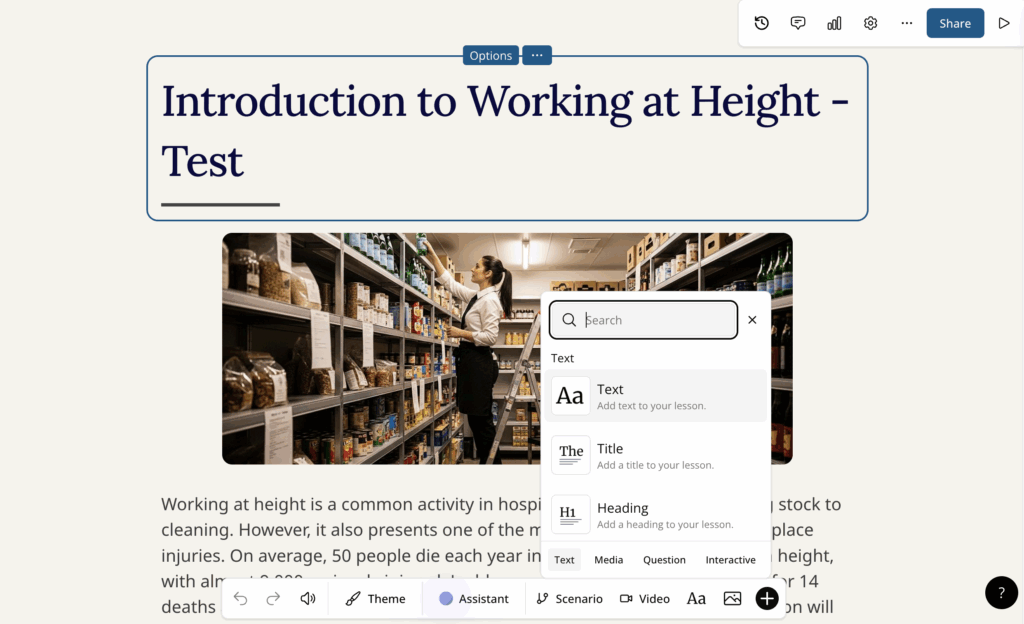
- Click + at the bottom of the page or in the toolbar.
- Choose from:
- Text: Title, header, paragraph.
- Media: Image, video, embeds, links. Embedded PDFs open full screen on mobile devices, so learners can read documents without zooming.
- Interactive: Quizzes, matching, flashcards, hotspots, buttons, sorting.
- Scenario Builder: Branching conversations or simulations.
- To edit a tile, click into it to change text or replace media.
Tip: Keep it simple — 2–3 tiles per page work best, especially for mobile learners.
3. Bottom Toolbar – Quick Tools
Shortcuts for faster building:
- Undo/Redo: Step back or forward.
- AI Assistant: Rewrite text, generate quizzes, suggest interactives.
- Theme Builder: Adjust fonts, colours, and logos.
- Scenario: Insert branching decision trees.
- Video: Upload or embed clips.
- Aa: Add a quick text tile.
- +: Access all tile types.

Tip: Use the AI Assistant to transform existing content into interactions — e.g., turn a paragraph into a multiple-choice quiz.
4. Top Menu – Global Controls
Lesson-wide settings and tools:
- Analytics: Track learner performance (see Analytics Guide).
- Lesson Settings: Adjust preview, learning, and grading options.
- Preview: See the learner’s perspective.
- More (…) Menu: Translate, add narration, duplicate, return to Generator, or delete.

Tip: Preview often. A layout that looks balanced in the Editor may feel crowded in learner view.
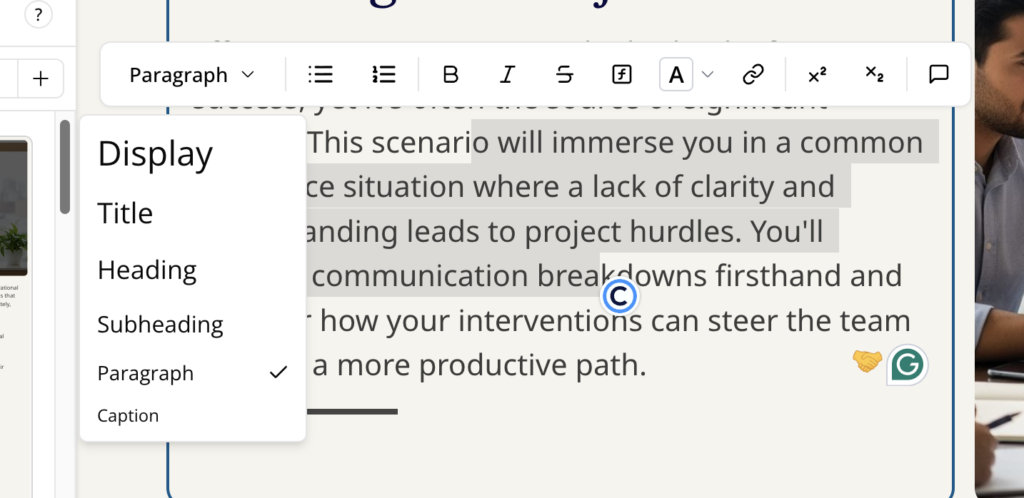
5. Formatting toolbar – Rich text and inline comments
When you select text inside a text-based tile (and in supported interactive fields such as question feedback and matching activities), a contextual formatting toolbar appears above your selection.
From this toolbar, you can:
- Apply rich text formatting, such as:
- Bold
- Italics
- Bullet lists / numbered lists
- Headings / paragraph styles (for example: Title, Heading, Subheading, Paragraph, Caption)
- Links (where available)
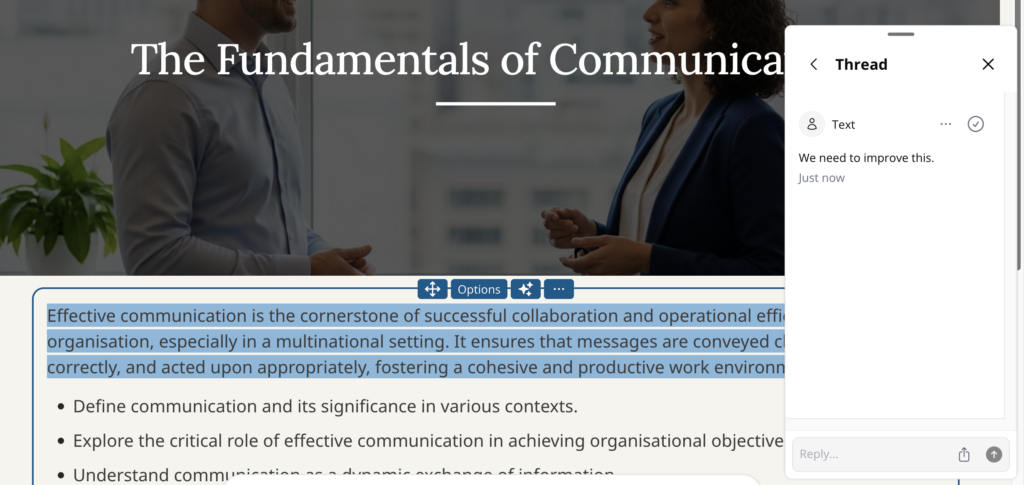
- Add inline comments on specific text for contextual feedback:
- Highlight the exact text you want to comment on.
- Select the Add Comment button in the formatting toolbar.
- Type your feedback and save it.

Inline comments are useful for collaborative review because they keep feedback attached to the exact phrase or sentence being discussed, rather than as a general note on the page.
Work with images
Select the image, then select Edit in the Image panel to open the image menu.
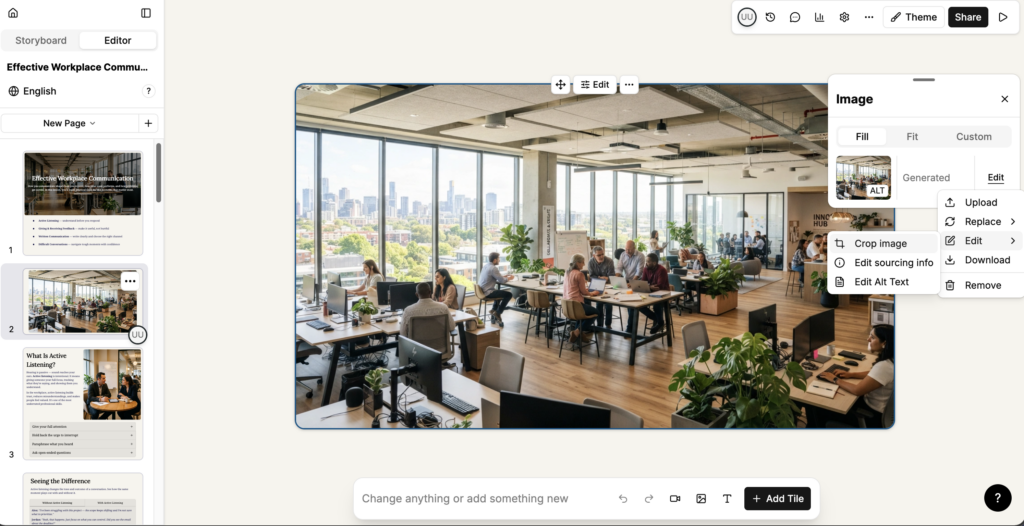
Replace the image
- Select Replace, then choose where the new image comes from:
- Generate: create an image with AI.
- Search: search for a stock image.
- Library: choose an image already in your library.
- File: choose a file from your device.
- Select Upload to upload an image from your device without opening the Replace menu.
Edit the image
- Select Edit, then choose what you want to change:
- Crop image: crop the image.
- Edit with AI: adjust the image using AI.
- Edit sourcing info: record where the image came from.
- Edit Alt Text: write the alternative text read by screen readers.
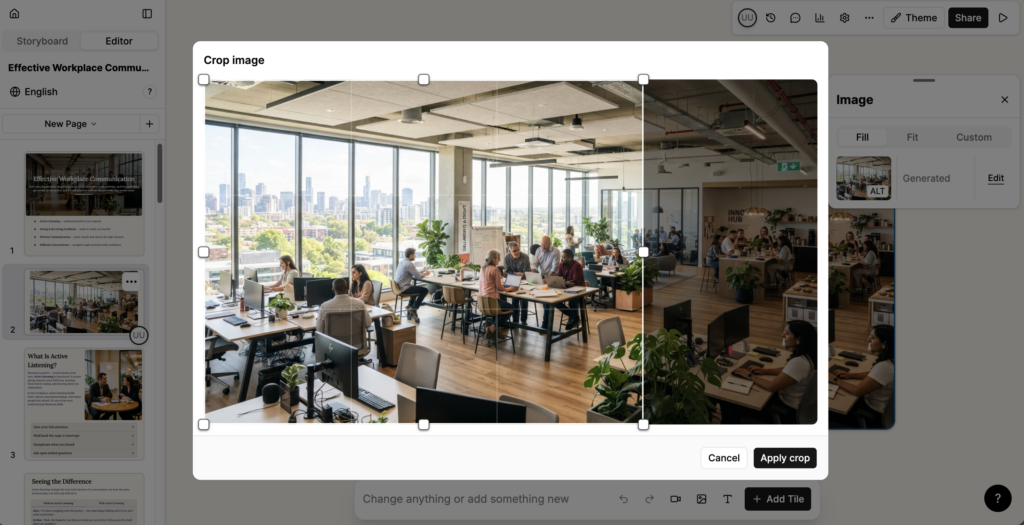
You can edit any image in a lesson this way, whether it was generated with AI, found through search, or uploaded.
Other options
- Select Download to save the image to your device.
- Select Remove to remove the image from the tile.
Under Fill, Fit and Custom, set how the image sits within the tile. The label beside the thumbnail shows where the image came from, and ALT shows whether it has alternative text.
Note: Add alternative text to every image that carries meaning, so that learners using a screen reader get the same information. Studio supports GIF and WebP images alongside standard image formats.
