


Note: Actions on the Easilys platform depend on your user access permissions. If you are not able to perform the actions below, this may be due to restrictions on your user profile. Please contact the support team or your administrator for assistance.
Start from: The Easilys menu
Prerequisite: Define the key traceability steps as described in the article Manage traceability steps.
Step 1: Create a new traceability plan
You can create a single traceability plan that includes all the steps you wish to trace, or you can define specific plans with only some of the steps to simplify usage for your teams. For example, you might create one plan for unpacking and production steps, and another for production and delivery; or one for cold preparation and another for hot preparation.
-
Go to Traceability > Traceability (plan mode).
-
Select the Traceability Plan view.
-
Click the Administration button.
-
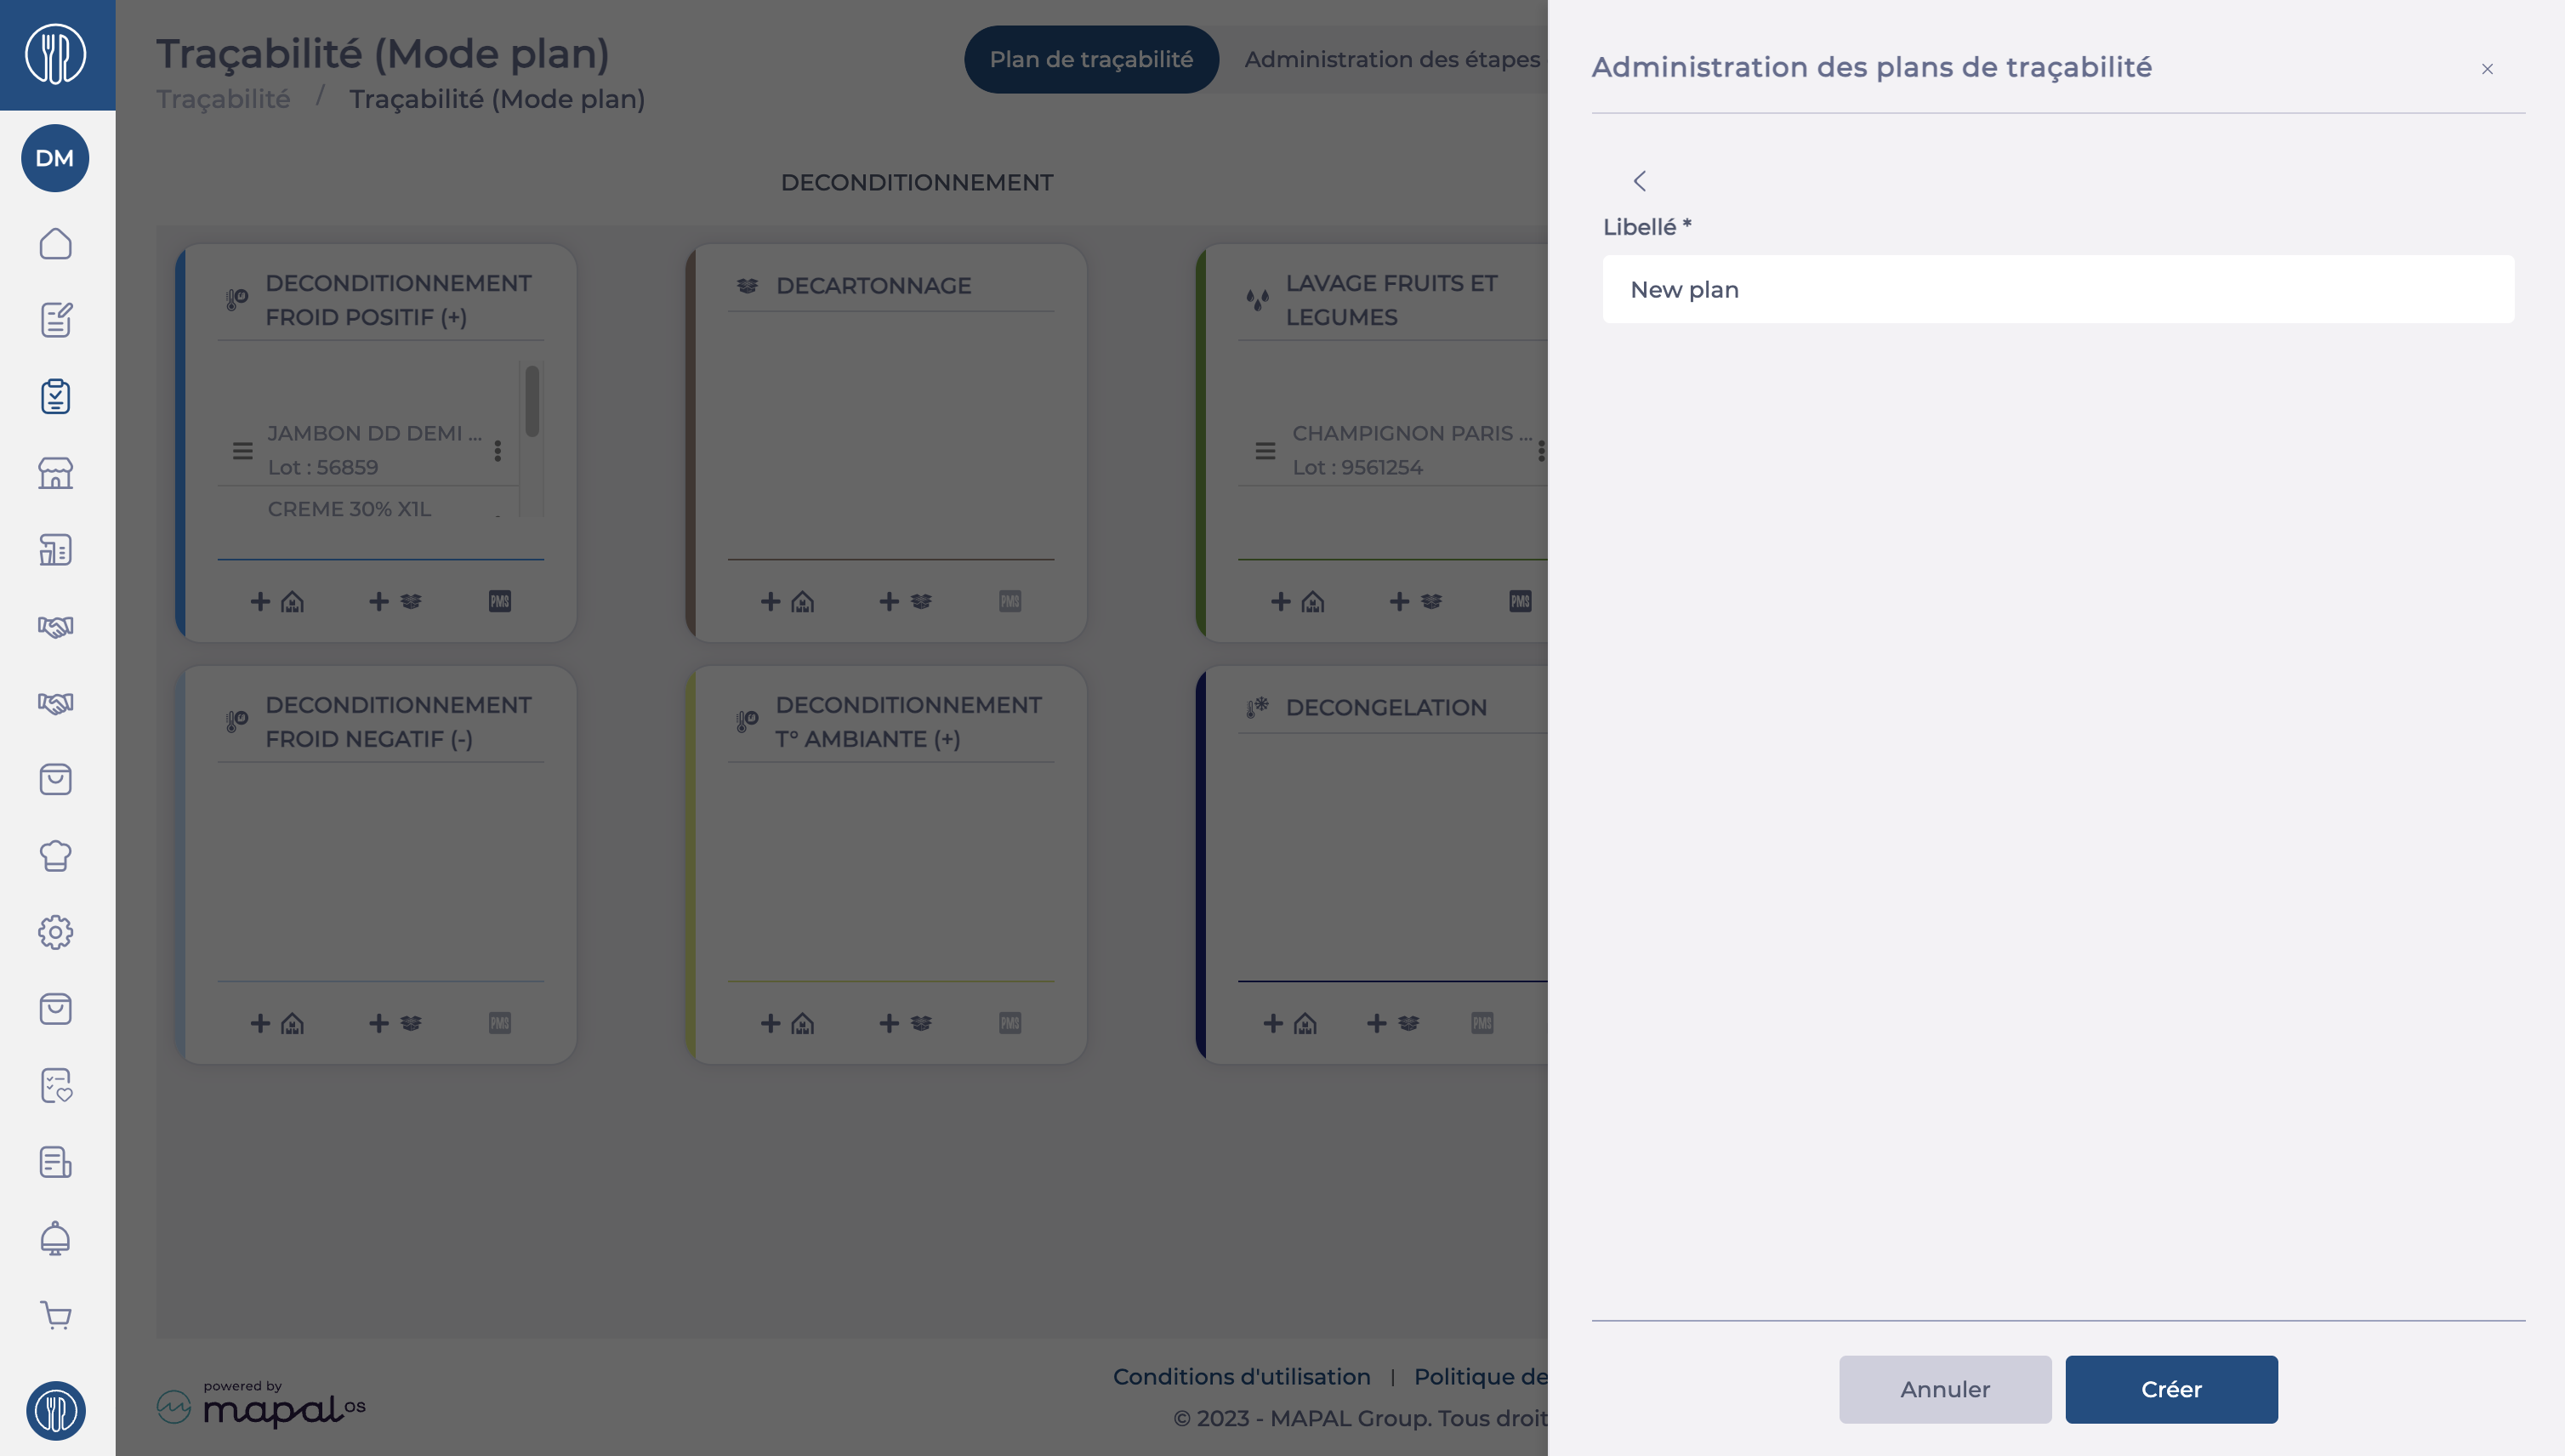
Select + Add to create a new traceability plan.
-
In the Name field*, enter a clear and descriptive name (e.g., cold preparation).
-
Click Create to save your new plan.
Step 2: Add traceability steps to the plan
You must now specify which steps should appear in the new plan.
-
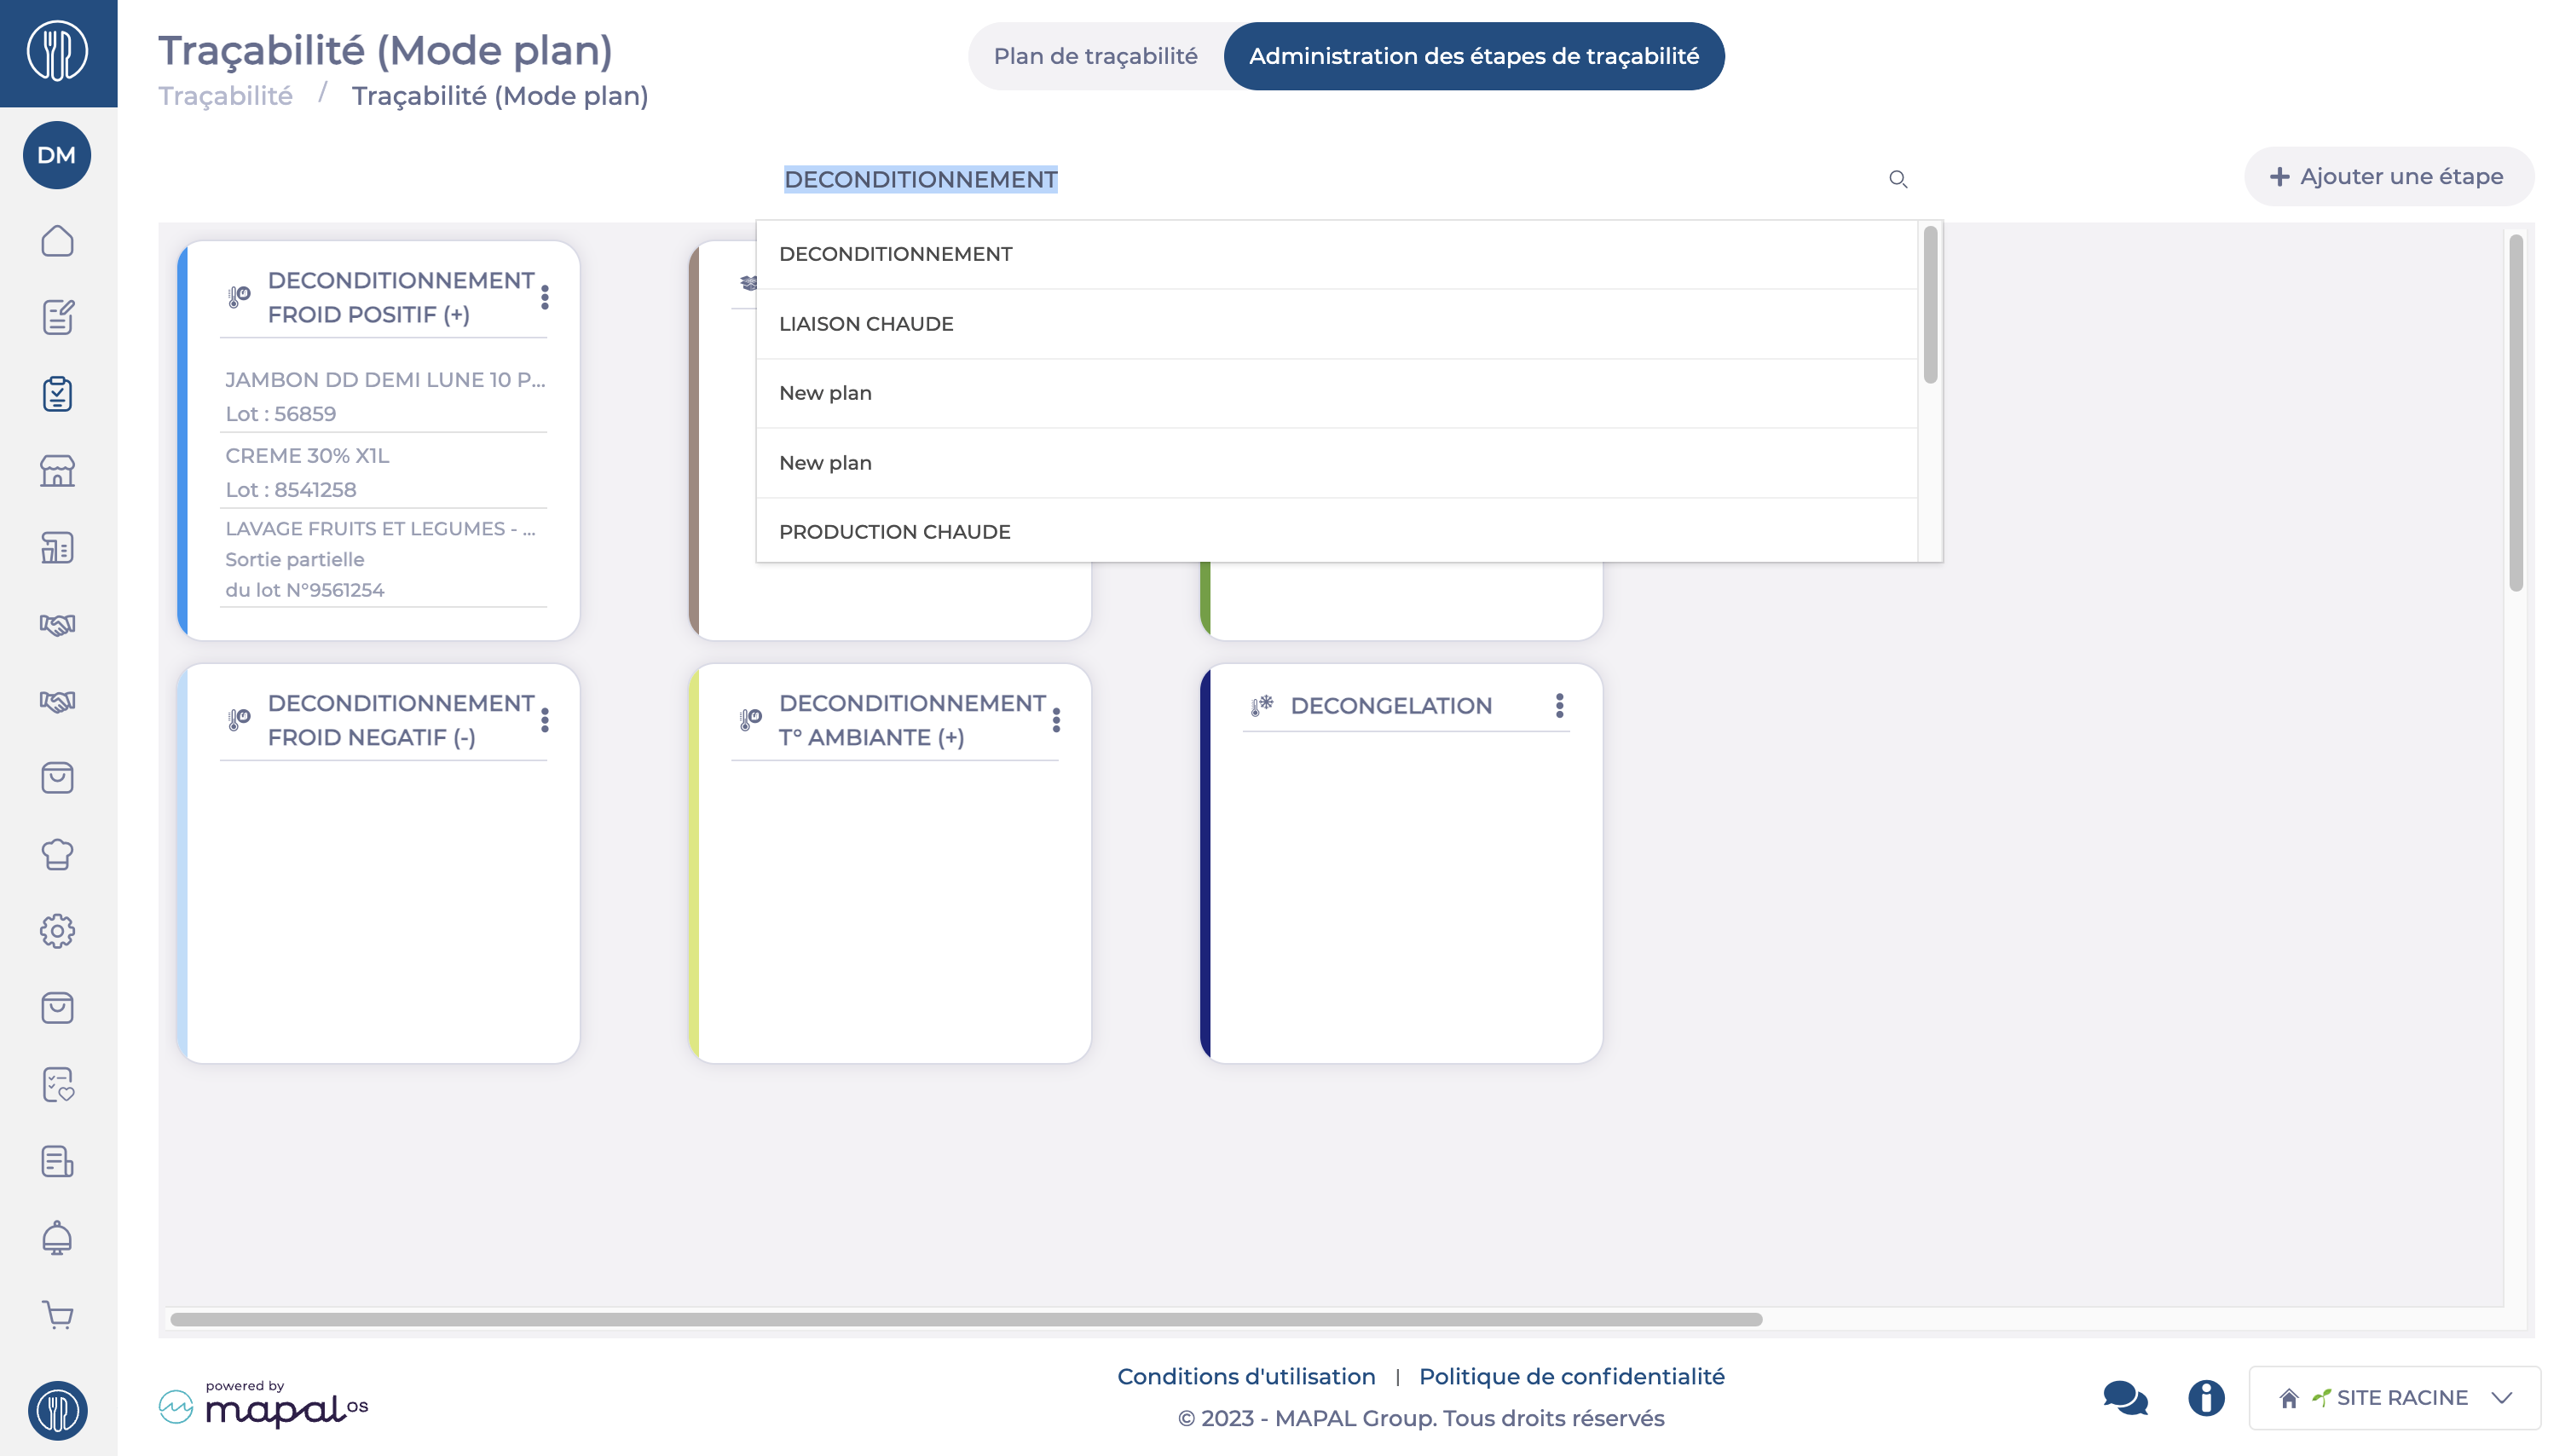
Select the Administration of traceability steps view.
-
Navigate to the traceability plan in which you want to add a step.
-
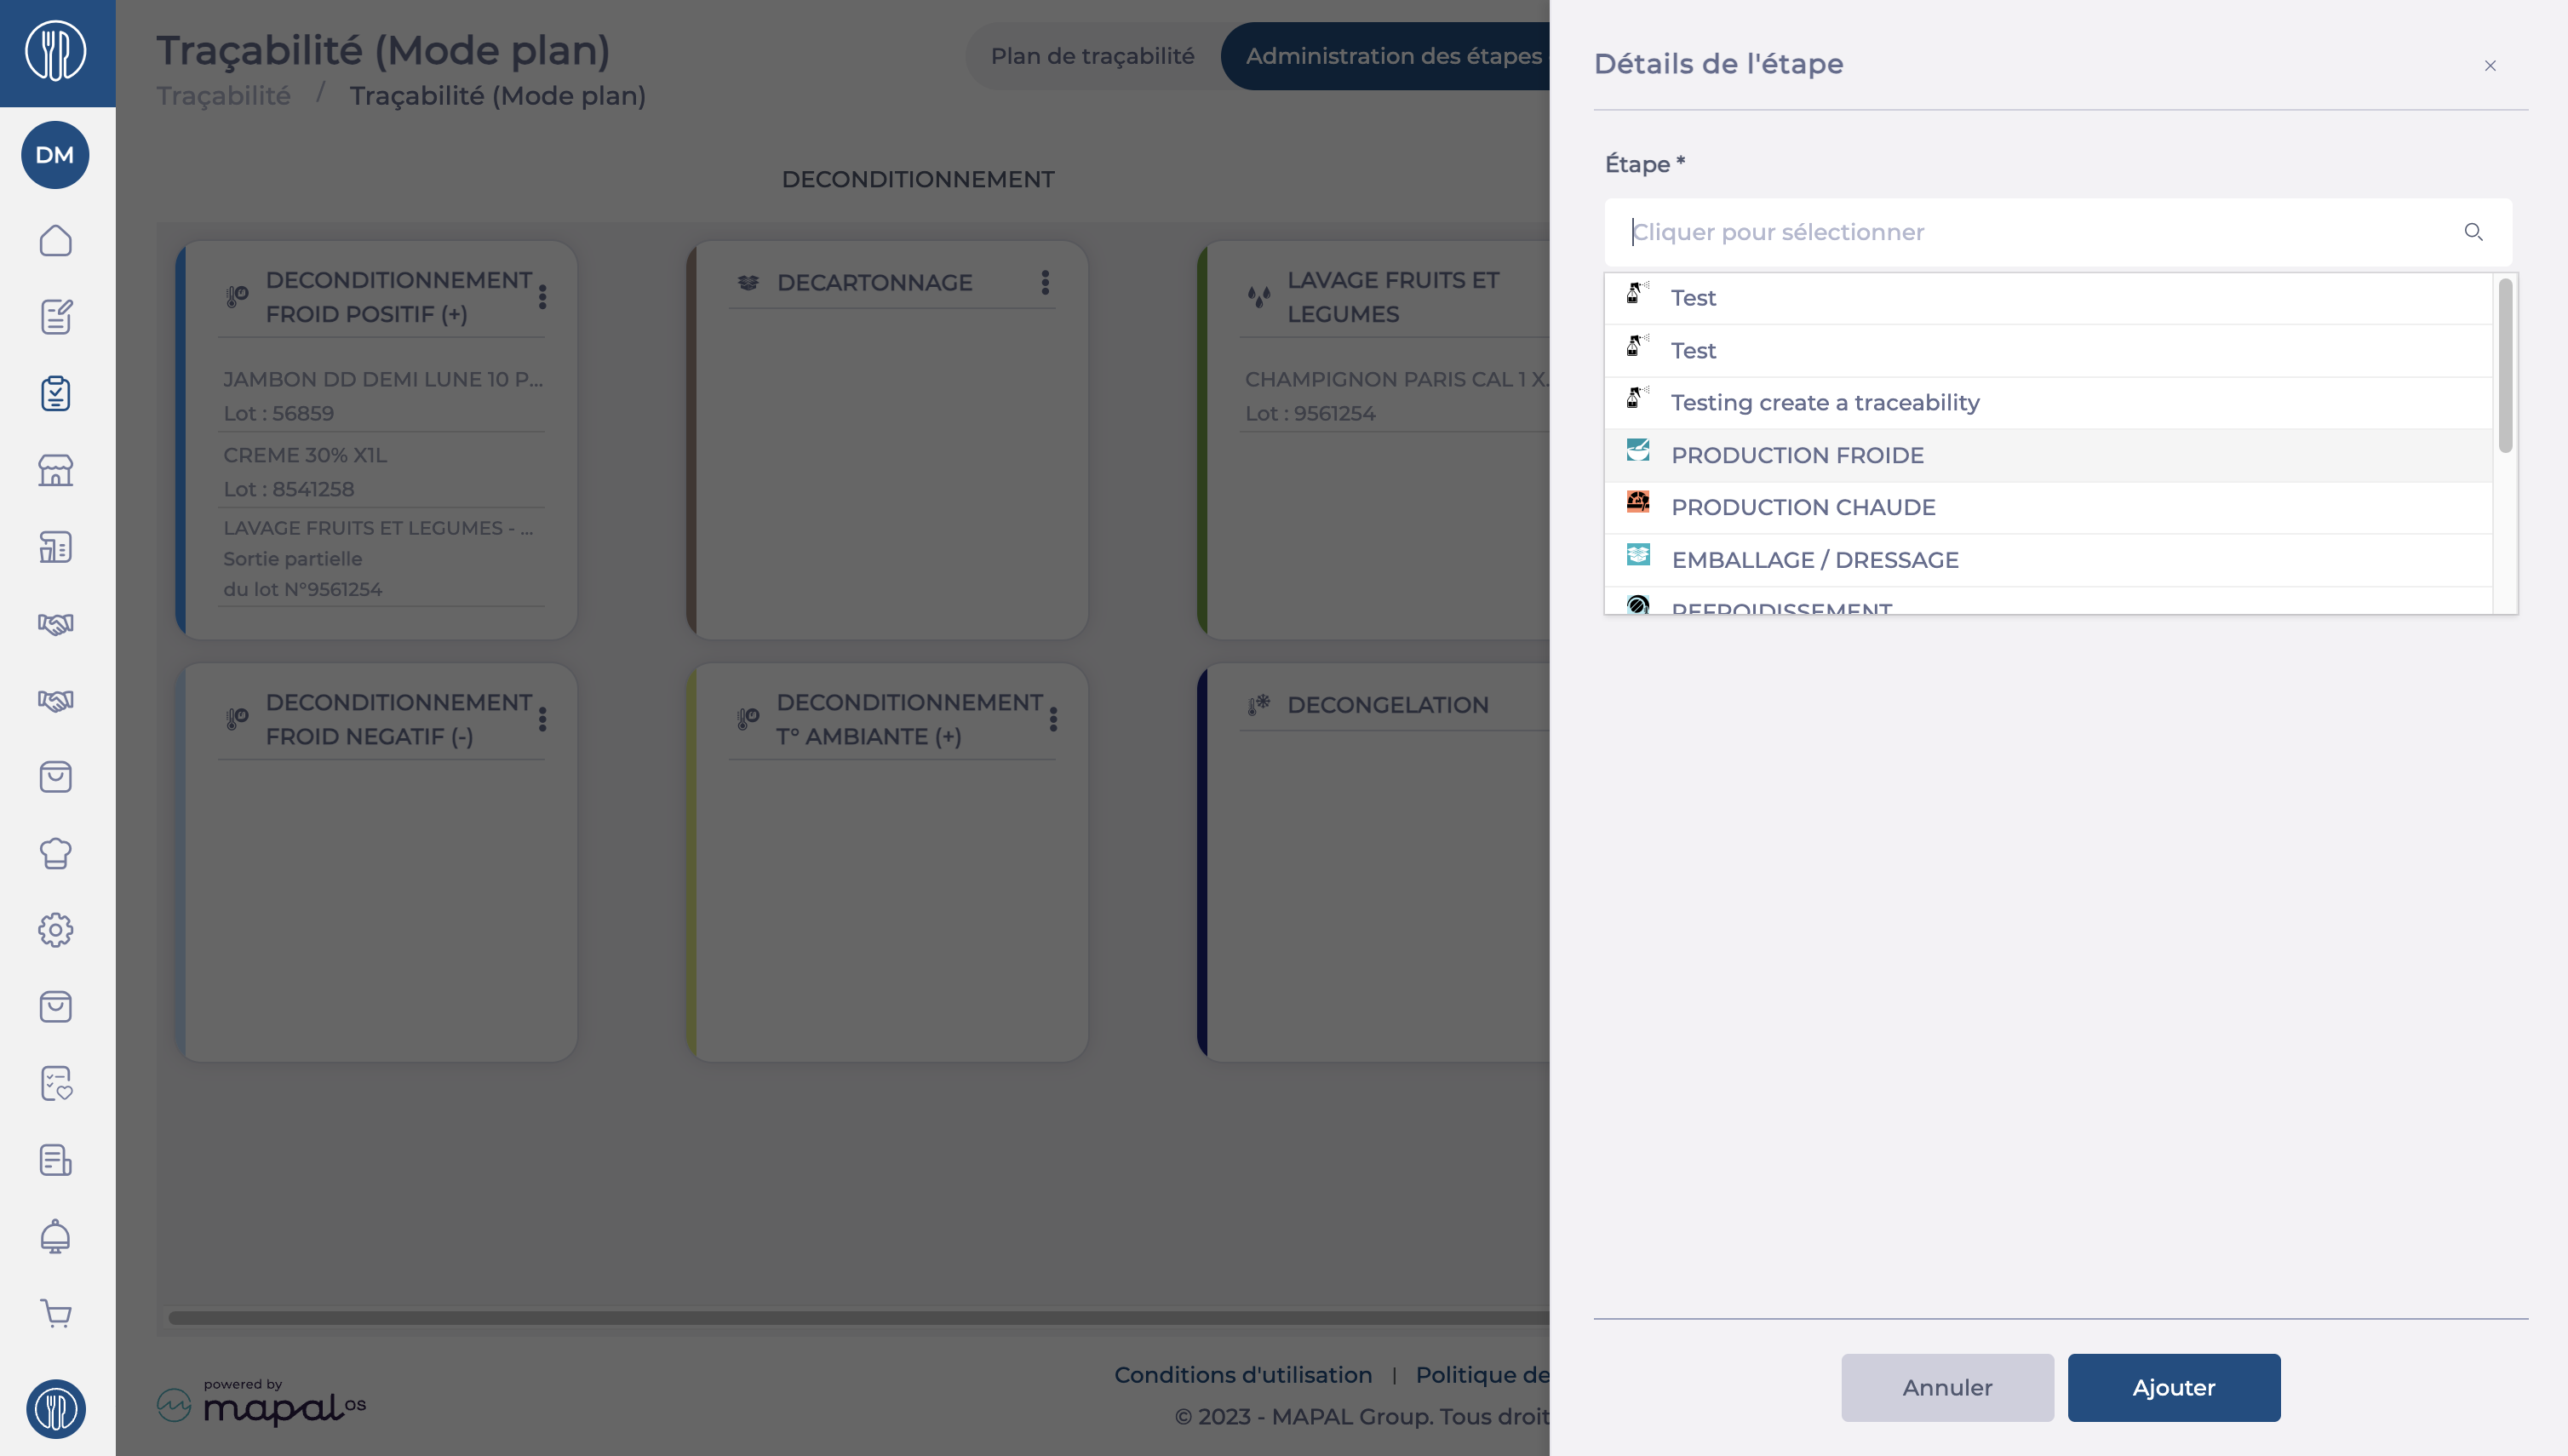
Click Add a Step.
-
Choose from the available traceability steps.
Note: Traceability steps must be created beforehand. See Manage traceability steps for setup and customisation.
-
Select the display size of the step (large or small card).
-
Arrange the traceability steps using drag-and-drop so that the plan is practical and easy to use.