


Start from: The Easilys menu.
Note: Actions performed on the Easilys platform are subject to user access permissions. If you are unable to carry out the actions described in the articles, this may be because the necessary permissions have not been activated on your user profile. Contact the Support team or your administrator for assistance.
- Select Home in the main menu.
You will be redirected to the Information area of the Home page.
If the message you wish to edit is no longer visible because its period has expired, you can, if your permissions allow, make it appear by enabling the Include out-of-period messages option.
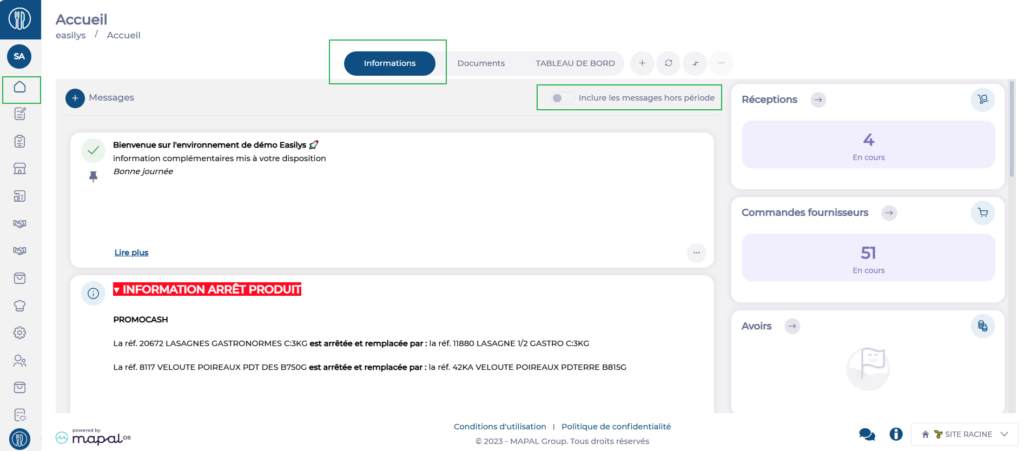
This space allows you to share messages with your team.
These messages are categorised into four types: Danger, Warning, Success and Information. The type influences the positioning of the message in relation to others and its colour. Within each category, messages appear by creation/modification date (most recent at the top), but it is possible to change this order by promoting or pinning messages.
Messages can be scheduled for selected periods.
Create a message
- Select + Message.
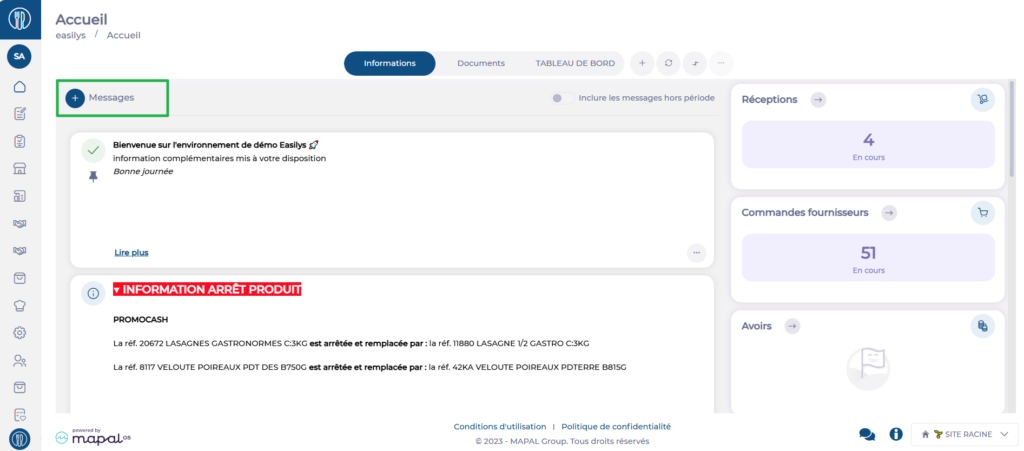
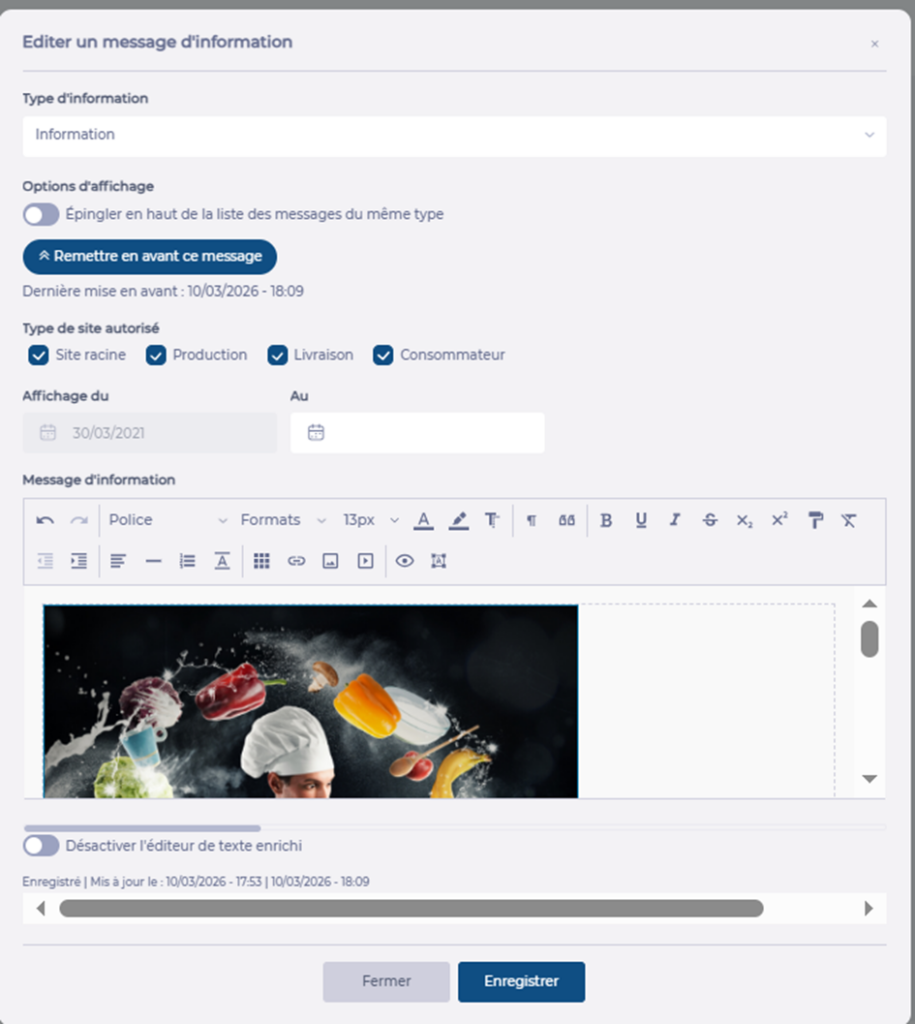
The "Add an information message" window appears on screen.

- Select the type of information by selecting the small arrow next to the "Information type" title: Danger, Warning, Success, Information and Video.
- If you want this message to appear first in its category, enable the Pin option.
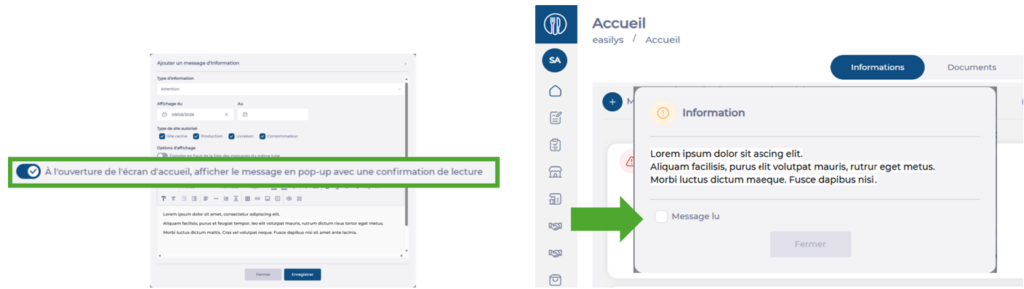
- Enable the When the home screen opens, display the message as a pop-up with a read confirmation option so that the message appears in a pop-up window that the user must confirm before being able to close it.
- Select the type of site authorised to see this message.
Note: If an information message is created on a child site, the information does not go up to the parent site. This information card will only be visible on the child site and its own child sites if the corresponding site types are selected.
- Add a start date to indicate when the message should be visible.
- Add an end date to indicate when the message should no longer be visible. (If you do not, the message will be visible indefinitely).
- Then enter your message in the Message field. You can add images, videos, and format the message as you wish using the features in the toolbar above the message editing area.
Note: If you prefer to write your message with HTML tags, you can disable the rich text editor using the toggle below the message editing area.
- Then select Save.
When this option is enabled, the message appears in a pop-up window. The user must select Message read to close the window and access the platform. The confirmation is recorded and can be consulted in the read tracking report.
Edit a message
- Select Home in the main menu.
You will be redirected to the Information area of the Home page.
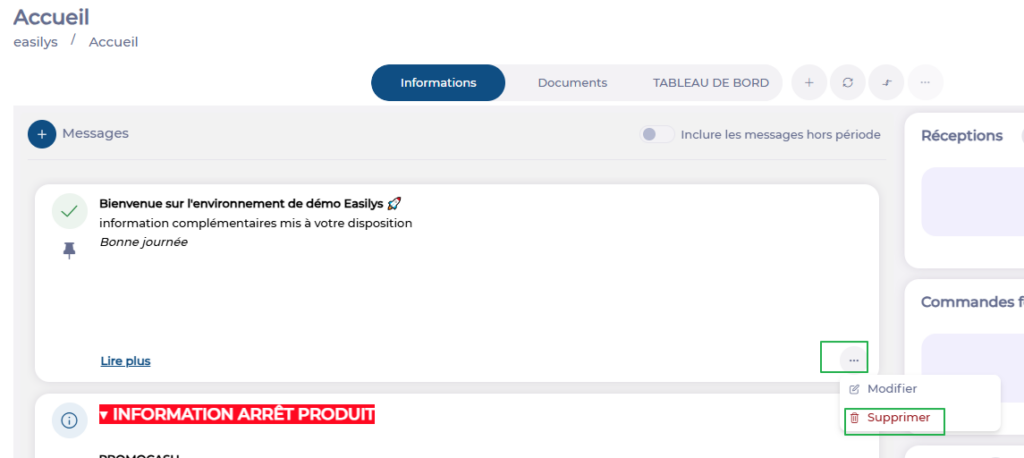
- Select the three dots in the message box you wish to edit.
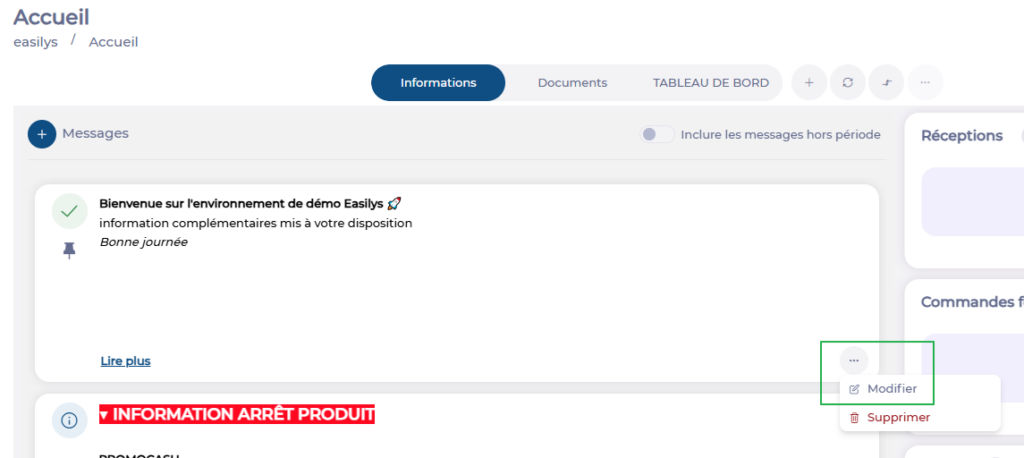
- Select Edit.
The "Edit information" window appears on screen.
- Make the desired changes.
- If you simply want this message to appear higher in the list of messages in its category, select Promote this message.
- Select Save to update the modified information.
Delete a message
- Select Delete.
- Select Yes to confirm the deletion.
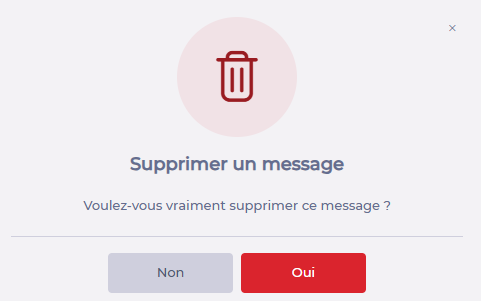
Note: Make sure of your choice before selecting this option, as you will not be able to undo this deletion.
