


They allow you to validate the receipt of goods and enter them into stock. It is also possible to manually create a goods received note without an order. For more information, see Generate a goods received note without an order. The goods received note also allows you to record any anomalies detected during delivery, creating complaints or credit requests as needed.
Start from: The Easilys menu.
- Select Supplier orders > Receipts.
- Select the In progress goods received note you want to validate.
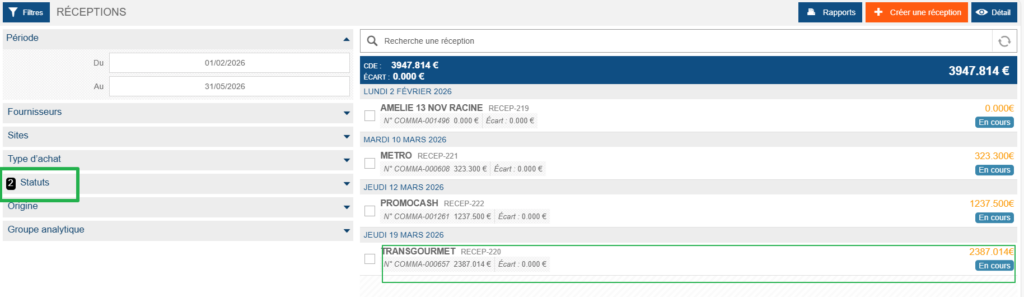
By default, Easilys only displays goods received notes with the status In progress. The Status filter allows you to show or hide other statuses.
Check the information
The goods received note details are displayed. It opens by default on the Supplier products tab, allowing you to view the list of supplier products included in the purchase order.
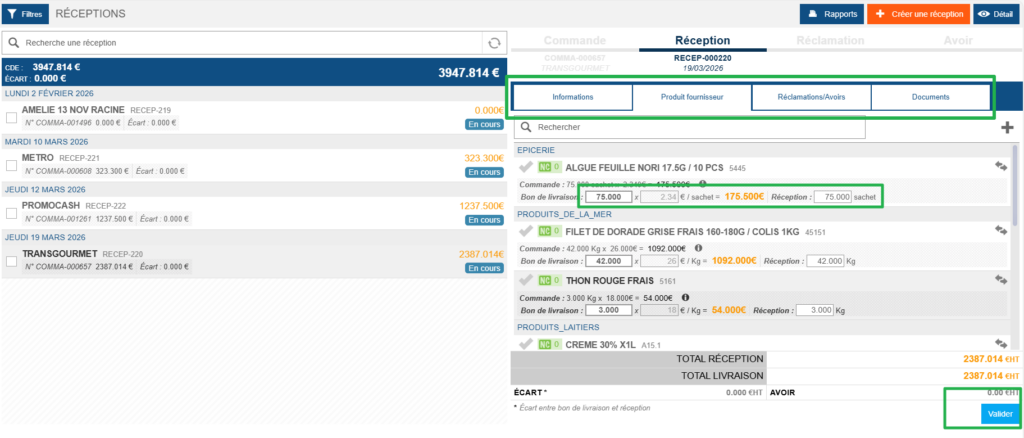
- Check the accuracy of each line: the delivered quantity, the price, and the received quantity can all be modified to reflect reality.
- In some cases, Easilys may automatically generate a credit request if you modify certain fields — for example, if the delivered quantity is greater than the received quantity. You can delete the credit request if it does not seem relevant by selecting the NC indicator (shown in red) on the product line, then selecting Delete these complaints. Refer to the article Record a claim and/or credit request related to a reception if needed.
- When you modify information, the Save now message appears. Select it whenever you want to save your work in progress to avoid losing any changes.
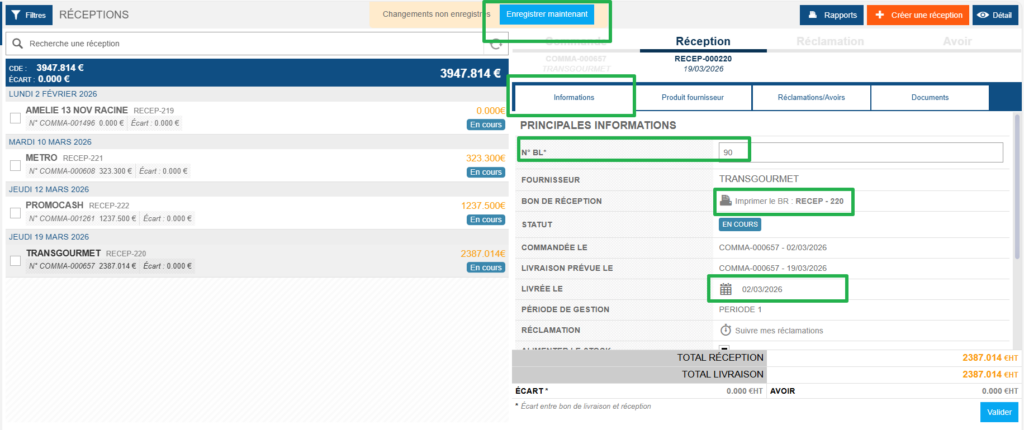
Other tabs are available in the goods received note:
- Information tab: View or modify the delivery note number and the receipt date, and print the goods received note control document.
- Complaint tab: Displays the overall complaints that will be generated when you validate this goods received note. Refer to the article Record a claim and/or credit request related to a reception if needed.
- Document tab: Allows you to attach a document to this goods received note.
- Select Add a document.
- Choose the desired file.
- Enter a label for the document.
- Select Add.

Validate the goods received note
- Once you have finished checking all the lines in your goods received note, select Validate.
- The Validate receipt window appears.
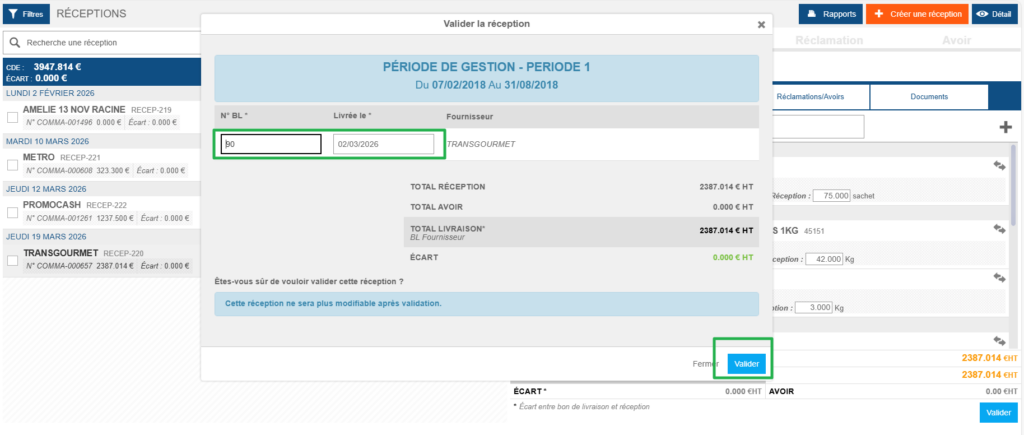
- You can modify the delivery date and enter or update the delivery note number, then select Validate again.
- The goods are then automatically entered into stock.