


Start from: The Compliance local overview.
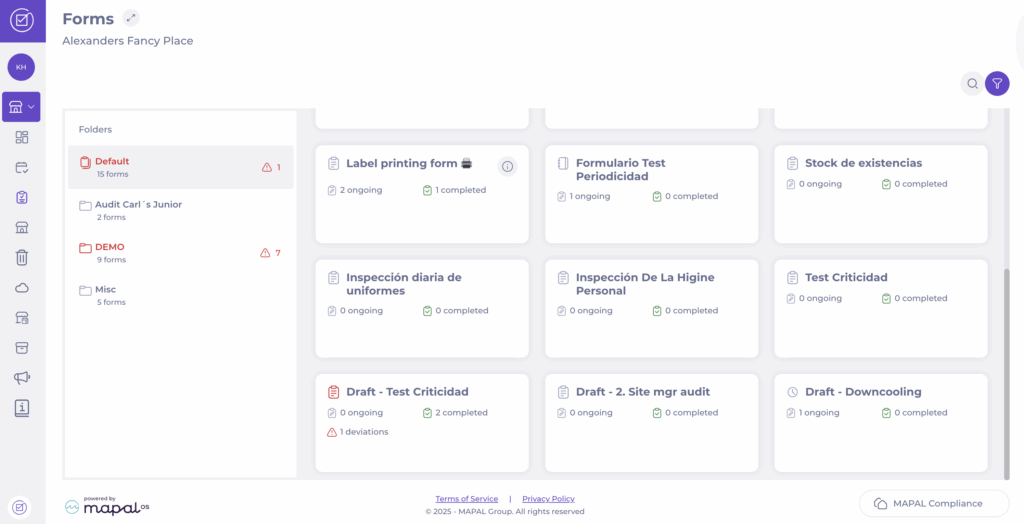
- Navigate to Forms.
- Locate the specific downcooling form and open it.
Note: Downcooling forms must be specifically created for that purpose. For more information, see Create a downcooling form.
- Select + Start new to record data.

- In the form, select the Manual button.
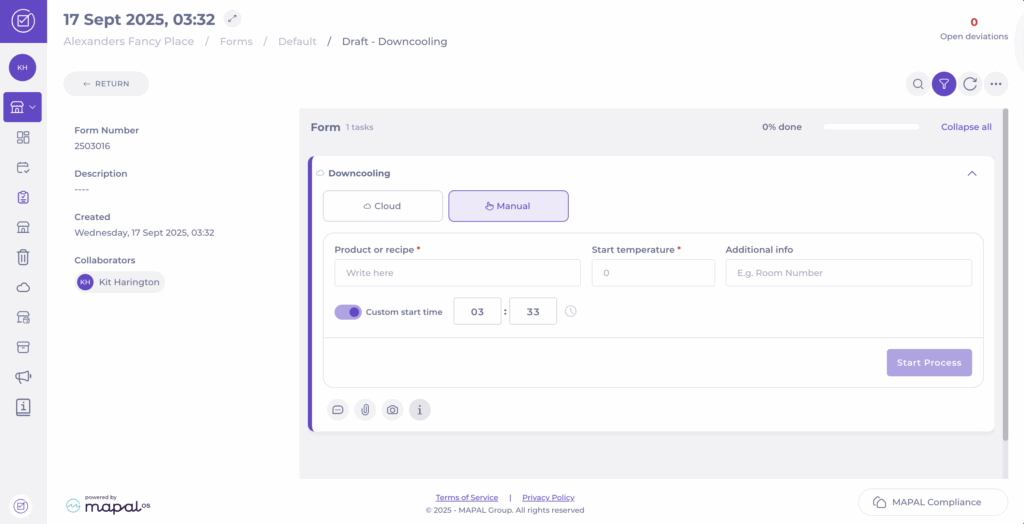
- Enter the Product or recipe name.
- Set the Start temperature.
- Record any Additional info.
- Toggle Custom start time to set a specific start time for the downcooling process.
- Press Start Process. The system will calculate the remaining time based on the rules.
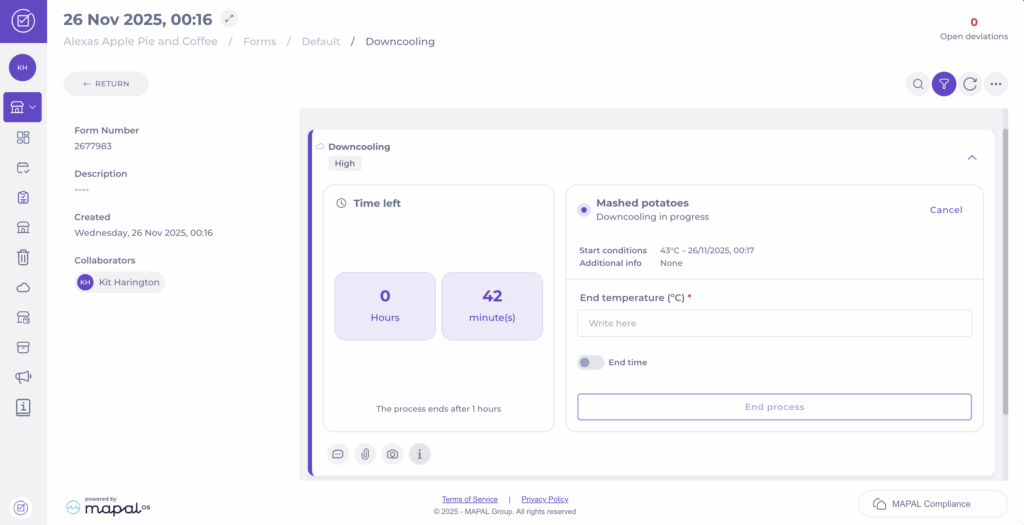
- The task will now show the Downcooling in progress, displaying:
- Time left
- Start conditions
- Additional info entered
- When the countdown finishes (or earlier if needed), record the End temperature.
- Select End process and confirm to complete the task.
Note: You can optionally toggle End time to enter the specific time when the process finished. If you leave this off, the system will use the current time as the end time.

View recorded downcooling data
After saving, the process appears in the Downcooling grid for that form. To access it:
- Navigate to Forms > [Specific downcooling form]
Here, you can view all recorded downcooling tasks, including:
- Status (In progress / Completed)
- Product/Recipe name
- Start and End temperatures
- Duration
- Created by / Completed by
- Date of creation and completion
- Deviations (Open / Total)
This dashboard view gives managers a quick summary of all completed or ongoing downcooling processes and highlights any items linked to deviations.
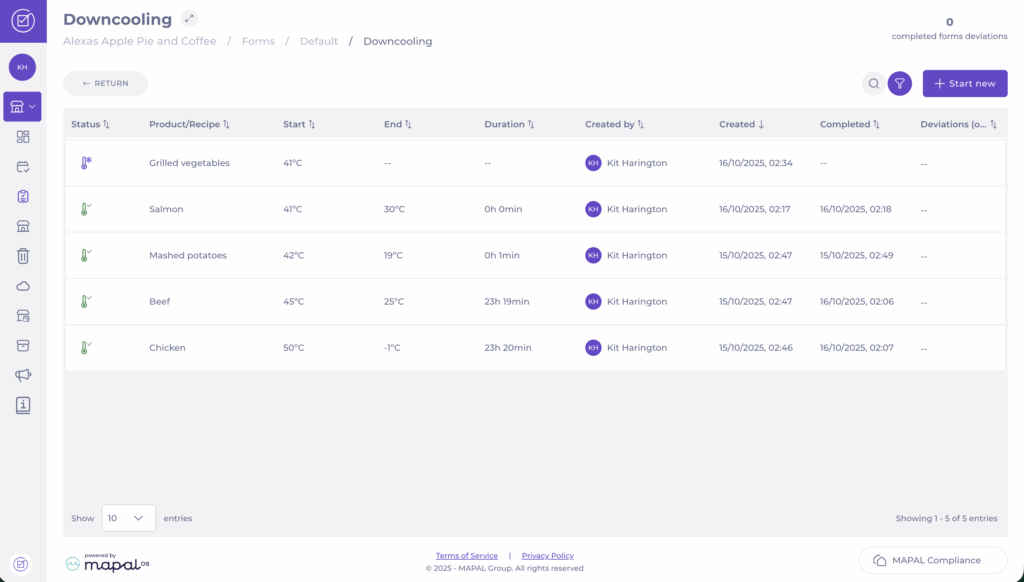
Note: If a downcooling task raises a deviation, it will appear in your Compliance deviation reports. For instructions on how to review and close these, see Respond to deviation reports.