Note: Some companies choose to rename 'workbooks' to something that works better for their company. If workbooks is part of your package and you are having trouble locating it on your system, please get in touch with us.
Start from: The Flow Learning Dashboard.
- Select Learning & Development > L&D Settings from the main menu.
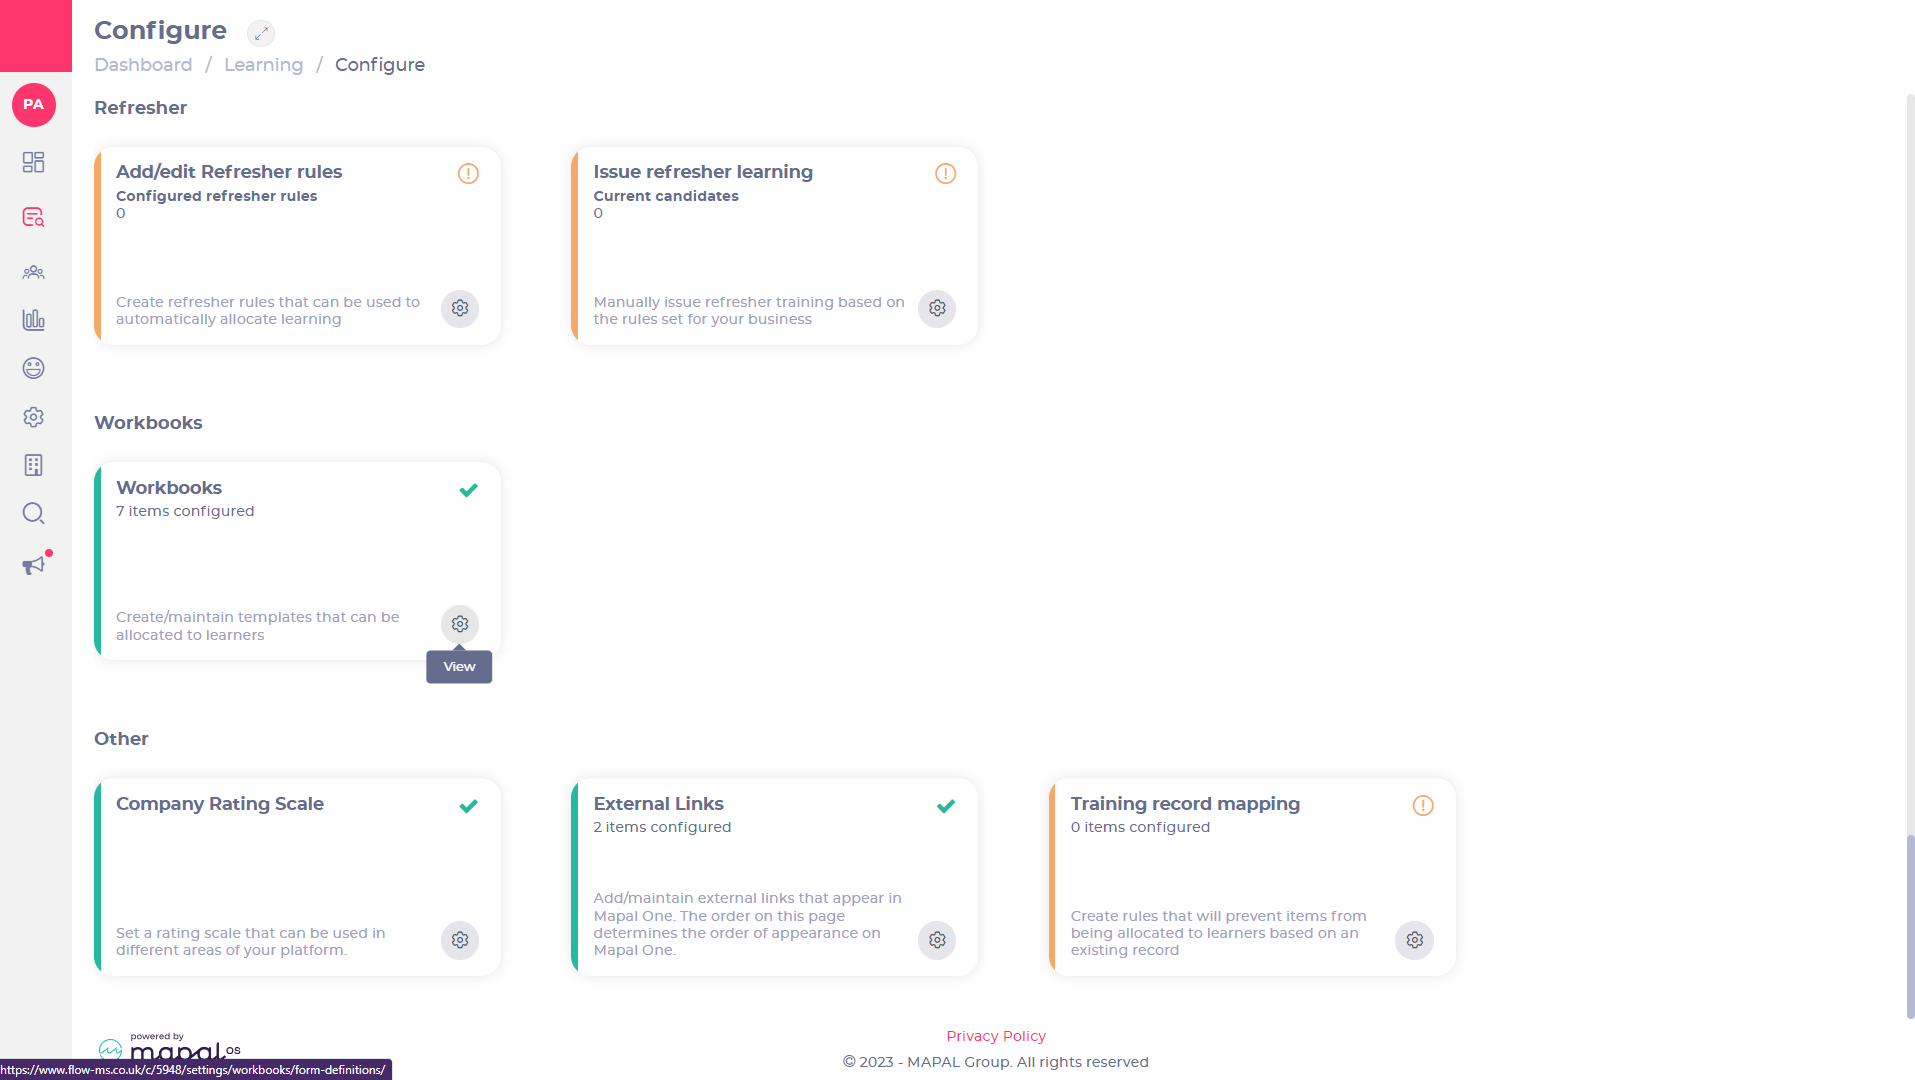
- Find Workbooks on the Configure screen.
- Select View to open the Workbooks page.

- Select Add to start creating a new workbook.
Workbook settings
The Add Workbook Template page will open in Step 1: Template Set–Up.

- Enter the title of your workbook in the Workbook name field.
- Use the Select from existing template dropdown to select a pre-existing template to modify. Note: This is optional. You can leave this field blank to start a fresh workbook.
- Select Upload Guidance Document to upload a document and add guidelines for your workbook. Once added the document name and size will appear in bold with an option to delete. Max file size: 1MB. Supported file extensions: pdf, csv, xls, xlsx, doc, docx, rtf, png, jpg, jpeg.
- Select Upload Thumbnail to upload an image for your workbook. This image will appear in Mapal One to represent this workbook for learners. You will be prompted to choose an image from your files, then use the tools to crop or zoom in or out of the image. A preview will appear when an item is successfully uploaded. Max file size: 2MB. Supported file extensions: png, jpg, jpeg.
Workbook Preview
After completing Step 1: Template Set-Up, you can use:
Learner preview (Mapal One)
Select Learner Preview to open a Mapal One preview tab and view the Workbook as a learner would see it.

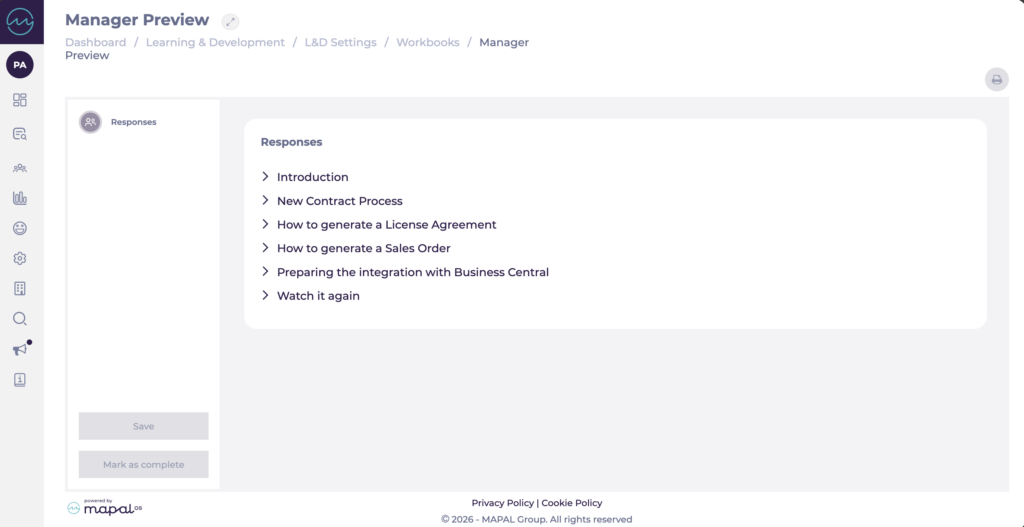
Manager preview (Workbook Manager)
Select Manager Preview to see how the Workbook will appear to managers when they are reviewing and signing off learner progress. This is useful for confirming that the structure, guidance, and evidence requirements are clear from the manager’s perspective before you assign the Workbook.
Note: Manager Preview is only available to users with manager-level access in Workbook Manager.
Sign off settings
The sign off settings let you control when the reviewer can mark the workbook as complete.
- Select the Sign off settings dropdown to choose an option for handling workbooks sign off:
- No sign off required: Both reviewer and learner can view, work through, and complete the workbook without the other person’s sign off.
- Learner sign off required: The trainee must sign off their workbook before the reviewer can mark it as complete.
- Learner and Training Manager sign off required: Both the trainee and the reviewer must sign off the workbook before the reviewer can mark it as complete.
Save settings
When you have finished creating Step 1 of your workbook:
- Select Save & Close to save your changes. A pop up will check if you are sure you want to save.
Note: The Workbook name and Sign off settings must be set before the workbook can be saved. If you leave the form at any stage without selecting Save, any changes you have made will be lost.
- Select Show Preview to review your edits. A Mapal One preview tab will open showing the workbook as a learner would view it. You must be signed in to the Mapal One learners portal in order to see the preview.
Once you have completed the Step 1 - Template Set-Up page you can move to Step 2 - Categories. See Understanding workbook categories to find out more about how to complete the next section of your workbook.
Cloning a Workbook
As well as building new from scratch, you also have the ability to duplicate an existing Workbook template. When you clone a Workbook, it will give you an exact copy of an existing template, making it easier to build upon.
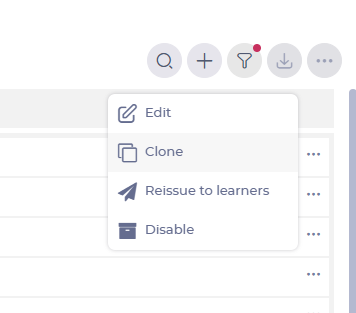
- Visit Learning & Development > L&D Settings > Workbooks.
- Choose a template from the list and select [...] to see more options.
- From the menu, select Clone.
- You'll be taken to the Edit Workbook Template screen where you can edit as usual.