


Note: every action that can be performed in the application is subject to a permission. If you are unable to perform the recommended actions in the articles you consult, it may mean that the necessary permissions are not enabled for your user profile. Contact the Support team or your admin for more information.
Start from: The Easilys menu.
Invoices to receive (ITRs) are generated automatically by Easilys when an exit voucher is validated, but it is possible to manually generate an ITR if needed.
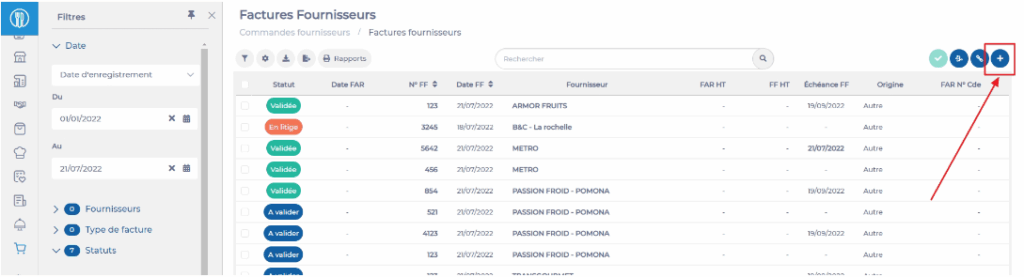
- Select the Supplier orders > Supplier invoices tabs.
- Select + at the top right of the screen.
- Easilys displays a blank purchase invoice by default. You can change the invoice type to a credit note in the "General" section at the "Type" line.
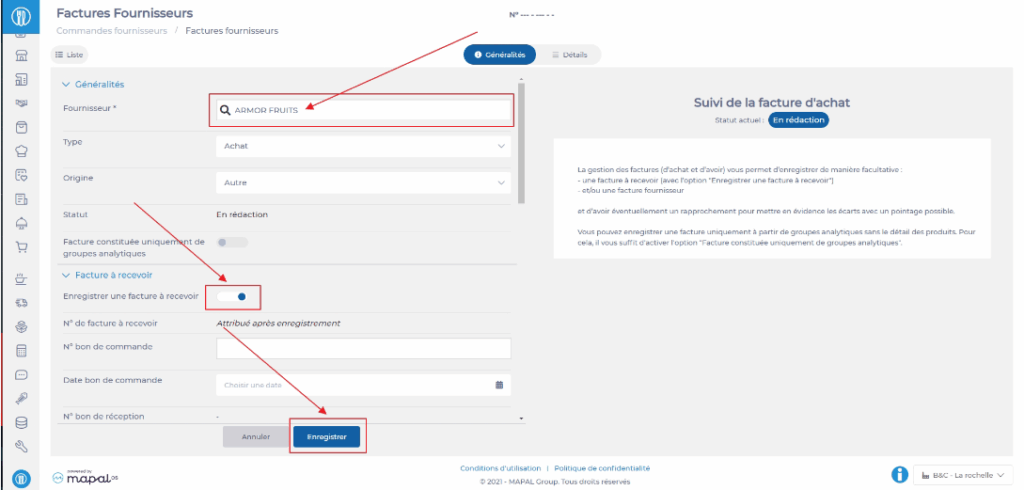
Note: the right side of the "General" tab displays explanations about the procedure to follow. This information changes depending on the stage you are at in the invoice validation process.
- Enable the "Save an invoice to receive" option in the "Invoice to receive" section. This then allows you to enter the information concerning the ITR (invoice to receive). Without this, you will only enter an SI (supplier invoice).
- You can then complete the information in the other sections as needed.
- Sélectionnez Enregistrer.
The invoice is created.
- Go to the "Details" tab of the invoice to add analytical groups outside products and/or the products concerned by the invoice.

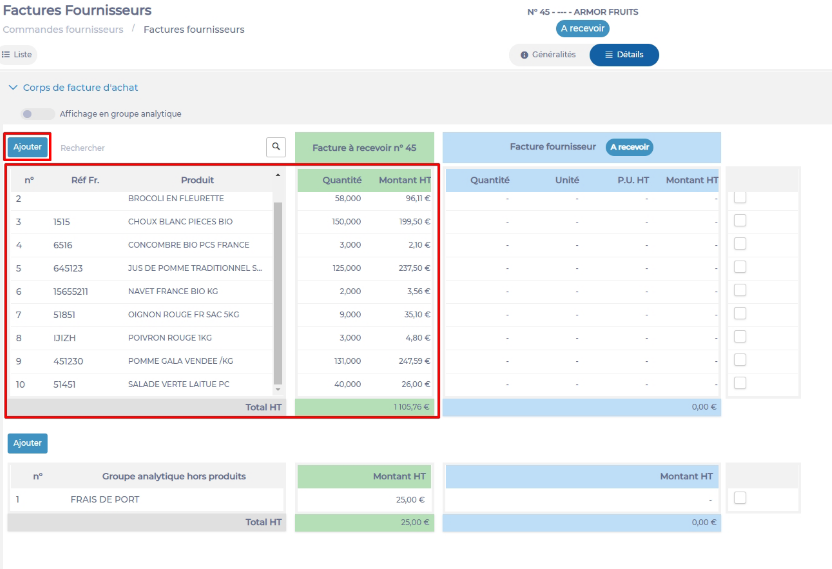
- Select Add to add a line to the invoice.
Once your ITR is completed, it will appear in the list of invoices with the status TO RECEIVE. When you receive the invoice from your supplier, you can link it to this ITR or manually complete this ITR with the invoice information.
