


Start from: the Engagement dashboard.
- Select Push Survey from the main menu.
- Select + New > Push survey.
Step 1 - Setup
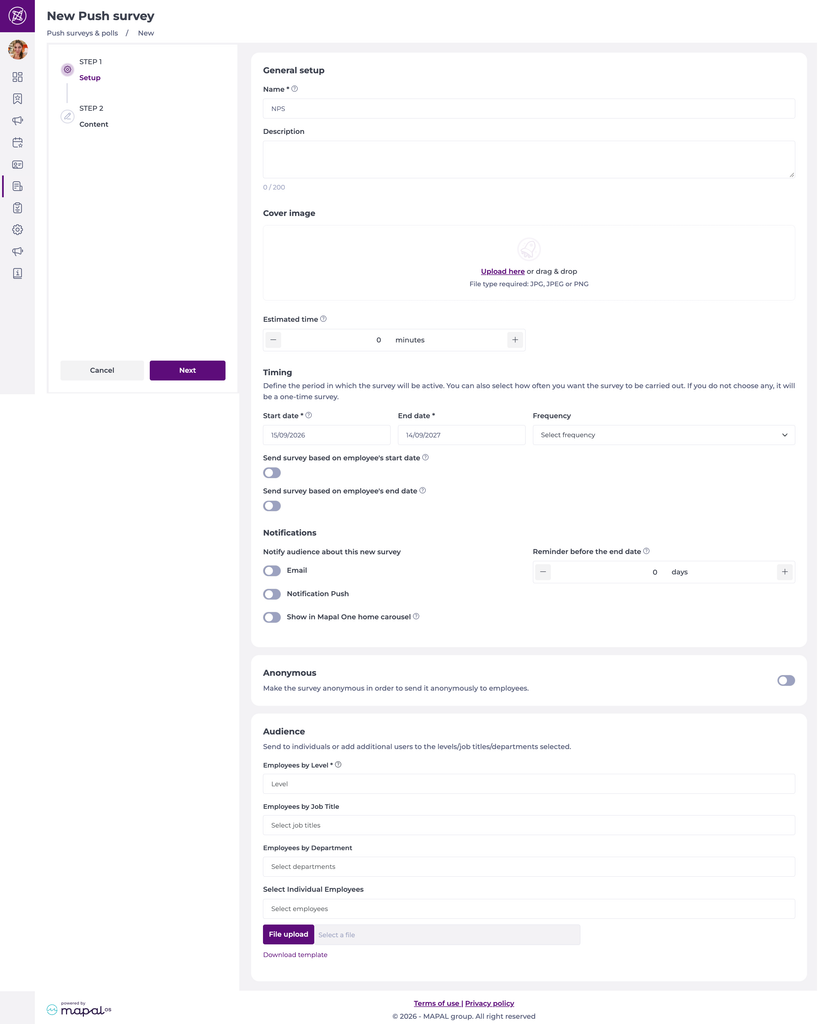
- Complete the General setup:
- Enter the survey Name*.
- Add a Description (up to 200 characters).
- Add a Cover image if you wish (JPG, JPEG, or PNG).
- Set the Estimated time to complete the survey, in minutes.
- Under Timing, define when the survey is active:
- Set the Start date* and End date*.
- Select a Frequency if you want the survey to repeat. If you do not choose one, it runs once.
- Optionally, turn on Send survey based on employee's start date or Send survey based on employee's end date.
- Under Notifications:
- Choose how to notify your audience: Email, Notification Push, and Show in Mapal One home carousel.
- Set a Reminder before the end date, in days, if you want to remind employees who haven't responded.
- Turn on the Anonymous toggle if you want to send the survey anonymously.
- Under Audience, select who receives the survey:
- Employees by Level*
- Employees by Job Title
- Employees by Department
- Select Individual Employees
- File upload: import a list using Download template.
- Select Next.
Notes: Only active category group levels from Mapal OS can be selected. Levels deleted in Mapal OS no longer appear as audience options.
Step 2 - Content
- On the Content step, select Create NPS Survey.
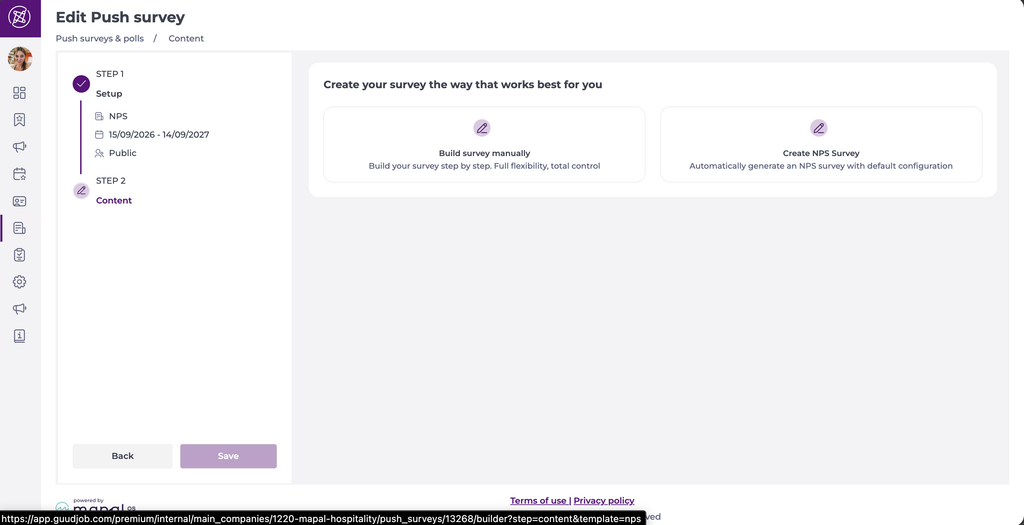
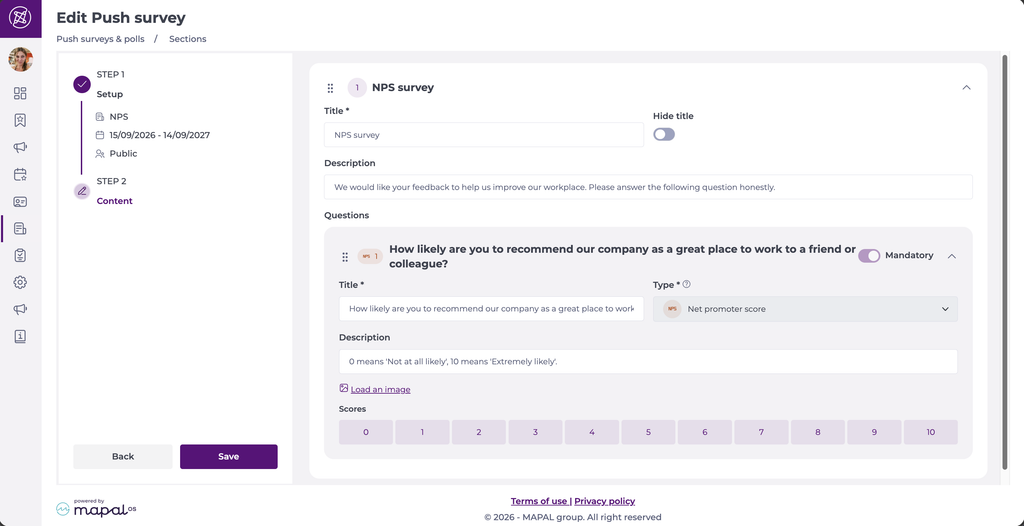
- A survey is generated automatically with a single NPS question, pre-filled and ready to use. It includes:
- A default title and description.
- One Net Promoter Score question on a 0 to 10 scale, set as mandatory.
- Edit the question wording if you wish.
- Select Save.
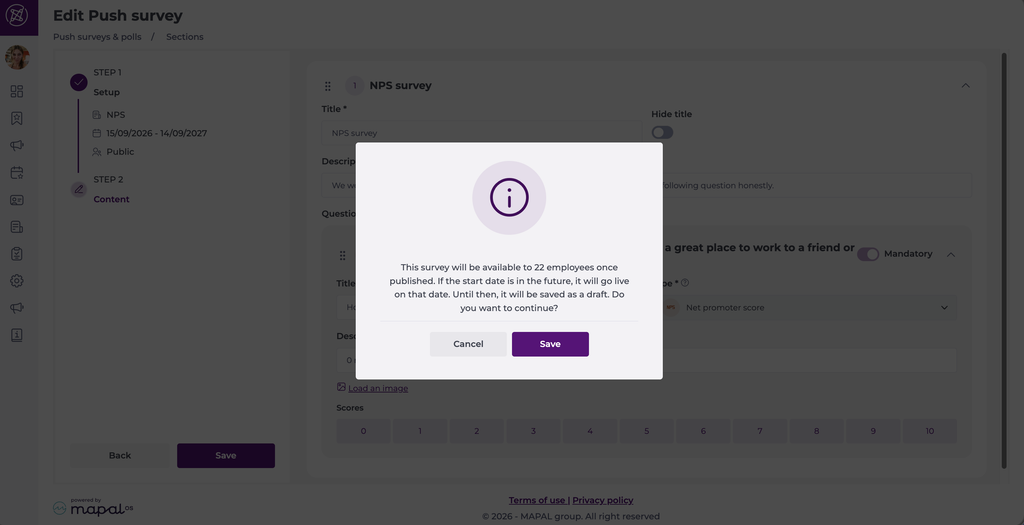
A confirmation window shows how many employees the survey will reach and when it will go live. A survey with a future start date is saved as a draft until that date. Select Save to continue.
Notes: In an NPS survey you cannot add sections or questions, or change the question type. To build a survey with multiple questions, select Build survey manually instead.
