


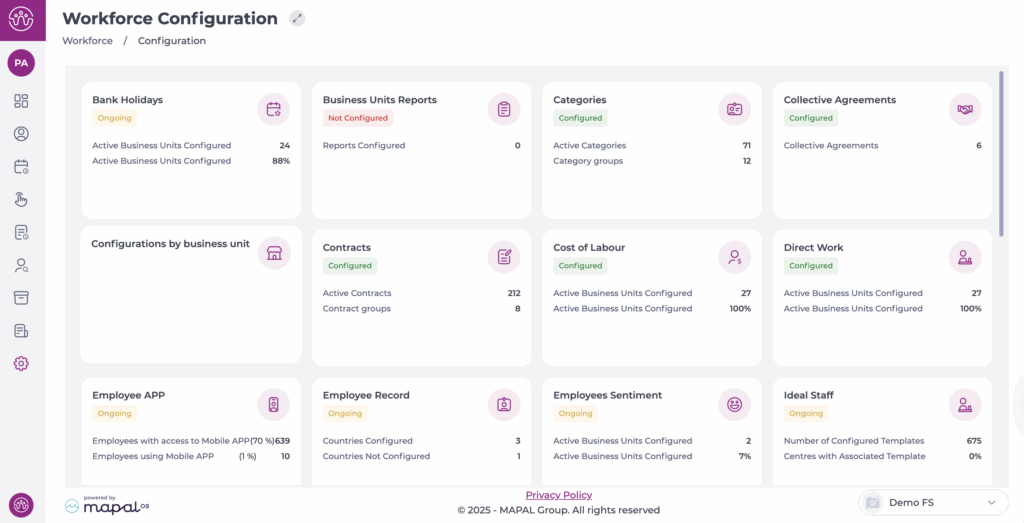
Start from: The Workforce Dashboard.
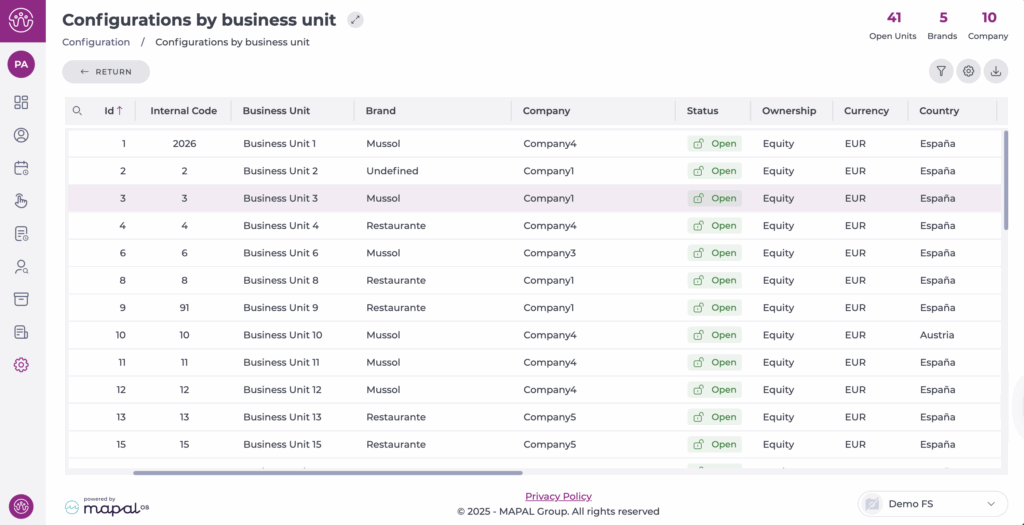
- From the main menu, go to Configuration > Configuration by business unit.
Note: If you still see the path Configuration > Non-holiday periods, you are working on GIR 2. This screen has been deprecated. Please use Configuration > Configuration by business unit instead.
- Select the Business Unit you want to configure.
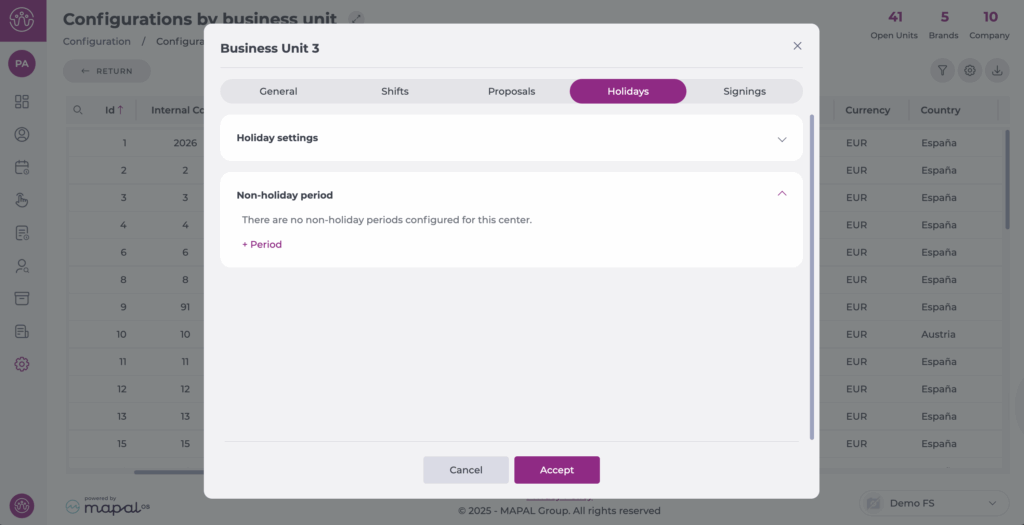
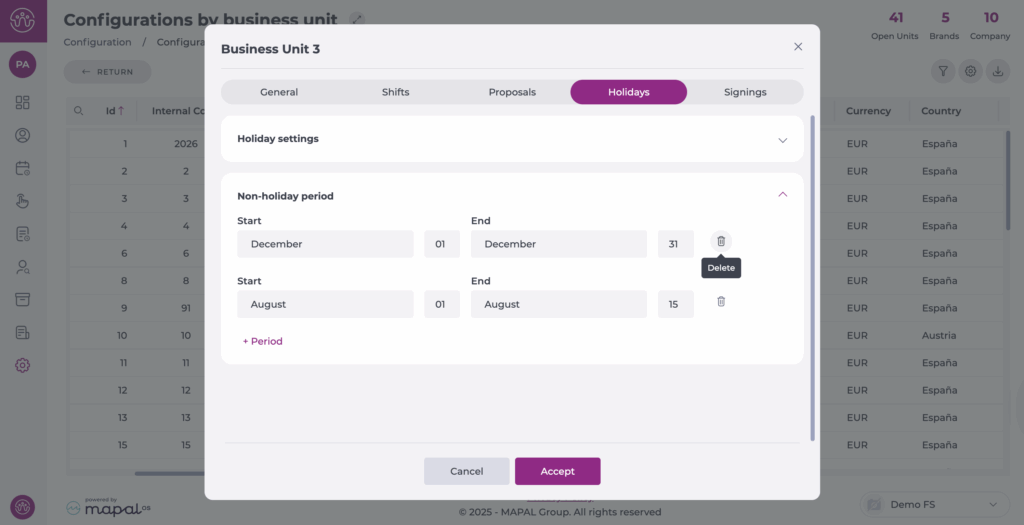
- Select the Holidays tab.
- Locate the Non-holiday periods section.
Create a new Non-holiday period
- Select + Period.
- Set a Start and End date for the period.
- Select + Add. The period will now be added to the list.
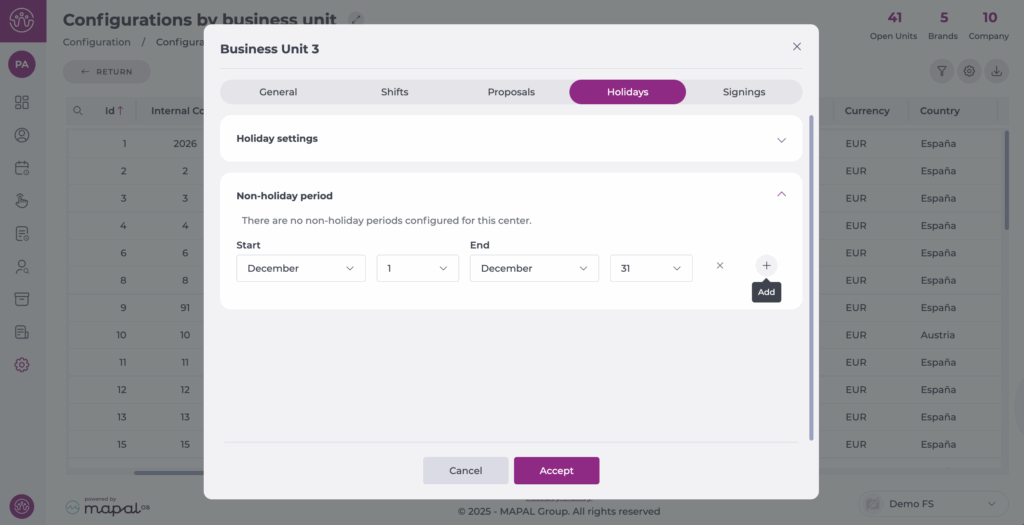
Note: You can continue adding periods by using the + Period button again.
- Select Accept to save your new non-holiday periods.
Delete a Non-holiday period
- In the Holidays tab, review the list of existing non-holiday periods.
- Select Delete (the trash can icon) on the period’s line.
- A confirmation window will appear.
- Select Delete again to complete the removal.
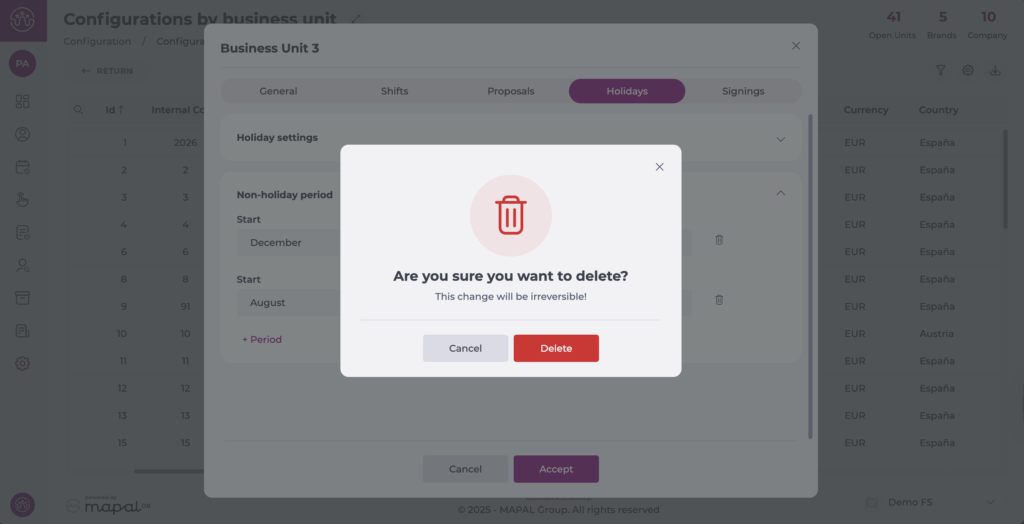
Note: Unlike GIR 2, you cannot edit a period once it has been created. If you need to make changes, delete the old period and create a new one.