Start from: The Workforce module.
- Select Workforce Management > Workforce 2.0 from the main menu.
- Use the filters at the top of the screen to refine the list of employees. To see all filtering options, see Filter the employee grid.
- Select the specific employee from the list.
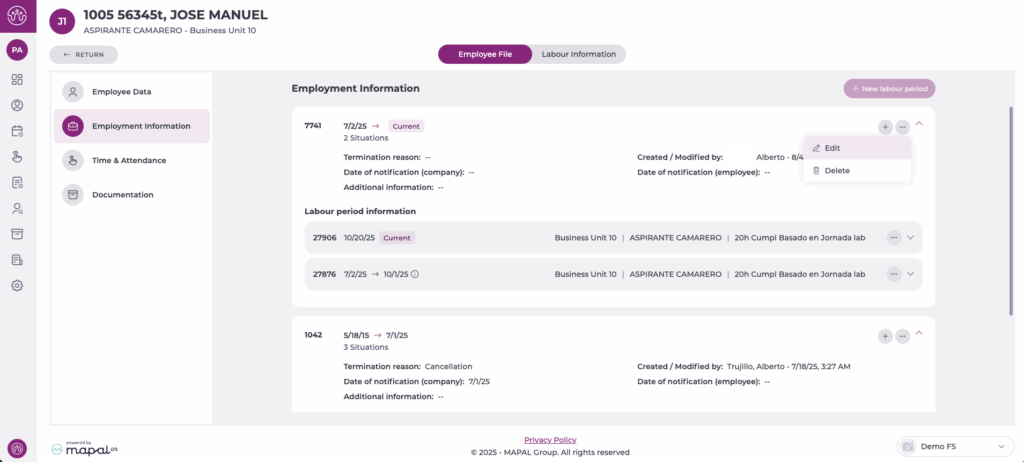
- Select Employment information in the left-hand menu.
- Select the three-dot menu next to the work period you want to update and select Edit.
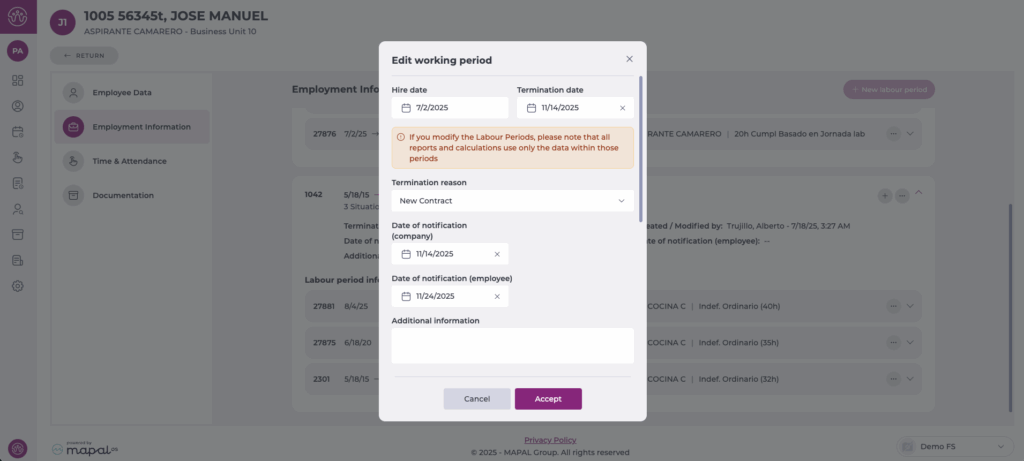
- The Edit work period box opens. Fill in the following fields:
- Termination date: The effective date on which the employee's employment relationship ends. This is the last day the employee will be available to work.
- Termination reason: Select the corresponding reason from the dropdown list. The available reasons are:
- Seasonal/intermittent contract termination: The fixed-discontinuous (seasonal or intermittent) contract comes to an end.
- Voluntary resignation: The employee resigns voluntarily with adequate notice.
- Voluntary resignation during probation period: The employee resigns immediately without giving prior notice.
- Company transfer: The employee transfers to another legal entity within the organisation.
- Dismissal
- Leave of absence
- Death of worker: The employment relationship ends due to the death of the worker.
- End of contract by the worker
- End of contract by the company: The company ends or does not renew a temporary or fixed-term contract.
- No-show
- Permanent disability: Employment ends because the employee has been declared permanently unable to work.
- Retirement: Employment ends because the employee retires voluntarily or upon reaching retirement age.
- Did not start
- Did not pass the probation period: The employee does not successfully pass the probation or evaluation period.
- Other
- Mutual agreement termination
- Date of notification (Company): The date on which the company formally notified the employee.
- Date of notification (Employee): The date on which the employee formally notified the company.
- Additional information: Any extra details related to the termination.
- Select Accept to confirm or Cancel to exit without saving.
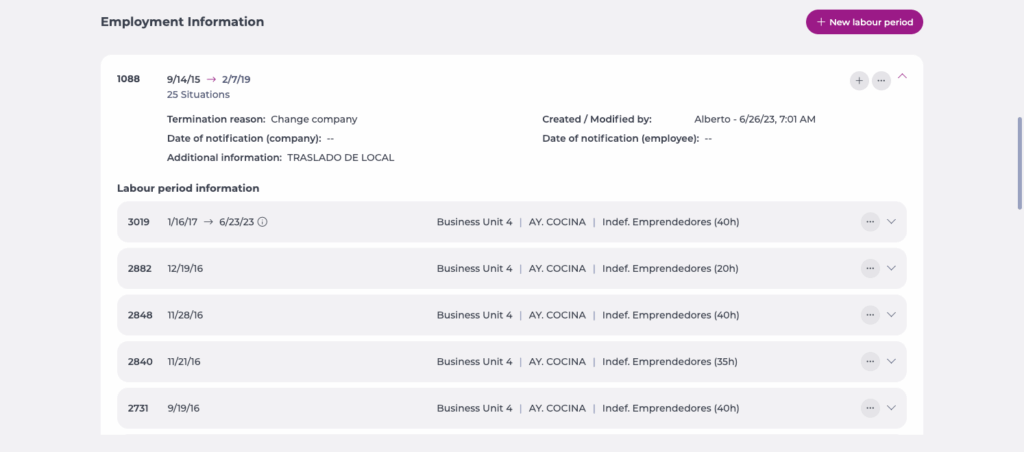
- After saving the changes, the Employment Information panel displays the termination details for the employee.
Delete a work period
- You should only use deletion to correct records created in error, as deleting periods affects reports and history accuracy.
- Open the menu (...) on the work period or employment situation.
- Select Delete.
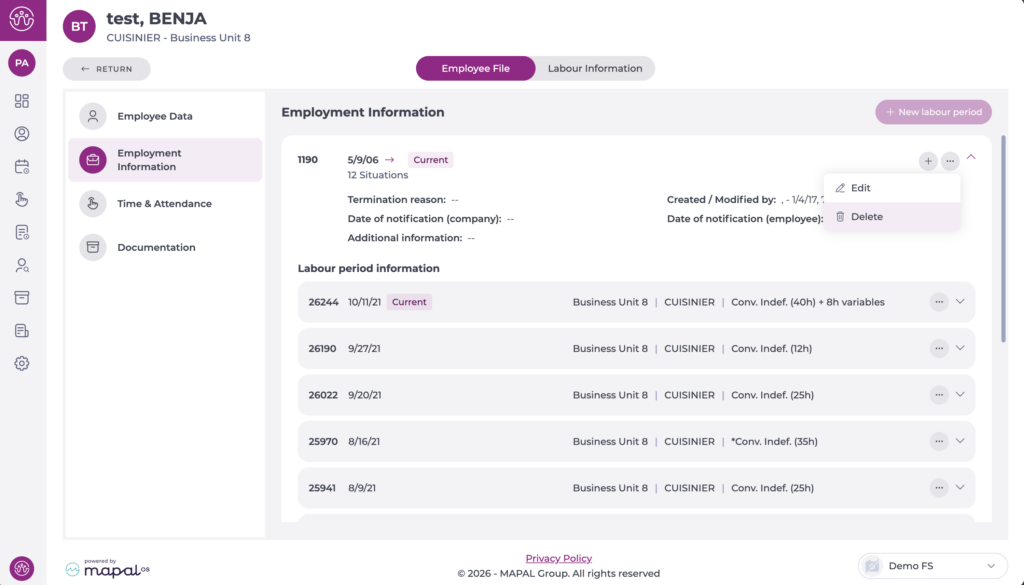
- A confirmation window appears. Select Delete to complete the deletion.
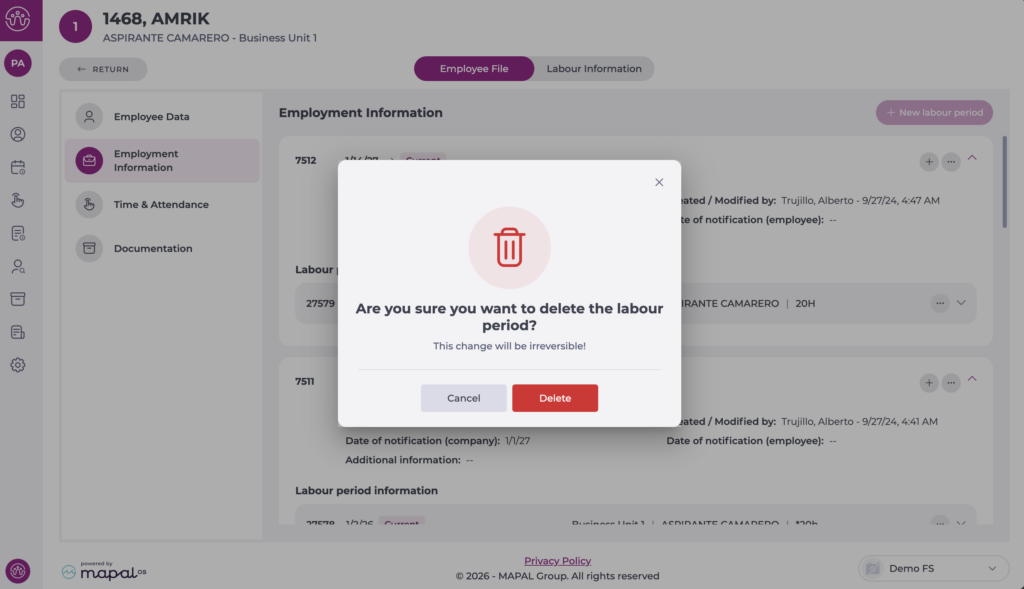
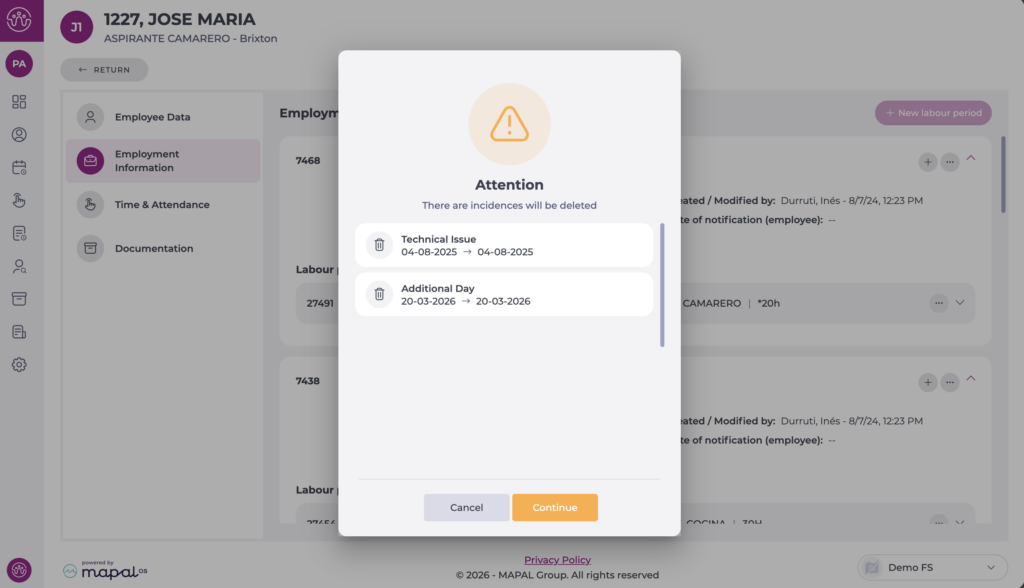
- Bear in mind that when deleting a work period, all incidents associated with that period will also be deleted. Before completing the deletion, the system will display a confirmation window titled Attention — Incidents will be deleted, with a detailed list of the incidents that will be deleted.
- Select Continue to complete the deletion or Cancel to keep the work period and its incidents.