


Start from: The SmartHub login screen on the shared device.
How remote authentication works
Remote authentication links the shared device to a secure login on your own browser. It:
- Avoids entering passwords directly on SmartHub.
- Lets you sign in from a mobile phone or corporate laptop.
- Works with both corporate SSO and Mapal OS credentials.
- Uses a unified flow across SmartHub.
SmartHub requires a valid Workforce user session to access configuration. During provisioning, or when stored credentials expire, the login screen appears and prompts you to authenticate again. Sessions can be refreshed silently for a period; when they are about to expire, the system shows a notification so you can renew access in time.
When you enter your email, the system automatically determines whether your operator is integrated with SSO or not and routes you to the correct login flow.
Remote authentication for integrated operators (SSO)
For integrated operators, authentication is handled through your corporate identity provider (SSO). You do not enter a password on the device.
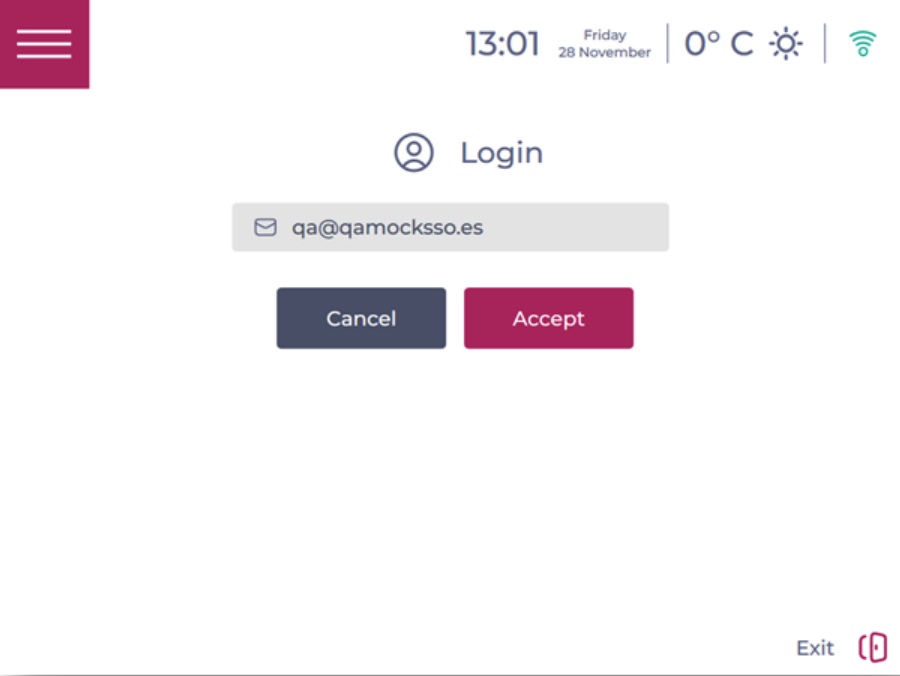
Step 1: Start login on the shared device
- On the shared device, open SmartHub.
- On the login page, enter your work email.
- Select Access.
- The device detects that your operator is integrated and shows a dynamic QR code that refreshes every few seconds.
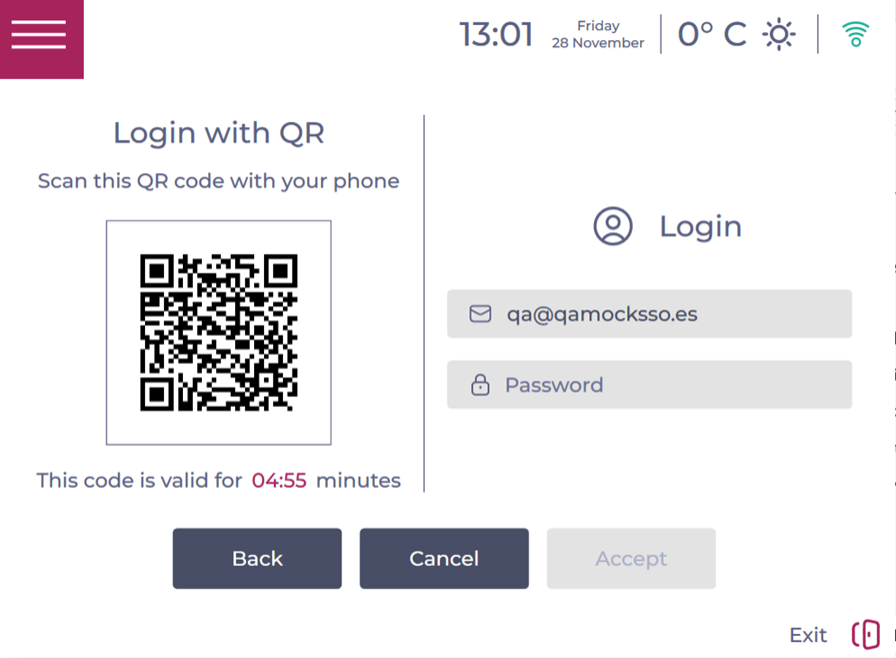
Step 2: Authenticate from your mobile via SSO
- On your mobile phone (or corporate laptop):
- Open the camera or a QR code reader.
- Scan the QR code displayed on the device screen.
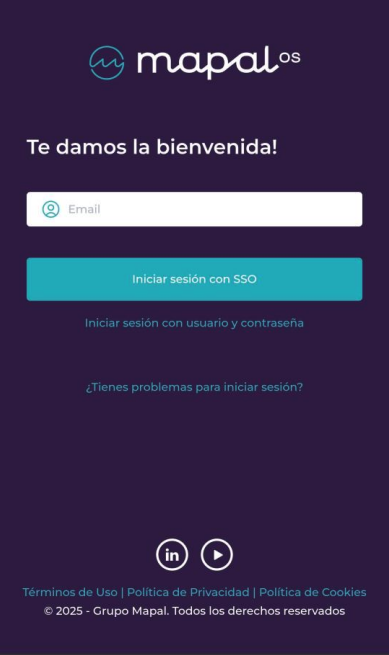
- A browser page opens on your device and redirects you to your corporate SSO login.
- Follow your normal SSO steps (for example, email and any additional MFA prompts).
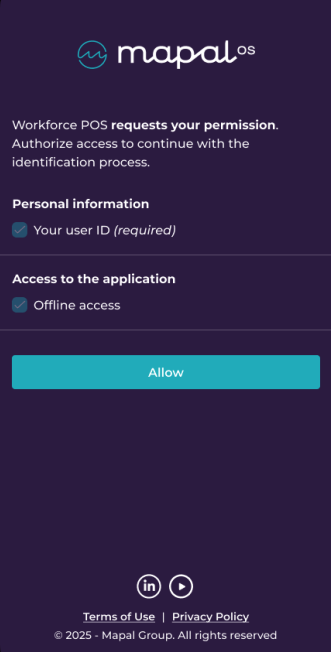
- A permissions screen is displayed. Review and Accept the permissions (user ID access and offline application access). These are required and pre-selected.
Once the permissions are accepted:
- The authentication process is completed.
- The server notifies POSApp/SmartHub and the shared device logs you in automatically.
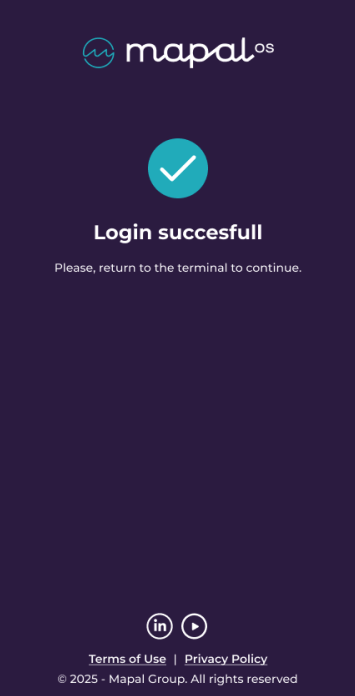
- A confirmation page appears in your browser indicating that login was successful and you can return to the device.
No extra app is needed on your phone; a standard browser is sufficient.
Note: SSO configuration must be set up in Mapal OS by authorised technical staff. If you are not sure whether your operator is integrated, contact your internal administrator or Mapal Customer Support.
Remote authentication for non-integrated operators (Mapal OS credentials)
For non-integrated operators, remote authentication still uses the QR code flow, but the browser login page is the standard Mapal OS login instead of your corporate SSO.
Step 1: Start login on the shared device
- On the shared device, open SmartHub.
- On the login page, enter your Mapal OS email.
- Select Access.
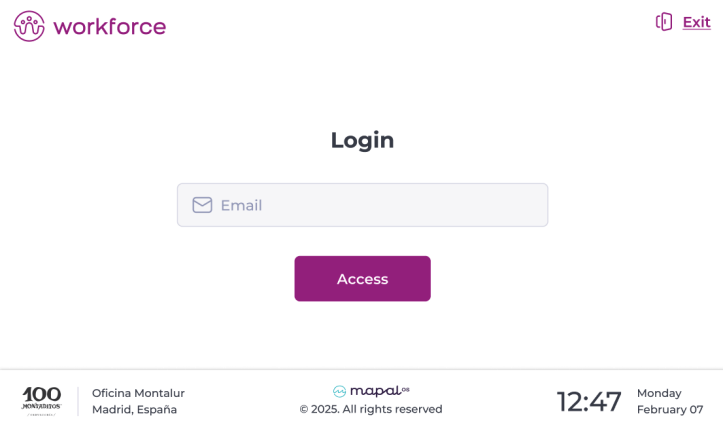
- The device detects that your operator is non-integrated and shows a dynamic QR code.
Step 2: Authenticate from your mobile with Mapal OS credentials
- On your mobile phone (or corporate laptop):
- Scan the QR code displayed on the POS/SmartHub screen.
- A browser page opens showing the Mapal OS login.
- Enter your Mapal OS email and password.
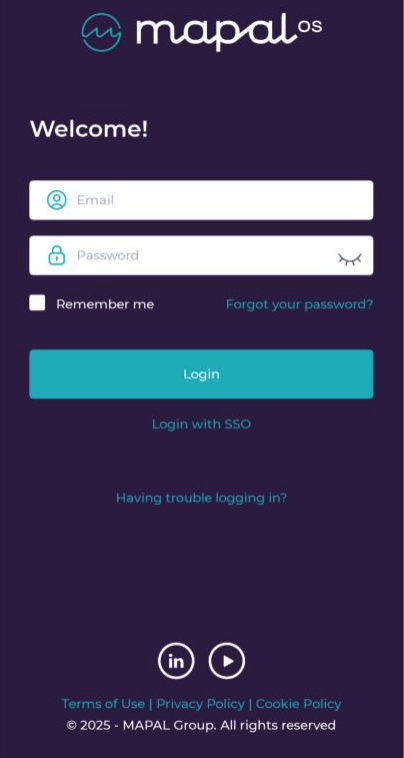
- A permissions screen is displayed. Review and Accept the required permissions (user ID and offline access).
After accepting:
- The server validates your credentials and permissions.
- POSApp/SmartHub is notified and completes the login automatically.
- A confirmation page in your browser confirms that login is successful and you can return to the device.
Optional: Direct login on the device (legacy)
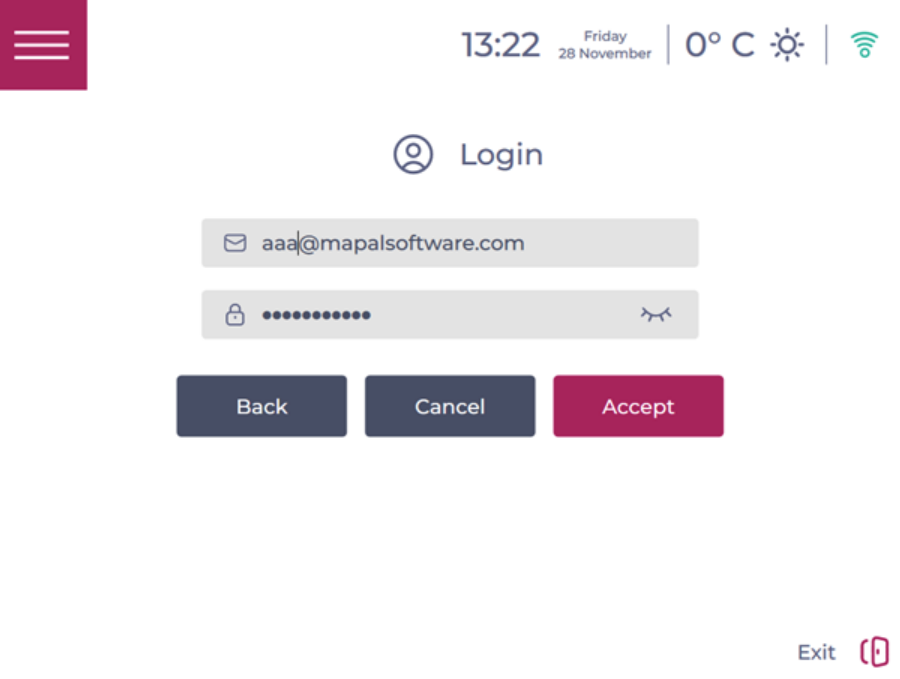
In some non-integrated environments, traditional login on the device may still be enabled:
- On the POS/SmartHub login page, enter your Mapal OS email and password directly.
- After successful authentication, the device is provisioned in the same way.
However, for shared devices, the QR-based remote login is recommended wherever available, as it avoids entering passwords on terminals used by multiple people.
What you can do after authentication
Once you are authenticated, your access to Workforce on the device is the same as with the traditional login. You can:
- Access configuration and provisioning options according to your permissions.
- Manage settings and integrations for the business unit.
- Return the device to the clock-in/clock-out screen for employees once you finish.
For employees, core Time & Attendance behaviours are unchanged. After you have provisioned the device and exited configuration, employees can continue to: