


Start from: The Easilys menu.
SI (supplier invoices) should be matched with GRNI (goods received not invoiced) to identify any discrepancies.
SIs can be generated automatically upon receipt validation if you have indicated in the supplier record that the delivery note serves as a supplier invoice. They can also be generated automatically if you are using an EDI system.
Otherwise, it is possible to manually enter SIs received from your suppliers, linking them directly or not to a GRNI.
FIRST SCENARIO – CREATE AN ISOLATED SI
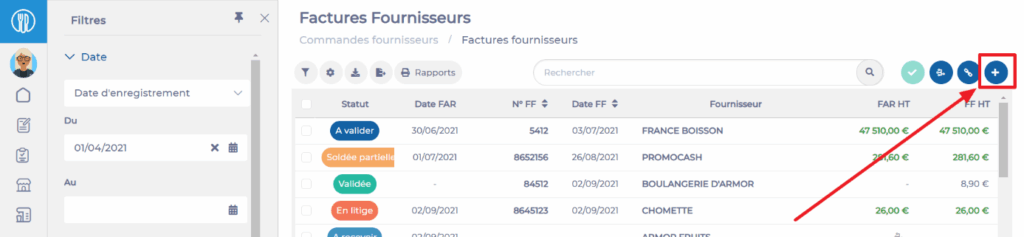
- Select Supplier orders > Supplier invoices.
- Select + Create at the top right of the screen.
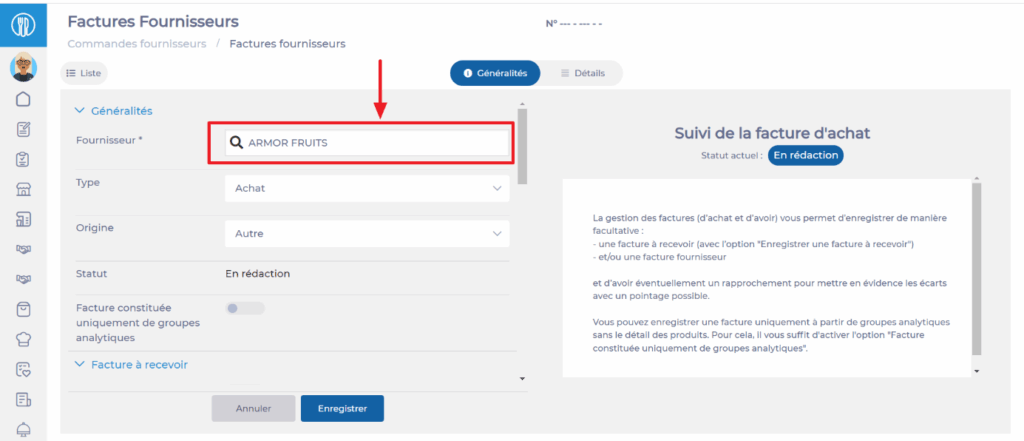
- Easilys displays a blank purchase invoice by default. You can change the invoice type to a credit note in the "General" section at the "Type" line.
- Complete the required information in the "General" section. Fields marked with an asterisk (*) are mandatory to save the new invoice.
Note: the right side of the "General" tab displays instructions on the procedure to follow. This information changes depending on the stage you are at in the invoice validation process.
- Complete the information in the "Supplier invoice" section.
- You can then complete the information in the other sections as needed.
- Select Save. The invoice is created.
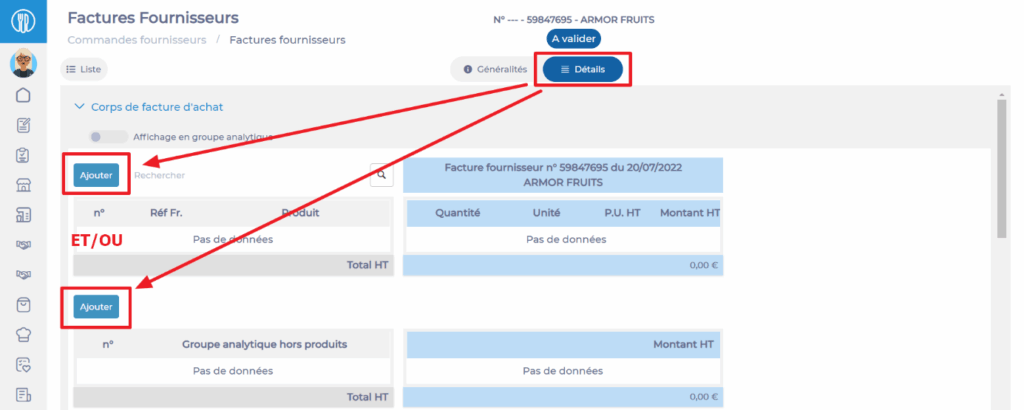
- Go to the "Details" tab of the invoice to add analytical groups outside products and/or the products concerned by the invoice.
- Select Add to add a line to the invoice.
SECOND SCENARIO – CREATE AN SI BY LINKING IT DIRECTLY TO AN EXISTING GRNI
- Select Supplier orders > Supplier invoices.
- Select the GRNI corresponding to the SI you need to enter.
The invoice details are displayed on the "General" tab.
- Select Edit.
- Complete the information in the "Supplier invoice" section. The supplier invoice number is mandatory.
- Select Save.
- Easilys then offers to automatically generate the supplier invoice by copying the information from the GRNI. You can then modify the items as needed. This option can save you time, but you are free to proceed this way or enter everything manually.
- Go to the "Details" tab of the invoice to add or modify the SI lines.
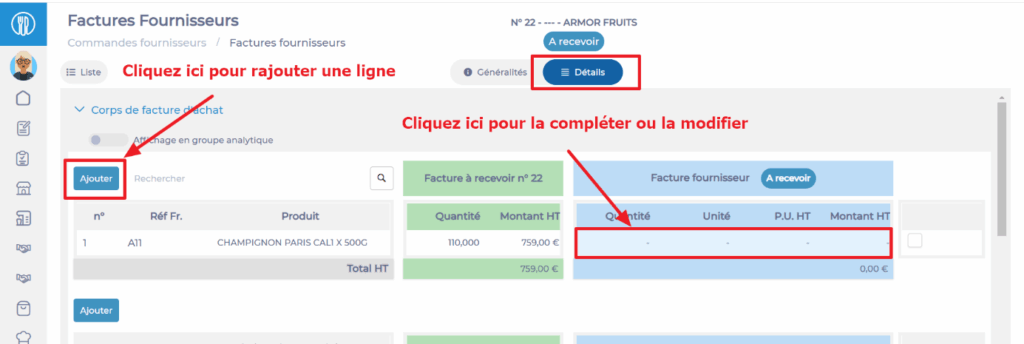
To add or modify information on a line, simply select the product or analytical group line. A panel appears on the right side of the screen allowing you to edit the billing information, whether at the GRNI or SI level.


Once your SI is entered, it appears in the invoice list with the status TO VALIDATE. For more information on reconciling invoices with the status TO VALIDATE, refer to the article Reconcile a GRNI and an SI to identify any discrepancies.