Start from: The Workforce dashboard.
Manage alerts
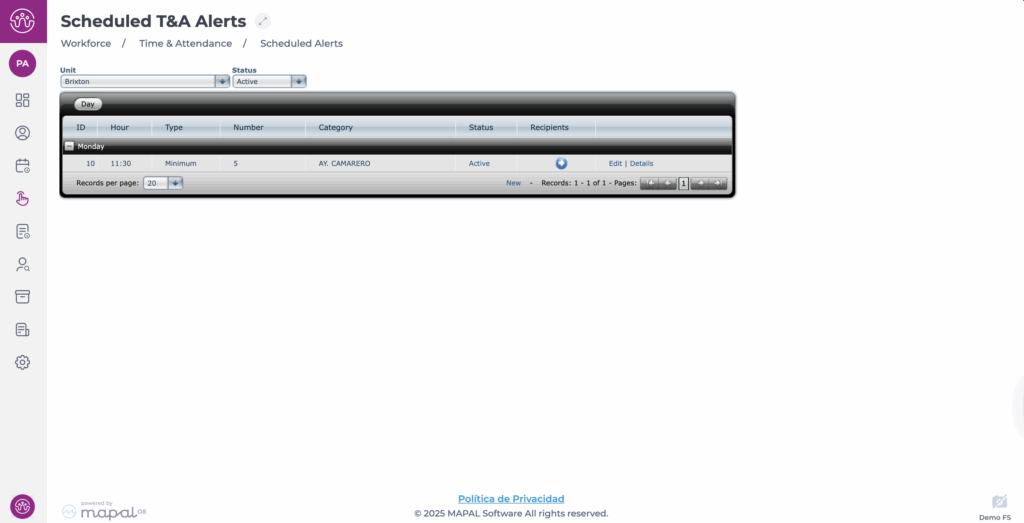
Available actions
From the Scheduled Alerts screen you can:
- Filter by Business Unit: select the centre to view or create alerts.
- Filter by Status: view active, inactive, or all alerts.
- To deactivate an alert, click Active.
- To reactivate an alert, filter for Inactive and click Inactive.
- Edit / View Details / Delete: edit or view configured alerts.
Note: alerts that have already been executed cannot be deleted, only deactivated.
- New: create a new alert.
Create a new alert
- Navigate to Time & Attendance > Scheduled Alerts.
- Select New.
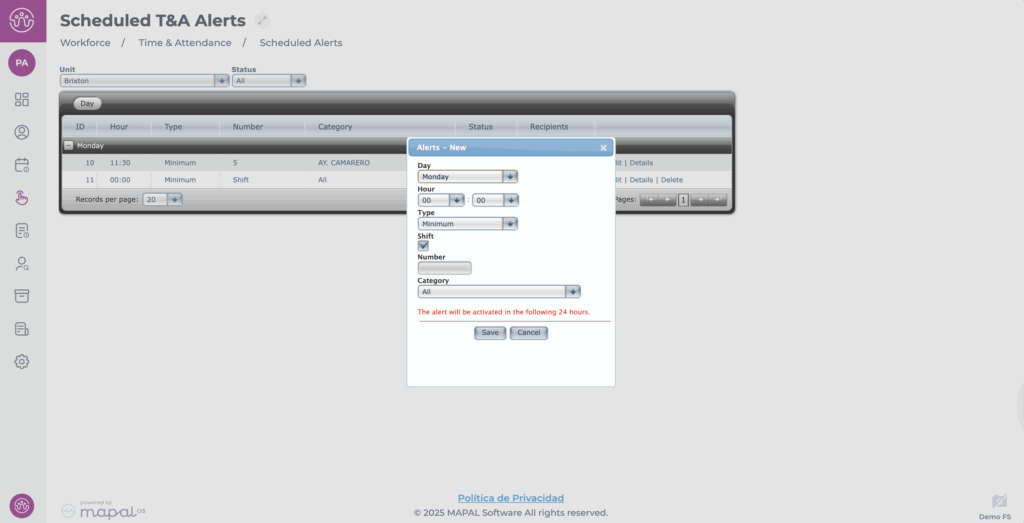
- Select the Day of the week to be checked.
- Select the time of day to be checked in Hour.
- Choose one of three alert types:
- Minimum: triggers if staff on shift are fewer than the minimum.
- Maximum: triggers if staff on shift exceed the maximum.
- Exact: triggers if staff on shift do not match the exact number.
- Choose whether the alert compares against:
- Projected shifts: check the Shifts box.
- A specific number of staff: enter the value manually.
- Apply to all staff categories or select a specific one.
- Select Save to record your new alert.
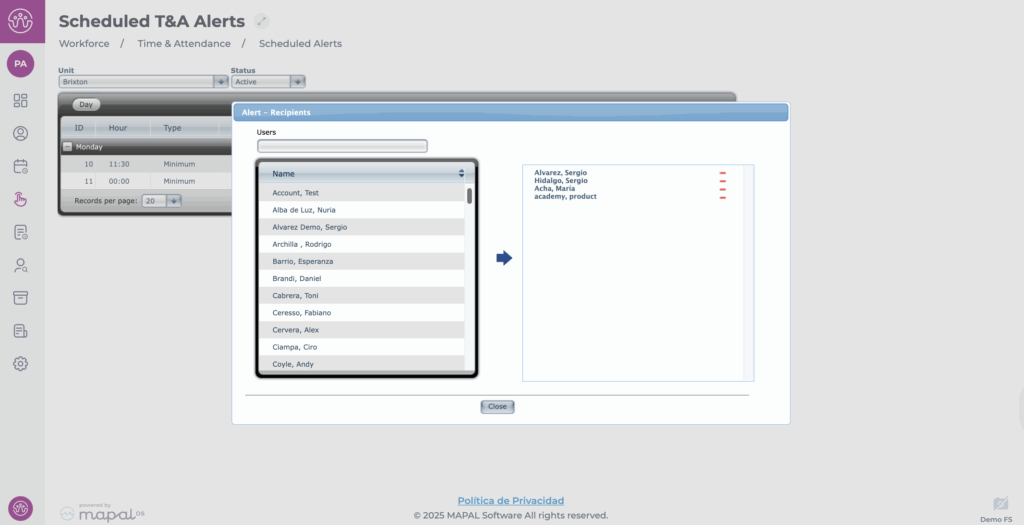
- After saving, locate the alert on the list and press the blue arrow button.
- Select the recipients who should receive notifications.
- Add users with the blue arrow button in the middle of the panel; remove them with the red – button beside the person's name.
- Click Close to confirm.
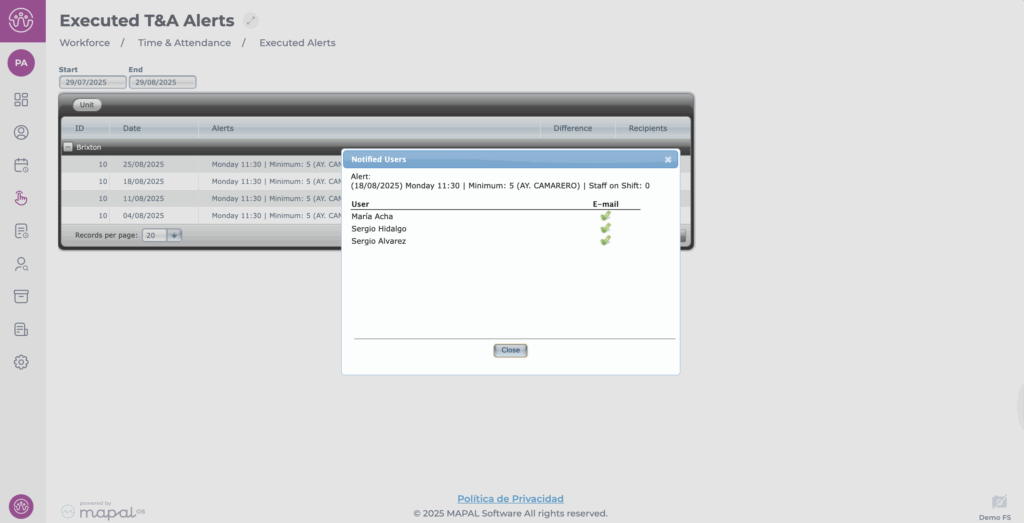
Review executed alerts
- Navigate to Time & Attendance > Executed Alerts.

- Select the time period you want to review.
- The screen displays alerts executed by business unit and date, including:
- The type of alert.
- The difference between the configured threshold and actual staff present.
- The notification recipients (click the blue arrow button to view).