


Start from: The Easilys menu.
- Select Recipes > Recipes from the main menu.
Note: There is another screen for managing recipe creation. This is the Recipe administration screen. If you create a recipe on either screen, the recipe will also appear on the other screen.
- Select Create.
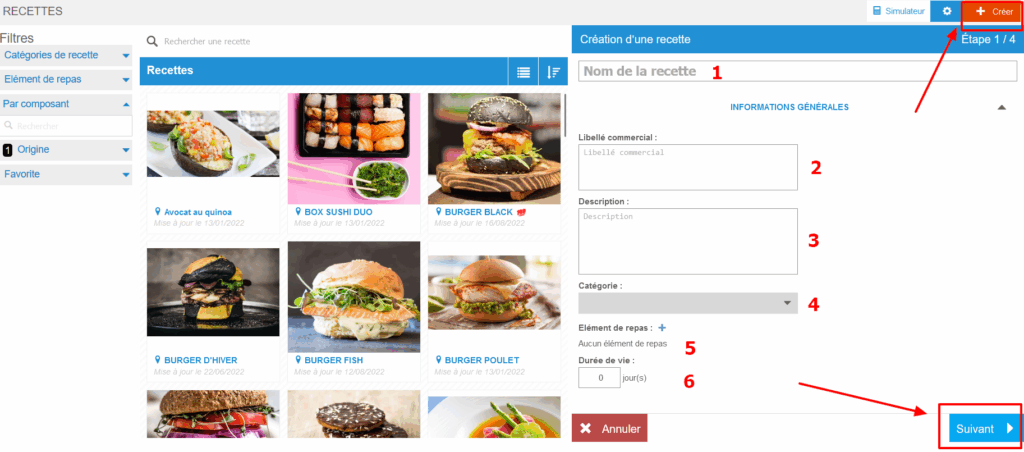
The Recipe creation window appears on the screen:
- Fill in the required information.
Fields marked with an asterisk (*) are required to create the recipe:
- Recipe name: The technical name of the recipe. (1)
- Commercial label: The public name of the recipe. (2)
- Description: Add a description of the recipe if needed. (3)
- Category: Indicates which category or subcategory the recipe belongs to. This allows you to use filters or create Smart Selection, Smart Weight, Smart Packaging, Smart Catalogue or smart feature rules. (4)
- Meal item: Important information that indicates which meal item the recipe is compatible with. This allows the application to suggest the right recipes when building your menu. For example, the application will show all recipes compatible with starters when you fill in a starter menu slot. (5)
- Shelf life (D): Indicates the number of days of shelf life. (6)
- Select Next.
Optional steps:
- Select the box to add a picture of the recipe.
- Select Next.

AND/OR
- Complete the composition of the recipe.
Note: You can add recipes, generic ingredients, or products directly to your recipe composition. It is recommended to use products directly in recipes sparingly, as when a product is no longer available for ordering, you will need to update the recipes in which it was used.
Note: If the ingredient you are looking for does not exist, you can create it in the Ingredient administration screen. If you do not have access to this screen or creation rights, you should contact your administrator or the Easilys Support team.
- Select Next.

Optional step:
- Indicate the procedure to follow to produce the recipe.
- Select Save.