Note: Every action that can be performed in the application is subject to access permissions. If you are unable to perform the recommended actions in the articles you are viewing, it may mean that the necessary rights are not enabled for your user profile. Contact the Support team or your administrator to learn more.
Start from: The Easilys menu.
Managing delivery tours then allows you to obtain allotment reports and delivery notes from the “Packaging and logistics” screen organized by tour. This then makes the work of the preparers and delivery staff easier.
It is possible to manage a tour over different types of periods to adapt it according to calendar changes.
FIRST STEP: CREATE DELIVERY TOURS
- Select the Shipping > Delivery Tours tabs.
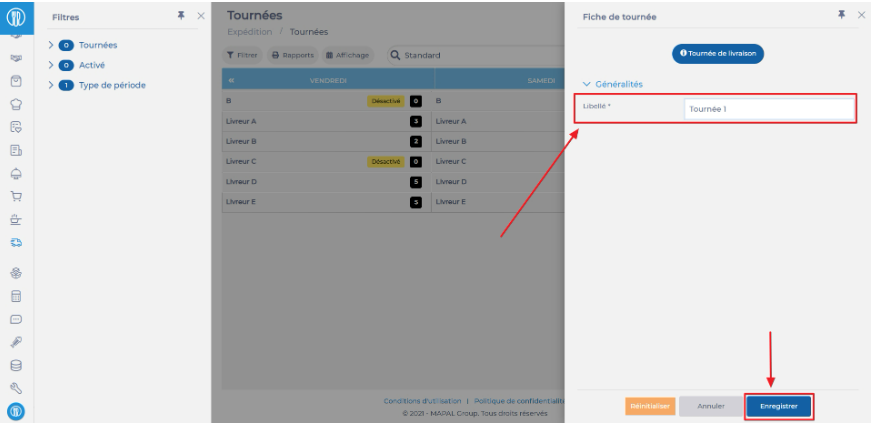
- Select + Add at the top right of the screen.
A blank "Delivery Tour Sheet" appears on the right side of the screen.
- Enter the name of the tour in the "Label" field.
- Select Save at the bottom right of the delivery tour sheet.
The tour is then created. It is in "Disabled" status.
SECOND STEP: LINK THE RELEVANT SITES TO THE TOURS
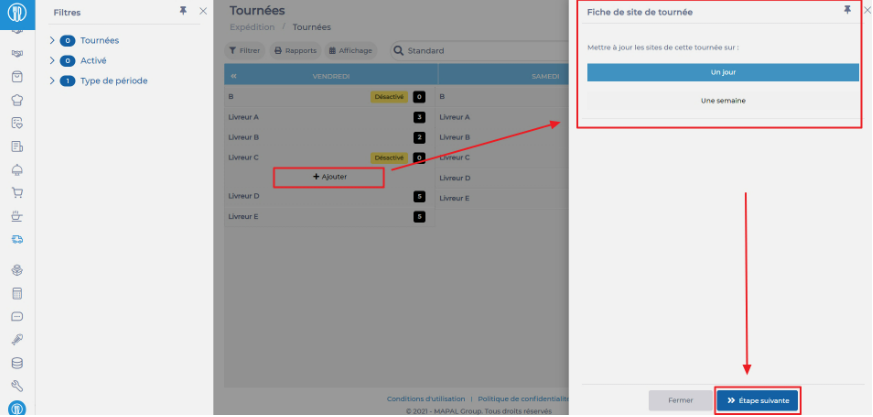
- Select the name of the tour in the display table.
The list of sites already linked to the tour appears. At the bottom of this list, the "+ Add" button is available.
- Select + Add.
The "Tour Site Sheet" appears on the right side of the screen.
- Indicate whether you want to add one or more sites only on the selected day of the week, or for the entire week.
- Select Next step at the bottom right of the sheet.
- Select the sites to link.
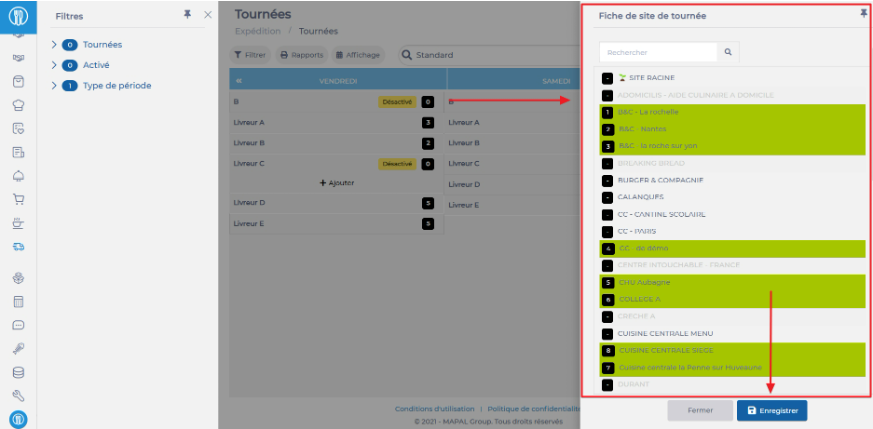
- Select Save.
Note: Remember to activate the tour once the configuration is complete.

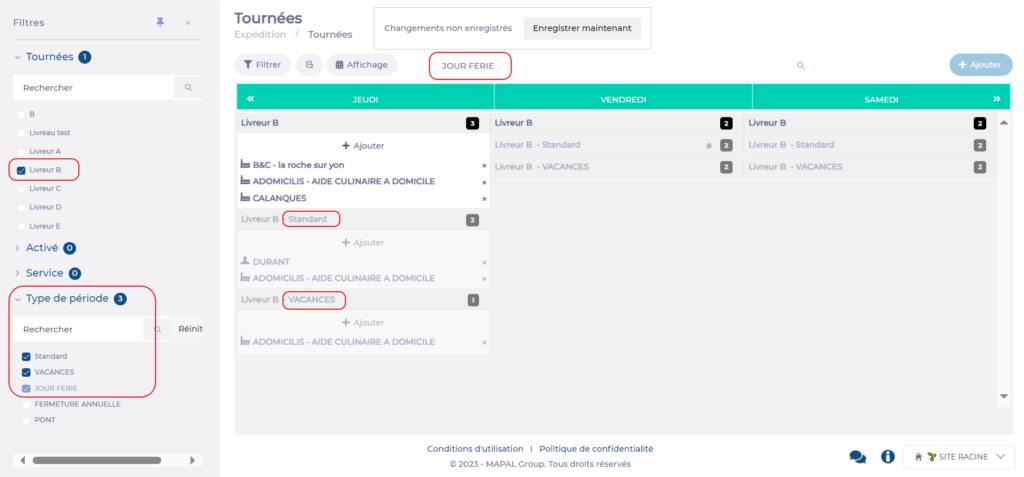
Optional: MANAGE DIFFERENT ORGANIZATIONS OF THE TOUR ACCORDING TO PERIOD TYPES
The principle here is to link your delivery tours to one or more types of periods. For example, the tour may be different during school holidays, with fewer sites to deliver, so it will need to be adapted to this type of period.
Outside of these specific period types, the "Standard" period applies.
Don't have a period type defined yet? To do this, go to the "Calendars" screen in the "Sites" section to create your period types.
For more information, see the article Manage different periods or how to make Easilys adapt to calendar changes.
To indicate that a tour is different for certain periods, you must first add these periods:
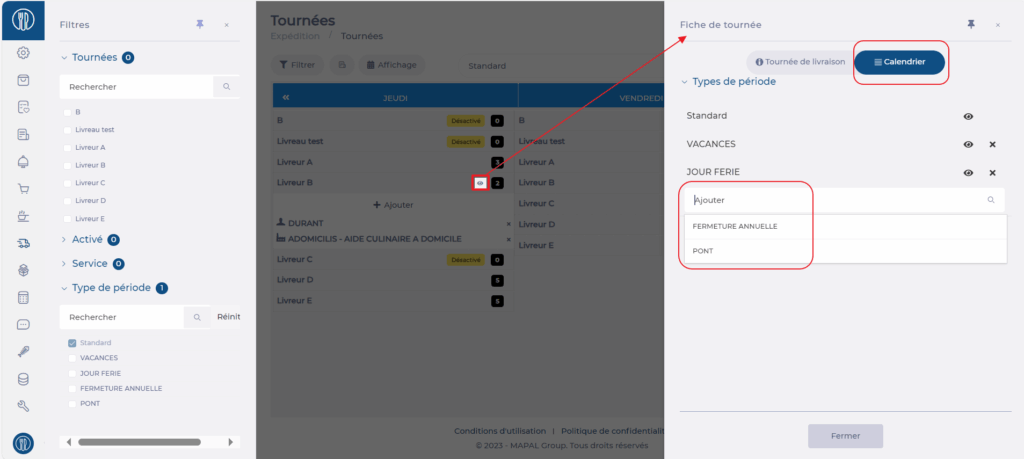
- Hover over the name of the tour and click on the eye icon
- Display the Calendar tab. The periods in which this tour is already present are listed. If you want to view them, click on the eye icon on the period line and it will be displayed in the background for viewing.
- Add the necessary period(s) by selecting them from the dropdown list.
- Select Close.
Once the different periods have been added to the tour, you can display each period to make the necessary changes for each period: for example, you can remove some of the delivery points from a tour or move them to another tour:
- Click in the search area and select the desired period.
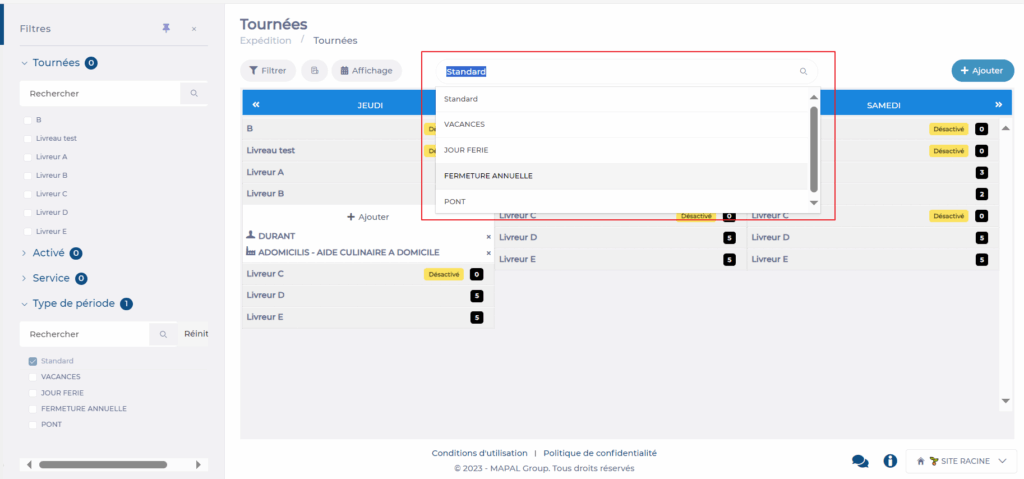

The tours for this period will then be displayed and you can make the necessary changes, for example:
- Change the order of the sites to be delivered for a tour by simple drag and drop.
- Add sites to a tour with the + Add button.
- Remove sites from a tour using the cross.
Once the changes are made, select Save now.
Good to know: In the filters, an option allows you to display several periods at once on the screen, giving you a better overview. You can also select the tours to display if you want to lighten the display and make configuration easier.