


Note: At least one product must already be in stock before you can start creating, modifying, attaching or deleting storage zones from stock.
Start from: the Easilys menu
ENTER THE STORAGE AREA OF A PRODUCT
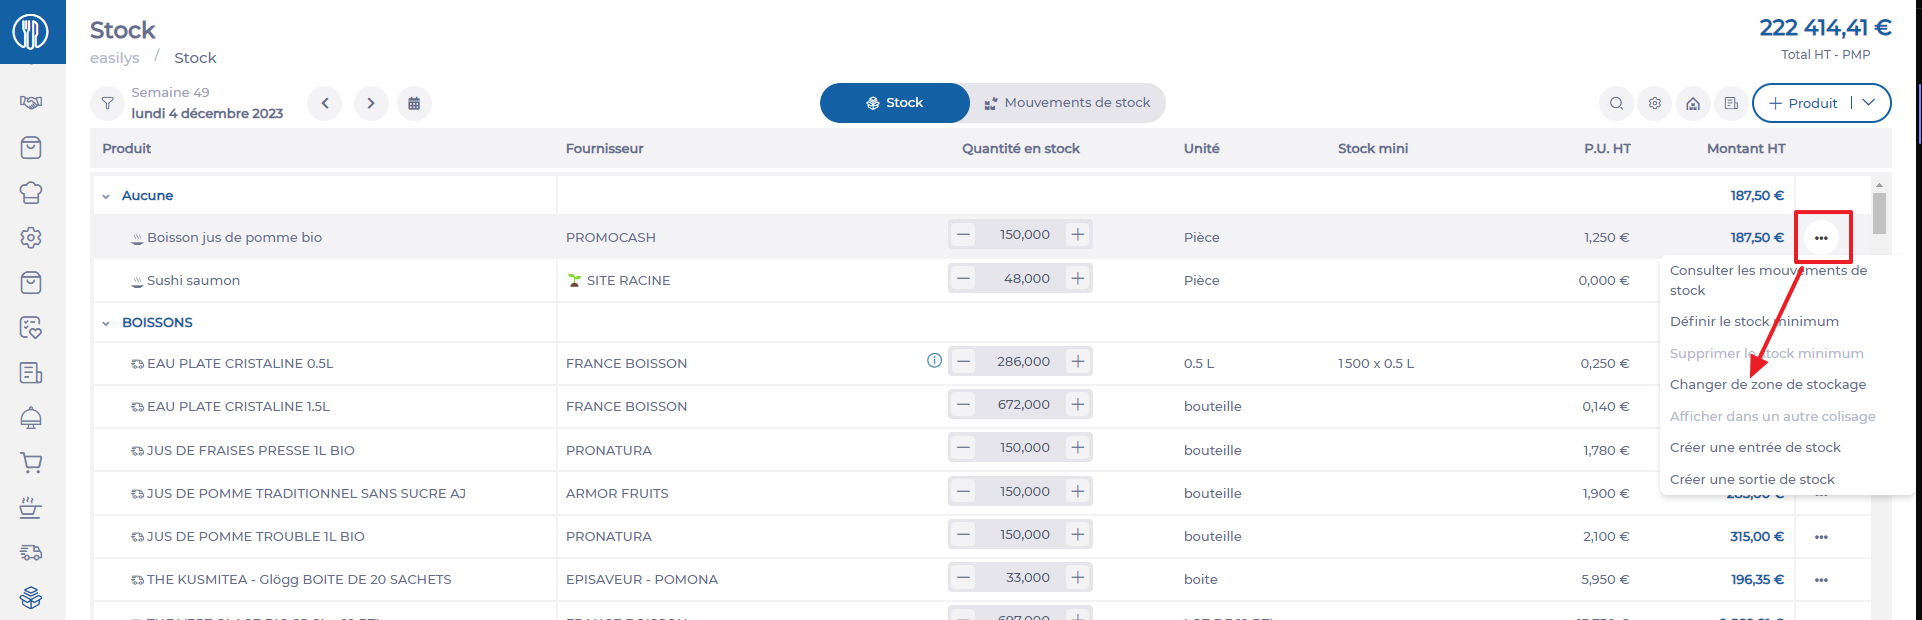
- Select the Stock > Stock tabs.
- Select the three dots at the end of the product line, then select Changer de zone de stockage (Change storage zone).
- The "Changer de zone de stockage" (Change storage zone) window appears on the screen. Select the new product storage area, then select Enregistrer (Save).
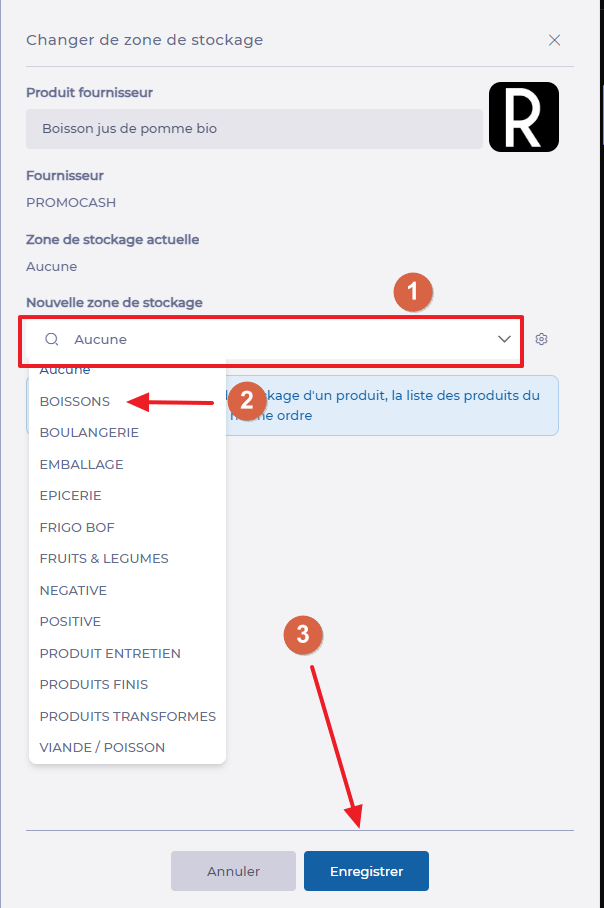
The product is now attached to the selected storage area. After an order, receipt or manual entry, you will always find it in this storage area.
MANAGE STORAGE AREAS
- Select the cogwheel from the "Changer de zone de stockage" (Change storage area) window.

- Create a new storage zone by entering the name of the new zone in the search bar, then click on + and confirm by selecting the diskette.

- Modify a storage area as required, by selecting the pencil to the right of the desired area.
- Delete a storage area as required by selecting the trash can to the right of the desired area.
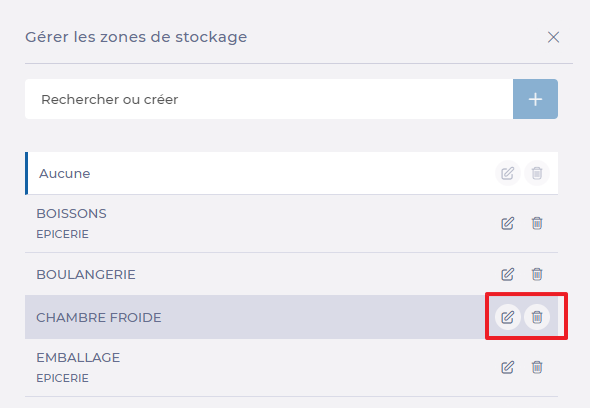
A storage area cannot be deleted if it is still a product storage area.