


Start from: The Easilys menu.
Menu plans
Menu plans defined in the Menu pre-design screen allow you to list all the recipes needed to meet the requirements of a group of customers for meals and days within a given period, and to generate customer-specific menus. They serve the following purposes:
- Ensure all customers receive menus that comply with their contracts and specific needs.
- Provide an overall view.
- Create all menus for all child sites with one click from a single menu plan.
Important: Before creating your menu plans, you must configure rules using the Smart Specification screen to indicate if certain products, recipes, allergens, or ingredients must be excluded from menus for certain clients. For more on this, see Manage custom rules for menu planning.
Create a menu plan
- Go to Menus > Menu Pre-Design.
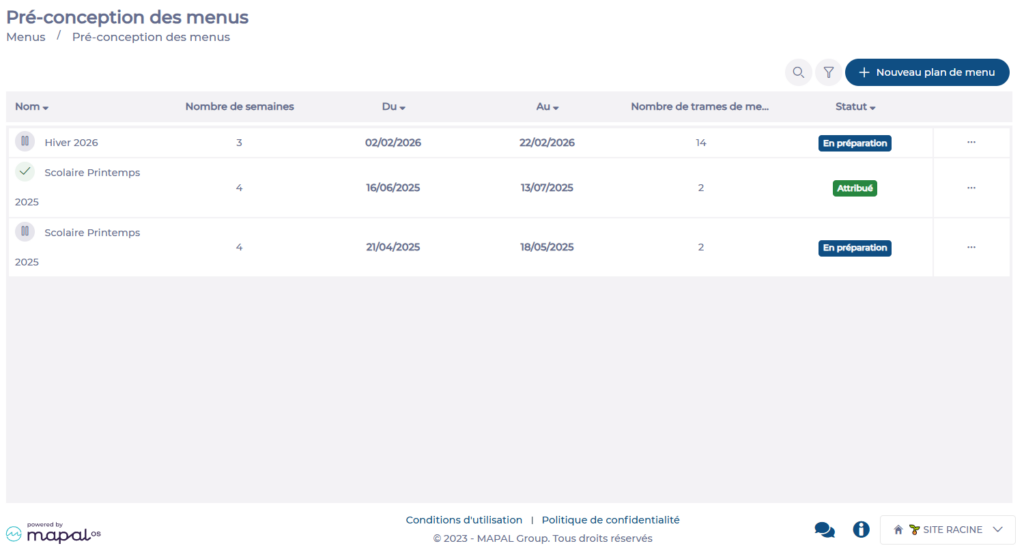
- Click the + Create button (or the + at the top right if plans already exist).
- In the "Create New Menu Plan" window, fill in the following fields:
- General settings:
- Name*: Enter a name for the menu plan.
- Period*: Define the period covered by this plan.
- Menu templates:
- Days of the week*: Automatically populated based on the selected menu templates.
- Menu templates*:
- Use filters, the search field, and the scroll bar to select the templates included in the plan.
- For each template, specify whether all or only some child templates are included.
- The number of selected child templates is displayed for each parent template.
- General settings:
- Select Save to create the plan. It will then appear in the menu plan list.

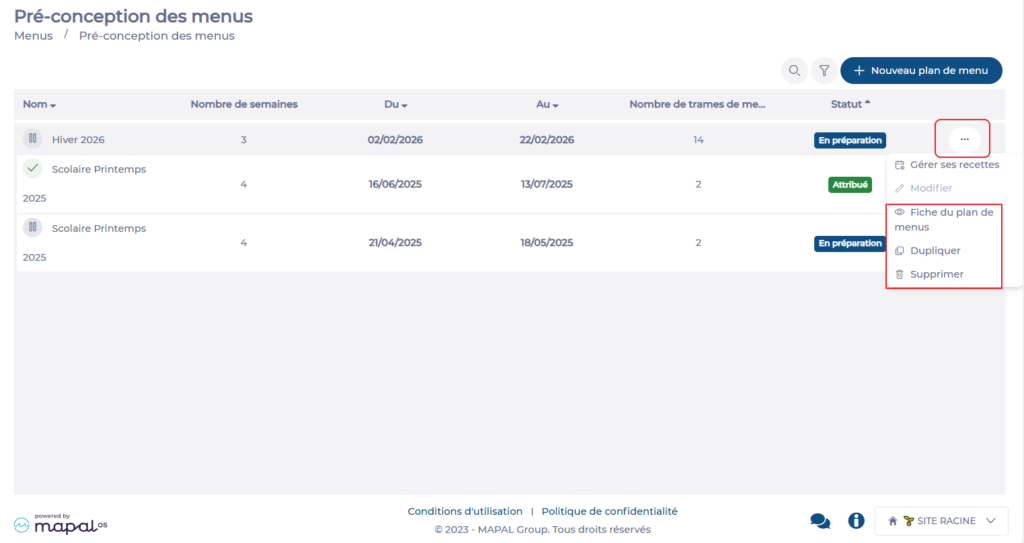
Note: The action menu (three dots) at the end of the row allows you to View, Duplicate, or Delete the menu plan.
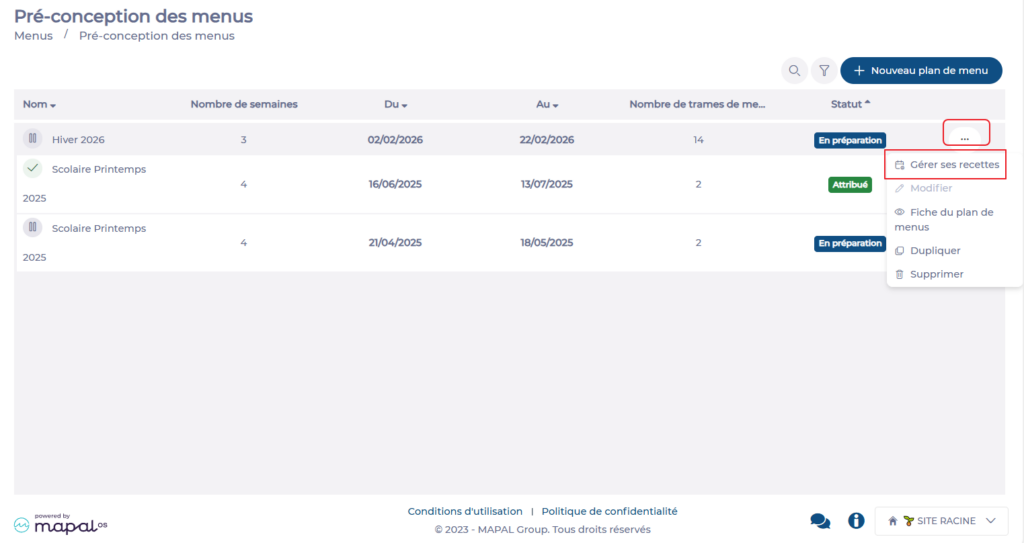
Add recipes to a menu plan
- Select the action menu (three dots) for the plan and choose Manage recipes, OR
- Select the plan row directly.
- The first week of the plan is displayed with all relevant services and meal components based on the selected templates. You can now assign recipes for all weeks in the plan.
Start by placing the main recipe (the one intended for most clients). Then add alternative recipes for clients who cannot receive the main recipe due to Smart Particularity rules.
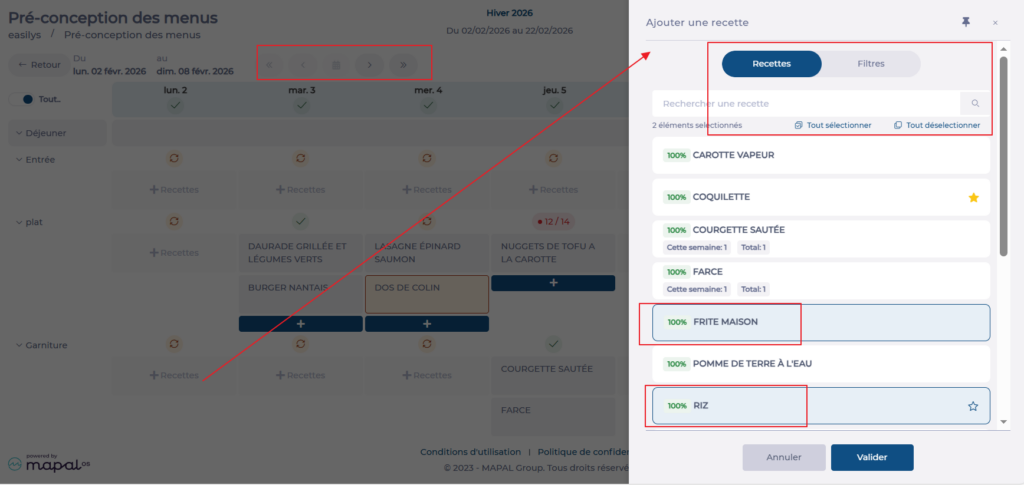
- Use the calendar or arrows to navigate to the correct week.
- Click + Recipes for the desired date, service, and meal component to open the add panel.
- Use the search or filters to find recipes.
- Consider indicators (cost, favourite, frequency, coverage rate...) to make your choice.
- Select the recipes you want to assign, in order.
- Click Validate.
Note:
- Recipes can be reordered using drag and drop.
- To remove a recipe, select the trash icon displayed on hover.
- To apply a recipe to all days of the week, select the double-arrow icon.
- One recipe per meal component can be pinned. This is useful for exceptional situations (for example festive meals) where a single recipe must be imposed for all clients. When pinned, all quantities are assigned to that recipe during menu impact.

Verify the menu plan
Use the Simulation feature to verify that the plan generates valid menus for each client site.
- Select Simulator. Indicator meanings:
- Green check marks: All client requirements are met.
- Red bubbles: Invalid menus for some clients.
- Numbers (e.g. 0/2): Number of templates covered versus total.
- To analyse issues:
- Hover over red bubbles to see affected templates.
- Select a bubble to open the Simulation analysis panel.
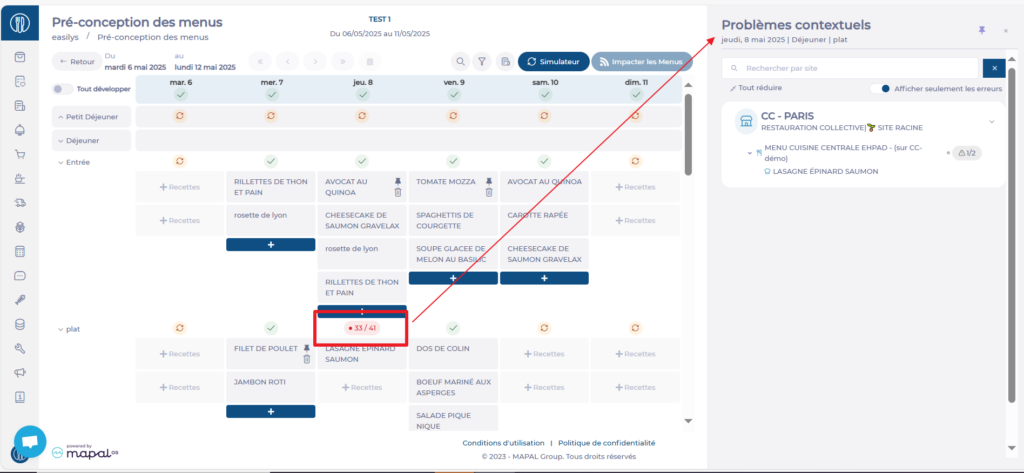
- In the Contextual issues panel:
- Use Expand all / Collapse all to navigate easily.
- View sites with issues.
- For each site, review:
- Affected menu templates
- Recipes involved with prices
- The rule that is not respected
- Select the eye icon to view or edit the rule.
- To fix issues:
- Replace a conflicting recipe by clicking its name and selecting another.
- Add an extra recipe that complies with client requirements by clicking + in the relevant meal component.
- Re-run the simulation to confirm issues are resolved.
Note: Recipes added after a simulation are highlighted with a yellow background. This distinction remains visible as long as a new simulation is not run or the page is not exited.
Apply the menu plan to menus
Once the plan is complete, apply it to update menu templates across all relevant sites.
- Select Apply menus.
- Review alerts or confirmation messages.
- Choose Publish or Cancel to make further changes.
You can track progress via the impact button showing how many templates have been updated. You may leave the screen while the process continues. Additional menu plans can be queued and will run automatically once the current impact is complete.
Note: If you modify a menu plan after applying it, you must apply it again. This will overwrite previous versions on child sites.ply it again to update the templates on the child sites. This will overwrite previous versions.